Ideal For: All the weed killer manufacturers, weed killer sellers, retail weed killer shop owners, and other merchants can use this method to take their weed killer selling business online.
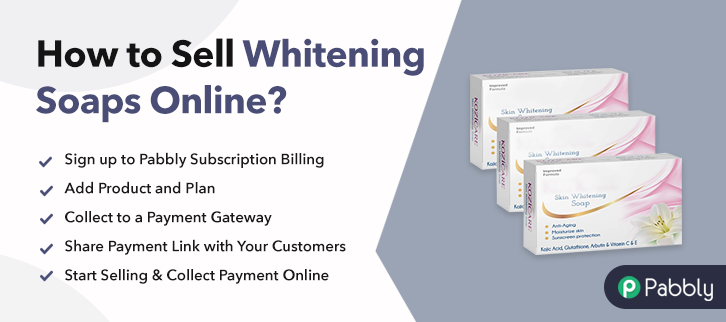
Why Choose this Method to Sell Weed Killer Online?
Unlike any other solution, this method allows you to:
- List and sell your weed killer for FREE. Absolutely no payment required.
- No need to pay commission on any of your sale.
- Multiple payment options like PayPal, Credit Card, etc to collect payment from a single place.
- Sell one time or recurring subscriptions of your weed killer.
- Collect payments & sell products in any currency as per your requirement.
- Give discounts on your products by offering special coupon codes.
- Add sales commission agents to help you in selling weed killer online.
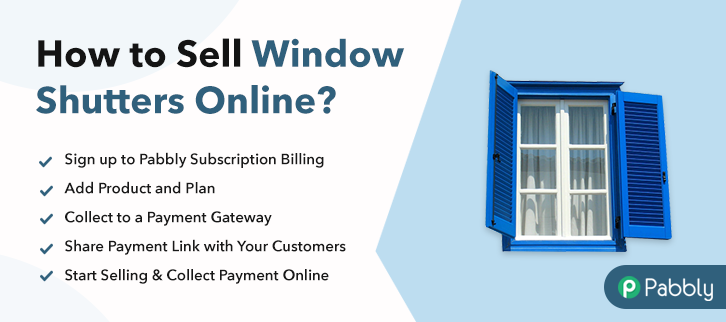
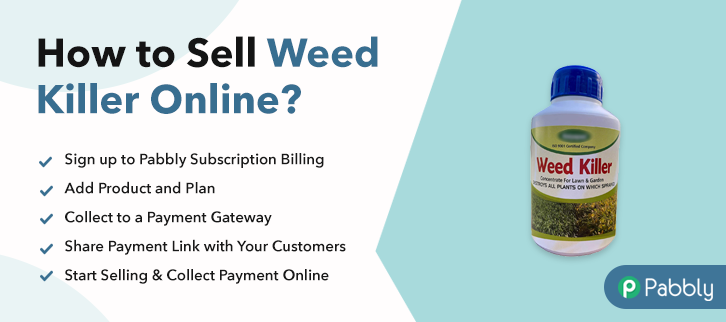
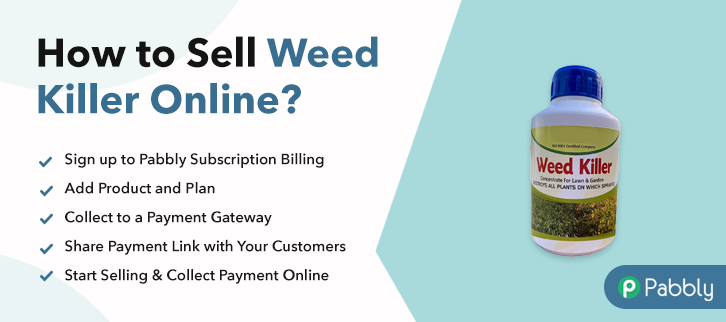
Herbicides or weed killer are substances that are used to control unwanted plants while leaving the desired crop relatively unharmed. If you are willing to extend your reach to a greater audience by selling weed killer online than maybe we can tell you how.
In this blog, I’ve given a complete explanation of the checkout page creation to sell weed killers online. A checkout page can help you start weed killer business online in the following ways.
- Checkout page helps you display your product information beautifully such as image, description, pricing etc.
- It allows you to collect payments securely
- You can offer coupons to your customers
- Sell unlimited products worldwide
- Apply global taxes easily
- Accept one-time/recurring payments
- Automate billing and invoicing
And much more…
Apart from all the functionalities & advantages, you can share the plan checkout pages over various social media and link sharing channels like Facebook, Twitter, WhatsApp, emails, SMS etc. Also, you can embed the checkout pages within buttons, anchor texts, post/pages of websites.
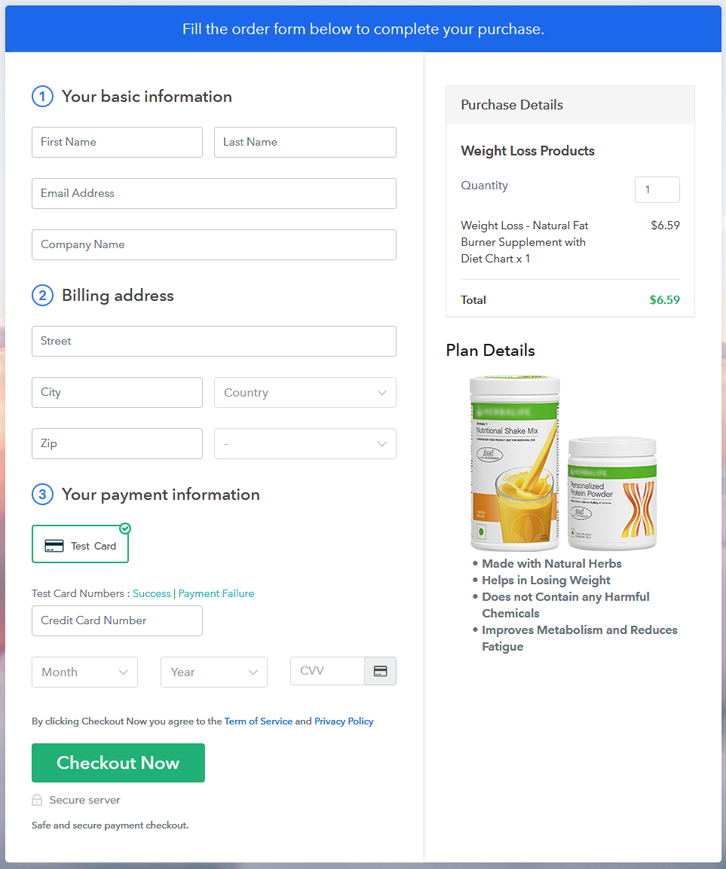
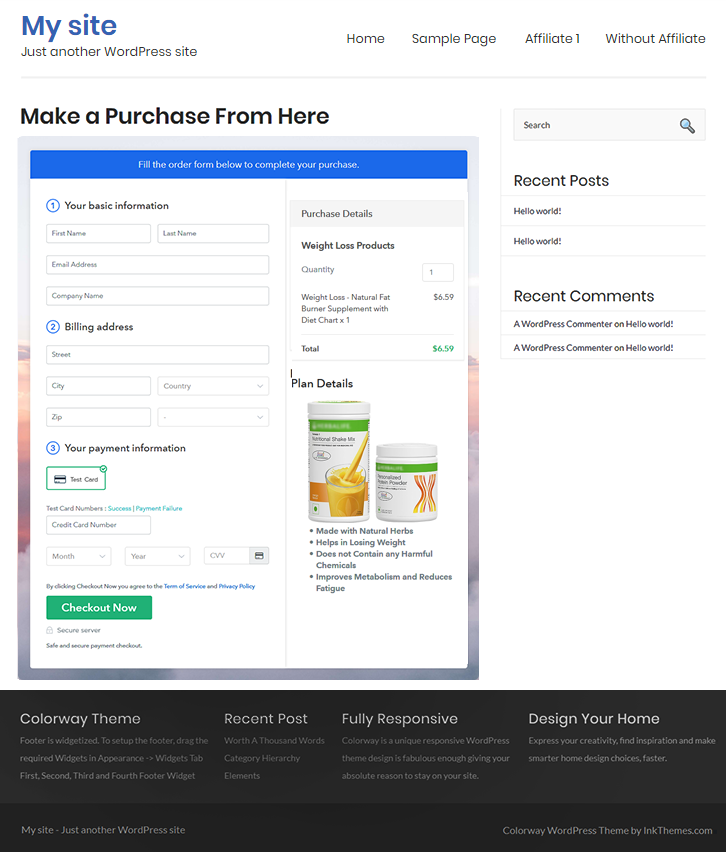
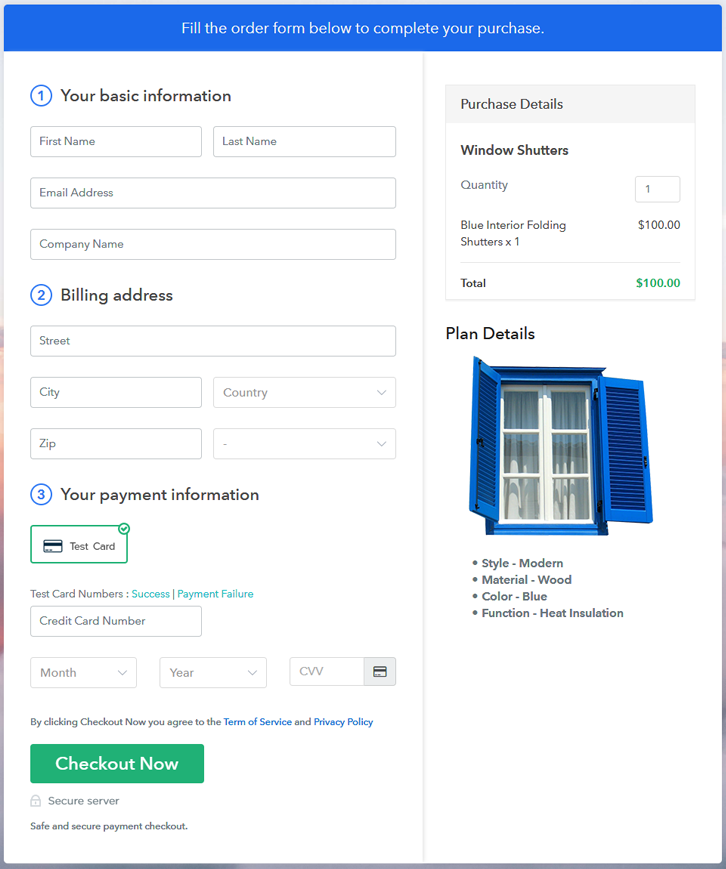
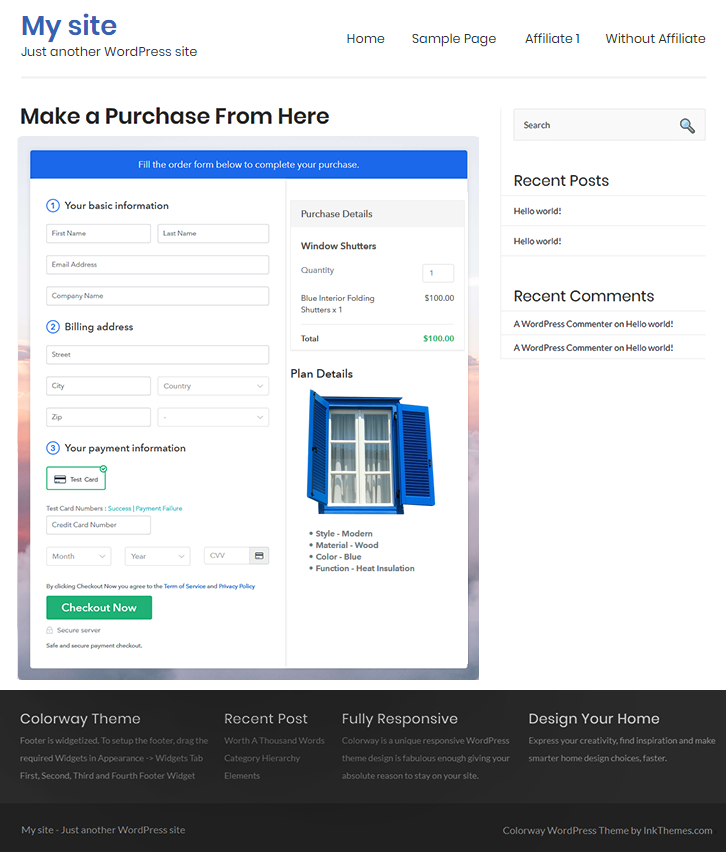
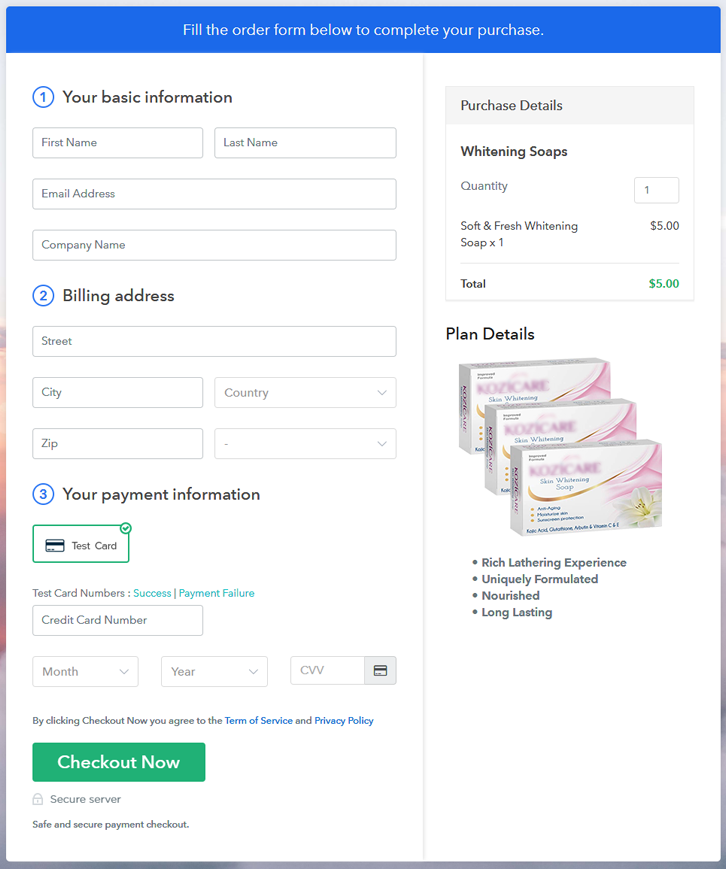
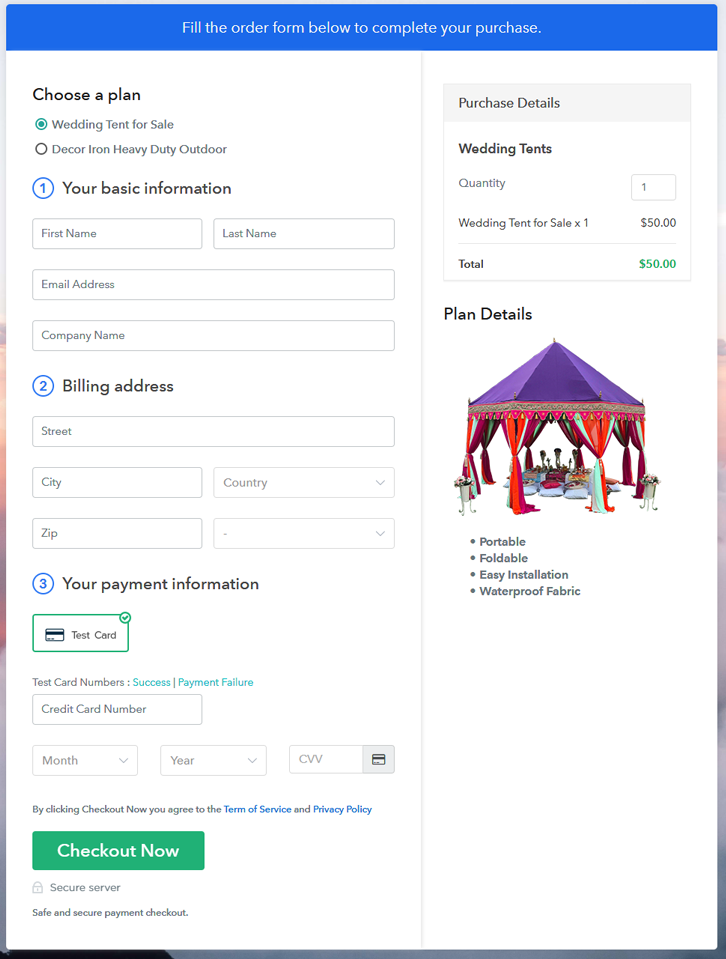
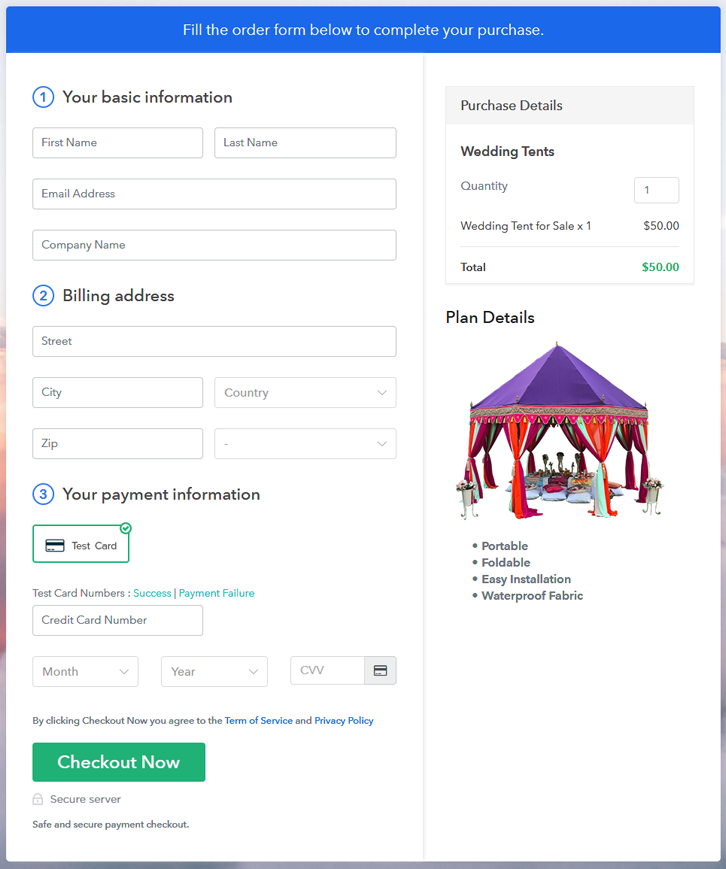
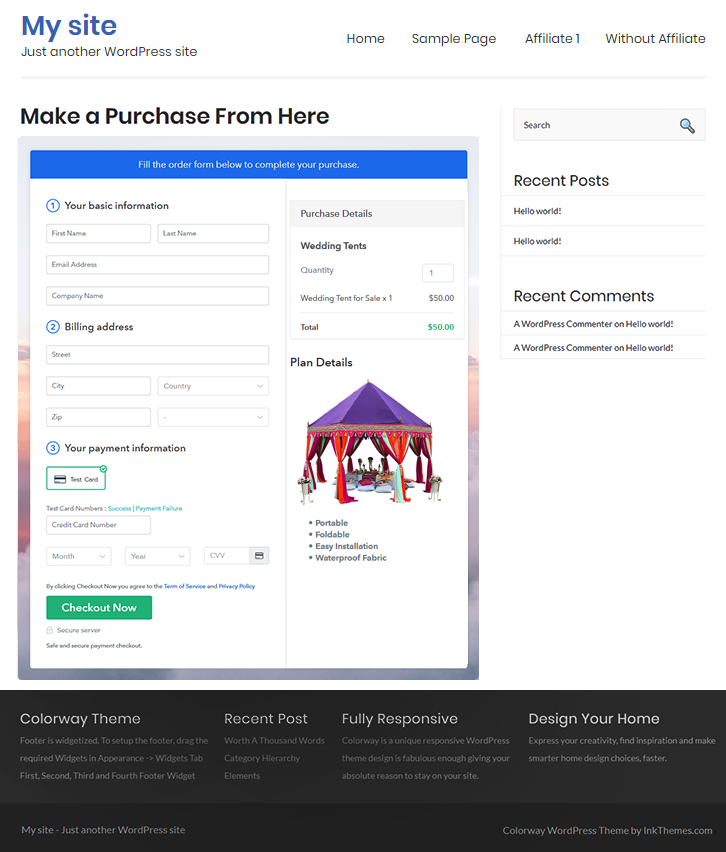
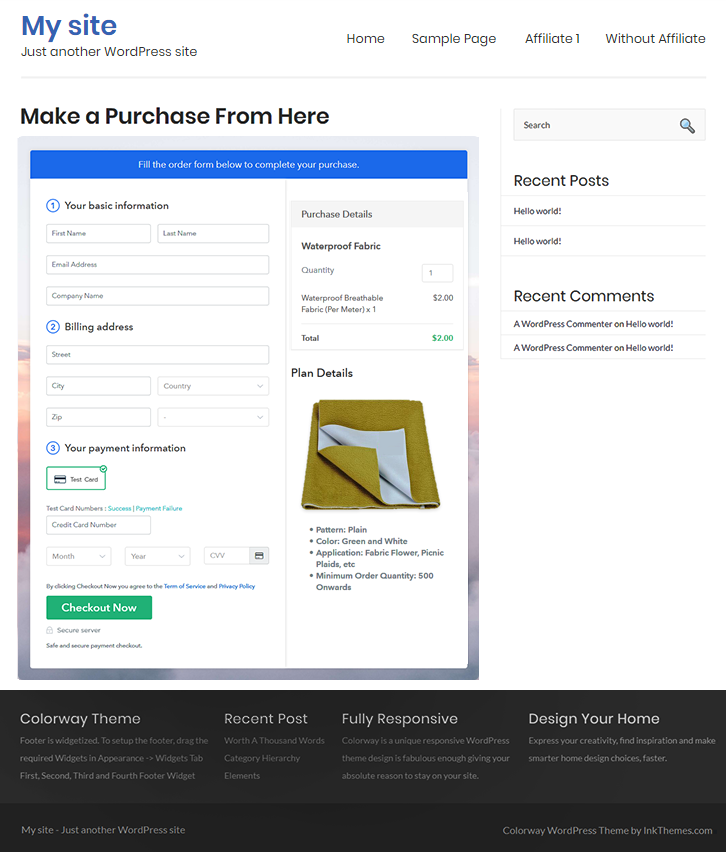
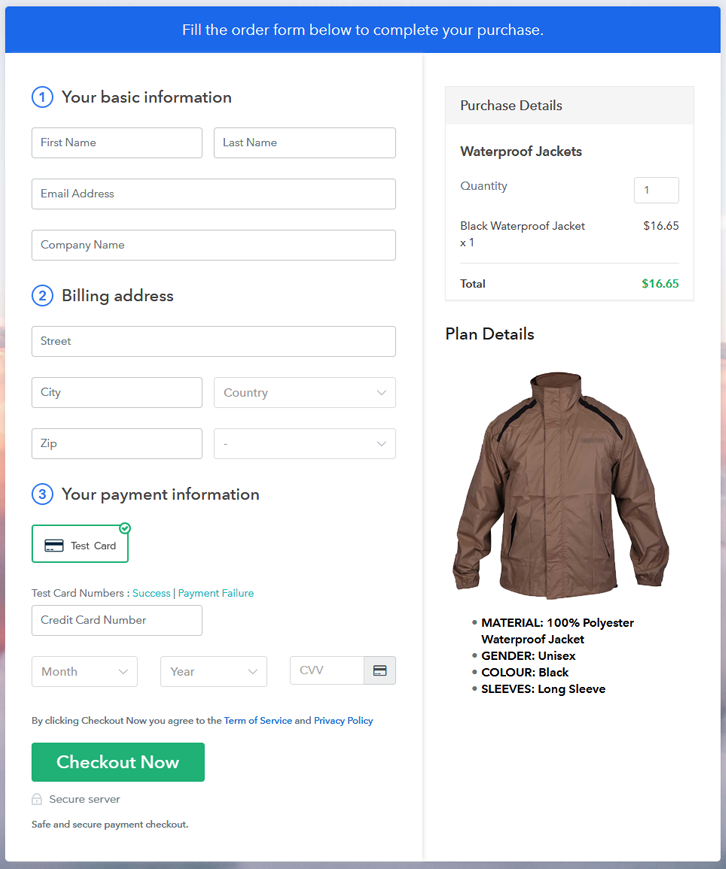
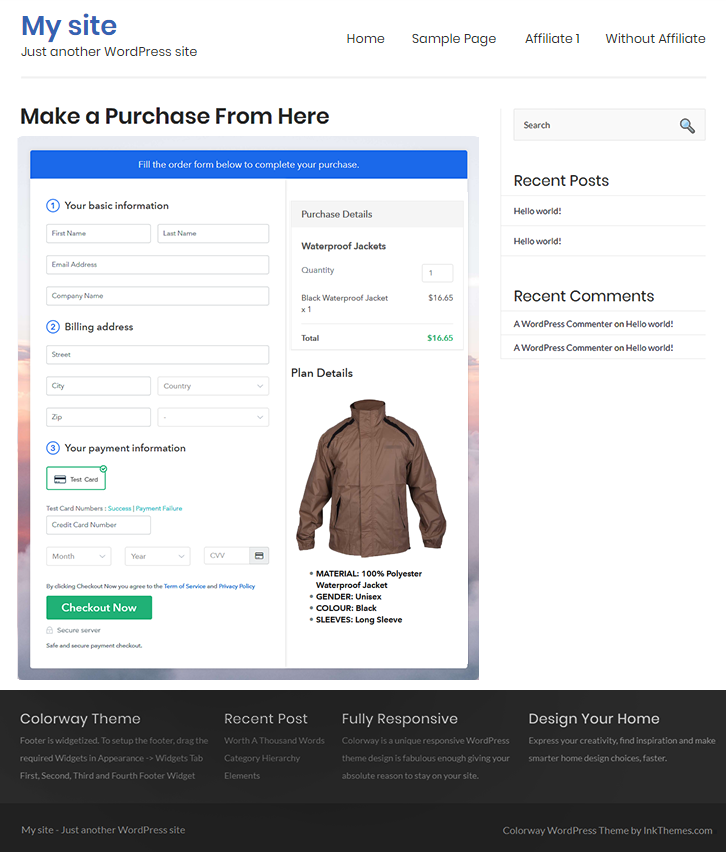
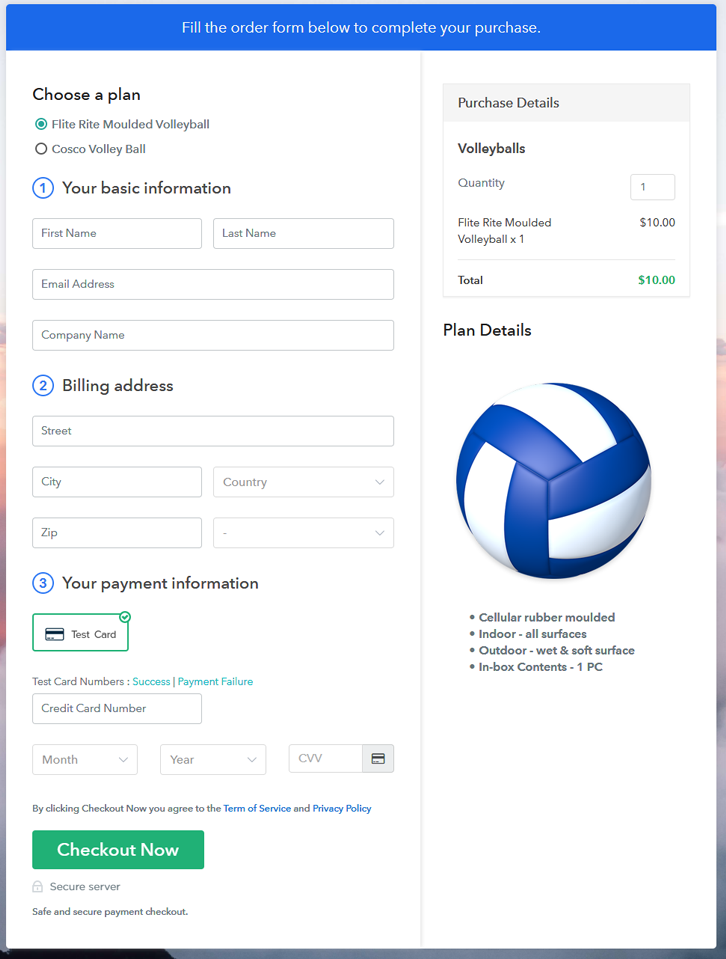
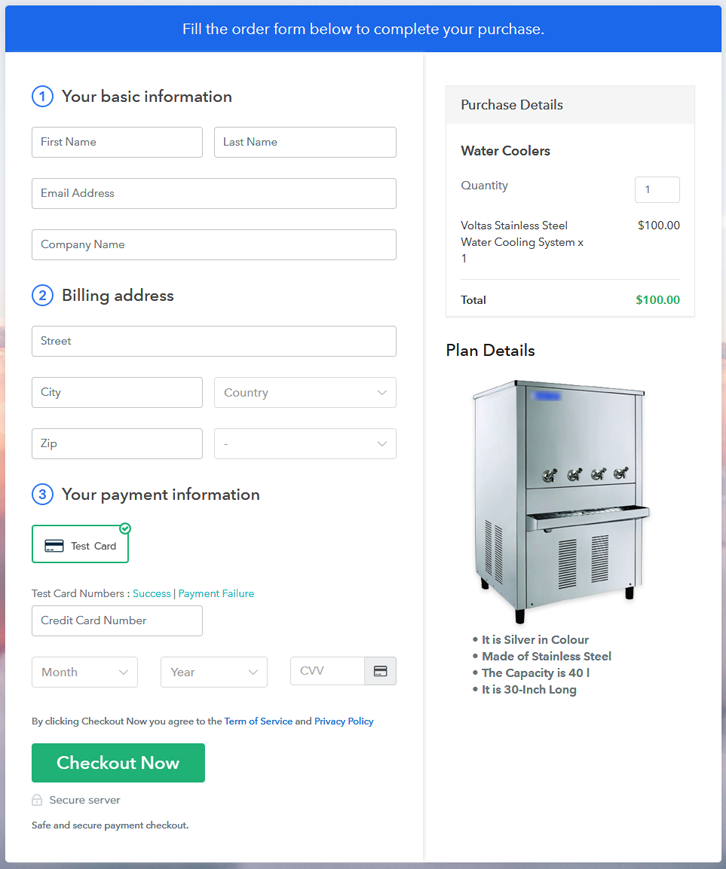
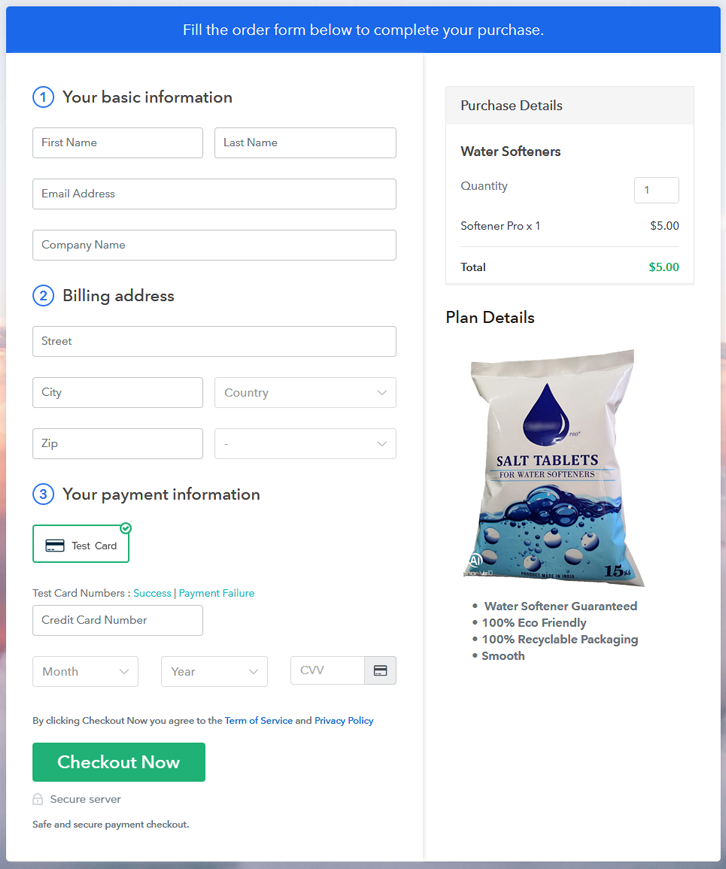
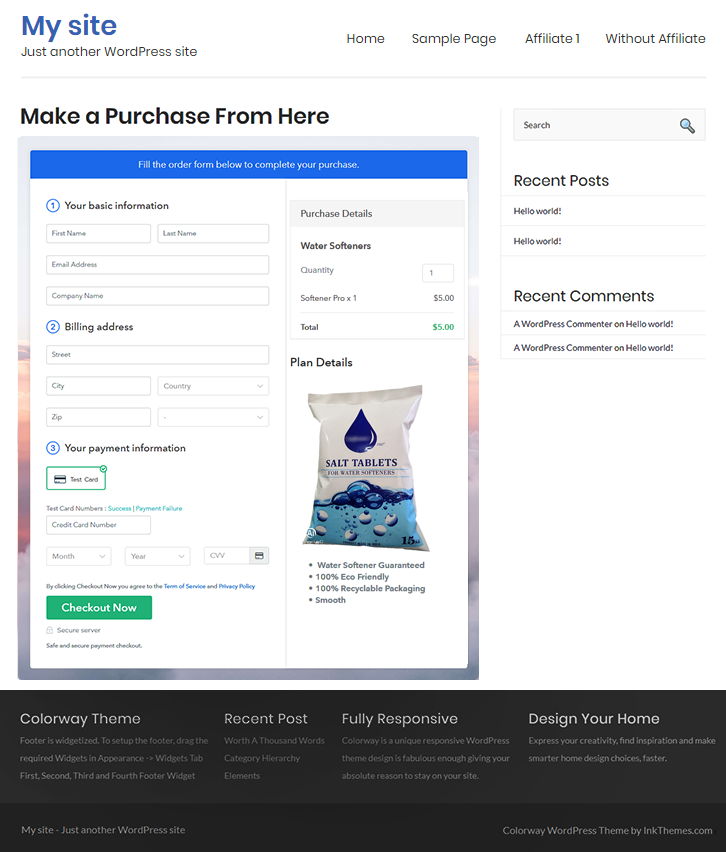
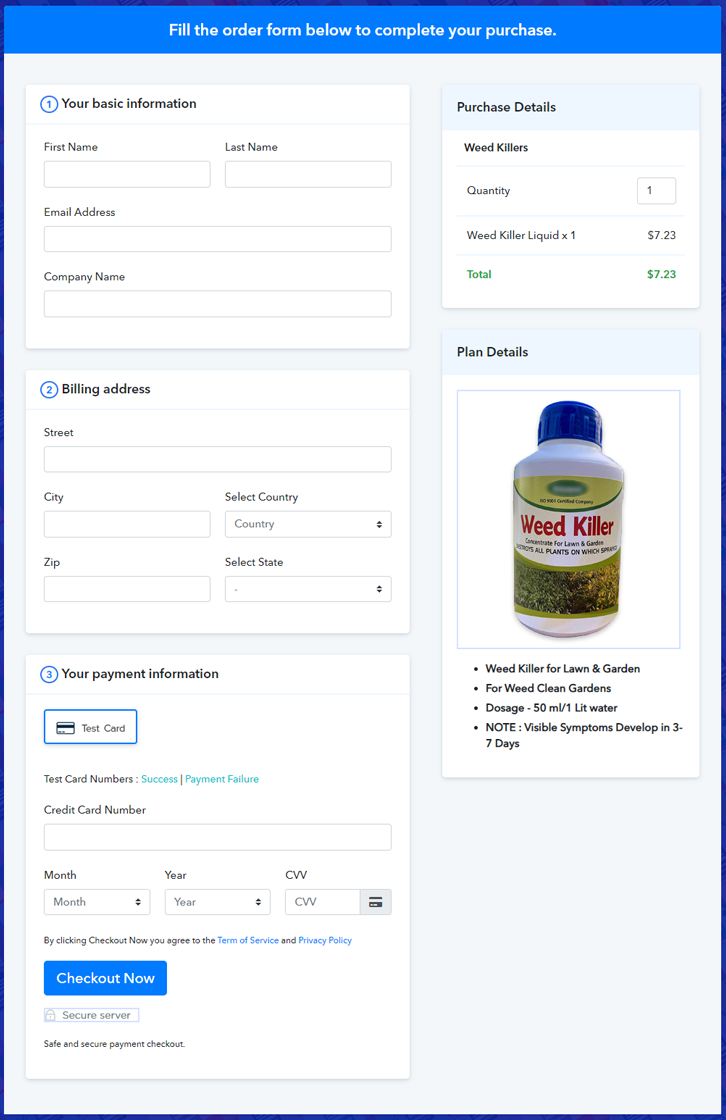
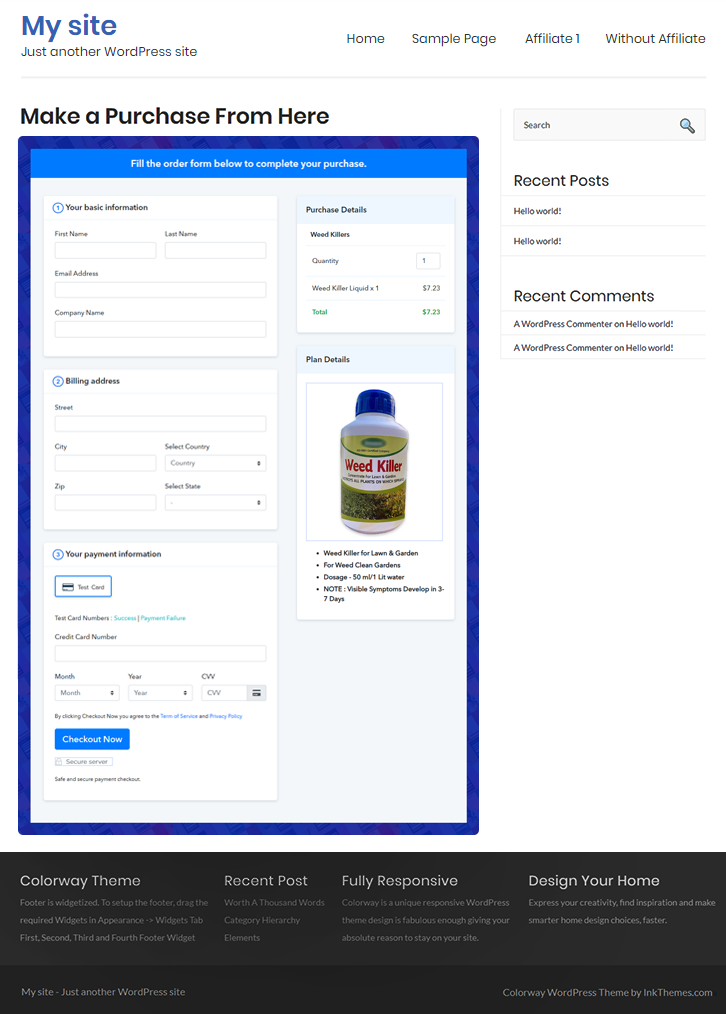
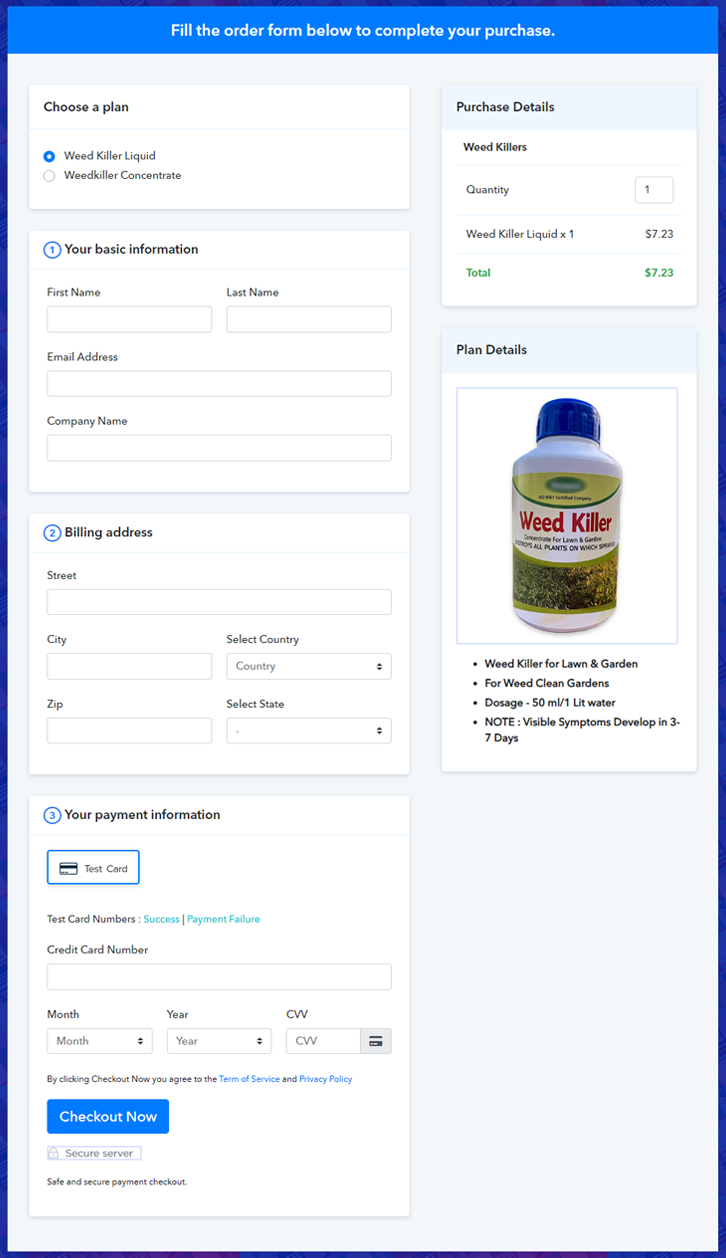
Final View of Checkout Page for your Weed Killer Selling Business
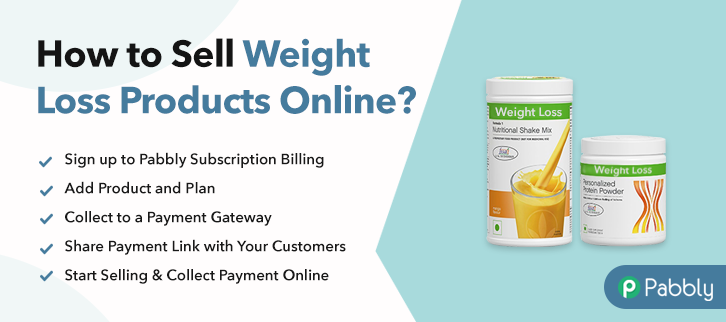
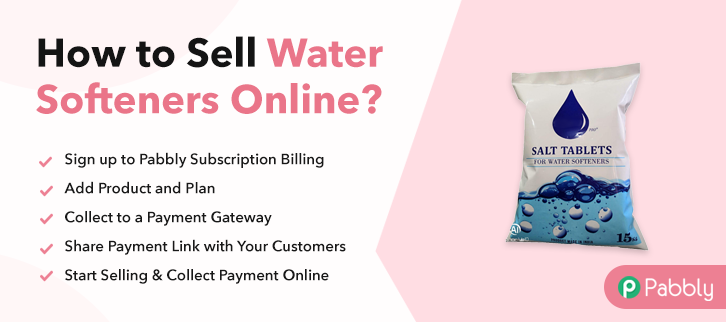
Step 1: Log in to Pabbly Subscription Billing

Begin by visiting, Pabbly Subscription Billing and click on the ‘Sign Up Free‘ button there. On the registration page, use an existing Gmail account of do manual sign-up to get into the system.
Sign Up For Free!
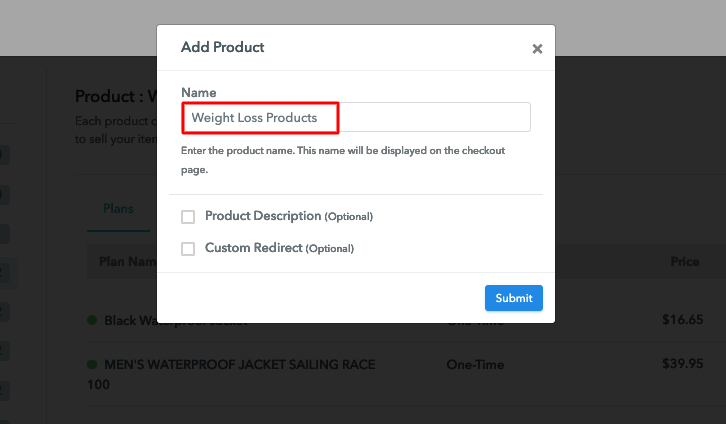
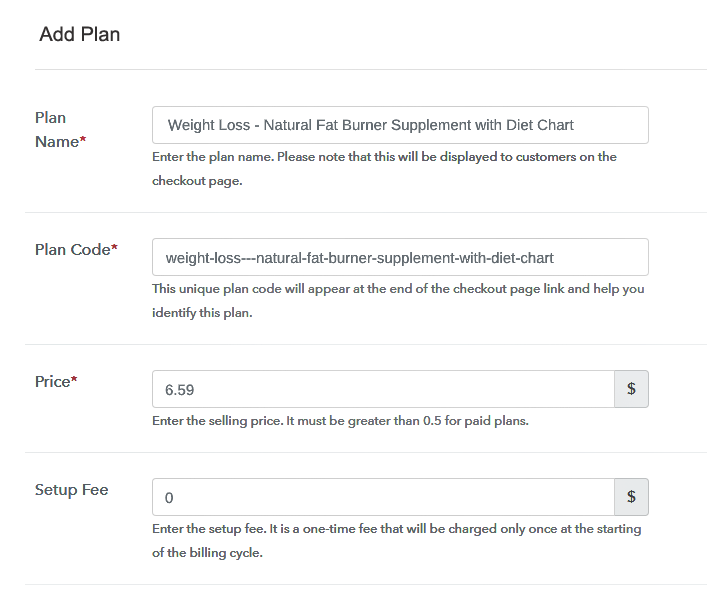
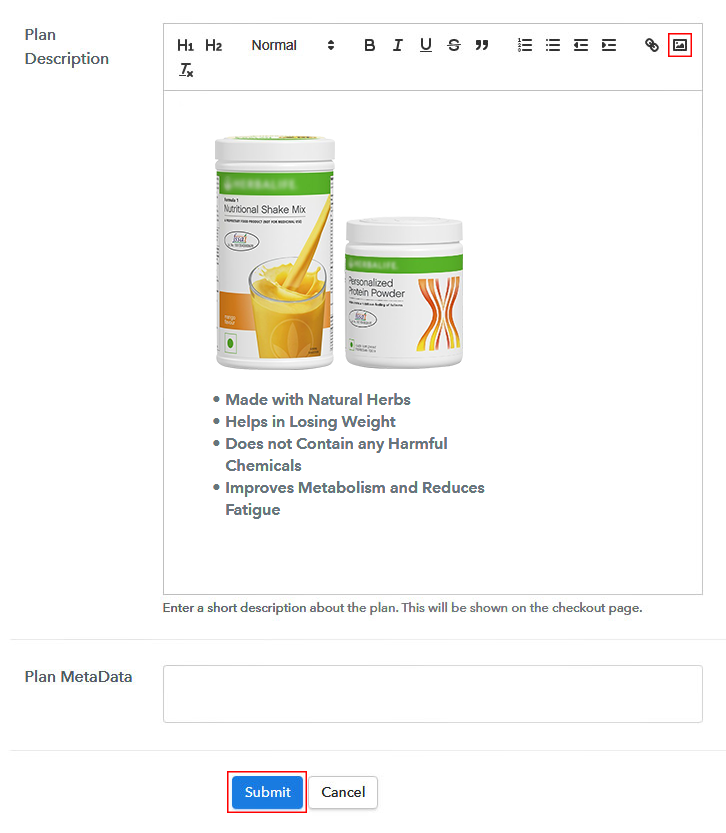
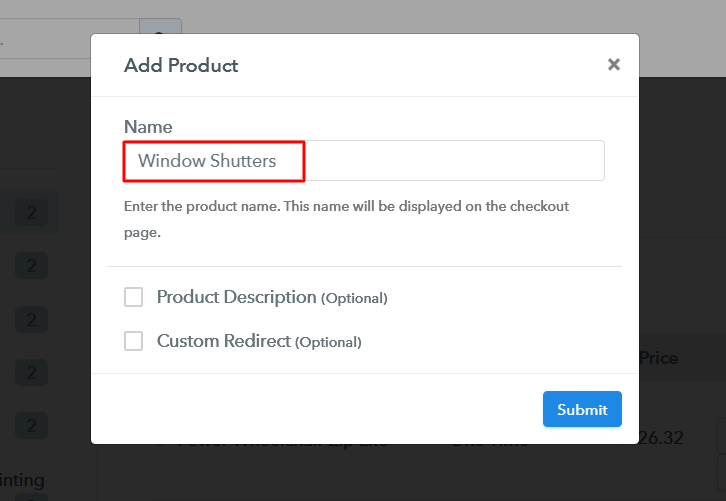
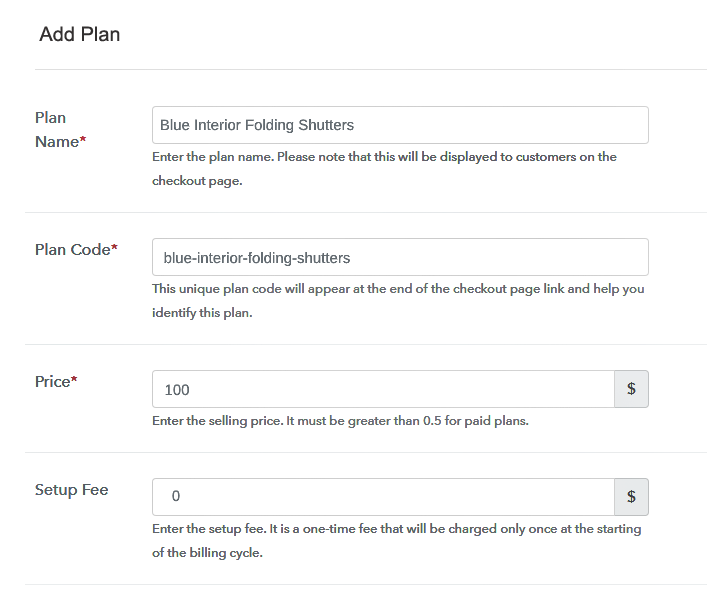
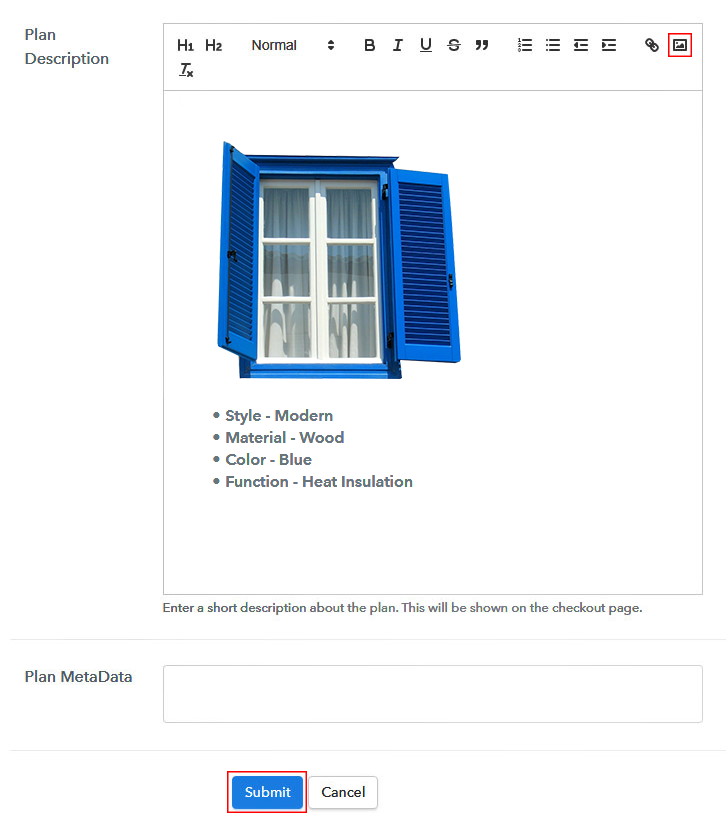
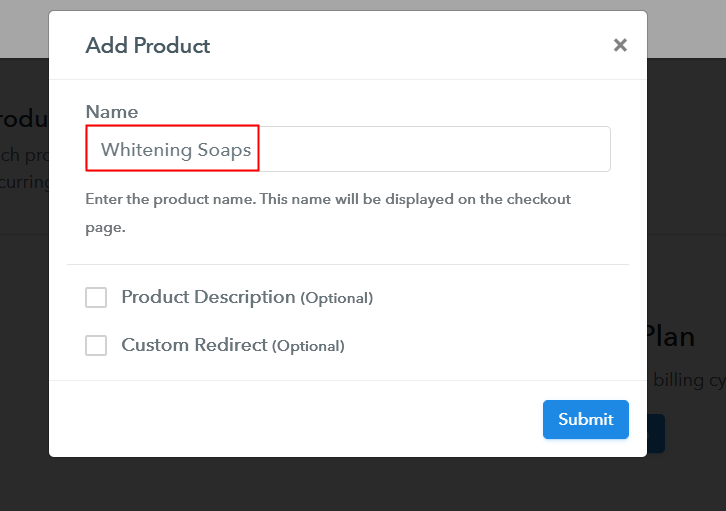
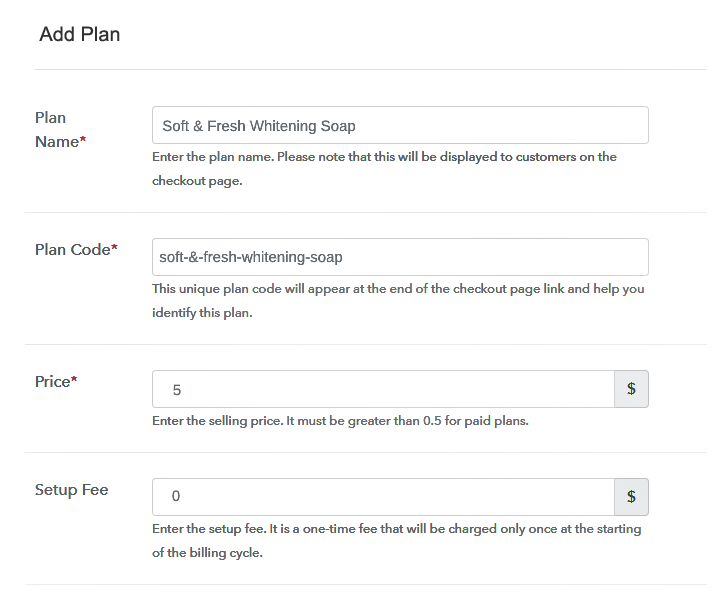
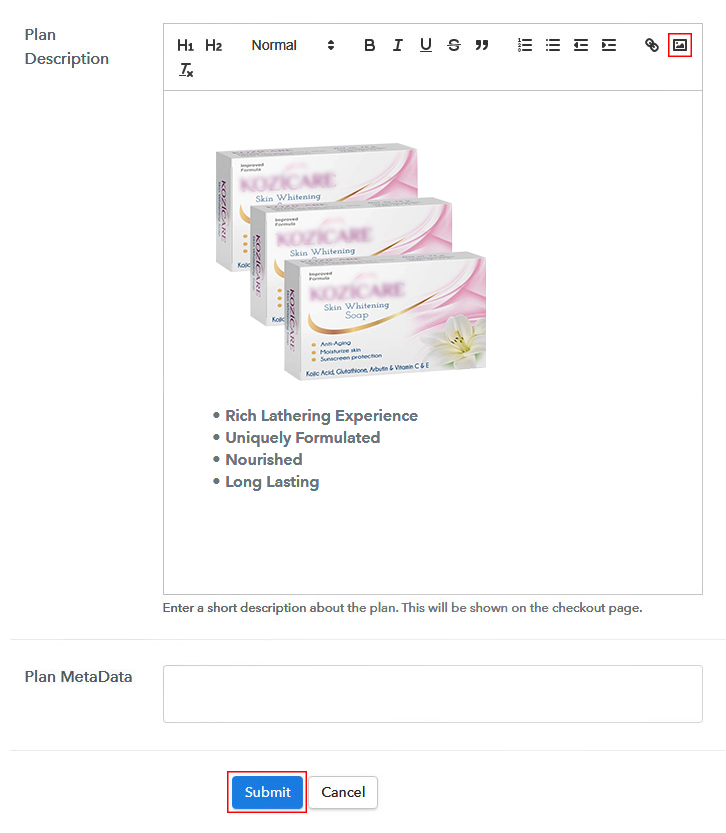
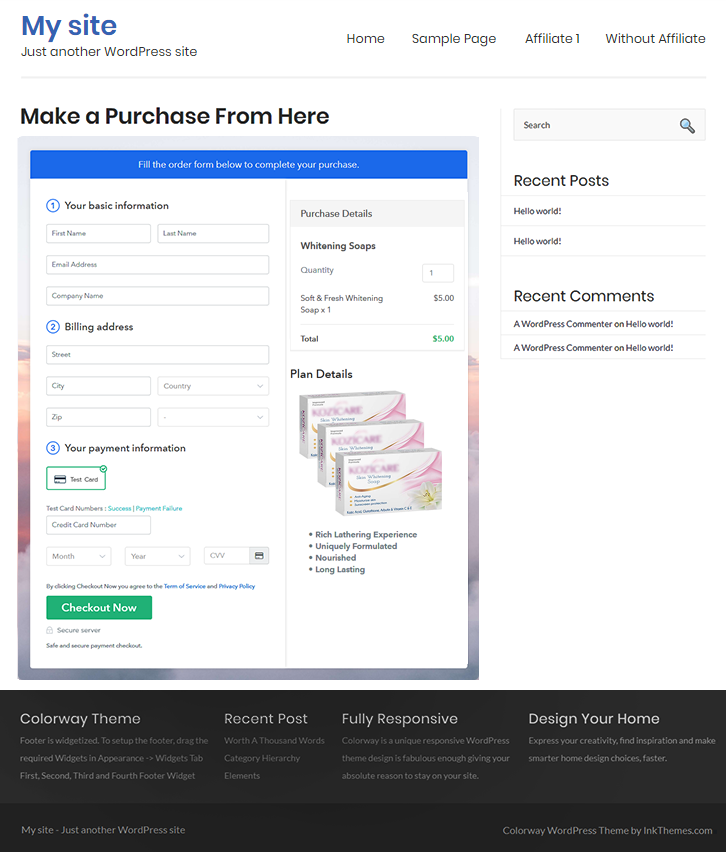
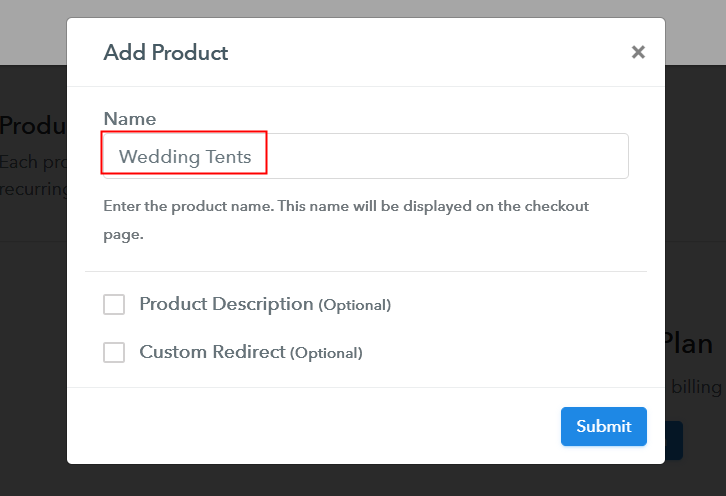
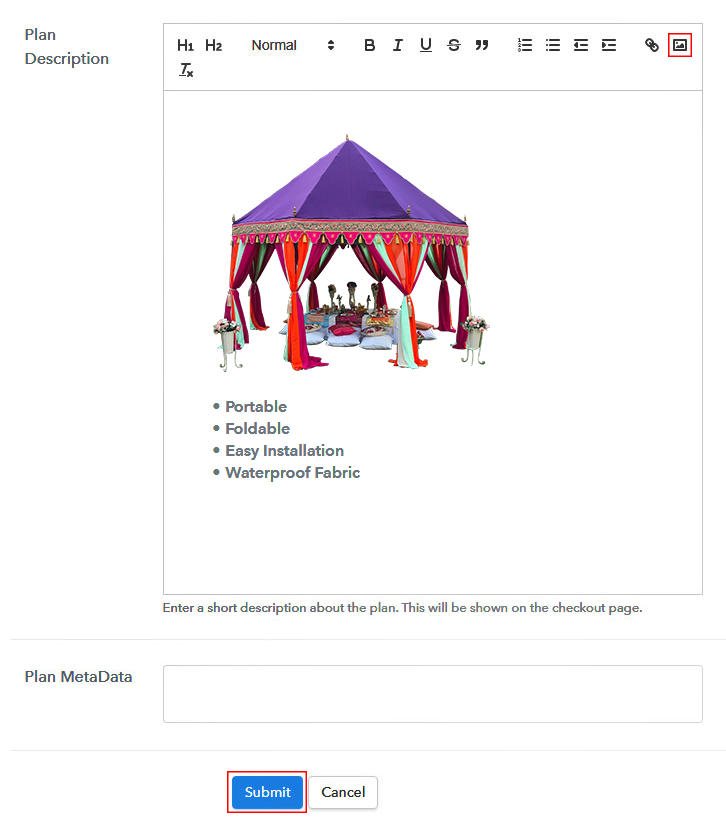
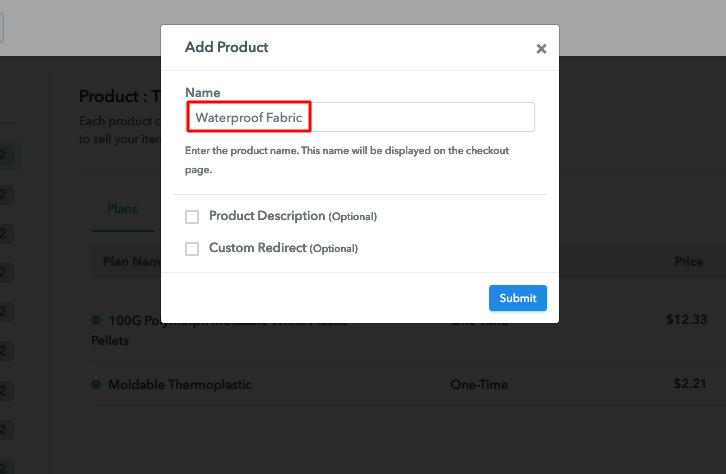
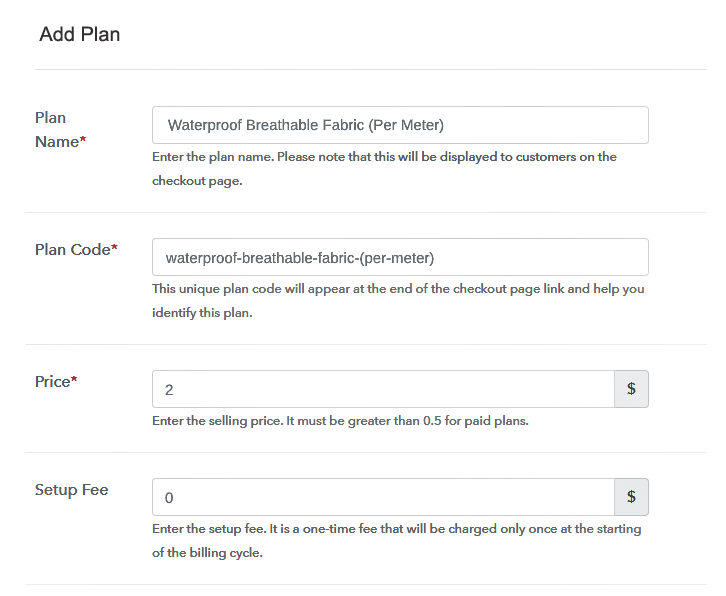
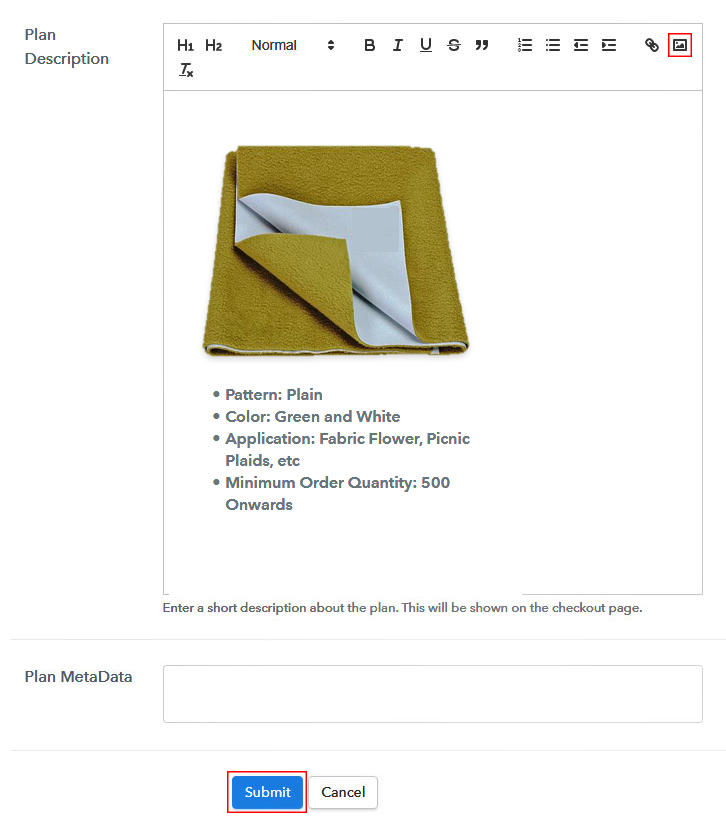
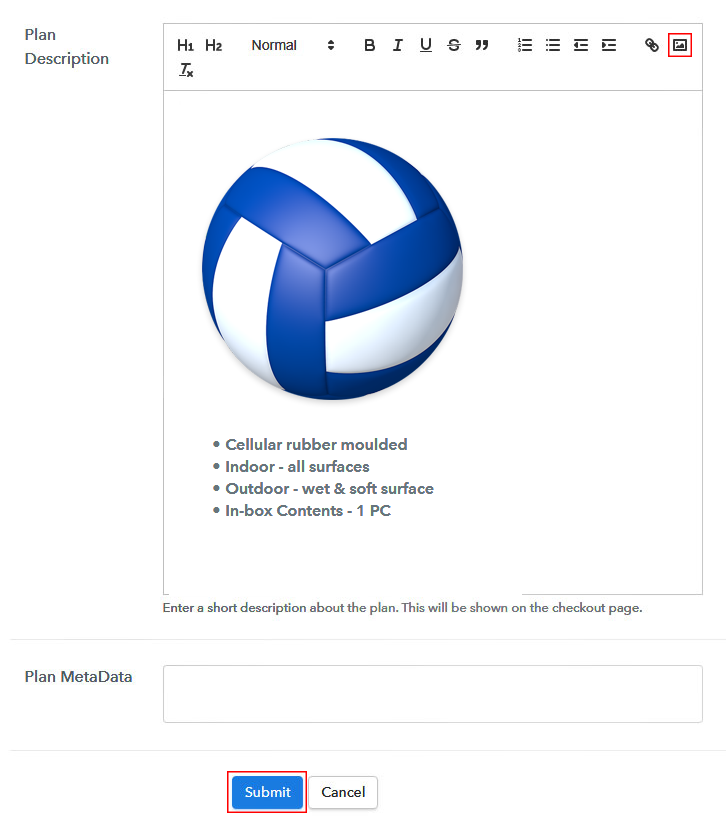
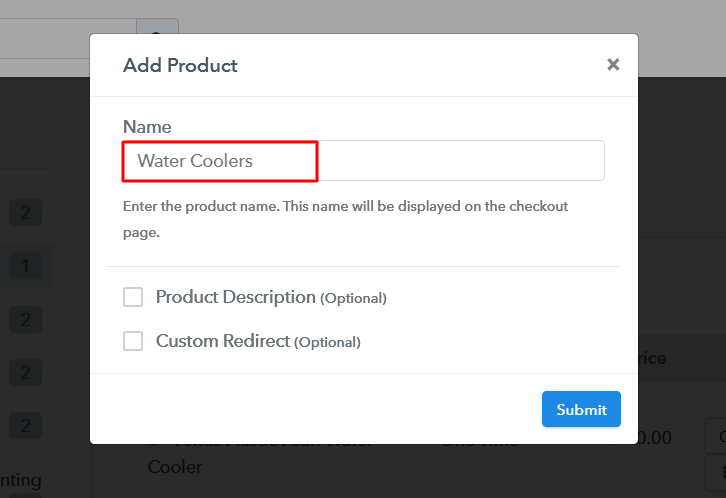
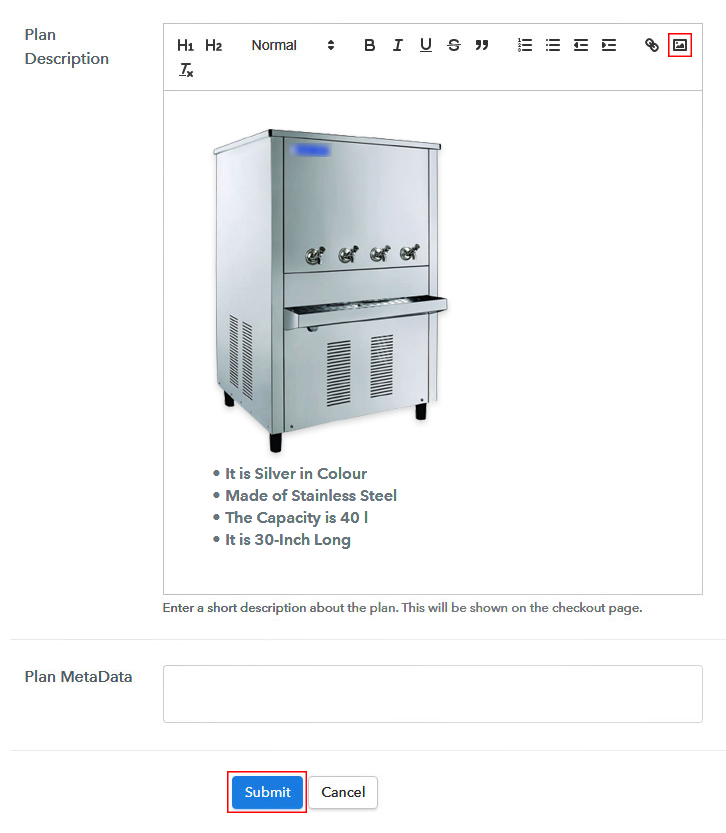
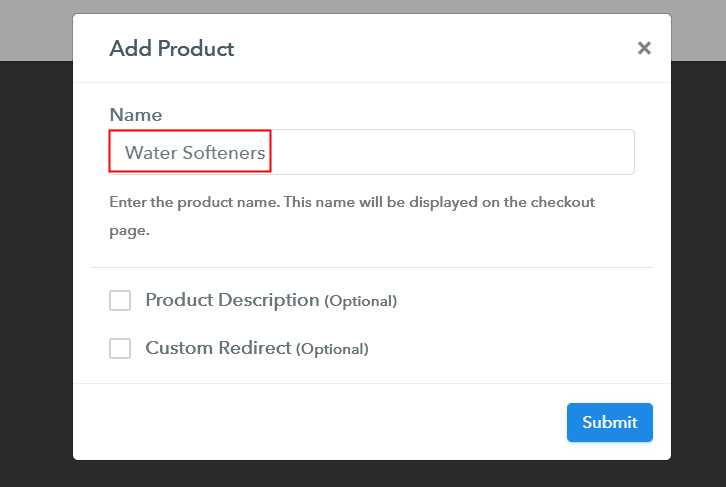
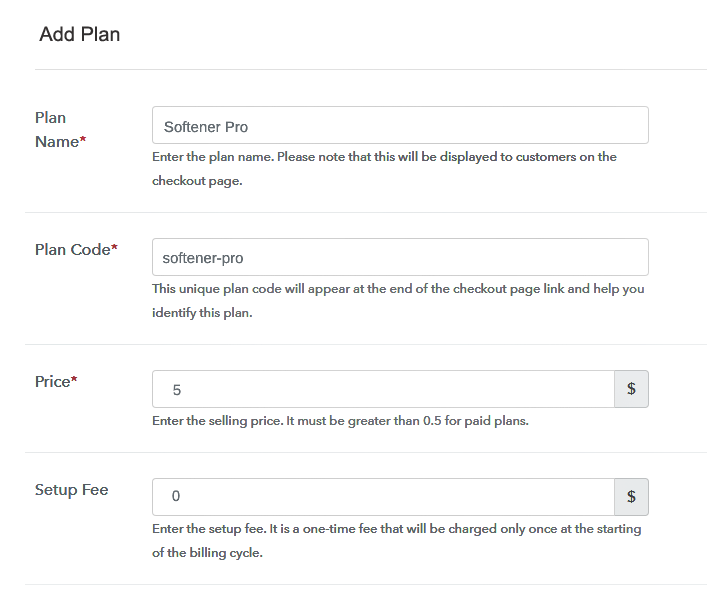
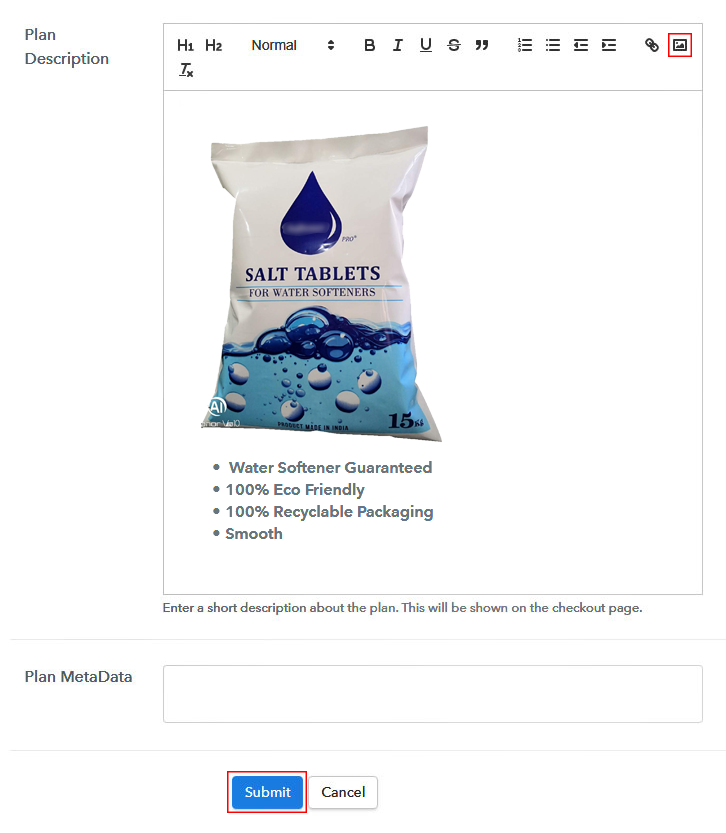
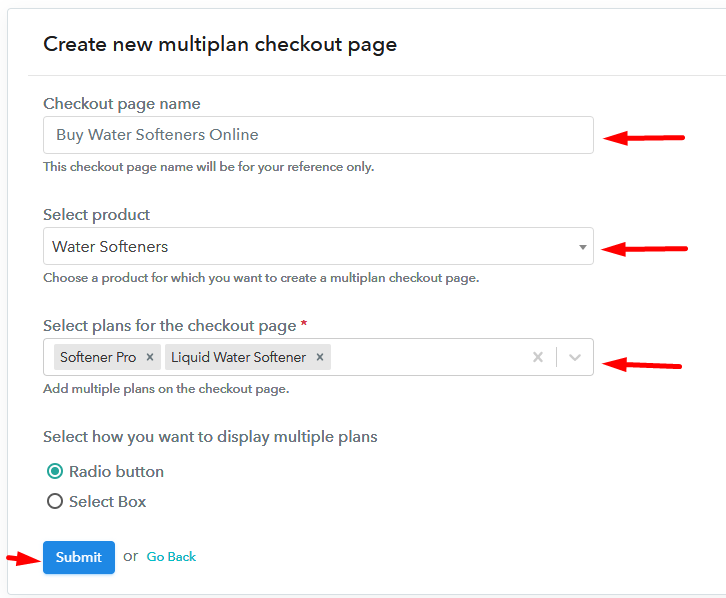
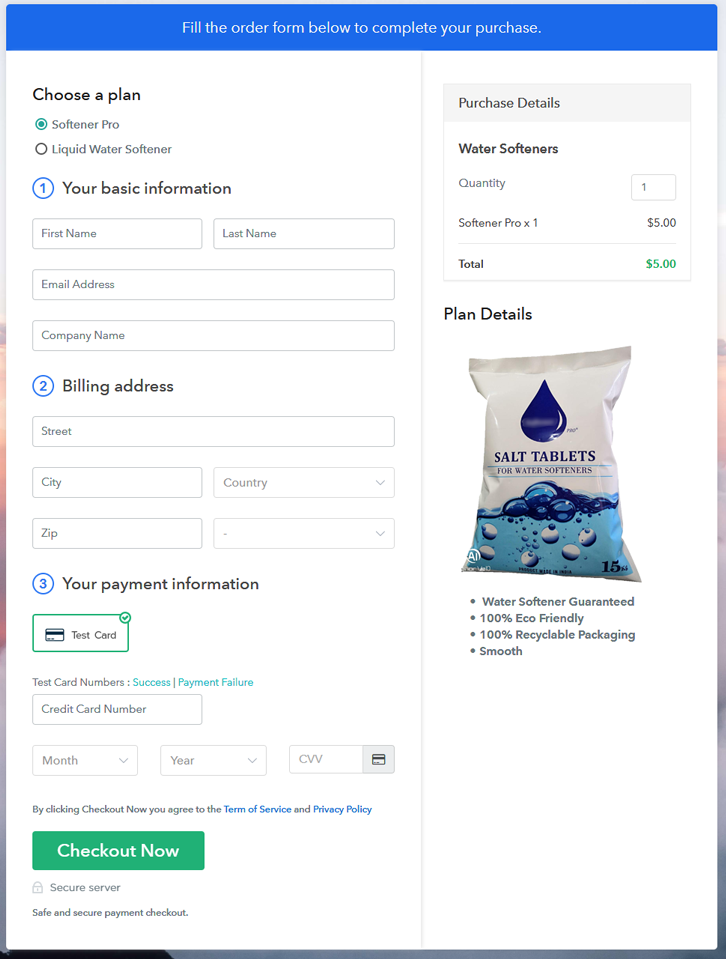
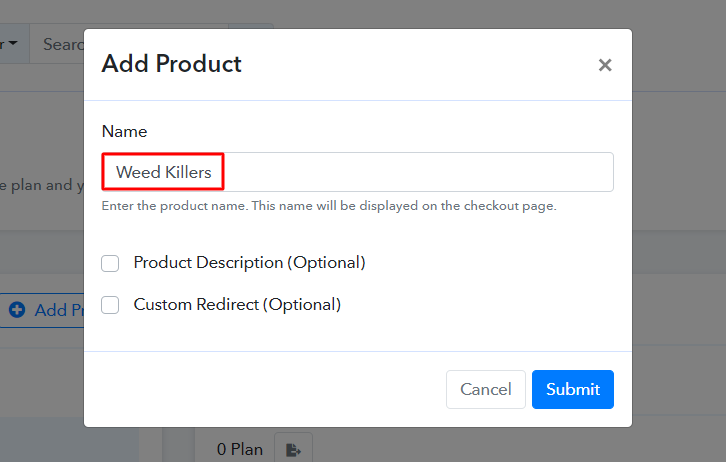
Next, you’ll be asked to provide some company details such as a company name, a phone number and a currency choice. Quickly, fill in the details asked and hit ‘Continue’ on this pop-up. In this step, you’ll need to make a choice for selecting a payment gateway to collect payments afterwards. You can also enable the test payments option for testing but remember to integrate a gateway from the following choices available with their integration guides. After the system settings upto step 4, in this step, you can start adding a product. For this, click on the ‘Add New Product’ button & name the product. We will be adding plans to sell afterwaords under these products. Fill all the required weed killer product details and hit ‘Submit’. Note: Here you can add all the products related to the similar category by creating plans for each of them. In this step, you can add plans under any product that you have created for the different types of weed killer available in your store. Name the plan as your item name and set the other details such as pricing, billing cycle etc. To put a picture in the checkout page’s display. Fill the plan description fields. Also, you can display some description of the weed killer. Submit this plan page and a checkout page will be generated to sell weed killer online. Likewise, you can add other weed killer products too. To sell a weed killer online, you can share a checkout page or embed it somewhere else. Follow up the recommended steps to preview the checkout page: Just copy the link and add the checkout page to sell weed killer online at any preferable place on your WordPress site. Further, paste the plan link on a text editor of the WordPress dashboard. Next, click the “Publish” button, after making changes. Note: In case you want to sell multiple products via a single checkout page, you can create a multi-plan checkout page otherwise skip this step. This was all about “How to sell weed killer online?’. The process is very simple and you can easily implement it by yourself. Also, it is pretty scalable as there is no limit over product sales. Moreover, you’ll get to choose among the multiple gateway options such as PayPal, Stripe, Razorpay etc.Step 2: Select Subscription Billing

Step 3: Account Setup

Step 4: Connect Payment Gateways & Start Weed Killer Selling Business Online

Step 5: Add Product for your Weed Killer

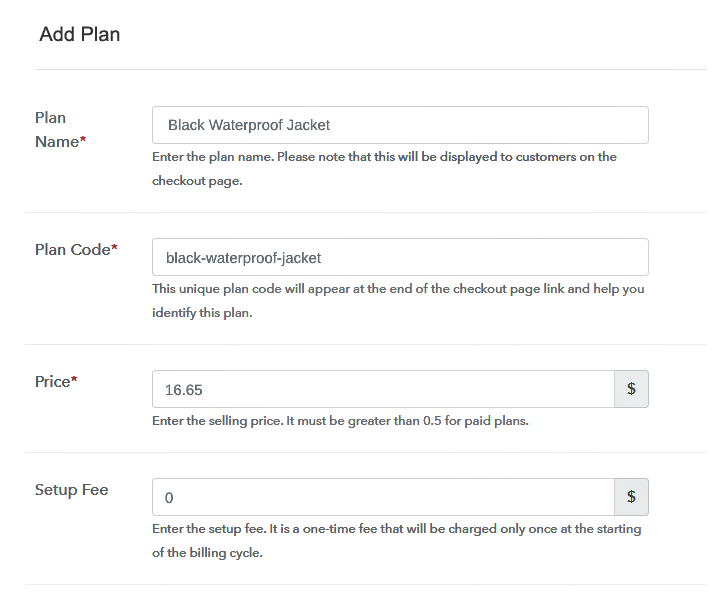
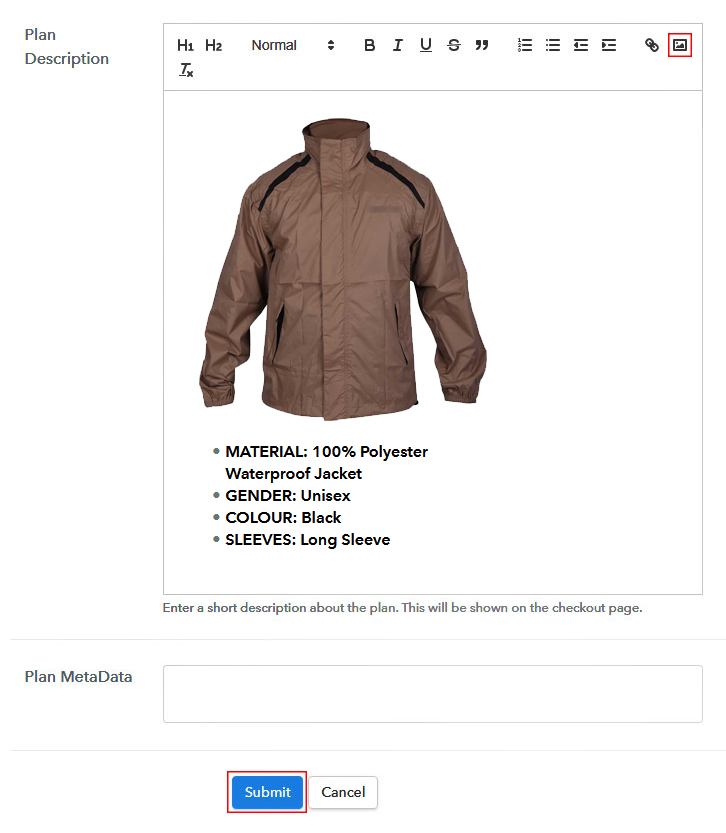
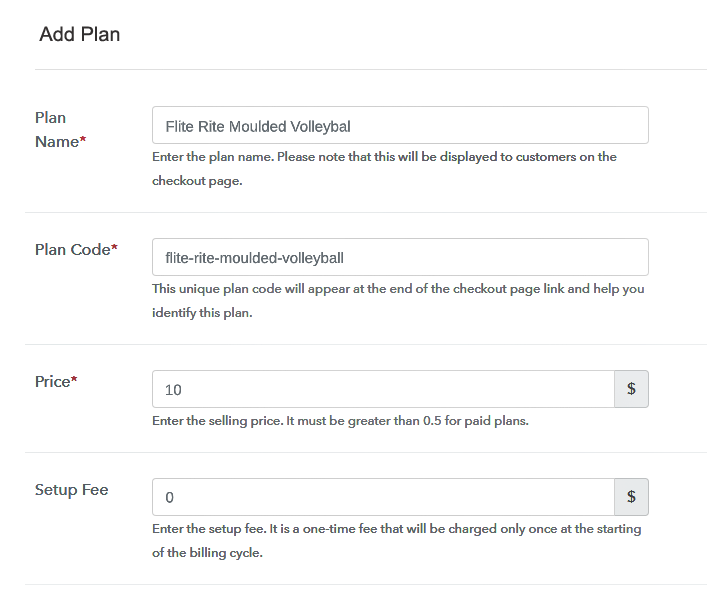
Step 6: Add Plans
(a) Select Add New Plan

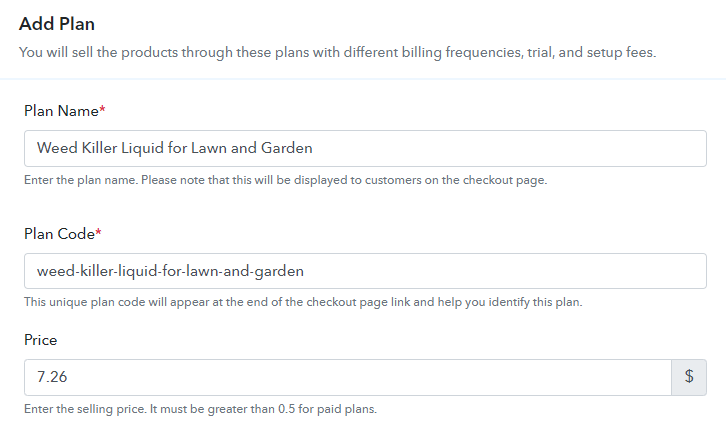
(b) Specify the Plan & Pricing Details
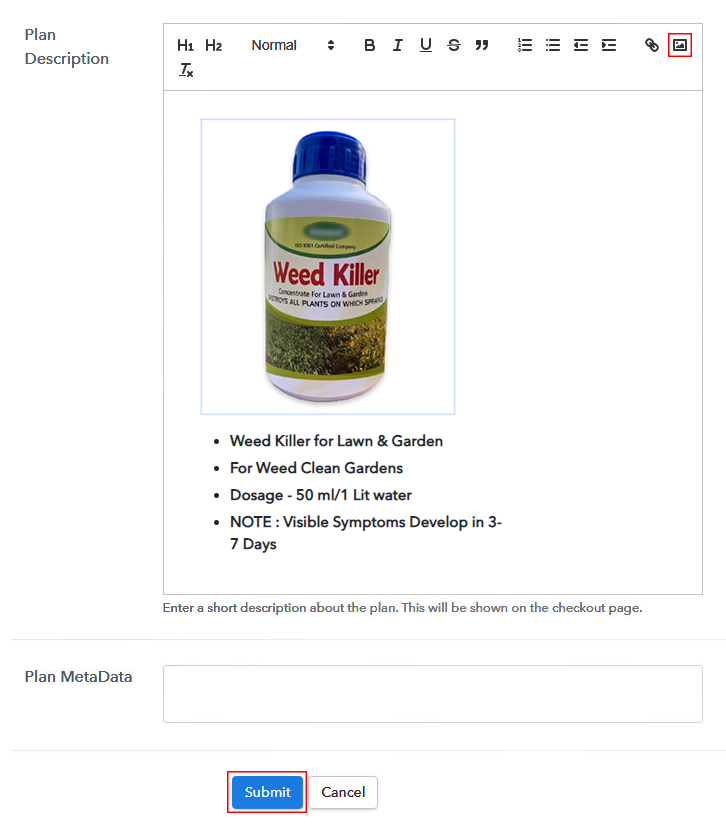
(c) Add Image & Description of Weed Killer
Step 7: Share your Checkout Page

Step 8: Preview Checkout Page
(a) Click on the View Button

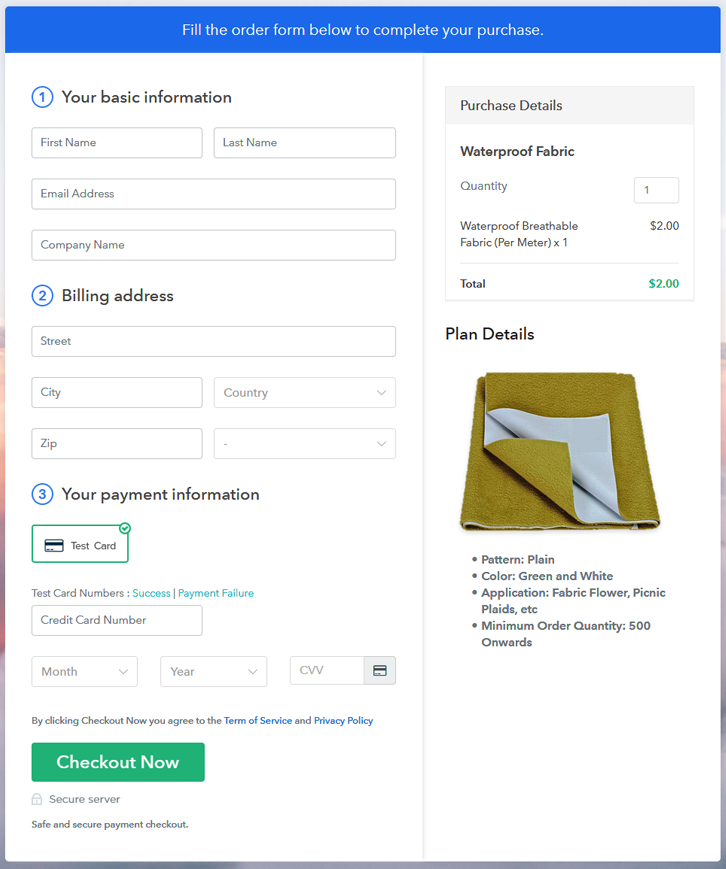
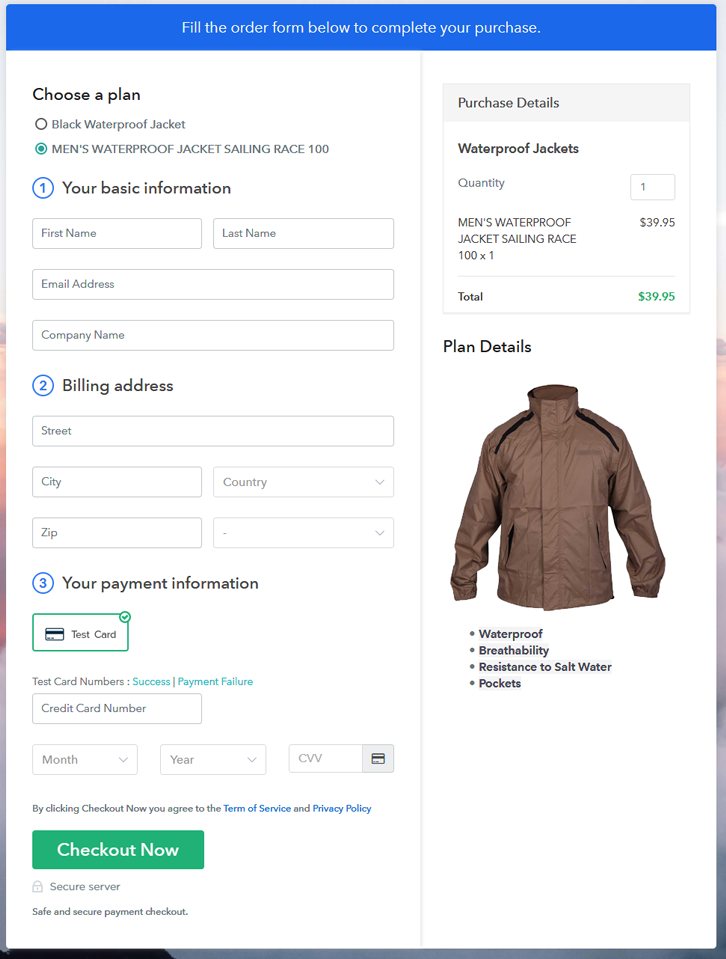
(b) Take a Look at the Checkout Page
Step 9: Embed Checkout Page in Site & Sell Weed Killer Online

(a) Edit the Page & Paste the Copied Link

(b) Save & Publish the Checkout Page

(c) Check out the Final Look of your Checkout Page on WordPress Site
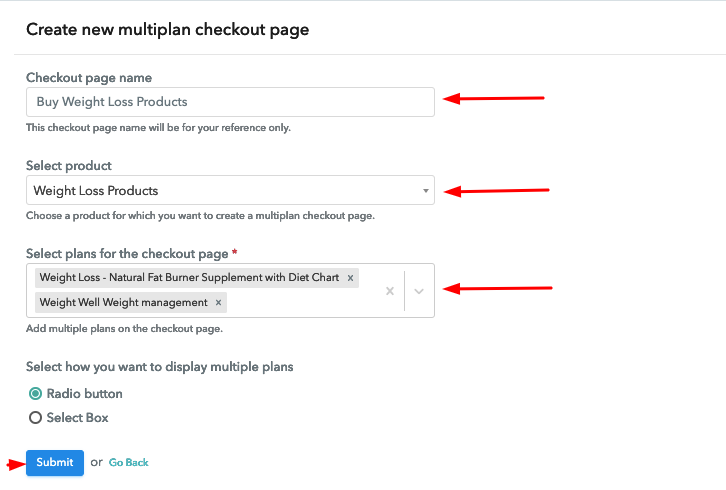
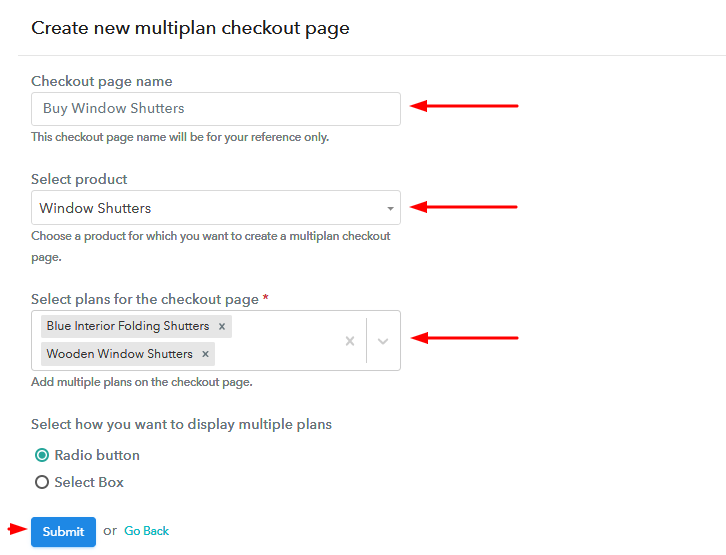
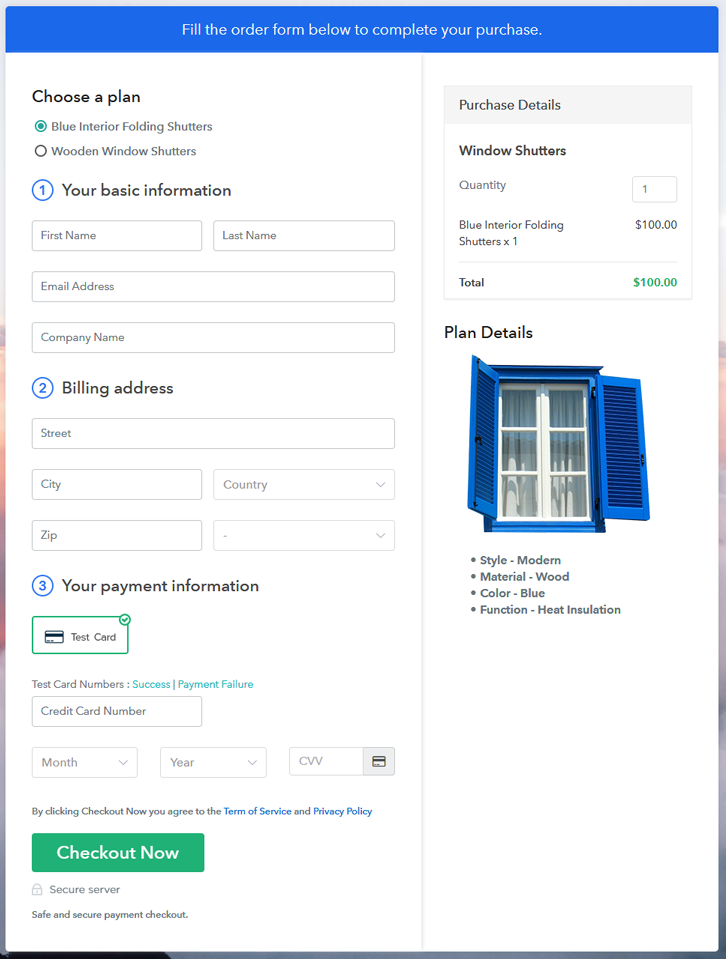
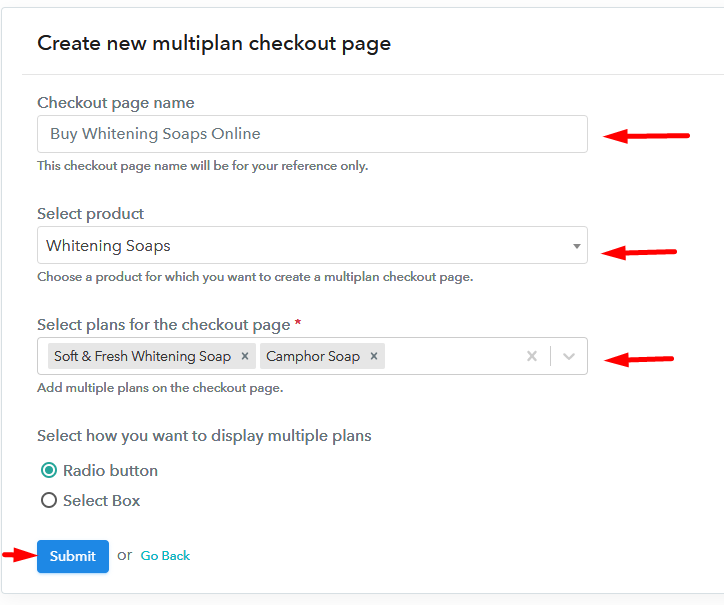
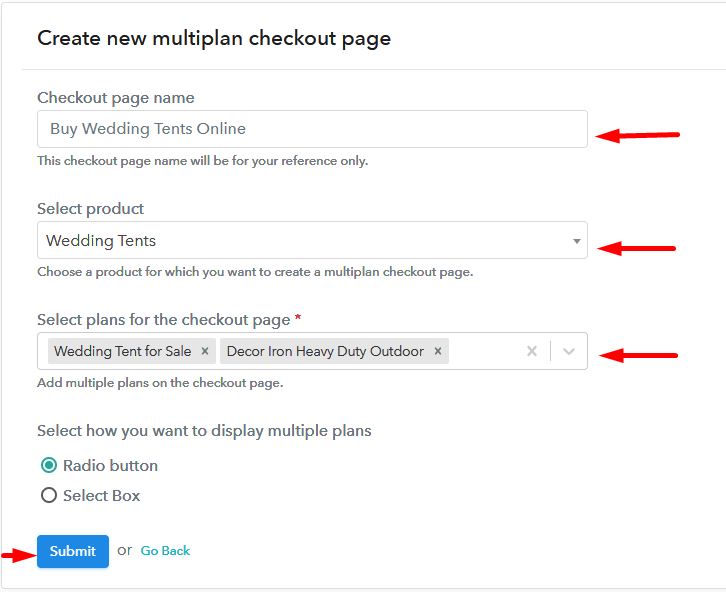
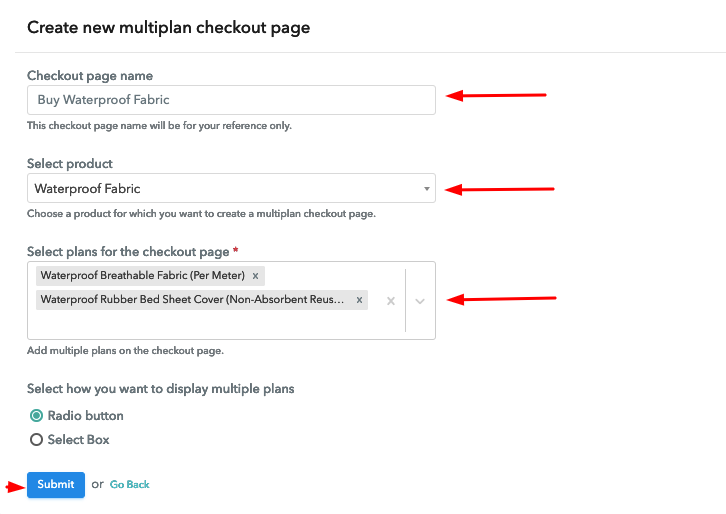
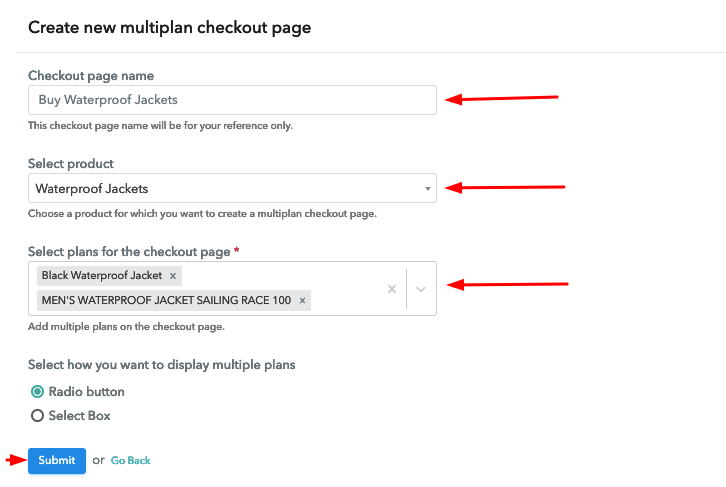
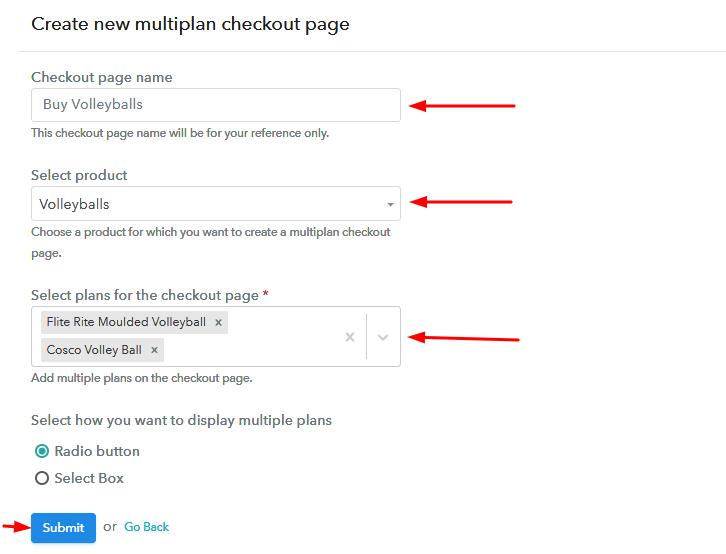
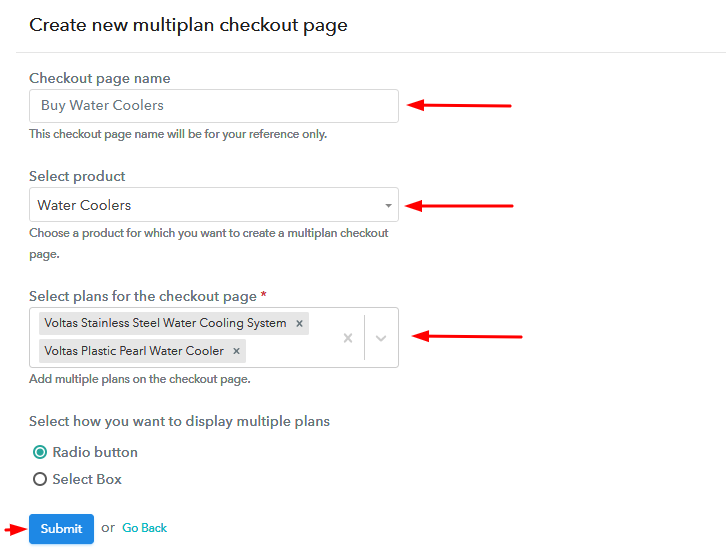
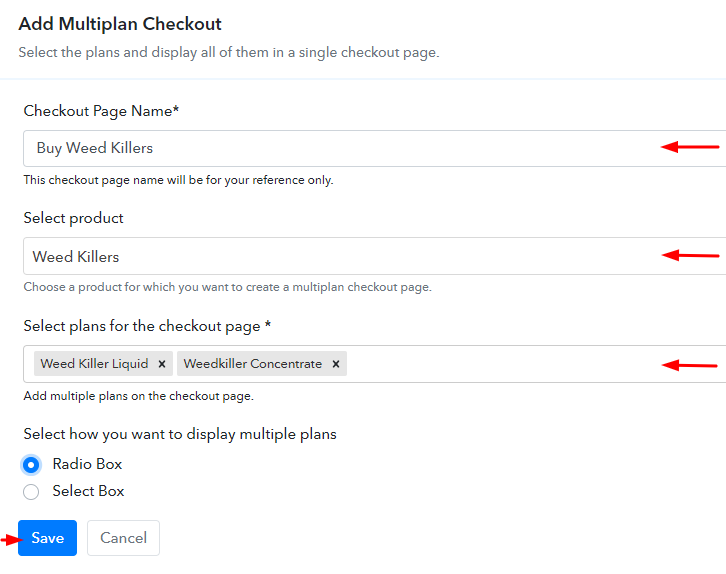
Step 10: Multiplan Checkout Page
(a) Click on Add Mutiplan Checkout

(b) Add Plans to Sell Multiple Weed Killer from Single Checkout Page
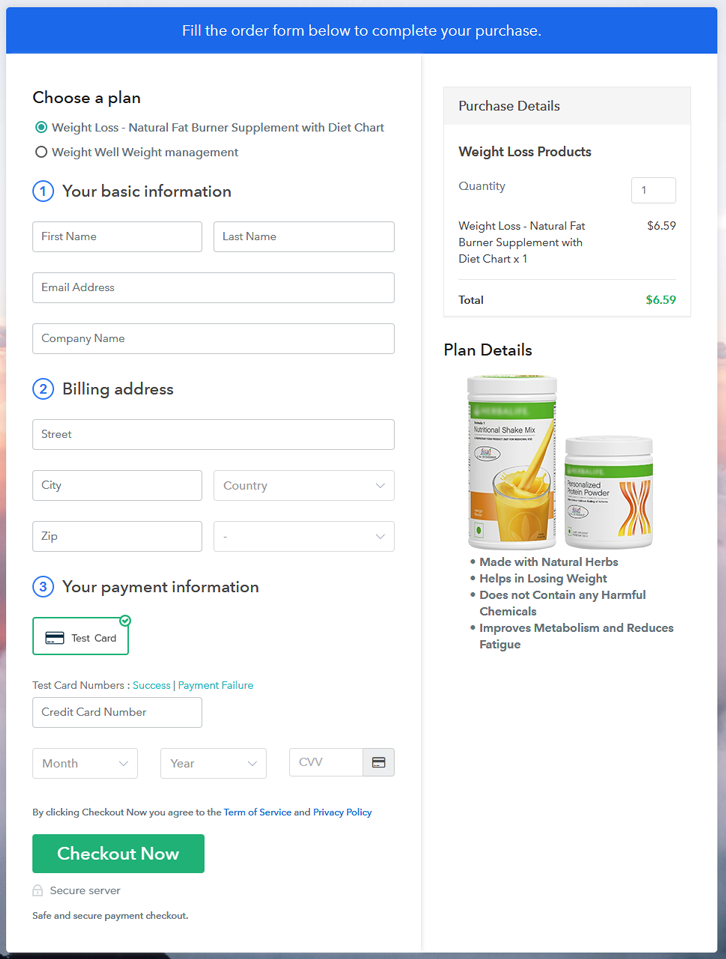
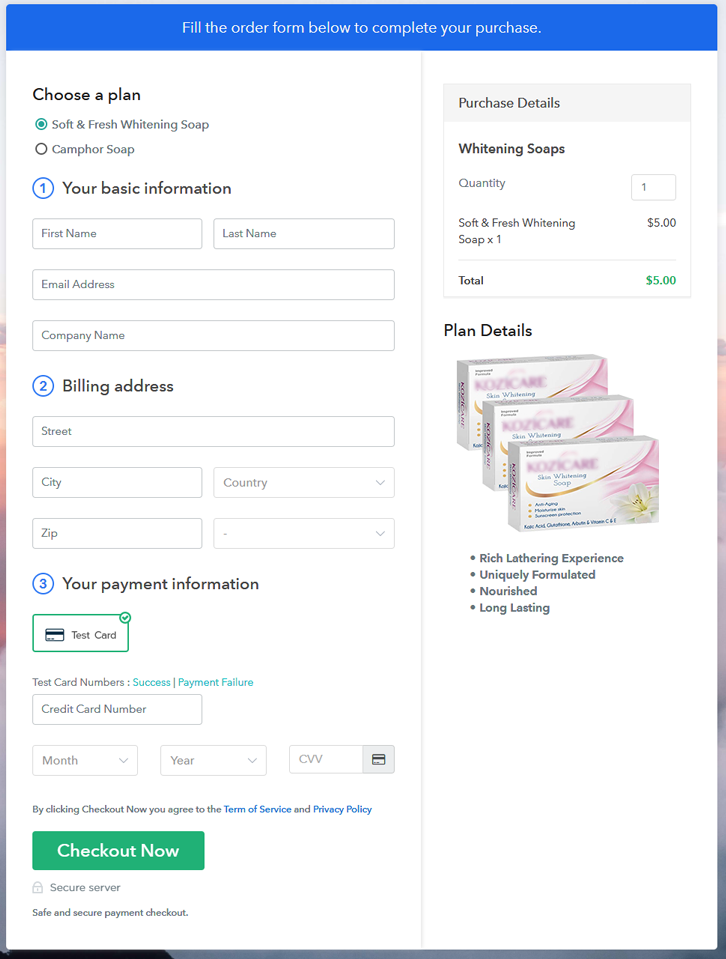
(c) Take a Look at the Checkout Page
Wrapping Up
You May Also Like To Read –