Automate 100% Customer Replies with One Powerful AI Chatbot

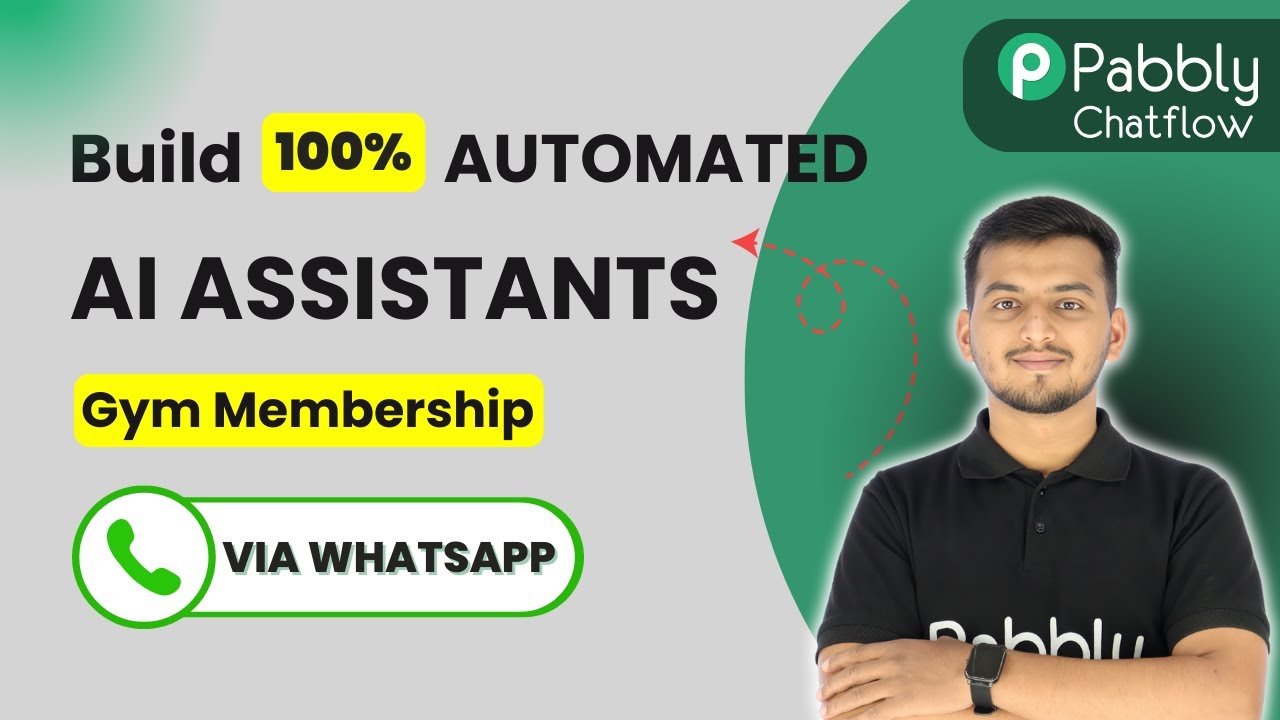
Learn how to automate customer replies using Pabbly Chatflow and a powerful AI chatbot. Follow our step-by-step tutorial for seamless integration with YouTube. Master conversational marketing with practical techniques for creating chatbots that engage visitors at exactly the right moment in their journey.

Watch Step By Step Video Tutorial Below


1. Accessing Pabbly Chatflow for Customer Replies

To automate customer replies, you first need to access Pabbly Chatflow. This platform is essential for integrating your AI chatbot with YouTube to manage customer interactions effectively. Start by logging into your Pabbly account and navigating to the Chatflow dashboard.

Once in the dashboard, you will see various options for creating workflows. Select the option to create a new workflow, which allows you to set up the integration that will handle customer replies automatically. This step is crucial for ensuring that your AI chatbot can respond to inquiries seamlessly.


2. Creating a Workflow in Pabbly Chatflow

Creating a workflow in Pabbly Chatflow is straightforward. Click on the ‘Create Workflow’ button, and you will be prompted to name your workflow. Choose a descriptive name that reflects its purpose, such as ‘YouTube Customer Replies Automation.’ This will help you identify the workflow later.

After naming your workflow, you will need to set the trigger event. For this integration, select YouTube as the trigger app. You can then specify the event that will initiate the workflow, such as when a new comment is posted on your YouTube videos. This setup is essential for automating customer replies effectively.

  • Click on ‘Create Workflow’
  • Name your workflow (e.g., ‘YouTube Customer Replies Automation’)
  • Select YouTube as the trigger app
  • Choose the trigger event (e.g., new comment)

Once these settings are configured, you can proceed to connect your AI chatbot to handle the replies automatically. This integration is what makes Pabbly Chatflow a powerful tool for managing customer interactions.


3. Integrating the AI Chatbot with Pabbly Chatflow

Next, you need to integrate your AI chatbot with Pabbly Chatflow. This step is crucial for ensuring that the chatbot can respond to customer inquiries automatically. Select the option to add an action step in your workflow.

Choose your AI chatbot application as the action app. You will then need to specify the action event, such as sending a reply to the comment. Configure the fields to include the necessary information, like the comment text and the response you want the chatbot to provide. This configuration allows the AI chatbot to function effectively within your automated workflow.

  • Select the action step in your workflow
  • Choose your AI chatbot as the action app
  • Specify the action event (e.g., send reply)
  • Configure the fields with necessary information

With these actions set up, your AI chatbot will be ready to engage with customers automatically, enhancing your customer service capabilities through Pabbly Chatflow.


4. Testing the Workflow in Pabbly Chatflow

Once you have set up the integration, it’s important to test the workflow in Pabbly Chatflow. This ensures that everything functions as expected. Start by clicking on the ‘Test’ button in your workflow settings. This will simulate a new comment on your YouTube video to check if the AI chatbot replies correctly.

If the test is successful, you will see the AI chatbot responding to the comment as configured. If there are any issues, you can troubleshoot by checking the workflow settings and ensuring that all fields are correctly filled. Testing is crucial to confirm that your automation is working smoothly.


5. Activating the Workflow for Live Use

After successful testing, you can activate your workflow in Pabbly Chatflow. Click on the ‘Activate’ button to enable the workflow for live use. This means that your AI chatbot will now automatically respond to customer comments on your YouTube videos.

It’s important to monitor the workflow initially to ensure it operates as expected. You can make adjustments as needed based on customer interactions. With Pabbly Chatflow, you can streamline your customer replies and enhance engagement effectively.


Conclusion

In conclusion, using Pabbly Chatflow to automate customer replies with a powerful AI chatbot is an efficient way to enhance your customer service. By following the steps outlined in this tutorial, you can set up a seamless integration with YouTube and ensure that your customers receive timely responses. This automation not only saves time but also improves customer satisfaction.

Ensure you check out Pabbly Connect to create business automation workflows and reduce manual tasks. Pabbly Connect currently offer integration with 2,000+ applications.

This Automation Turns Your Leads into Customers

Learn how to automate your lead conversion process using Pabbly Connect, Google Ads, and Gmail to enhance your business efficiency. Develop expertise in application integration and learn how to design streamlined automation workflows using proven, simplified approaches.

Watch Step By Step Video Tutorial Below


1. Accessing Pabbly Connect for Lead Automation

To begin automating your lead conversion process, you need to access Pabbly Connect. Start by visiting Pabbly.com in your browser. This platform is essential for integrating Google Ads and Gmail to streamline your lead management.

Once on the homepage, you will find two options: ‘Sign In’ and ‘Sign Up for Free’. If you are new, click on ‘Sign Up for Free’ to create an account and explore the software with 100 free tasks each month. If you already have an account, simply click ‘Sign In’ to access your dashboard.


2. Creating a Workflow in Pabbly Connect

After signing in to Pabbly Connect, navigate to the dashboard and select the ‘Access Now’ button to enter the Pabbly Connect interface. Here, you will create a new workflow that will automate the lead conversion process.

  • Click on the ‘Create Workflow’ button.
  • Name your workflow (e.g., ‘This Automation Turns Your Leads into Customers’).
  • Choose a folder for organization.

Once you have set these parameters, click on the ‘Create’ button to finalize your workflow setup. This workflow will serve as the backbone for automating your lead management.


3. Setting Up the Trigger in Pabbly Connect

The next step involves setting up a trigger that will initiate the automation process. Select Google Ads as your trigger application in Pabbly Connect. This is where you will capture new leads generated from your Google Ads campaigns.

Choose the event ‘New Lead Form Entry’ to specify the exact moment a new lead is captured. After selecting this event, click on the ‘Connect’ button to establish a connection with your Google Ads account.

Once connected, you will receive a Webhook URL from Pabbly Connect. This URL needs to be integrated into your Google Ads account to enable data transfer. Copy this URL and proceed to your Google Ads account to set up the Webhook integration.


4. Configuring Google Ads for Webhook Integration

In your Google Ads account, navigate to the lead form section and select the form you want to use. Look for the option to set up lead delivery and choose ‘Webhook Integration’. Here, you will paste the Webhook URL you copied from Pabbly Connect.

  • Add your business name and required fields in the lead form.
  • Select the Webhook URL option for lead delivery.
  • Test the integration by sending dummy data.

After completing these steps, send a test lead from your Google Ads form. This will confirm that the integration is working correctly and that Pabbly Connect is receiving the lead data.


5. Generating and Sending Emails via Gmail

Now that your trigger is set up and tested, it’s time to create an action step to send personalized emails to your leads. In Pabbly Connect, select Gmail as your action application and choose the event ‘Send Email’.

Connect your Gmail account by clicking on the ‘Connect’ button. After establishing the connection, configure the email details, including the sender name, recipient email address, subject, and content. Use the data mapped from the lead form to personalize the email.

Finally, click on the ‘Save and Send Test Request’ button to send a test email. Once you confirm that the email has been successfully sent, your automation is complete. You can now watch your leads turn into customers with the help of Pabbly Connect.


Conclusion

In conclusion, using Pabbly Connect to automate your lead conversion process is a game-changer for any business. By integrating Google Ads and Gmail, you can efficiently turn leads into paying customers through personalized email communication. Start automating today to enhance your business efficiency!

Ensure you check out Pabbly Connect to create business automation workflows and reduce manual tasks. Pabbly Connect currently offer integration with 2,000+ applications.

Instagram Auto Posting Tutorial with Google Gemini (Beginner Friendly)

Learn how to automate Instagram posting using Pabbly Connect and Google Gemini in this step-by-step tutorial for beginners. Discover how to seamlessly connect your essential tools through accessible instructions that make powerful automation available to professionals at every skill level.

Watch Step By Step Video Tutorial Below


1. Accessing Pabbly Connect for Instagram Automation

To start automating your Instagram posts, you first need to access Pabbly Connect. Open a new tab and visit Pabbly.com/connect. This platform allows you to integrate multiple applications without any coding.

If you are new to Pabbly, click on the ‘Sign up Free’ option to create an account. Existing users should click on ‘Sign In’. After logging in, locate the ‘Access Now’ button to enter the Pabbly Connect dashboard.


2. Creating Your Instagram Auto Posting Workflow

Once in the Pabbly Connect dashboard, you can create a new workflow for Instagram auto posting. Click on the ‘+ Create Workflow’ button and select the new beta workflow builder. using Pabbly Connect

  • Enter the workflow name as ‘Instagram Auto Posting Tutorial with Google Gemini’.
  • Select the appropriate folder for your workflow.
  • Click on the ‘Create’ button to finalize your workflow creation.

This step sets the foundation for your automation. Now you can proceed to configure the trigger for your workflow.


3. Setting Up the Trigger with Pabbly Connect

The next step involves configuring the trigger for your Instagram posting automation. Select ‘Schedule by Pabbly’ as your trigger application to automate daily posting. using Pabbly Connect

  • Choose the app event as ‘Schedule Workflow’.
  • Click on the ‘Connect’ button to establish a connection.
  • Set the frequency to ‘Every Day’ and select your desired time for posting.

After saving your settings, your trigger is now set to run automatically at the specified time each day, ensuring consistent Instagram posts.


4. Generating Captions and Images with Google Gemini

Now, you will use Google Gemini to generate captions for your Instagram posts. Select ‘Google AI Studio Gemini’ as your action application and choose the event ‘Generate Content’. using Pabbly Connect

Connect to your Google Gemini account by entering your API key. Enter your desired prompt to generate a caption. Click ‘Save and Send Test Request’ to receive the generated caption.

After generating the caption, you will also need to generate an image using the same Google Gemini application. Select the event ‘Generate and Add Images’ and repeat the process to generate an image for your post.


5. Posting the Content on Instagram

Finally, it’s time to post your generated content on Instagram. Select the ‘Instagram for Business’ application and choose the action event ‘Create and Publish Photo’. using Pabbly Connect

Connect your Instagram account through Facebook authentication. Map the photo URL and caption fields with the responses from the previous steps. Click ‘Save and Send Test Request’ to publish your post.

After successfully posting, ensure to enable the toggle for your workflow in Pabbly Connect to keep it active. This automation allows you to post consistently without manual intervention.


Conclusion

In this tutorial, you learned how to automate Instagram posting using Pabbly Connect and Google Gemini. By following these steps, you can ensure regular and engaging content on your Instagram account effortlessly.

Ensure you check out Pabbly Connect to create business automation workflows and reduce manual tasks. Pabbly Connect currently offer integration with 2,000+ applications.

Level Up Your Discord Server with Daily Auto Messages

Learn how to automate daily messages in your Discord server using Pabbly Connect. Follow our step-by-step tutorial for seamless integration. Build sophisticated automated workflows in less time than you think. This guide translates complex integrations into straightforward steps for immediate implementation.

Watch Step By Step Video Tutorial Below


1. Accessing Pabbly Connect for Discord Automation

To start automating daily messages in your Discord server, you need to access Pabbly Connect. If you are a new user, simply open a new tab and search for ‘Pabbly.com/connect’. This will take you to the Pabbly Connect landing page.

Once on the landing page, click on the ‘Sign Up for Free’ button located in the top right corner. As a new user, you will receive 100 free tasks every month, allowing you to send up to 100 messages without any cost. This is a great way to explore the capabilities of Pabbly Connect.


2. Creating a Workflow in Pabbly Connect

After signing up, navigate to the workflow builder within Pabbly Connect. This is where you’ll create your automation workflow. Click on the ‘Add Trigger’ button to get started. Select ‘Schedule’ as your trigger application since you want to automate the sending of messages daily at a specific time.

  • Choose the event as ‘Schedule Workflow’.
  • Set the frequency to run the workflow every day at 12:00 PM.
  • Click ‘Save’ to schedule your workflow.

Once saved, your workflow is now scheduled to run every day at noon. You can also customize it to run on specific days of the week or dates of the month as per your needs.


3. Generating Messages with Pabbly Connect

Next, you need to generate the message that will be sent to your Discord community. To do this, click on ‘Add New Action Step’ and select ‘Gemini’ as your action application. Choose ‘Generate Content’ as the event to create the message.

To connect your Gemini account, you will need to provide an API key. Here’s how to obtain it:

  • Open Google AI Studio and navigate to the ‘Get API Key’ section.
  • Click ‘Create API Key’, name your key, and select your project.
  • Copy the generated API key and paste it into your workflow in Pabbly Connect.

After connecting, enter your prompt for message generation and select the model you want to use. Click ‘Save and Send Test Request’ to generate the message.


4. Sending Generated Messages to Discord

Now that you have your message generated, it’s time to send it to your Discord server. Click on ‘Add New Action Step’ again and search for ‘Discord’. Choose Discord as your action application and select ‘Send Channel Message’ as the event.

To configure this, you will need to set up a webhook URL from your Discord server. Here’s how:

Go to your Discord server settings and navigate to ‘Integrations’. Click on ‘New Webhook’ and create a webhook for the channel where you want to send messages. Copy the webhook URL and paste it into your Pabbly Connect workflow.

Map the message generated by Gemini to the message field in Discord and click ‘Save and Send Test Request’. Your message will now be sent to your Discord channel every day automatically.


5. Conclusion: Automate Your Discord Messages with Pabbly Connect

In this tutorial, we demonstrated how to use Pabbly Connect to automate daily messages in your Discord server. By following the steps outlined, you can easily set up a workflow that generates and sends messages without manual intervention.

Ensure you check out Pabbly Connect to create business automation workflows and reduce manual tasks. Pabbly Connect currently offer integration with 2,000+ applications.

Check out Pabbly Connect – Automate your business workflows effortlessly! Sign Up Free – Start your journey with ease! 10,000+ Video Tutorials – Learn step by step! Join Pabbly Facebook Group – Connect with 21,000+ like minded people!

With Pabbly Connect, you can enhance your Discord community engagement effortlessly. Start your free trial today and explore the powerful automation features available to you!

Top WordPress Automations for Business to Drive Growth & Sales

Discover how to automate your WordPress tasks using Pabbly Connect to enhance your business growth and sales through effective integrations with Google, Mailchimp, and more.

Watch Step By Step Video Tutorial Below


1. Accessing Pabbly Connect for WordPress Automation

To start automating your WordPress tasks, access Pabbly Connect by visiting its URL at pabby.com/connect. Once logged in, you will be able to create workflows that connect WordPress with various applications.

In Pabbly Connect, you can set up automations that allow your WordPress posts to trigger actions in other platforms, enhancing your business efficiency. This integration is crucial for reducing manual efforts and increasing productivity.


2. Automating WordPress Posts to Social Media Using Pabbly Connect

The first automation involves posting new WordPress content directly to social media platforms like Facebook, Instagram, and Twitter using Pabbly Connect. Start by selecting WordPress as your trigger app and the event as ‘New Post Published’.

  • Select the trigger app as WordPress.
  • Choose the action apps: Facebook Pages, Instagram for Business, and Twitter.
  • Map the data from WordPress to these platforms, including the post title and image URL.

After setting this up in Pabbly Connect, every time a new post is published on WordPress, it will automatically share the content across your selected social media platforms.


3. Autogenerating and Publishing WordPress Posts with Pabbly Connect

In the second automation, you can automatically generate and publish WordPress posts using Google Sheets and Google Gemini through Pabbly Connect. Start by selecting Google Sheets as your trigger app and setting the event to ‘New or Updated Spreadsheet Row’.

Next, input your content theme and description in Google Sheets. This data will be sent to Google Gemini to create the post content. Here’s how to proceed:

  • Paste the webhook URL from Pabbly Connect into your Google Sheet.
  • Capture the response from Google Sheets in Pabbly Connect.
  • Use Google Gemini to generate content based on the data received.

Finally, map the generated content back to WordPress to create a new post. This automation allows you to streamline content creation without manual input.


4. Keeping Google Business Profile Updated with Pabbly Connect

For the third automation, use Pabbly Connect to keep your Google Business Profile updated with new WordPress posts. Again, select WordPress as your trigger app and set the event to ‘New Post Published’.

After capturing the webhook response from WordPress, you can set the action app to Google Business Profile. Here’s how:

Select the Google Business Profile app and choose the event ‘Create Call to Action Post’. Map the post title and URL from WordPress to this action. Click ‘Save and Send Test Request’ to update your Google Business Profile.

This integration ensures that your Google Business Profile remains active and reflects your latest content, helping maintain your online presence.


5. Conclusion: Leverage Pabbly Connect for WordPress Automation

In summary, using Pabbly Connect allows you to automate various tasks related to WordPress, enhancing your business growth and efficiency. By integrating with platforms like Google, Mailchimp, and social media, you can save time and resources.

Ensure you check out Pabbly Connect to create business automation workflows and reduce manual tasks. Pabbly Connect currently offer integration with 2,000+ applications.

Check out Pabbly Connect – Automate your business workflows effortlessly! Sign Up Free – Start your journey with ease! 10,000+ Video Tutorials – Learn step by step! Join Pabbly Facebook Group – Connect with 21,000+ like minded people!

Start utilizing Pabbly Connect today to transform your WordPress site into a powerful automation engine, driving growth and engagement for your business.

Automate Webinar Signups Using WhatsApp Chatbot

Learn how to automate webinar signups using a WhatsApp chatbot with Pabbly Chatflow. Follow this step-by-step guide for seamless integration. Master conversational marketing with practical techniques for creating chatbots that engage visitors at exactly the right moment in their journey.

Watch Step By Step Video Tutorial Below


1. Setting Up Pabbly Chatflow for Webinar Automation

To automate webinar signups using a WhatsApp chatbot, the first step is to access Pabbly Chatflow. This platform allows you to create a chatbot that interacts with users on WhatsApp seamlessly. To get started, visit the Pabbly Chatflow website and either sign in or create a new account.

Once you have logged into your Pabbly Chatflow account, navigate to the dashboard. Here, you will find options to add your WhatsApp number. Click on the ‘Add WhatsApp Number’ button and follow the prompts to integrate your WhatsApp account with Pabbly Chatflow. This integration is crucial for enabling the chatbot functionality.


2. Creating the WhatsApp Chatbot in Pabbly Chatflow

After setting up your WhatsApp number, you can begin creating your chatbot. Click on the ‘Flows’ option in Pabbly Chatflow and then select ‘Add Flow’. Name your flow, for example, ‘Webinar Registration Bot’. This name will help you identify the flow later.

  • Select the trigger event as ‘Keyword Match’.
  • Add keywords such as ‘event’ and ‘hello’ to trigger the chatbot.
  • Create a welcome message that the chatbot will send when triggered.

Once you have configured the trigger settings, you can add action steps. The first action is to send a welcome message with options for the user to choose from. This sets the stage for further interaction with your Pabbly Chatflow chatbot.


3. Configuring User Options in the Chatbot

In this step, you will configure the options that users can select after receiving the welcome message. Using Pabbly Chatflow, you can add buttons for choices such as ‘Register for Event’, ‘View Event Details’, and ‘Talk to Manager’. Each button will lead to different actions based on the user’s selection.

For instance, when a user clicks on ‘Register for Event’, the chatbot should respond with a message prompting the user to choose a specific session. You can create additional buttons for each event you are hosting, ensuring that the user experience is smooth and straightforward.

  • Add buttons for each event, e.g., ‘Free Evening’, ‘Free Morning’, and ‘VIP Workshop’.
  • Connect these buttons to corresponding messages that provide event details.
  • Ensure each event button leads to a booking confirmation process.

This setup allows users to interact with your Pabbly Chatflow chatbot effectively and makes the registration process seamless.


4. Finalizing the Registration Process

Once the user selects an event, the next step in Pabbly Chatflow is to collect user information for registration. You can do this by adding a series of questions that the chatbot will ask the user, such as their name, email, and business name. This information is vital for completing the registration.

After gathering the necessary details, you can send a confirmation message to the user, summarizing their registration. This message can include the event details and a note about receiving the Zoom link prior to the event.

Here’s how to finalize the process:

Ask for user details using the ‘Ask Question’ feature in Pabbly Chatflow. Store user responses in custom fields for future reference. Send a final confirmation message to the user.

This ensures that the user has a clear understanding of their registration and what to expect next.


5. Testing and Launching the Chatbot

After completing the setup of your WhatsApp chatbot in Pabbly Chatflow, it’s essential to test the flow to ensure everything works as intended. You can do this by sending the trigger keywords through WhatsApp and observing the chatbot’s responses.

For instance, send the keyword ‘event’ to your WhatsApp number and see if the chatbot responds with the welcome message and options. If everything functions correctly, your chatbot is ready to go live.

To finalize the launch:

Test each interaction to ensure accuracy. Make any necessary adjustments based on the test results. Once satisfied, promote your WhatsApp chatbot to your audience.

With these steps, your Pabbly Chatflow WhatsApp chatbot will be fully operational, enabling you to automate webinar signups efficiently.


Conclusion

In this tutorial, we explored how to automate webinar signups using a WhatsApp chatbot with Pabbly Chatflow. By following the outlined steps, you can create a seamless registration process that enhances user experience and saves time. Implementing this automation can significantly streamline your webinar management.

Ensure you check out Pabbly Connect to create business automation workflows and reduce manual tasks. Pabbly Connect currently offer integration with 2,000+ applications.

Build Your First Meta Ads Automation for Free with Pabbly

Learn how to automate your Meta Ads with Pabbly Connect. Follow our step-by-step tutorial to integrate Google, Gmail, and Facebook effortlessly. Revolutionize your productivity approach with just a few strategic clicks. Uncover professional methods for connecting applications and creating workflows that reclaim hours of your week.

Watch Step By Step Video Tutorial Below


1. Accessing Pabbly Connect for Meta Ads Automation

To begin your journey in automating your Meta Ads, you need to access Pabbly Connect. Start by visiting Pabbly.com/n in your browser. This will take you to the Pabbly Connect homepage where you can sign up for a free account.

If you are a new user, click on the ‘Sign Up Free’ option to get started with 100 free tasks every month. Existing users can simply log in to their accounts. Once logged in, you can access all Pabbly applications, including the powerful automation tool, Pabbly Connect.


2. Creating Your First Automation Workflow with Pabbly Connect

Once you are in Pabbly Connect, you can create a new workflow for your Meta Ads automation. Click on the ‘Create New Workflow’ button to get started. You will be prompted to name your workflow, so enter ‘Build Your First Meta Ads Automation’.

  • Select the folder for your workflow.
  • Choose between Beta and Classic versions.
  • Click on the ‘Create’ button to finalize your workflow setup.

After creating the workflow, you will need to set up a trigger. For this automation, select ‘Facebook Lead Ads’ as your trigger application. This allows Pabbly Connect to capture leads from your Facebook ads automatically.


3. Connecting Facebook Lead Ads to Pabbly Connect

To connect Facebook Lead Ads, click on the ‘Connect’ button in Pabbly Connect. You will be asked to select your Facebook account. If it’s your first time connecting, you will need to give access to Pabbly Connect to retrieve your data.

After successful connection, choose your Facebook page and the lead form you want to capture leads from. This setup allows Pabbly Connect to monitor new leads in real-time. Make sure to save your settings to proceed to the next step of the automation.


4. Capturing Leads in Google Sheets

Next, you will want to capture the leads in Google Sheets. In Pabbly Connect, select Google Sheets as your action application. Choose the event as ‘Add New Row’ to create a new entry for each lead captured.

  • Connect your Google account to Pabbly Connect.
  • Select the spreadsheet and the specific sheet where you want to store the leads.
  • Map the fields such as Name, Email, and Phone Number from the Facebook lead data.

This integration ensures that every new lead is automatically logged into your Google Sheets, streamlining your lead management process through Pabbly Connect.


5. Sending Personalized Emails via Gmail

Finally, to engage with your leads, you can set up an email notification. Choose Gmail as your action application in Pabbly Connect. Select the event ‘Send Email’ to configure your email settings.

Fill in the required fields like sender name, sender email, recipient email (mapped from the lead data), and the email subject. You can also personalize the email content to greet your leads. After setting up, click on ‘Save and Send’ to initiate the email sending process.


Conclusion

In this tutorial, we explored how to automate your Meta Ads using Pabbly Connect. By integrating Facebook, Google Sheets, and Gmail, you can streamline your lead management and enhance engagement with personalized emails. This seamless automation not only saves time but also improves your marketing efficiency.

Ensure you check out Pabbly Connect to create business automation workflows and reduce manual tasks. Pabbly Connect currently offer integration with 2,000+ applications.

How to Send Bulk SMS for Offers & Discounts

Learn how to send bulk SMS for offers and discounts using Pabbly Connect. This step-by-step guide covers integration with Google Sheets and Twilio. Transform complex automation concepts into accessible, actionable steps that eliminate unnecessary manual work while maximizing existing application capabilities.

Watch Step By Step Video Tutorial Below


1. Accessing Pabbly Connect for SMS Integration

To send bulk SMS for offers and discounts, the first step is to access Pabbly Connect. If you are a new user, visit pabbl.com/connect and click on the ‘Sign up for free’ option in the top right corner. This will allow you to create an account and start with 100 free tasks each month, enabling you to send up to 100 SMS messages at no cost.

Once you have signed up, you can explore Pabbly Connect and its features. For existing users, simply log into your account and navigate to the workflow builder. This is where all the automation magic happens, allowing you to set up triggers and actions for your SMS campaigns.


2. Setting Up Google Sheets with Pabbly Connect

In this step, you will configure Google Sheets as your trigger application within Pabbly Connect. Click on the ‘Add Trigger’ button and select Google Sheets from the list. Choose the event ‘New or Updated Spreadsheet Row’ to ensure that any new customer details added to your sheet will trigger the SMS sending process.

  • Search for Google Sheets in the trigger application.
  • Select the event ‘New or Updated Spreadsheet Row’.
  • Copy the generated webhook URL.

Next, open your Google Sheets document, navigate to Extensions, and then Add-ons. Install the ‘Pabbly Connect Webhooks’ add-on if you haven’t already. After installation, refresh the Google Sheets to see the Pabbly Connect option in the Extensions menu. Go to ‘Pabbly Connect Webhooks’ and select ‘Initial Setup’ to paste the copied webhook URL and specify the trigger column.


3. Sending SMS Using Twilio with Pabbly Connect

After setting up Google Sheets, the next step is to configure Twilio as the action application to send SMS messages through Pabbly Connect. Click on ‘Add New Action Step’ and search for Twilio. Select the action event ‘Send SMS Message’ to proceed with the SMS sending configuration.

You will need to connect your Twilio account by providing the Account SID and Authorization Token. These can be found in your Twilio dashboard. Paste these details into the respective fields and click ‘Save’ to establish the connection between Twilio and Pabbly Connect.

  • Enter the SMS body, including a dynamic mapping for the customer name.
  • Map the recipient’s phone number from the Google Sheets data.
  • Click ‘Save and Send Test Request’ to verify the SMS sending functionality.

After testing, ensure that the SMS is successfully sent to the specified number. This verification confirms that Twilio is properly integrated with Pabbly Connect.


4. Sending Bulk SMS to Multiple Customers

Once the integration is confirmed, you can send bulk SMS messages to all customers listed in your Google Sheets. To do this, go back to the Extensions menu in Google Sheets, select ‘Pabbly Connect Webhooks,’ and click on ‘Send All Data.’ This action will trigger Pabbly Connect to send automated SMS messages to each customer in the spreadsheet.

For ongoing automation, ensure that the ‘Send on Event’ option is enabled in the Pabbly Connect Webhooks settings. This will allow Pabbly Connect to automatically send SMS messages to new customers added to your Google Sheets in the future.


5. Conclusion

Using Pabbly Connect to send bulk SMS for offers and discounts is a straightforward process that can significantly enhance your marketing efforts. By integrating Google Sheets and Twilio, you can automate your SMS campaigns efficiently. Start utilizing Pabbly Connect today to take your communication to the next level!

Ensure you check out Pabbly Connect to create business automation workflows and reduce manual tasks. Pabbly Connect currently offer integration with 2,000+ applications.

Gym Membership Automation Using AI Agent

Learn how to automate gym membership inquiries using Pabbly Chatflow. This detailed tutorial covers every step of the integration process with specific applications. Implement professional chat automation that answers common questions, qualifies leads, and books appointments without human intervention.

Watch Step By Step Video Tutorial Below


1. Accessing Pabbly Chatflow for Gym Membership Automation

To begin automating gym membership inquiries, first access Pabbly Chatflow. Open a new tab and navigate to the Pabbly Chatflow website by entering pav.com/chatflow. This platform allows you to create AI agents that can interact with potential gym members.

If you are a new user, click on the ‘Sign Up Free’ button to create your account. With Pabbly Chatflow, you receive 100 free credits each month, which can be used to develop your AI assistant. If you prefer unlimited access, consider purchasing a yearly or lifetime subscription.


2. Setting Up WhatsApp with Pabbly Chatflow

After logging into Pabbly Chatflow, the first step is to link your WhatsApp number. Click on the ‘Add WhatsApp Number’ button on the right side of the dashboard. You can choose from two methods to add your number, ensuring your AI assistant can communicate effectively with users.

  • Select the method for adding your WhatsApp number.
  • Follow the prompts to verify your number.

Once your WhatsApp number is added, navigate to the ‘AI Assistants’ section in the left column. Here, you can create your AI assistant, which will collect vital information from gym prospects.


3. Creating the AI Assistant in Pabbly Chatflow

With Pabbly Chatflow, you can create an AI assistant that pre-qualifies gym membership inquiries. Click on the ‘Add Assistant’ button and name your assistant appropriately, such as ‘Gym Membership AI Agent’. This assistant will interact with users and collect their information.

Next, configure the assistant by following these steps:

  • Set the assistant instructions, detailing how it should respond to users.
  • Choose the AI model to use, such as GPT 5.2, and input your OpenAI API key.

After completing these configurations, your AI assistant is ready to engage with potential gym members and gather their fitness goals, budget, and commitment levels.


4. Testing the AI Assistant with Pabbly Chatflow

Once your AI assistant is set up in Pabbly Chatflow, it’s crucial to test its functionality. To do this, activate the assistant and ensure it can respond to user inquiries. Send a message like ‘Hello there’ through WhatsApp to trigger the assistant.

Upon receiving the message, the assistant should respond with a welcome message and ask for the user’s primary fitness goal. This interaction confirms that the AI assistant is functioning properly and can engage users effectively.

Ensure the assistant asks for fitness goals, current fitness level, and budget. Check that it collects user information accurately before connecting them with a sales counselor.

Testing ensures that your AI assistant is ready to streamline the gym membership inquiry process, saving time for your sales team.


5. Finalizing the Gym Membership Automation with Pabbly Chatflow

With the AI assistant successfully tested, you can finalize your gym membership automation using Pabbly Chatflow. Ensure your assistant is activated and embedded on your website or other communication channels to maximize its reach.

This automation will enable your sales team to focus on serious inquiries, as the AI assistant will handle initial interactions and qualification. Whenever a potential member sends a message, the assistant will gather their details and pass them to the sales team for follow-up.

By implementing this system, you can significantly enhance your gym’s customer engagement and streamline the membership process.


Conclusion

In conclusion, automating gym membership inquiries using Pabbly Chatflow not only improves efficiency but also enhances user experience. By following the steps outlined in this tutorial, you can create an effective AI assistant that qualifies leads and connects them with your sales team, ensuring only serious prospects move forward.

Ensure you check out Pabbly Connect to create business automation workflows and reduce manual tasks. Pabbly Connect currently offer integration with 2,000+ applications.

How to Schedule LinkedIn Posts for Free

Learn how to schedule LinkedIn posts for free using Pabbly Connect. Follow our step-by-step guide to automate your LinkedIn posting process effectively. Navigate the automation landscape confidently with clear, structured guidance suitable for professionals regardless of prior technical experience.

Watch Step By Step Video Tutorial Below


1. Accessing Pabbly Connect for Scheduling LinkedIn Posts

To schedule LinkedIn posts for free, you need to access Pabbly Connect. If you are a new user, open a new tab and search for pabbl.com/connect to reach the landing page. In the top right corner, click on the option to sign up for free to access 100 tasks every month.

Once you sign up, you will be able to explore Pabbly Connect and schedule up to 100 posts on LinkedIn without any cost. This is a great way to test the platform before considering a subscription plan. Once you are familiar with the interface, you can proceed to the workflow builder.


2. Creating a Workflow in Pabbly Connect

In the workflow builder of Pabbly Connect, you will set up your automation. Begin by clicking on the ‘Add Trigger’ button, where you will select ‘Scheduled by Pabbly’ as your trigger application. This feature allows you to set a specific time for your LinkedIn posts to go live.

  • Select ‘Scheduled by Pabbly’ as the trigger application.
  • Choose the event as ‘Schedule Workflow’.
  • Set the frequency to run your workflow, e.g., every day at 1:00 PM.

After configuring these settings, click on ‘Save’. Your workflow is now scheduled to run at the specified time, enabling you to automate your LinkedIn posts efficiently.


3. Generating LinkedIn Post Content Using Google AI

Next, you will generate the content for your LinkedIn posts using Google Gemini integrated with Pabbly Connect. Click on ‘Add New Action Step’ and search for ‘Gemini’ to select the Google AI studio. Choose the event as ‘Generate Content’ and connect it.

To connect Gemini with Pabbly Connect, you will need an API key. Go to your Google AI studio, find the ‘Get API Key’ section, and create a new API key. Copy this key and paste it in your Pabbly Connect workflow to establish the connection.


4. Posting the Generated Content on LinkedIn

After generating the content, the next step is to post it on LinkedIn. Click on ‘Add New Action Step’ again, search for ‘LinkedIn’, and select it. Choose the event as ‘Share a Simple Text’ and connect it. using Pabbly Connect

  • Ensure your LinkedIn account is logged in to facilitate the connection.
  • Select the author and map the content generated by Gemini.
  • Click on ‘Save and Send Test Request’ to verify the post.

Once you receive a positive response, your post will be successfully shared on LinkedIn. You can refresh your LinkedIn feed to see the new post created by the automation.


5. Conclusion: Automate Your LinkedIn Posts with Pabbly Connect

In conclusion, using Pabbly Connect to schedule LinkedIn posts is an efficient way to manage your social media presence. By following the steps outlined, you can automate content generation and posting seamlessly.

Ensure you check out Pabbly Connect to create business automation workflows and reduce manual tasks. Pabbly Connect currently offer integration with 2,000+ applications.

With Pabbly Connect, you can focus on other aspects of your business while your LinkedIn posts are handled automatically. Start using Pabbly Connect today and enhance your LinkedIn strategy effortlessly!