From Zero to Your First AI Voice Agent in 15 Minutes (No Code)

Watch Step By Step Video Tutorial Below


1. Accessing Pabbly Connect for Voice AI Integration

To create a voice AI agent using Pabbly Connect, start by visiting the Pabbly Connect website. This automation tool allows you to integrate various applications seamlessly without any coding skills.

Once on the site, you can sign up for free to access the features. Pabbly Connect offers 100 free tasks each month, which is perfect for testing your voice AI setup. Sign up and log in to start your integration journey.


2. Setting Up Webhook URL in Google Sheets with Pabbly Connect

After logging into Pabbly Connect, create a new workflow to connect Google Sheets with your voice AI agent. The first step is to set up the trigger by selecting “Google Sheets – New or Updated Spreadsheet Row”.

  • Copy the webhook URL provided by Pabbly Connect.
  • Open your Google Sheets and go to Extensions > Add-ons > Get Add-ons.
  • Search for “Pabbly Connect Webhooks” and install it.
  • Refresh your spreadsheet to see the new Pabbly Connect option.

Next, go to the initial setup option and paste the copied webhook URL. Set the trigger column to the final data column where lead details will be added. Click on submit to configure your setup successfully.


3. Testing the Trigger Setup in Pabbly Connect

Once the webhook is configured, it’s time to test the integration. Enter a new lead’s details in your Google Sheets, including their name, email, and phone number. This will trigger the webhook in Pabbly Connect.

After entering the details, check Pabbly Connect to see if the trigger captures the lead’s information. If successful, you will see the new lead’s data reflected in the trigger response.

This step ensures that Google Sheets is correctly connected to Pabbly Connect and is ready to forward data to your voice AI agent. If everything looks good, you can proceed to the next step of making the call.


4. Making the Call Using Bolna AI and Twilio

Next, integrate Bolna AI with Pabbly Connect to automate phone calls to your leads. Select “Bolna AI” as the action application and choose the event “Make a Phone Call”.

To connect, you will need an API key from your Bolna AI account. Log in to Bolna AI, navigate to the developer section, and create a new API key. Copy this key and paste it into Pabbly Connect.

  • Select the AI agent you created in Bolna AI.
  • Map the recipient’s phone number from the previous step to ensure calls go to the correct lead.
  • Set the call schedule to UTC time zone format, adding a delay if necessary.

Once your settings are configured, save the step and check the response. You should see a positive confirmation that the call is scheduled.


5. Conclusion: Automate Your Lead Management with Pabbly Connect

In this tutorial, you’ve learned how to create a voice AI agent using Pabbly Connect, integrating Google Sheets and Bolna AI. This setup allows you to automate lead management efficiently, enhancing customer interactions.

With Pabbly Connect, you can easily manage your leads and ensure timely follow-ups through automated calls. Start using Pabbly Connect today to streamline your business processes and improve customer engagement.

By following these steps, you can create a powerful voice AI agent without any coding skills, making your lead management process much more efficient.
🚀 Instant Facebook Leads to WhatsApp | 5-Min No-Code Setup

Watch Step By Step Video Tutorial Below


1. Accessing Pabbly Connect for Integration

To start integrating WhatsApp with Facebook leads, you need to access Pabbly Connect. Open your browser and visit pabbly.com/connect. If you are a new user, click on “Sign Up for Free” to create an account. Existing users can simply log in by clicking on “Sign In”.

Once you log in, you will see all Pabbly applications. Click on Pabbly Connect to access the dashboard. From here, you can create a new workflow by selecting “Create from Scratch”. Name your workflow appropriately, such as “Connect Facebook Leads to WhatsApp Automatically”.


2. Creating the Workflow in Pabbly Connect

After naming your workflow, you will see a trigger box. In this box, you will set up the trigger event that starts the automation process. For this integration, select “Facebook Lead Ads” as the trigger application. The trigger event will be set to “New Lead Instant”.

  • Select “Facebook Lead Ads” as the trigger application.
  • Choose “New Lead Instant” as the trigger event.
  • Click on “Connect” to link your Facebook account.

Once connected, select the Facebook page and the lead generation form you want to use. This setup allows Pabbly Connect to listen for new leads from your Facebook ads.


3. Sending WhatsApp Messages via Pabbly Connect

After setting the trigger, you need to add an action step that sends a WhatsApp message using Pabbly Connect. Click on “Add New Action Step” and select “Pabbly Chatflow” as the action application. The action event will be set to “Send Text Message”.

To connect to Pabbly Chatflow, you will need to enter your API token. This token can be found in the settings of your Pabbly Chatflow dashboard. Once you have entered the token, click on “Connect”. Fill in the required fields, including the phone number and the message you wish to send.

  • Input the phone number format as required by WhatsApp.
  • Personalize the message using lead details.
  • Ensure that all required fields are filled before proceeding.

This setup allows Pabbly Connect to automatically send personalized WhatsApp messages to new leads captured from Facebook.


4. Testing the Integration Setup

To ensure that your integration is working correctly, you need to test it. After setting up the action step, you can send a test request. Click on “Save and Send Test Request”. If everything is set up correctly, you should receive a message in your WhatsApp.

Check your WhatsApp to verify that the message has been sent successfully. If you see the message, it confirms that the integration through Pabbly Connect is functioning as expected. If there are any issues, double-check the connections and the fields filled in the workflow.


5. Conclusion

In this tutorial, we successfully integrated WhatsApp with Facebook leads using Pabbly Connect. This automation allows you to send personalized messages without manual effort, enhancing your lead engagement process. By following these steps, you can streamline your communication and improve your business efficiency.

Overall, using Pabbly Connect for automating WhatsApp messages from Facebook leads is a powerful way to enhance your marketing efforts.

How to Automate Patient Bookings on WhatsApp

Watch Step By Step Video Tutorial Below


1. Overview of Pabbly Connect for WhatsApp Integration

Pabbly Connect is a powerful platform that enables automation between various applications, including WhatsApp. In this tutorial, we will use Pabbly Connect to automate patient appointment bookings through WhatsApp, streamlining the process for clinics.

The integration allows the clinic’s chatbot to handle patient inquiries and appointment bookings automatically. This not only saves time but also enhances the patient experience by providing instant responses.


2. Creating a Chatbot with Pabbly Chat Flow

To begin, you need to access Pabbly Chat Flow, which is integrated with Pabbly Connect. This no-code platform allows you to build chatbots easily. Start by signing up for a free account on the Pabbly website.

Once logged in, navigate to the flows feature and click on the plus add flow button to create a new chatbot. Here’s how you can set it up:

  • Click on the plus add flow button.
  • Name your flow as “Appointment Booking”.
  • Select the trigger event as “Keyword”.

After setting up the trigger, you will define the keywords that patients might use to initiate the booking process. For example, keywords like “book appointment” and “hello” can be added to activate the chatbot.

WhatsApp AI Agent for Sports Clubs | Court Bookings, Memberships & Tournament Support 24/7

Watch Step By Step Video Tutorial Below


1. Setting Up Pabbly Connect for WhatsApp AI Agent

To create a WhatsApp AI agent for sports clubs, you first need to set up Pabbly Connect. Start by visiting the Pabbly Chat Flow website at www.pabbly.com/chatflow. Once there, sign in or sign up for a free account to access the features.

After logging in, navigate to the Pabbly Chat Flow dashboard. Here, you can see the credits available and the WhatsApp number linked to your account. To connect your WhatsApp number, simply click on the ‘Add WhatsApp Number’ button and choose the preferred method for connection.


2. Creating the AI Assistant Using Pabbly Connect

Next, you can create your AI assistant. Click on the ‘AI Assistant’ option in the left-hand menu. To add a new assistant, click on ‘Add AI Assistant’ and name it “WhatsApp AI Agent for Sports Club”. After naming it, click on ‘Add AI Assistant’ to proceed.

  • Select the instruction type as “AI Agent”.
  • Set the temperature to 0.8 for a balanced response.
  • Choose OpenAI as the AI to use, with the model set to GPT-5 Mini.

Once configured, enter your OpenAI API key. This key allows your assistant to access OpenAI’s capabilities. After entering the key, click on ‘Connect’ to save your settings. This is how Pabbly Connect facilitates the integration of AI capabilities into your WhatsApp assistant.


3. Configuring the AI Assistant Settings in Pabbly Connect

After creating your AI assistant, you need to configure its settings. This includes setting up the header and footer messages, stop keywords, and fallback messages. The header message can be customized to greet users, while the footer can include company information.

  • Add a stop keyword to escalate issues to human support.
  • Specify retry attempts for fallback messages.
  • Upload a knowledge base file for the AI to reference when responding.

These configurations ensure that your AI assistant can handle inquiries effectively. With Pabbly Connect, you can easily manage these settings to enhance user interaction.


4. Assigning the AI Assistant to Contacts Using Pabbly Connect

To maximize the utility of your AI assistant, you need to assign it to contacts. Navigate to the inbox settings within Pabbly Connect. Here, you can select the AI assistant you created and assign it to specific contacts or groups.

To do this, simply click on the ‘Choose AI Assistant’ option and select your “WhatsApp AI Agent for Sports Club”. Save the changes to apply the assistant to the selected contacts. You can also automate this process by setting rules for auto replies.

This feature of Pabbly Connect allows for efficient management of multiple contacts, ensuring they receive timely assistance without manual intervention.


5. Testing the WhatsApp AI Agent Created with Pabbly Connect

After setting up and assigning your AI assistant, it’s time to test its functionality. Open WhatsApp and send a message like, “I’d like to book a badminton court for tomorrow evening. Is it available?” Wait for the response from your AI agent.

You should receive an automated reply confirming the availability and asking for further details. Additionally, you can inquire about upcoming tournaments or membership plans, and the AI should provide accurate information based on the knowledge base uploaded earlier.

This testing phase is crucial to ensure that your AI agent, powered by Pabbly Connect, is ready to assist users effectively in real-time scenarios. By following these steps, you can ensure that your WhatsApp AI agent is fully operational and capable of handling various inquiries.


Conclusion

In this tutorial, we explored how to create a WhatsApp AI agent for sports clubs using Pabbly Connect. This integration enables seamless court bookings, membership inquiries, and tournament support, enhancing user experience 24/7. Implementing these steps will empower your sports club to engage with members efficiently.

WhatsApp Chatbot for Your Specialty Tea & Coffee Shop 🍵☕

Watch Step By Step Video Tutorial Below


1. Creating a WhatsApp Chatbot Using Pabbly Connect

To create a WhatsApp chatbot, you first need to access Pabbly Connect. This platform enables seamless integration between your WhatsApp and various applications, enhancing customer interaction.

Begin by visiting the Pabbly website and signing up for an account. Once logged in, navigate to the flow page by entering the URL paby.com/chatflow. Here, you can create your chatbot and set up automation for your tea and coffee shop.


2. Setting Up Chatbot Triggers with Pabbly Connect

In this section, we will set up triggers for your WhatsApp chatbot using Pabbly Connect. Triggers are essential as they initiate the chatbot flow when a customer sends a specific message.

  • Select the trigger event as “Keyword”.
  • Enter the keyword that will activate your chatbot, e.g., “hello”.
  • Configure the response actions in Pabbly Connect to send a welcome message.

With these steps, you have successfully set up the initial trigger. The chatbot will now respond when the specified keyword is sent by a user, enhancing customer engagement.


3. Designing the Chatbot Flow with Pabbly Connect

Next, we will design the flow of your WhatsApp chatbot using Pabbly Connect. This involves creating buttons and responses that guide users through the ordering process.

Start by adding a welcome message with buttons like “Order Coffee” and “Order Tea”. Each button should link to a specific flow that lets users select their desired beverage.

  • Create a button for coffee and link it to a coffee selection list.
  • Create a button for tea and link it to a tea selection list.
  • Ensure to set custom fields for each selection to capture user preferences.

By structuring your chatbot this way, you can guide customers through a seamless ordering experience directly on WhatsApp, thanks to the robust capabilities of Pabbly Connect.


4. Capturing User Input with Pabbly Connect

Capturing user input is crucial for a personalized experience. With Pabbly Connect, you can easily gather information such as names and order details from your users.

After the user selects a beverage, prompt them to enter their name. Use the “Ask Question” node in Pabbly Connect to capture this data. Additionally, ask users how they would like their drink prepared.

Follow these steps to ensure accurate data collection:

  • Ask for the user’s name and store it in a contact custom field.
  • Inquire about sweetness preferences and cup size.
  • Confirm the order details before finalizing the process.

This method allows you to personalize interactions, ensuring customers feel valued and engaged throughout their ordering experience, facilitated entirely by Pabbly Connect.


5. Finalizing Orders with Pabbly Connect

Finally, you need to finalize the order process using Pabbly Connect. This step ensures that customers receive confirmation of their orders.

Once all preferences are gathered, send a confirmation message that summarizes their order, including the beverage type, size, and delivery time. This helps in building trust and transparency with your customers.

To complete the order process, follow these steps:

  • Send a final confirmation message to the user.
  • Thank them for their order and provide estimated delivery time.
  • Save the flow in Pabbly Connect to ensure all settings are preserved.

With these steps, your WhatsApp chatbot is fully functional, providing a seamless ordering experience for your customers, all thanks to the powerful integration capabilities of Pabbly Connect.


Conclusion

In this tutorial, we explored how to create a WhatsApp chatbot for your tea and coffee shop using Pabbly Connect. By following these steps, you can enhance customer engagement and streamline the ordering process efficiently.

How to Share RSS Feeds on Facebook Automatically

Watch Step By Step Video Tutorial Below


1. Accessing Pabbly Connect for Automation

To begin automating your RSS feed updates on Facebook, you first need to access Pabbly Connect. If you’re a new user, open a browser and navigate to pabbly.com/connect. Here, you can sign up for a free account, which offers 100 tasks per month to explore the features of Pabbly Connect.

Once signed up, log in to your account and navigate to the workflow builder. This is where you will create your automation. Use the top right corner to find the “Sign up for free” option if you haven’t already registered. This process allows you to experience the capabilities of Pabbly Connect without any initial investment.


2. Setting Up the RSS Trigger in Pabbly Connect

To set up the automation, click on the “Add Trigger” button in Pabbly Connect. Search for “RSS by Pabbly” and select it. For the event, choose “New Item in Feed” and click “Connect”. You will need to enter the feed URL from your chosen news source.

  • Open your RSS feed source, like Times of India or The Hindu.
  • Copy the feed URL for the category you want to track.
  • Paste the copied URL into Pabbly Connect.

After pasting the URL, keep the filter type as default and click on “Save and Send Test Request”. This action retrieves the latest updates from the RSS feed, which will be used in your Facebook posts. The Pabbly Connect platform allows you to automate this process efficiently.


3. Configuring the Facebook Action Step

Next, you will add an action step to connect Facebook with Pabbly Connect. Click on “Add New Action” and search for “Facebook Pages”. Select it and for the event, choose “Create a Page Post”. Click “Connect” to link your Facebook account.

If you have previously connected Facebook to Pabbly Connect, select the existing connection. Otherwise, create a new connection by logging into your Facebook account. Ensure you are logged in to avoid any interruptions during the setup.

Once connected, you will be prompted to choose your Facebook page. Enter the name of your page, such as “Digital Dynamics”, and prepare the message for the post. This message can include dynamic content from the RSS feed, which Pabbly Connect will automatically update with each new feed item.


4. Mapping Dynamic Data for Facebook Posts

In this section, you will map the dynamic data from your RSS feed to the Facebook post. This is crucial for ensuring that each post contains the latest news updates. Use the mapping feature in Pabbly Connect to insert the title, content, and link of the news.

For example, you will map the headline, the news description, and the link directly from the RSS feed data retrieved earlier. This mapping process makes your posts dynamic, allowing them to change with each new feed item.

  • Map the title of the news article.
  • Map the content description from the RSS feed.
  • Map the link to the full article.

After mapping the necessary fields, click on “Save and Send Test Request” to verify that the post is created successfully on your Facebook page. This integration showcases the power of Pabbly Connect in automating social media updates.


5. Conclusion: Automate Your Facebook Updates with Pabbly Connect

In conclusion, using Pabbly Connect to automate posting RSS feed updates to your Facebook page is a straightforward process. By following the steps outlined in this tutorial, you can ensure that your audience is always informed about the latest news without manual effort.

With the ability to connect multiple applications, Pabbly Connect is an invaluable tool for enhancing your social media presence. Start using Pabbly Connect today to automate your workflows effectively and keep your followers engaged with real-time updates.

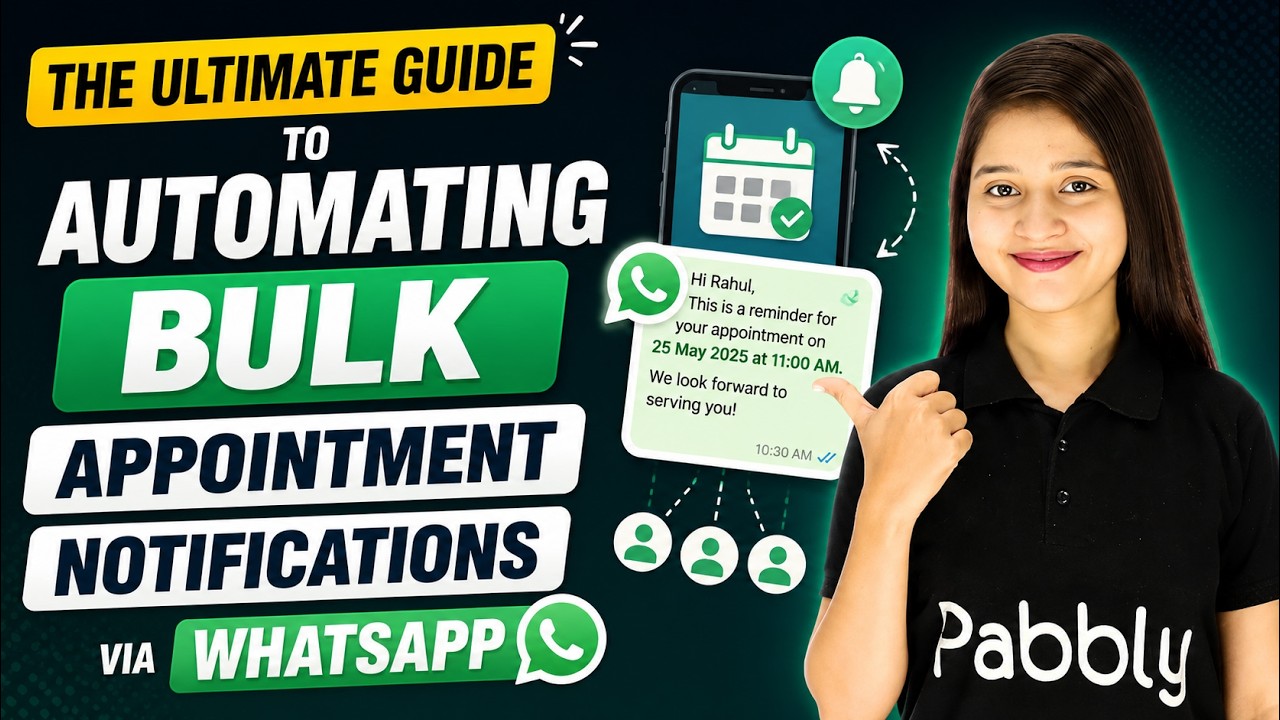
The Ultimate Guide to Automating Bulk Appointment Notifications via WhatsApp

Watch Step By Step Video Tutorial Below


1. Introduction to Pabbly Connect for WhatsApp Automation

Pabbly Connect is a powerful automation platform that allows you to connect various applications seamlessly. In this tutorial, we will demonstrate how to use Pabbly Connect to automate sending WhatsApp appointment reminders from Google Sheets. This automation saves time and reduces the chances of errors in messaging.

With Pabbly Connect, you can manage your workflows effectively, ensuring that every patient receives a personalized message. This tutorial will guide you step-by-step through the entire integration process, from setting up your Google Sheet to sending reminders via WhatsApp.


2. Setting Up Google Sheets for Appointment Details

First, you need to create a Google Sheet that contains all your patients’ appointment details. This sheet should include columns for the patient’s name, contact number, doctor’s name, appointment date, and appointment time. Using Pabbly Connect, we will pull this data to send reminders automatically.

To set up your Google Sheet, ensure it has the following columns:

  • Patient Name
  • Contact Number
  • Doctor Name
  • Appointment Date
  • Appointment Time

After creating the sheet, you are ready to connect it to Pabbly Connect for automation.


3. Connecting Google Sheets to Pabbly Connect

To connect your Google Sheets with Pabbly Connect, start by logging into your Pabbly Connect account. Click on the “Create Workflow” button to initiate a new workflow. Select Google Sheets as your trigger application and choose the event as “New or Updated Spreadsheet Row”.

Next, you will be provided with a webhook URL. Copy this URL and go back to your Google Sheet. Navigate to Extensions > Add-ons > Get Add-ons, and search for the Pabbly Connect Webhooks add-on. Install it, then go to the initial setup and paste the webhook URL you copied. Set the trigger column to the final data column (for example, column K) and send a test to ensure the setup is working correctly.


4. Sending WhatsApp Reminders Using Pabbly Connect

Now that Google Sheets is connected to Pabbly Connect, the next step is to set up the action application, which will be Pabbly Chatflow for sending WhatsApp messages. Select Pabbly Chatflow as your action application and choose the event “Send Text Message”.

To connect Pabbly Chatflow, you will need your API token. Navigate to your Pabbly Chatflow dashboard, go to Settings, and find your API token. Copy it and paste it into the Pabbly Connect action setup. Map the recipient’s WhatsApp number and personalize the message using dynamic fields from your Google Sheet, ensuring that every patient receives a tailored message.


5. Finalizing the Automation and Sending Messages

After configuring the action step, ensure to enable the toggle for the workflow to be active. To send personalized WhatsApp messages to all patients, return to your Google Sheet and click on Extensions > Pabbly Connect Webhooks > Send All Data. This action will trigger Pabbly Connect to send messages to all listed patients automatically.

Once the process is complete, each patient will receive their appointment reminder via WhatsApp without any manual effort. This automation not only saves time but also enhances the patient experience by ensuring timely reminders. You can now manage hundreds of appointments efficiently using Pabbly Connect.


Conclusion

In this tutorial, we demonstrated how to automate WhatsApp appointment reminders using Pabbly Connect and Google Sheets. By following the steps outlined, you can significantly reduce manual tasks and improve communication with your patients. Experience the power of automation with Pabbly Connect to streamline your workflows.

Get WhatsApp Notifications for Every New Lead

Watch Step By Step Video Tutorial Below


1. Setting Up Pabbly Connect for Notifications

To start the integration process, access Pabbly Connect by navigating to www.pabbly.com/connect. This platform is essential for creating automated workflows.

If you’re a new user, sign up for free to receive 100 tasks monthly. This allows you to create the integration setup without any cost, letting you test how Pabbly Connect works.


2. Connecting Facebook Lead Ads to Pabbly Connect

Now, let’s set up the connection between Facebook Lead Ads and Pabbly Connect. Start by selecting the trigger event as “New Lead” from Facebook Lead Ads.

  • Click on “Add New Connection” in the connector options.
  • Choose “Connect with Facebook Lead Ads”.
  • Authorize your Facebook account by clicking “Continue”.

After connection, select your Facebook page and the lead form you created. Click on “Save and Send Test Request” to capture the lead data.


3. Testing the New Lead Capture

To verify if the connection is successful, generate a test lead using the form you selected. Enter the lead details such as name, email, and phone number.

Upon submission, Pabbly Connect will capture the lead details instantly. You should see the lead’s information reflected in the trigger response.

Now, every new lead generated through Facebook Lead Ads will trigger an automatic response in Pabbly Connect, ensuring you receive timely notifications.


4. Sending WhatsApp Notifications through Pabbly Connect

Next, set up the WhatsApp notification feature using Pabbly Chat Flow. This integration allows you to send instant notifications to your WhatsApp whenever a new lead is captured.

  • Select “Add New Connection” for Pabbly Chat Flow.
  • Log in to your Pabbly Chat Flow account and generate an API token.
  • Paste the token into Pabbly Connect to establish the connection.

Fill in the recipient’s WhatsApp number and customize the message to include lead details. Map the lead’s name, email, and phone number to make the notification dynamic.


5. Finalizing and Confirming the Setup

After configuring the WhatsApp notification, click on “Save and Send Test Request”. If everything is set up correctly, you will receive a notification on WhatsApp with the lead’s details.

This confirms that the integration between Facebook Lead Ads and WhatsApp through Pabbly Connect is successfully established. You will now receive instant notifications for every new lead generated.

For additional recipients, you can repeat the process to send notifications to multiple contacts simultaneously.


Conclusion

Using Pabbly Connect, you can seamlessly integrate Facebook Lead Ads with WhatsApp for instant lead notifications. This setup ensures you never miss an important lead detail again!

How to Automate Catering Orders for Corporate Events via WhatsApp 🍴🏢

Watch Step By Step Video Tutorial Below


1. Introduction to Pabbly Connect for Catering Automation

In this tutorial, we will explore how to automate catering orders using Pabbly Connect. This powerful integration platform allows seamless communication between your WhatsApp chatbot and your business operations.

By utilizing Pabbly Connect, you can streamline the ordering process, ensuring that customers can place their catering orders effortlessly through WhatsApp. This automation reduces the need for manual interaction, saving time and improving efficiency.


2. Setting Up Your WhatsApp Chatbot with Pabbly Connect

To begin automating your catering orders, you need to set up your WhatsApp chatbot via Pabbly Connect. First, access the flow page by visiting pave.com/chatflow. Sign in or create a free account to start.

Once logged in, you’ll be prompted to configure your WhatsApp number. Ensure your number is linked to Pabbly Chatflow. Follow these steps to set up your chatbot:

  • Enter your WhatsApp number in the settings.
  • Select the trigger for your chatbot, using keywords to initiate the conversation.
  • Create message blocks to define the flow of your chatbot.

Now, you can customize responses and actions based on user inputs, allowing for a smooth interaction.


3. Designing the Order Flow with Pabbly Connect

Next, we will design the order flow for the catering service using Pabbly Connect. This involves creating a sequence of messages that guide customers through placing their orders. Start by creating a welcome message with options for “Place Order” and “Contact Us”.

For the “Place Order” button, set up a series of questions to gather necessary details. Here’s how to do it:

  • Ask for the customer’s full name.
  • Request the event date and time for delivery.
  • Collect the delivery address and the number of guests.

This structured approach ensures that all necessary information is collected efficiently, allowing you to process orders smoothly.


4. Finalizing the Order and Confirmation with Pabbly Connect

Once you have gathered all the required information, the next step is to confirm the order using Pabbly Connect. After collecting the event details, prompt the user to select their preferred cuisine from a list. This can include options like Indian, Continental, and Chinese.

After the selection, send a confirmation message to the user. The confirmation process can be set up as follows:

  • Use a text node to display a confirmation message.
  • Include the details of the order for verification.

This step is crucial as it provides clarity to the customer and ensures that all details are correct before finalizing the order.


5. Benefits of Using Pabbly Connect for Catering Automation

Utilizing Pabbly Connect for automating your catering orders offers numerous benefits. It enhances customer experience by providing a quick and efficient way to place orders through WhatsApp. Additionally, it reduces manual workload for business owners.

Some key advantages include:

  • No coding skills required to set up the chatbot.
  • Automated responses save time and improve efficiency.

By leveraging Pabbly Connect, you can focus more on growing your business while the chatbot handles customer interactions seamlessly.


Conclusion

In summary, using Pabbly Connect to automate catering orders through WhatsApp enhances efficiency and improves customer satisfaction. With simple steps, you can streamline your order process and reduce manual tasks.

Generate 100+ YouTube Scripts with AI for Free

Watch Step By Step Video Tutorial Below


1. Accessing Pabbly Connect for Automation

To start generating YouTube scripts automatically, you need to access Pabbly Connect. Open your browser and navigate to pabbl.com/connect. If you’re a new user, sign up for free to get started with 100 tasks each month.

Once logged in, you can create a new workflow by clicking on the “Add Workflow” button. This is where the integration between Google Sheets and the script generation process will be set up using Pabbly Connect.


2. Setting Up Google Sheets with Pabbly Connect

In this section, you will set up Google Sheets to work with Pabbly Connect. Start by creating a spreadsheet that includes video details such as topic, target audience, and video length.

  • Open your Google Sheets and enter the necessary video details.
  • Ensure that the headers are clear and understandable.
  • Delete any previous scripts in the designated column to avoid confusion.

After setting up your sheet, go to the Extensions menu, find Pabbly Connect Webhooks, and install it. Refresh your spreadsheet to see the new option. This step is crucial for connecting Google Sheets with Pabbly Connect.


3. Creating a Webhook Trigger in Pabbly Connect

To capture data from Google Sheets, you need to create a webhook trigger using Pabbly Connect. Click on the “Add Trigger” button, select Google Sheets as the app, and choose “New or Updated Spreadsheet Row” as the event.

Once you click connect, you will receive a webhook URL. Copy this URL and go back to your Google Sheets. Navigate to the Pabbly Connect Webhooks option in the Extensions menu and select “Initial Setup.” Paste the webhook URL here and specify the trigger column.

  • Enter the trigger column based on the number of details you want to send.
  • Click “Submit” to configure the setup successfully.

After this, return to Google Sheets and click on “Send Test” to send a test row to Pabbly Connect. This step ensures that your integration is working properly and that data is being sent successfully.


4. Generating Scripts Using Gemini with Pabbly Connect

Now, to generate the YouTube scripts, you will add an action step in your workflow. Click on “Add New Action Step” and select Gemini as the application. Choose “Generate Content” as the event and connect it to Pabbly Connect.

If you haven’t set up a connection before, you will need to enter your API key from Google AI Studio. Once connected, you can map the video details from your Google Sheets into the prompt for Gemini.

  • Enter your prompt in the designated field.
  • Ensure to map the details dynamically for better results.

After entering the prompt, click on “Save and Send Test Request”. This will generate your YouTube script, which will be captured by Pabbly Connect and ready to be sent back to Google Sheets.


5. Updating Google Sheets with Generated Scripts

After generating the script, the next step is to update the Google Sheets with the new content. Click on “Add New Action Step” again, select Google Sheets, and choose “Update Cell Value” as the event.

Connect to your Google Sheets account and specify the spreadsheet and the range where the script will be added. Make sure to keep the column static (e.g., G) while making the row dynamic by mapping the row index.

  • Enter the range in the format G2, G3, etc., depending on the row index.
  • Map the generated script from Gemini to the value field.

Finally, click on “Save and Send Test Request” to confirm that the script has been successfully added to your Google Sheets. This concludes the automation process using Pabbly Connect.


Conclusion

By following these steps, you can efficiently generate YouTube scripts using Pabbly Connect and Google Sheets. This automation not only saves time but also enhances productivity by allowing you to focus on content creation.