They Messaged at 2 AM — And Still Got a Reply

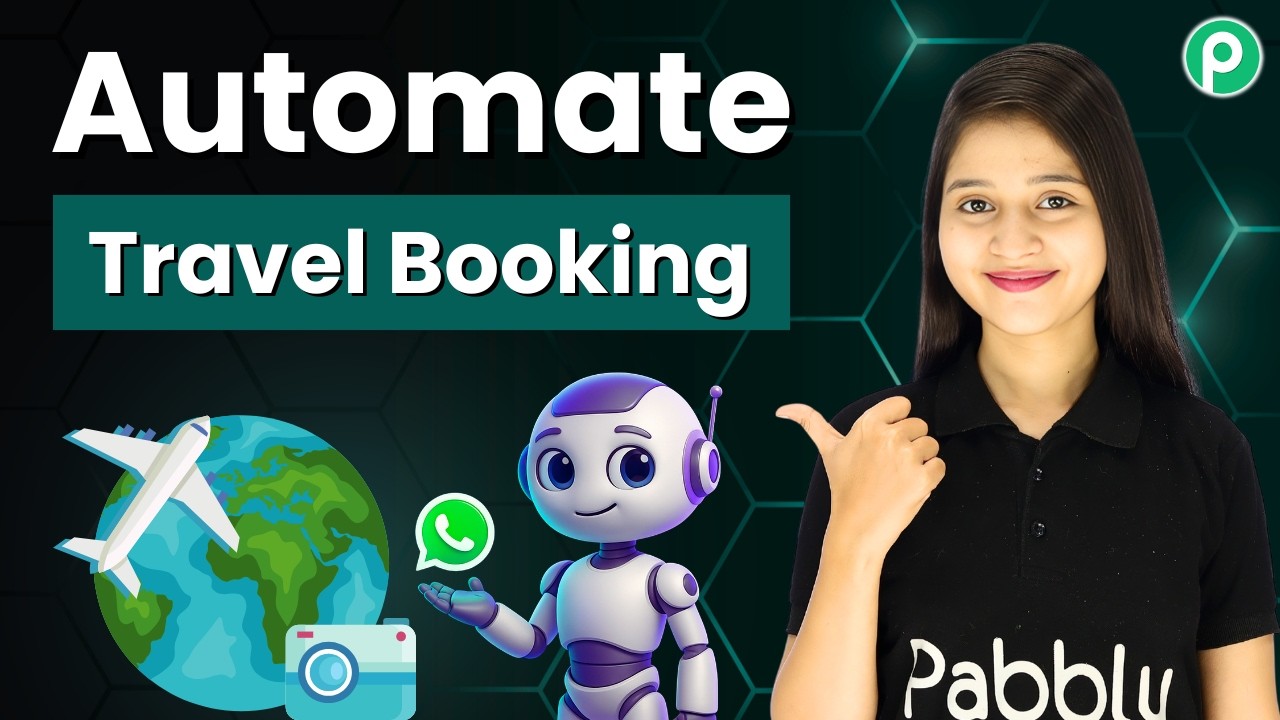
Learn how to use Pabbly Connect to automate WhatsApp replies, ensuring you never miss a customer message, even at 2 AM. Follow this definitive guide to creating powerful automated workflows with straightforward, efficiency-focused solutions that save valuable time.

Watch Step By Step Video Tutorial Below


1. Accessing Pabbly Connect for WhatsApp Automation

To start automating WhatsApp replies, you need to access Pabbly Connect. Open a new tab and enter the URL Pabbly.com/connect. This will take you to the Pabbly Connect homepage where you can either sign in or sign up for free.

If you are a new user, select the ‘Sign Up Free’ option to create your account. After signing up, you will receive 100 free tasks every month, allowing you to practice using Pabbly Connect. Existing users can simply click on the ‘Sign In’ button to access their dashboard.


2. Creating a Workflow in Pabbly Connect

Once you’re logged into Pabbly Connect, navigate to your dashboard. Here, you can create a new workflow by clicking the ‘Create Workflow’ button. You will be prompted to choose between creating from scratch or using AI. For this automation, select ‘Create from Scratch’.

  • Click on the ‘Select’ button to use the beta workflow builder.
  • Name your workflow, for example, ‘They Messaged at 2 AM and Still Got a Reply’.
  • Choose the trigger event, such as ‘Keyword Regex Match’ to initiate the chatbot.

After setting up the trigger, you will define keywords that will activate your WhatsApp chatbot. For instance, entering ‘hello’ as a keyword will prompt the chatbot to respond when this word is received. This setup is crucial for ensuring customers receive prompt replies.


3. Designing Your WhatsApp Chatbot Flow

In this step, you will design the flow of your WhatsApp chatbot using Pabbly Connect. Drag and drop the message node to create a welcome message for users who initiate contact. This message can include buttons for further interaction, such as ‘View Courses’.

  • Add buttons to your welcome message by clicking ‘Add Button’ and entering the button name.
  • Select button type, either as a quick reply or a link.
  • Create a list node to provide users with course options when they click the ‘View Courses’ button.

Each course should have details and buttons for actions like ‘Enroll Now’ or ‘Fees and Duration’. This structured approach ensures that your customers can easily navigate the information and take action, enhancing their experience.


4. Capturing User Data via Pabbly Connect

To effectively capture user data, utilize the ‘Ask Question’ node in your flow. This allows you to collect essential information such as the user’s full name and qualifications. Set the contact custom fields accordingly to store this data in your Pabbly Connect account.

For instance, after a user selects the ‘Enroll Now’ button, prompt them to provide their full name. After they enter this information, you can follow up with another question regarding their qualifications. This data collection is vital for processing enrollments efficiently.

Once the user completes the input, send a confirmation message thanking them for their response. This not only acknowledges their input but also keeps the conversation flowing smoothly. By integrating these steps with Pabbly Connect, you ensure that no user inquiry goes unanswered, even at odd hours.


5. Saving and Sharing Your WhatsApp Flow

After completing the setup of your WhatsApp chatbot using Pabbly Connect, make sure to save your workflow. Click the ‘Save’ button, and you will receive a confirmation pop-up indicating that your flow has been successfully saved.

You can also share your created flow with others. Navigate to the flow builder page, click the three dots next to your flow, and select ‘Share Flow’. This will generate a shareable link that you can distribute to colleagues or team members.

This sharing capability enhances collaboration and allows others to benefit from your automation setup. By using Pabbly Connect, you can create an efficient and responsive customer service experience that operates around the clock.


Conclusion

Using Pabbly Connect, you can automate WhatsApp replies to ensure timely responses to customer inquiries, even at 2 AM. This setup enhances customer engagement and satisfaction, making your business more responsive and efficient.

Ensure you check out Pabbly Connect to create business automation workflows and reduce manual tasks. Pabbly Connect currently offer integration with 2,000+ applications.

Store Meta Ads Lead Details in Google Sheets Automatically

Learn how to automatically store Meta Ads lead details in Google Sheets using Pabbly Connect. Follow our step-by-step guide for seamless integration. Implement the precise methodologies leading organizations use to automate repetitive tasks, illustrated with practical examples designed for immediate application.

Watch Step By Step Video Tutorial Below


1. Accessing Pabbly Connect for Meta Ads Integration

To automate the process of storing Meta Ads lead details in Google Sheets, first, you need to access Pabbly Connect. Open your web browser and navigate to pabby.com/connect. You will see options to sign in or sign up.

If you are a new user, click on ‘Sign Up Free’ to create an account and receive 100 free tasks each month. Existing users can simply sign in. Once logged in, you will see all Pabbly apps, including Pabbly Connect, which is essential for this integration.


2. Creating a Workflow in Pabbly Connect

After accessing Pabbly Connect, click on ‘Access Now’ to enter the dashboard. To create a new workflow, click on the ‘Create Workflow’ button. You will be prompted to choose between the new beta version or the classic version. Select the beta version for a modern experience.

  • Click on ‘Create Workflow’
  • Name your workflow (e.g., ‘Store Meta Ad Leads Detail in Google Sheets Automatically’)
  • Select the appropriate folder for your workflow

Finally, click on the ‘Create’ button to initiate your workflow setup. This workflow will utilize triggers and actions to automate lead storage in Google Sheets using Pabbly Connect.


3. Setting Up Trigger for Facebook Lead Ads

To set up the automation, the first step is to configure the trigger. Since you are collecting leads from Facebook, select ‘Facebook Lead Ads’ as your trigger app and choose ‘New Lead Instant’ as the event. Click on ‘Connect’ to build a new connection. using Pabbly Connect

In this step, you can add a new connection by selecting your Facebook account. After granting the necessary permissions, you will need to specify the page name and lead form. Choose your Facebook page and the relevant lead form from the dropdown menu.


4. Testing the Trigger with Pabbly Connect

After setting up the trigger, you will need to test it to ensure it captures lead information correctly. Use the Leads Testing Tool provided by Meta to generate a test lead. Click on ‘Create Lead’ to initiate this process.

  • Select your page and product
  • Click on ‘Create Lead’ to generate a test lead
  • Check the response in Pabbly Connect for confirmation

Once the test lead is created, return to Pabbly Connect to verify that the lead details have been captured successfully. This confirmation indicates that the trigger setup is complete and functional.


5. Adding Action Step to Store Leads in Google Sheets

The final step is to add an action that will store the captured lead details in Google Sheets. Choose ‘Google Sheets’ as your action app and select ‘Add a New Row’ as the event. Click on ‘Connect’ to establish a connection. using Pabbly Connect

After signing in with your Google account, select the spreadsheet and specific sheet where you want the lead details to be stored. Map the fields for name, email, and phone number using the data received from the trigger step. Click on ‘Save and Send’ to finalize the action.


Conclusion

In this tutorial, we demonstrated how to use Pabbly Connect to automatically store Meta Ads lead details in Google Sheets. By following these steps, you can streamline your lead management process and ensure that all leads are organized in a single location.

Ensure you check out Pabbly Connect to create business automation workflows and reduce manual tasks. Pabbly Connect currently offer integration with 2,000+ applications.

With Pabbly Connect, managing leads becomes efficient and hassle-free, allowing you to focus on growing your business.

How to Generate and Send Engaging HTML Emails Automatically Using AI

Learn how to automate sending engaging HTML emails using Pabbly Connect, integrating Shopify, OpenAI, and Gmail for seamless email marketing. This comprehensive guide reveals exactly how to connect your applications and automate repetitive tasks — accessible for professionals of all technical backgrounds.

Watch Step By Step Video Tutorial Below


1. Accessing Pabbly Connect for Email Automation

To start generating and sending engaging HTML emails automatically, you first need to access Pabbly Connect. Simply go to Pabbly.com/connect in your browser.

Once there, you will see options to either sign in or sign up. New users can click on ‘Sign Up Free’ to get 100 free tasks each month. Existing users should sign in using their credentials. This step is essential to utilize the powerful automation capabilities of Pabbly Connect.


2. Creating a Workflow in Pabbly Connect

After signing in, you will be directed to the Pabbly apps window. Here, select Pabbly Connect and click on ‘Access Now’ to reach the dashboard. To create a new workflow, click on the ‘Create’ button.

  • Choose between the new beta version or classic.
  • Select the beta version for modern features.
  • Name your workflow (e.g., ‘Generate and Send Engaging HTML Emails Automatically Using AI’).

Once you create the workflow, remember that each automation consists of triggers and actions. In this case, you will set a trigger for when a new order is placed in Shopify.


3. Setting Up the Trigger with Shopify

To initiate the automation, select Shopify as the trigger application and the event as ‘New Order’. Click on connect, and you will receive a webhook URL from Pabbly Connect.

Next, log into your Shopify account and navigate to Settings > Notifications. Here, add a new webhook for order creation, selecting JSON as the format. Paste the webhook URL you received from Pabbly Connect and save the settings. This setup allows Pabbly Connect to listen for new orders placed in your Shopify store.


4. Generating HTML Emails Using OpenAI

Once the trigger is set up, the next step is to generate personalized HTML emails using OpenAI. In Pabbly Connect, add an action step and select OpenAI with the event as Chat GPT. Click on connect and enter your API key to establish the connection.

  • Choose the model (e.g., GPT-5) for generating the content.
  • Input the prompt with customer details, order ID, and product name.
  • Map the data received from the Shopify trigger to personalize the email.

After setting up the action, click on ‘Save and Send Test Request’. This will generate the HTML content which will be used in the email.


5. Sending Emails via Gmail

Finally, to send the generated HTML email, add another action step in Pabbly Connect and select Gmail as the action application. Choose the event as ‘Send Email’ and connect your Gmail account.

Fill in the required fields: set the sender name and recipient email (mapped from the previous steps), and enter the subject line (e.g., ‘Thanks for Your Purchase’). For the email content, select the HTML content generated by OpenAI. Make sure to set the content type as HTML before sending the email.


Conclusion

In this tutorial, we explored how to generate and send engaging HTML emails automatically using AI with Pabbly Connect. By integrating Shopify, OpenAI, and Gmail, you can streamline your email marketing efforts effectively. This automation not only enhances customer engagement but also saves time and resources.

Ensure you check out Pabbly Connect to create business automation workflows and reduce manual tasks. Pabbly Connect currently offer integration with 2,000+ applications.

Auto Send Upsell Emails After Purchase

Learn how to automate upsell emails after purchase using Pabbly Connect with this detailed step-by-step tutorial. Enhance your e-commerce strategy today! Explore systematic approaches to creating efficient automation solutions that convert technical concepts into practical, implementable instructions.

Watch Step By Step Video Tutorial Below


1. Accessing Pabbly Connect for Automation

To begin automating your upsell emails after a purchase, you need to access Pabbly Connect. If you are a new user, open a new tab and search for pabbl.com/connect. This will lead you to the landing page of Pabbly Connect.

Once there, click on the ‘sign up for free’ option located in the top right corner. By signing up, you will receive 100 tasks free every month, allowing you to explore the features of Pabbly Connect. After testing the platform, you can choose to purchase a subscription plan.


2. Creating Your Workflow in Pabbly Connect

Now that you have accessed Pabbly Connect, the next step is to create your automation workflow. In the workflow builder, you will set up triggers and actions. The trigger will initiate the workflow, while actions will follow based on that trigger.

  • Click on the ‘add trigger’ button.
  • Search for Razer Pay and select it as your trigger application.
  • Choose ‘payment captured’ as the event.
  • Click on ‘connect’ to generate the webhook URL.

Copy this webhook URL and navigate to your Razer Pay dashboard. Under the developers section, click on ‘webhooks’ and then ‘add new webhook’. Paste the copied URL and select the active event as ‘payment captured’. Click on ‘create webhook’ to save your settings.


3. Filtering Purchases for Targeted Upsell Emails

After setting up the webhook, you will need to filter purchases to ensure that upsell emails are only sent to customers who buy specific products. This is crucial for targeted marketing.

In Pabbly Connect, click on ‘add new action step’ and select the ‘filter’ application. Set the event to ‘filter values’ and connect it. For the label, choose the product name field from your payment page. Set the filter type to ‘equals’ and enter the specific product name, such as ‘natural glow skincare face toner’.

  • This ensures that only customers who purchased the toner will receive the upsell email.
  • If the condition is met, the workflow continues; otherwise, it stops.

By implementing this filter, you streamline your email marketing efforts and enhance customer engagement through personalized upsell opportunities.


4. Sending Upsell Emails Using Pabbly Connect

With the filter in place, you can now send automated emails to customers. Click on ‘add new action step’ and select Gmail as your action application. Choose ‘send email’ as the event and connect your Gmail account.

Fill in the required fields such as the sender’s name and email address. Enter the subject for the thank you email, such as ‘Your glow journey starts now’. For the email content, you can use HTML for a more engaging format. Map the customer’s name to personalize the email.

Ensure that the recipient’s email address is correctly mapped to the email field. Click on ‘save and send test request’ to verify that the email is sent successfully.

By utilizing Pabbly Connect, you can automate the entire email process, saving time and ensuring consistent communication with your customers.


5. Delaying and Following Up with Upsell Emails

To enhance your upsell strategy, you can add a delay to the workflow before sending the follow-up upsell email. Click on ‘add new action step’ and select the ‘delay’ feature in Pabbly Connect. Choose to delay for 3 days.

After the delay, copy the previous Gmail step to create a new email action for the upsell offer. Change the subject to something like ‘Complete Your Skincare Routine’ and update the email content accordingly. Ensure the customer’s name is mapped for personalization.

Click on ‘save and send test request’ to send the upsell email. Verify that the email is received in the customer’s inbox.

This structured approach using Pabbly Connect ensures that your customers receive timely and relevant upsell offers, maximizing your sales opportunities.


Conclusion

By following this tutorial, you can effectively automate upsell emails after a purchase using Pabbly Connect. This integration not only saves time but also enhances customer engagement by delivering personalized content. Start implementing these strategies today to boost your e-commerce performance!

Ensure you check out Pabbly Connect to create business automation workflows and reduce manual tasks. Pabbly Connect currently offer integration with 2,000+ applications.

Auto WhatsApp Follow-Ups for Event & Occasion Businesses

Learn how to automate WhatsApp follow-ups for your event business using Pabbly Connect. Step-by-step guide to integrate Facebook Lead Ads and WhatsApp Cloud API. Revolutionize your productivity approach with just a few strategic clicks. Uncover professional methods for connecting applications and creating workflows that reclaim hours of your week.

Watch Step By Step Video Tutorial Below


1. Accessing Pabbly Connect for Automation

To automate WhatsApp follow-ups for your event business, first, access Pabbly Connect. Visit Pabbly.com and sign in to your account. If you are a new user, you can sign up for free and receive 100 tasks monthly to evaluate the platform.

Once logged in, navigate to the Pabbly Connect dashboard. Here, you can create new workflows. Click on the ‘Create Workflow’ button, and select the new beta workflow builder for a modern experience. Name your workflow ‘Auto WhatsApp Follow-Ups for Event & Occasion Businesses’ and choose an appropriate folder for organization.


2. Setting Up the Trigger Event with Facebook Lead Ads

In this section, you will set up the trigger for your workflow using Pabbly Connect. The trigger will activate whenever a new lead is captured from Facebook Lead Ads. Select Facebook Lead Ads as your trigger application and choose the ‘New Lead Instant’ event.

  • Connect your Facebook account to Pabbly Connect.
  • Select the Facebook page you are using for your event business.
  • Choose the lead form associated with your ads.

After selecting the appropriate lead form, test the connection by sending test data from Facebook to ensure that your Pabbly Connect integration is functioning correctly. A successful connection will allow you to capture leads automatically.


3. Sending Initial WhatsApp Message

Now that you have set up the trigger, the next step is to send an initial WhatsApp message to the new lead using Pabbly Connect. Add a new action step and select WhatsApp Cloud API as the action application. Choose the ‘Send Template Message’ event.

Connect to WhatsApp Cloud API by entering your access token and phone number ID. This is crucial for sending messages through WhatsApp. Map the phone number field to the number captured from the Facebook lead data.

  • Select the template you created for initial inquiries.
  • Map any custom variables such as the lead’s first name.
  • Test the action to ensure the message is sent successfully.

Upon successful testing, the lead will receive a personalized WhatsApp message acknowledging their inquiry, enhancing your engagement with potential clients.


4. Adding a Follow-Up Message

After sending the initial message, it’s essential to follow up with the lead after a few days. In this part of the workflow, you’ll set a delay using Pabbly Connect. Add an action step and select ‘Delay by Pabbly’ as the application.

Choose the option to add a time delay. Set the unit to days and specify the duration for the follow-up message, for example, 2 days. This delay ensures that you maintain contact without overwhelming your leads.

Add another action step for WhatsApp Cloud API. Select the follow-up template you created earlier. Map the same phone number and any custom variables needed.

After configuring the follow-up message, test the action to confirm that the message is sent after the specified delay. This feature helps in nurturing leads effectively.


5. Conclusion

In conclusion, using Pabbly Connect to automate WhatsApp follow-ups for your event business significantly enhances lead engagement. By integrating Facebook Lead Ads with WhatsApp Cloud API, you can streamline your communication process, ensuring timely responses and follow-ups.

Ensure you check out Pabbly Connect to create business automation workflows and reduce manual tasks. Pabbly Connect currently offer integration with 2,000+ applications.

This setup not only saves time but also helps in building better relationships with your leads. By following the steps outlined in this tutorial, you can effectively manage your event business communications through automation.

Create a Discord Bot to Send Messages Automatically

Learn how to create a Discord bot that sends automated messages using Pabbly Connect. Follow this step-by-step tutorial for seamless integration. Master proven automation processes with practical implementation examples and strategic recommendations you can apply immediately in your workflow.

Watch Step By Step Video Tutorial Below


1. Getting Started with Pabbly Connect

To create a Discord bot that sends messages automatically, you first need to access Pabbly Connect. If you are a new user, open your browser and navigate to pabbl.com/connect. There, you will find the option to sign up for free. This allows you to explore Pabbly Connect with 100 free tasks each month, enabling you to send up to 100 messages for free.

Once you have signed up, you can start using the workflow builder. This is the main interface of Pabbly Connect where you will set up your automation. If you like the service, consider subscribing for more features. Now, let’s dive into creating your Discord bot.


2. Creating the Workflow in Pabbly Connect

In the workflow builder of Pabbly Connect, click on the ‘Add Trigger’ button to begin. You will select ‘Schedule by Pabbly’ as your trigger application because you want your Discord bot to send automated messages daily. Choose ‘Schedule Workflow’ as the event and click on ‘Connect’.

  • Select how often you want the workflow to run.
  • Set the time for the messages to be sent, for example, 1:00 PM.
  • Click ‘Save’ to schedule your workflow.

After saving, your workflow is now set to run every day at the specified time. This sets the foundation for your Discord bot to send messages automatically.


3. Generating Messages Using Gemini

Next, you need to generate the content that your Discord bot will send. Click on ‘Add New Action Step’ and search for ‘Gemini’ to select Google AI Studio. Choose ‘Generate Content’ as the event and click on ‘Connect’.

If you haven’t connected Gemini to Pabbly Connect before, you’ll need to create a new connection. This requires an API key from your Google AI Studio. To obtain this, navigate to the ‘Get API Key’ section in Google AI Studio, create a key, and paste it into Pabbly Connect.

  • Enter your prompt for generating the message.
  • Select the model, such as Gemini 2.5 Flash.
  • Click ‘Save and Send Test Request’.

After this, you will see the generated message that will be sent to your Discord channel.


4. Sending Messages to Discord

Now it’s time to send the generated message to your Discord channel. Click on ‘Add New Action Step’ and search for ‘Discord’. Select it and choose ‘Send Channel Message’ as the event. Click on ‘Connect’ to set up the integration.

You will need the webhook URL from your Discord server. Go to your Discord server settings, find ‘Integrations’, then ‘Webhooks’, and create a new webhook. Copy the URL and paste it into Pabbly Connect.

Map the generated message from Gemini to the message field in Discord. Set the bot name and icon if desired. Click ‘Save and Send Test Request’.

Once you receive a positive response, your message will be posted in the specified Discord channel automatically at the scheduled time.


5. Finalizing the Automation

With everything set up, your Discord bot is now ready to send messages automatically every day at the specified time. This entire process runs in the background, and you don’t need to manually trigger anything after the initial setup in Pabbly Connect.

To recap, you have successfully created a Discord bot using Pabbly Connect that sends automated messages by scheduling a workflow, generating content with Gemini, and sending it to Discord. This automation can save you time and keep your Discord channel active with fresh content.

Try this amazing automation for your own Discord channel and explore more possibilities with Pabbly Connect. If you have any questions or need assistance, feel free to reach out through the support channels mentioned in the video.


Conclusion

In this tutorial, we demonstrated how to create a Discord bot that sends messages automatically using Pabbly Connect. By following the steps outlined, you can enhance your Discord channel’s engagement effortlessly.

Ensure you check out Pabbly Connect to create business automation workflows and reduce manual tasks. Pabbly Connect currently offer integration with 2,000+ applications.

How to Automatically Import Contacts from Google Sheets into Zoho CRM

Learn how to automatically import contacts from Google Sheets to Zoho CRM using Pabbly Connect with this detailed step-by-step tutorial. Eliminate manual repetitive tasks from your workflow. Discover proven automation methods with intuitive steps designed for efficiency-minded professionals.

Watch Step By Step Video Tutorial Below


1. Setting Up Pabbly Connect for Integration

To automatically import contacts from Google Sheets into Zoho CRM, you need to start with Pabbly Connect. This platform enables seamless integration between various applications without any coding required.

First, visit the Pabbly Connect website and sign up for a free account. Once you’re signed in, navigate to the dashboard where you can create a new workflow. This workflow will facilitate the connection between Google Sheets and Zoho CRM.


2. Creating Your Workflow in Pabbly Connect

In Pabbly Connect, the first step is to create a workflow that will automate the process. Click on the ‘Create Workflow’ button and name your workflow something like ‘Automatically Import Contacts from Google Sheets to Zoho CRM’. using Pabbly Connect

  • Click on the ‘Create’ button to initiate the workflow.
  • Select ‘Google Sheets’ as the trigger application.
  • Choose ‘New or Updated Spreadsheet Row’ as the trigger event.

After setting up the trigger, you will need to connect your Google Sheets account with Pabbly Connect. This step is crucial as it allows Pabbly Connect to access your Google Sheets data.


3. Configuring Google Sheets in Pabbly Connect

Once you have connected Google Sheets, the next step is to configure the trigger settings. You will need to select the specific spreadsheet and worksheet that contains the contact data you want to import. using Pabbly Connect

After selecting the correct sheet, test the trigger to ensure that Pabbly Connect can fetch the data correctly. This step is essential to confirm that the integration is working as intended.

  • Enter the URL of your Google Sheet in the provided field.
  • Select the column that will trigger the import, typically the last column with data.

After testing, you should see a confirmation that the data has been successfully fetched. This ensures that Pabbly Connect is properly set up to monitor your Google Sheets for any new entries.


4. Setting Up Zoho CRM Integration with Pabbly Connect

Now that your Google Sheets is set up, the next step involves integrating Zoho CRM into your workflow. In Pabbly Connect, select Zoho CRM as the action application. using Pabbly Connect

Choose the action event as ‘Insert or Update Contact’. This allows you to create a new contact in Zoho CRM whenever a new entry is added to Google Sheets. You will then need to connect your Zoho CRM account to Pabbly Connect.

Input your Zoho CRM domain name. Authorize Pabbly Connect to access your Zoho CRM account.

Once connected, map the fields from Google Sheets to the corresponding fields in Zoho CRM. This mapping ensures that the data is accurately transferred from Google Sheets to Zoho CRM.


5. Testing and Finalizing the Integration

After mapping the fields, it’s time to test the integration. Pabbly Connect allows you to send test data to Zoho CRM to verify that everything is functioning correctly. Click on the ‘Send Test Request’ button to initiate this process. using Pabbly Connect

If the test is successful, you should see the new contact appear in your Zoho CRM account. This confirms that the integration is working as intended and that contacts are being automatically imported from Google Sheets.

Finally, make sure to turn on the workflow in Pabbly Connect so that the automation runs continuously. This will ensure that every new entry in Google Sheets is captured and sent to Zoho CRM automatically.


Conclusion

Using Pabbly Connect, you can easily automate the process of importing contacts from Google Sheets into Zoho CRM. This integration saves time and ensures that your CRM is always up-to-date with the latest client information, enhancing your business efficiency.

Ensure you check out Pabbly Connect to create business automation workflows and reduce manual tasks. Pabbly Connect currently offer integration with 2,000+ applications.

Smart Way to Track Instagram Engagement

Learn how to track Instagram engagement effortlessly using Pabbly Connect to integrate Google Sheets and Instagram comments. Follow this step-by-step tutorial! Learn to create powerful connections between your critical applications without requiring specialized programming knowledge or extensive technical background.

Watch Step By Step Video Tutorial Below


1. Accessing Pabbly Connect for Instagram Engagement Tracking

To start tracking Instagram engagement, first access Pabbly Connect by visiting Pabbly.com/connect. This platform allows you to automate the process of capturing Instagram comments directly into Google Sheets.

Once on the Pabbly Connect landing page, you can either sign in or sign up for a free account. New users will receive 100 free tasks each month, which can be utilized for exploring the features of Pabbly Connect.


2. Creating Your Automation Workflow in Pabbly Connect

After signing in to Pabbly Connect, navigate to the ‘All Pabbly Apps’ section and click on ‘Access Now’ under Pabbly Connect. Next, click on the ‘Create Workflow’ button to begin setting up your automation.

  • Select the new beta method version for creating workflows.
  • Name your workflow as ‘Smart Way to Track Instagram Engagement’.
  • Choose a folder for your workflow and click ‘Create’.

This sets up the basic structure for your automation within Pabbly Connect, which will capture Instagram comments and log them into Google Sheets.


3. Setting Up Trigger and Action in Pabbly Connect

In the workflow, you will need to set up a trigger and an action. For the trigger, select ‘Instagram Developer’ as the application and choose the event ‘New Comment’. This will allow Pabbly Connect to capture new comments made on your Instagram account.

Click on the ‘Connect’ button to establish a connection. You will need to provide a token and account identifier, which can be generated from your Instagram developer account. Follow the instructions in the Pabbly forum to create an app and obtain these details.


4. Testing the Connection and Logging Data in Google Sheets

Once the connection is established, test it by creating a new comment on your Instagram post. Check back in Pabbly Connect to see if the comment details are captured correctly. This verifies that your trigger is working.

  • Create a comment like ‘You guys create amazing content. I really like it.’
  • Ensure the comment appears in the trigger response in Pabbly Connect.

If successful, you can now proceed to log this data into Google Sheets by setting up an action step. Select ‘Google Sheets’ as the application and the event ‘Add New Row’.


5. Finalizing the Integration and Automating the Process

For the Google Sheets connection, click on the ‘Sign in with Google’ button to link your Google account. Select the spreadsheet you want to use for logging comments, typically named ‘Instagram Comments’.

Map the fields for username and comment in Google Sheets to ensure that each new comment is recorded accurately. Click on the ‘Save and Send Test Request’ button to finalize the setup. If everything is set correctly, your comment should now appear in the specified Google Sheet.

This entire process illustrates the smart way to track Instagram engagement using Pabbly Connect, automating the logging of comments without any coding skills required.


Conclusion

Using Pabbly Connect to track Instagram engagement is an efficient method to automate comment logging into Google Sheets. This setup simplifies the process and ensures you never miss important interactions on your posts.

Ensure you check out Pabbly Connect to create business automation workflows and reduce manual tasks. Pabbly Connect currently offer integration with 2,000+ applications.

Add Multiple Contacts to Google Contacts at Once

Learn how to add multiple contacts to Google Contacts at once using Pabbly Connect with this step-by-step tutorial. Streamline your contact management today! Transform complex automation concepts into accessible, actionable steps that eliminate unnecessary manual work while maximizing existing application capabilities.

Watch Step By Step Video Tutorial Below


1. Introduction to Pabbly Connect for Google Contacts

In this section, we will explore how to use Pabbly Connect to add multiple contacts to Google Contacts efficiently. This integration allows you to automate the process of adding contacts from Google Sheets, streamlining your workflow significantly. By using Pabbly Connect, you can save time and reduce manual entry errors.

To get started, ensure you have a Google account and access to Pabbly Connect. This tutorial will guide you step-by-step through the entire process, making it easy to follow along. With Pabbly Connect, you can connect various applications seamlessly, enhancing your productivity.


2. Setting Up Pabbly Connect

To begin using Pabbly Connect, first visit the Pabbly Connect website and sign up for a free account. Once logged in, navigate to the workflow builder within Pabbly Connect. Here, you will create a new workflow specifically for adding contacts to Google Contacts.

  • Open your web browser and go to Pabbly Connect.
  • Click on ‘Sign Up for Free’ to create a new account.
  • Access the workflow builder and select ‘Create New Workflow’.

Once you are in the workflow builder, click on the ‘Add Trigger’ button. Choose Google Sheets as your trigger application and select the event as ‘New or Updated Spreadsheet Row’. This setup will allow Pabbly Connect to monitor your Google Sheets for any new entries.


3. Configuring Google Sheets with Pabbly Connect

Now that you have set up Pabbly Connect, it’s time to configure your Google Sheets. You need to install the Pabbly Connect Webhooks add-on to your Google Sheets. This will allow you to send data from your spreadsheet to Pabbly Connect.

  • Open your Google Sheets and click on ‘Extensions’.
  • Select ‘Add-ons’ and then ‘Get Add-ons’.
  • Search for ‘Pabbly Connect Webhooks’ and install it.

After installation, refresh your Google Sheets to see the Pabbly Connect Webhooks option. Click on it and choose ‘Initial Setup’. Paste the webhook URL provided by Pabbly Connect into the designated field, and set your trigger column (for example, column D). This setup ensures that whenever you add data to this column, it will be sent to Pabbly Connect.


4. Creating Contacts in Google Contacts

With your Google Sheets configured, you can now set up the action to create contacts in Google Contacts using Pabbly Connect. In your workflow, click on ‘Add New Action Step’ and select Google Contacts as the application. Choose the event ‘Create Contact’.

When prompted, connect your Google account to Pabbly Connect. Ensure you allow all permissions required for Pabbly Connect to access your Google Contacts. Once connected, you can start mapping the fields from your Google Sheets to the corresponding fields in Google Contacts.

Map the first name and last name from your spreadsheet. For email, map it to the work email field. Map the phone number to the work phone number field.

After mapping all necessary fields, click on ‘Save and Send Test Request’. This will create a new contact in your Google Contacts, verifying that the integration through Pabbly Connect is working correctly.


5. Adding Multiple Contacts at Once

To add multiple contacts at once, return to your Google Sheets and click on the Pabbly Connect Webhooks option again. This time, select ‘Send All Data’. This action will trigger Pabbly Connect to process all entries in your spreadsheet and create multiple contacts in Google Contacts simultaneously.

Once you click ‘Send All Data’, all the contact information will be sent to Pabbly Connect, which will then create the corresponding contacts in Google Contacts. After the process is complete, refresh your Google Contacts to see all the new entries added seamlessly.

Additionally, you can enable the ‘Send on Event’ option in the Pabbly Connect Webhooks settings to ensure that new contacts are automatically added every time you update your Google Sheets.


Conclusion

In this tutorial, we have covered how to add multiple contacts to Google Contacts at once using Pabbly Connect. By following the steps outlined, you can streamline your contact management process and save valuable time. With Pabbly Connect, you can easily automate this process and enhance your productivity.

Ensure you check out Pabbly Connect to create business automation workflows and reduce manual tasks. Pabbly Connect currently offer integration with 2,000+ applications.

Travel Bookings on Autopilot with AI Assistant ✈️

Learn how to automate travel bookings using Pabbly Chatflow and AI Assistant. Follow this detailed tutorial for seamless integration with various applications. Create intelligent chat experiences that delight users while collecting valuable information and moving prospects through your sales process.

Watch Step By Step Video Tutorial Below


1. Accessing Pabbly Chatflow for Your Travel Agency

To start automating your travel bookings, first access Pabbly Chatflow by navigating to Pabbly.com/chatflow. This platform is designed to streamline communication for businesses, especially travel agencies, by automating responses and managing inquiries efficiently.

Once on the Pabbly Chatflow page, you will see options to sign in or sign up. If you’re new, click on the ‘Sign Up Free’ option to create an account and receive 100 free credits monthly. Existing users can simply sign in to access the dashboard, where all automation tools are available.


2. Creating Your AI Assistant with Pabbly Chatflow

After signing into Pabbly Chatflow, navigate to the AI Assistant feature. Click on the ‘Create AI Assistant’ button to initiate the setup process. You’ll be prompted to name your assistant; for this tutorial, we will use ‘Travel Bookings on Autopilot with AI Assistant’.

  • Click on the ‘Create’ button to finalize the assistant’s creation.
  • Choose the instruction type as ‘AI Agent’.
  • Set the temperature for responses to control creativity.

Once you have configured these settings, your AI Assistant will be ready to handle user queries for travel bookings effectively. This is a critical step in ensuring your assistant can provide accurate and relevant information.


3. Configuring OpenAI API in Pabbly Chatflow

To enhance your AI Assistant’s capabilities, you need to connect it to the OpenAI API. In Pabbly Chatflow, select the model provider as OpenAI and choose GPT-4 Mini. You will need to input your API key, which can be generated from the OpenAI platform.

Follow these steps to obtain your API key:

  • Go to the OpenAI API keys page and create a new secret key.
  • Copy the generated key and paste it back into Pabbly Chatflow.

After saving the key, you can proceed to configure additional settings for your AI Assistant, such as header messages and fallback responses, ensuring it provides a seamless user experience.


4. Uploading Knowledge Base for Travel Bookings

To ensure your AI Assistant offers accurate and tailored responses, upload a knowledge base file containing relevant information about travel bookings. This file should include details about packages, payment processes, and FAQs.

Here’s how to upload your knowledge base in Pabbly Chatflow:

Prepare your knowledge base file in PDF or TXT format, ensuring it is under 90 MB. Drag and drop the file into the designated upload area in Pabbly Chatflow.

Once uploaded, your AI Assistant will be equipped to provide users with specific answers based on the knowledge base, enhancing the overall customer service experience.


5. Testing Your AI Assistant for Travel Bookings

After setting up your AI Assistant in Pabbly Chatflow, it’s crucial to test its functionality. Send a message to your assistant, such as ‘Hello’, to initiate the conversation and see how it responds.

For example, if you ask, ‘What services do you offer?’, the assistant should provide a detailed list of travel packages available. You can also test booking inquiries by providing specific details like destination and travel dates to ensure the assistant handles requests accurately.

Testing is essential to confirm that your AI Assistant is functioning as expected, providing timely and relevant responses to user inquiries. Once satisfied with the performance, your automated travel booking assistant is ready to assist customers 24/7.


Conclusion

By following this tutorial, you can successfully automate travel bookings using Pabbly Chatflow and an AI Assistant. This setup allows for efficient management of customer inquiries, enhancing the overall service experience while ensuring your travel agency operates on autopilot.

Ensure you check out Pabbly Connect to create business automation workflows and reduce manual tasks. Pabbly Connect currently offer integration with 2,000+ applications.