Are you looking for a way to integrate Landingi with Automizy? If so, then this article might help you as we are going to discuss the integration process.
But before moving any further, let’s put light on the software. About our first software which is Landingi, it lets you create beautiful landing pages in a couple of minutes. From that landing page, you can build leads, organize marketing campaigns, and much more. And using Automizy i.e. an email marketing software, you can send customized emails to customers.
Now, suppose you want all your leads generated from Landingi into Automizy so that you can send automated emails to prospects. But filling every entity manually requires a lot of effort and time. Now, the real question is how you gonna do that? And the answer is quite simple which is with the help of software named Pabbly Connect.
The software allows you to automate all the repetitive tasks which save a lot of effort and time. Using Pabbly Connect, one can create seamless workflows for data transmission. Plus, with this lifetime deal, you can get access to unlimited premium applications, workflows, and much more. Also, Pabbly Connects requires no coding skill, just create a simple workflow in no time and you’re good to go.
Here, in this article, we will understand how one can integrate Landingi with Automizy using Pabbly Connect.
So, let’s begin the process.
Step 1: Sign up to Pabbly Connect

Initiate the process of connecting Landingi to Automizy by clicking on the “Sign Up Free” icon on the Pabbly Connect dashboard. Further, either manually fill-up all the details or sign up using Gmail credentials.
Try Pabbly Connect for FREE
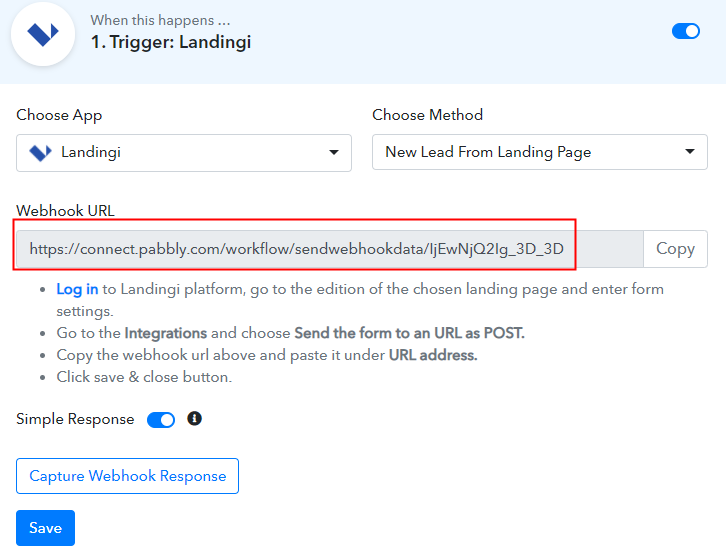
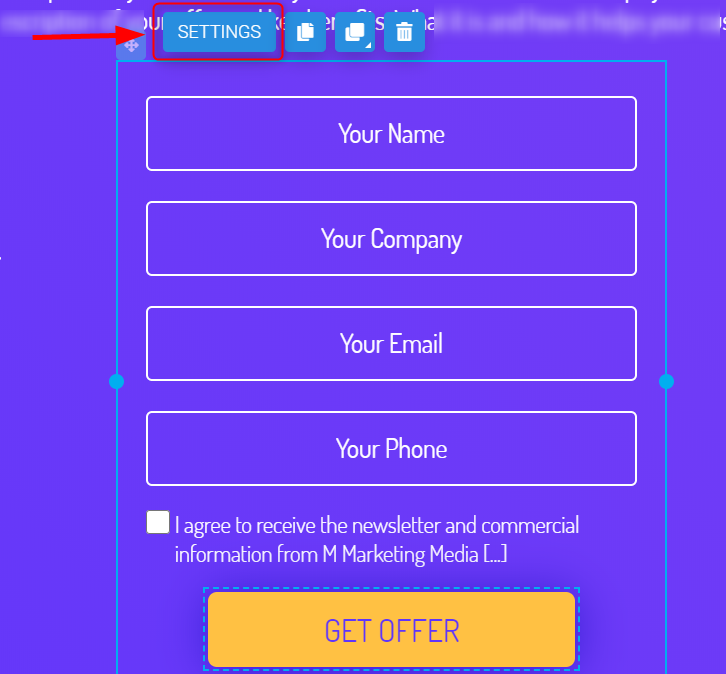
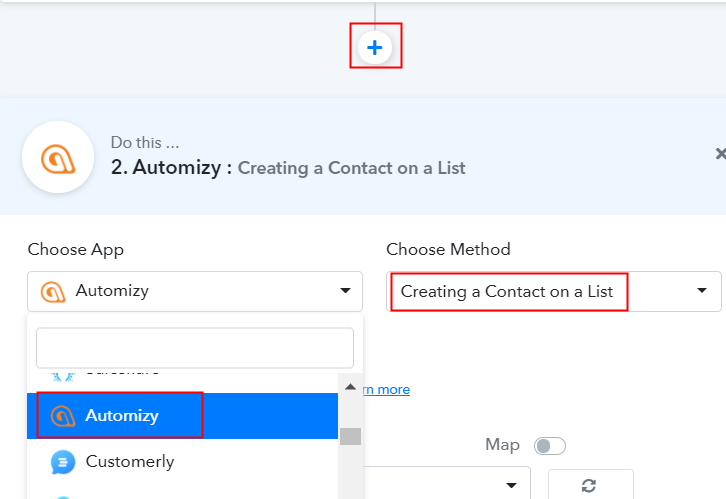
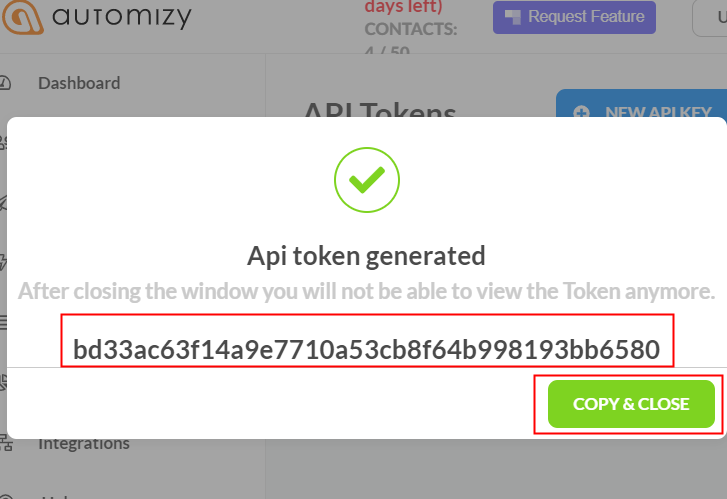
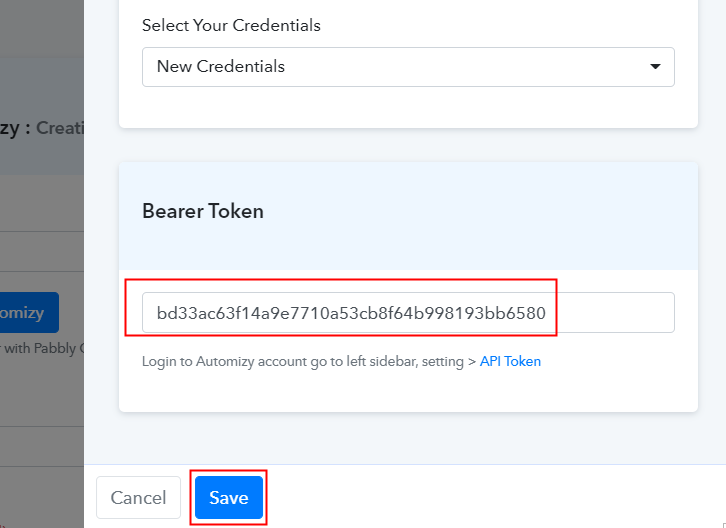
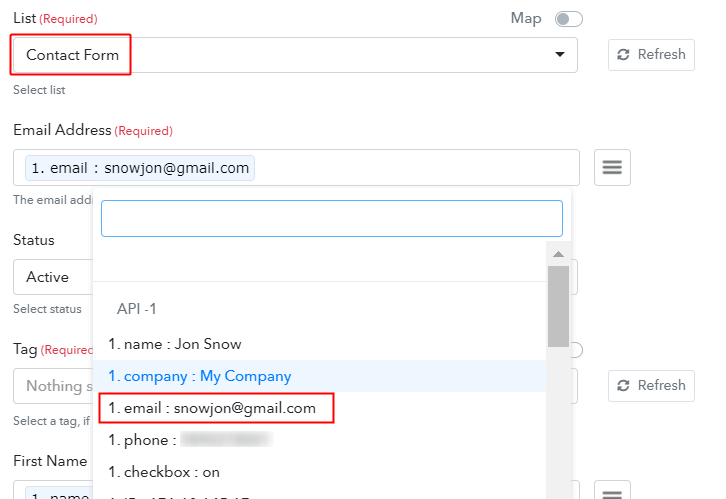
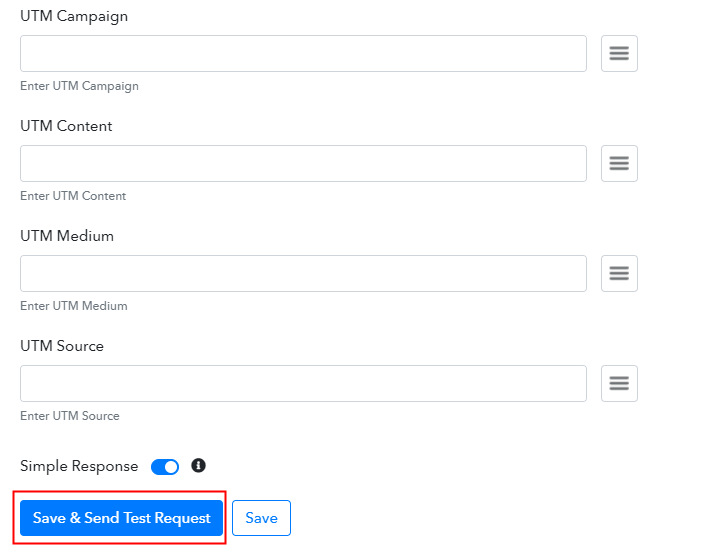
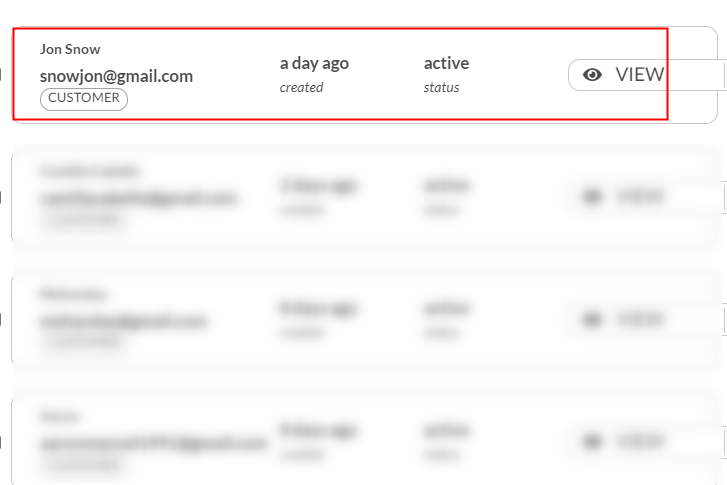
After signing into the account, click on the “Access Now” button of Connect. Start the process of building a workflow for your automation by pressing the “Create New Workflow” button. Subsequently, add the name of workflow which in our case is “Landingi to Automizy”. Nonetheless, you can name the workflow according to your needs. Now after creating a workflow, you have to choose the application you want to integrate. The following step is to select “Landingy” from the dropdown, then choose the “New Lead from Landing Page” option. Then copy the Webhook URL appearing on the dashboard. To smooth the whole Landingi with Automizy integration process, you have to paste the webhook URL for which you have to log in to your Landingi account. After login to your Landingi account, click on “Create New Landing Page” Option. Further, on that landing page, move to the lead generation tab. After doing that, select the “Setting” icon. Then click on the”Integrations” option which will provide certain choices, simply select “Send the URL as a Post” option. Now as soon as you click on the “Send the URL as a Post” option, it will open up the tab. Just paste the copied Webhook URL as shown in the above image. Further, click on the “Save and Close” button. Now after publishing the landing page, make a dummy entry in the form to test the workflow. Fill all the necessary details and click on the “Get Offer” button. As soon as you submit the response, go back to the Pabbly Connect dashboard where you will see the submitted entry. Then, click on the “Save” button to continue the workflow. Now the next step is to set a trigger, select the action for your trigger. For this, you have to choose the application you want to integrate. Next, click on the “+” icon to add an action for your trigger. Here we are going to select “Automizy” from the dropdown. Then, select the “Creating a Contact on a List” option. Now, after making all the necessary changes, click on the “Connected with Automizy” button. Further, it will ask for “Bearer Token”, for which you have to visit the Automizy account. To copy the “Bearer Token”, you have to log in to your Automizy account. After login into your Automizy account, select the “Setting” option. Further, click on the API token option. The API token option will open up the tab with the “New API key” option, simply click on it which will generate the key. Just copy your generated key and close the pop-up window. Now to paste the copied API token, go back to the “Pabbly Connect” dashboard. As soon as you click on the “Connected with Automizy” button, the page will open with the option “New Credentials”. Below on this page, you will see the option of “Token”, just paste your copied token there. After that, hit the “Save” button. Now, select the list from the dropdown in which you want your subscribers to get added. Then, add the required field from drop-down such as for the email field, select the email option, and for name field select the name option. After making all the changes, save the setting and then “Send Test Request” to test the process. Finally, when you check the subscriber list in Automizy, your response will appear there. So, just like that, all the form submissions will automatically get added to your subscriber list after that simple procedure. Alright! Now you see, how easy is to integrate Landingi with Automizy using software Pabbly Connect. Not just the automation task, but it also offers features like filters, path routers, etc for easy data transmission. And, you don’t need to have any coding skills for operating this amazing software. Just get the software and it is ready to roll. In case you have any queries regarding software, you can always reach out to support staff of software.Step 2: Access Pabbly Connect

Step 3: WorkFlow for Landingi with Automizy Integration
(a) Start with a New Workflow

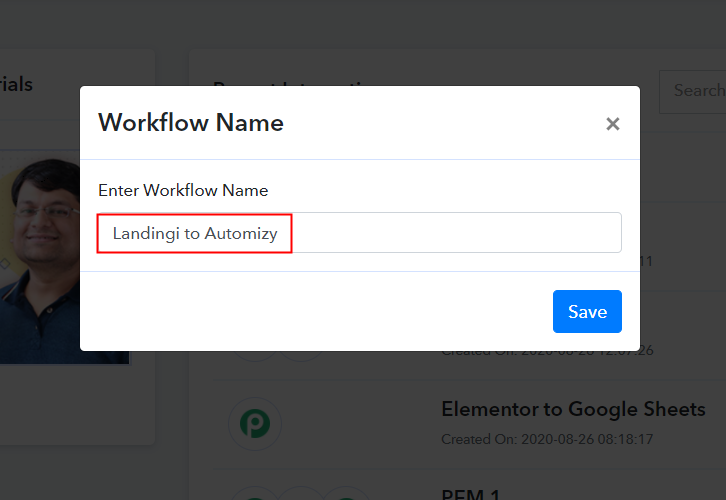
(b) Name the Workflow
Step 4: Setting Trigger for Landingi Automizy Integration
(a) Select Application you Want to Integrate

(b) Copy the Webhook URL
Step 5: Paste the Webhook URL
(a) Create a Landing Page

(b) Click on Setting Option
(c) Select Integrations
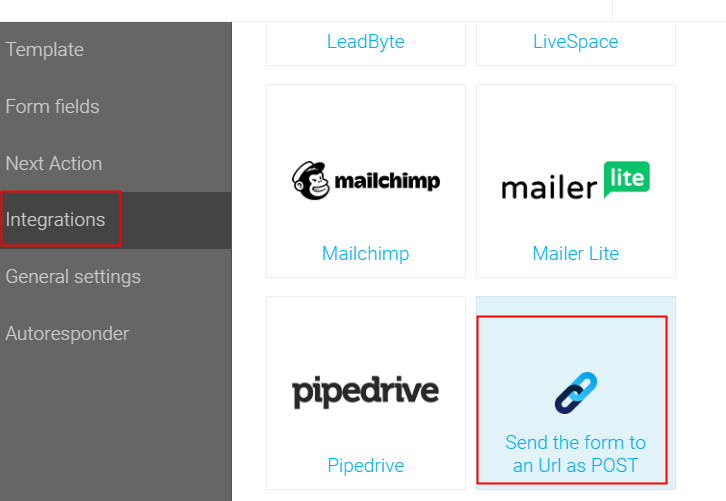
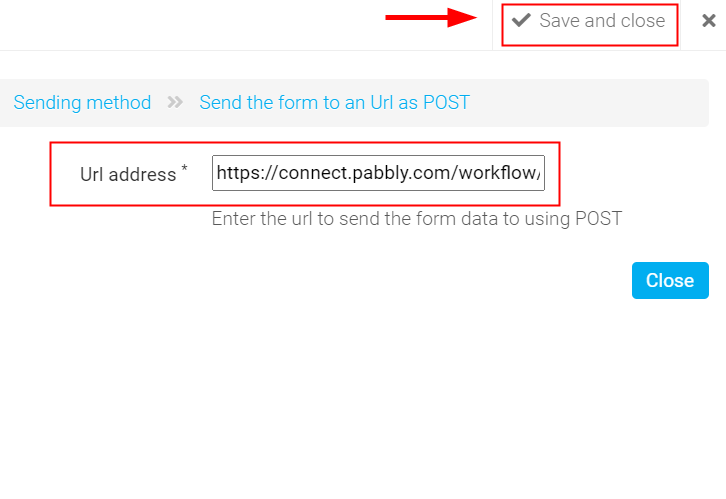
(d) Paste the Webhook URL
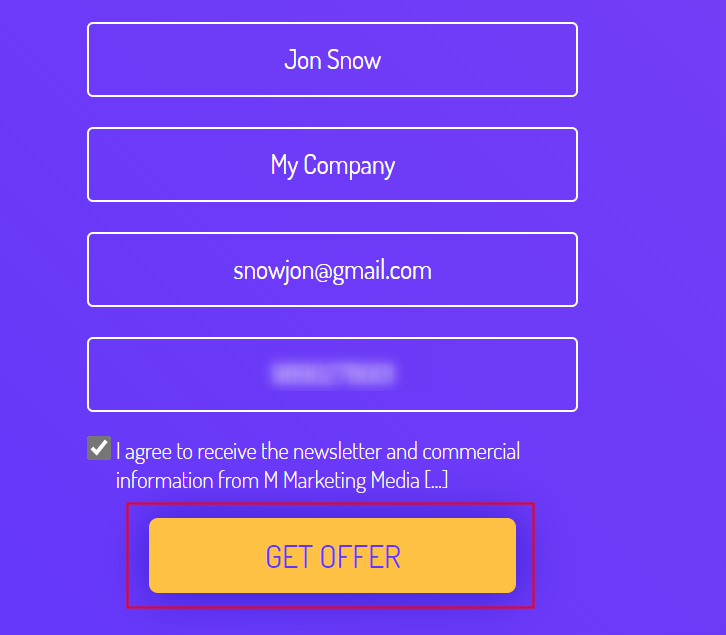
Step 6: Fill the Form to Test Landingi Integration
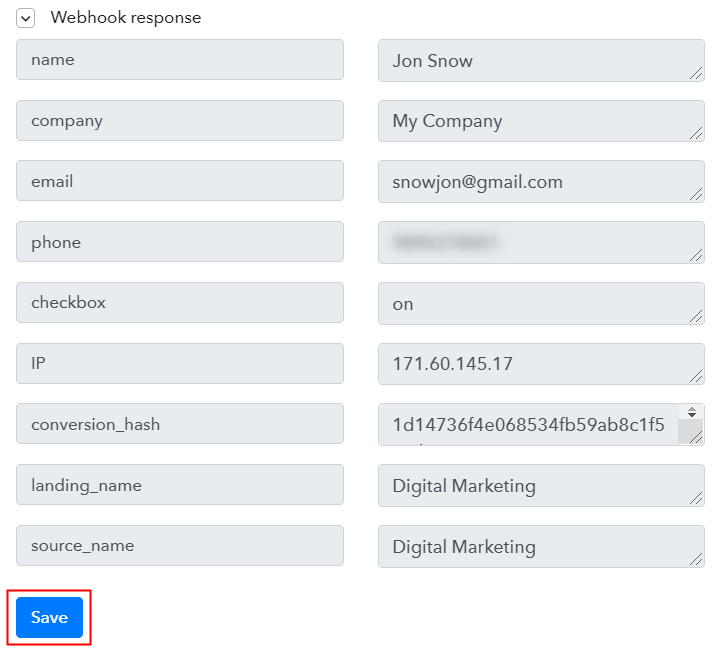
Step 7: Test the Response in Pabbly Connect Dashboard
Step 8: Setting Action for Landingi Automizy Integration
(a) Select Application you Want to Integrate
(b) Click the Connect Button
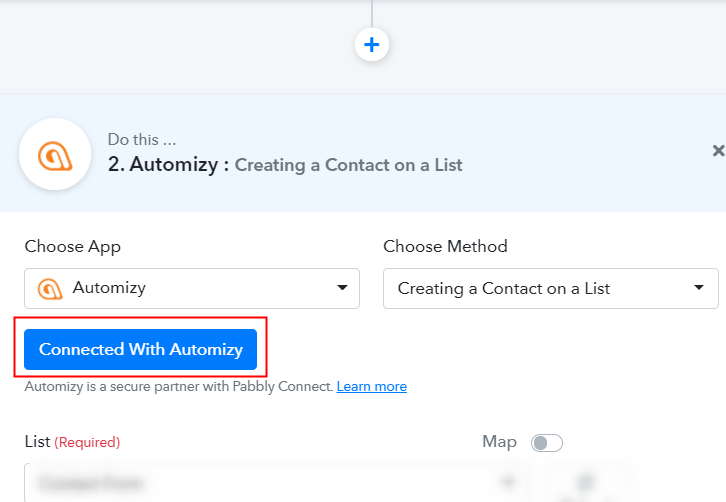
Step 9: Connecting Automizy to Pabbly Connect
(a) Click on Setting
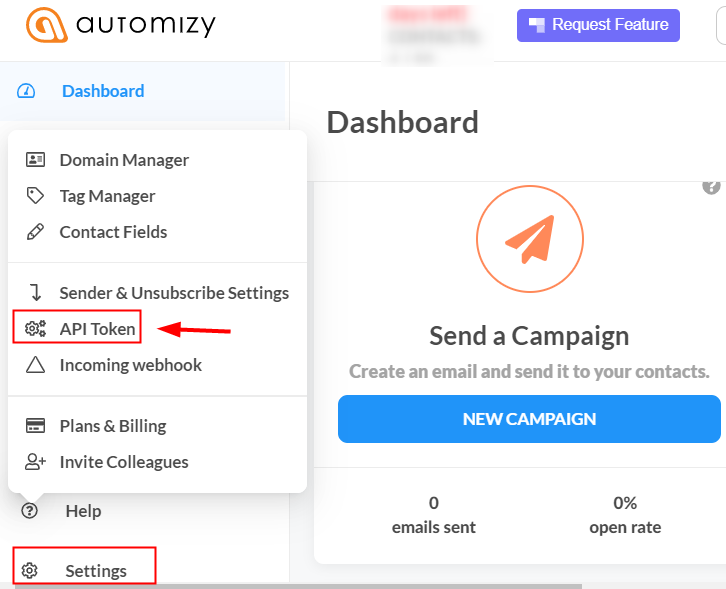
(b) Copy API Token
(c) Paste API Token in Pabbly Connect Dashboard
(d) Add Field Data
(e) Save and Send Test Request
Step 10: Check Responses in Automizy Dashboard
Conclusion –
You May Also Like To Read –


