Google Forms is an easy way to collect data and feedback from various stakeholders. Undoubtedly, it integrates seamlessly with other Google products like sheets, Gmail, etc. But, if you want to integrate Google Forms with Pabbly Email Marketing and you’re a beginner then don’t worry!
Here, we are recommending a tool called Pabbly Connect that integrates Google Forms with any email marketing software. Pabbly Connect automatically send data and email addresses to your subscriber’s list from a new or updated Google Forms without doing any manual efforts. Apart from this, it will directly send email addresses to Pabbly Email Marketing, MailChimp, ActiveCampaign, or another platform.
Basically, Pabbly Connect is an automation software that automates all your integrations without any manual efforts. It lets you create unlimited multi-step calls for connecting limitless applications in your workflows at a very affordable price. Apart from this, it is the only software that offers advanced features like instant triggers, formatters, filters, path routers, etc even with its basic plan without any restrictions.
Now, let’s take a look at how to integrate Google Forms with Pabbly Email Marketing using Pabbly Connect.
Just follow these easy and simple steps without using a single line of code and send info between Google Forms and Pabbly Email Marketing.
Step 1: Create New Google Forms
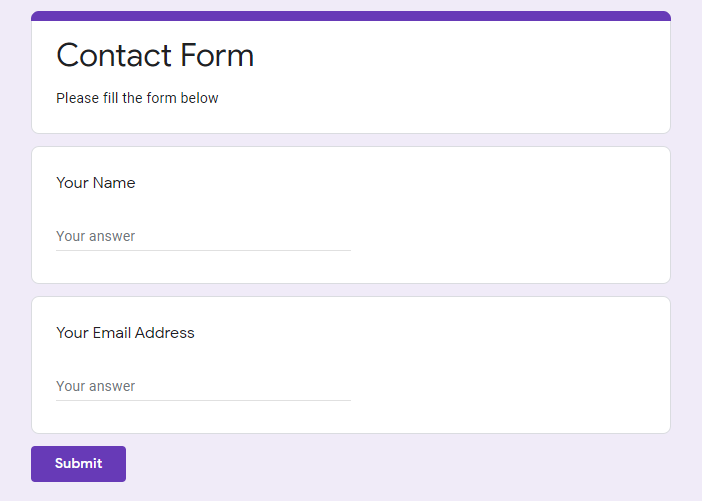
First of all, create a simple form through Google Forms to collect lead data in Pabbly Email Marketing.
Step 2: Create New Spreadsheet to Capture Form Responses
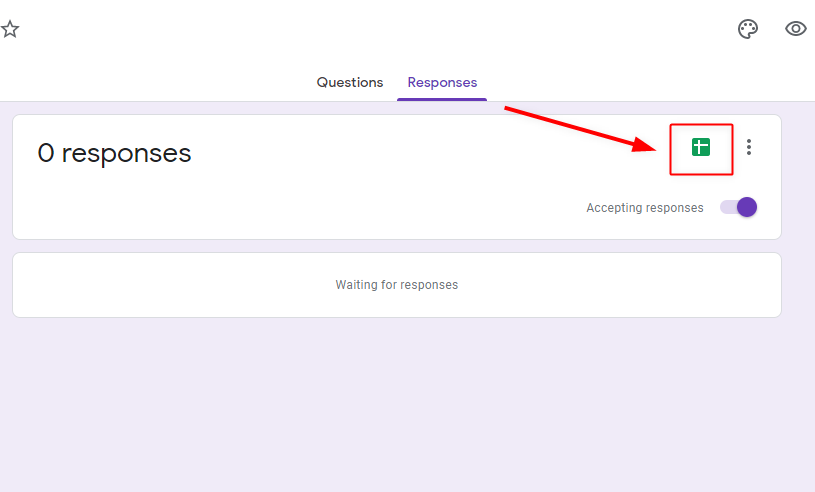
After creating the form click on the “Responses” option. Here you need to create a new spreadsheet to save all the responses to the Google Spreadsheet file. Just click on the spreadsheet icon, name the sheet, and your spreadsheet is ready to capture the form responses.
As soon as you click on the Spreadsheet icon, you will see that multiple columns are created in the sheet according to your form such as timestamp, your name, email address.
Step 3: Fill your Form to Get Test Data on Google Sheet
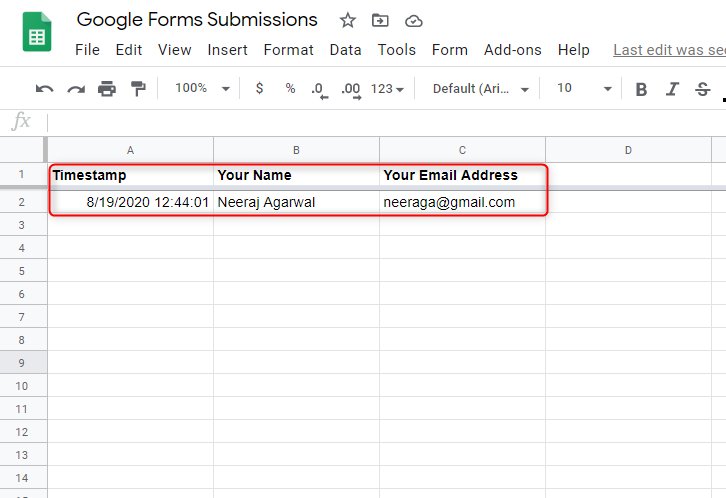
Fill your form to get some test data through which you can do the testing and push that test data to Pabbly Email Marketing. Once you filled the form the entry will appear on the Google Spreadsheet.
(a) Go to the Add-ons Button of Sheet Menu Bar
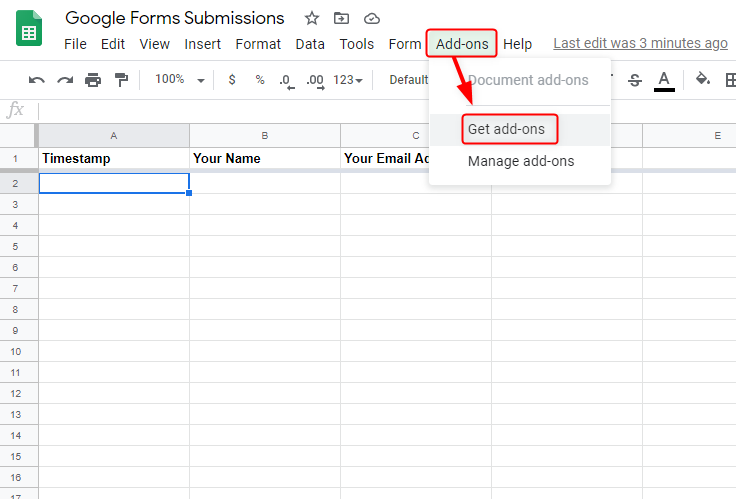
In this step, click on the “Add-ons” button from the sheet menu bar and go to the “Get add-ons” option for installing the Pabbly Connect webhooks.
(b) Install Pabbly Connect Webhooks

Next, when you click on the “Get add-ons” button G Suite Marketplace window will appear on your screen. Momentarily, search for the Pabbly Connect Webhooks and install it on your Google sheet for integrating Google Forms and Pabbly Email Marketing.
(c) Go to Pabbly Connect Webhooks and Click on Initial Setup Option
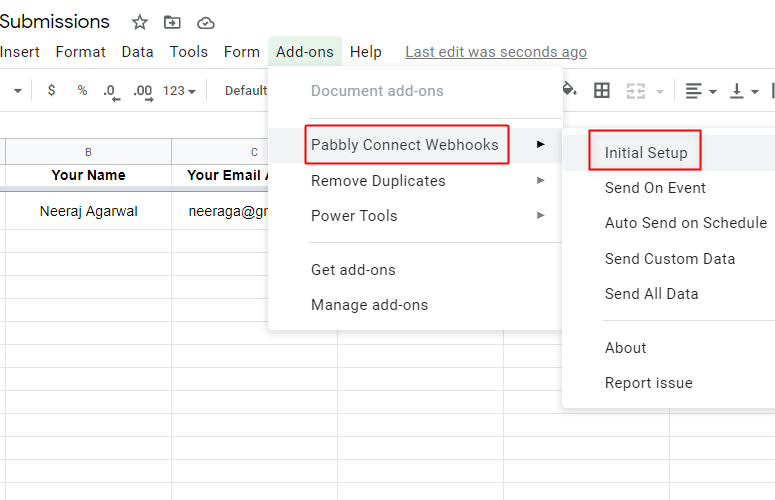
After installing the Pabbly Connect Webhook you will see that it appears on the add-ons section. Now go to the “Initial Setup” option.
(d) Paste Webhook URL and Set Trigger Column
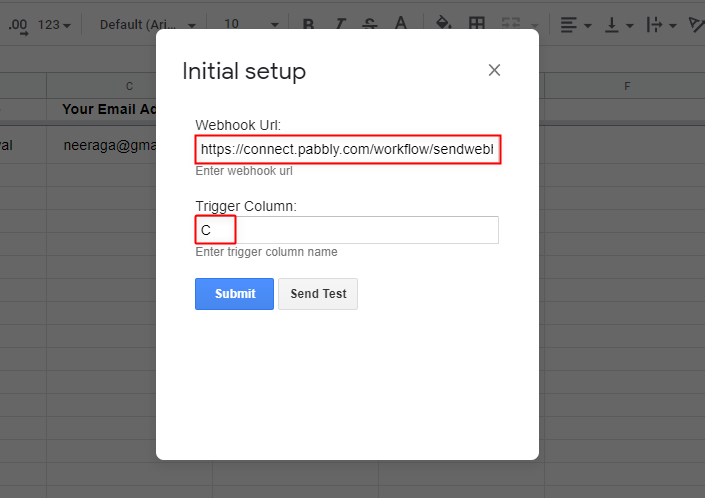
A small pop-up window will open on the screen where you will need to paste the webhook URL, which you will find on the Pabbly Connect dashboard after creating the workflow.
Step 4: Sign-up to Pabbly Connect
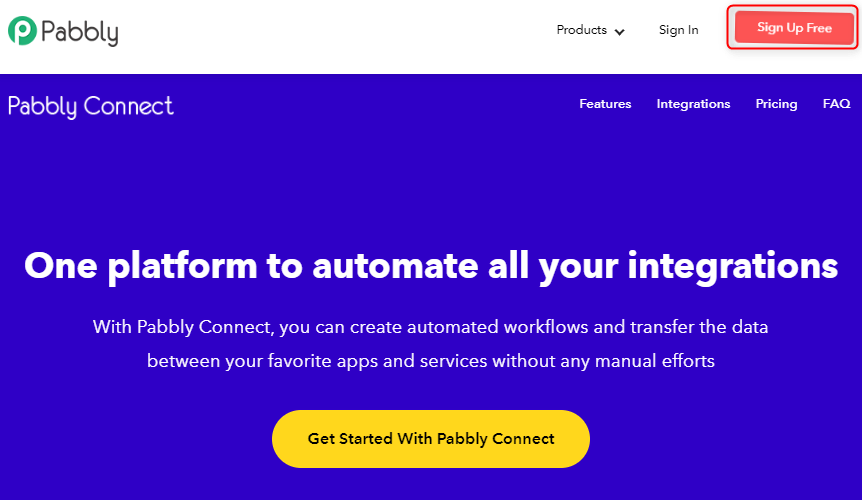
Now, to create your workflow, visit the Pabbly Connect website and Signup to your account. Either manually fill all the details or sign-up via your Google account.
Step 5: Access Pabbly Connect
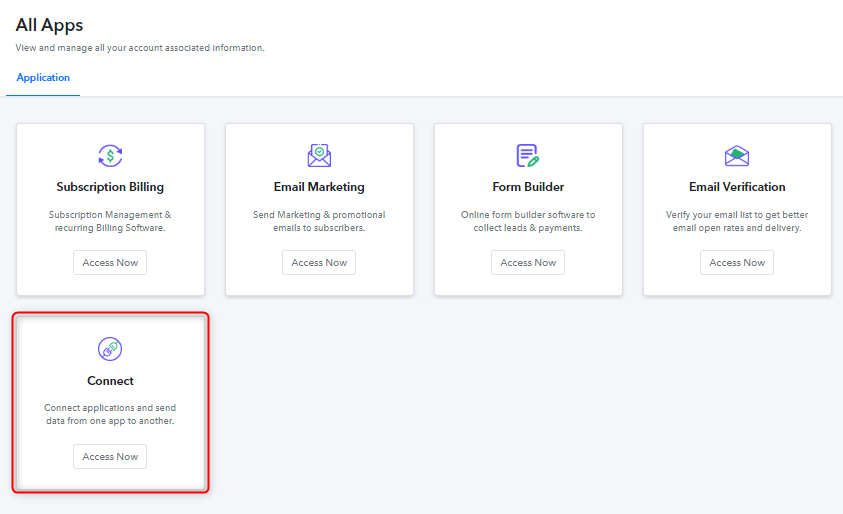
After completing the signup process, go to the “Connect” option and click on the “Access Now” button.
Step 6: Create a WorkFlow for Integrating Google Forms to Pabbly Email Marketing
(a) Create New Workflow
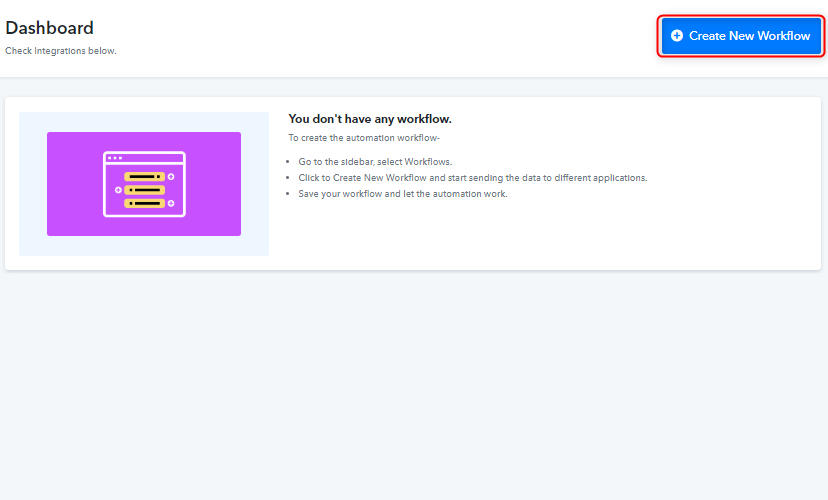
Let’s begin the process of creating a workflow to integrate Google Forms to Pabbly Email Marketing by hitting the ‘Create New Workflow’ button.
(b) Name the Workflow
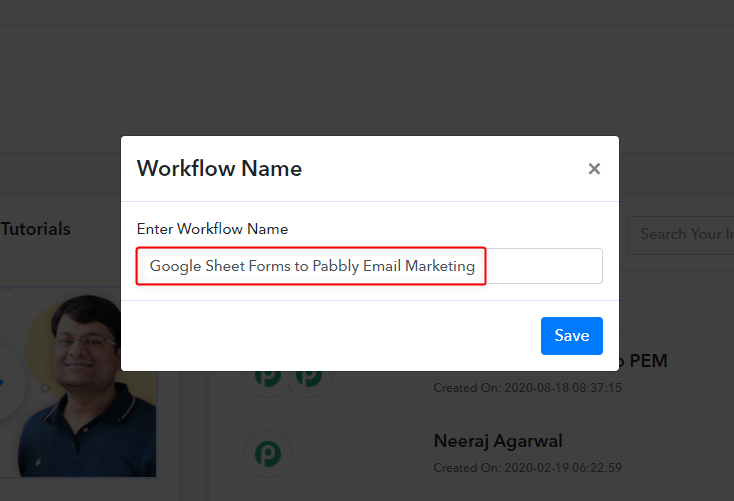
Following, named your workflow according to your project, which in our case is “Google Sheet Forms to Pabbly Email Marketing.”
(c) Setting Trigger
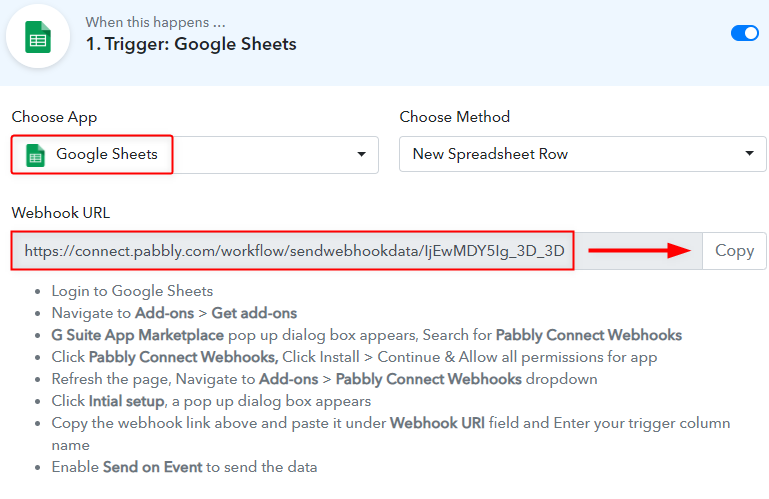
In this step, you need to choose the trigger app, i.e Google Sheets which you want to integrate with Pabbly Email Marketing. Additionally, copy the webhook URL which appears on the Pabbly Connect dashboard. Basically, a Webhook URL is a way to receive data from the application without any coding requirement.
Step 7: Go Back to the Google Sheet and Paste the Webhook URL
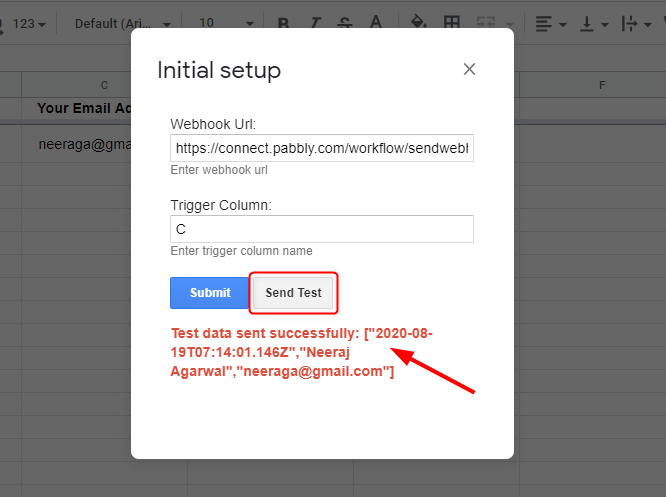
Now go back to the Google spreadsheet, paste the Webhook URL, and click on the “Send Test” button. Here, you can see the name, date, and email address are posted to the Pabbly Connect.
Step 8: Capture Test Data
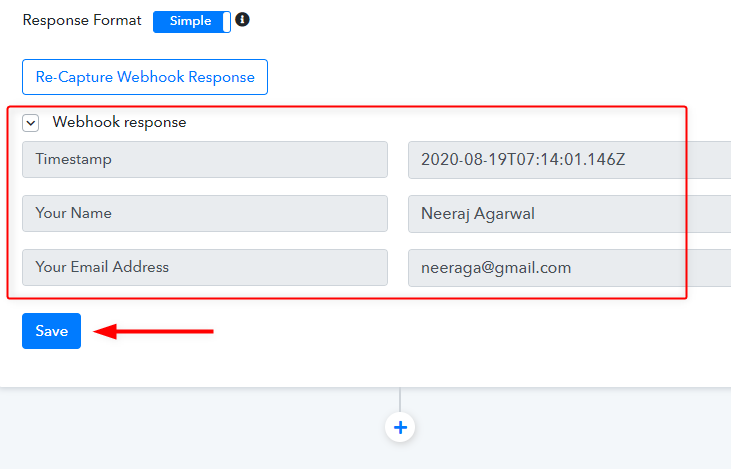
After sending the test data to your workflow, hit the “Capture Webhook Response” button, and capture the webhook response. All details of the form like email, name, and timestamp will come on the Pabbly Connect dashboard. Immediately, save all the responses by clicking on the “Save” button, and your Google spreadsheet is integrated with Pabbly Connect.
Step 9: Log-in to Pabbly Email Marketing Account for Developer API
(a)Click on the Integration Option from the Menu bar
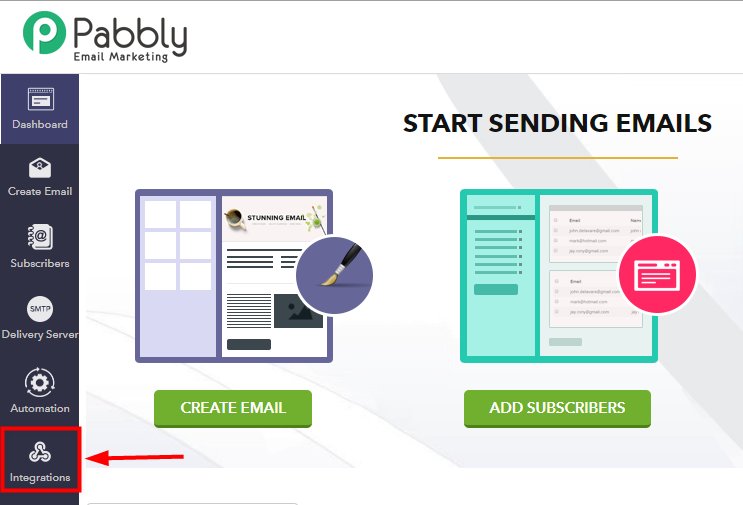
Here, all you have to do is log-in to your Pabbly Email Marketing account and go to the “Integrations” option.
(b) Visit Developer API Option
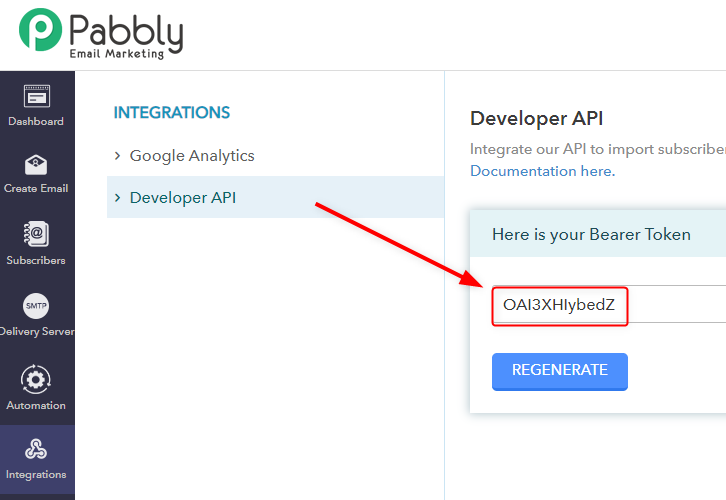
Next, inside the developer API, you will find bearer token of your specific account. Just copy it and go back to the Pabbly Connect dashboard.
Step 10: Setting Action
(a) Choose Pabbly Email Marketing App
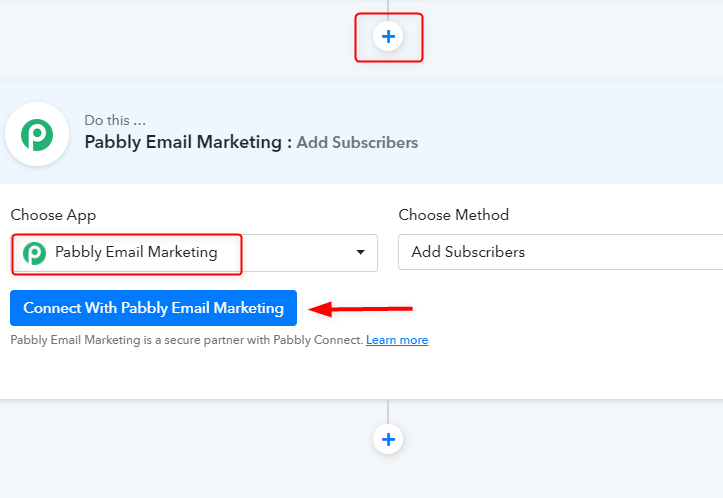
Here click on the “+” icon to add an action for your trigger. Choose “Pabbly Email Marketing” from the drop-down list, select the “Add subscriber” option as a method, and hit the “Connect with Pabbly Email Marketing” button.
(b) Paste the API key inside Pabbly Connect Dashboard & Save

Afterward, paste the “Bearer Token”, which you have copied from the Pabbly Email Marketing account.
(c) Map the Data Modules with Google Forms
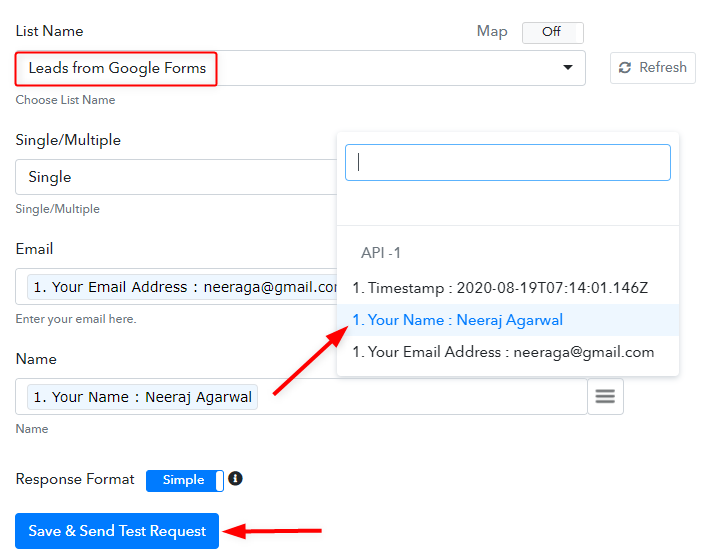
In this step, select the relevant list name in which you want to add data which in our case is “Leads from Google Forms”. Also, you can select the default list for storing your subscriber’s list. Further, in the next step click on the three-line symbol and map the data that is coming from the Google Forms such as email with “Your Email Address” and name with “Your Name”. After, doing all the changes hit the “Save & Send Test Request” button.
(d) Save and Send Test Request
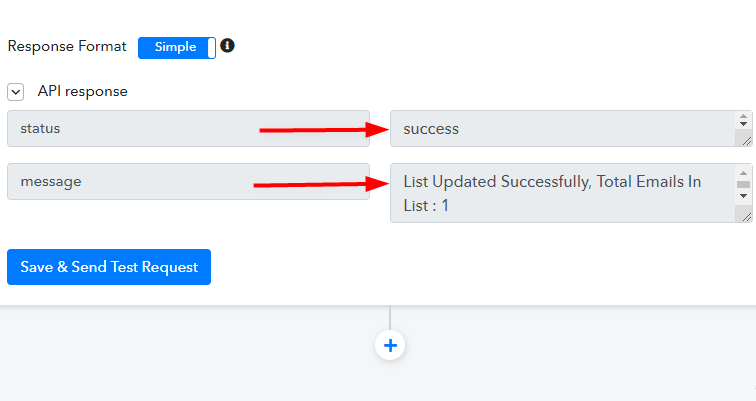
That’s it! Success message will appear on your screen it means your Google Forms are integrated with Pabbly Email Marketing.
Step 11: Check Submission in Pabbly Email Marketing Dashboard
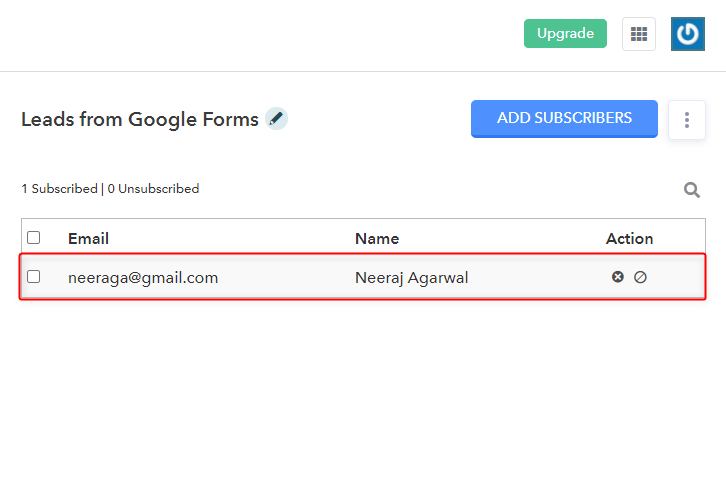
Finally, visit the Pabbly Email Marketing dashboard and check the subscriber list. All the details of the subscriber will appear there automatically. With Pabbly Connect, you won’t have to spend time reading through each response before taking action. It will automatically get added to your subscriber list.
Wrapping Up
This was a step by step guide towards “How to Integrate Google Forms & Pabbly Email Marketing”. As per now, you can clearly see the advantages of using Pabbly Connect over the other automation tools. Also, the service has made it super easy to integrate your favorite apps and services without requiring any technical skills. Just follow the above steps and transfer the data between multiple application.
If you have any queries, do comment us below. We’ll get back to you as early as possible.
You May Also Like To Read:


