Are you looking for an easy method to send data from Google Forms to Automizy and that too in real-time? Well in this article, we will definitely show you a solution to this problem.
Google Forms and Automizy are both impressive tools for any data collector. Through Google Forms, you can receive respondents’ data while Automizy can mail this data to many other contacts.
Now the traditional approach is you receive Google Form responses and manually place this data into Automizy. This works fine for a few respondents but imagine submissions from 100+ respondents!! How can you possibly append these data into Automizy in real-time?
So, we need a channel that automatically brings data from Google Forms into Automizy and that too in real-time. Simply put once a respondent has submitted the form, the data should be immediately reflected in Automizy.
Now, here in this article, we will use an awesome tool called as Pabbly Connect to fetch data from Google Forms and append it in Automizy in real-time. Let me show you how it is done.
Step 1: Send Google Forms Data To Google Sheets
(a) First Build A Google Form
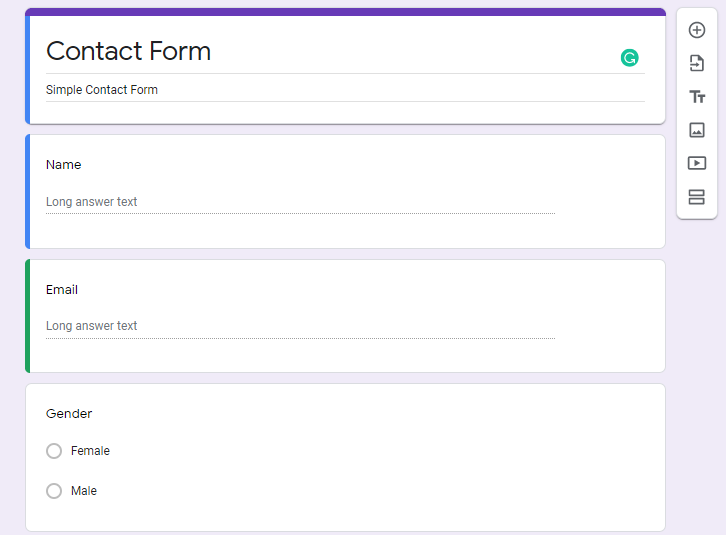
You should build a kickass Google Form but here I am simply creating a generic form with name, email, and radio options like gender.
(b) Submit Your Responses
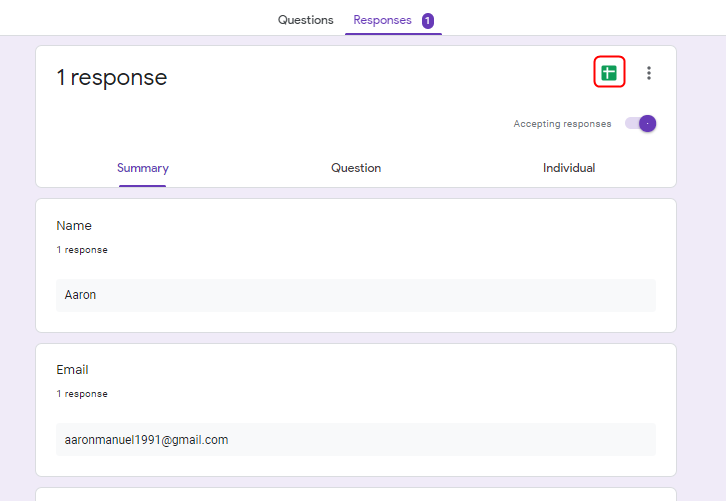
In the preview, fill in the details like your name, email and gender. After filling the responses, press the Google Sheet icon located near the top-right corner of Google Form.
(c) Preview The Google Sheet
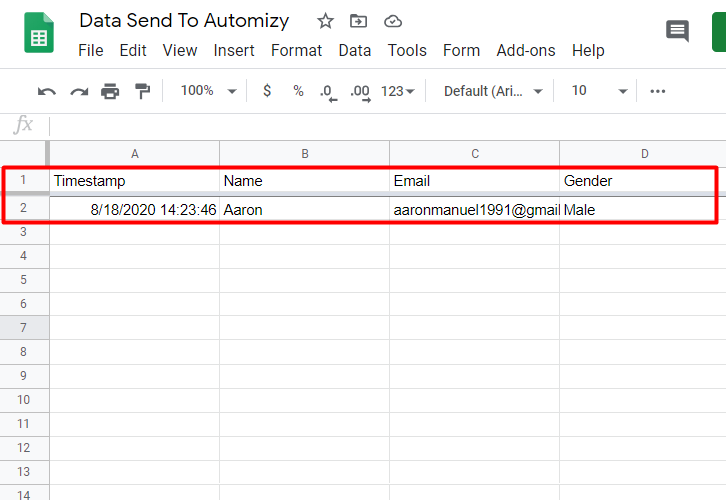
Once, you press the icon, a Google Sheet will be generated, here provide the title of the sheet. As you can see the data from Google form has already been appended into the Google Sheet.
(d) Click Add-ons in Google Sheet
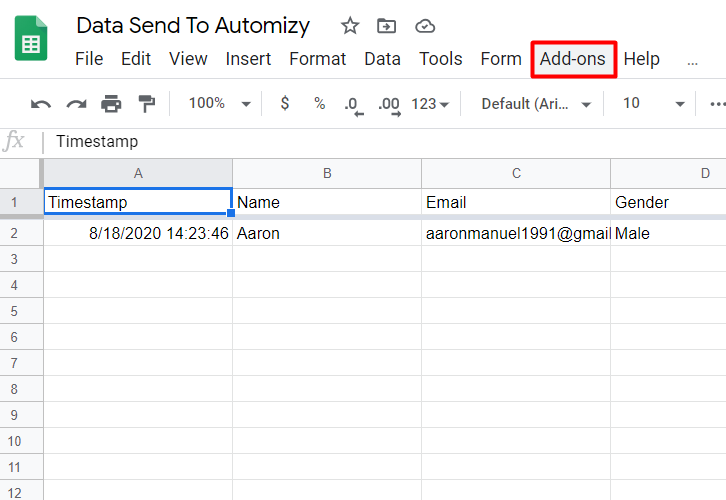
Now we are going to create an Add-on called Pabbly Connect and so in the upper taskbar press ‘Add-On’.
Step 2: Integrate Pabbly Connect With Google Sheet
(a) Now Click on Get Add-ons
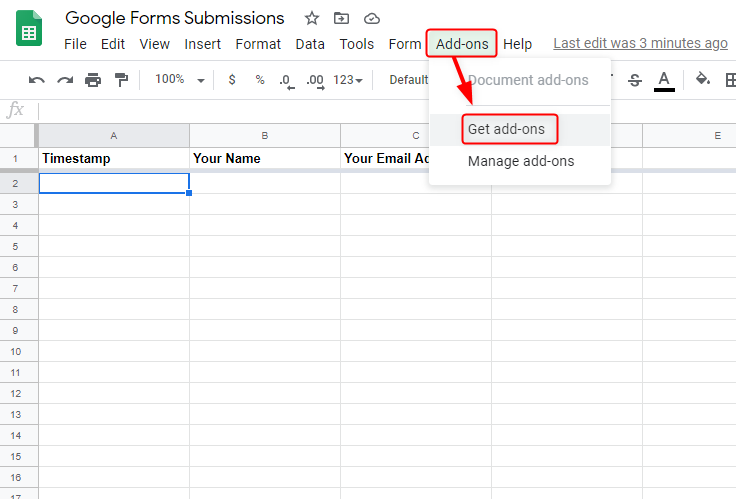
When you click on ‘Add-On’ a drop-down comes out, here press ‘Get Add-On’.
(b) Look For Add-on Called Pabbly Connect Webhooks
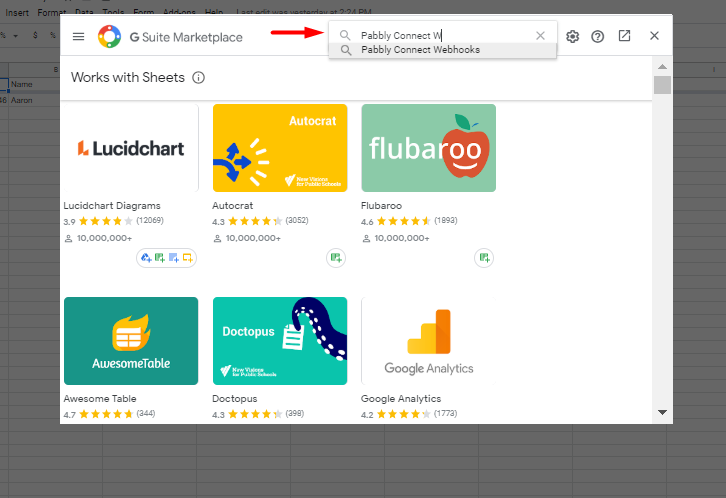
Once you press get add-on a window called G Suite Marketplace appears. In the search tab, look for ‘Pabbly Connect’. If you can find it then click it.
(c) Install Pabbly Connect Webhooks
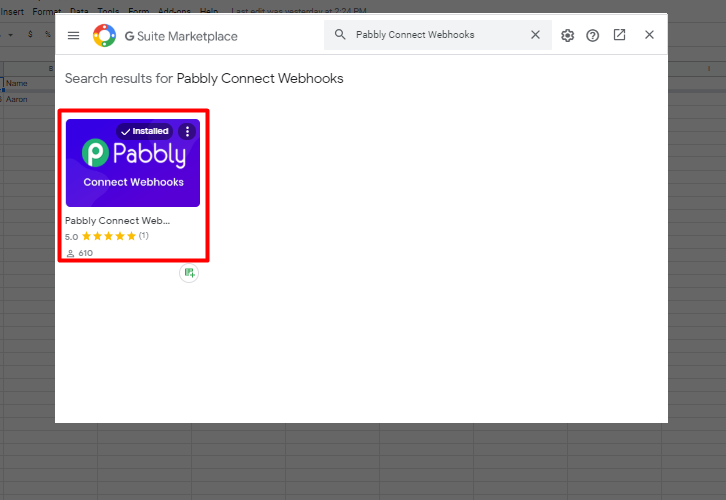
Locate the app, and install it.
(d) Chose Initial Setup
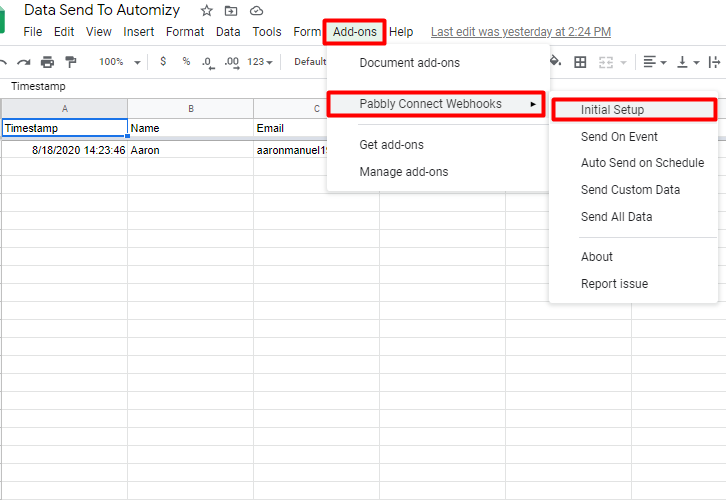
Again click on ‘Add-ons’ in the upper taskbar, a drop-down will emerge. Here click on Pabbly Connect Webhooks. And after clicking on Pabbly Connect Webhooks another side window will emerge, here chose ”Initial Setup”.
(e) Set Trigger Column
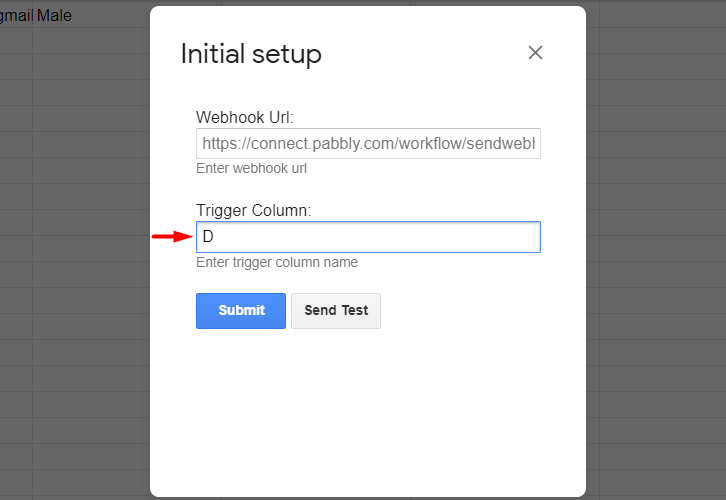
The last data entry column is the trigger column, in my case, it is column ‘D’. It basically means that after the last column has been filled, it will automatically trigger the Webhook Pabbly Connect.
Step 3: Sign into Pabbly Connect

Here sign in to Pabbly Connect to begin the process of data filtration. Now either fill in the details manually or sign-up via your Google account.
Step 4: Access Pabbly Connect

Once you are done with signing up, access Connect (a service of Pabbly for automated integration & data transmission).
Step 5: Create A New Workflow
(a) Click on Create New Workflow

Now, we are going to start a new workflow. So on the right top corner, you will find a button, ‘Create New Workflow’. Click it.
(b) Name The Workflow
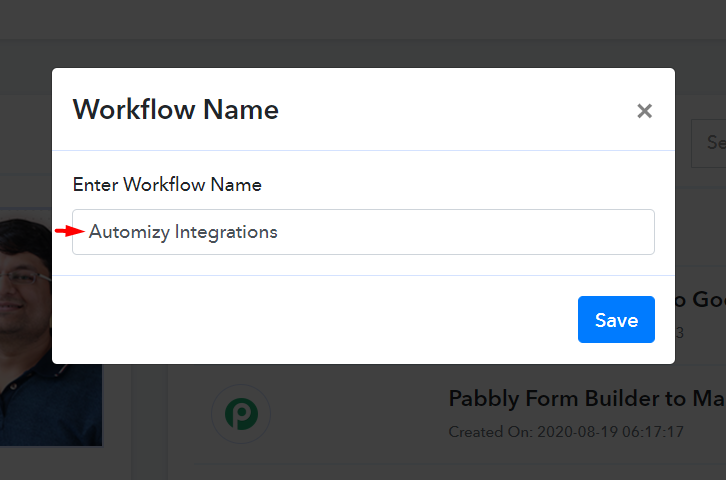
You can give it any name you desire for your workflow. Here I am giving it the name “Automizy Integrations”.
(c) Change The Choose App To Google Sheets
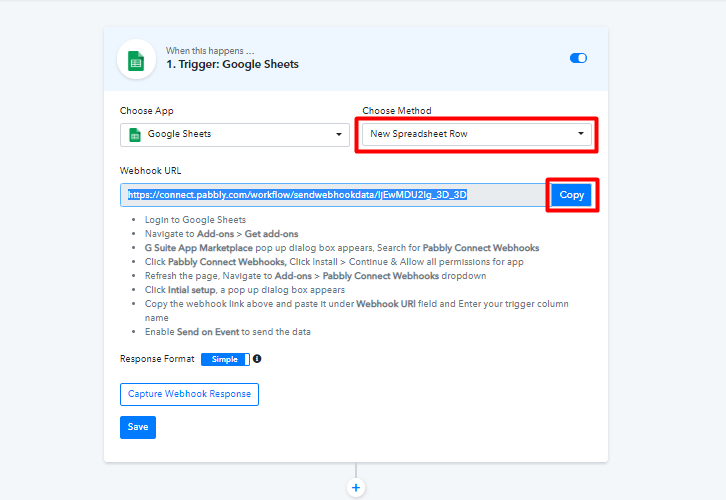
First, change the “Choose App” from Webhooks to Google Sheets and in the “Choose Method” select New Spreadsheet Row. After that, press the blue copy button to copy the URL.
(d) Paste The URL

Now, in the Initial setup window, paste the Webhook URL in the blank provided.
(e) Start Capturing Webhook Response

After pasting the URL in the Initial setup window of Google Sheet, click on the button ‘Capture Webhook Response’. Once clicked, the button turns into blue and starts receiving information.
(f) Click Send Test
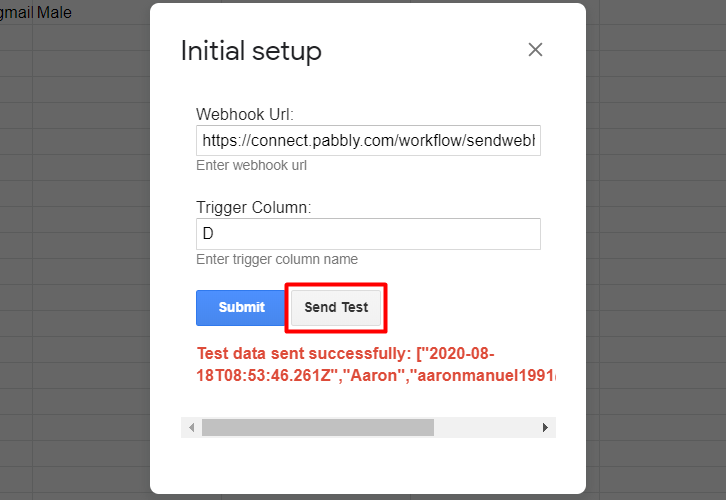
Click on the ‘Send Test’ button, as you can see it will convey a message in red letters that test data has been sent successfully.
Step 6: Integrate Pabbly Connect With Automizy
(a) Create Another Trigger Window
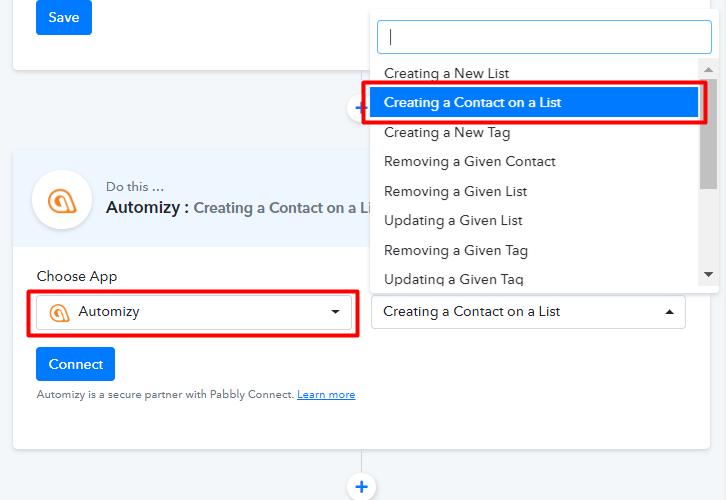
Pressing on (+) button located beneath the trigger window for Pabbly Connect Webhook creates another window. Here you have to repeat the same process as we did with Google Sheets. Choose the app as Automizy and the method as ‘Creating a Contact on a List’. And then click Connect.
(b) Click on API Token
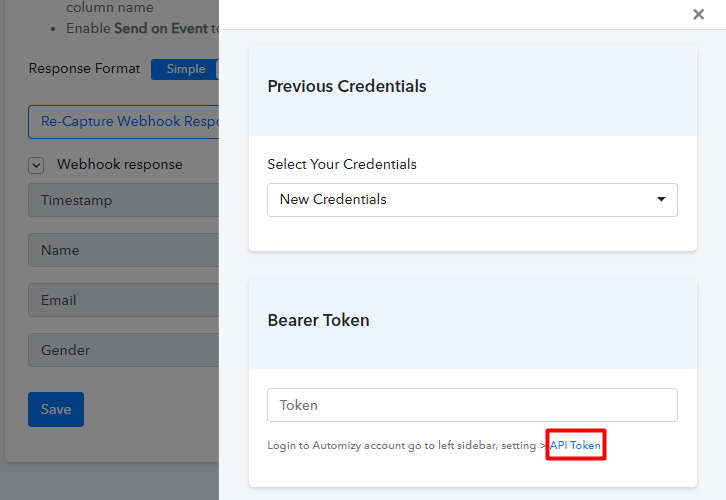
When you click on the connect button, it will create a dialogue box in the right corner. Here at the button click on API Token.
(c) Generate Your API Token
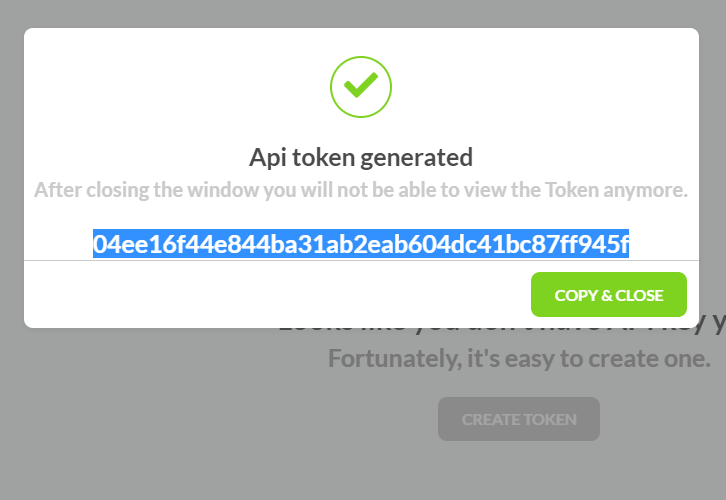
Generate your API Token and press copy & close.
(d) Paste The Token
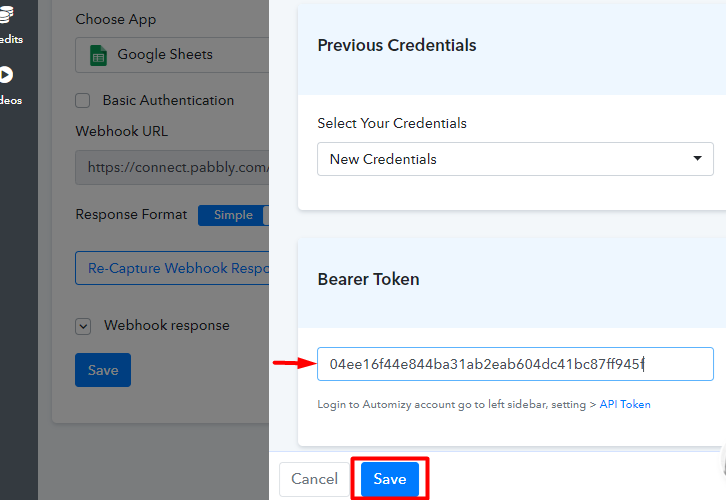
Paste the whole API token in the blank and press the save button.
(e) Create A Contact List In Automizy Dashboard
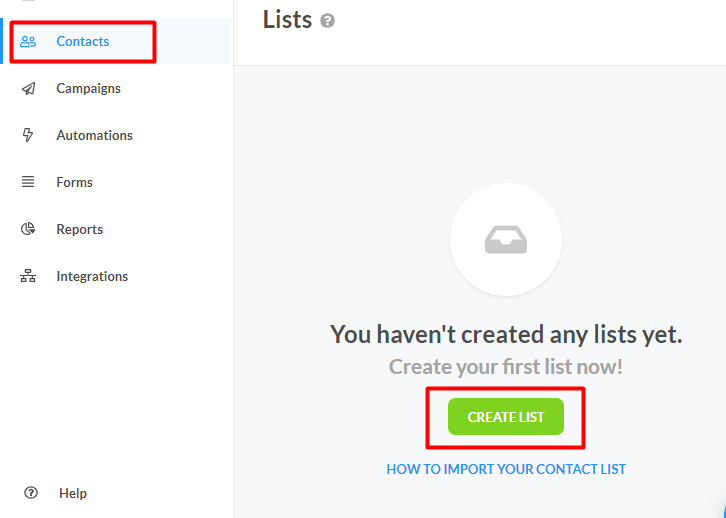
If you have a ready-made list, then it is fine otherwise build a new list by clicking on ‘Create List’.
(f) Fill in The Data
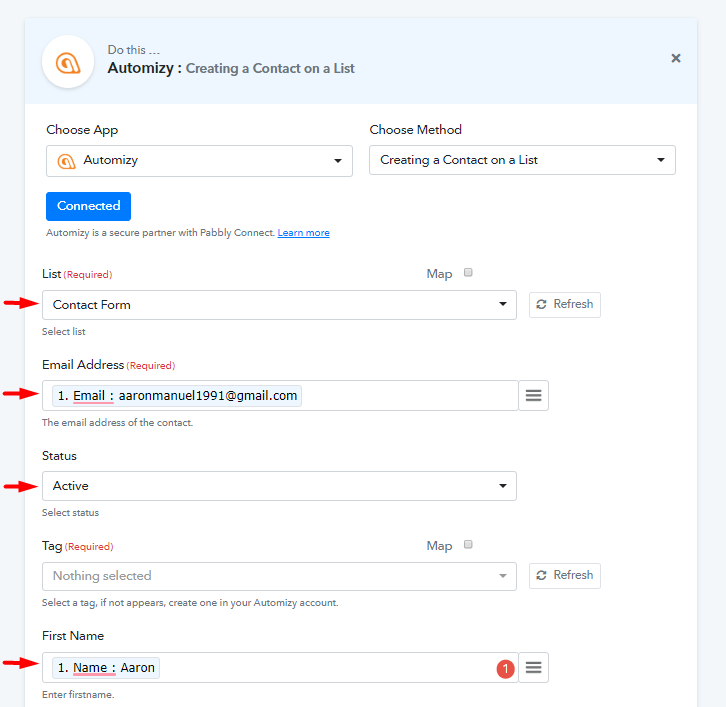
In the trigger window of Automizy, auto-fill in the data fields like First Name, Email, etc.
(g) Press The Save Button
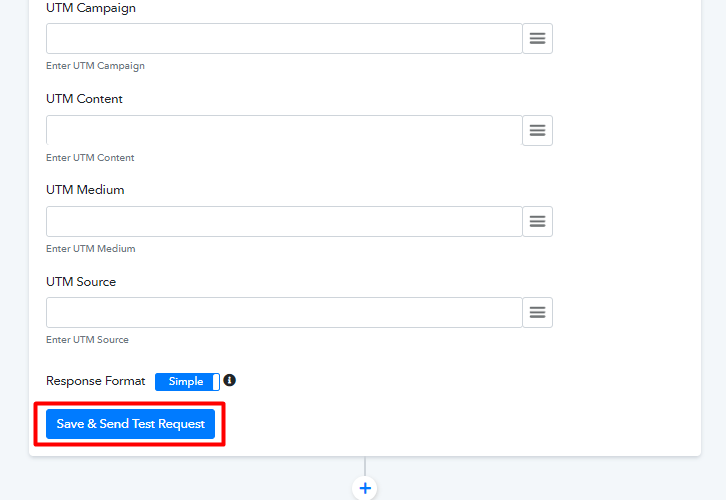
Press ‘Save & Send Test Request’ button.
(h) Preview The API Response

As you can see in the API response, the data has been captured.
(I) Preview The Contact
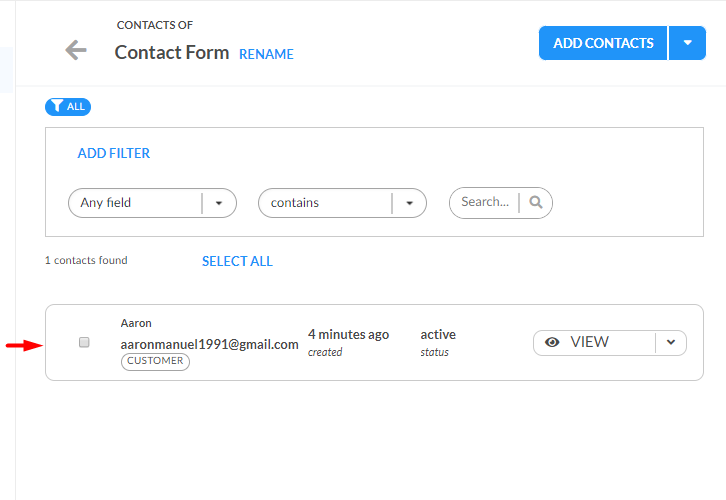
So the first data has been successfully been captured into the contact form.
(j) Press Send On Event
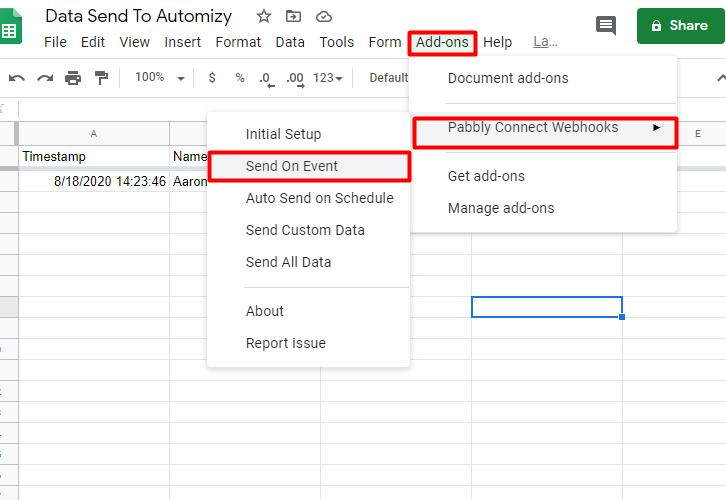
Now for the third time, we will go to ‘Add-on’ click, then to Pabbly Connect Webhooks, and just below the initial setup click on ‘Send On Event’.This will ensure that all responses will be appended into Automizy in real-time.
Step 7: Re-Check Data Collection
(a) Refill Another Response
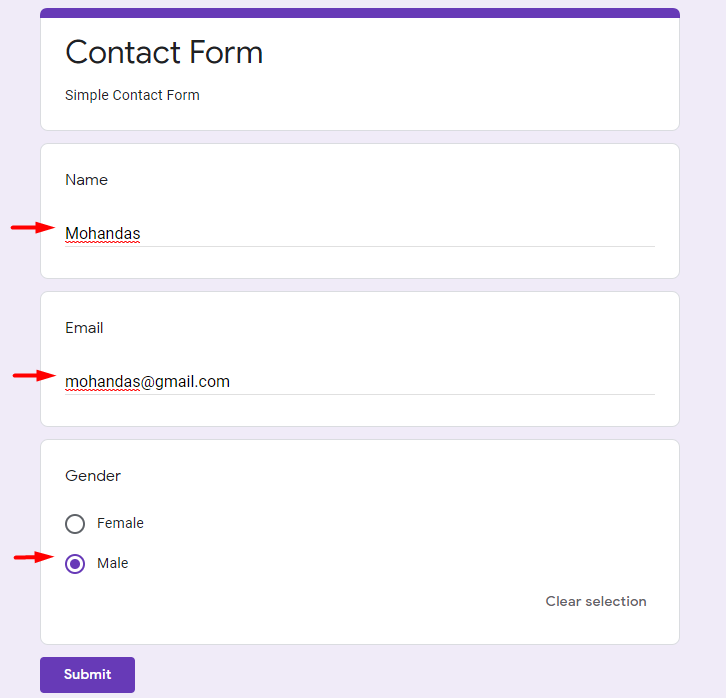
So fill in the Google Form with another set of data, and submit it.
(b) Preview The Data in Automizy
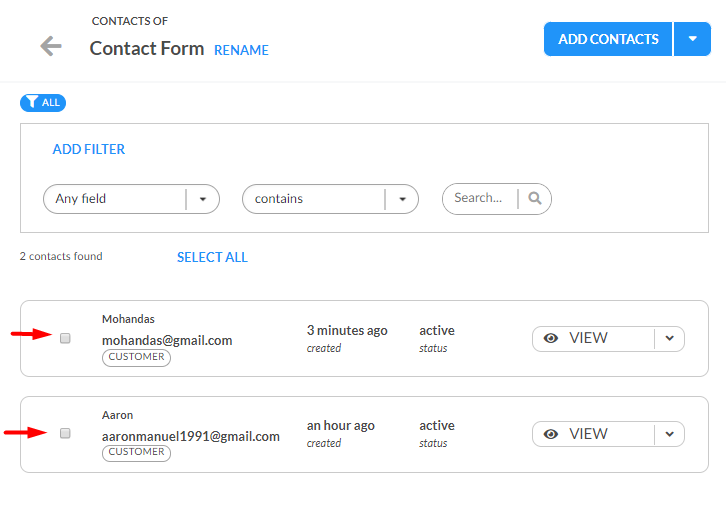
Every time a new respondent fills the Google Forms, its data will be patched automatically into Automizy and that too in real time. Impressive isn’t it?
Conclusion
So, in this article, we learned how Pabbly Connect helps you to send google forms data to Automizy. This is awesome because the people in the mailing list can receive data exactly at the time of submission. Also, you should know that other than integration there are many awesome features in Pabbly Connect, like routers, filters, etc. So do explore and experiment with all the features in Pabbly Connect. Moreover, we also provide excellent video tutorials and documentation to help you with the same.
Furthermore, if you have any queries regarding this article or about Pabbly Connect in general feel free to ask in the comment section below. We will respond as soon as possible.


