Looking for a way to integrate Pabbly Form Builder to Pabbly Email Marketing? If so, then you can take a deep breath as we are going to walk you through the process.
Many times we want entries collected through our forms to get added as a subscriber in the email marketing software. But, adding every single entity manually is a lot of work. And, in such cases software like Pabbly Connect is a great help that offers automation process.
Basically, Pabbly Connect automates the repetitious tasks or works without any technical skill. It allows you to create unlimited workflows to smoothen the tedious or manual process. In simple words, the software connects various applications to automate the data transmission task. Further, it is swamped with instant triggers, formatters, filters, path routers, and much more for effortless data transmission.
Now, let’s move to the part where one can integrate Pabbly Form Builder to Pabbly Email Marketing using tool Pabbly Connect.
So, without wasting any more time let’s jump on the process-
Step 1: Sign up to Pabbly Connect

The very first thing to do is click on the “Sign Up Free” icon on the Pabbly Connect dashboard. Further, either manually enters all the details or sign up using Gmail credentials.
Try Pabbly Connect for FREE
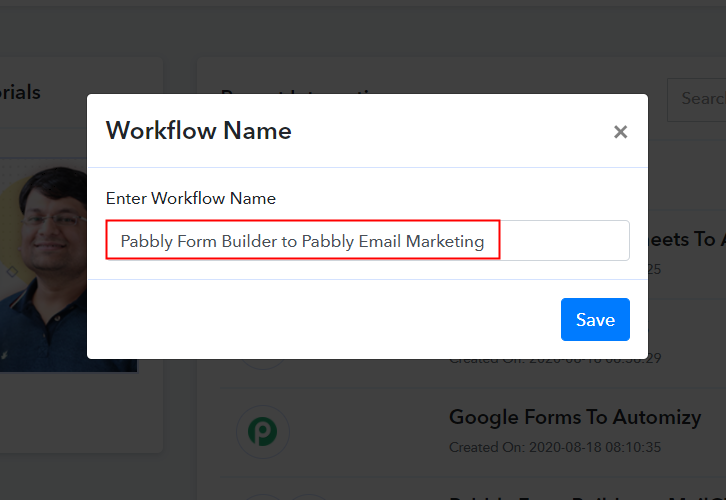
After the sign-up process, Select “Connect” then click on the “Access Now” button. Begin the process of creating a workflow for your automation by tapping the ‘Create New Workflow’ button. Subsequently, add the name of workflow which in our circumstance is “Pabbly Form Builder to Pabbly Email Marketing”. However, you can name the workflow as per your necessities and demand. After creating a workflow, you will have to select the application you want to integrate Here we are going to select an application which in our case is “Pabbly Form Builder”Step 2: Access Pabbly Connect

Step 3: WorkFlow for Pabbly Form Builder to Pabbly Email Marketing Integration
(a) Create New Workflow

(b) Name the Workflow
Step 4: Setting Trigger
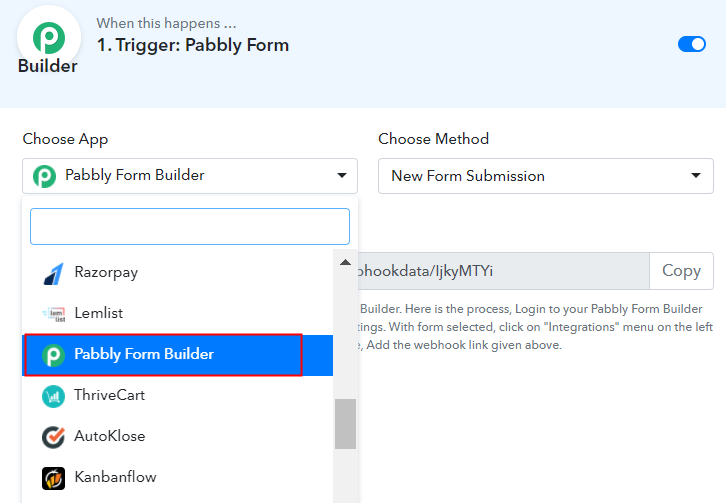
(a) Select Application you want to Integrate
(b) Copy the Webhook URL
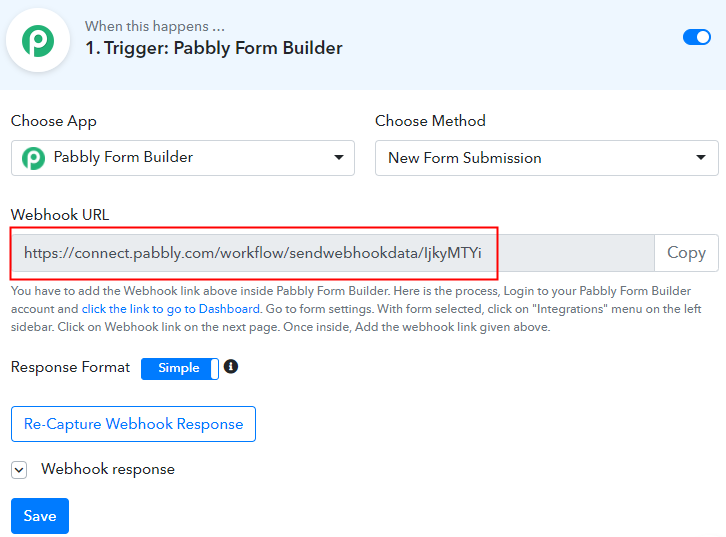
After creating a workflow, you will have to choose the trigger/application you want to integrate, in our case it is “Pabbly Form Builder”. Further, the next step is to copy the webhook URL which is appearing on the dashboard. Then, click on the “Capture Webhook Response”.
Step 5: Paste the Webhook URL in Pabbly Form Builder
To connect with Pabbly Form Builder, you gotta paste the copied Webhook URL in your form builder dashboard.
(a) Click on Integration Option
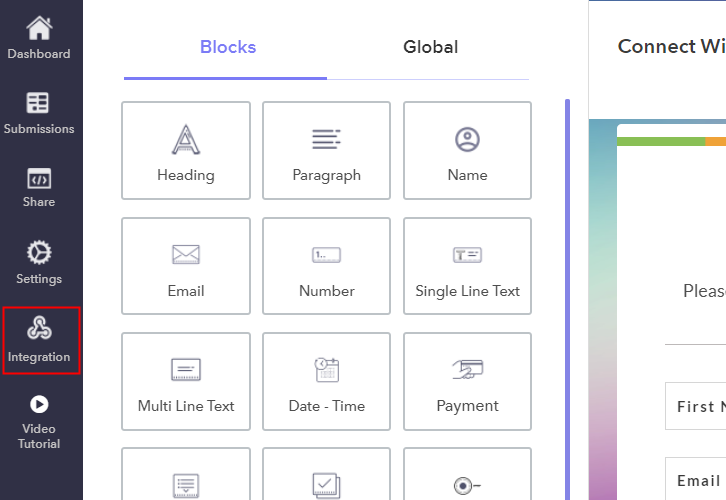
Either create a new form or select pre-built templates. Here we are using the already created form “Connect with us”. Simply click on the “integration” option of the form.
(b) Click on Webhook Option
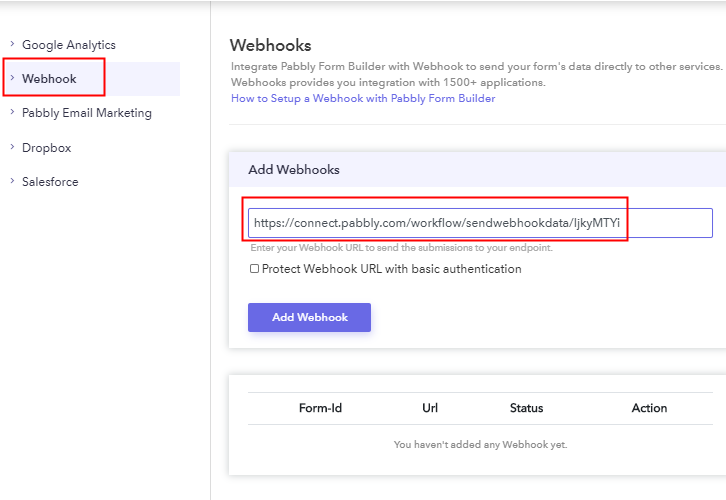
Next, in the integration section, click on the Webhook option and then paste the copied URL.
(c) Fill the Form
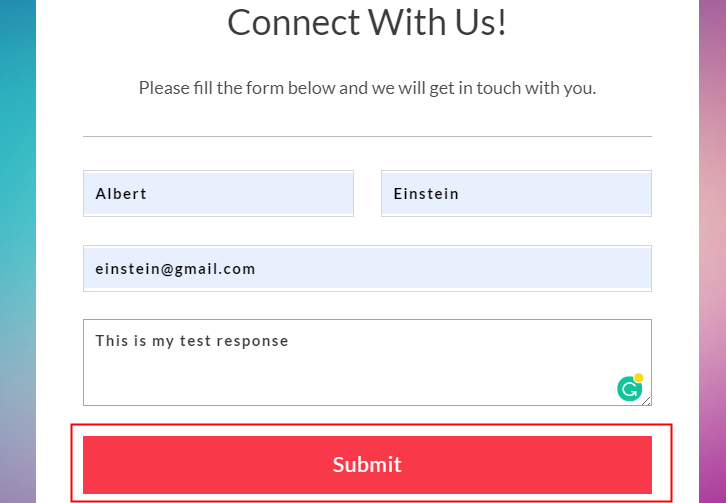
Fill all the details and then click on the “Submit” button.
Step 6: Test the Submission in Pabbly Connect Dashboard
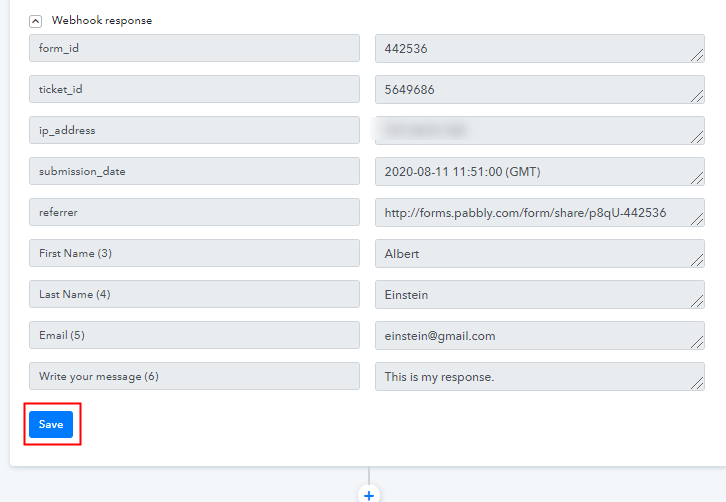
As soon as you fill the form the entry will appear on the “Pabbly Connect” dashboard. Then, click on the “Save” option.
Step 7: Setting Action
After setting a trigger, you will have to select the action for which you have to select the application you want to integrate.
(a) Select Application you want to Integrate
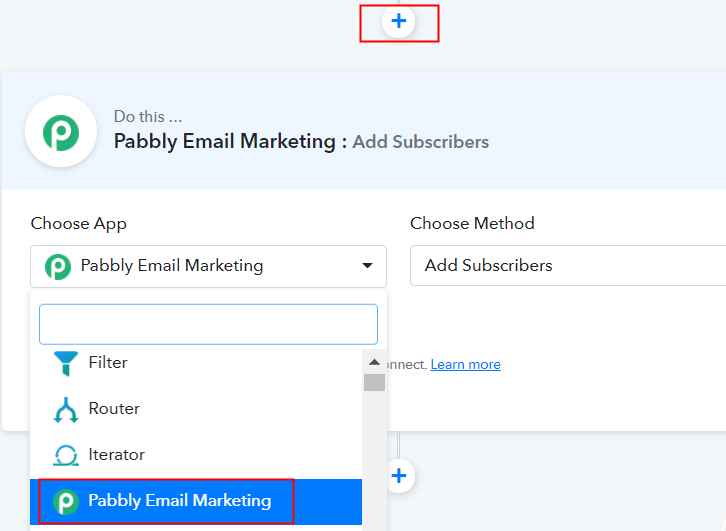
Click on the “+” icon to add an action for your trigger. In our case, it is “Pabbly Email Marketing”. Then, select the “Add subscriber” option.
(b) Click the Connect Button
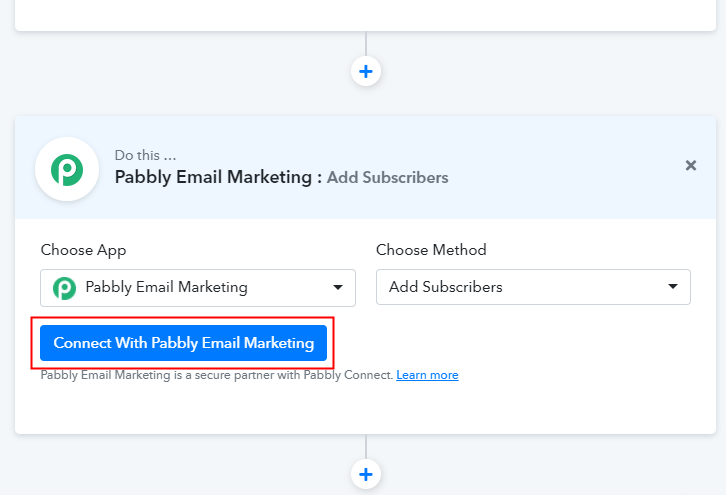
After making all the necessary changes, click on the “Connected” button. Further, it will ask for “Bearer Token”, for which you have to log in to Pabbly Email Marketing account.
Step 8: Connecting Pabbly Email Marketing to Pabbly Connect
To copy the “Bearer Token”, you have to log in to your Pabbly Email Marketing account.
(a) Click on Integrations
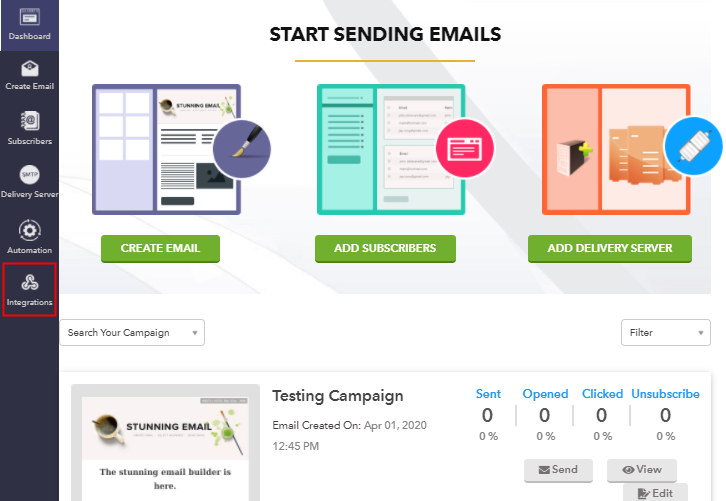
Sign to your Pabbly Email Marketing account and select the “Integrations” option from the tab on the left. Then, further, click on the developer API option.
(b) Copy Bearer Token
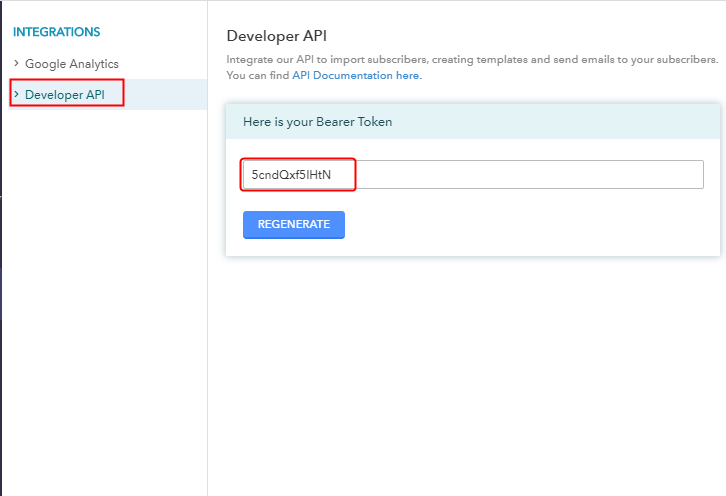
Now copy the “Bearer Token” code provided as shown in the above image.
(c) Paste Bearer Token in Pabbly Connect Dashboard

To paste the copied code, go back to the “Pabbly Connect” dashboard. As soon as you click on the “Connected” button, the page will appear with the option “New Credentials”. Below on this page, you will see the option of “Bearer Token”, just paste your copied token there.
(d) Add Field Data
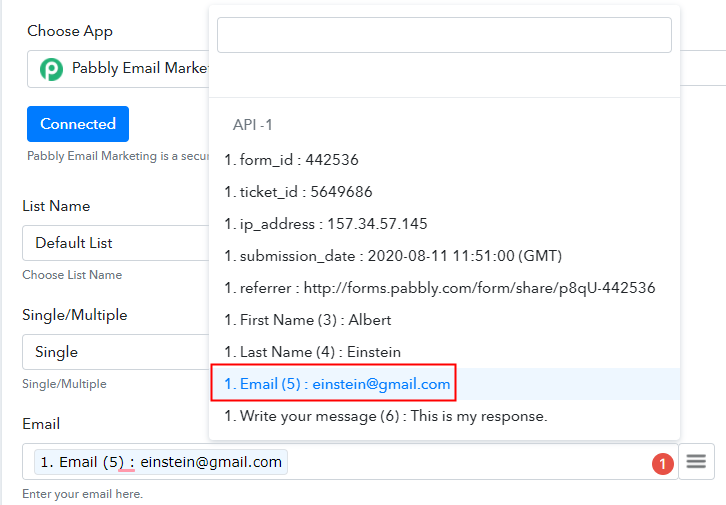
Now, as you can see “Default List” is appearing in the “List Name” field. Now, all you have to do is add the required field from drop-down such as for the email field, select the email option, and for name field select the name option.
(e) Save and Send Test Request
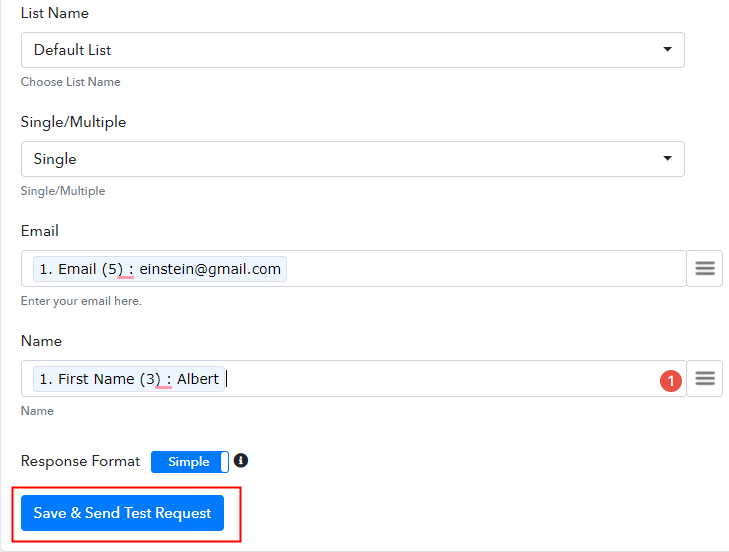
After making all the changes, save the setting and then “Send Test Request”.
Step 9: Check Submission in Pabbly Email Marketing Dashboard
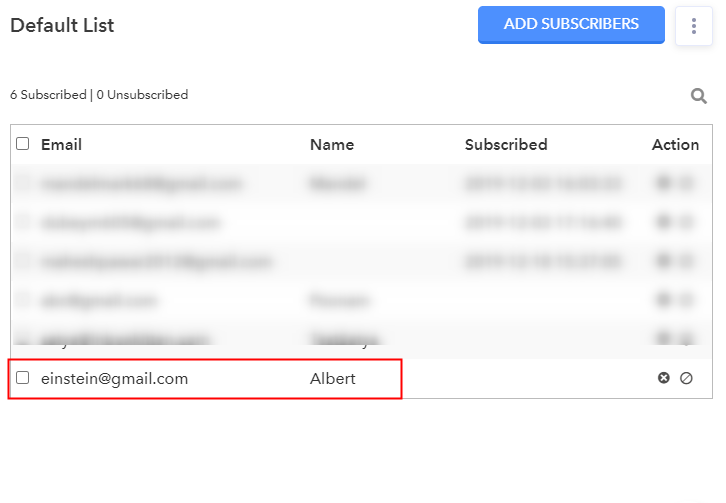
Lastly, when you check the default subscriber list in Pabbly Email Marketing, your entry will automatically appear there. This is a one-time process, after that, all the form submissions will automatically get added to your subscriber list.
Conclusion –
Alright! This is our catch on “How to Integrate Pabbly Form Builder to Pabbly Email Marketing”. All you have to do is follow all the above-mentioned steps and you’re good to go. Through Pabbly Connect, one can connect unlimited premium applications. Just integrate the webhook into your software and then don’t worry about anything else.
Further, in case you have any queries regarding the same, you can always contact the support staff of the software.
So, what are you waiting for? Go and try this software out.


