In this article, we are going to integrate Instamojo to ActiveCampaign. Instamojo is an online payment software using which you can sell different products online and ActiveCampaign is an email marketing service. And we’ll be connecting these to application together using Pabbly Connect so that, whenever a sell happens in Instamojo the information will be automatically transferred to ActiveCampaign in real-time.
Pabbly Connect will work as a switch in between these two services. Moreover, it is capable of creating an unlimited number of workflows, apply formatters, filters, routers etc to send or receive data to various integrated services. You can also make multi-step calls & set-up multiple triggers and action in minutes.
So, let’s get started with the step by step procedure to integrate Instamojo to ActiveCampaign using Pabbly Connect.
Step 1: Sign up to Pabbly Connect

Firstly, visit the Pabbly official website and click on the ‘Sign-Up Free‘ button. On the signup page, either use your existing Google account or manually fill out the registration form details to get in.
Step 2: Access Pabbly Connect

Once you successfully sign up, click on the ‘Access Now’ button next to the Pabbly application ‘Connect’.
Step 3: Create a New WorkFlow
(a) Click over the Create New Workflow Button

Start with creating a workflow to integrate Intsmojo to ActiveCampaign and hit the ‘Create New Workflow’ button.
(b) Name the Workflow
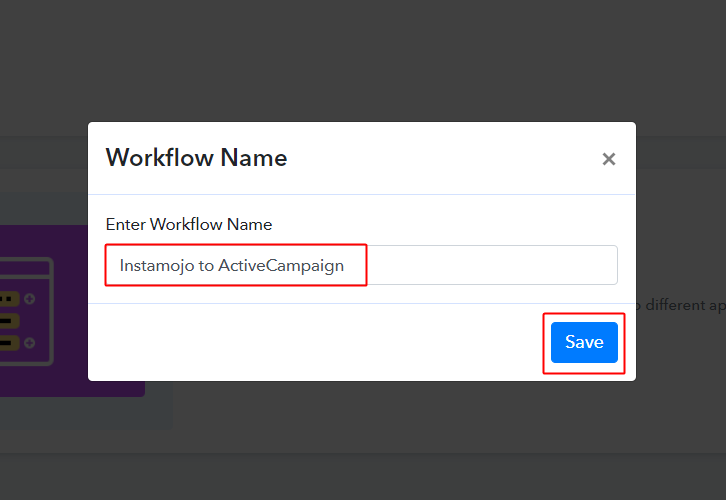
Name the Workflow as per your need (for instance: Instamojo to Active Campaign’) and hit the ‘Save’ button.
Step 4: Set-up A Trigger to Integrate Instamojo to ActiveCampaign
(a) Select Application to Integrate as Instamojo
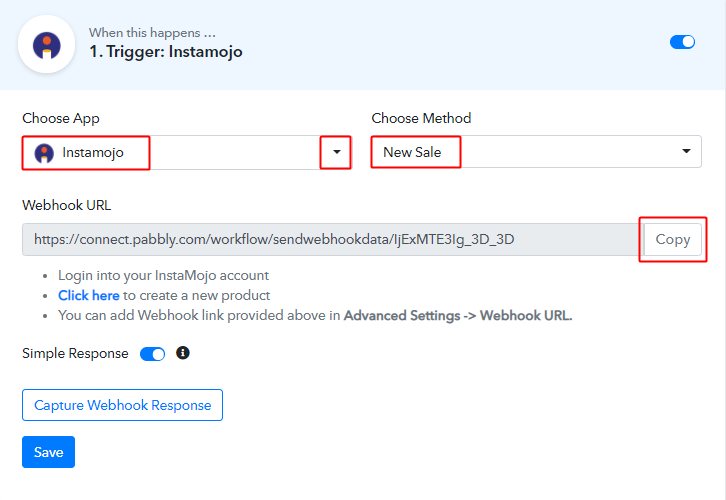
When you save a workflow after naming it, a trigger window will open up asking for setting up a trigger condition. Select the app to integrate as Instamojo from the ‘Choose App’ field from the drop-down.
Make sure the method is ‘New Sale’ here.
Finally, copy the Webhook URL by clicking the button named ‘Copy’.
(b) Go to your Instamojo Account > Add Product

Now, to complete setting up the Instamojo trigger, you must paste the copied Webhook URL (from Pabbly Connect) in an Instamojo product.
For doing this, you must have a product. If you already have a product then simply edit it.
And if you haven’t created any product yet then go to your Instamojo account dashboard & click the ‘Add Product’ button.
(c) Fill Up the Product Details
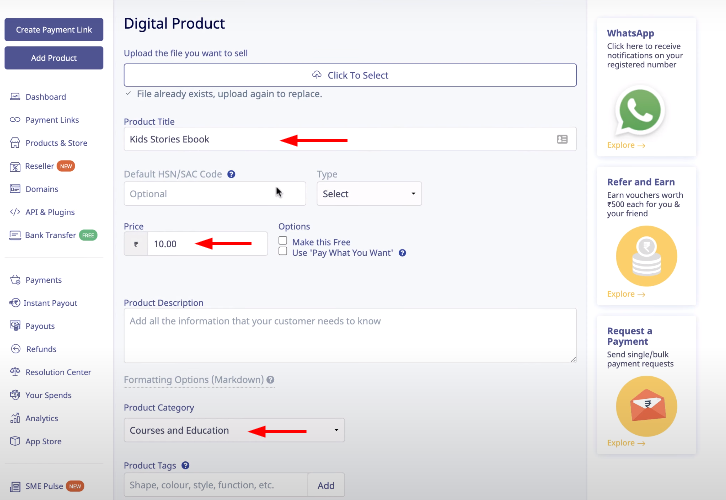
Now, fill in the product details such as the product title, its price, product category, product image etc.
(d) Paste the Copied URL on Instamojo
As all the required product information are filled until now, we can move forward the integration.
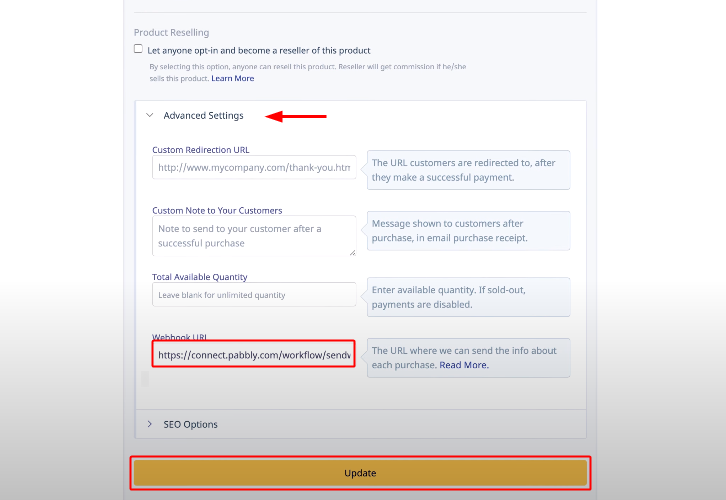
So, click on ‘Advanced Setting’ available on this same page and paste the copied Webhook URL (from Pabbly Connect) in the field named as ‘Webhook URL’.
Lastly, save the product settings.
Step 5: Make a Purchase to Test the Trigger’s Working
To test whether the trigger that we just set-up is working as expected or not, we can make a purchase. For this, follow these steps.
(a) Copy the URL of the Product Page
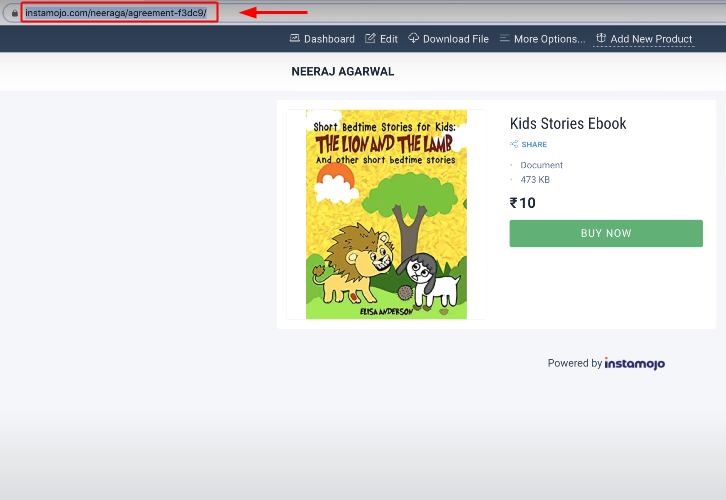
Make sure whether the product link is working properly.
For this, copy the product URL from the address bar of your browser.
(b) Paste the Copied Product Page URL on Incognito Window
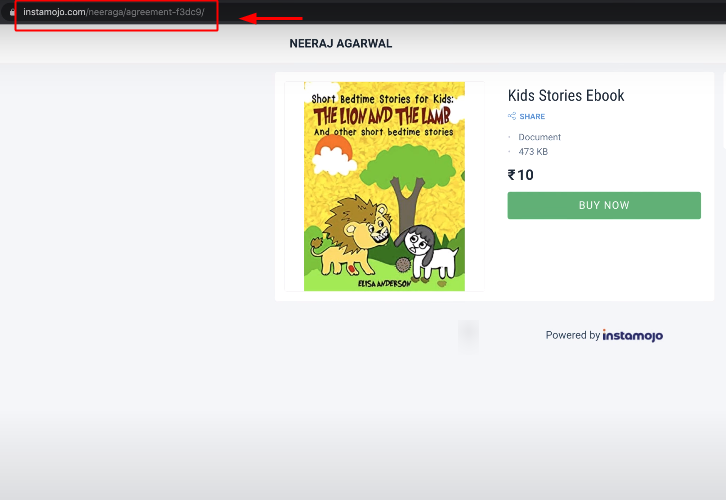
Now, paste the copied product URL in an Incognito window.
If the product is visible the link is working fine else there is some error in creating the product.
(c) Go Back to Pabbly Connect & Capture Webhook Response
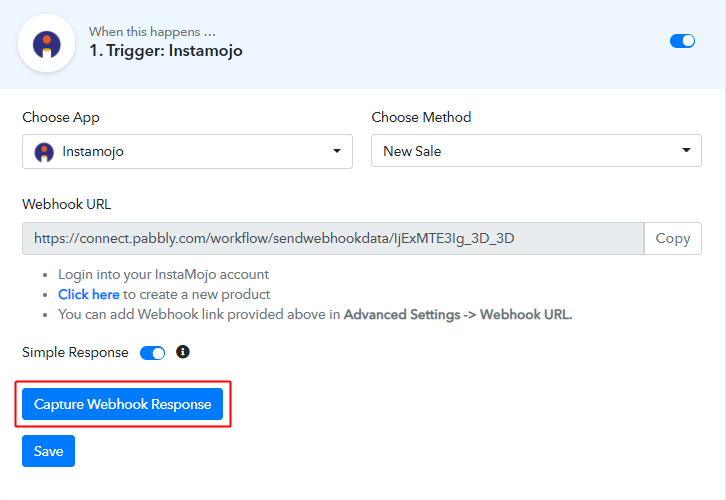
Now, go back to the Pabbly Connect trigger window and hit ‘Capture Webhook Response’ button.
This is to alert the trigger for receiving the response.
(d) Click the Buy Now Button on Instamojo
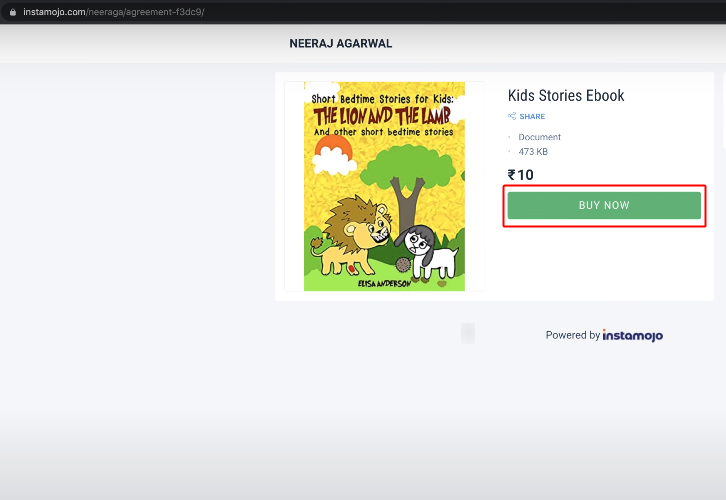
Next, you will have to make an actual payment for setting up the trigger. So, click the ‘Buy Now’ button of the created product.
(e) Make a Purchase
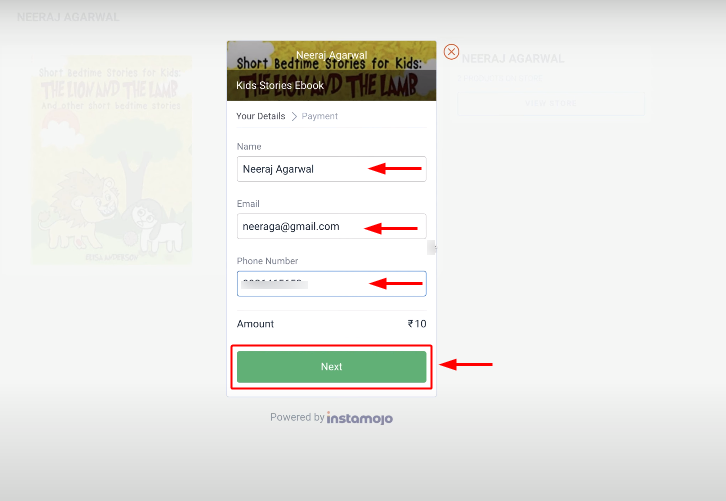
Fill out the entries in the checkout page and click ‘Next’.
(f) Make Payment
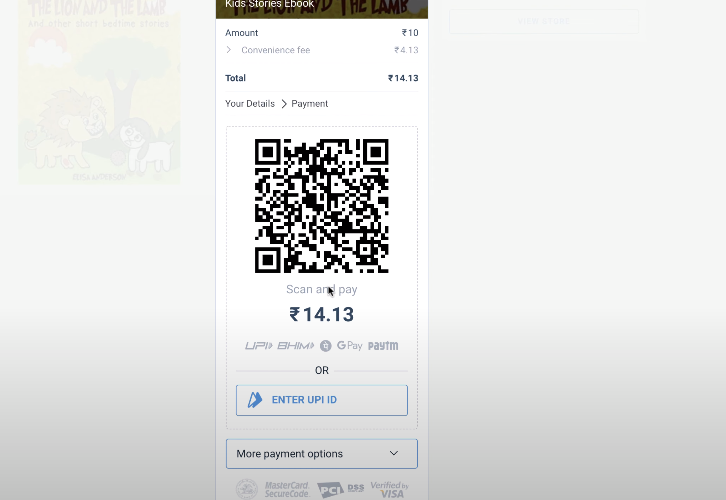
Complete the purchase as directed by Instamojo.
(g) Check the Payment Success
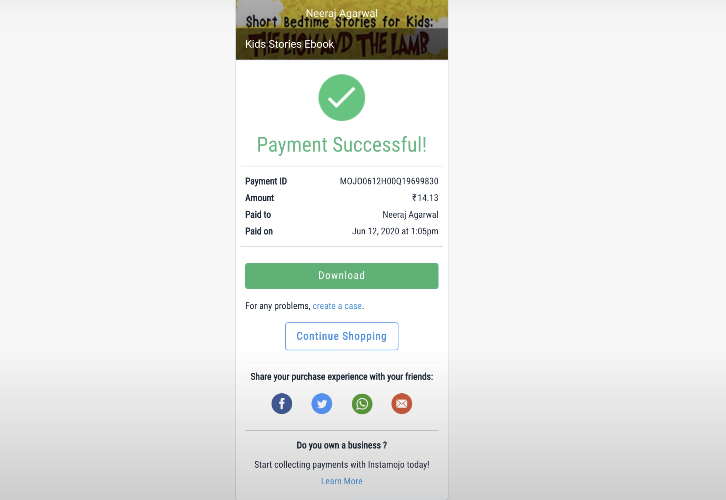
Check the successful payment response after your purchase.
(h) Check the Webhook Response
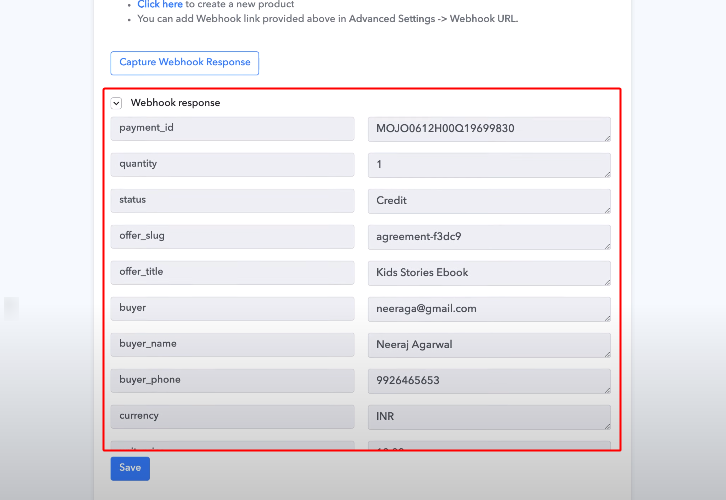
Go back to the Pabbly Connect trigger and check your purchase response that has been recorded.
Step 6: Set-up an Action to Integrate Instamojo & ActiveCampaign
Up to step 5, our trigger condition is ready and working perfectly as expected. And from now on we can start working on the action step.
(a) Select Application to Integrate as ActiveCampaign
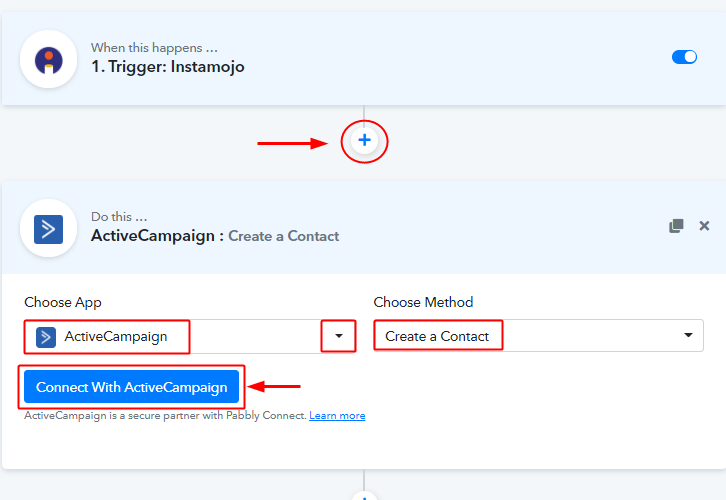
First, click the plus (+) button that is present at the button of your trigger.
In the action window, select the app to integrate as ActiveCampaign from the ‘Choose App’ field drop-down.
Make sure the method here is chosen as ‘Create a Contact’.
And hit the ‘Connect with ActiveCampaign’ button lastly.
(b) Copy the ActiveCamapign API Key
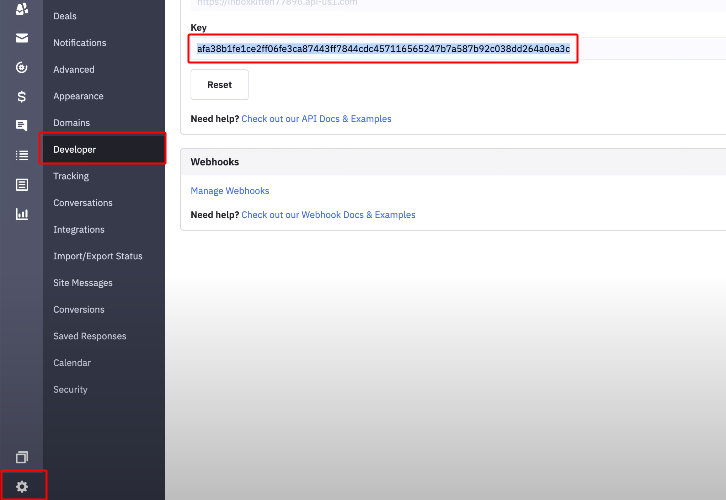
To complete the ActiveCampaign integration you must bring the API Key and URL from ActiveCampaign and paste them in Pabbly Connect action step.
For this, first, go to your ActiveCampaign account and click the gear icon (or settings) available at the bottom left corner with a tooltip ‘Settings’.
After clicking the setting button another menu opens up. Hit the ‘Developer’ option from the available menu options.
Lastly, manually select and copy the API ‘Key’ mentioned in here.
(c) Paste the Copied ActiveCampaign API Key under Pabbly Connect
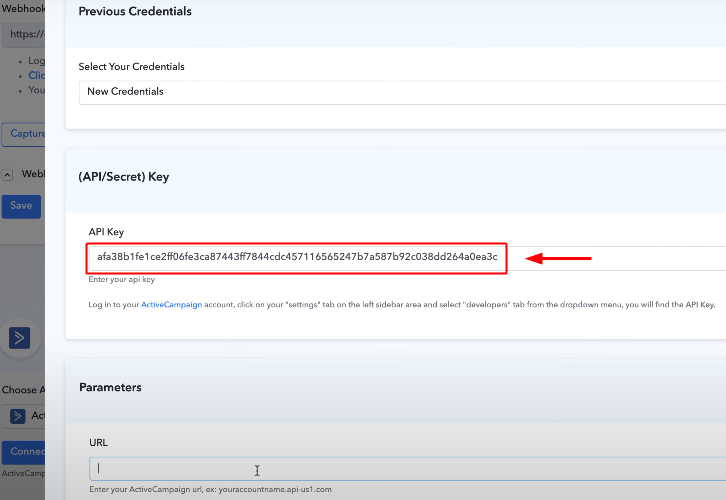
Come back to the Pabbly Connect ActiveCampaign action integration page and paste the copied API Key under the field named ‘API Key’.
(d) Copy the URL form ActiveCampaign without https://
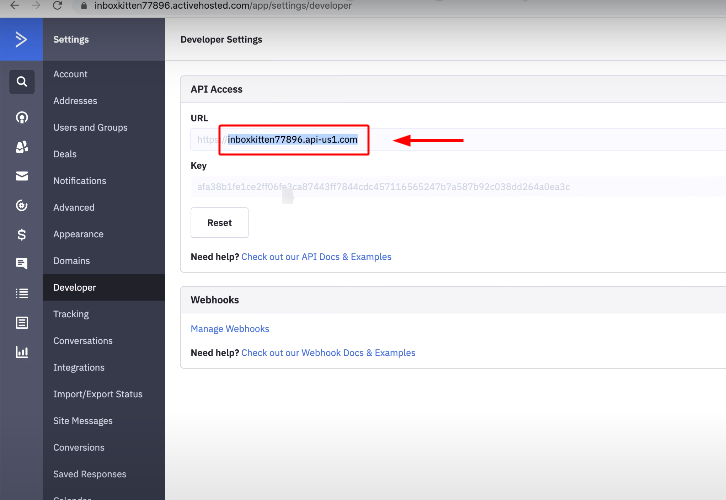
Then, go back to ActiveCampaign and copy the URL given above the key.
Remember, don’t copy the ‘https://’ part from the URL.
(d) Paste ActiveCampaign API URL in Pabbly Connect Action
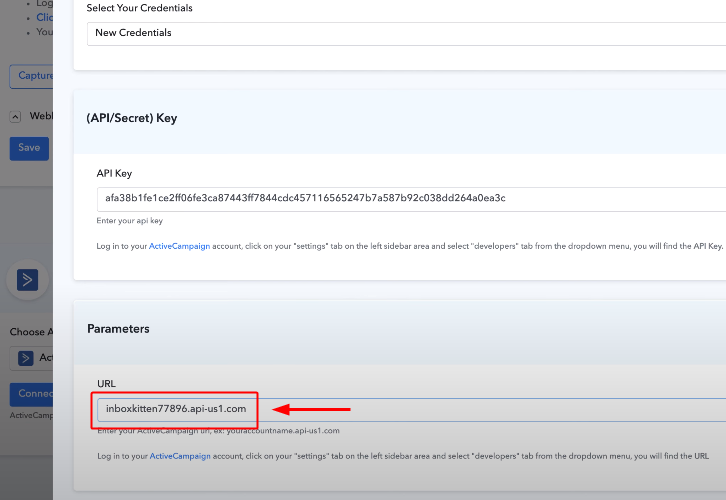
Now, come back on Pabbly Connect and paste the copied URL under the field named URL.
(e) Save All the Settings
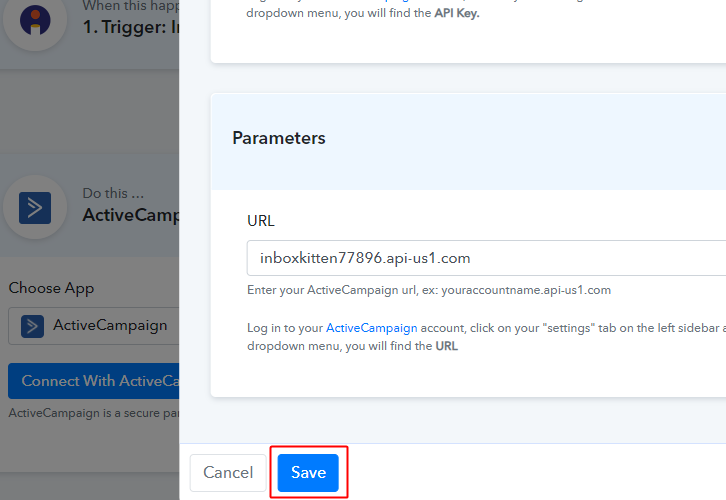
Finally, click the ‘Save’ button to save the settings that you just did.
Step 7: Map the Values
Once the ActiveCamapign integration is done perfectly, the action step starts showing the field values to carry further. You can map the values from your Instamojo response to send to ActiveCampaign.
(a) Map the FirstName
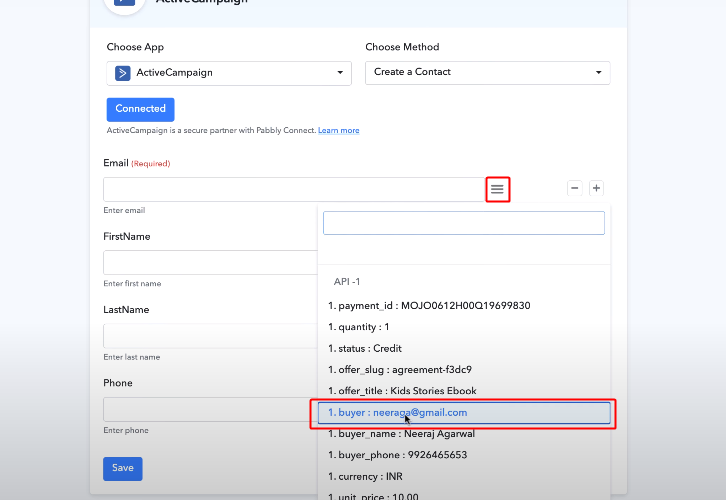
Click the menu icon (three verticle line) next to a field and select the respective value from the response options in the drop-down.
Similarly, map all the other field values carefully.
(b) Save the Action
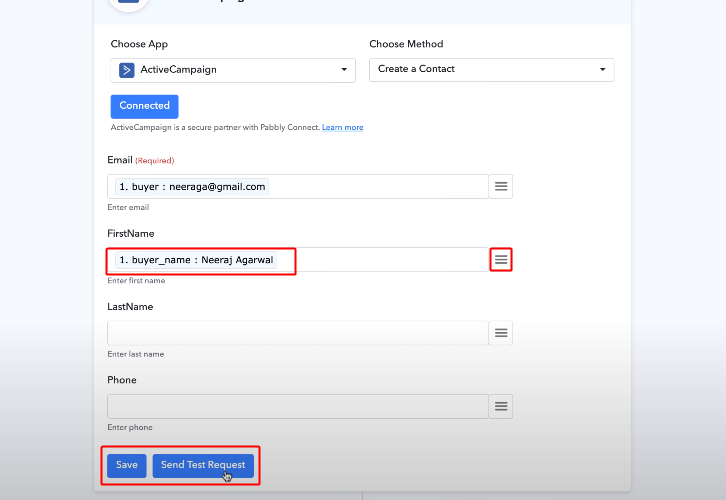
After mapping all the keys and values that you want to send to ActiveCamapign, click the ‘Save & Send Test Request’ button.
You can check the response below your request within some time.
Step 8: Check the Final Response in your ActiveCampaign Account
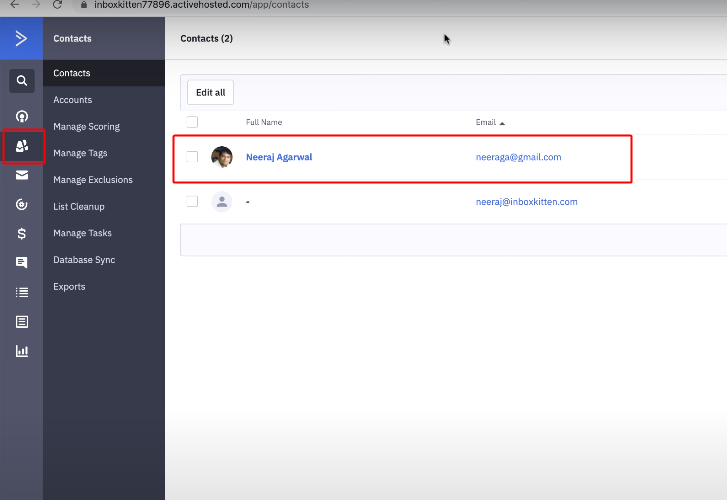
To check the response of the complete integration set-up that you just did, head back to your ActiveCampaign account and click on ‘Contacts’ in the verticle menu. Check the response of the integration, you can see all the values that you mapped are visible in here.
This means the integration is working as expected & will work the same for all further sales on the Instamojo product.
Wind-Up
Well, this is ‘How to integrate Instamojo to ActiveCampaign using Pabbly Connect. Consequently, after completing this procedure, you will end up getting sales data from Instamojo to ActiveCamapign smoothly.
For any further queries, do comment below.


