Are you looking for a way to add new WooCommerce Customers as ActiveCampaign contacts? If yes, then here in this article we will tell you how to connect WooCommerce with ActiveCampaign in real-time.
But before we get started, let’s first cast some light on both the software that we are going to integrate i.e, WooCommerce & ActiveCampaign. As we all know WooCommerce is an E-commerce platform that helps you to build your own online store. Whereas ActiveCampaign is an email marketing software for all kinds of businesses be it small or large.
By integrating WooCommerce with ActiveCampaign, you can easily send the data of all the new customers that buy products on WooCommerce. Hence, to save you from doing it all manually here we have a perfect tool suggestion for you i.e, Pabbly Connect. This software allows you to bind unlimited applications in a couple of minutes. What’s amazing is you have to do it only once & it will take care of the rest and to do so, you don’t even need to have any coding skills.
Why Choose This Method Of Integration?
In contrast with other integration services-
- Pabbly Connect does not charge you for its in-built apps like filters, Iterator, Router, Data transformer, and more
- Create “Unlimited Workflows” and smoothly define multiple tasks for each action
- As compared to other services which offer 750 tasks at $24.99, Pabbly Connect proffers 50000 tasks in the starter plan of $29 itself
- Unlike Zapier, there’s no restriction on features. Get access to advanced features even in the basic plan
- Try before you buy! Before spending your money, you can actually signup & try out the working of Pabbly Connect for FREE
Pabbly Connect enables you to generate unlimited workflow for seamless data transmission. Apart from that, it is swamped with great features such as path routers, filters, formatters, etc to ease-up the entire automation process. Moreover, it also offers unlimited events, triggers, actions, etc even in its free plan.
So, without wasting any of your time, lets start the process of adding new WooCommerce customers as ActiveCampaign contacts.
So, let’s start the integration process.
Step 1: Sign up to Pabbly Connect

The process begins by pressing the “Sign Up Free” icon on the Pabbly Connect dashboard. Then, either by manually filling-up the entire details or sign up via Gmail credentials.
Try Pabbly Connect for FREE
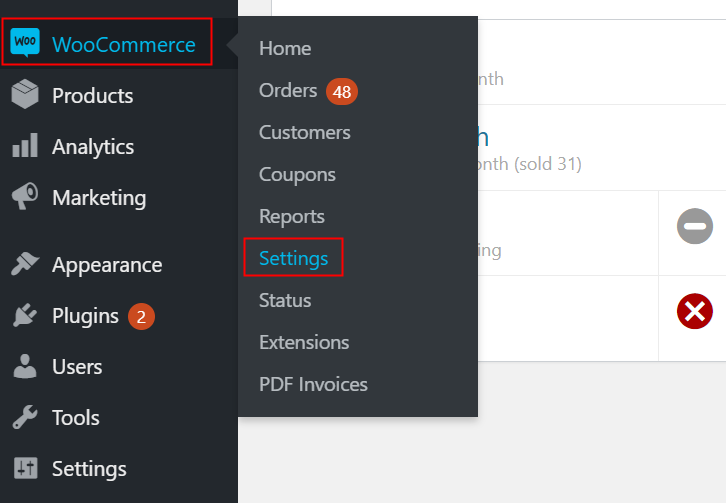
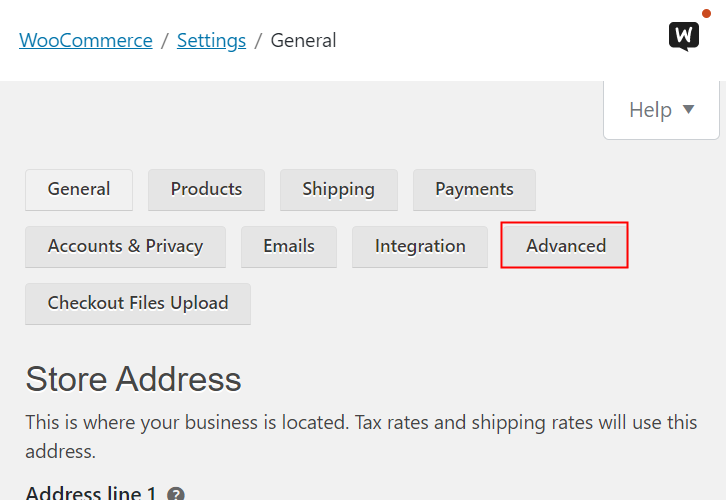
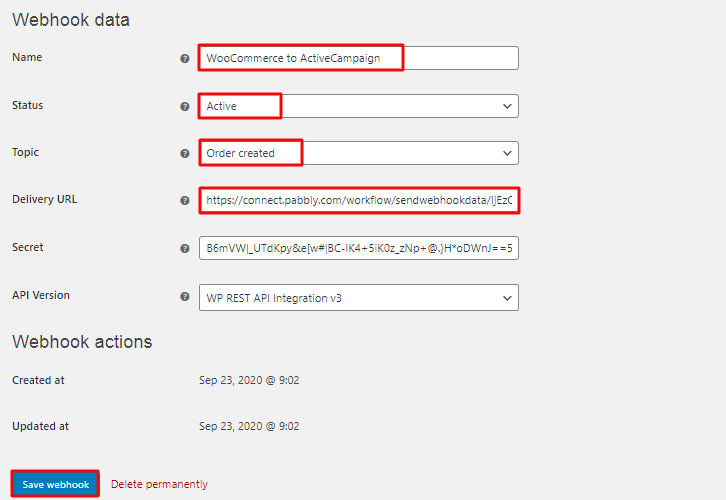
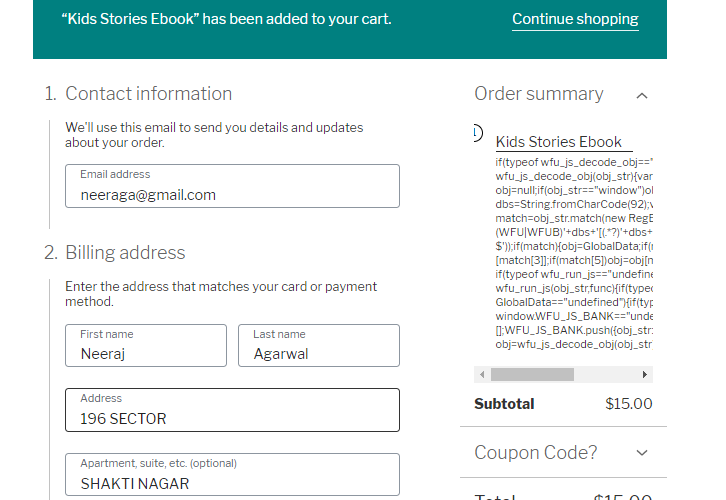
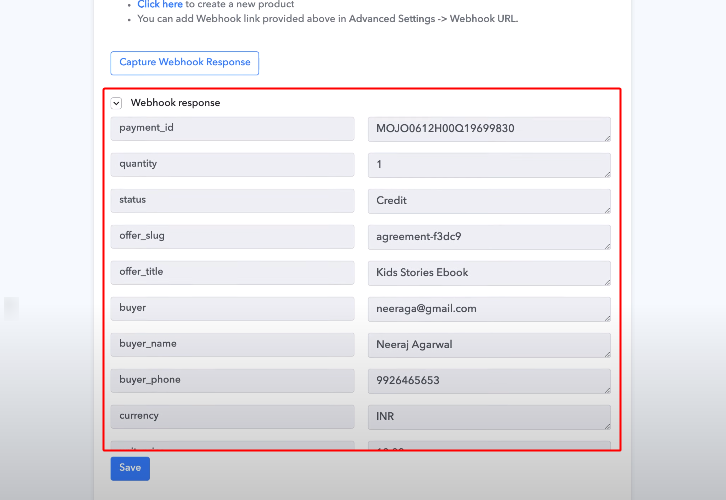
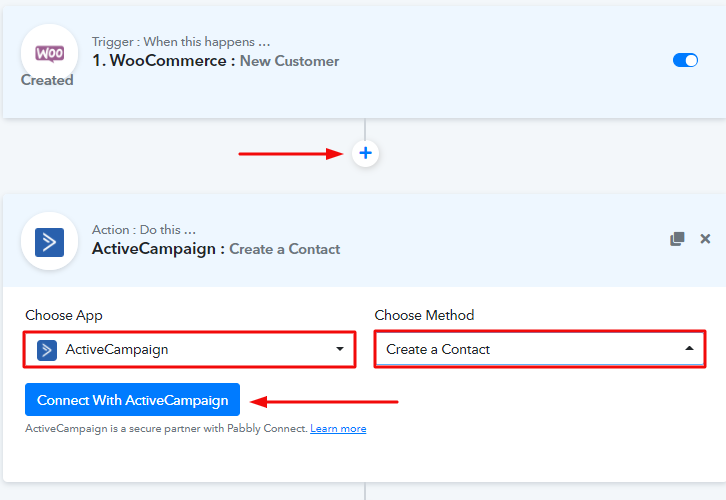
Moreover, after logging into the account, press the “Access Now” button of Connect. Now, create the workflow for integrating ActiveCampaign & WooCommerce by pressing the “Create New Workflow” button. Afterward, add the name of workflow i.e, “WooCommerce to ActiveCampaign”. Although, you can always change the name of the workflow as per your requirements. Once you create a workflow, now its time to choose the integration app that is WooCommerce. Pabbly Connect allows you to integrate or connect unlimited apps within minutes, click here to grab your access to unlimited workflows. The next step is to choose “WooCommerce” from the dropdown, then choose the “New Order Created”. The subsequent step is to copy the webhook URL which is appearing on the dashboard. In order to capture the details of all the customers in Pabbly Connect whenever a sale happend in WooCommerce, you need to paste the copied Webhook URL in the software. And to do that, you have to first log in to the WordPress account where you have installed your Woocommerce plugin. Once you successfully logging into your WordPress account, just go to the “WooCommerce” section and tap on the “Settings” option. Later, when you press “Settings”, it will open a tab with different options, where you need to select the “Advanced” option. Subsequently, when you press on the “Webhooks” option, it will open a new tab with a certain option. Simply tap on the “Add Webhook” option in order to paste the Webhook URL. Now, name the Webhook as per your requirement and change the status to “Active”. Also, in the topic section, select “Order Created” and paste the URL copied from Pabbly Connect in the delivery URL. Once you are done making all changes, just hit the “Save Webhook” button. Now, make a dummy purchase by opening the product checkout page in a new tab. Simply enter the entire details and click on the “Place Order” button. But before you do that, just go back to the Pabbly Connect dashboard and press the “Capture Webhook Response” button. Now, go back to the Pabbly Connect dashboard and check the response that has been captured. Simply click on the “Save” option. After setting up the trigger, now its time to set-up the action. First of all, press the plus (+) button then select the app to integrate as ActiveCampaign from the ‘Choose App’ along with the method i.e, ‘Create a Contact’. And click on the ‘Connect with ActiveCampaign’ button. Now, in order to connect ActiveCampaign with Pabbly Connect, we need to log in to the ActiveCampaign account. In order to complete the ActiveCampaign integration, you must bring the API Key along with the URL from ActiveCampaign and paste them in Pabbly Connect action step. Hence to do that, just go to your ActiveCampaign account and hit on the gear icon (or settings) available at the bottom left corner with a tooltip ‘Settings’ which will open the menu option. Simply click on the ‘Developer’ option from the available menu options. Afterward, just go back to ActiveCampaign & copy the URL and API key. Now, go back to the Pabbly Connect ActiveCampaign action integration page & paste the copied API Key under the field named ‘API Key’ and paste the copied URL under the field named URL. Finally, click the ‘Save’ button to save the settings that you just did. After completing the integration process of ActiveCamapign, now its time to map the values from your WooCommerce response in order to send to ActiveCampaign. Tap on the menu icon (three verticle line) next to a field & select the respective value from the response options in the drop-down. Likewise, map all the other field values as well. After mapping all the keys and values, just press the ‘Save & Send Test Request’ button. In order to check the response, just go back to your ActiveCampaign account and click on ‘Contacts’. Voila!! All the values that you mapped are visible here. Finally!! now you know how to add WooCommerce Customers in ActiveCampaign as contacts using Pabbly Connect. All you need to do is follow all the above-mentioned steps just once and your workflow is set. So, go ahead and try Pabbly Connect for free and tell us about your experience in the comment section below.Step 2: Access Pabbly Connect

Step 3: WorkFlow for WooCommerce to ActiveCampaign Integration
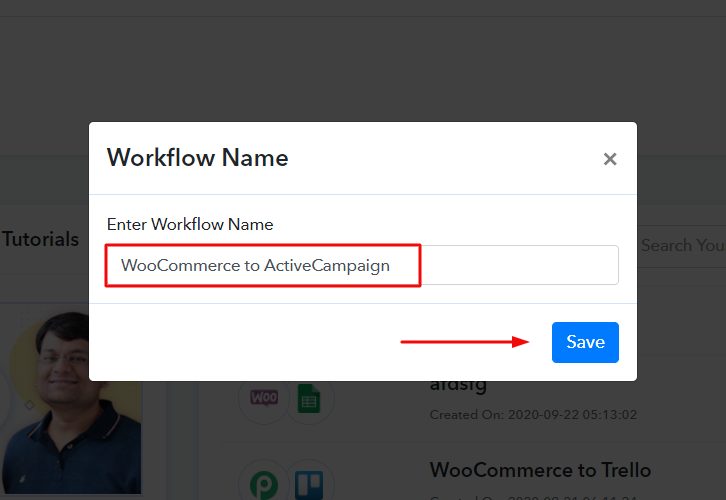
(a) Start with a New Workflow

(b) Name the Workflow
Step 4: Setting Trigger for WooCommerce & ActiveCampaign Integration
(a) Select Application you Want to Integrate
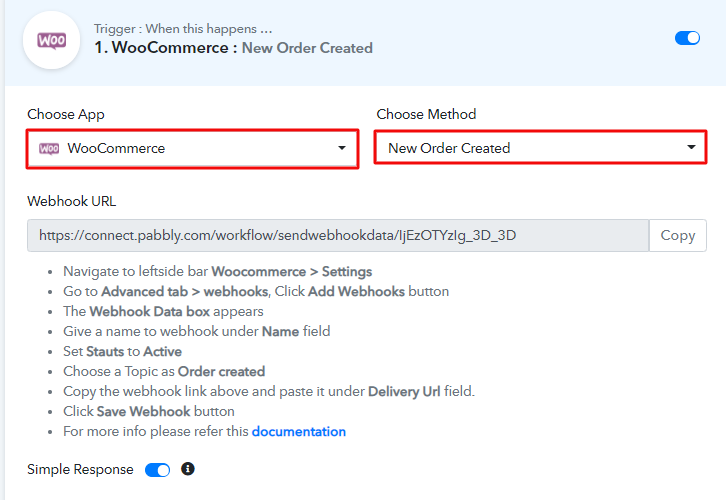
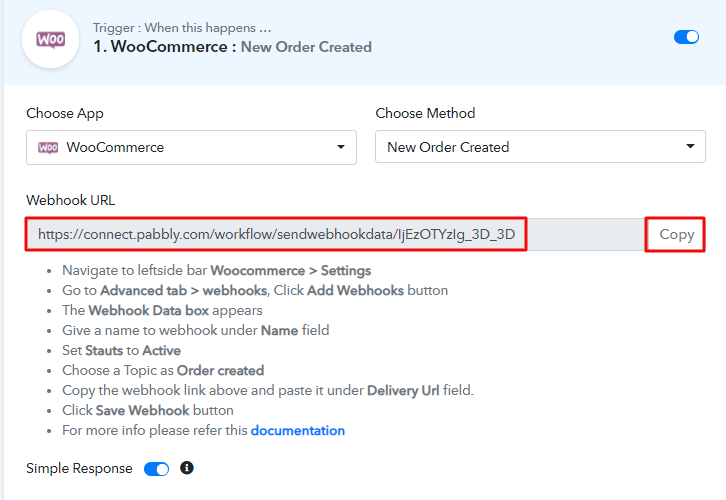
(b) Copy the Webhook URL
Step 5: Connecting WooCommerce to Pabbly Connect
(a) Go to WooCommerce Settings
(b) Click on Advanced Option
(c) Click on Webhooks Option
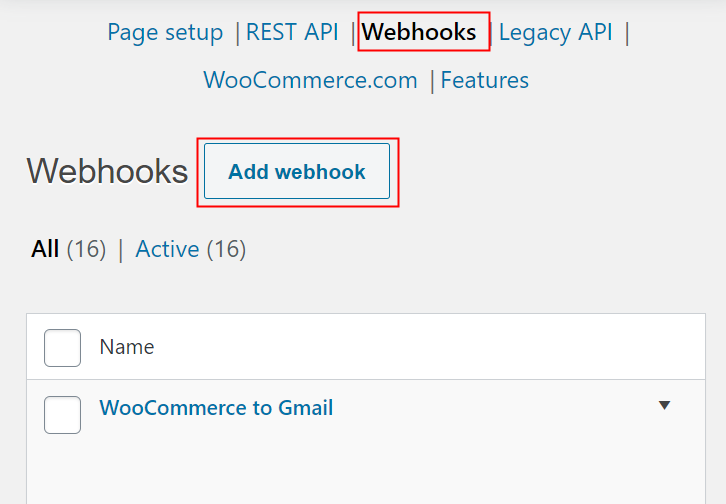
(d) Add Webhook
(e) Make a Test Purchase
Step 6: Test the Response in Pabbly Connect Dashboard
Step 7: Setting Action for WooCommerce and ActiveCampaign Integration
(a) Select Application to Integrate as ActiveCampaign
Step 8: Connecting ActiveCampaign to Pabbly Connect
(a) Go to ActiveCampaign Settings
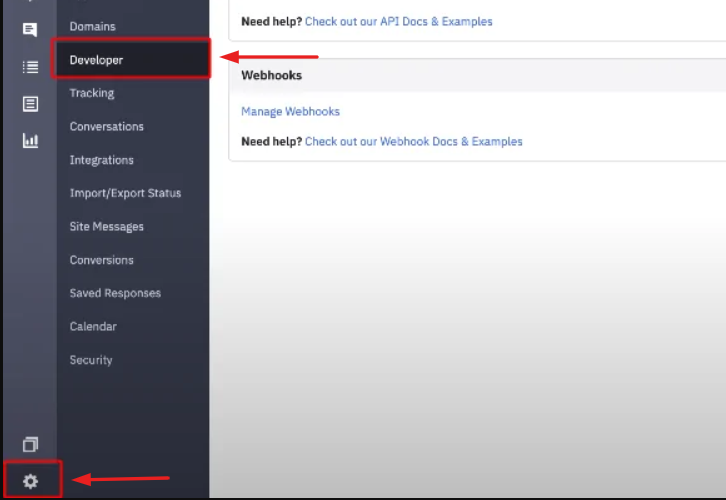
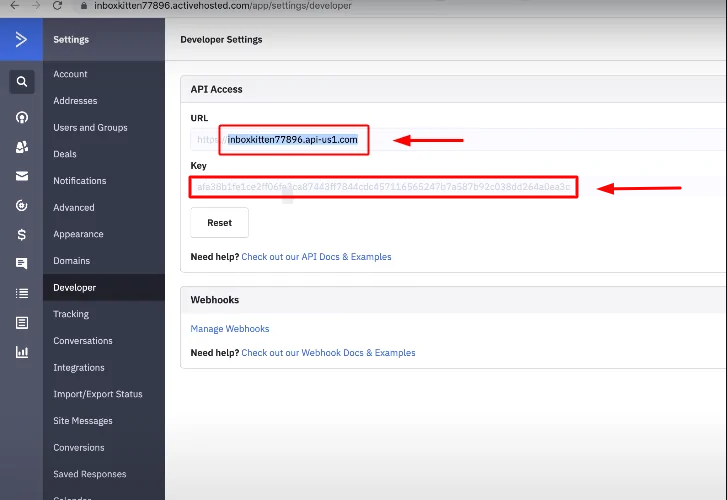
(b) Copy the API key & URL form ActiveCampaign
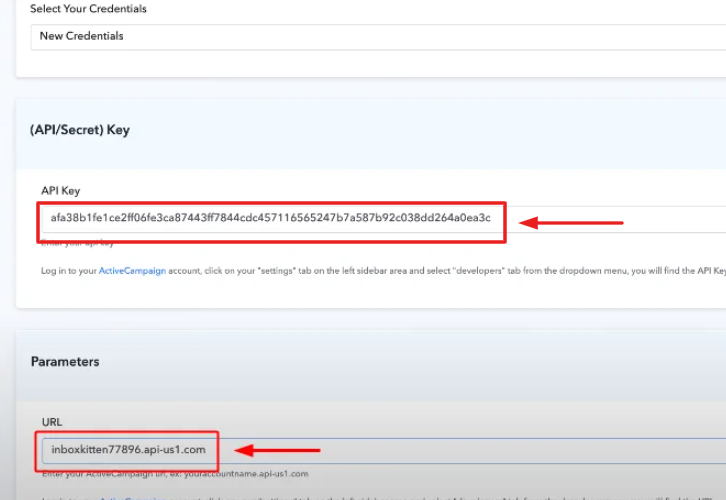
(c) Paste ActiveCampaign API Key & URL in Pabbly Connect Action
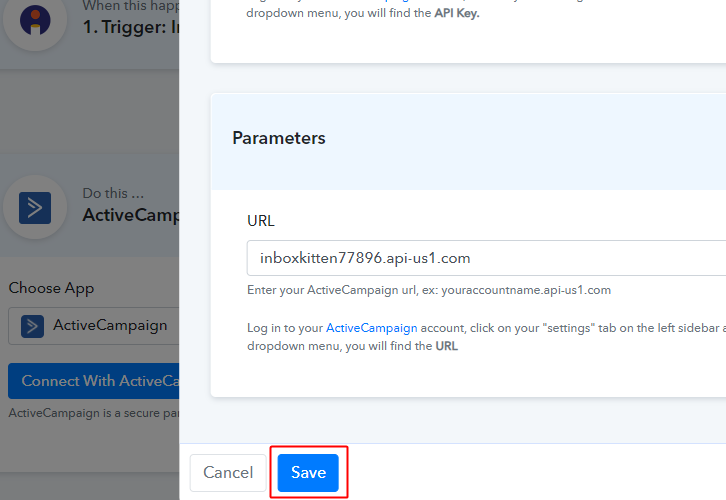
(e) Save All the Settings
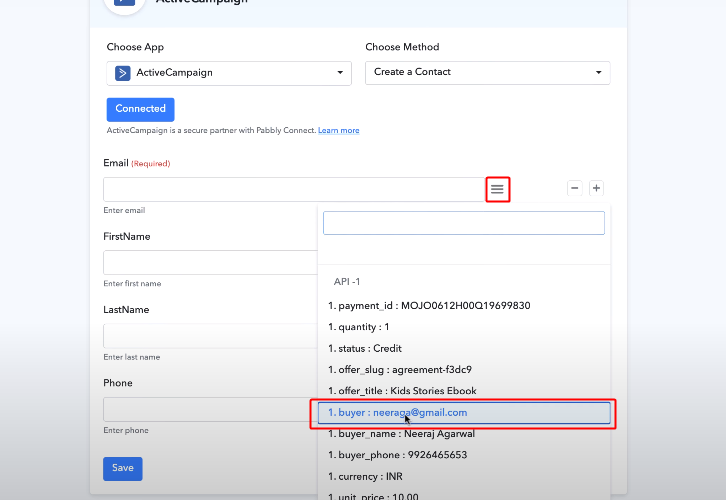
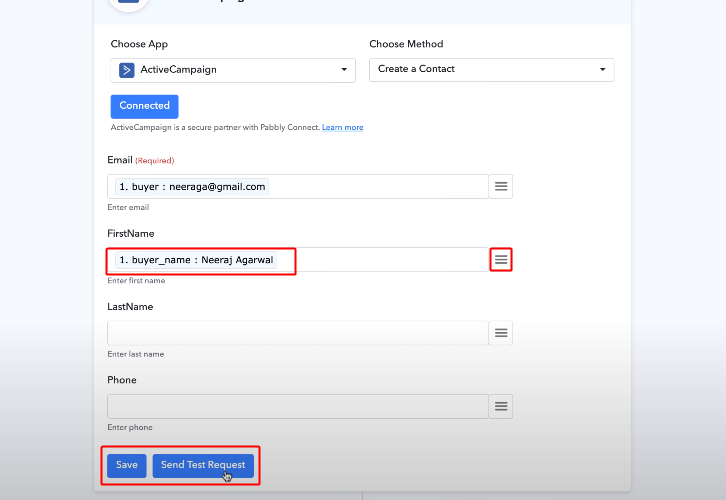
Step 9: Map the Values
(a) Map the FirstName
(b) Save the Action
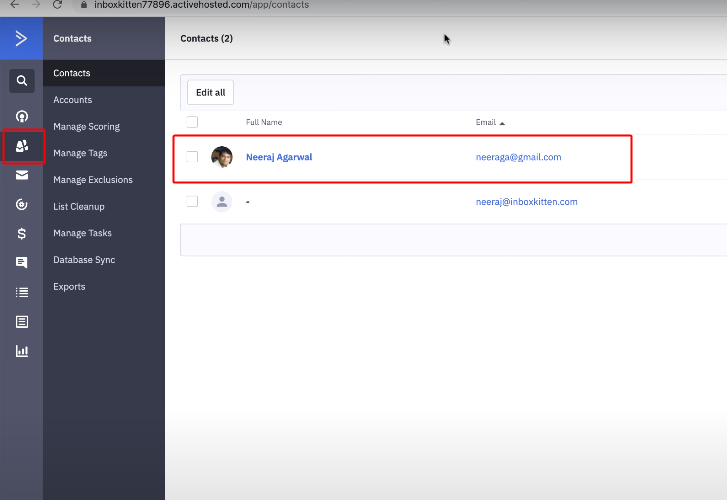
Step 10: Check the Final Response in your ActiveCampaign Account
Wind-Up
You May Also Like to Read:


