Fed up of searching for ways to add new Shopify orders to Xero? If yes, then you don’t have to look any further. Because, in this article, we will be integrating Shopify with Xero in real-time.

Before we get started, let’s know a little bit about the software that we are about to integrate in this article. So, as the name says Shopify is an online store builder software which helps you to create an online shop. On the other hand, Xero is a business accounting software which allows you to manage accounting activities such as generating invoices, bank account balance, and many more.
Hence, integrating these two services could be very beneficial for you as it will save your time and effort by importing all the Shopify orders to your Xero account automatically.
Now, you must be thinking that exactly how is that going to happen? Well, the answer is quite simple i.e, known as Pabbly Connect.
Why Choose This Method Of Integration?
In contrast with other integration services-
- Pabbly Connect does not charge you for its in-built apps like filters, Iterator, Router, Data transformer and more
- Create “Unlimited Workflows” and smoothly define multiple tasks for each action
- As compared to other services which offer 750 tasks at $24.99, Pabbly Connect proffers 50000 tasks in the starter plan of $29 itself
- Unlike Zapier, there’s no restriction on features. Get access to advanced features even in the basic plan
- Try before you buy! Before spending your money, you can actually signup & try out the working of Pabbly Connect for FREE
Pabbly Connect is the best integration tool available in the market which can help you integrate thousands of applications, set countless triggers & actions, create infinite workflows, and so much more in real-time. Furthermore, in order to do that there is no coding skill required. All you need to do is integrate it once and relax, it will manage all the redundant work afterwards.
Therefore, without wasting any more time, let me take you through the steps to add new Shopify orders to Xero automatically.
Step 1: Sign up to Pabbly Connect
Let’s begin the process to add new Shopify orders to Xero by pressing the “Sign Up Free” icon on the Pabbly Connect dashboard. Besides, either you can manually enter the entire details or else sign up using your Gmail account.
Try Pabbly Connect for FREE
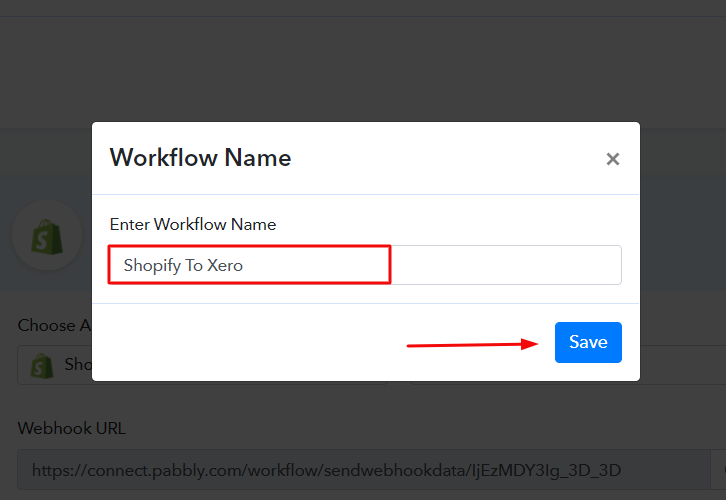
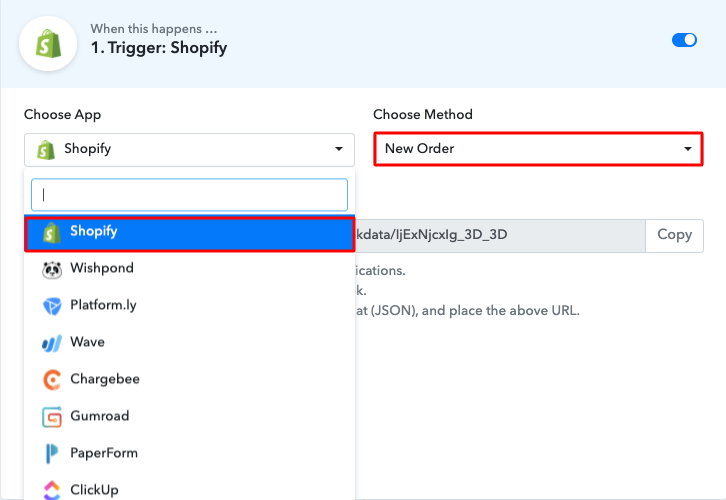
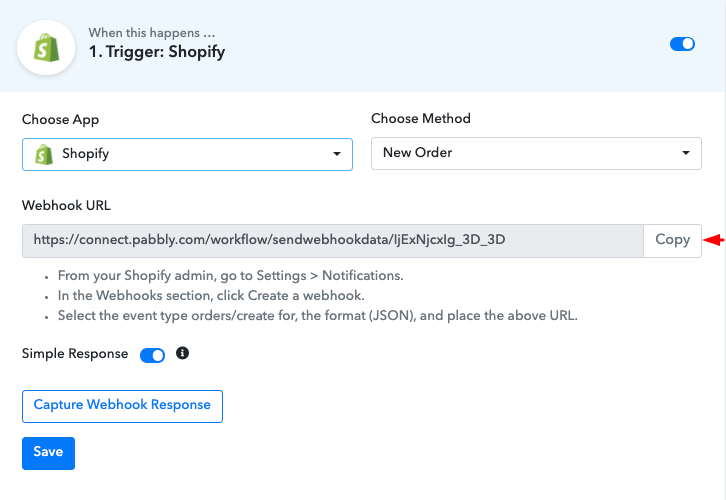
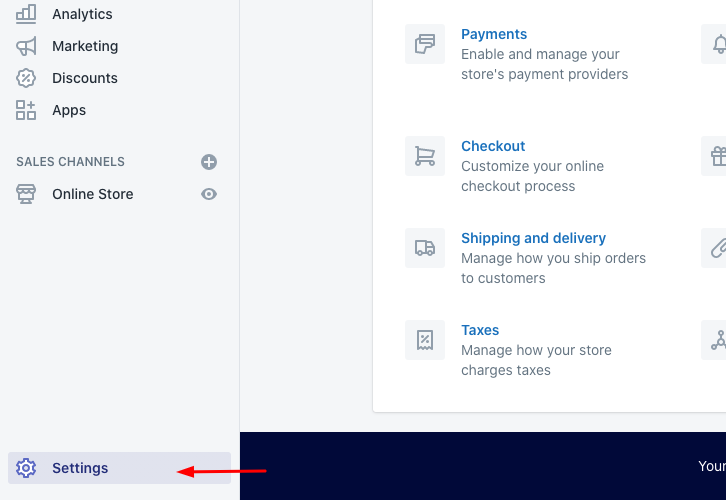
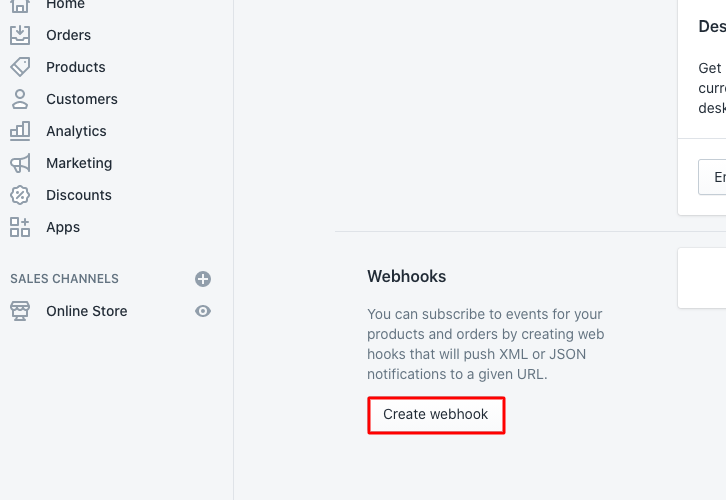
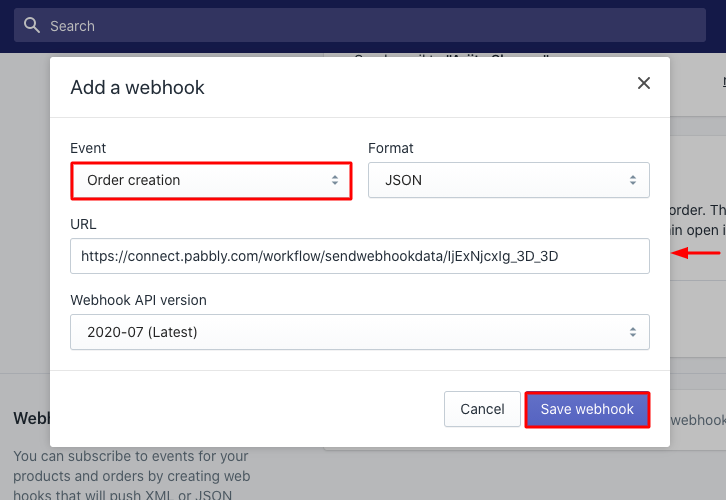
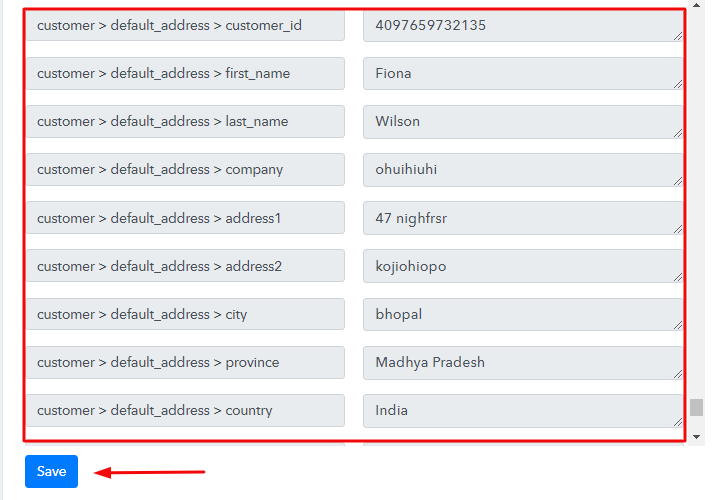
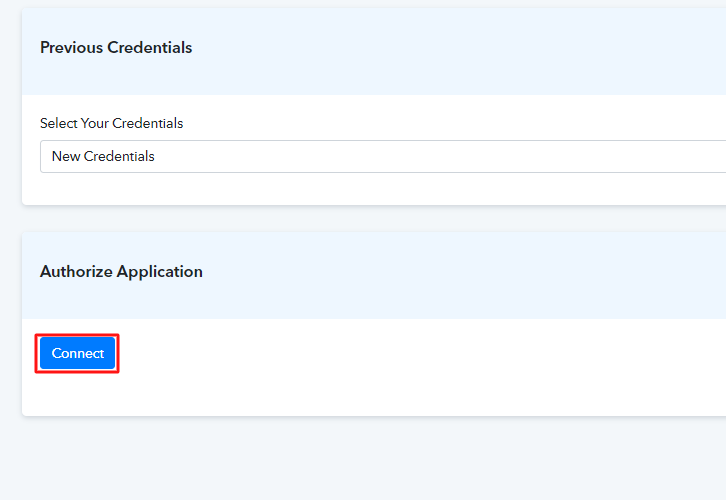
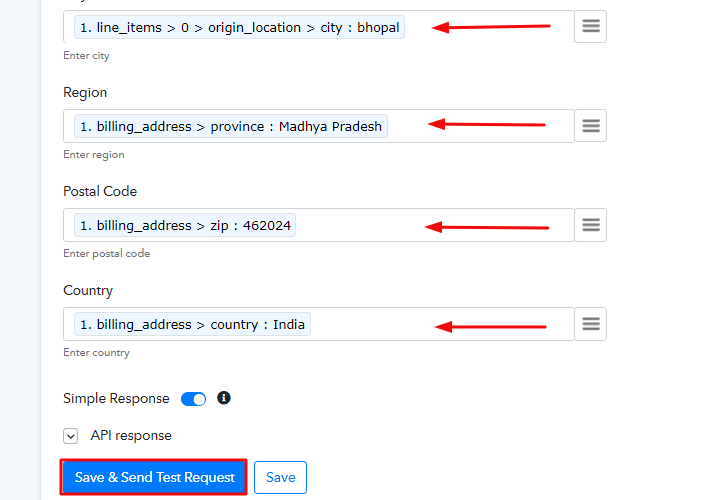
After signing into the account, press the “Access Now” button of the Connect section to access Pabbly Connect software. Here, you have to click on the button named “Create New Workflow” in order to start the integrate Shopify with Xero. The next step is to name the workflow as per your requirements. As here, I have named the workflow as Shopify to Xero. Once the workflow is created, now its time to choose the application you want to integrate. Pabbly Connect helps you to connect unlimited apps in real-time, click here to try it out for free. Now, choose the application that you want to integrate as well as the Method. Here, I am selecting Shopify for integration and “New Order” option as a method. Afterward, just copy the webhook URL and press the button named “Copy” to take further the integration process. The subsequent step is to paste the copied webhook URL in your Shopify account’s settings section. Hence, to do that log in to your Shopify account to move forward. Once you log in to your Shopify account, click on the “Settings” option at the bottom of the screen, as we did. After you reach the settings page, simply tap on notifications and scroll down the page. There you will find a webhooks option saying the “Create Webhook” button just tap on that. After pressing the button, you will see a screen pop-up where you need to paste your copied webhook URL. Simply select “Order creation” from the event section and hit on the “Save Webhook” button. Subsequently, to test the integration among Shopify & Pabbly Connect, you just need to make a dummy purchase in your Shopify account of any specific product. Then, enter all the required details and hit the “Pay Now” button. Once you make the purchase, just go to the Pabbly Connect dashboard and hit the button named “Capture Webhook Response”. After clicking on the capture webhook response button, all the submitted entries will get captured in just a few seconds. Succeedingly hit on the “Save” button to continue the workflow. Moving on, to set an action for your trigger, you have to select the application you wish to integrate i.e, Xero. Furthermore, in order to add new Shopify orders to Xero, you need to hit the “(+)” button. Moreover, choose Xero from the drop-down option along with the method named “Create a Contact”. Then, press the button named “Connect”. Now, to connect with Xero, you just need to tap on the “Connect” button. A few moments later, a window will pop-up asking you to select/fill a Google Account that you want to connect the Xero & Pabbly Connect. After connecting your Xero account, just enter all the required fields manually. Further, after you complete entering all the details, just tap the “Save & Send Test Request” button in order to complete the entire procedure. Voila! Now, as you can see that all the order details are now visible in your Xero account & your automation is now set. To put in a nutshell, here we have explained the entire procedure that how you can add new Shopify orders to Xero using an automation tool i.e, Pabbly Connect. Moreover, the procedure is quite simple & you have to do it only once. So go ahead and create your account for free. We hope the process was clear to you guys. However, in case you have any doubts, don’t forget to write to us in the comment section below. We’ll get back to you ASAP.Step 2: Access Pabbly Connect

Step 3: WorkFlow to Add New Shopify Orders to Xero
(a) Start with a New Workflow

(b) Name the Workflow
Step 4: Setting Trigger to Integrate Shopify with Xero
(a) Select Application you Want to Integrate
(b) Copy the Webhook URL
Step 5: Connecting Shopify to Pabbly Connect
(a) Click on Settings
(b) Select Webhook
(c) Paste the URL
Step 6: Make a Purchase to Test Shopify Integration

Step 7: Test the Response in Pabbly Connect Dashboard
Step 8: Setting Action for Shopify & Xero Integration
(a) Select Application you Want to Integrate
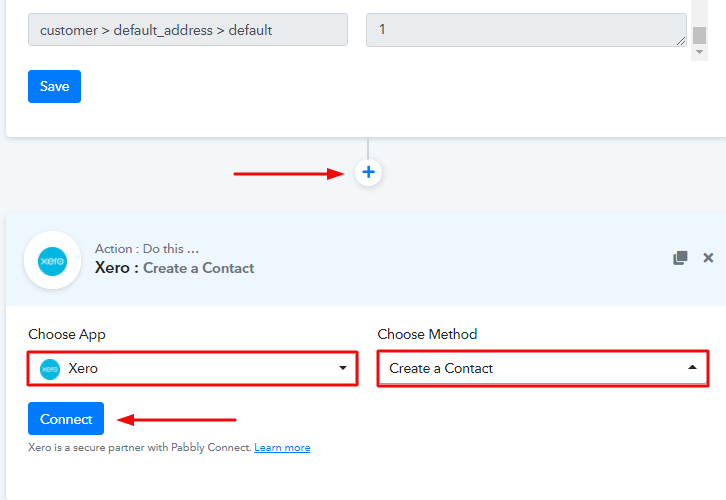
(b) Click on “Connect”
Step 9: Fill up All the Fields
Step 10: Check the Xero Account

Conclusion –
You May Also Like to Read –


