Ideal For: All the sportswear shops, sportswear stores, sportswear wholesalers, sportswear suppliers, sportswear retailers, and other sellers can use this method to take their sportswear selling business online.
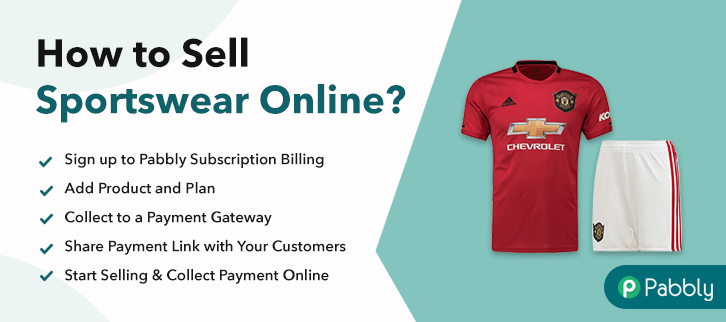
Why Choose this Method to Sell Sportswear Online?
Unlike any other solution, this method allows you to:
- List and sell your sportswear for FREE. Absolutely no payment required.
- No need to pay commission on any of your sales.
- Multiple payment options like PayPal, Credit Card, etc to collect payment from a single place.
- Sell one time or recurring subscriptions of your sportswear.
- Collect payments & sell products in any currency as per your requirement.
- Give discounts on your products by offering special coupon codes.
- Add sales commission agents to help you in selling sportswear online.
Not only people who are involved in sports but other people can also be seen wearing sportswear on a daily and casual basis now. Therefore, to keep up with the trends of e-commerce you should consider taking your sportswear selling business online.
Taking your business online will earn you extra profit as well as more customers as people can buy your sportswear online from all over the world just by swiping on their phones. Hence, today we have brought you a fantastic service that allows you to sell sportswear online for free which is Pabbly Subscription Billing. You can easily create checkout pages on this service for your sportswear and share their links on online platforms and start collecting payments through those checkout pages.
Also, you get unlimited access to its amazing features:
- Collect one-time or recurring payments of your sportswear
- Create and share invoices automatically with buyers
- Add and sell unlimited sportswear
- Create discount coupons for your buyers
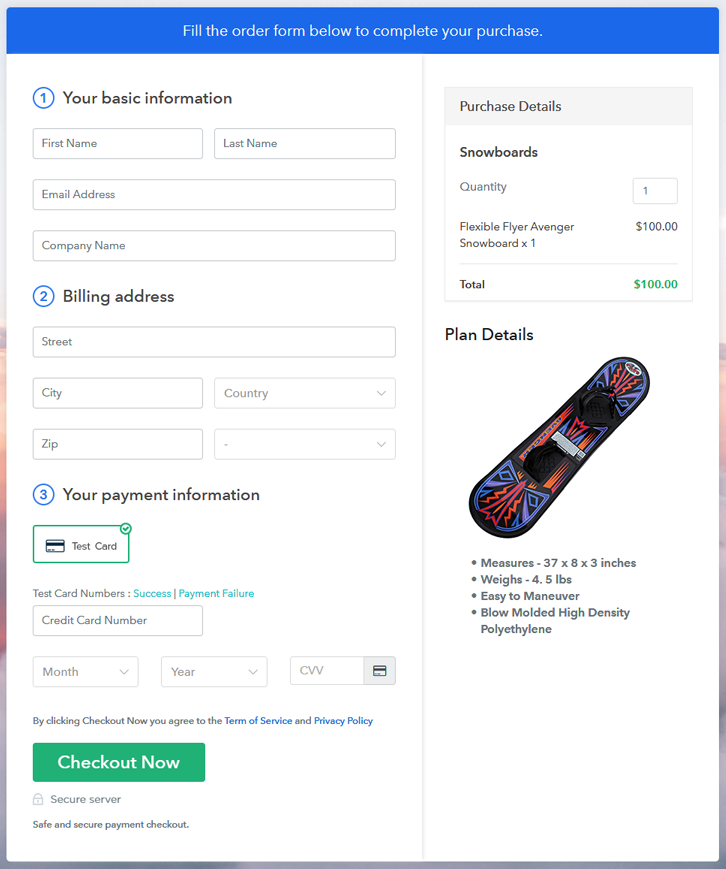
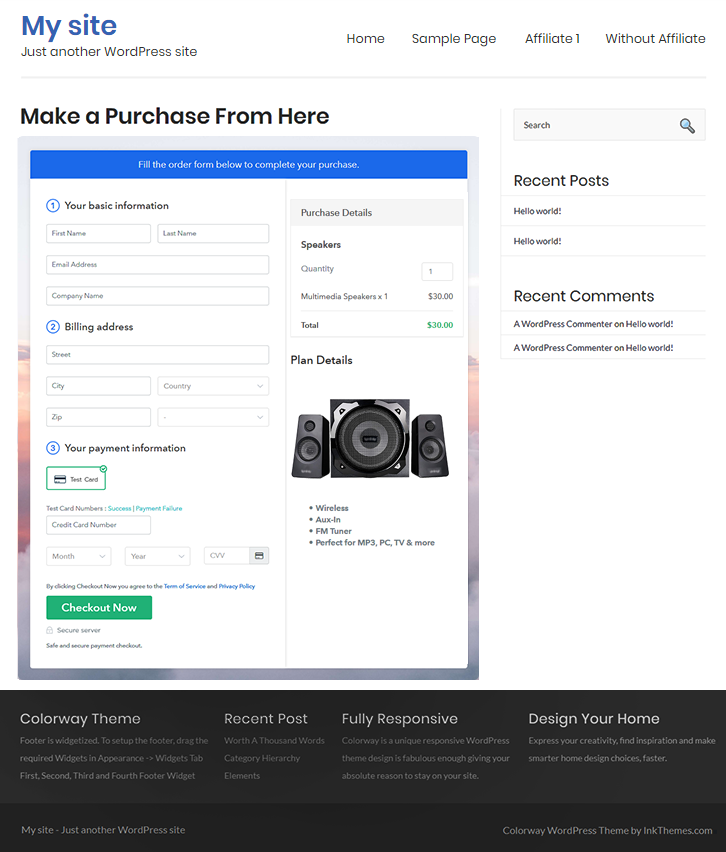
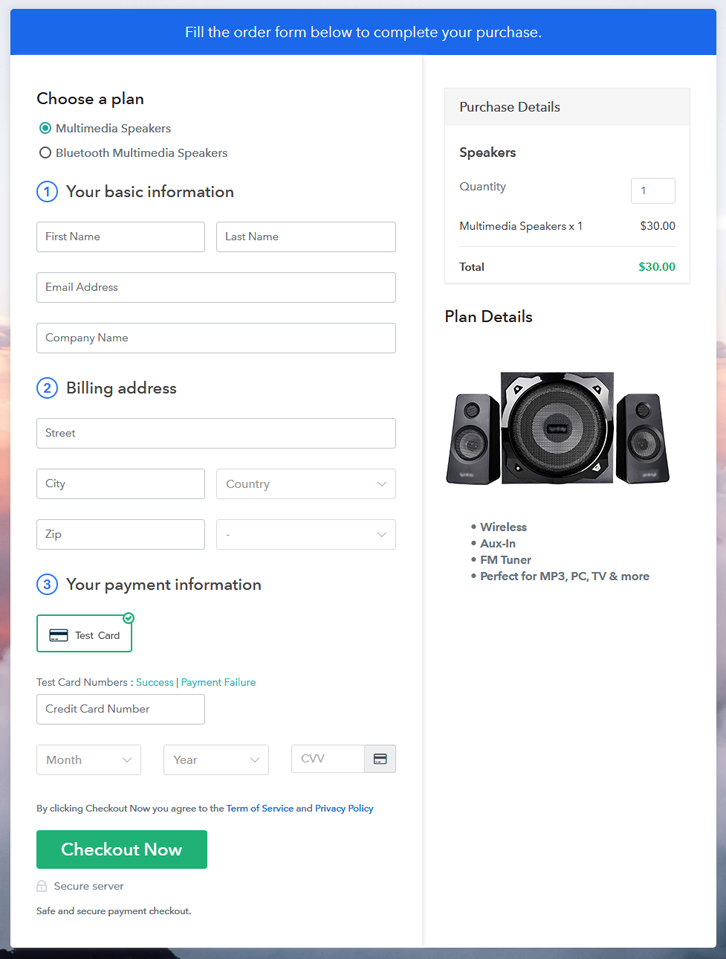
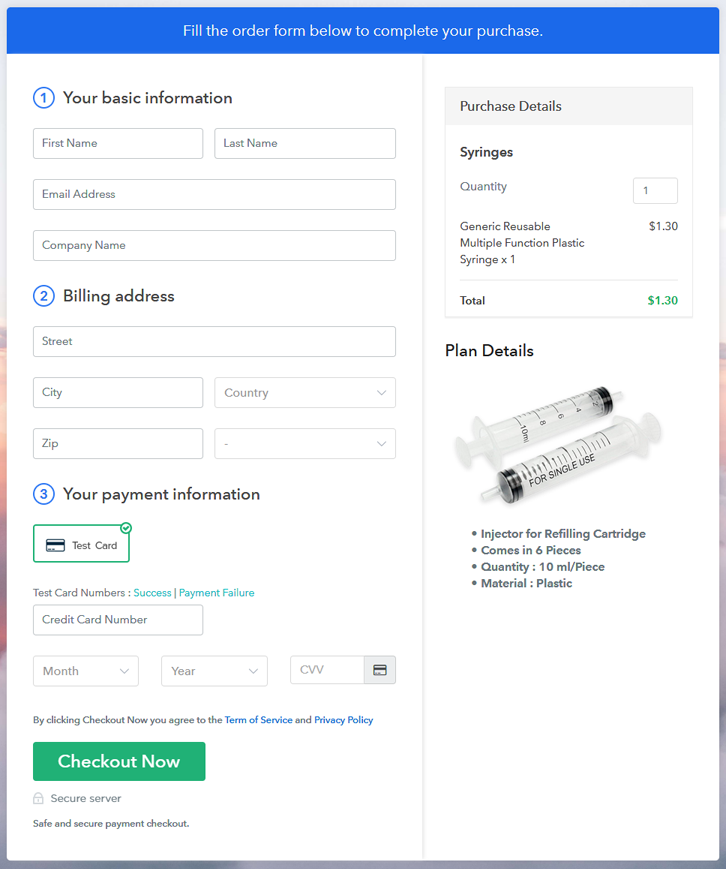
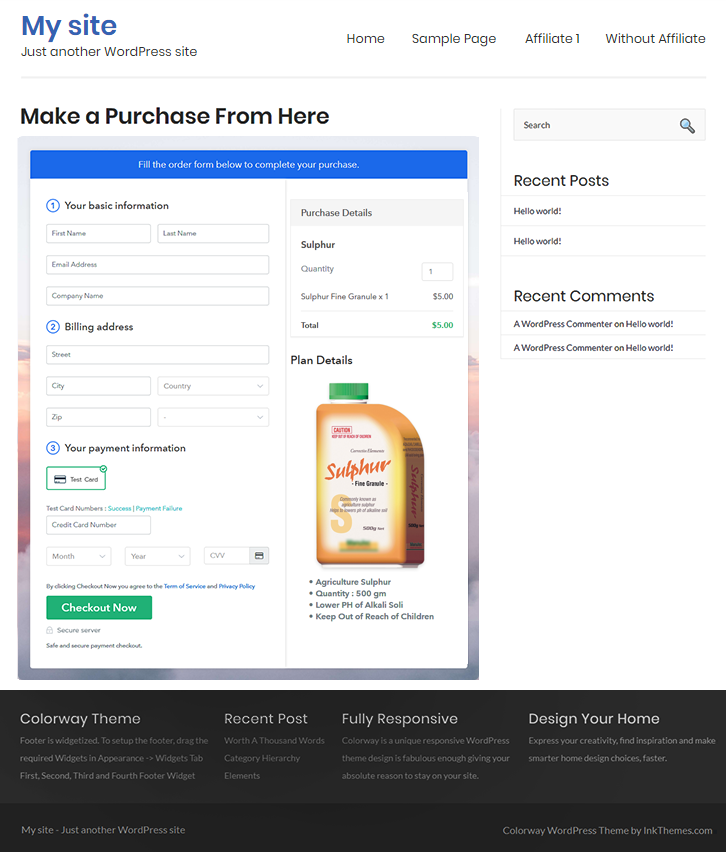
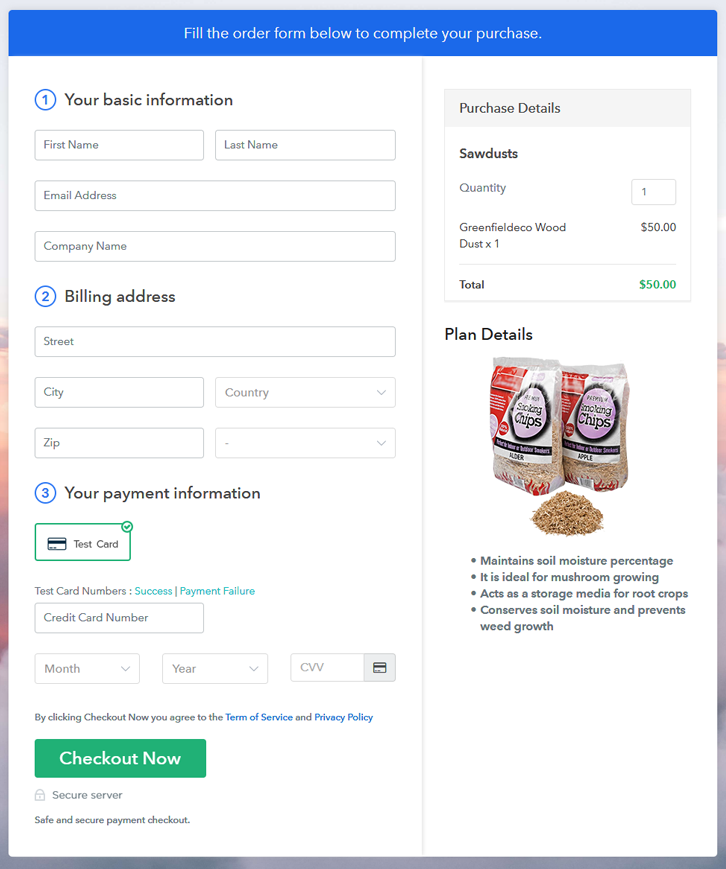
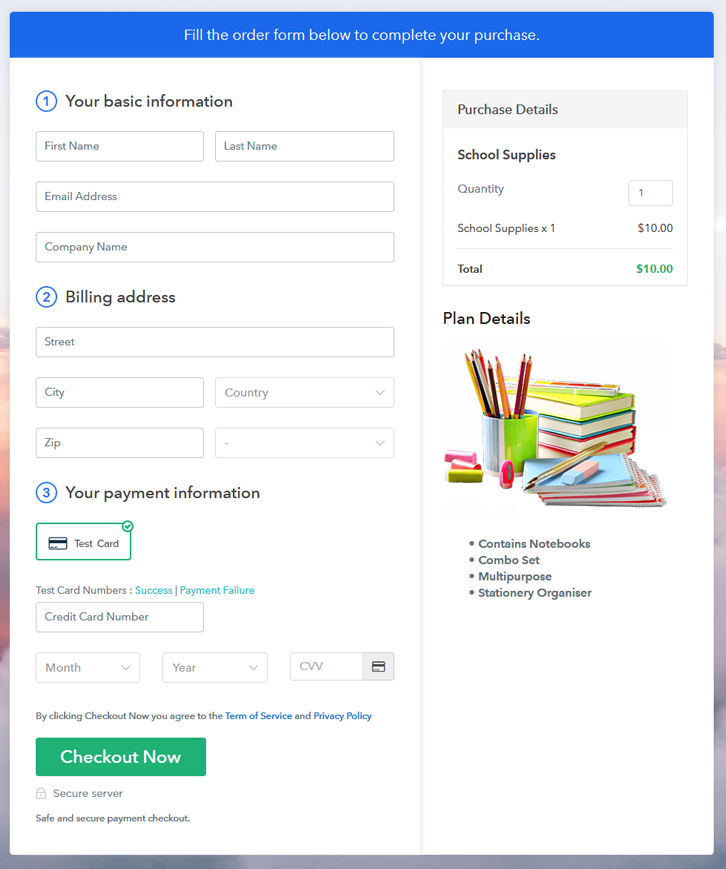
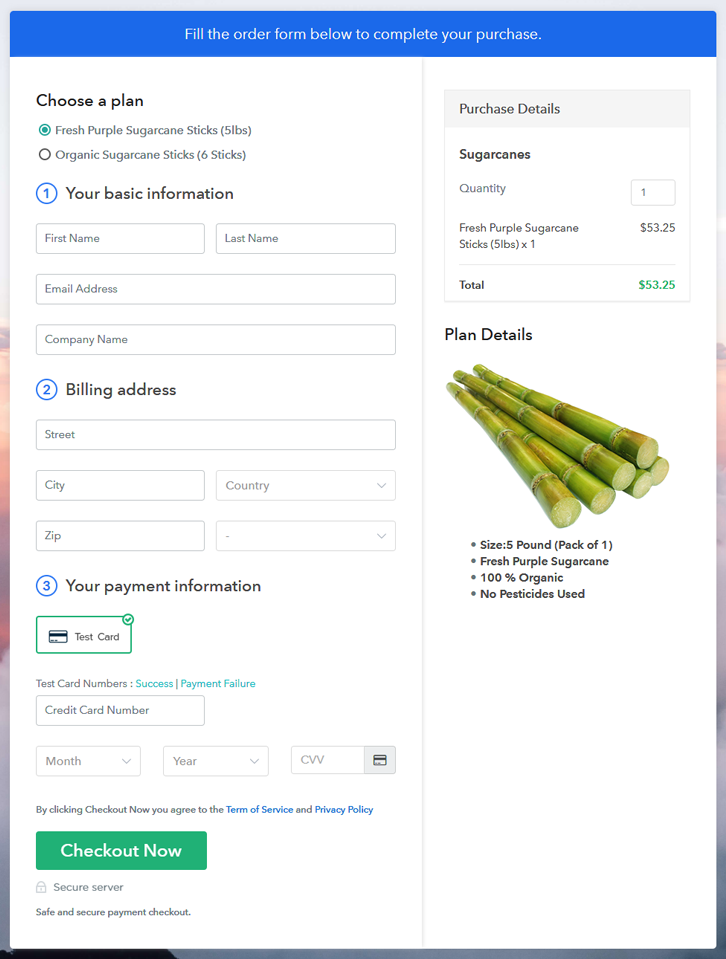
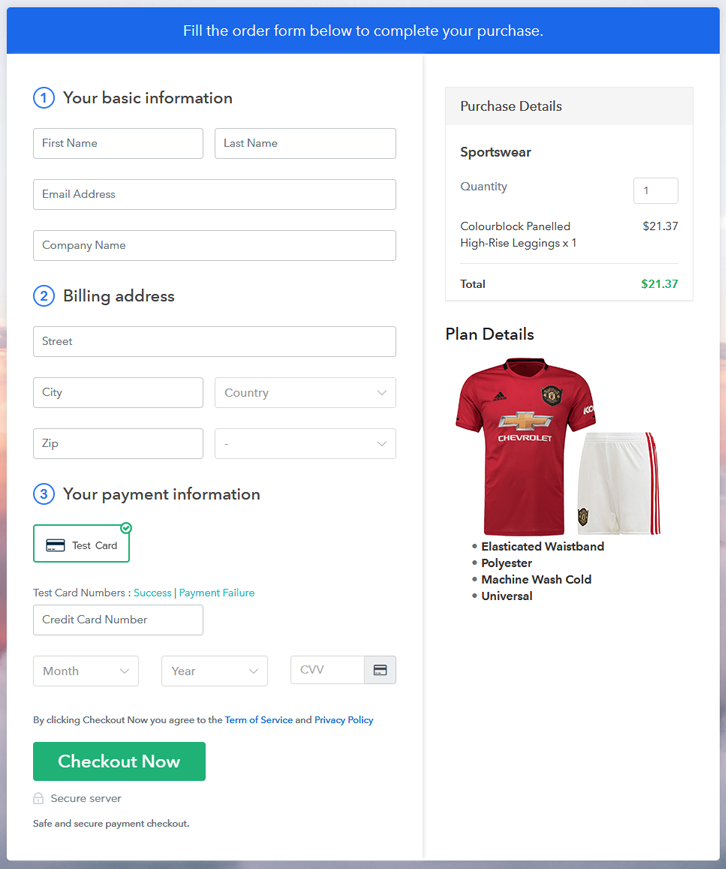
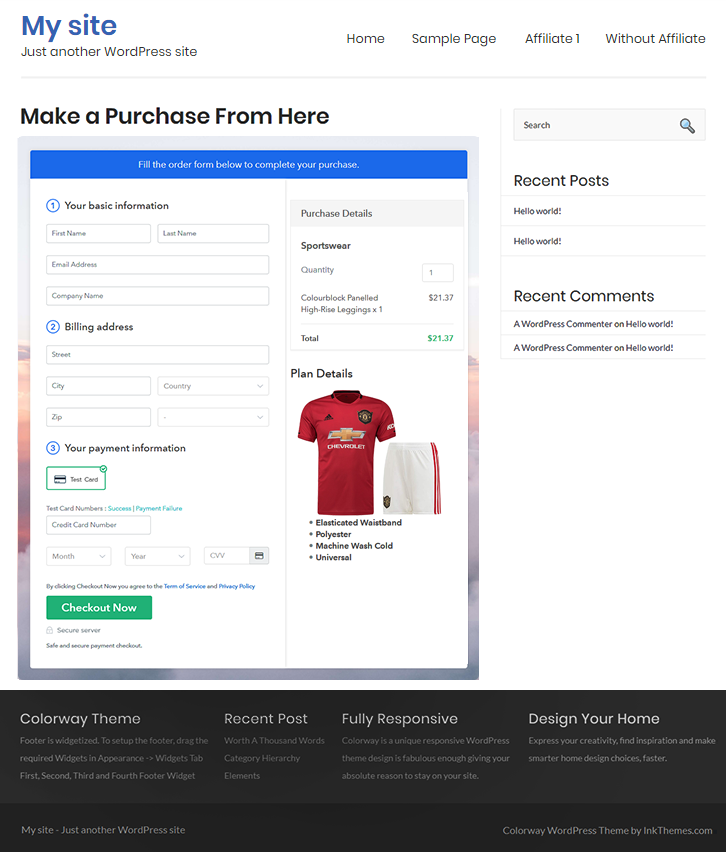
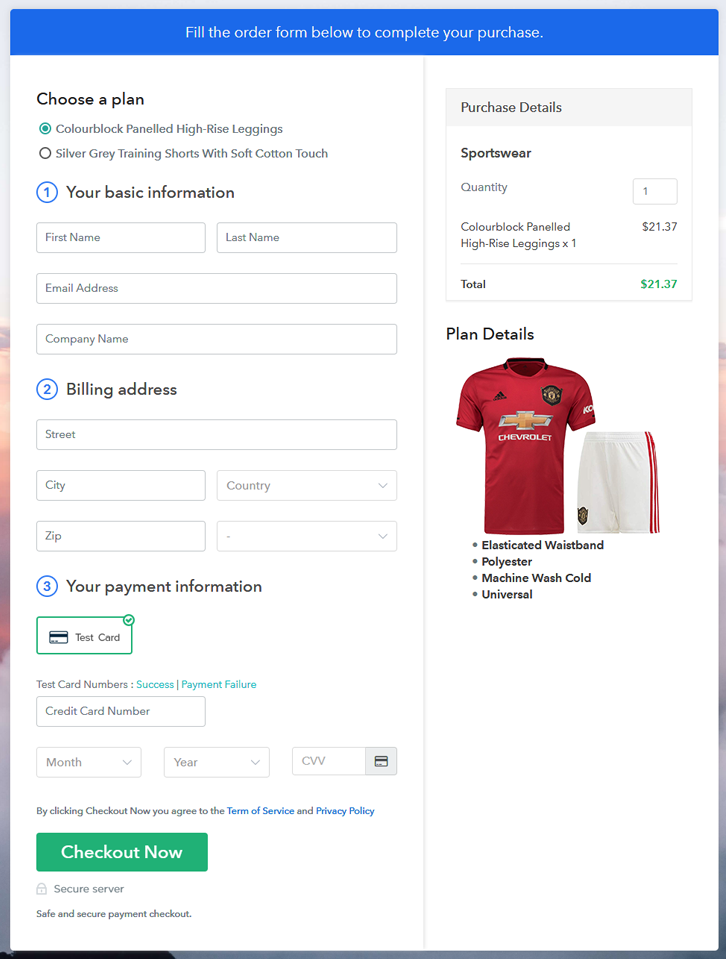
Final View of Checkout Page for your Sportswear Selling Business
Step 1: Log in to Pabbly Subscription Billing

Visit Pabbly Subscription Billing website and then click on the “Signup Free” button. On clicking the button the signup page will appear, where you can create an account for free via Gmail or you can also enter your details manually.
Sign Up For Free!
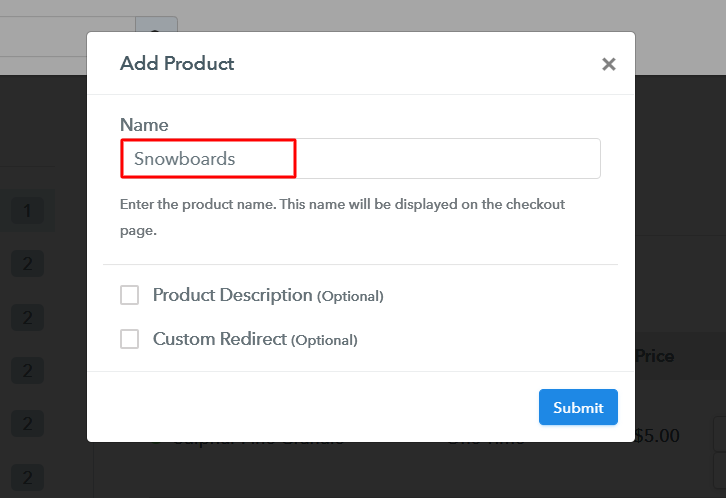
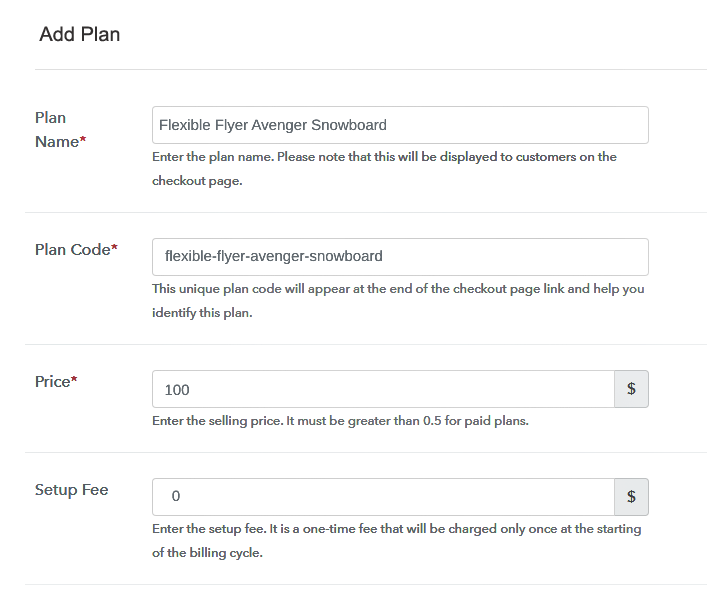
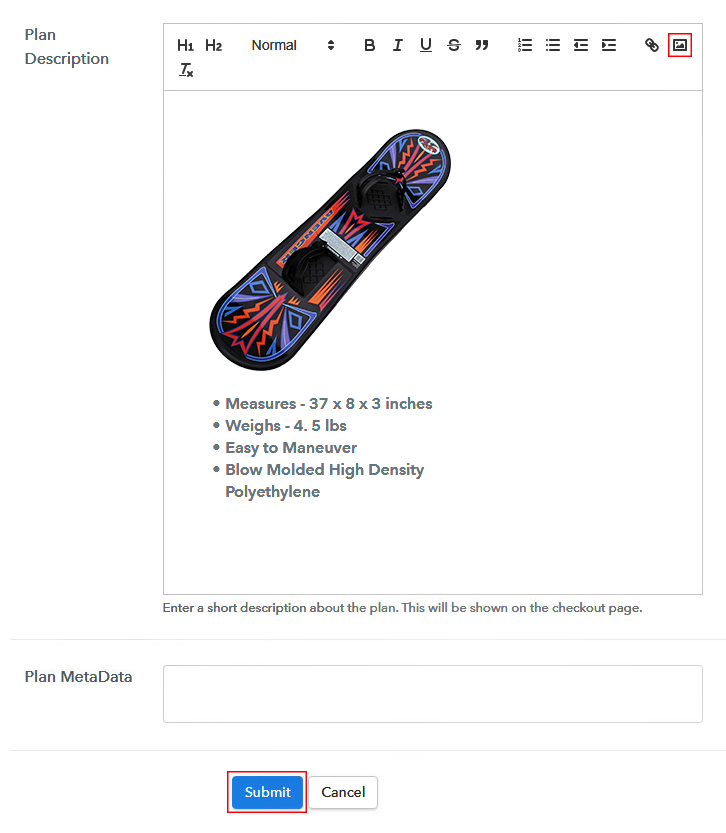
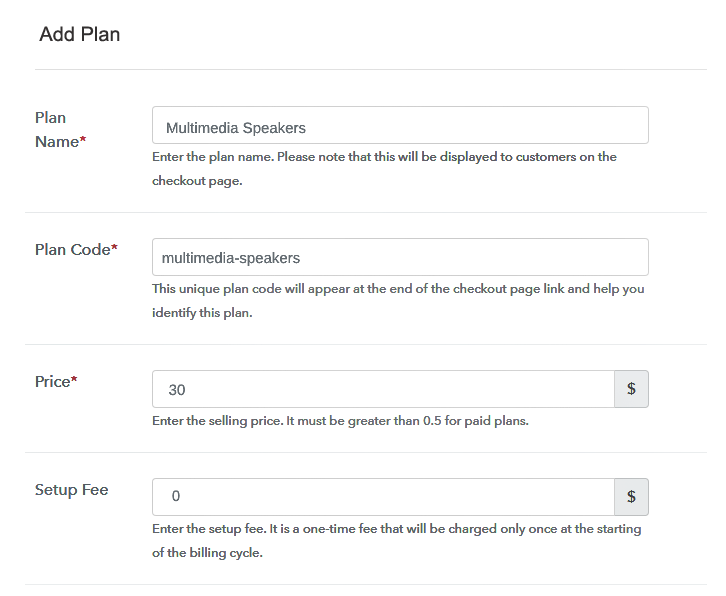
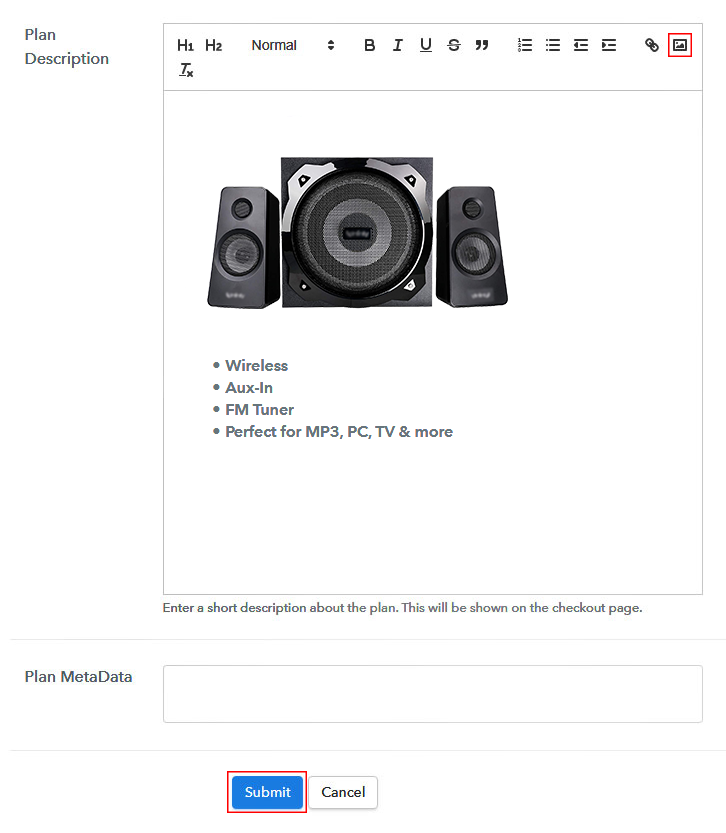
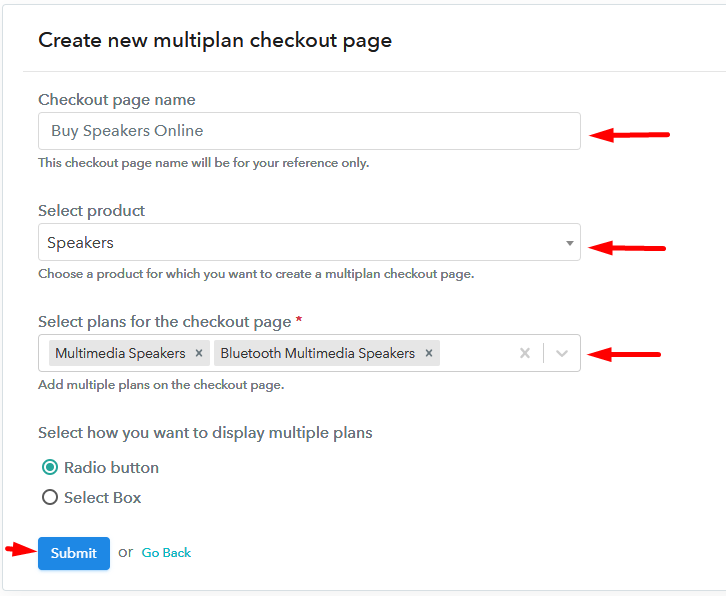
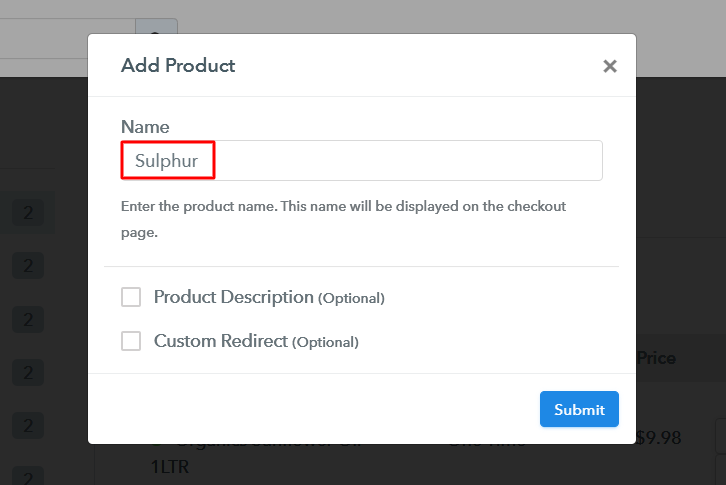
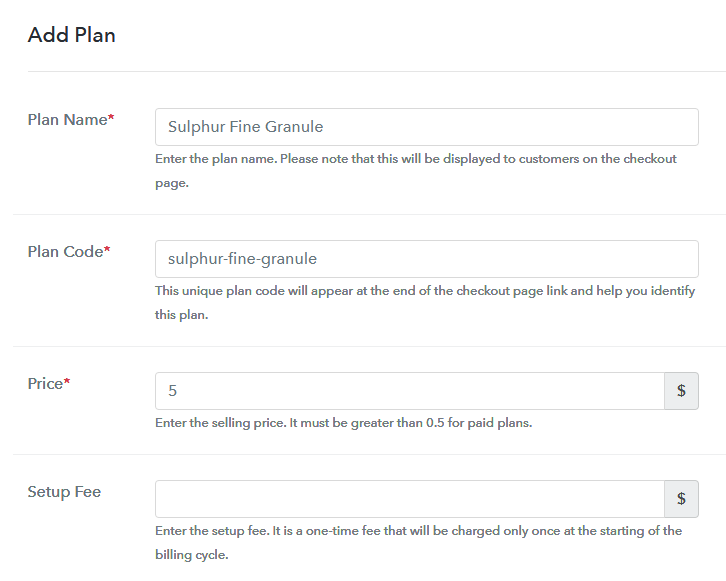
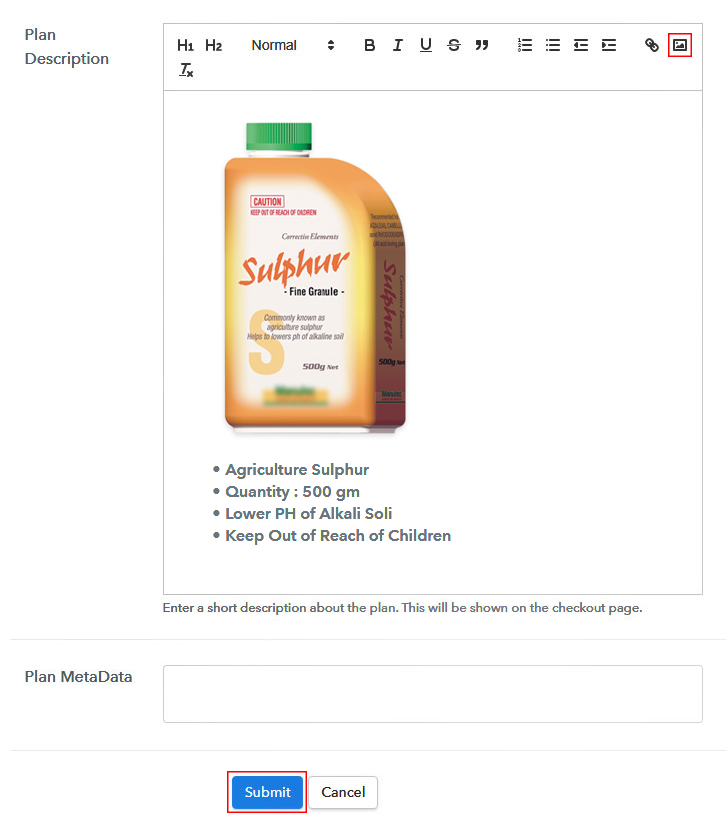
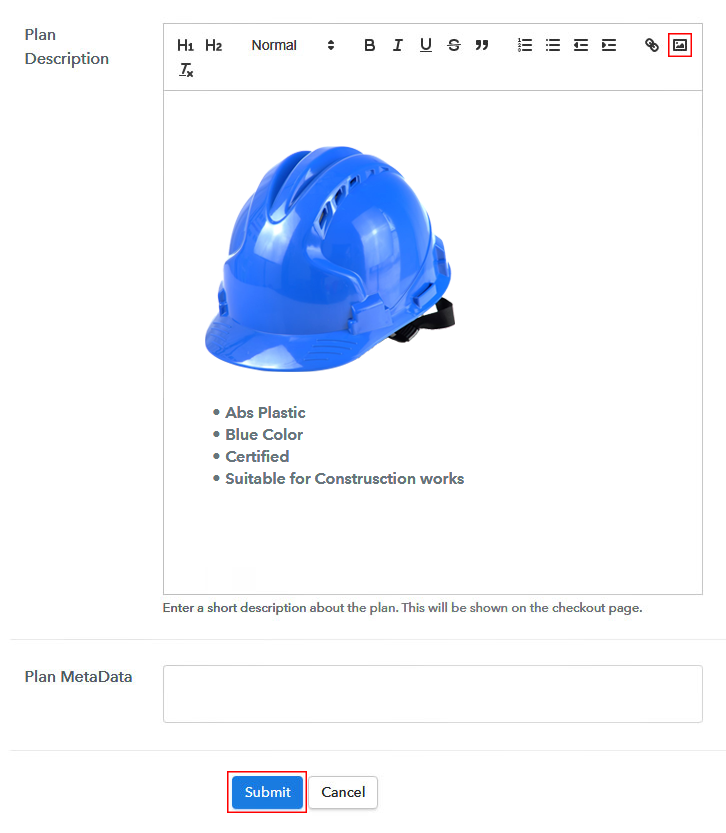
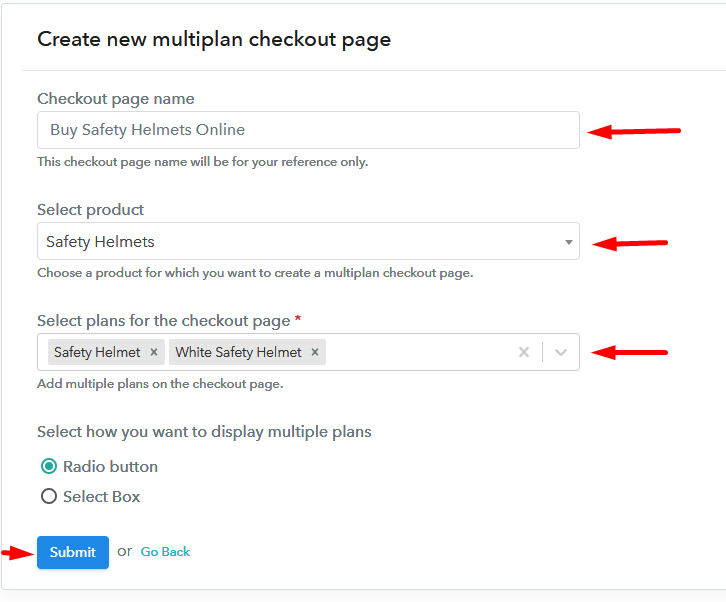
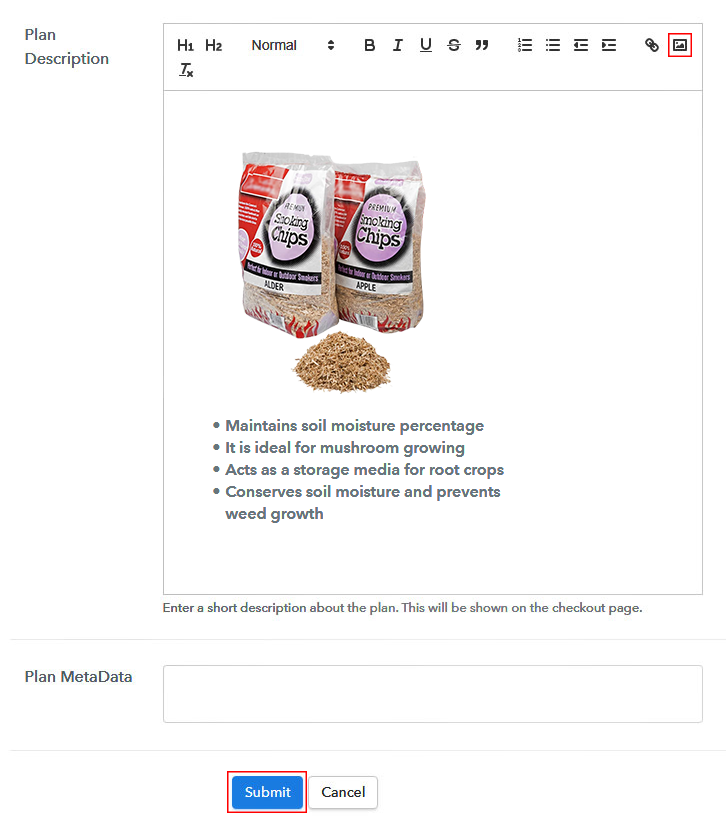
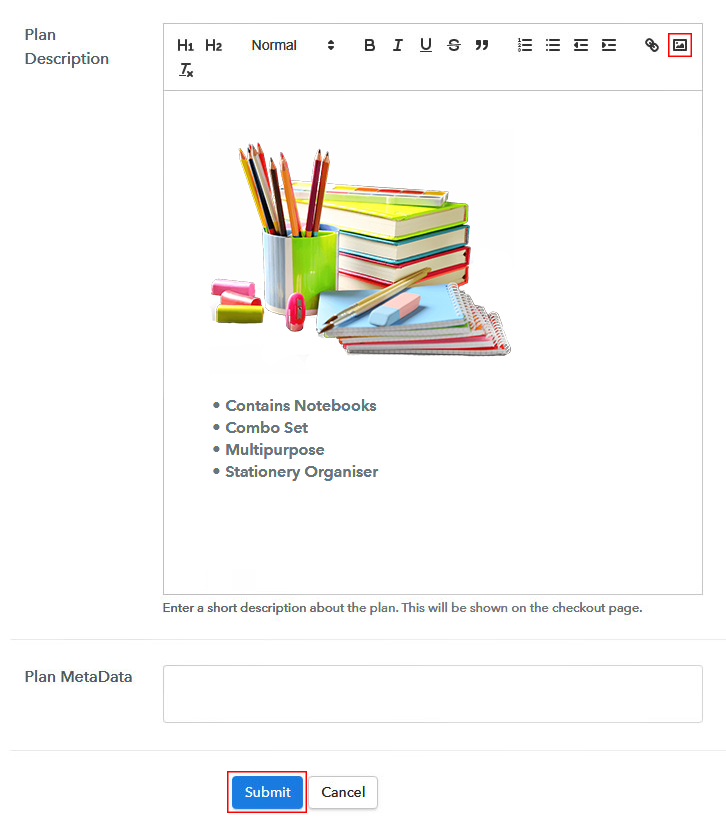
After finishing the signup process, now you have to fill up your company details, i.e, company name, currency, and phone number in the given dialogue box. Pabbly Subscription Billing provides a “Test Payment” mode to make the payment collection process error-free for the sellers. You can also enable and check it before moving any further. Thereafter, you have to connect with the other payment gateways such as PayPal, Stripe, etc whichever you prefer. The complete payment gateways integration guides are given below- Moving to this step, you have to add your first product. You can add sportswear of different categories for instance jerseys, shorts, etc. Add all other types of sportswear in the same product by creating different plans. Note: Here you can add all the products related to the similar category by creating plans for each of them. Let’s rollout plans for different kinds of sportswear available in your store. On clicking add new plan, you will reach to the plan page, here you will have to fill the plan details such as plan name, code, billing cycle, price, etc. Also, you can write a description of the sportswear that you want to sell along with the product links, images, etc, and click on the “Submit” button to add your plan. You can create more plans for all the sportswear in a similar manner. Reach to a large number of people by following the below steps: Follow up the recommended steps to preview the checkout page: Just copy the provided plan embedding link and embed the checkout page to your WordPress site to sell sportswear online. Further, paste the plan link on a text editor of the WordPress dashboard. Next, click the “Publish” button, after making changes. Note: In case you want to sell multiple products via a single checkout page, you can create a multi-plan checkout page otherwise skip this step. To conclude, now you can start selling sportswear online easily without any investment, all thanks to Pabbly Subscription Billing. This amazing service offers you so many beneficial features for free like easy invoicing, discount coupons creation, listing of unlimited products, and plans, checkout pages, and the list is long. Hence, without any more wait signup and start selling now.Step 2: Select Subscription Billing

Step 3: Account Setup

Step 4: Connect Payment Gateways & Start Sportswear Selling Business Online

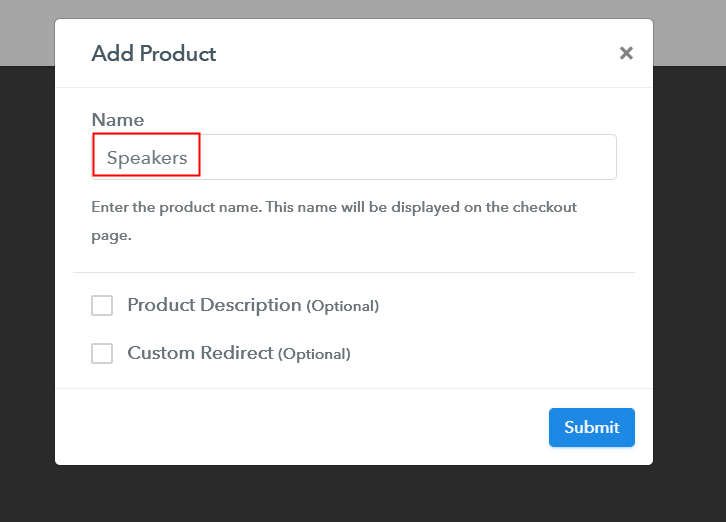
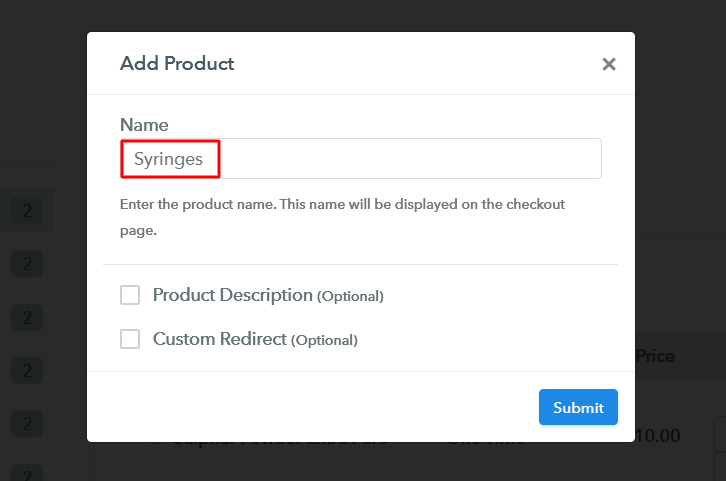
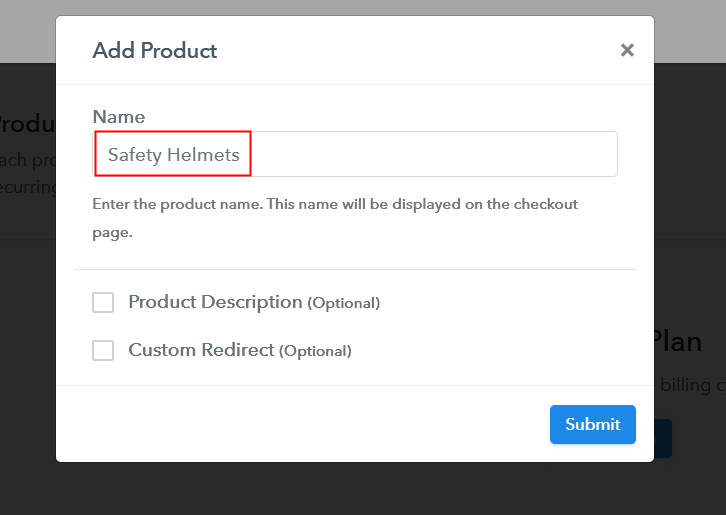
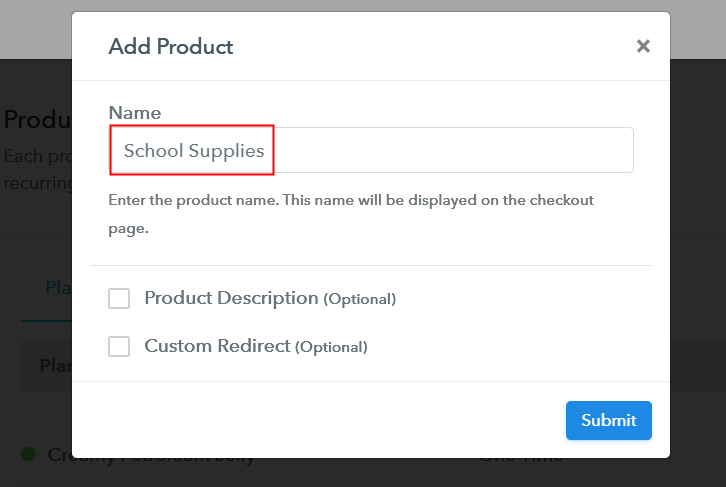
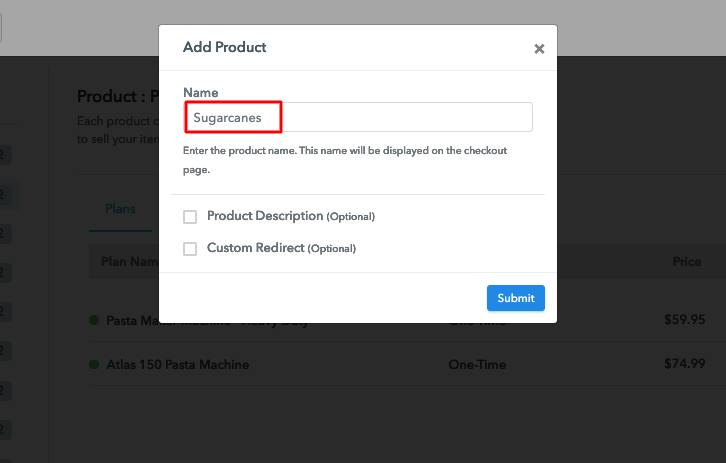
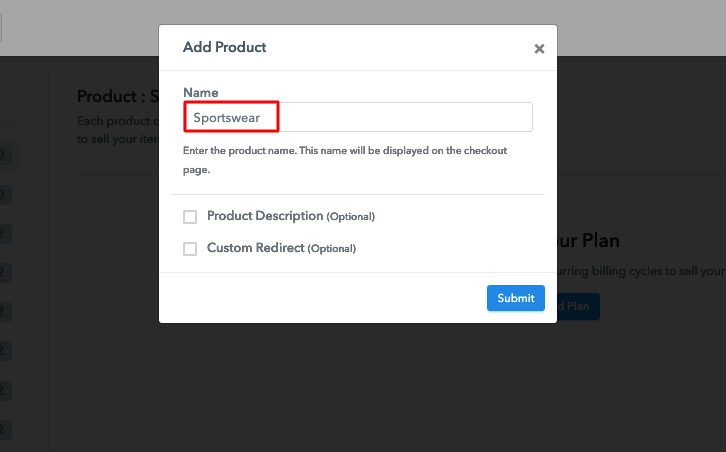
Step 5: Add Product for your Sportswear

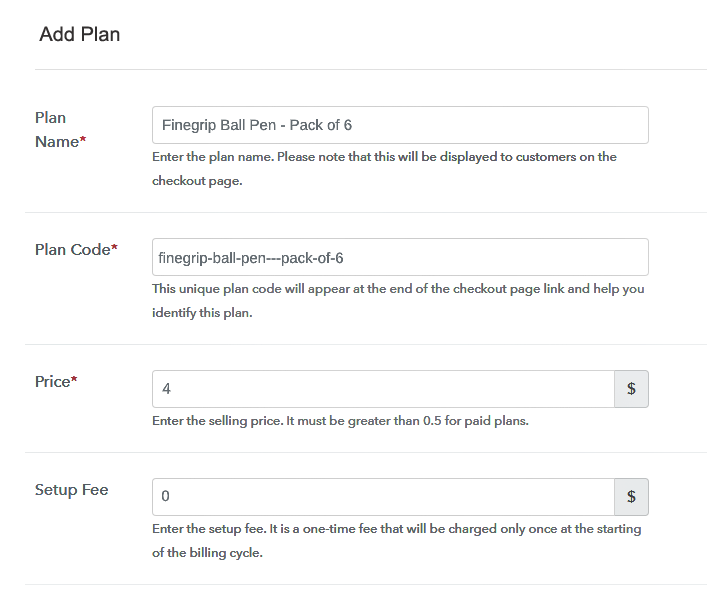
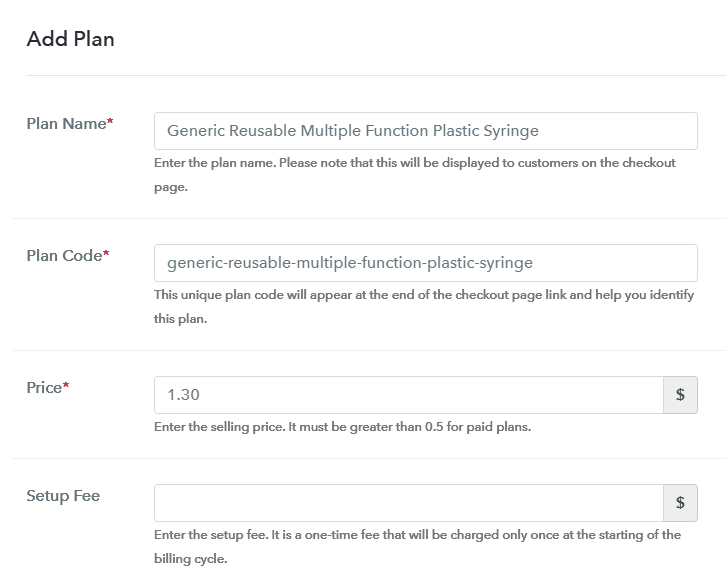
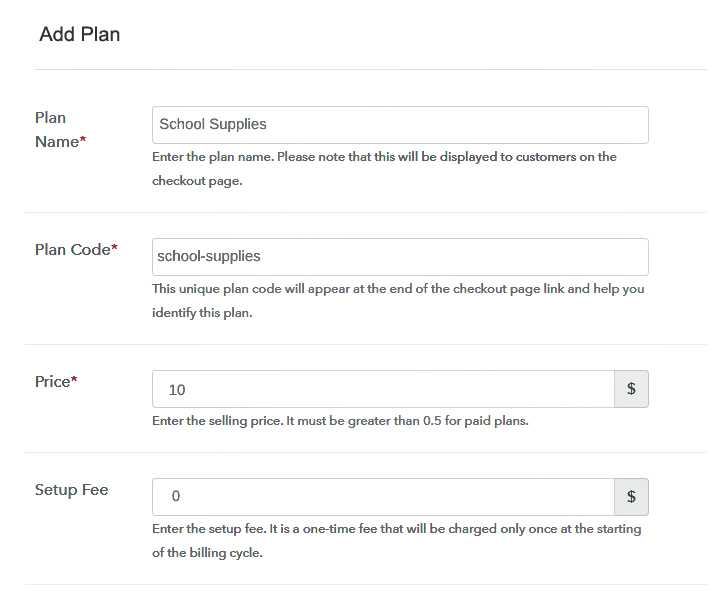
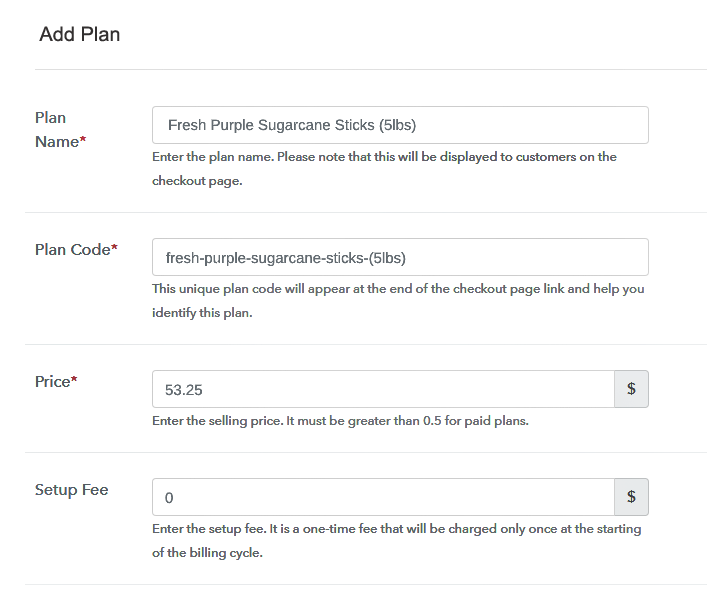
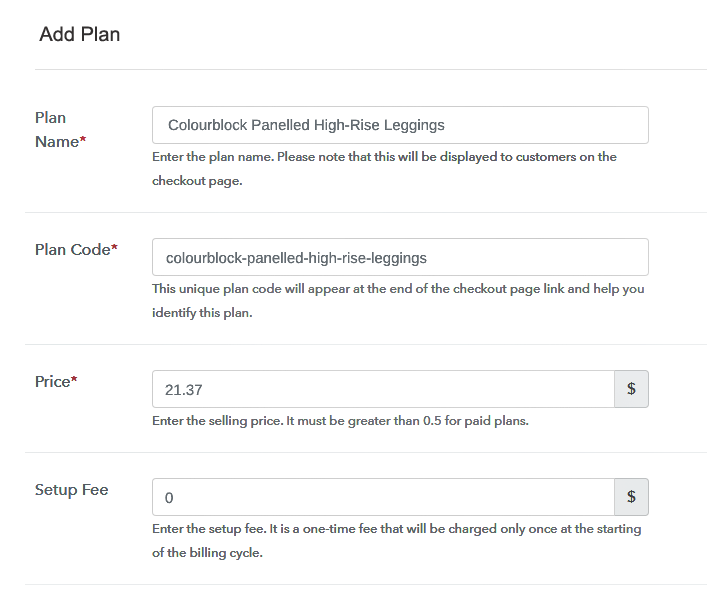
Step 6: Add Plans
(a) Select Add New Plan

(b) Specify the Plan & Pricing Details
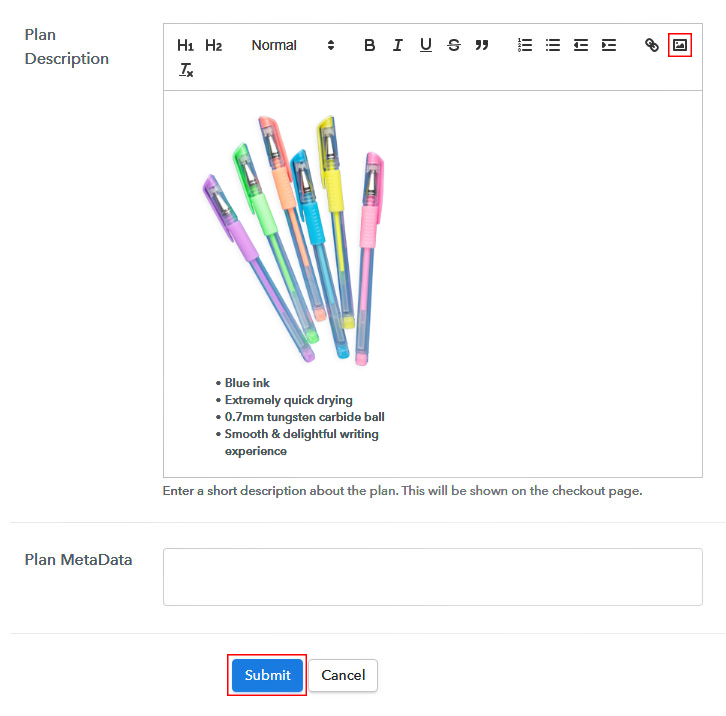
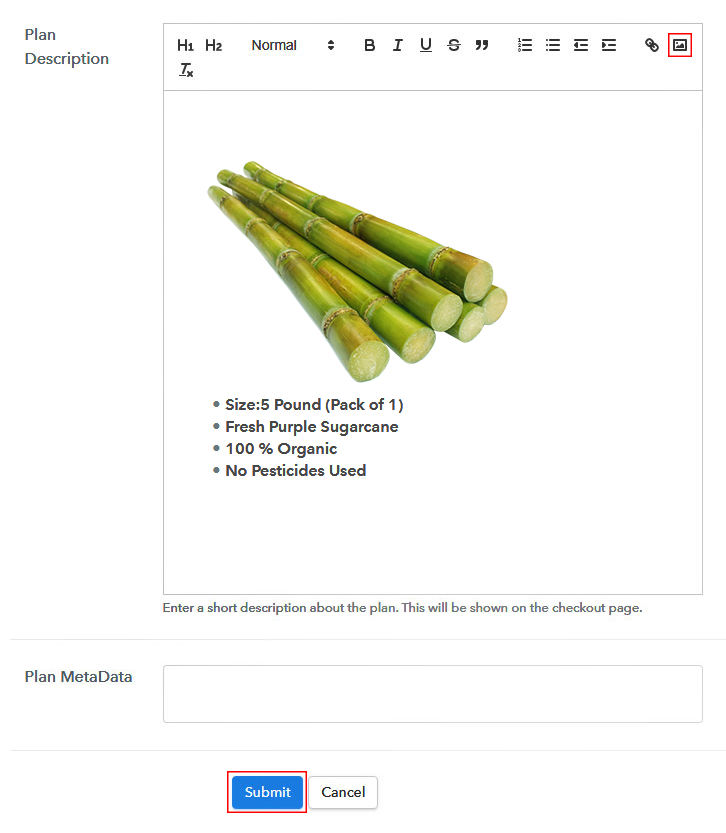
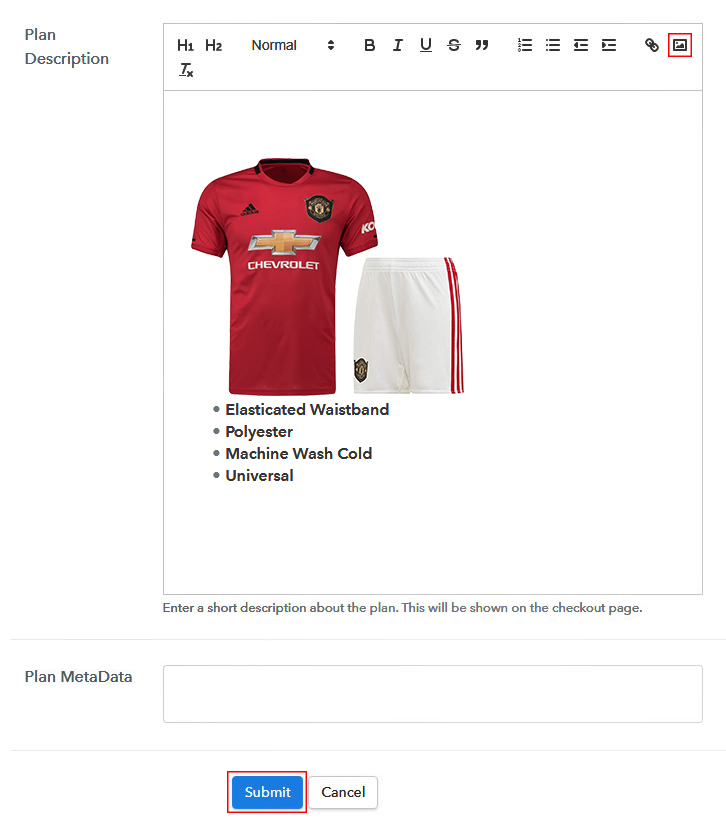
(c) Add Image & Description of Sportswear
Step 7: Share your Checkout Page

Step 8: Preview Checkout Page
(a) Click on the View Button

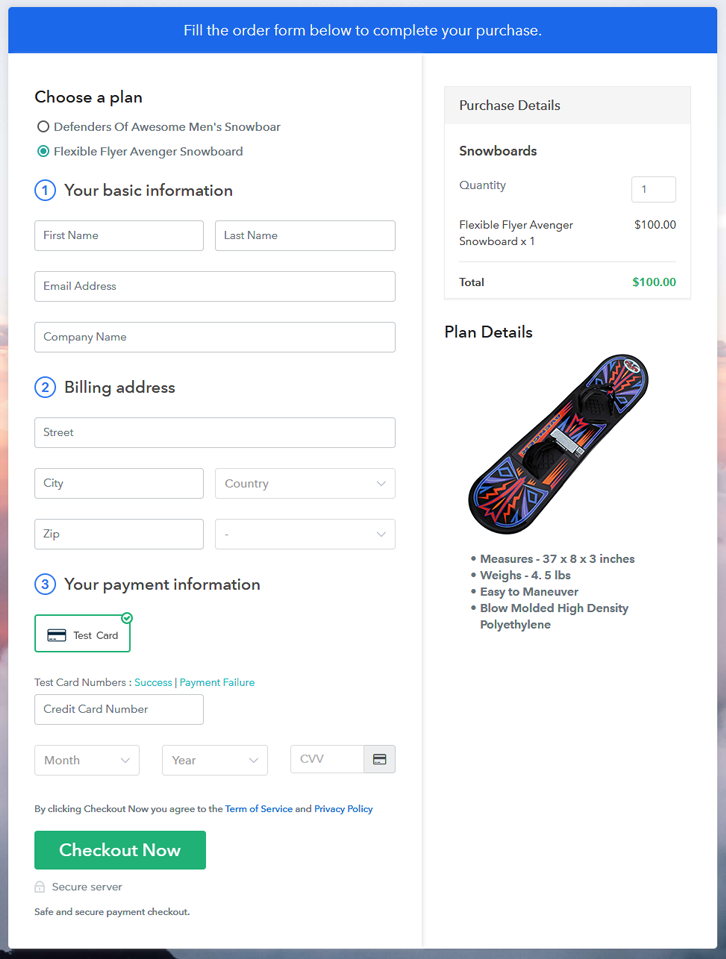
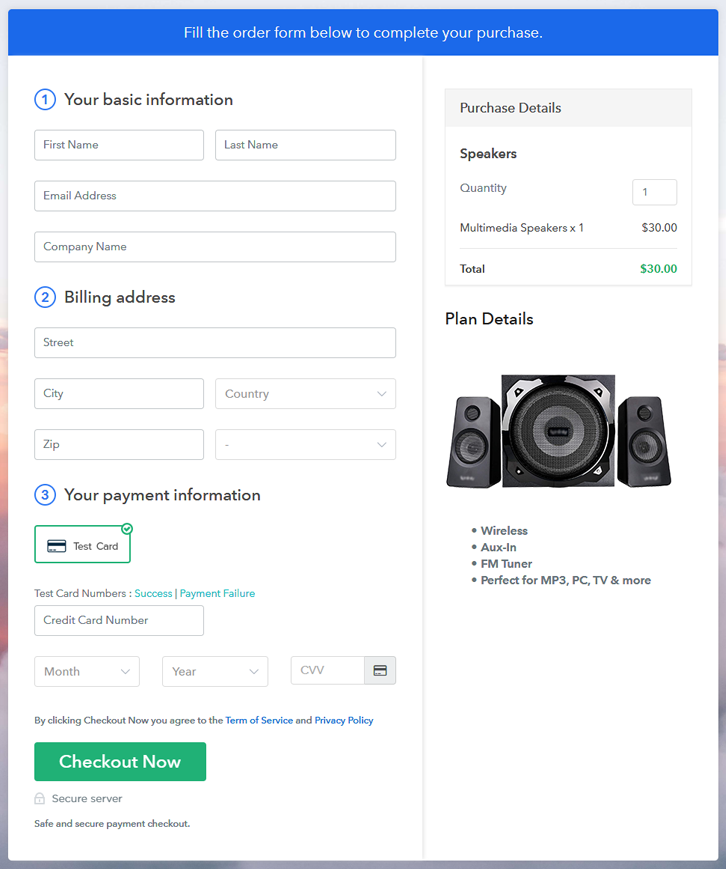
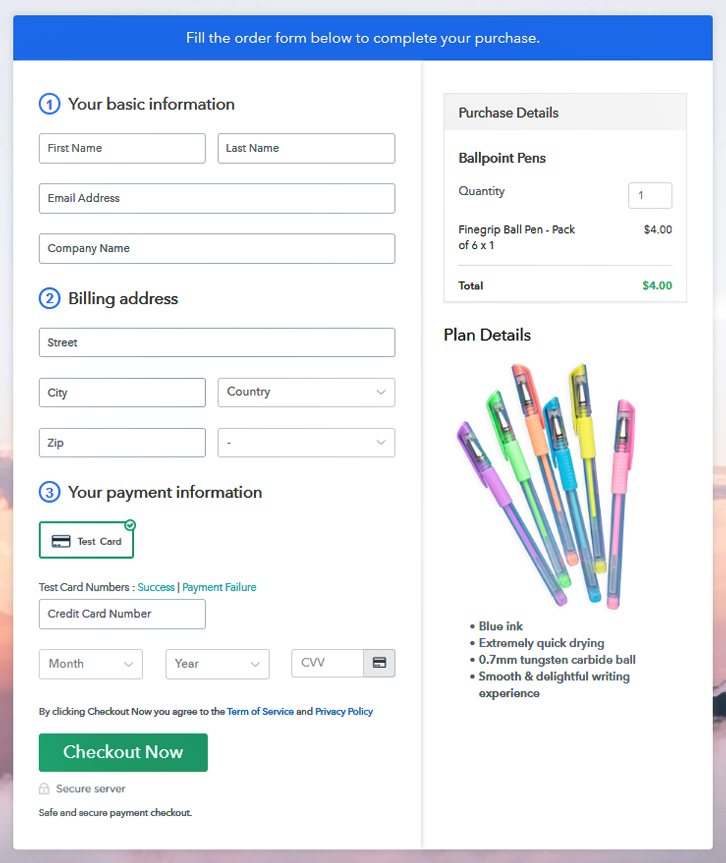
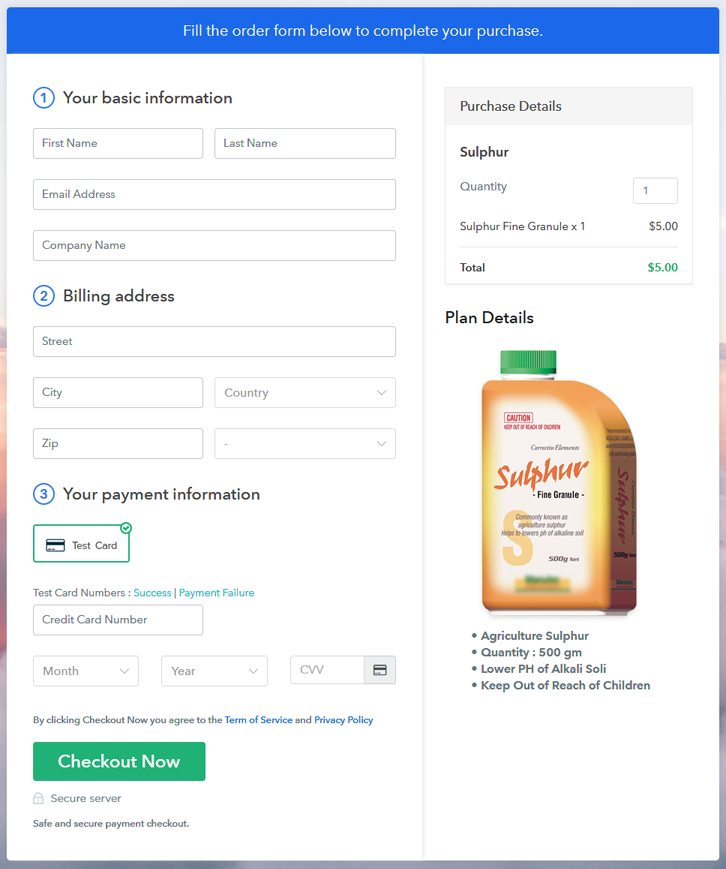
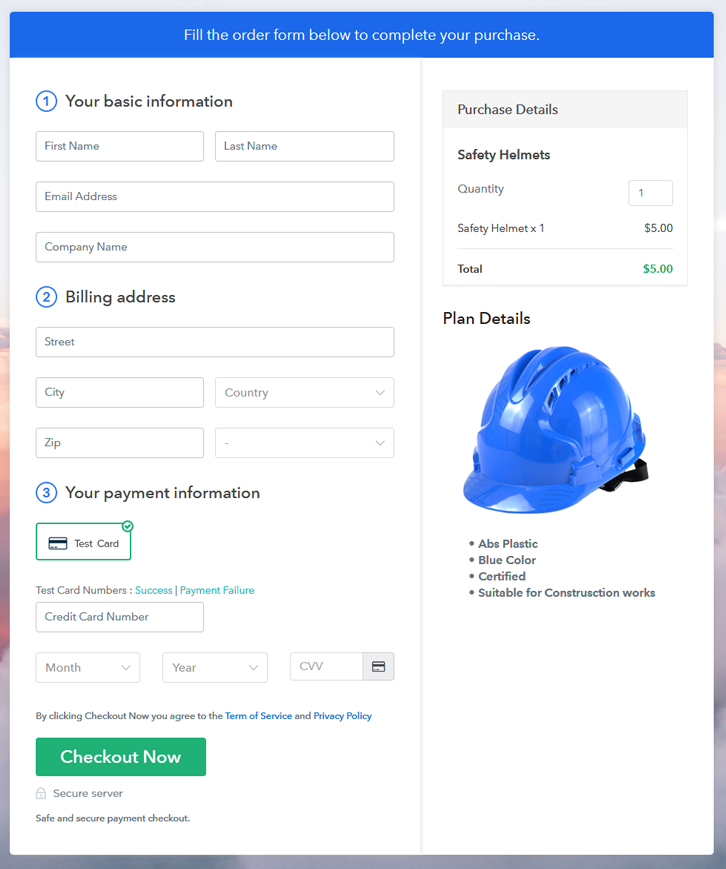
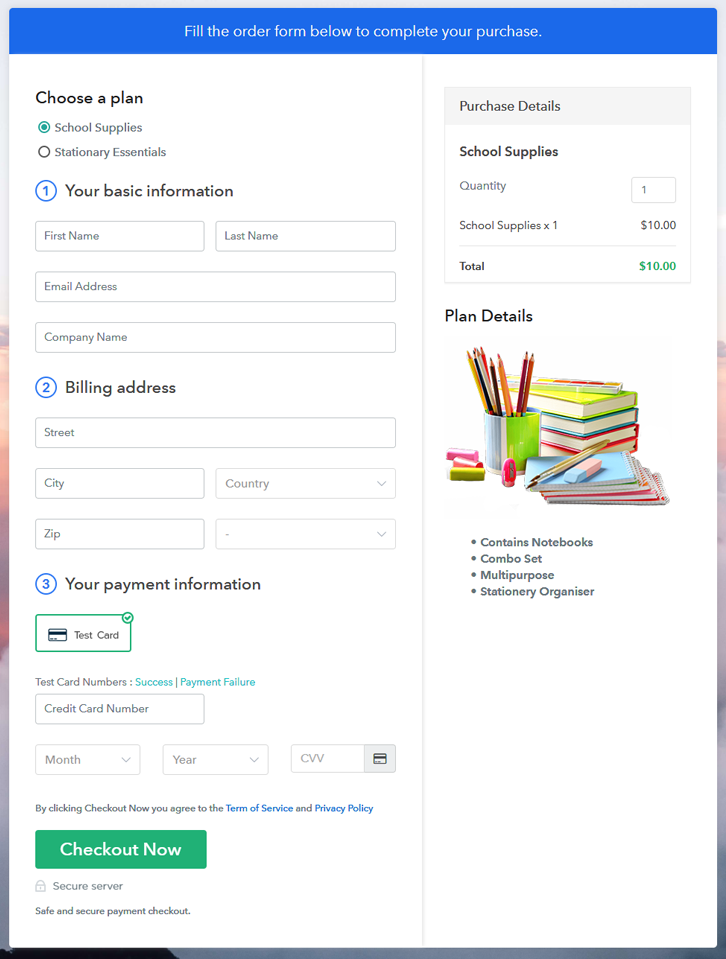
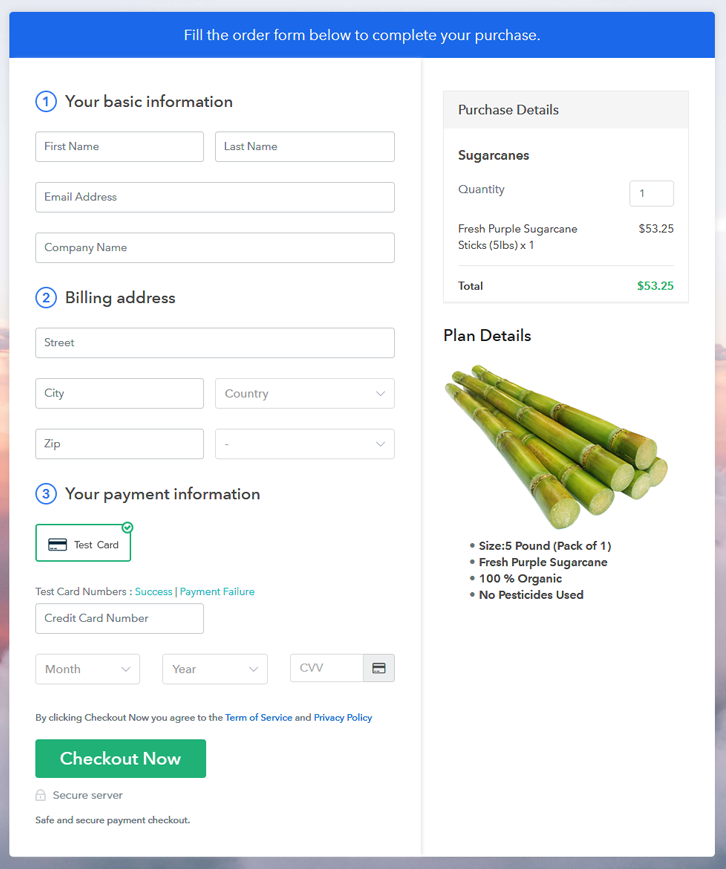
(b) Take a Look at the Checkout Page
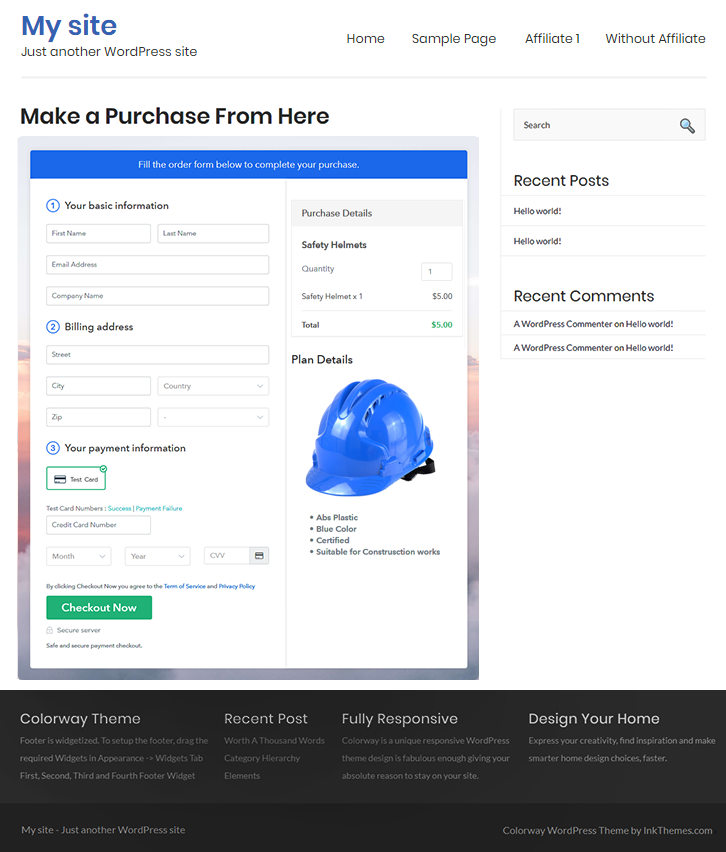
Step 9: Embed Checkout Page in Site & Sell Sportswear Online

(a) Edit the Page & Paste the Copied Link

(b) Save & Publish the Checkout Page

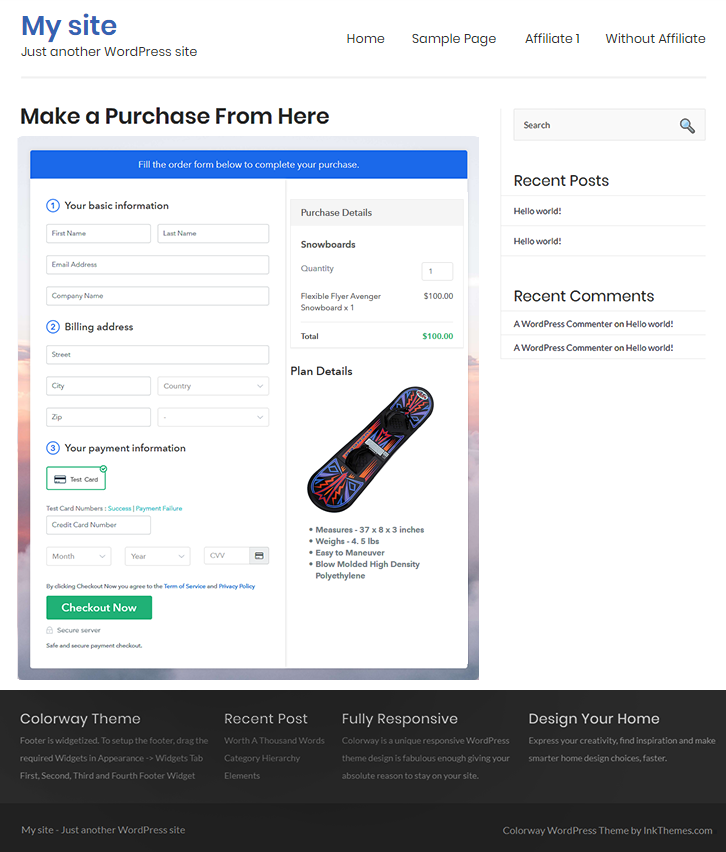
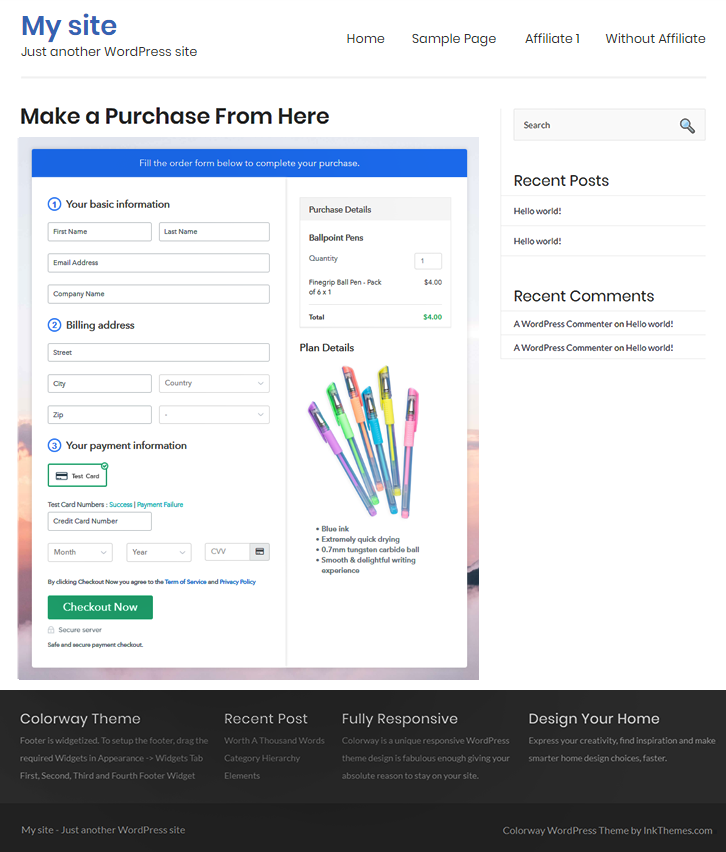
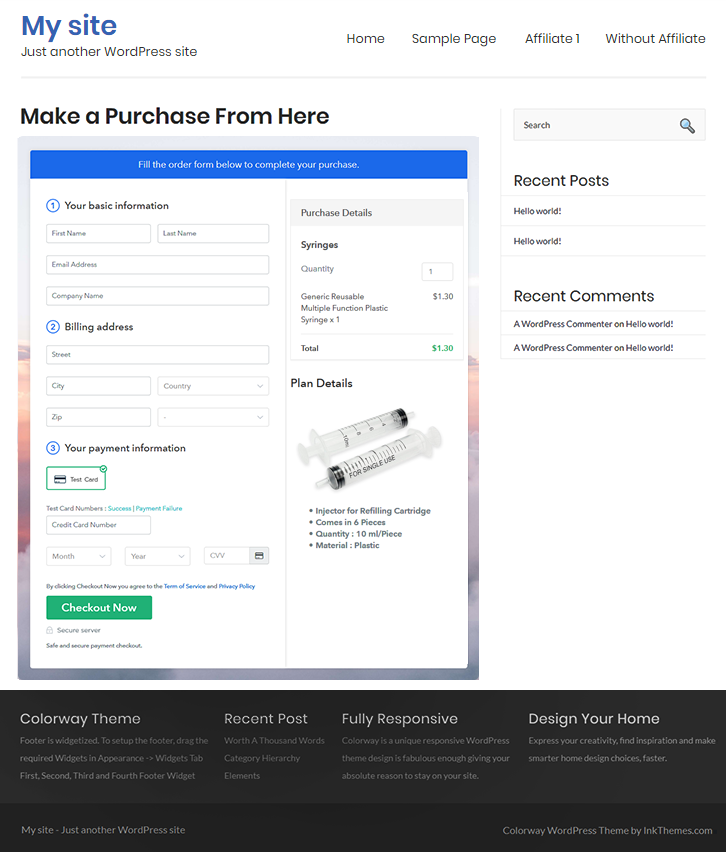
(c) Check out the Final Look of your Checkout Page on WordPress Site
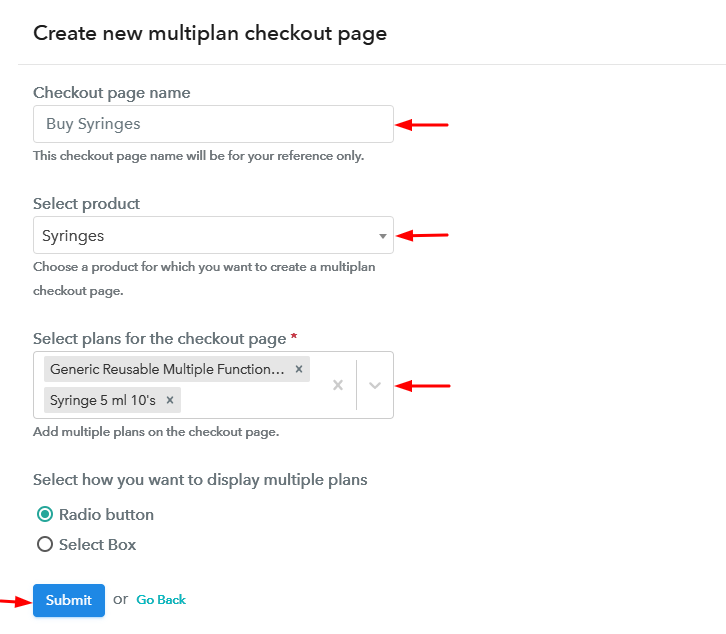
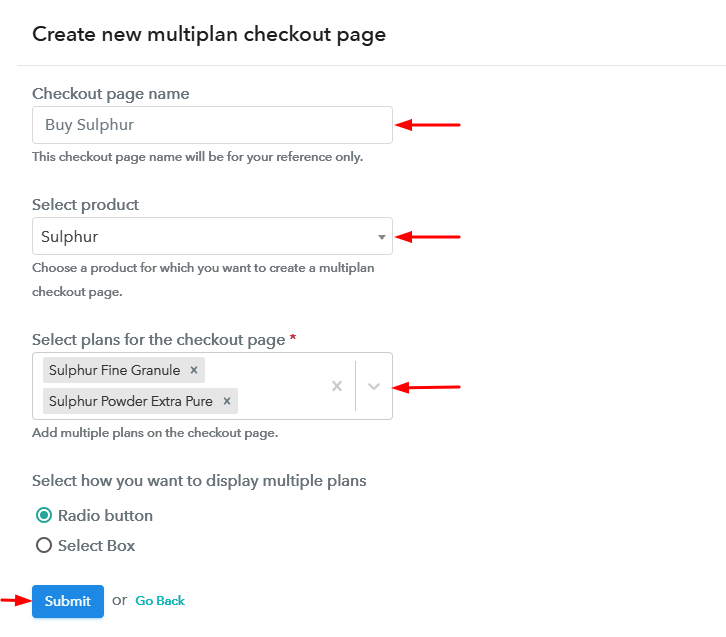
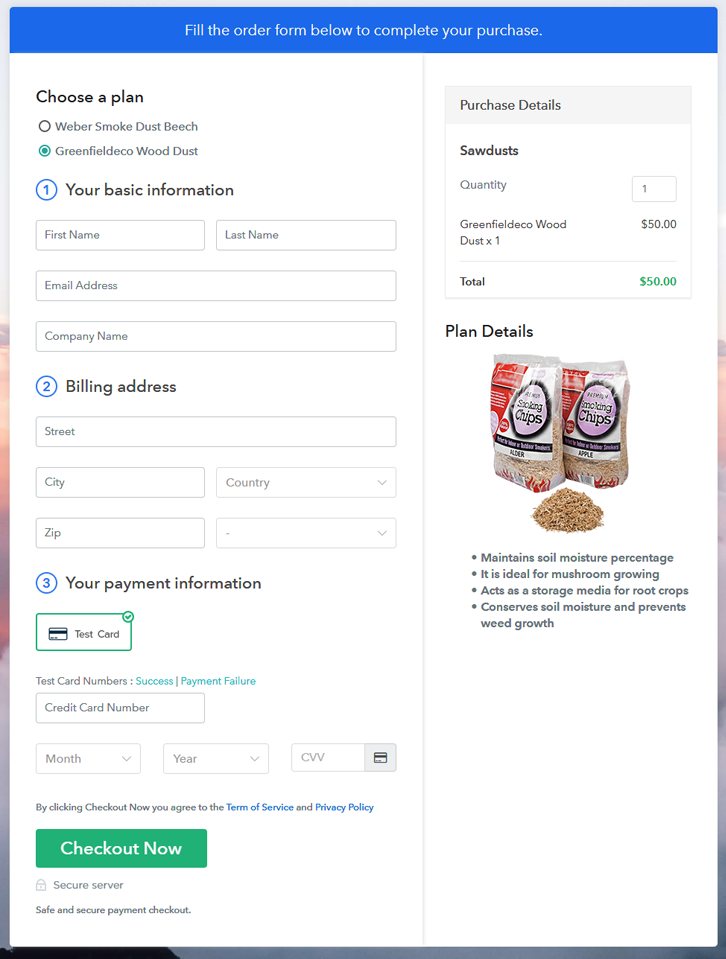
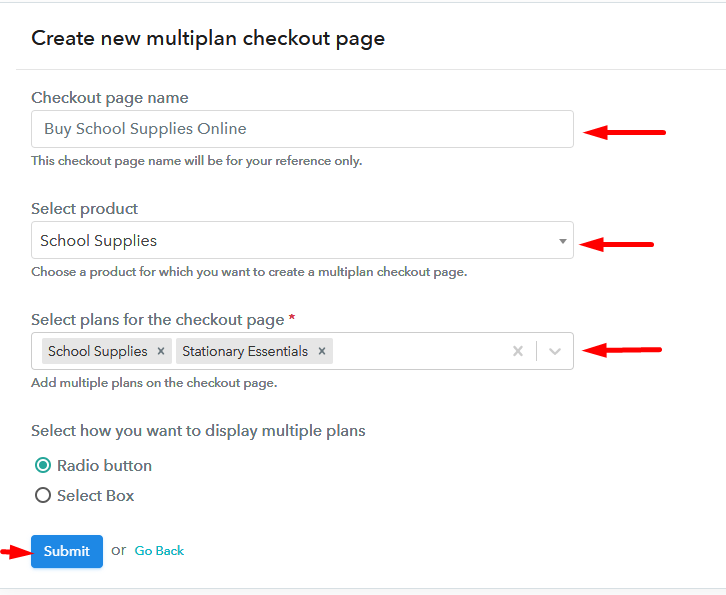
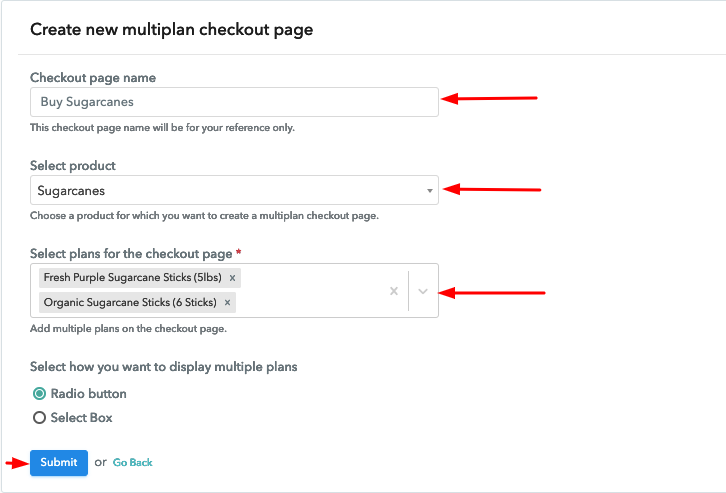
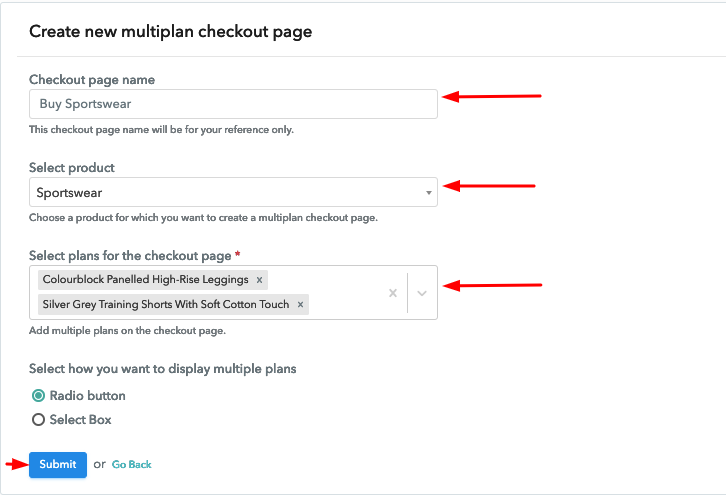
Step 10: Multiplan Checkout Page
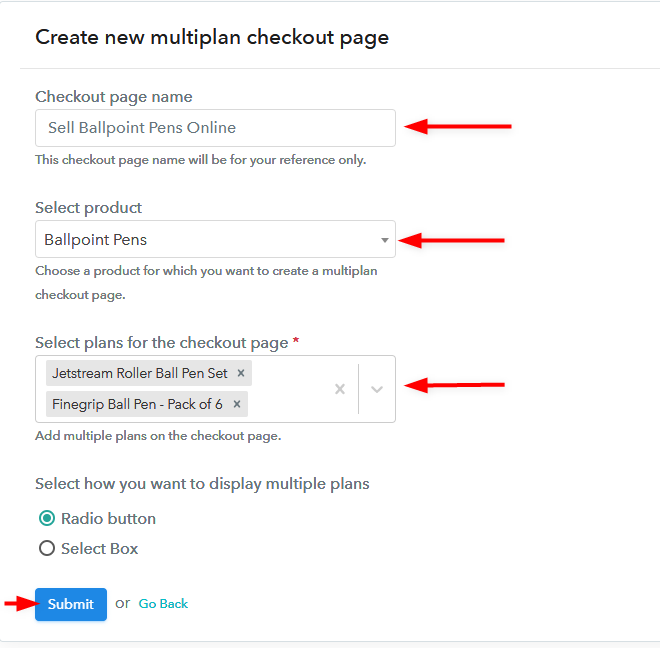
(a) Click on Add Mutiplan Checkout

(b) Add Plans to Sell Multiple Sportswear from Single Checkout Page
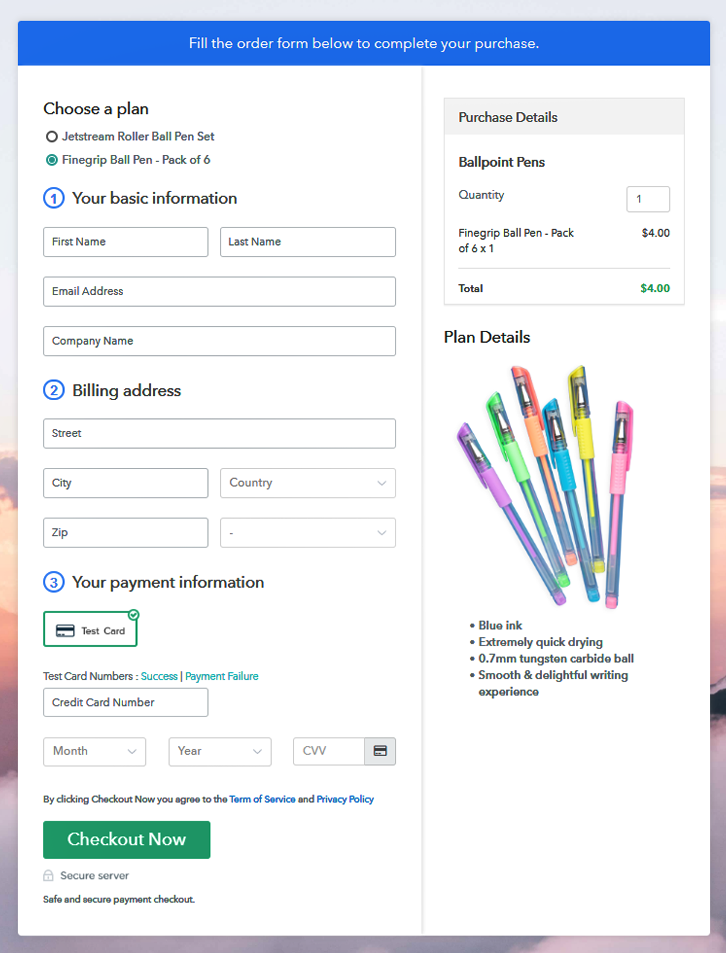
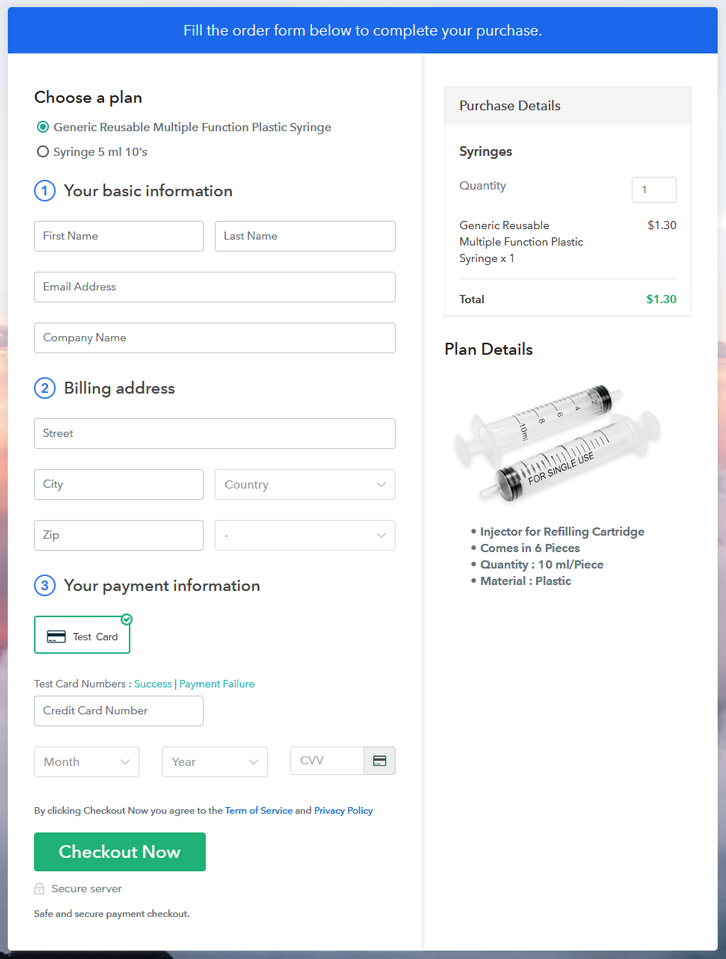
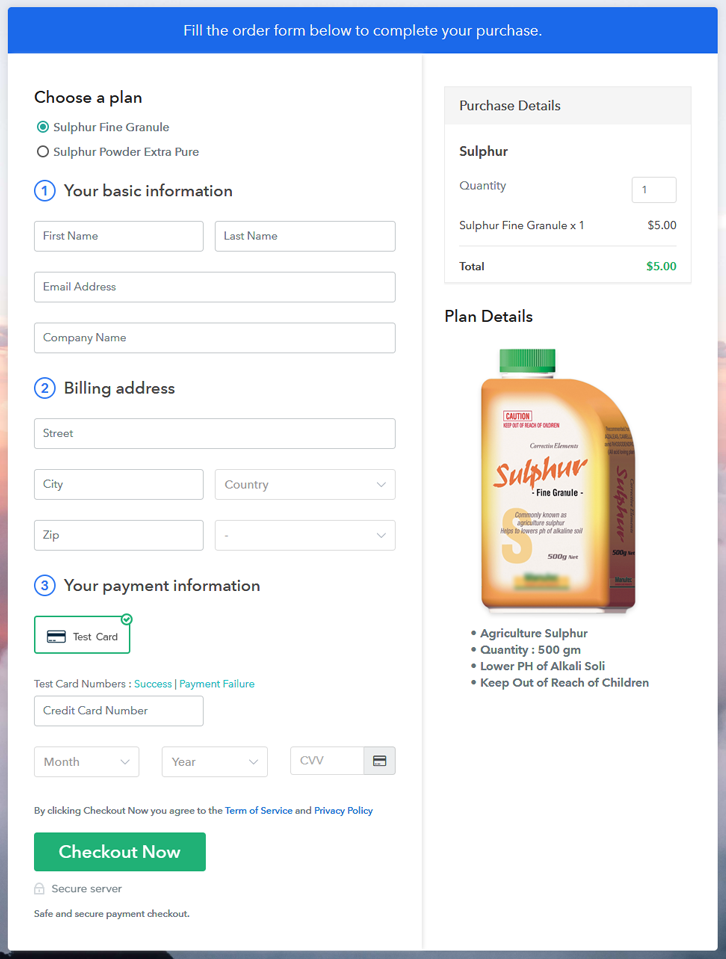
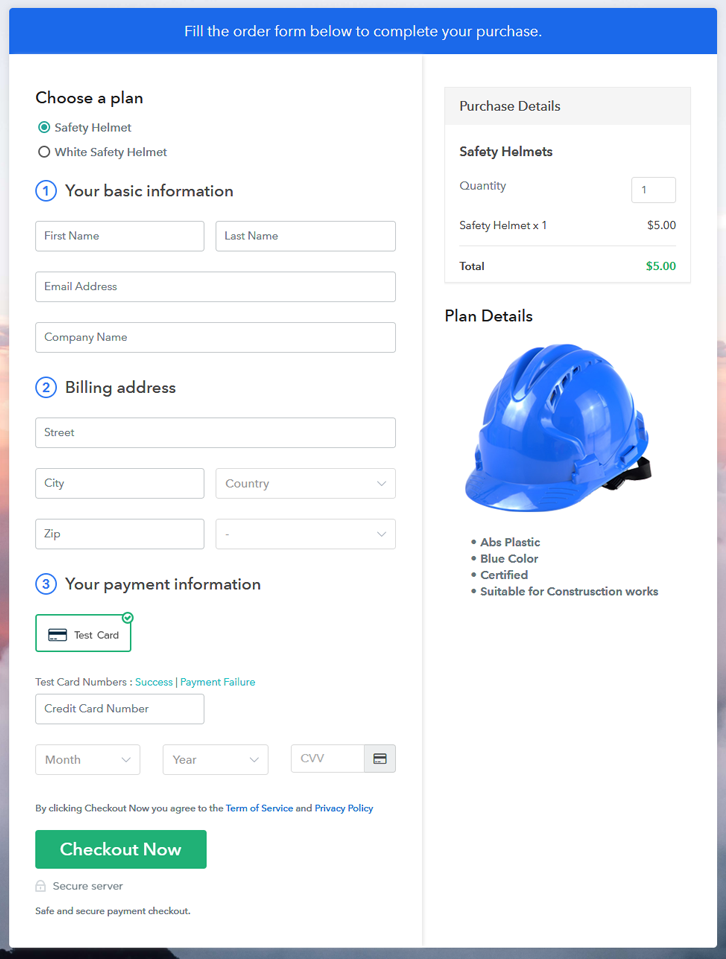
(c) Take a Look at the Checkout Page
Wrapping Up
For further queries or suggestions, please write to us.You May Also Like To Read –