Ideal For: All the sunglasses case manufacturers, sunglasses case sellers, sunglasses case dealers, sunglasses case suppliers, sunglasses shop owners and other merchants can use this method to sell sunglasses cases online.

Why Choose this Method to Sell Sunglasses Cases Online?
Unlike any other solution, this method allows you to:
- List and sell your sunglasses cases for FREE. Absolutely no payment required.
- No need to pay commission on any of your sales.
- Multiple payment options like PayPal, Credit Card, etc to collect payment from a single place.
- Sell one time or recurring subscriptions of your sunglasses cases.
- Collect payments & sell products in any currency as per your requirement.
- Give discounts on your products by offering special coupon codes.
- Add sales commission agents to help you in selling sunglasses cases online.
Sunglasses cases are widely used by people to keep their sunglasses safe and secure. That’s why the business of sunglasses cases never goes out of trend. So, if you want to take your offline sunglasses case store online then you have come to the right place.
There are many advantages of selling sunglasses cases online as you get orders from global audiences, an increase in sales, etc. Besides, online store is way more convenient as compared to an offline store when it comes to management. Luckily, we have an amazing software named Pabbly Subscription Billing that can help you to take your business online. This tool enables you to create a checkout page for selling sunglasses cases online without any hassle.
Some other benefits of using this online tool are in the following:
- Easy Revenue Management
- Unlimited Plans & Products
- Multiple Billing Models
- Numerous Payment Gateways
- Professional Invoices
- Tax Management
- Unlimited Coupon Codes & Discounts
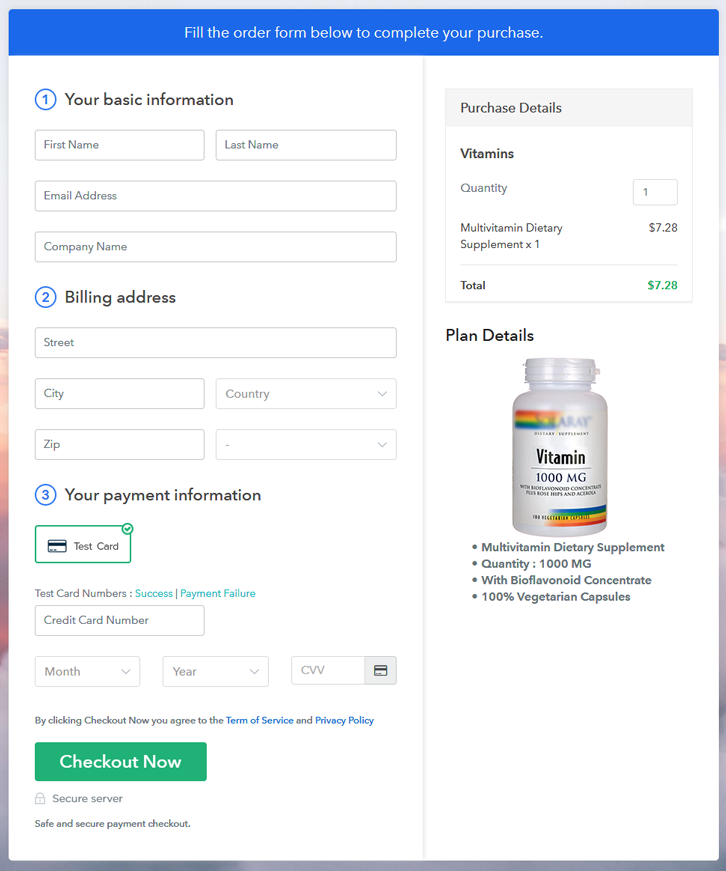
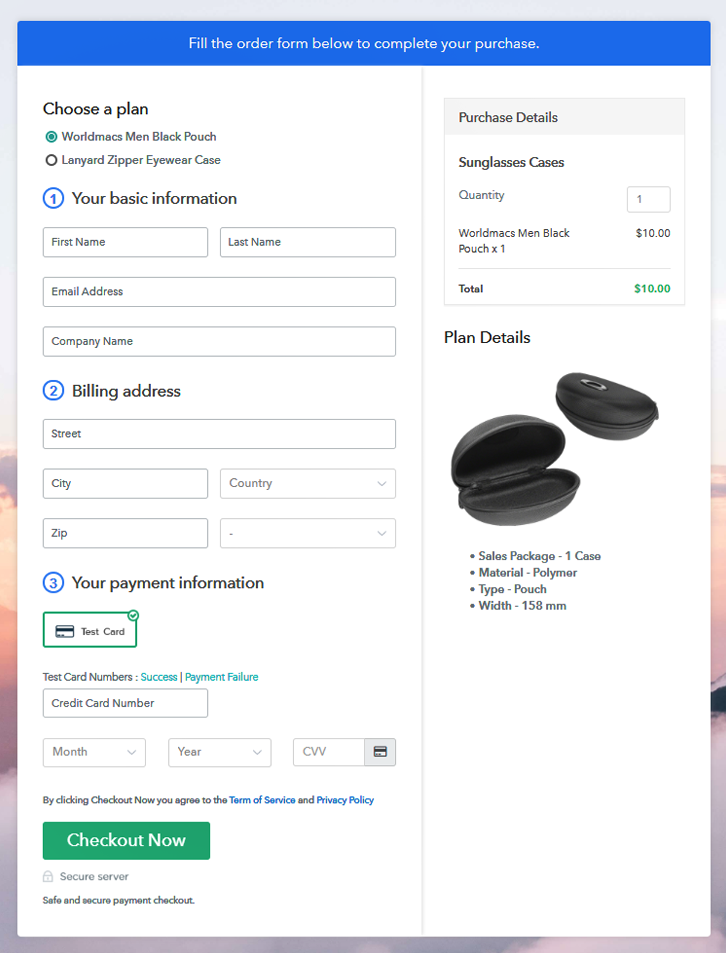
Final View of Checkout Page for your Sunglasses Cases Selling Business
Step 1: Log in to Pabbly Subscription Billing

Begin the process for creating a checkout page for sunglasses cases by visiting the Pabbly Subscription Billing in your browser. After that, click on the “Sign up Free“ button. Moreover, either manually filled out the details or sign in using your Gmail account.
Sign Up For Free!
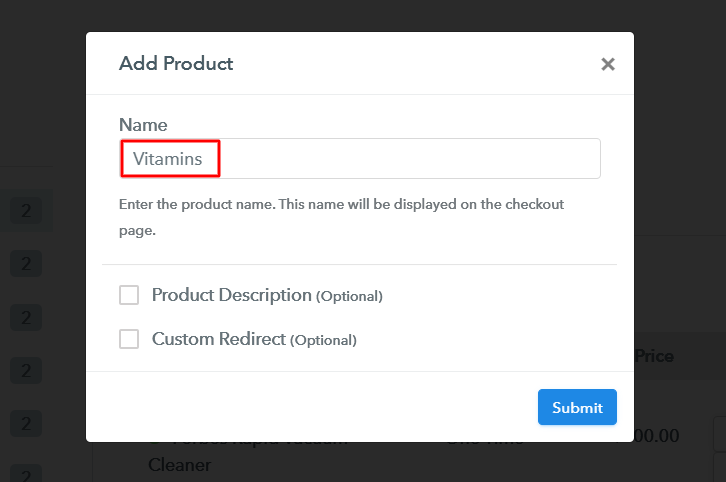
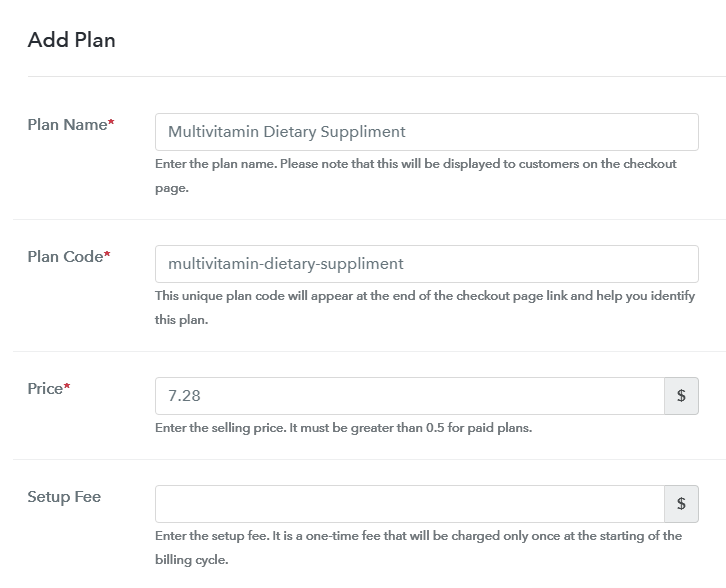
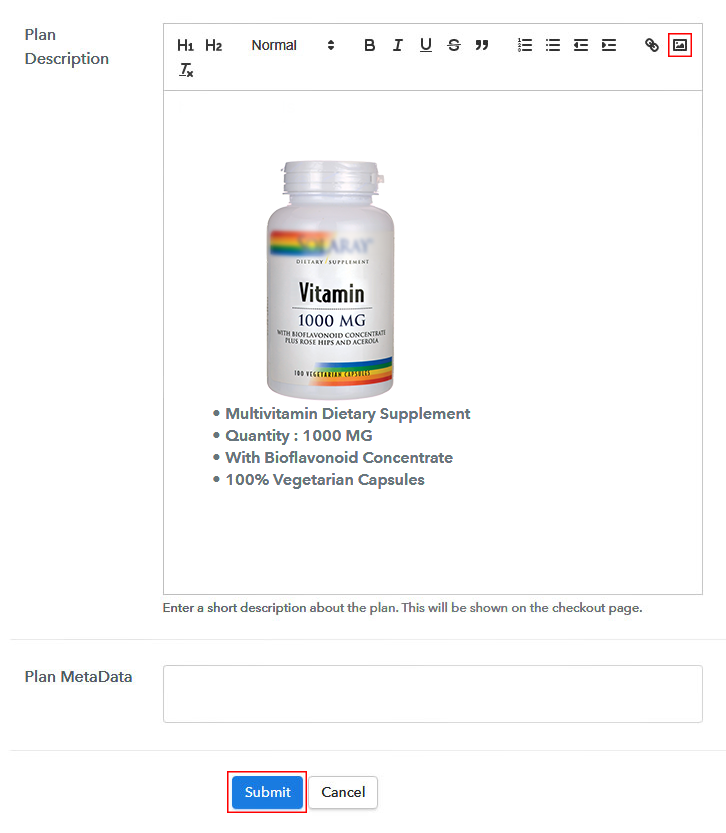
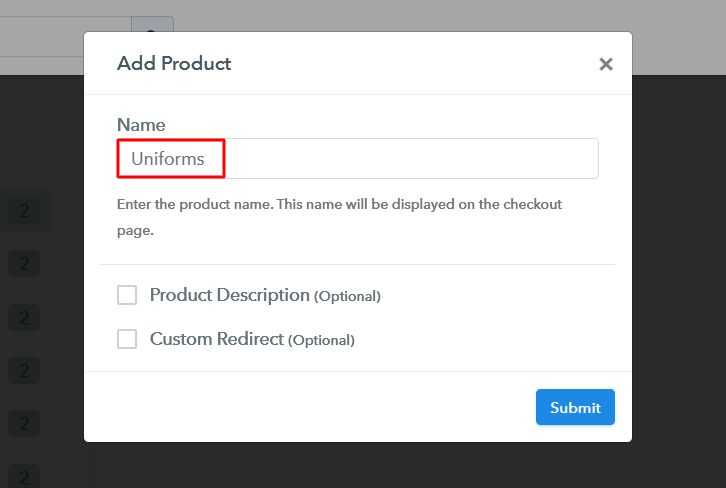
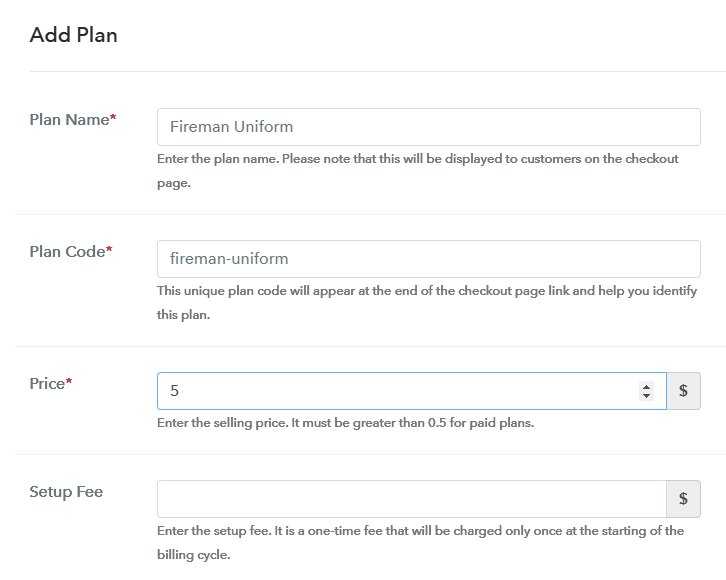
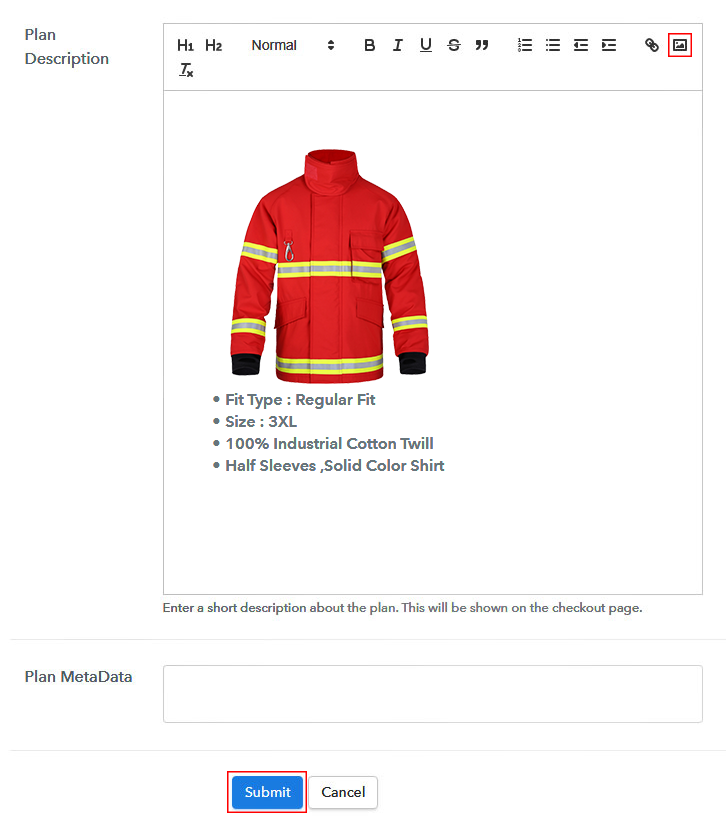
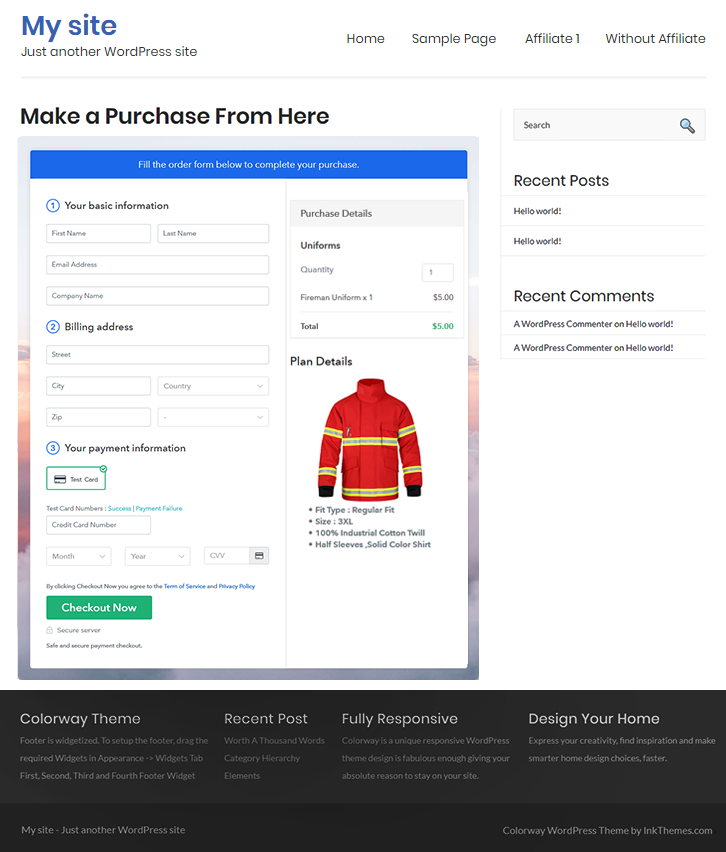
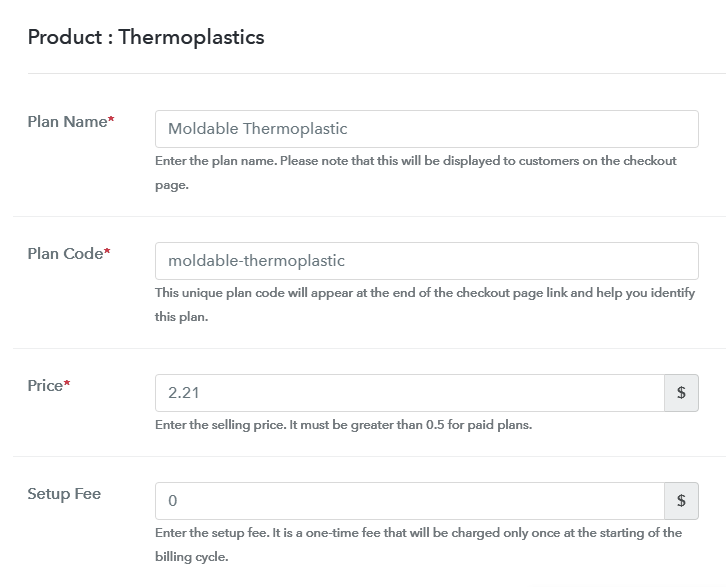
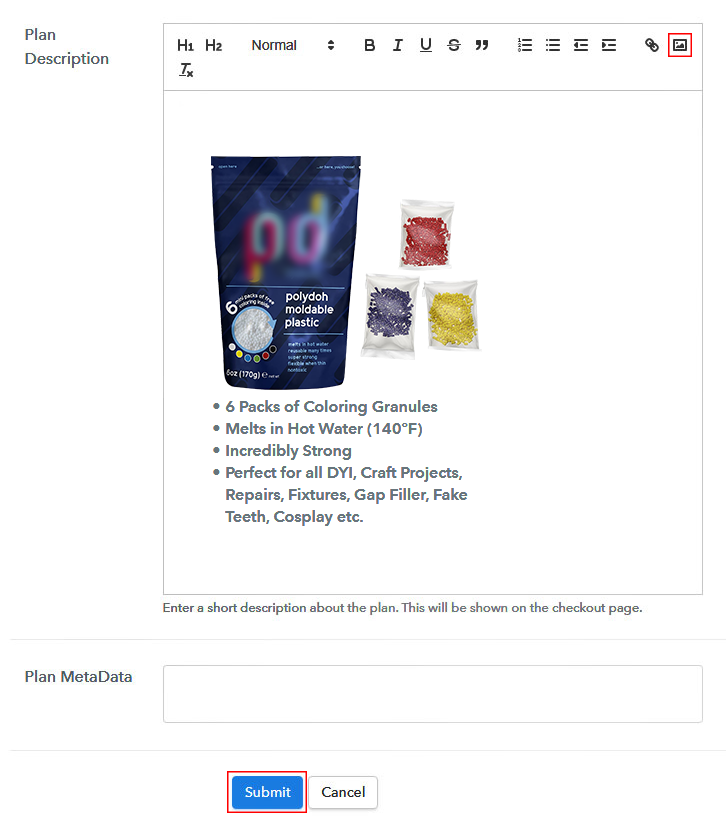
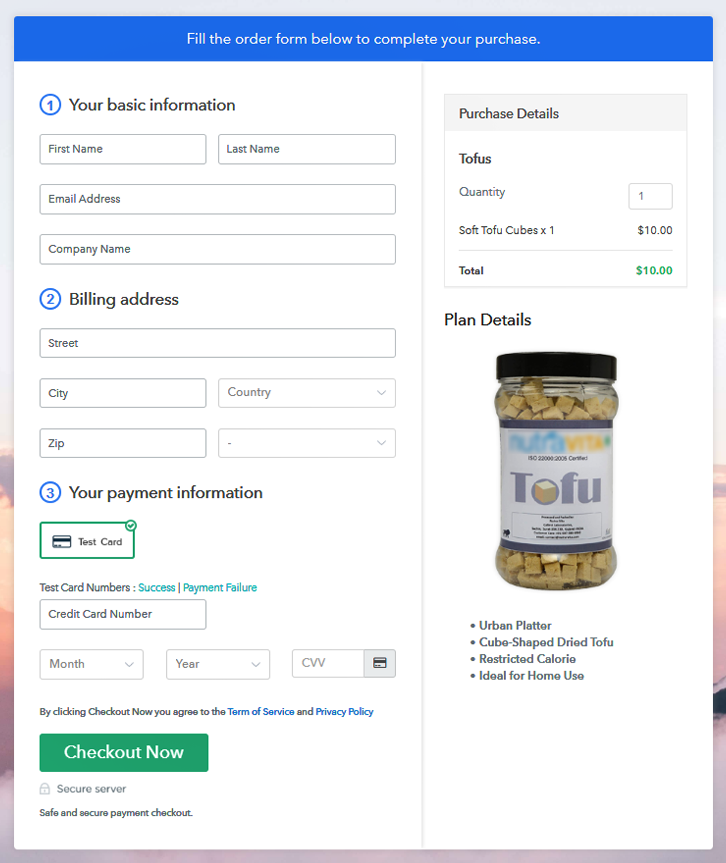
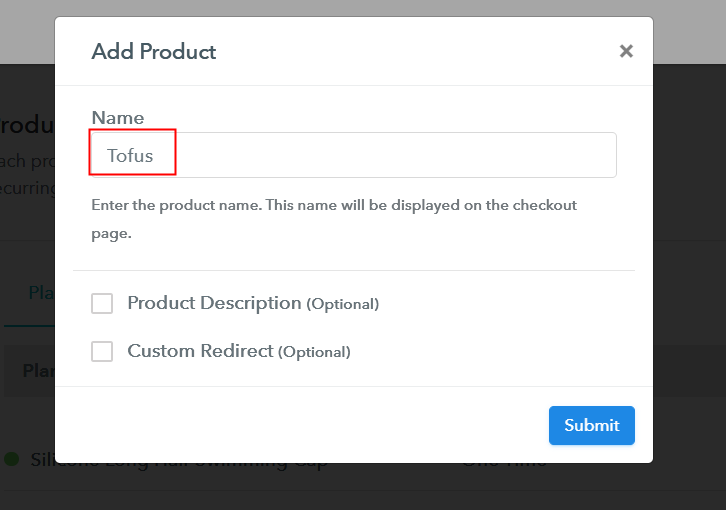
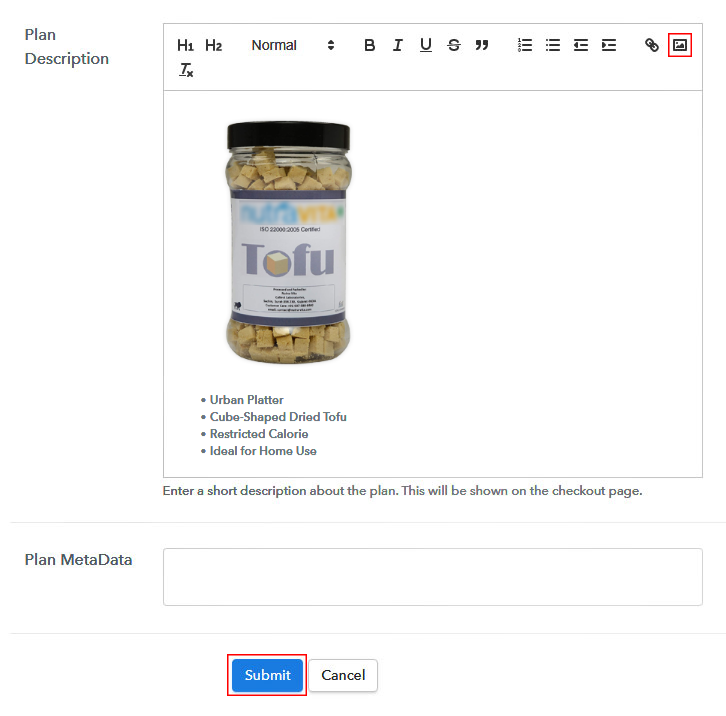
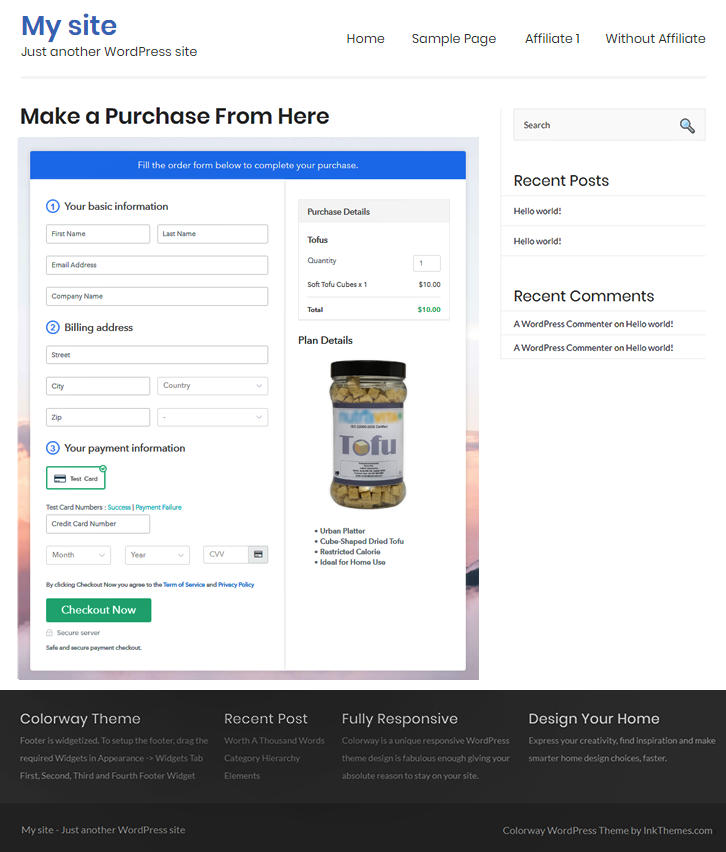
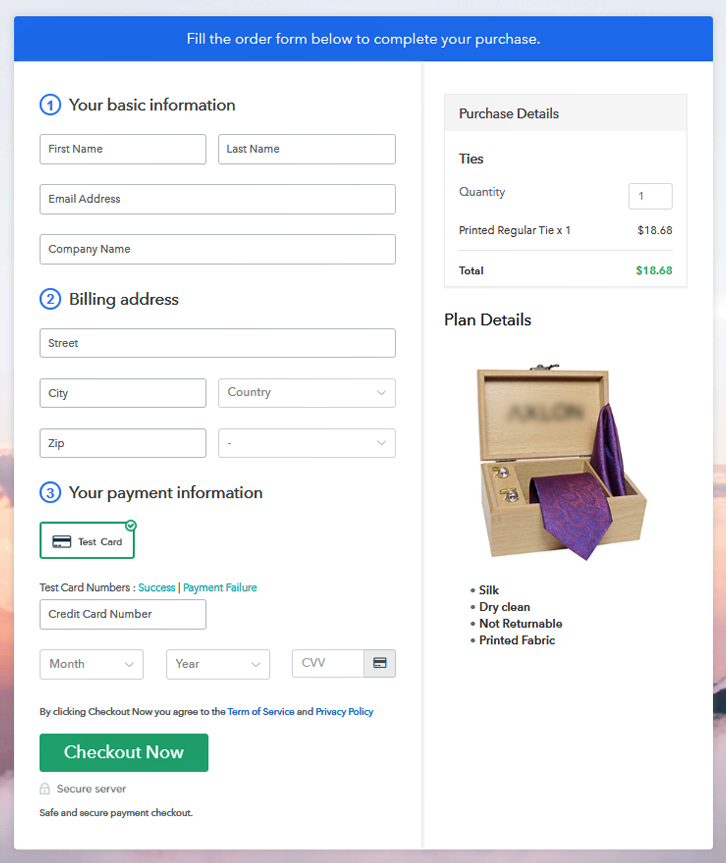
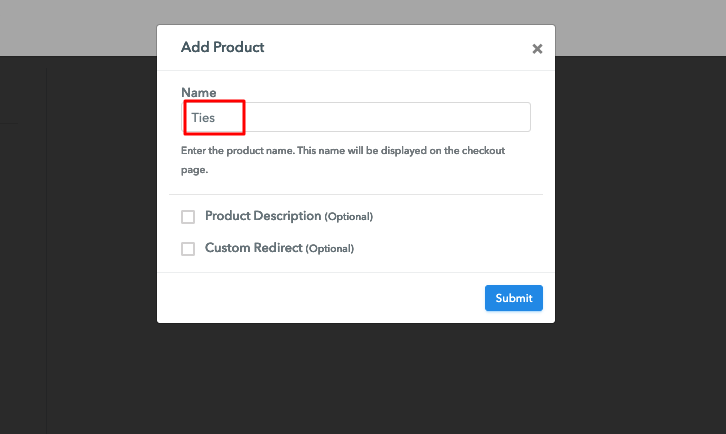
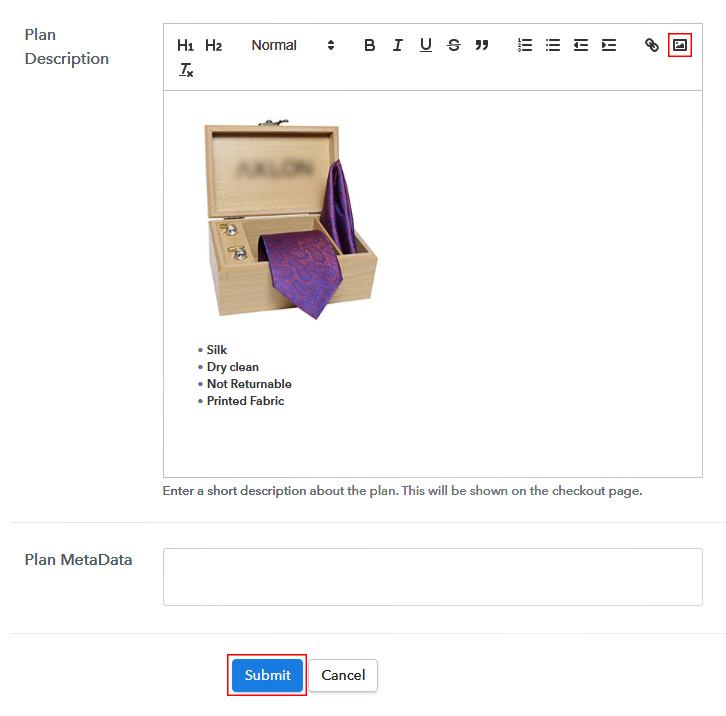
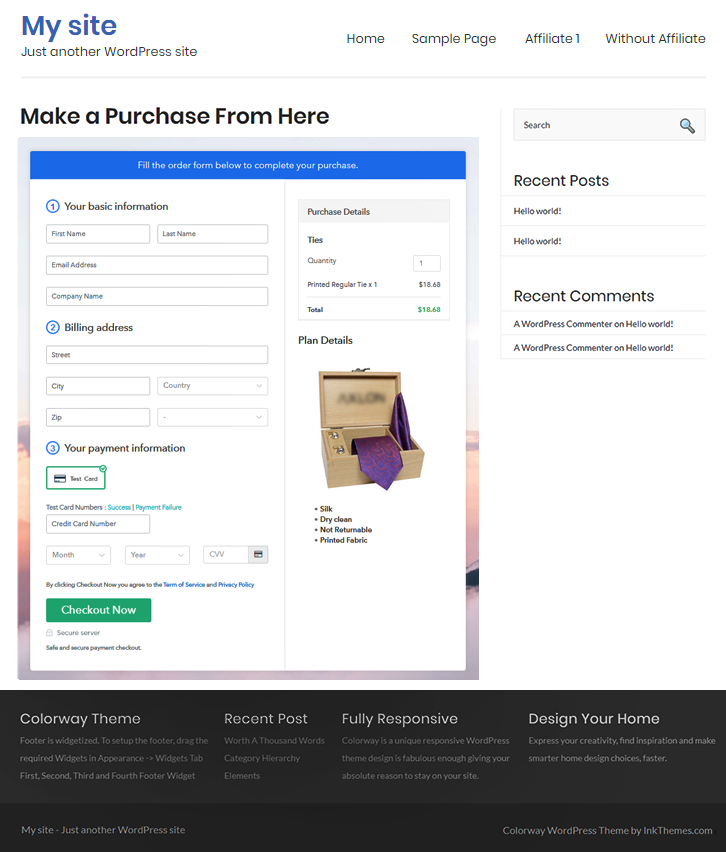
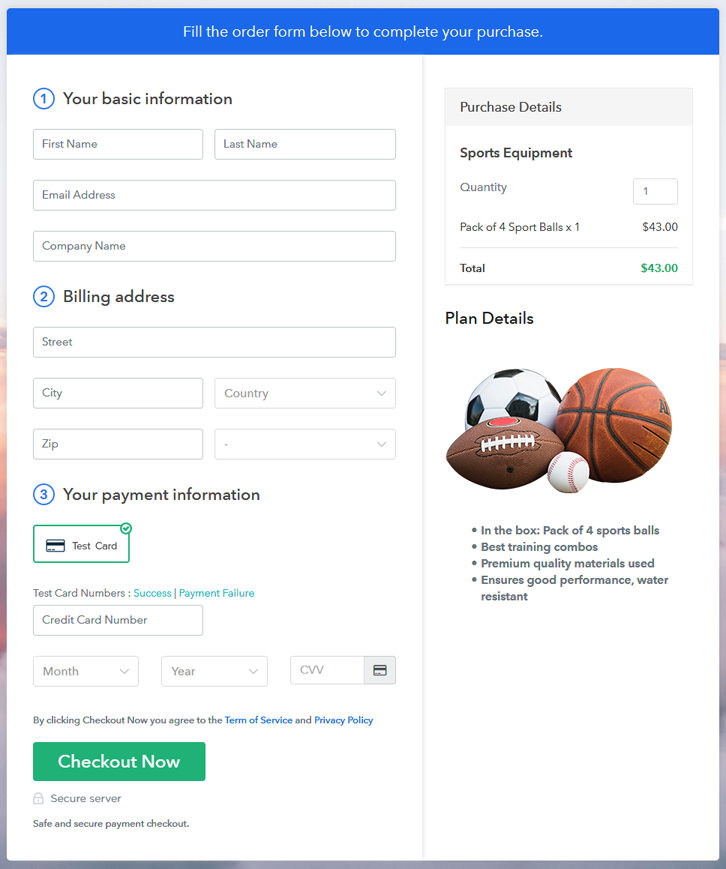
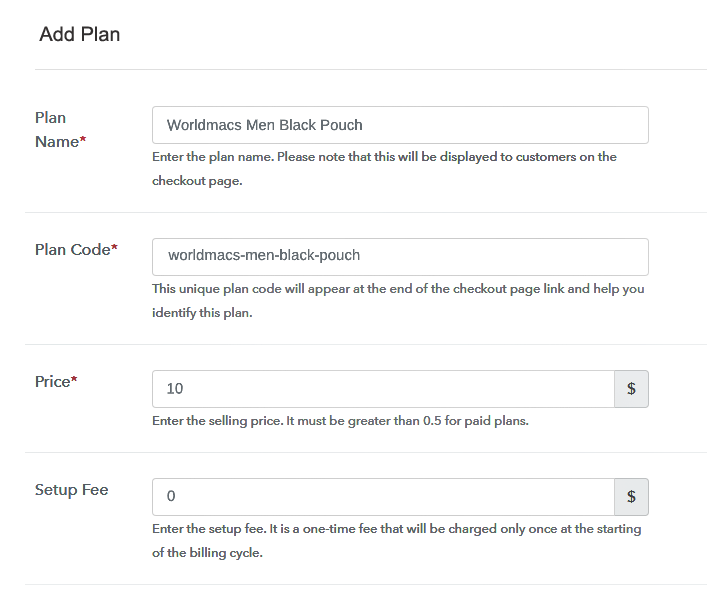
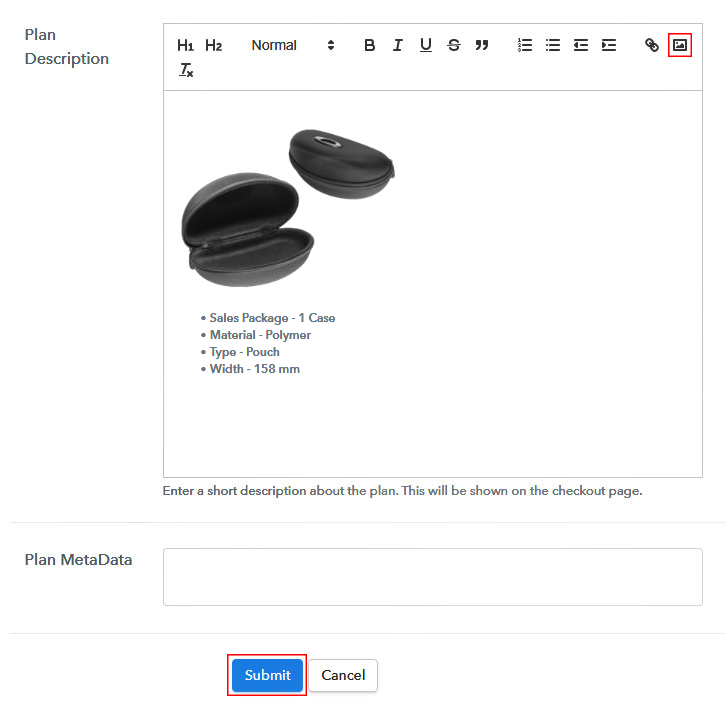
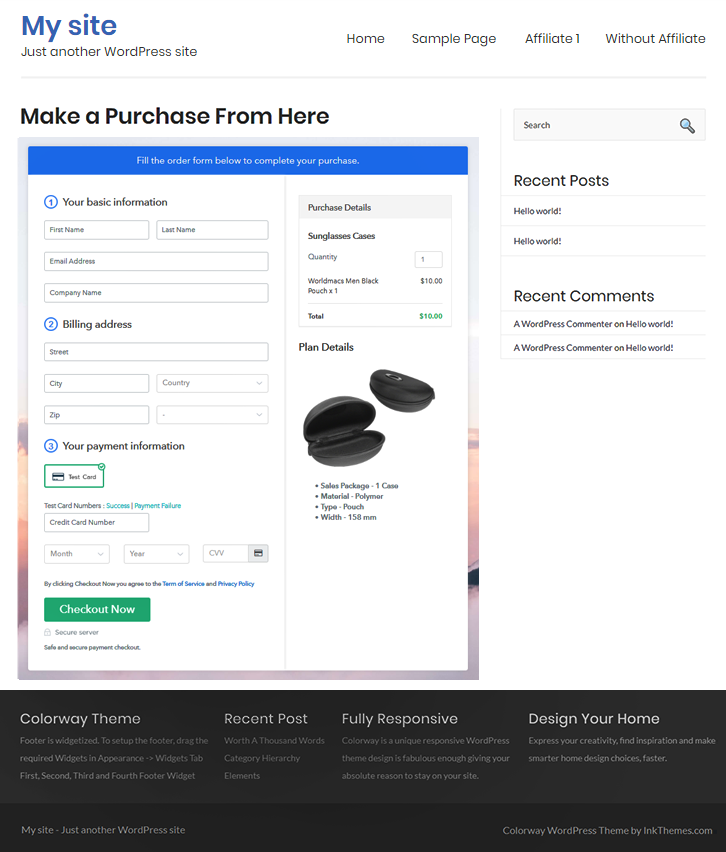
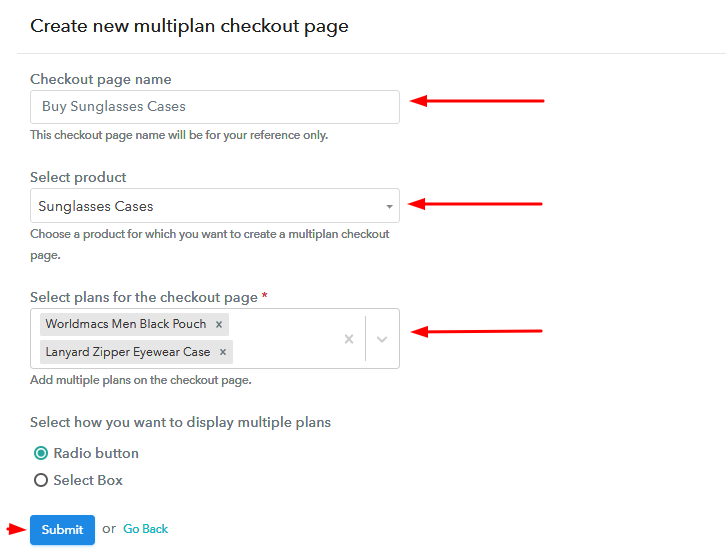
Besides, after clicking on the “Access Now” button of the software, a page will open with fields like company name, select currency, and phone number. Simply fill out those details to continue creating a checkout page for sunglasses cases. The subsequent step is to understand payment procedures using a “Test Payment Gateway”. Here, we will describe the checkout page process for the sunglasses cases with the help of a test payment gateway. Besides this, the tool offers various payment gateways such as PayPal, Stripe, etc. Further, below are the payment integration guides to help you out. Additionally, add the name, which in our case is “Sunglasses Cases”. Here you can specify the type like printed sunglasses cases, designed sunglasses cases, etc. Further, write a short description of the sunglasses cases to get the customer’s attention. Moreover, just fill out all those details and your product is created. Note: Here you can add all the products related to the similar category by creating plans for each of them. Let’s unfold out plans for different kinds of sunglasses cases available in your store. The next thing to do is fill all the details of the sunglasses cases like plan name, code, price, set-up fee, and much more to continue. Moreover, provide a brief description of the sunglasses cases using bullets, images, etc, to get buyers attention to the checkout page. Next, click on the “Submit” button to add the sunglasses cases on the checkout page. Finally, you can add multiple plans and kinds of sunglasses cases in your product list which you want to sell online. Follow up the recommended steps to preview the checkout page: Just copy the link and add the checkout page to sell sunglasses cases online at any proper place on your WordPress site. Further, paste the plan link of sunglasses cases on a text editor of the WordPress dashboard. Next, click the “Publish” button, after making changes. Note: In case you want to sell multiple products via a single checkout page, you can create a multi-plan checkout page otherwise skip this step. Okay! So now you know how easy is to start sunglasses cases business online using Pabbly Subscription Billing software. Just go through all the mentioned steps and nothing else. Moreover, in case if you any trouble or query, note it down in the comment section below. We will get back to you as soon as possible. Thank you!!Step 2: Select Subscription Billing

Step 3: Account Setup

Step 4: Connect Payment Gateways & Start Sunglasses Cases Selling Business Online

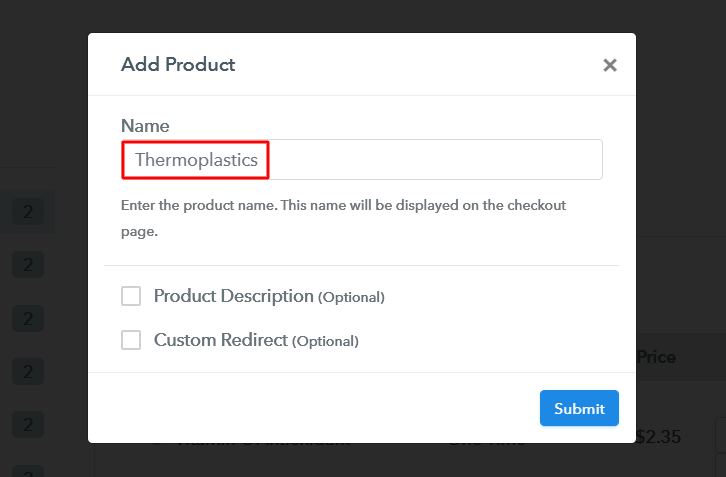
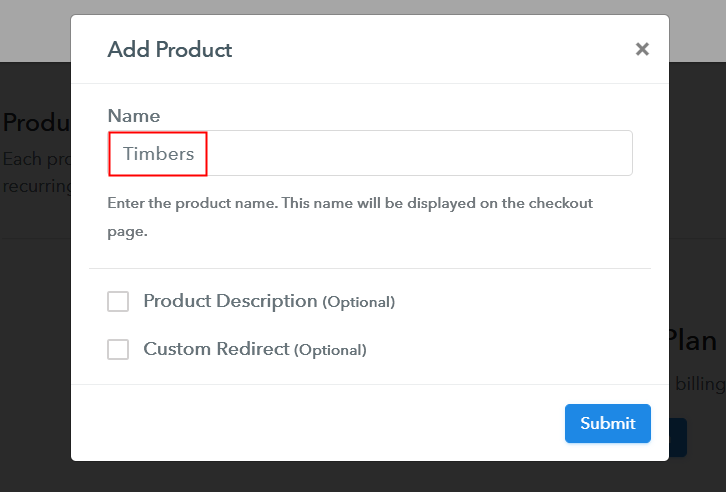
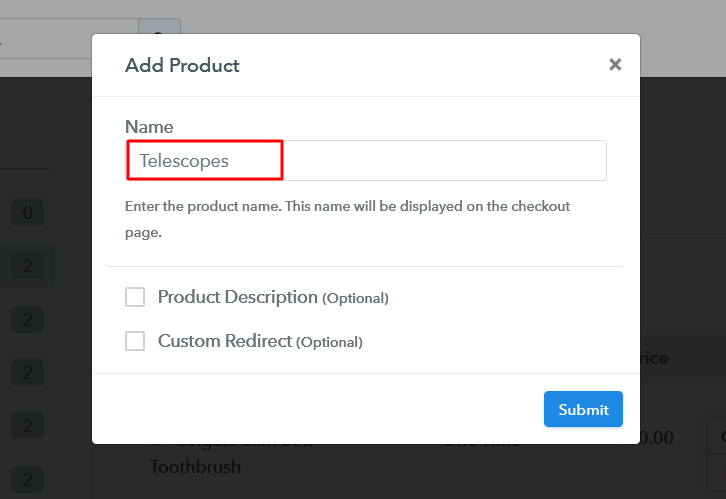
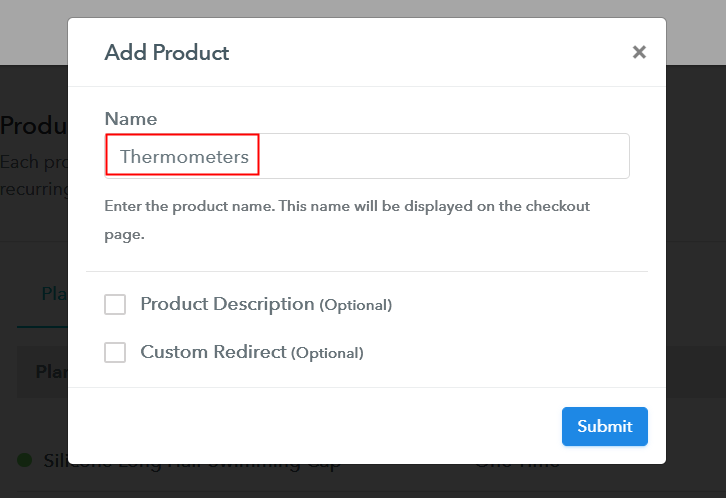
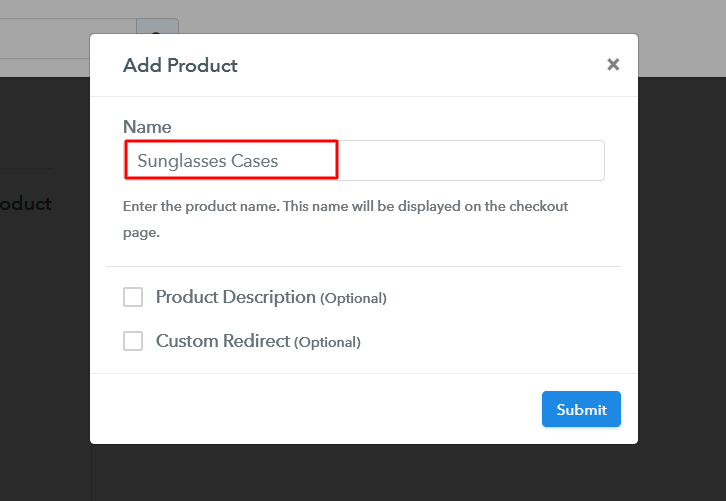
Step 5: Add Product for your Sunglasses Cases

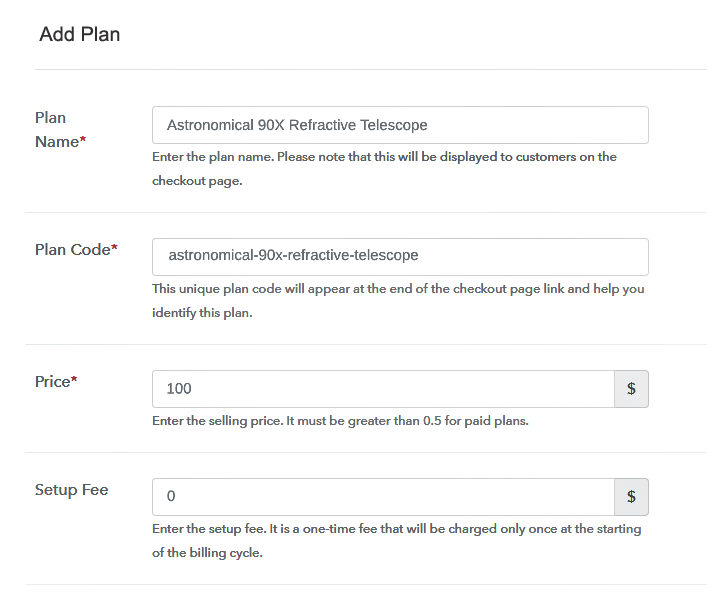
Step 6: Add Plans
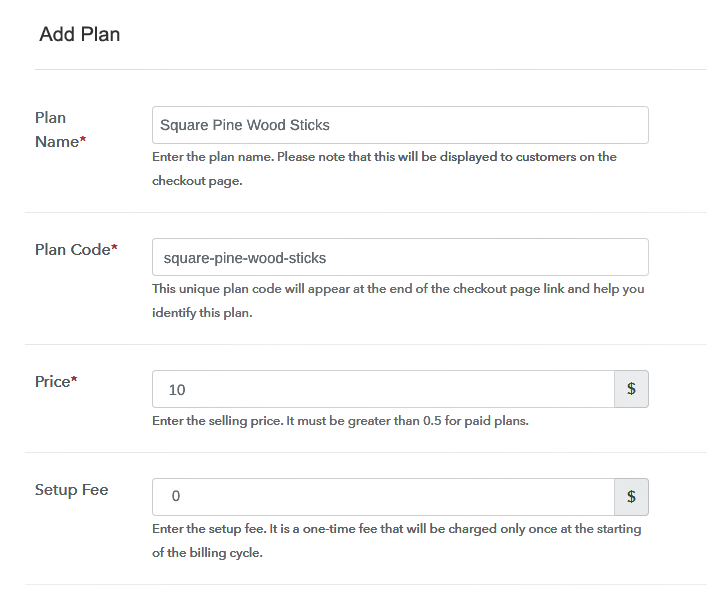
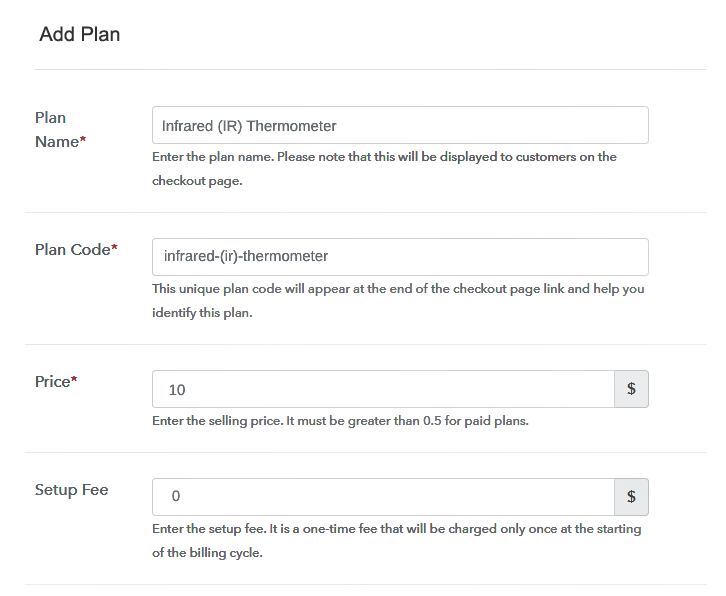
(a) Select Add New Plan

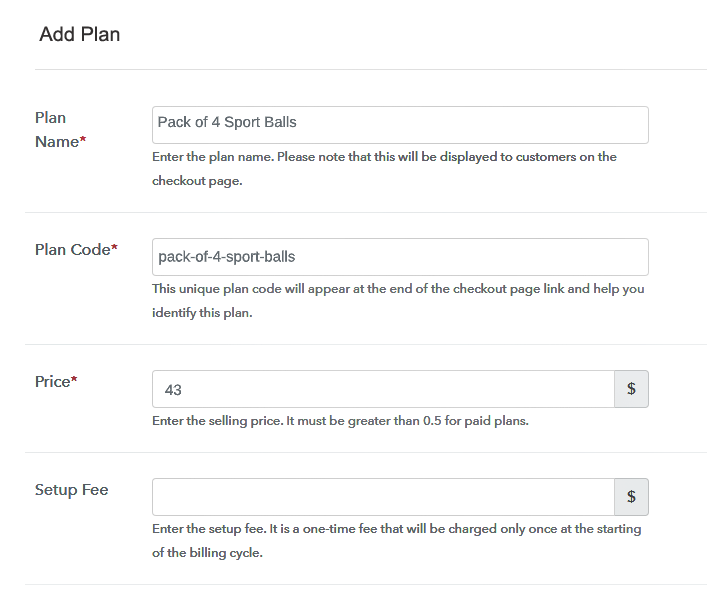
(b) Specify the Plan & Pricing Details
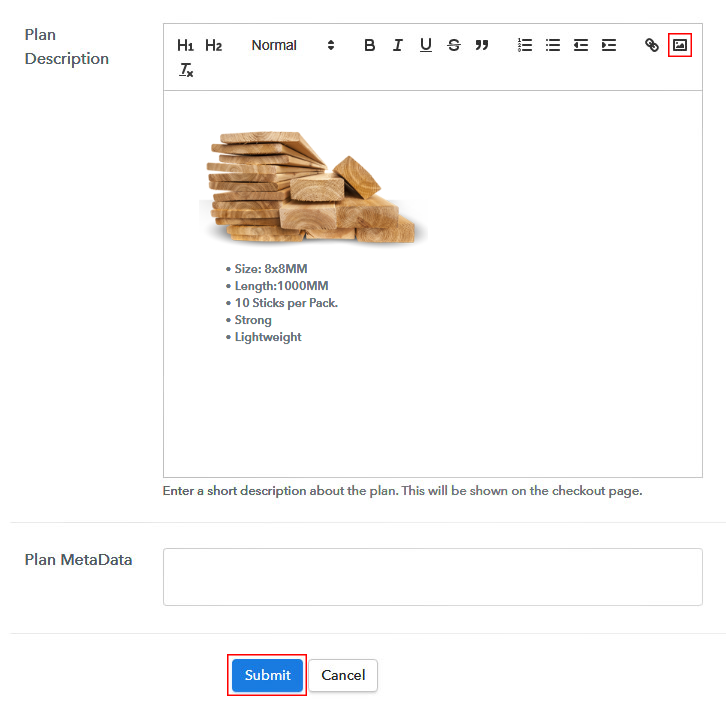
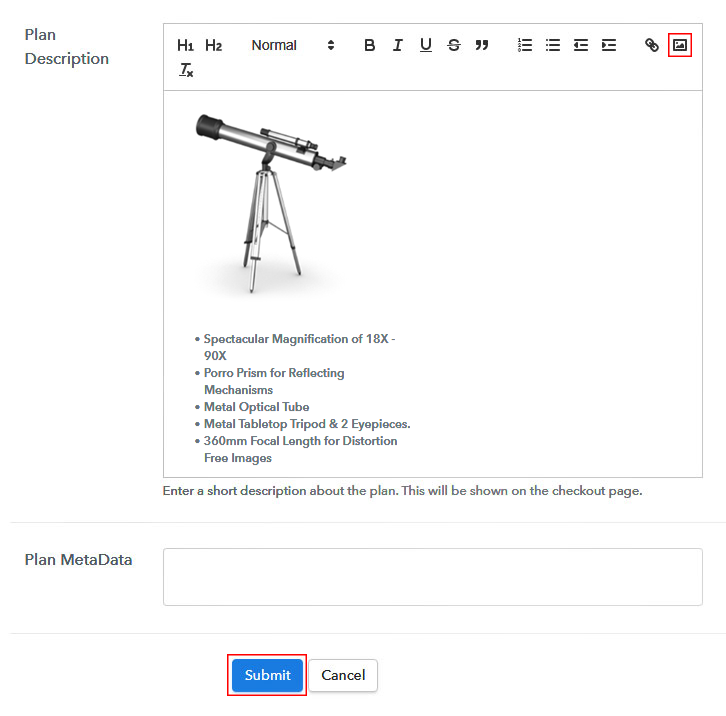
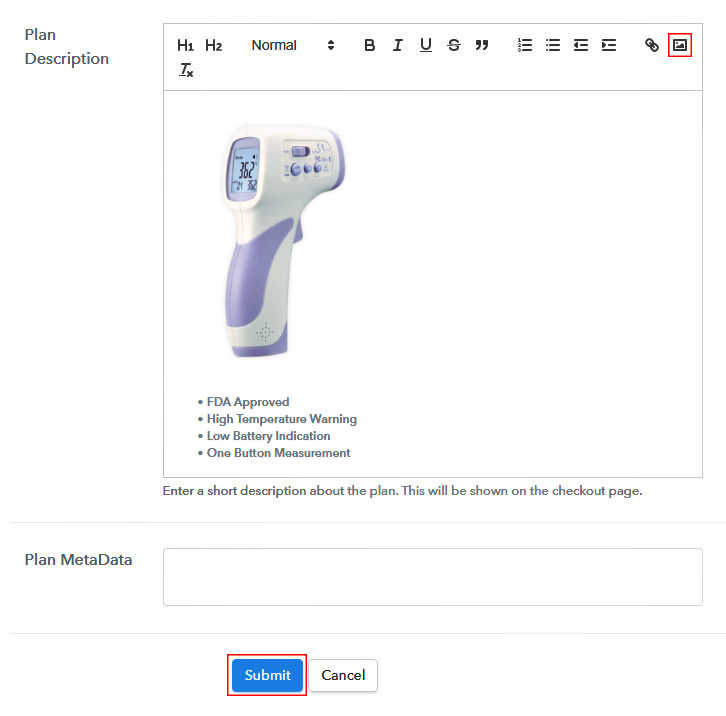
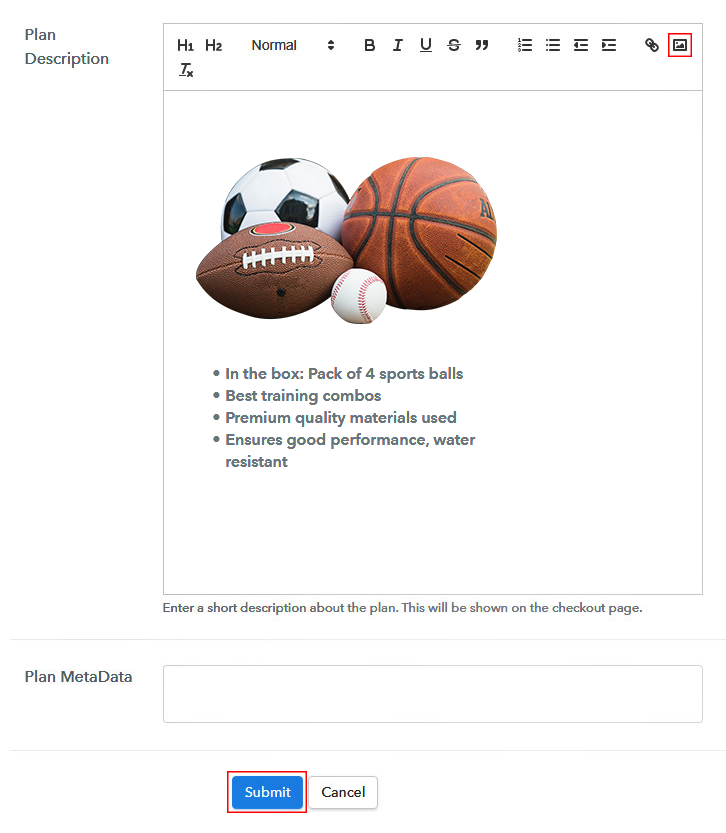
(c) Add Image & Description of Sunglasses Cases
Step 7: Share your Checkout Page

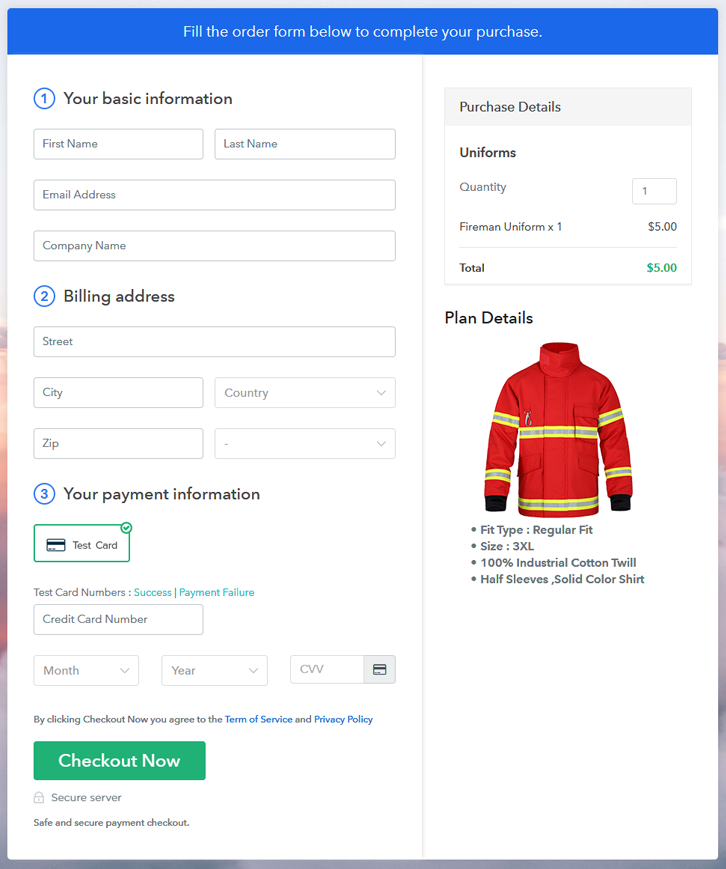
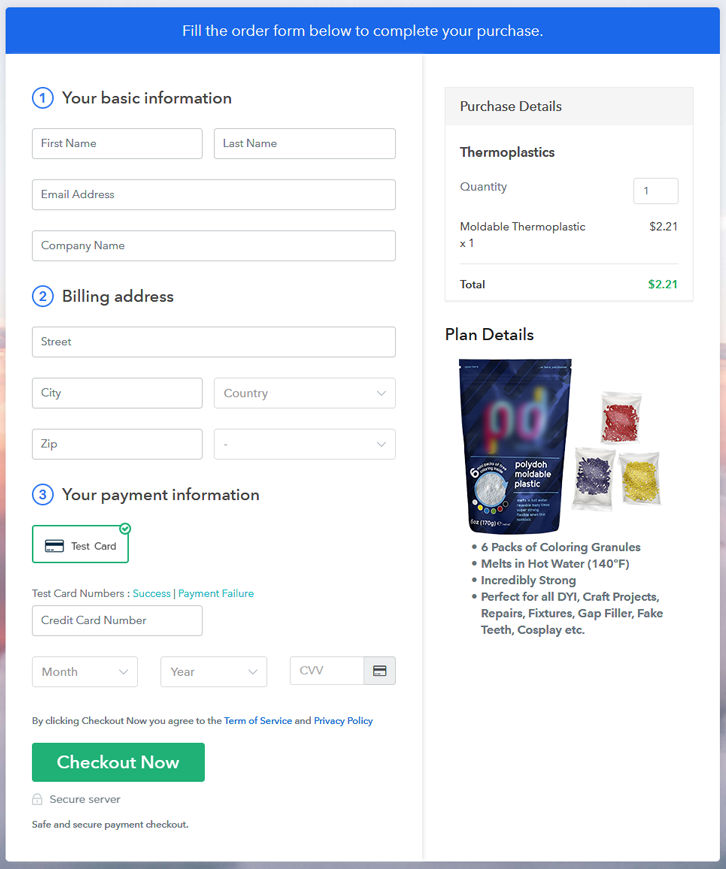
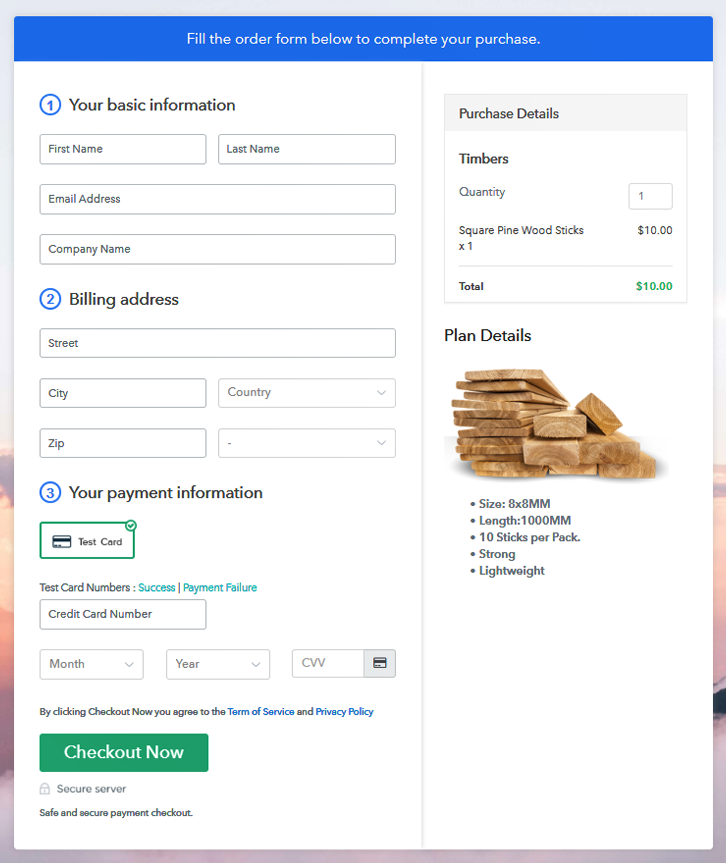
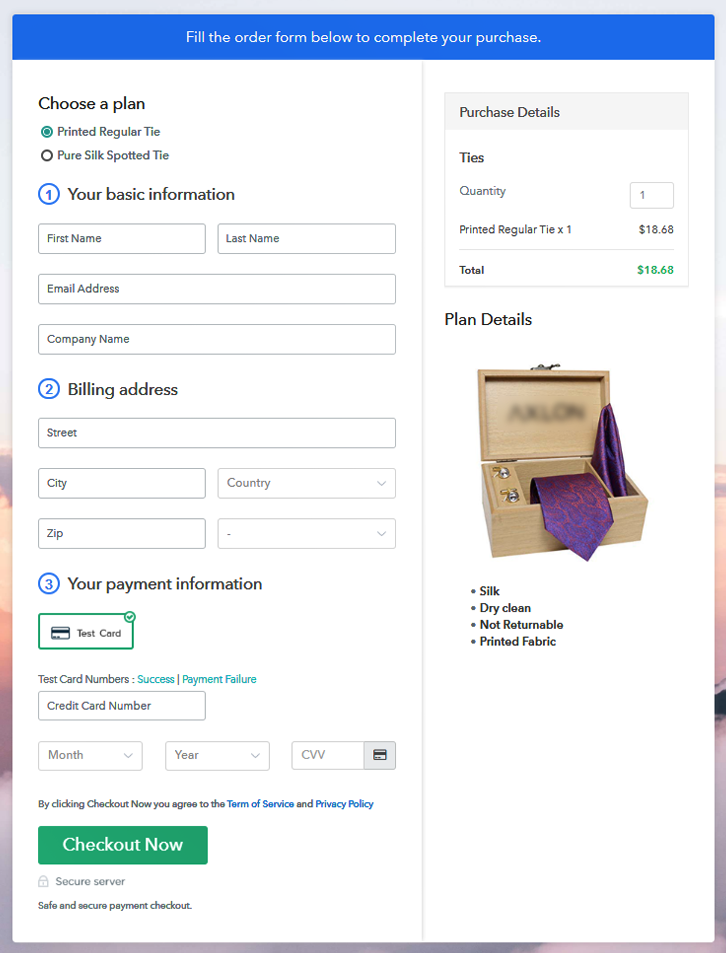
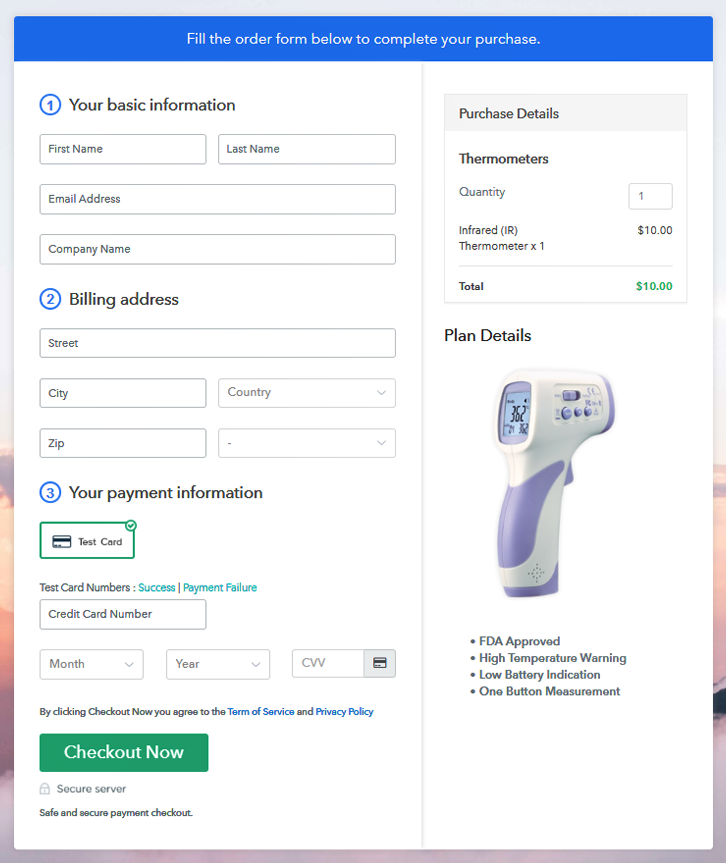
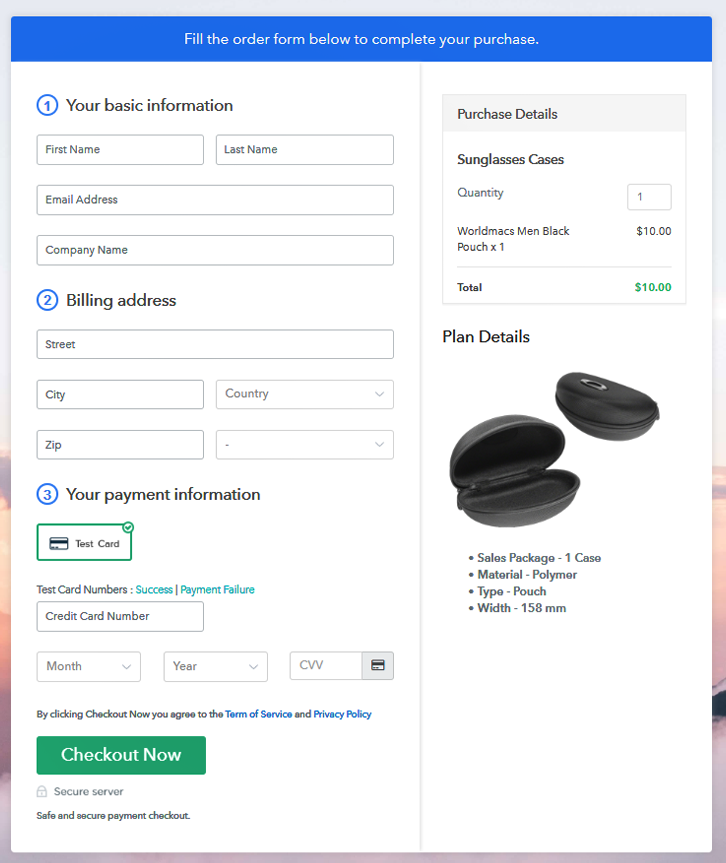
Step 8: Preview Checkout Page
(a) Click on the View Button

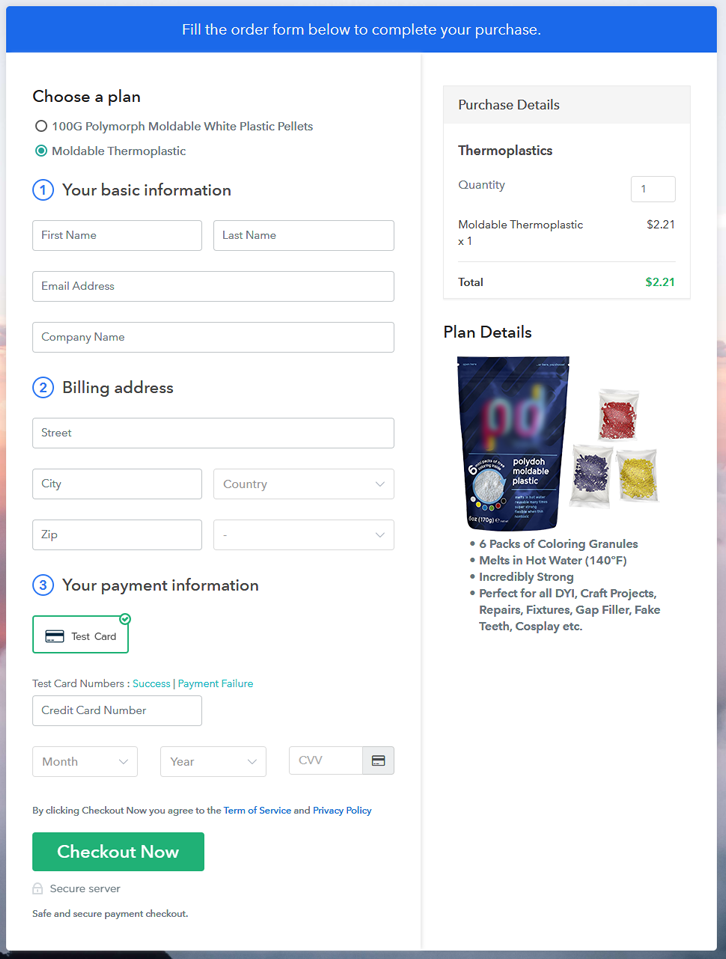
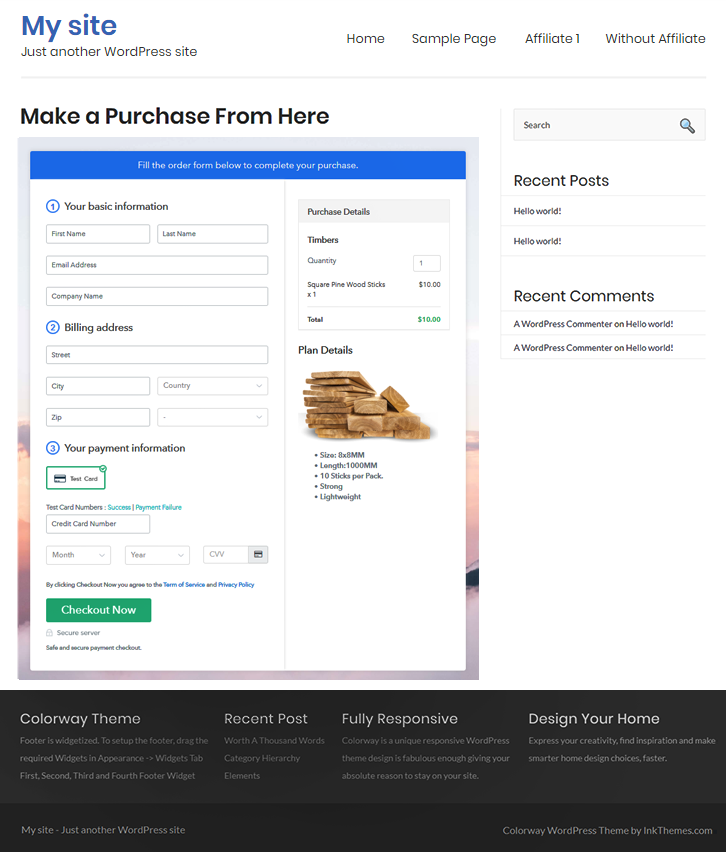
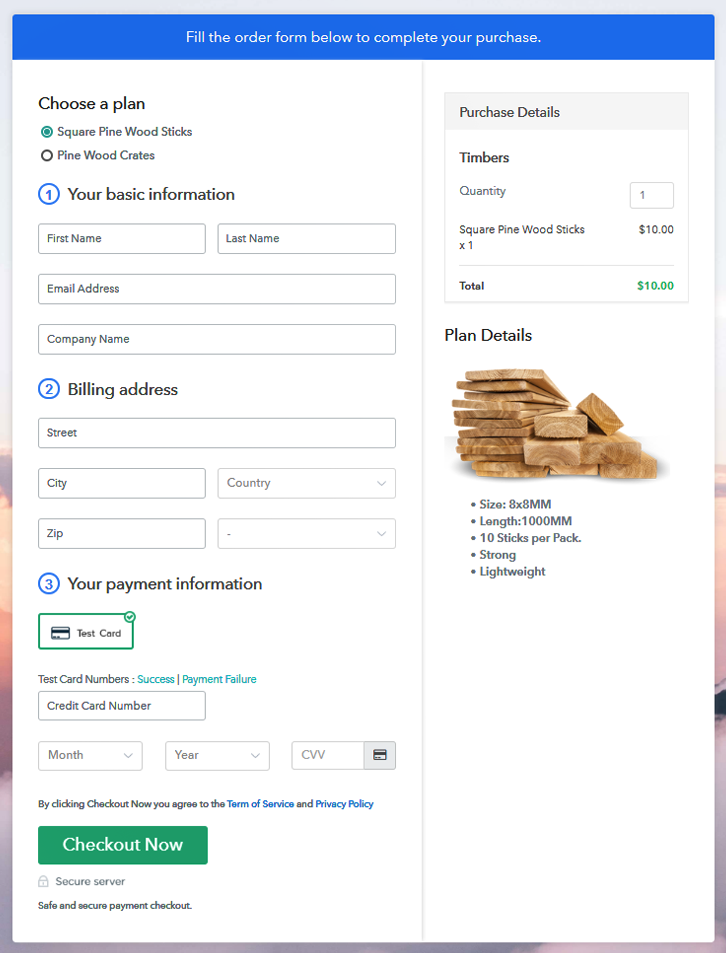
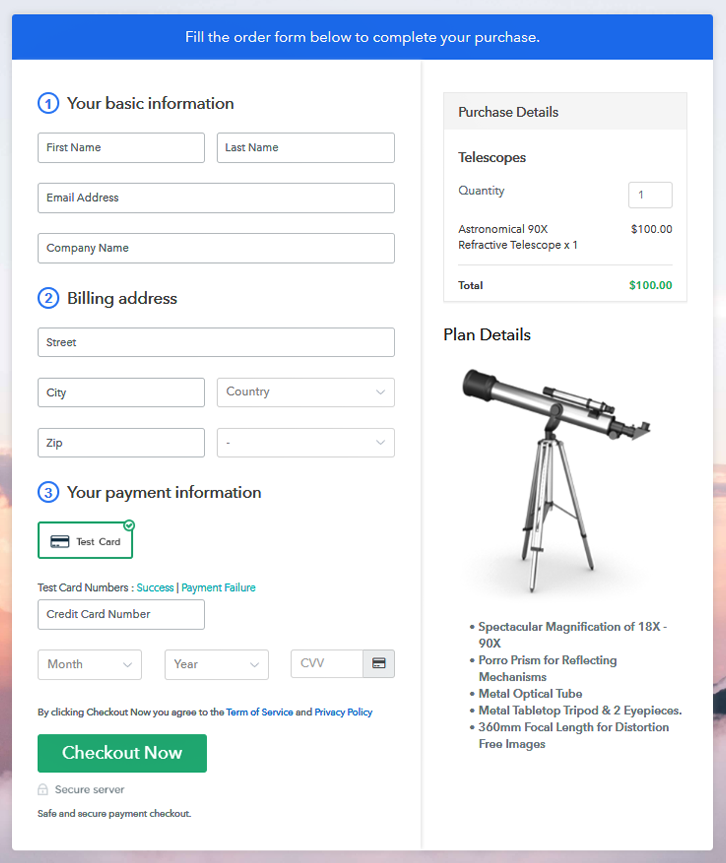
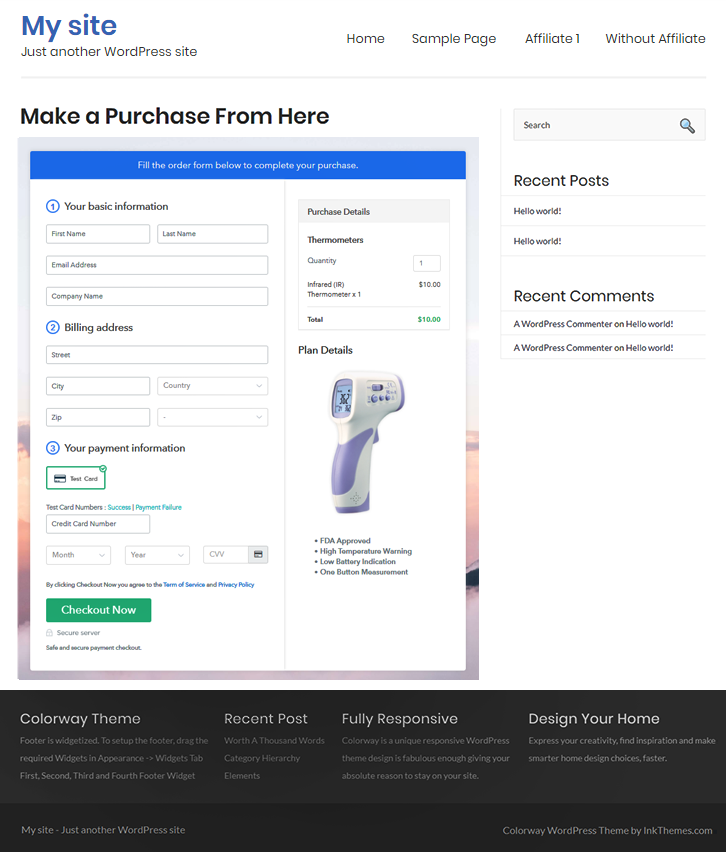
(b) Take a Look at the Checkout Page
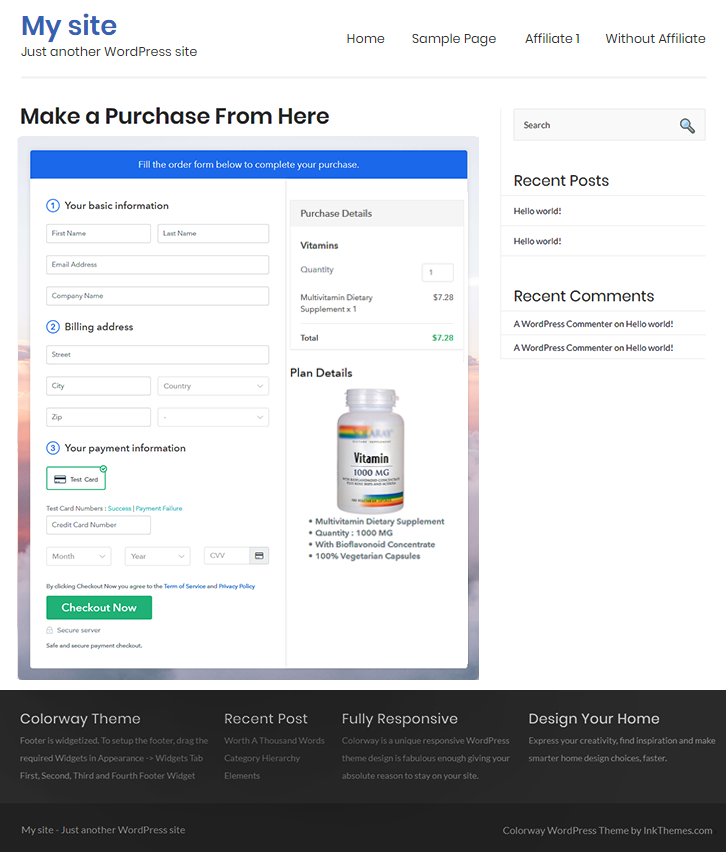
Step 9: Embed Checkout Page in Site & Sell Sunglasses Cases Online

(a) Edit the Page & Paste the Copied Link

(b) Save & Publish the Checkout Page

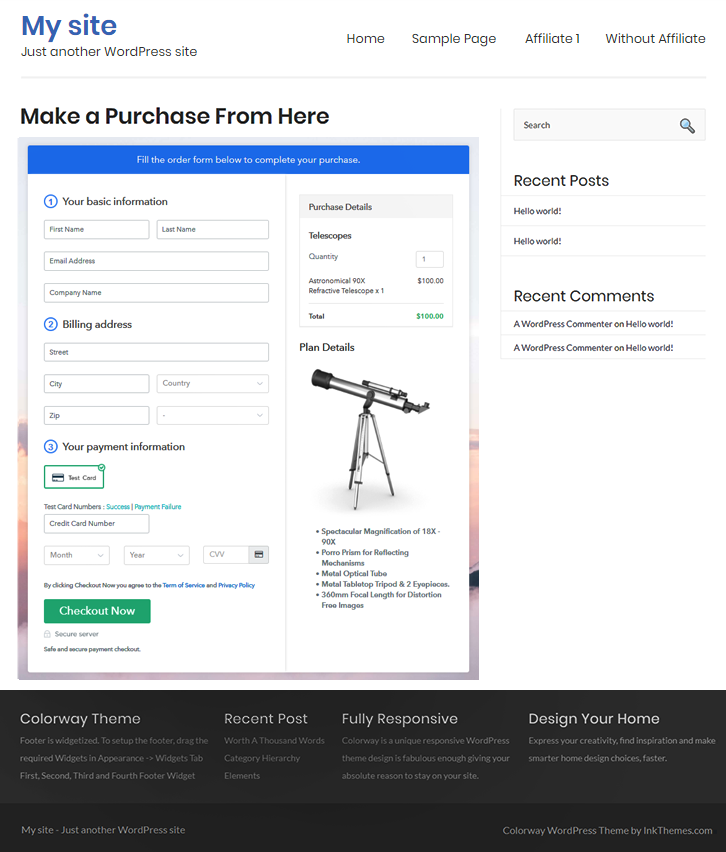
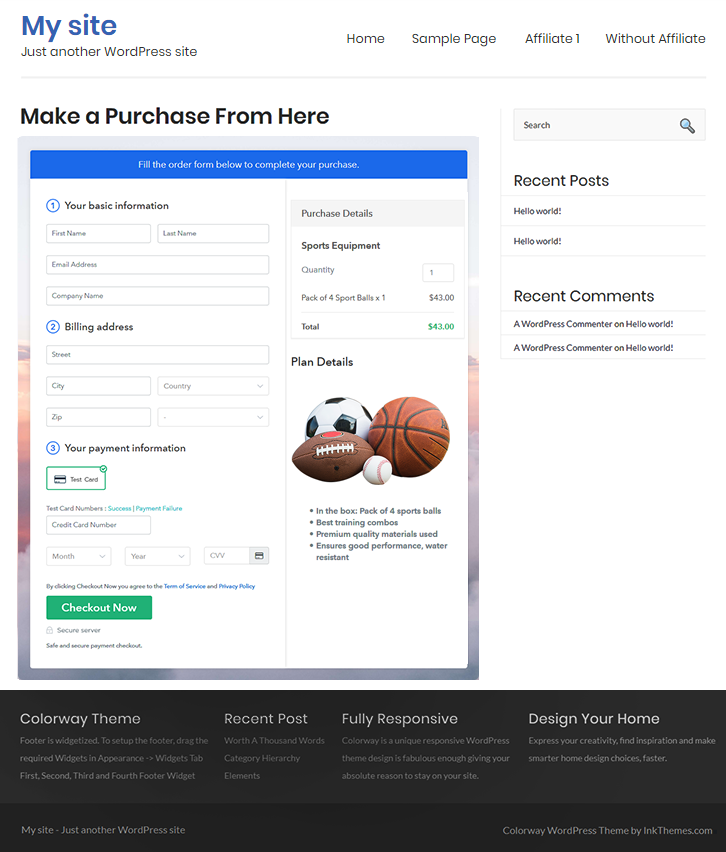
(c) Check out the Final Look of your Checkout Page on WordPress Site
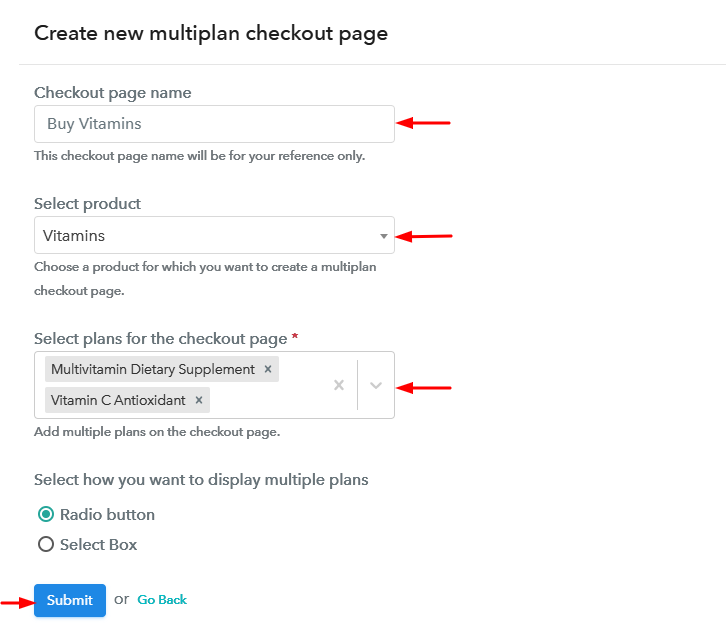
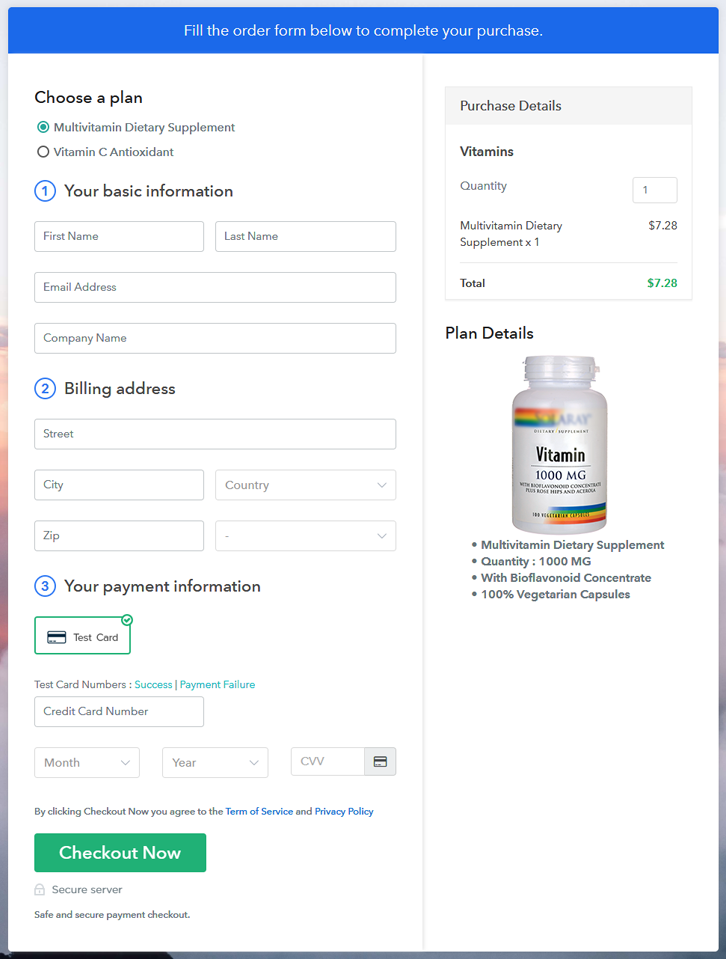
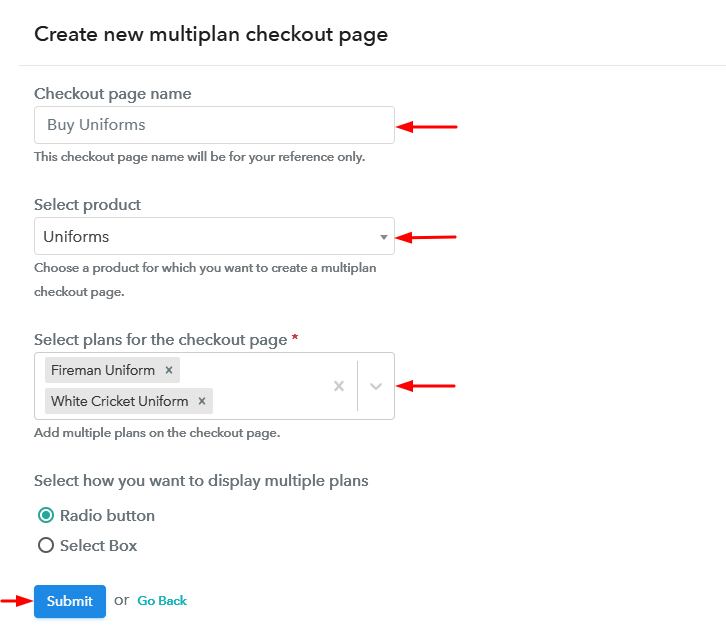
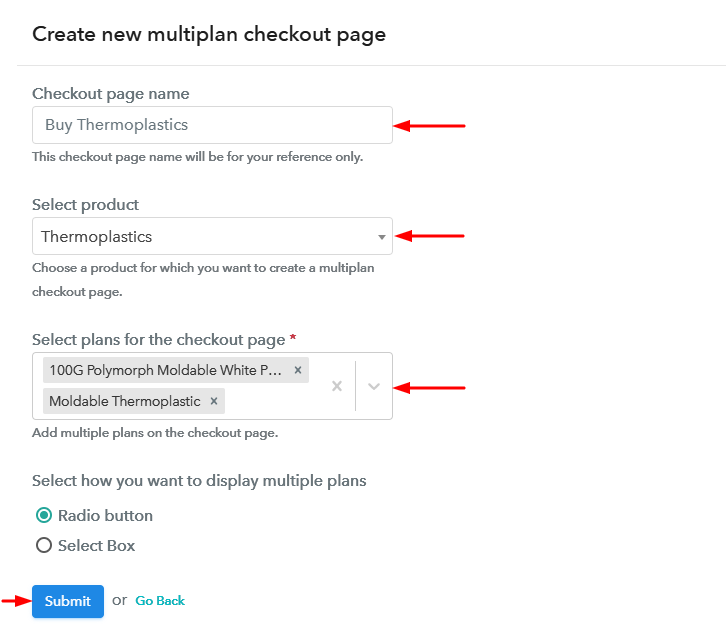
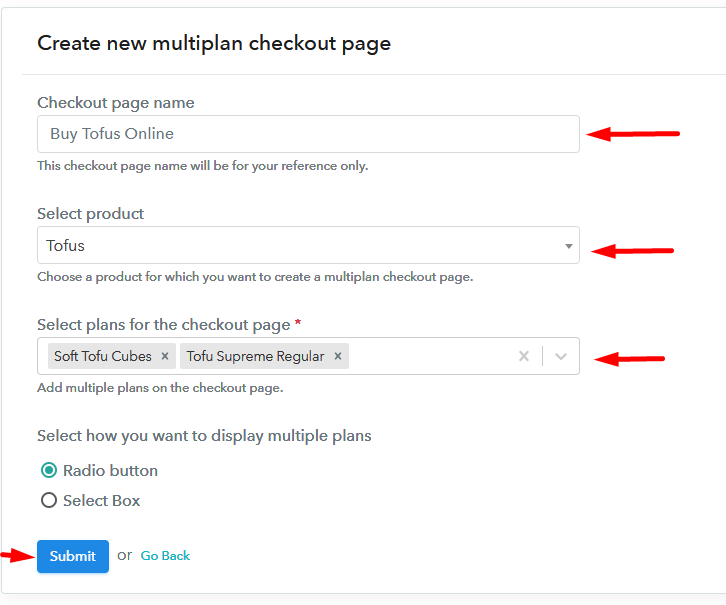
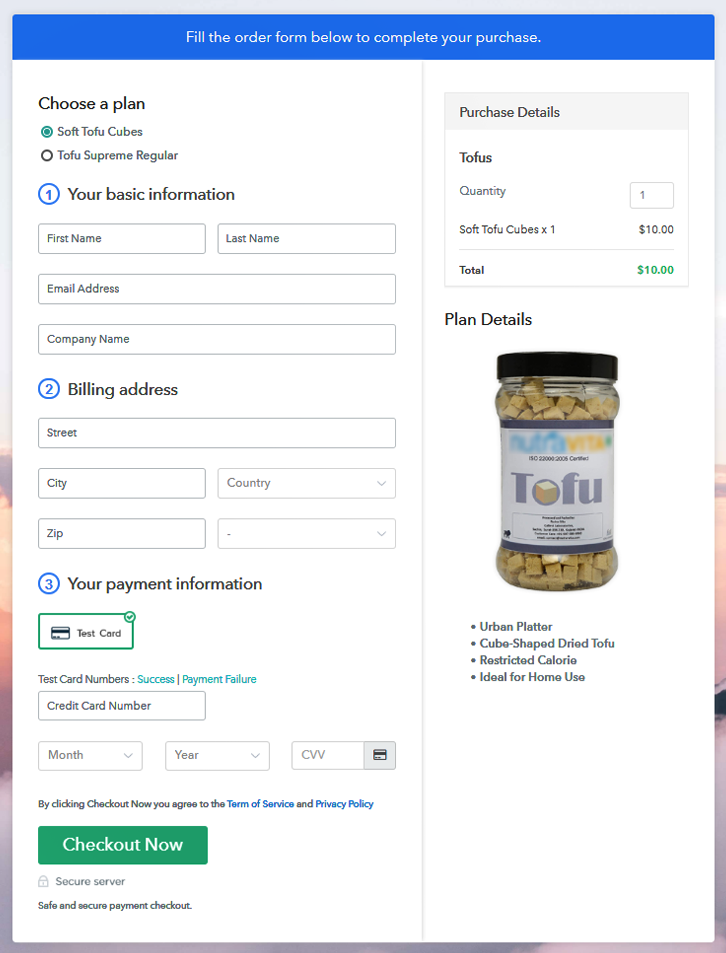
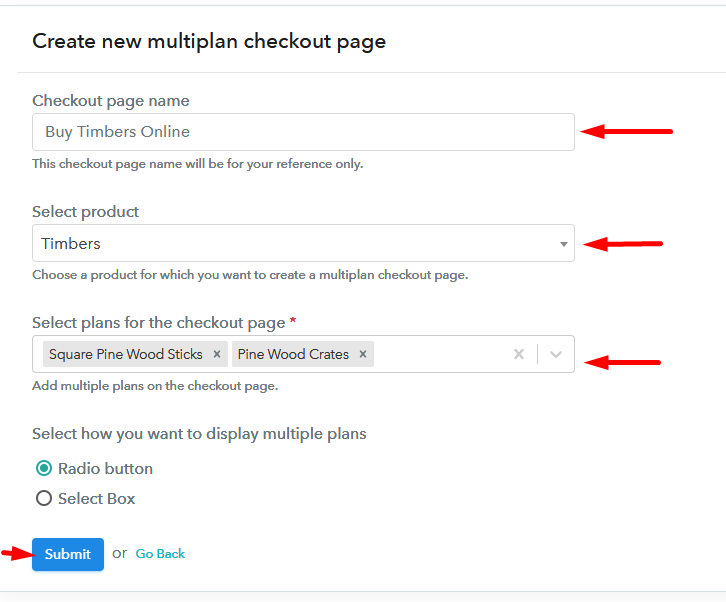
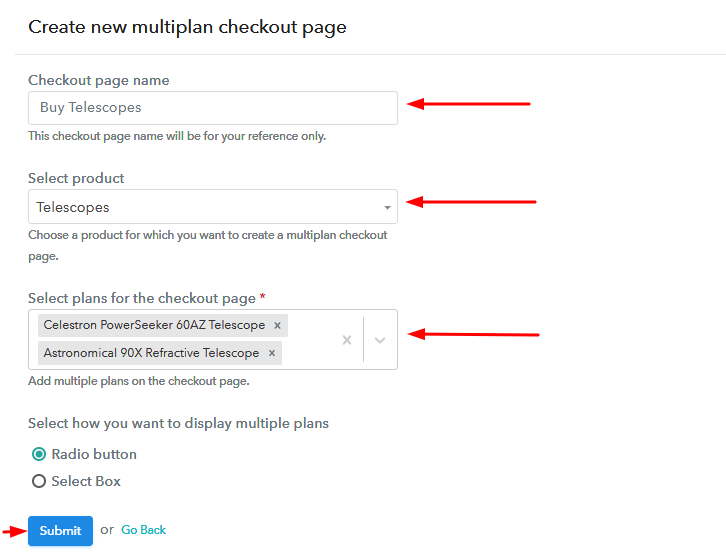
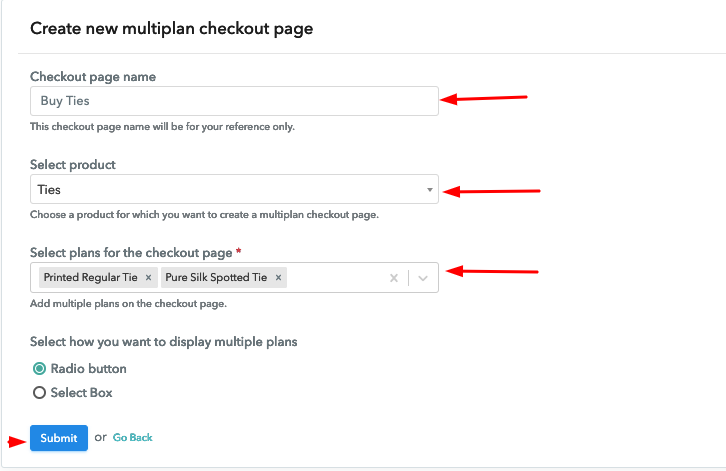
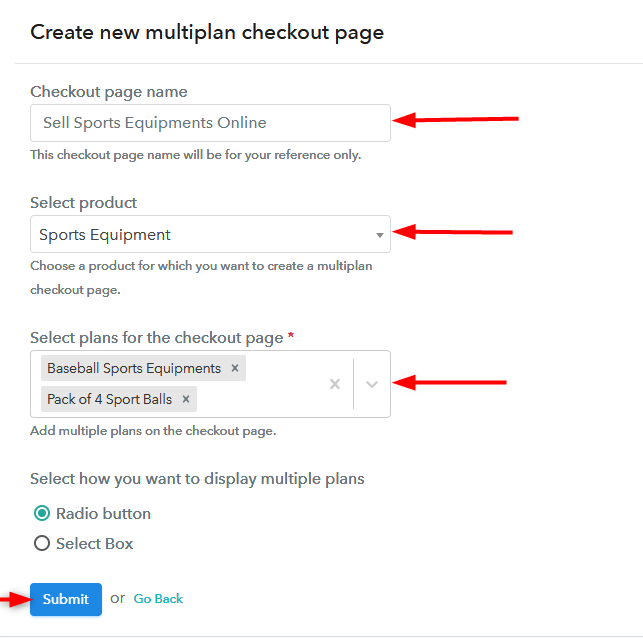
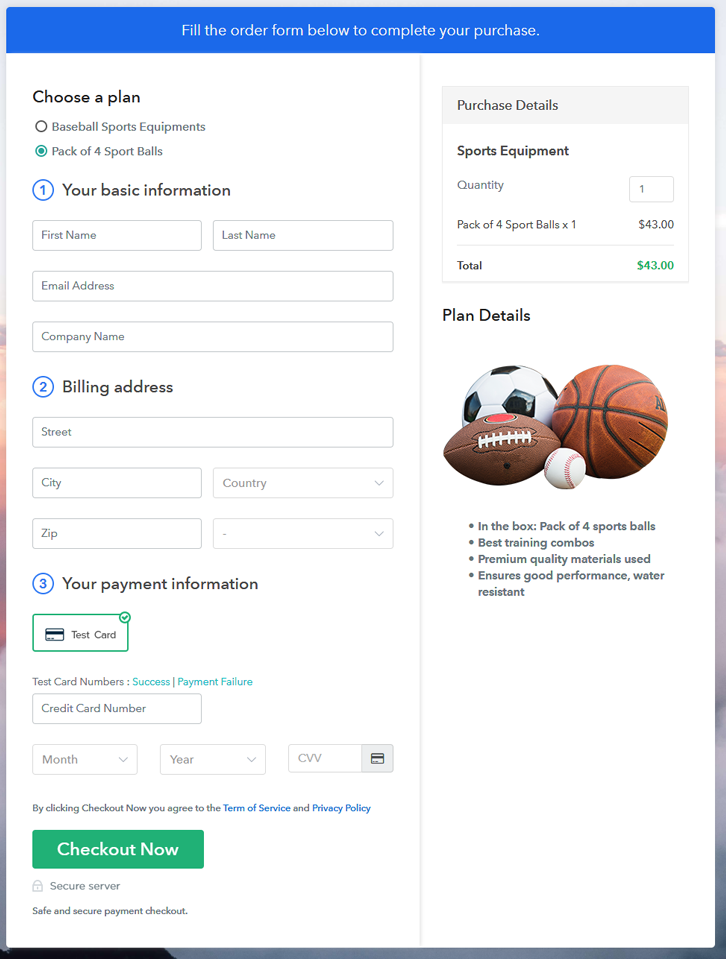
Step 10: Multiplan Checkout Page
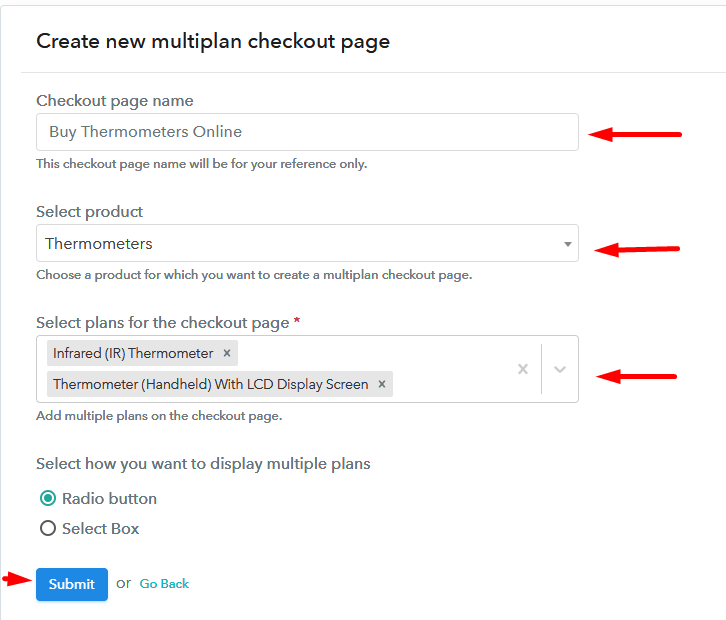
(a) Click on Add Mutiplan Checkout

(b) Add Plans to Sell Multiple Sunglasses Cases from Single Checkout Page
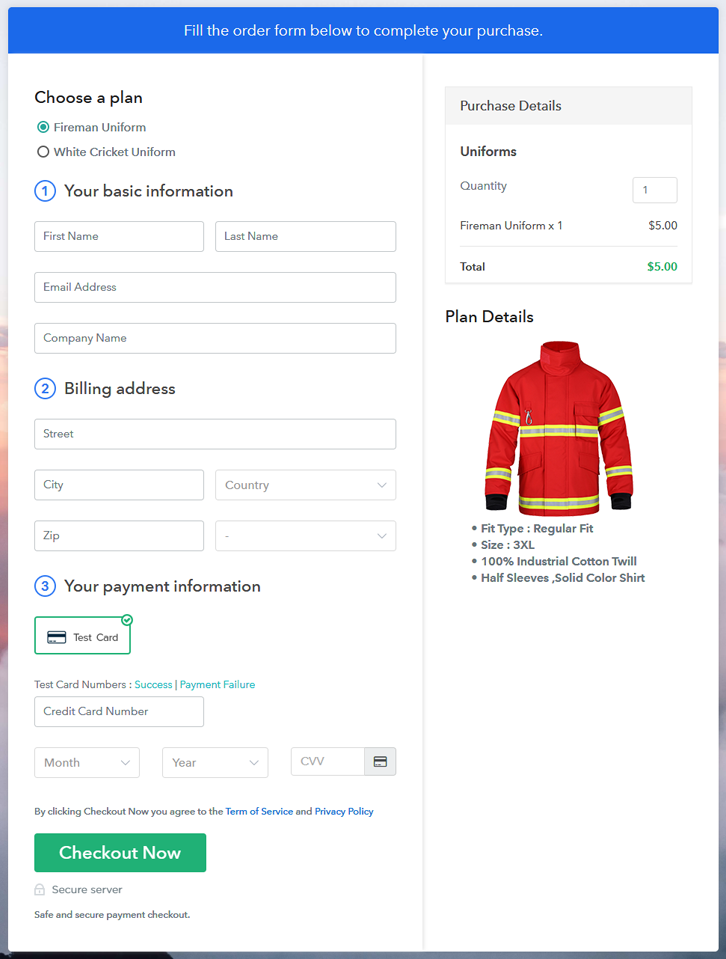
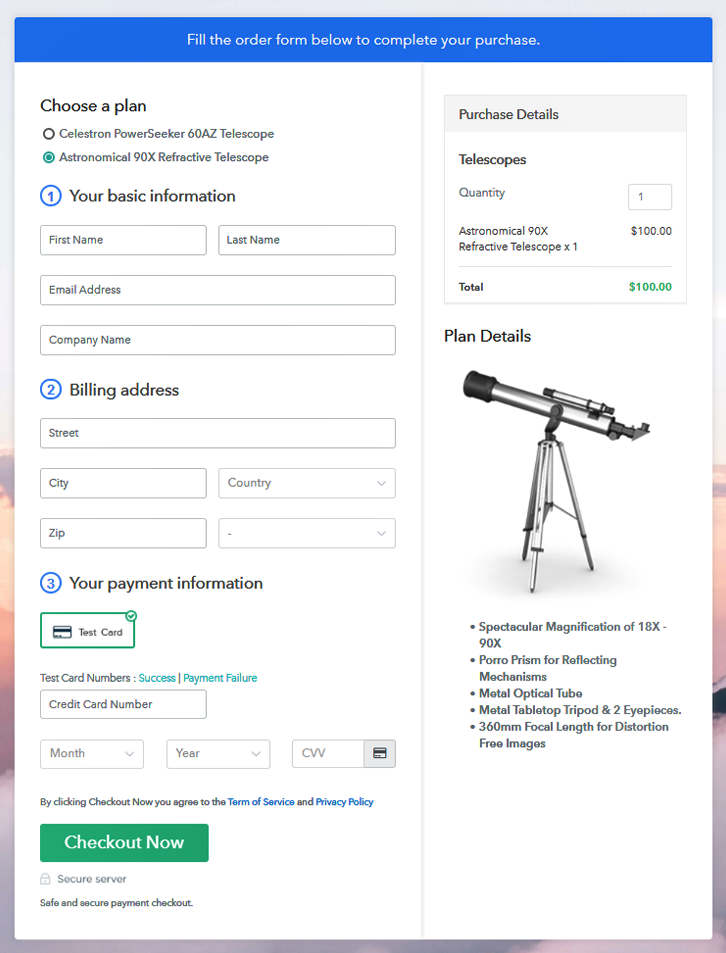
(c) Take a Look at the Checkout Page
Wrapping Up
You May Also Like To Read –