Are you in search of a way to add MailChimp member from new Instamojo sale? If yes!! Then, this could be the end of your search. As here we are going to integrate Instamojo with MailChimp using Pabbly Connect.
Wouldn’t that be too helpful and time-saving for you? Well, If only you can use a connecting service that can enable you to transfer data automatically from one app to another. In this blog, I’ll be using Pabbly Connect to do so, as I found it as one of the easiest ways to automate my tasks in no time.
Before we start the integration process, let’s know a bit about the software that we are about to integrate. Primarily, Instamojo is India’s largest on-demand payments and e-commerce platform that empowers over 1,200,000 micro-entrepreneurs, startups, MSMEs, to start, manage, and grow their business online. On the other hand, MailChimp is an all-in-one marketing platform that helps you manage and talk to your clients, customers, and other interested parties.
Thus, integrating these two services can help you import all the Instamojo customers to MailChimp as members in real-time. Hence, you don’t have to worry about doing repetitive work & can ultimately save a lot of time & effort.
Pabbly Connect is one of the best integration & automation tools that enable you to integrate unlimited premium applications, set unlimited triggers & actions, create infinite workflows, etc.
Why Choose This Method Of Integration?
In contrast with other integration services-
- Pabbly Connect does not charge you for its in-built apps like filters, Iterator, Router, Data transformer, and more
- Create “Unlimited Workflows” and smoothly define multiple tasks for each action
- As compared to other services which offer 750 tasks at $24.99, Pabbly Connect offers 50000 tasks in the starter plan of $29 itself
- Unlike Zapier, there’s no restriction on features. Get access to advanced features even in the basic plan
- Try before you buy! Before spending your money, you can actually signup & try out the working of Pabbly Connect for FREE
Furthermore, you don’t even need to have any coding skills. Only integrate it once & relax, it will do all the heavy lifting for you. Besides, you can access all the features even in its free plan. All you need to do is go to the Marketplace and look for the apps you use to get started.
Therefore, here we will learn how to connect Instamojo and MailChimp in real-time. Moreover, we have a template for this integration that can assist you to get started quickly. Hit the Use Workflow button below to get started.

Hence, without taking any more of your time, let’s begin to integrate Instamojo to MailChimp.
Step 1: Sign up to Pabbly Connect

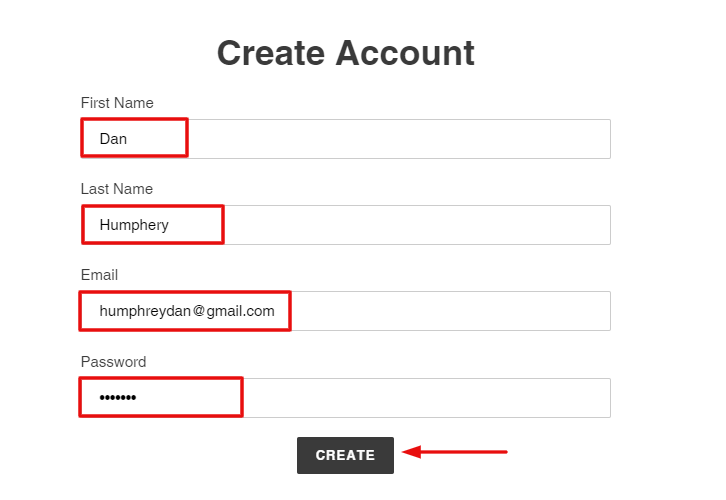
Begin the process to add MailChimp member from new Instamojo sale by clicking on the ‘Sign Up Free’ icon on the Pabbly Connect dashboard. Subsequently, either fill-up all the details manually or sign up using Gmail credentials.
Try Pabbly Connect for FREE
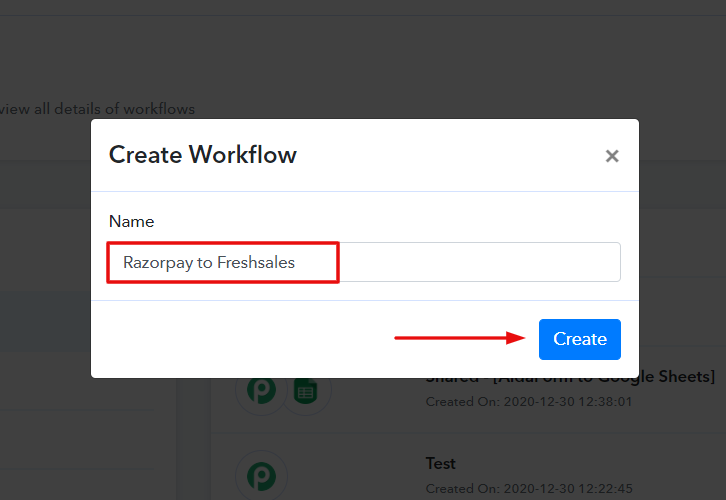
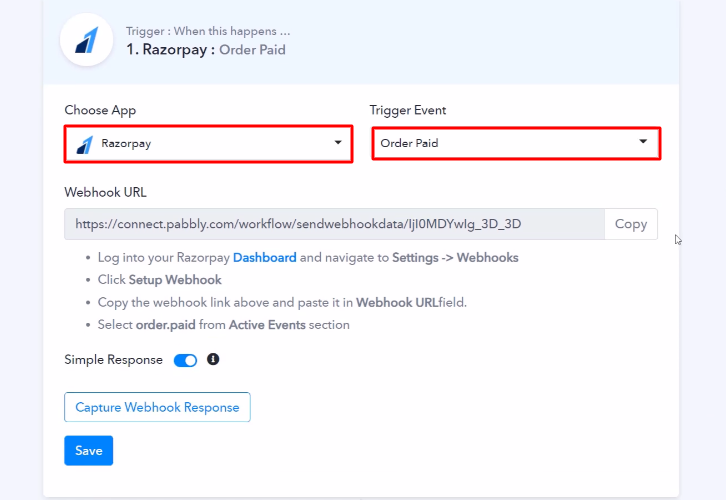
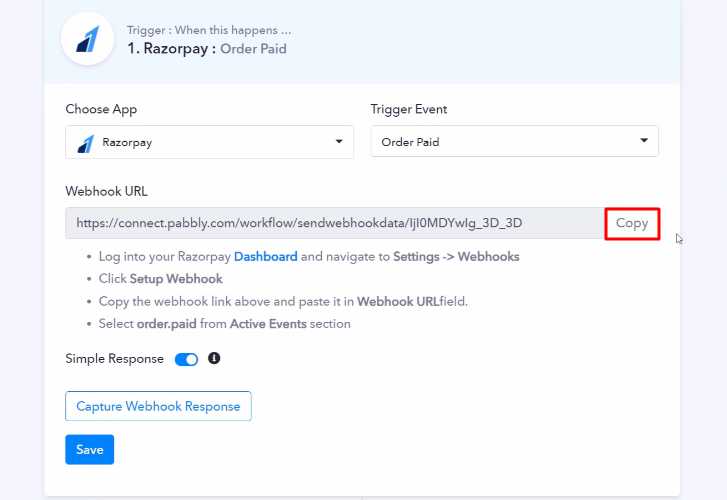
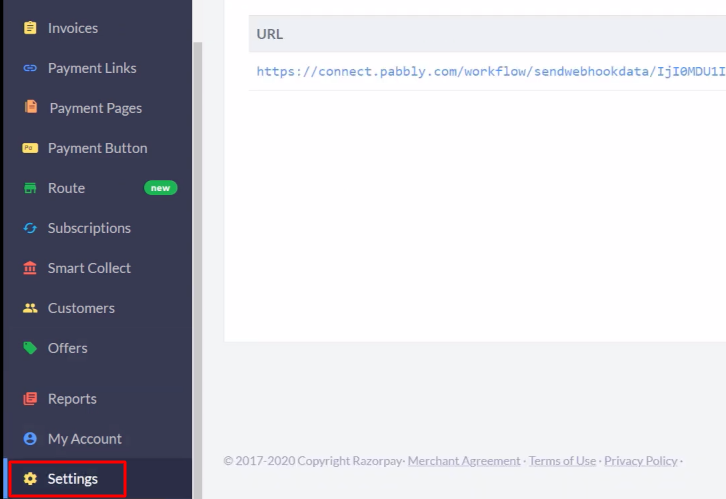
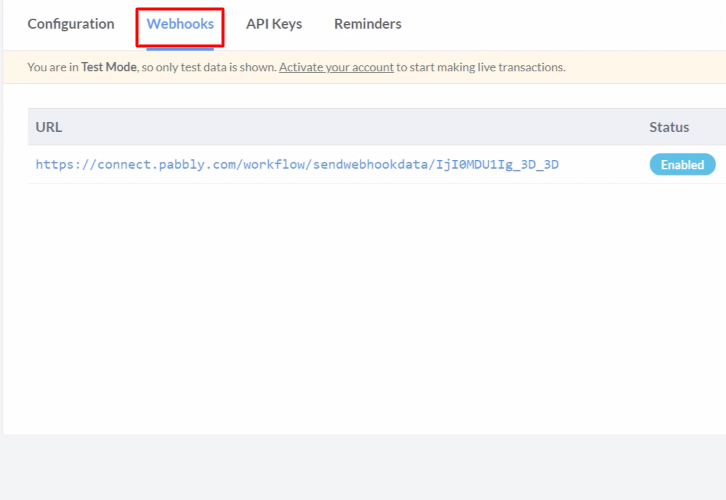
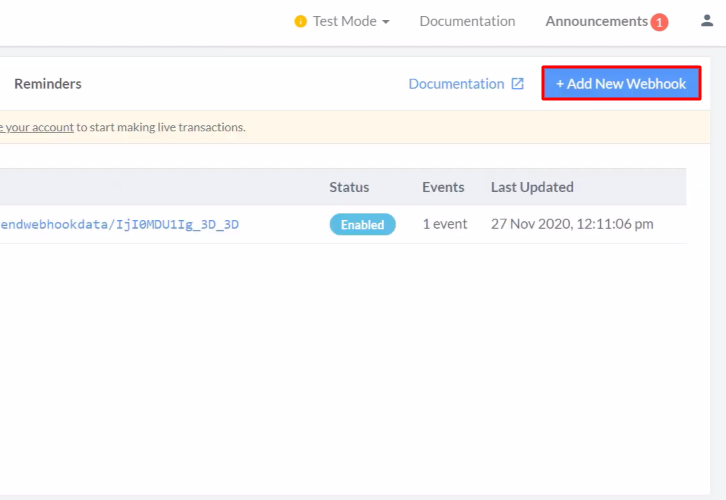
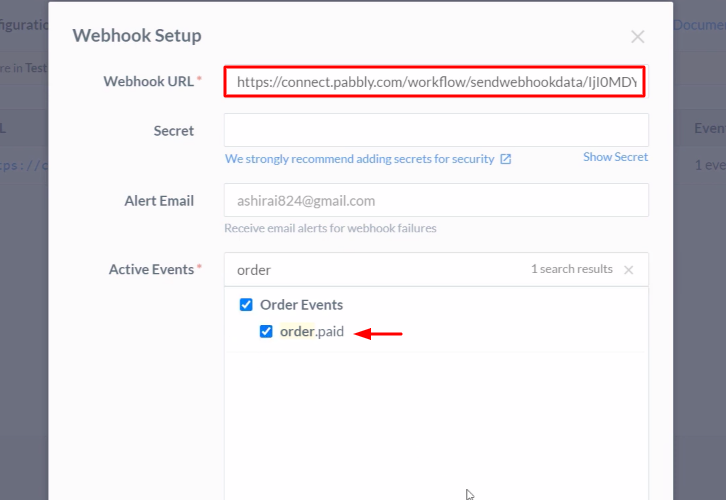
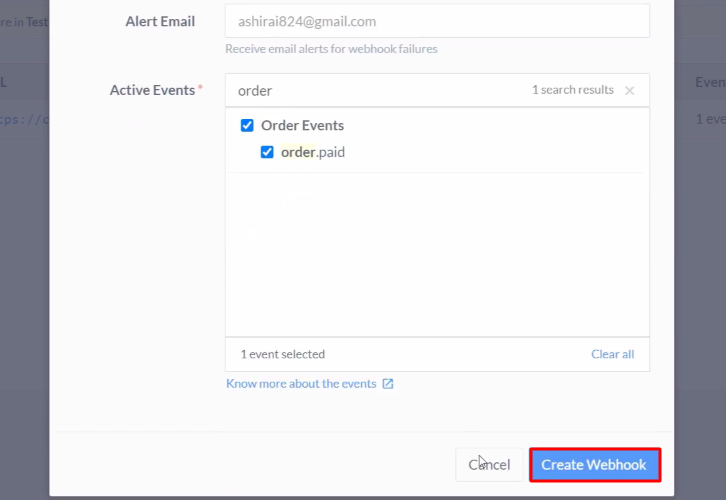
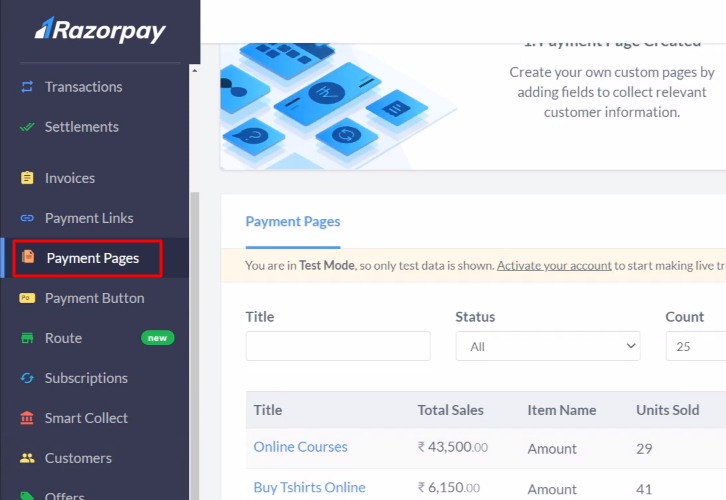
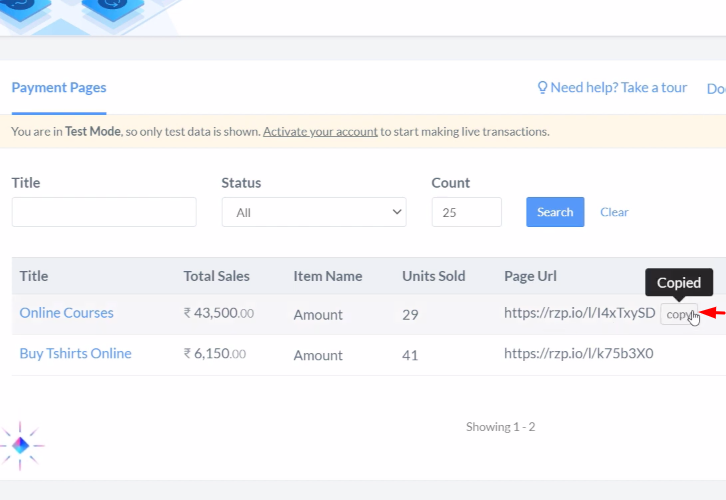
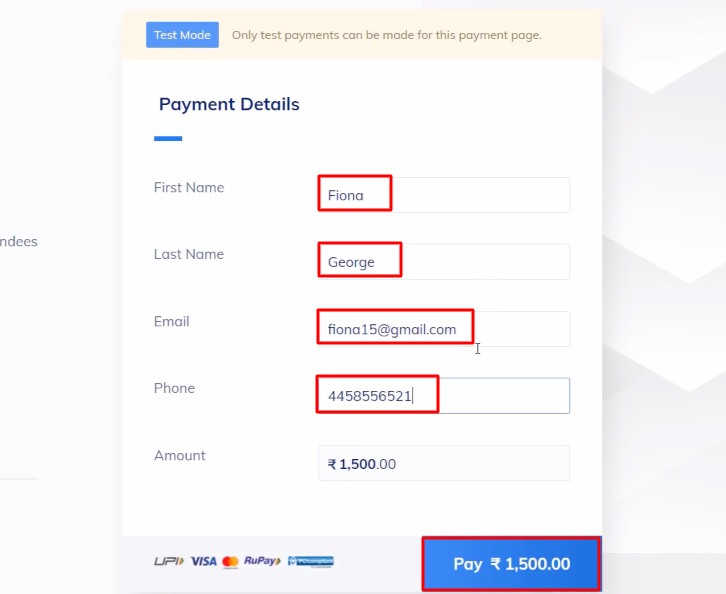
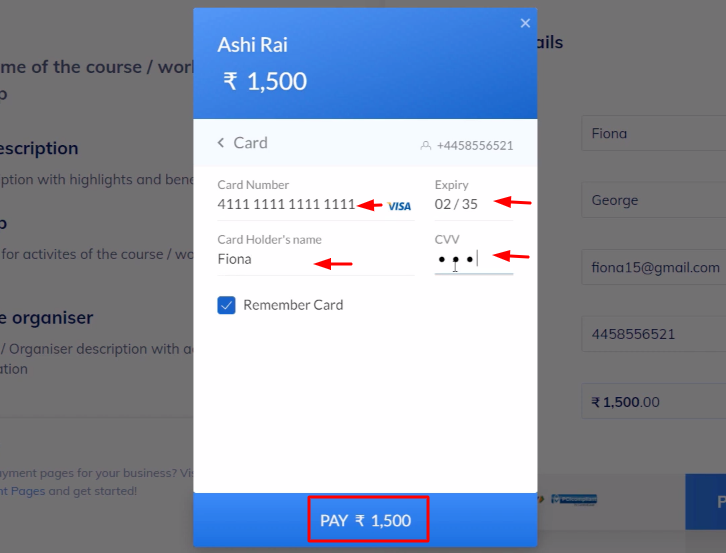
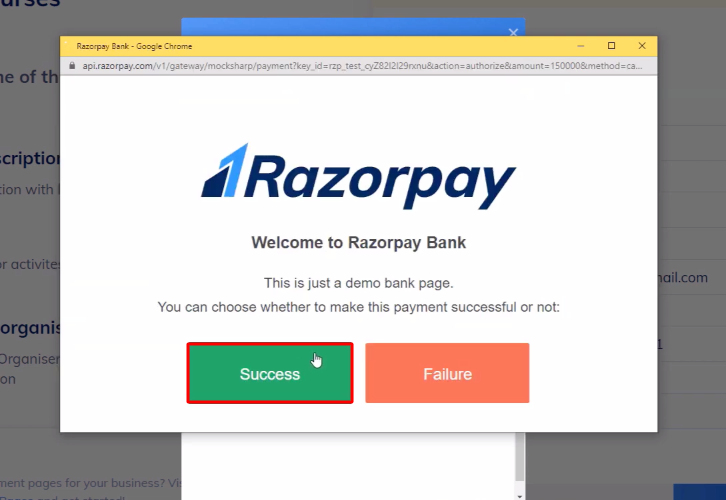
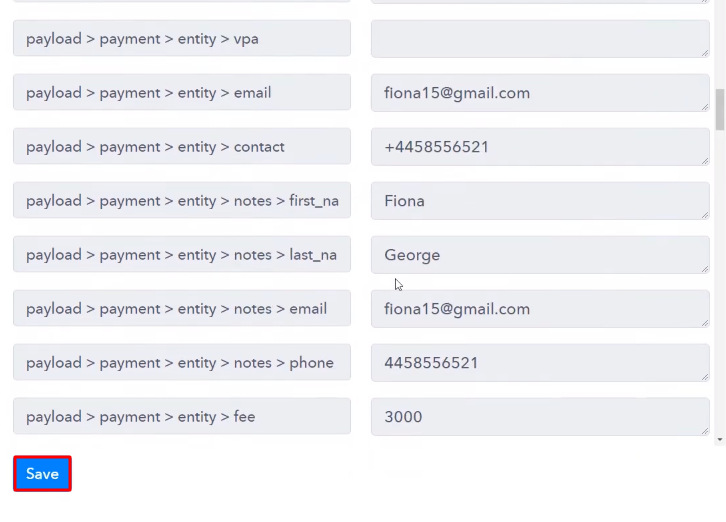
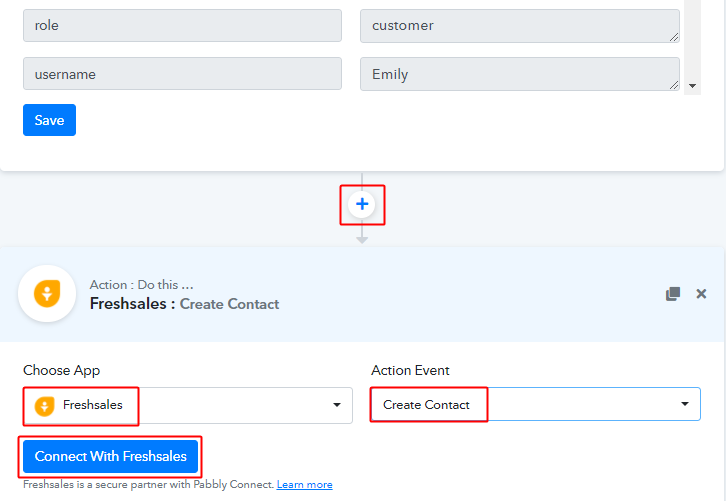
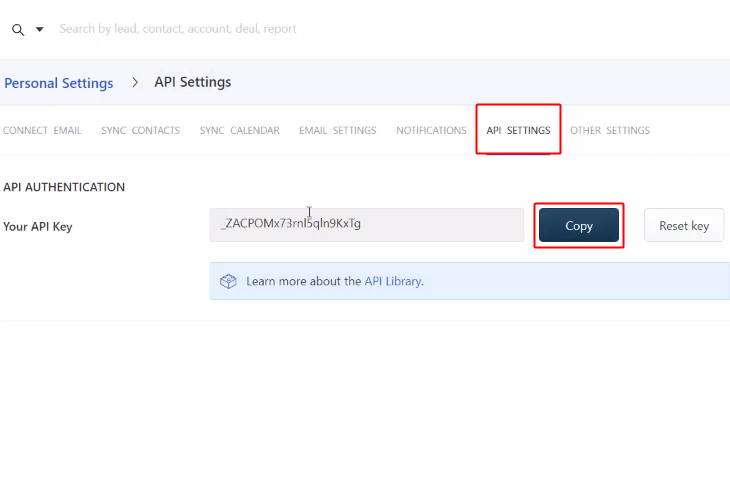
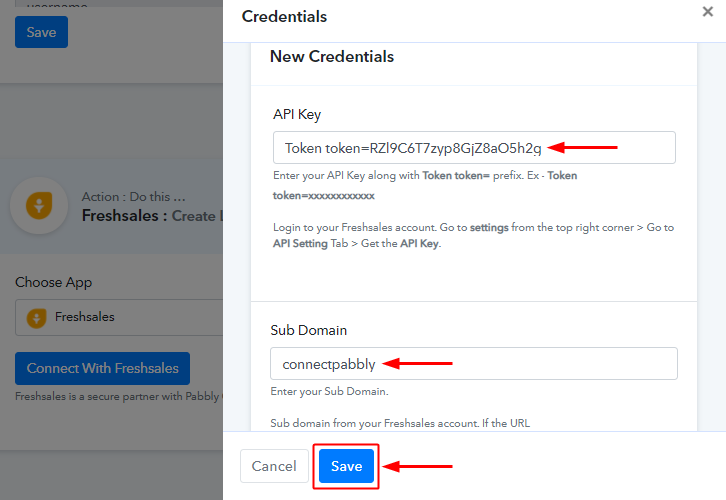
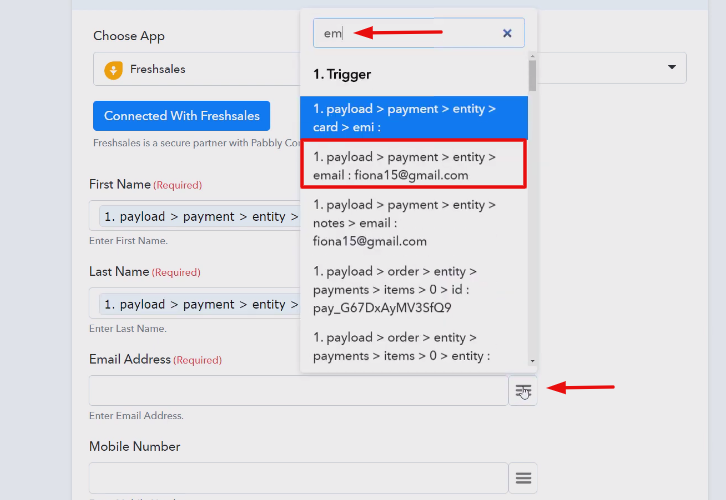
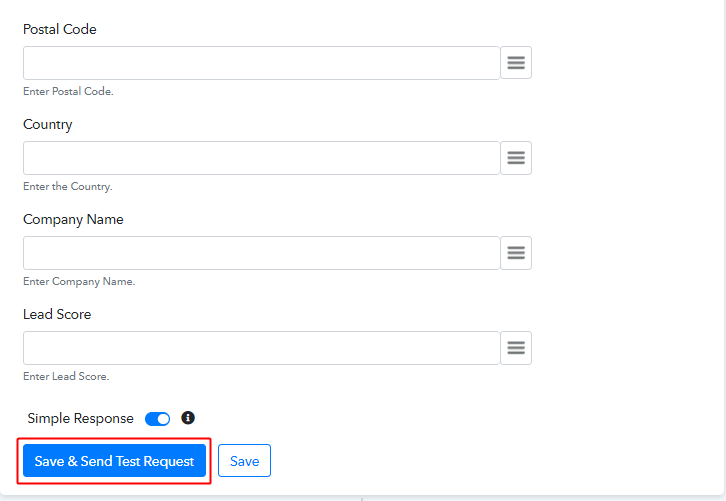
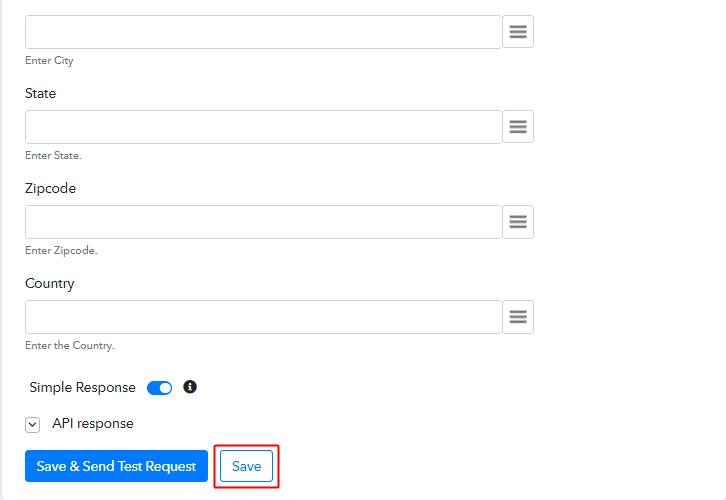
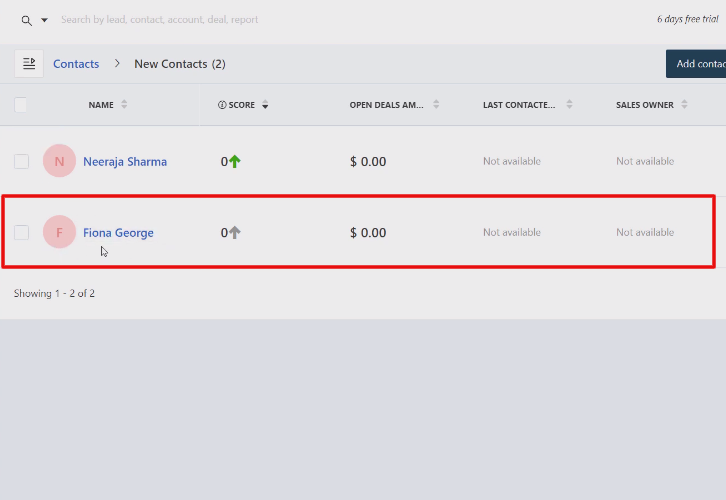
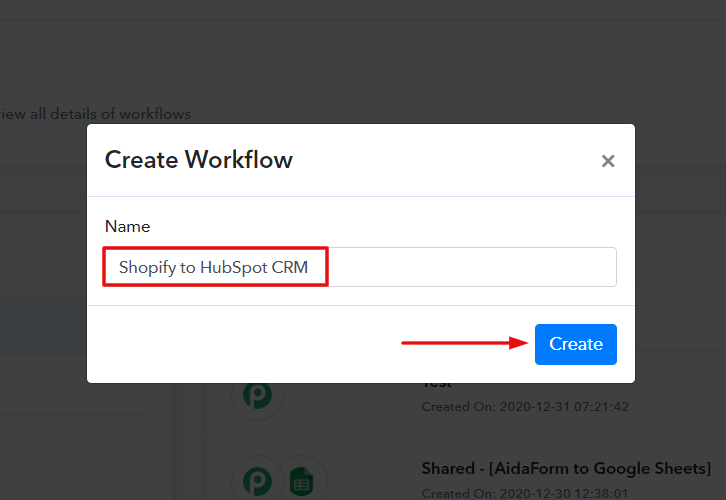
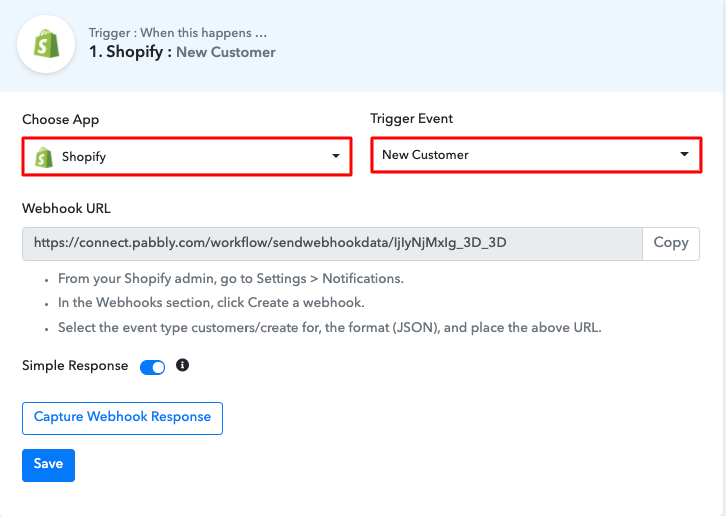
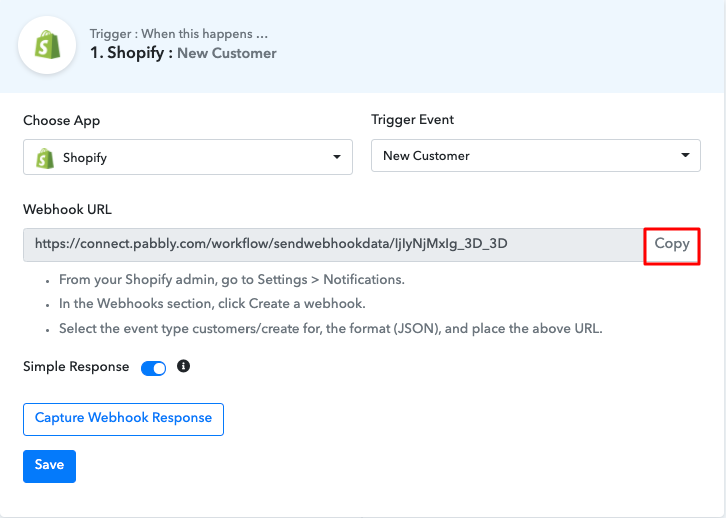
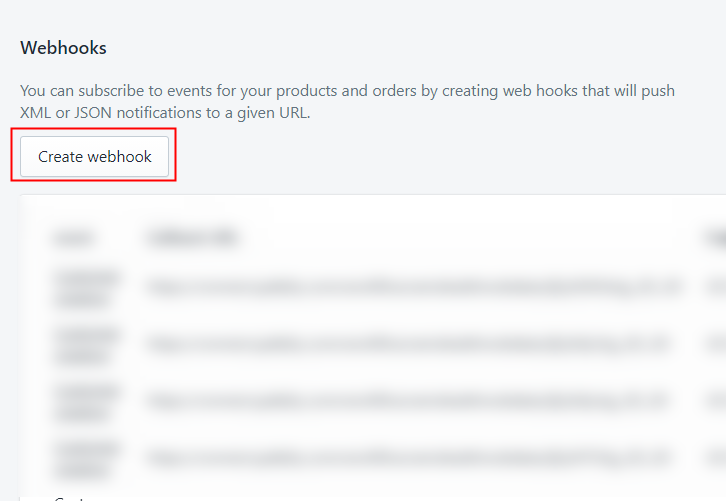
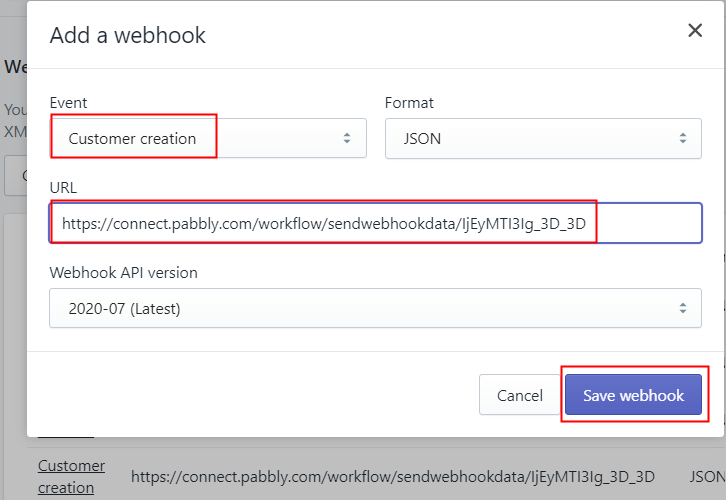
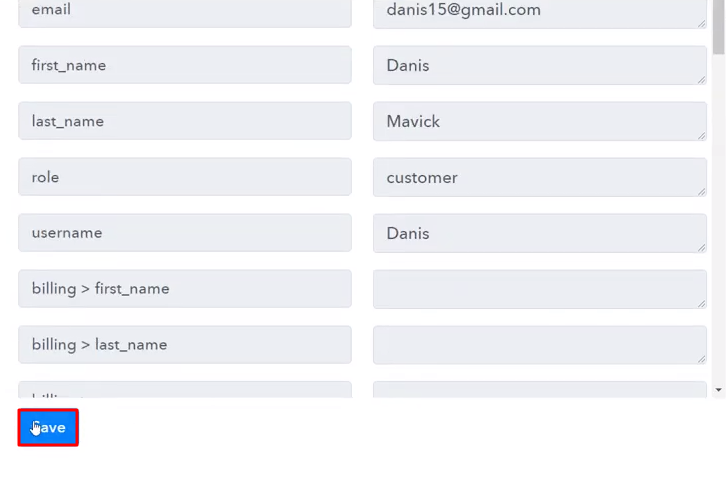
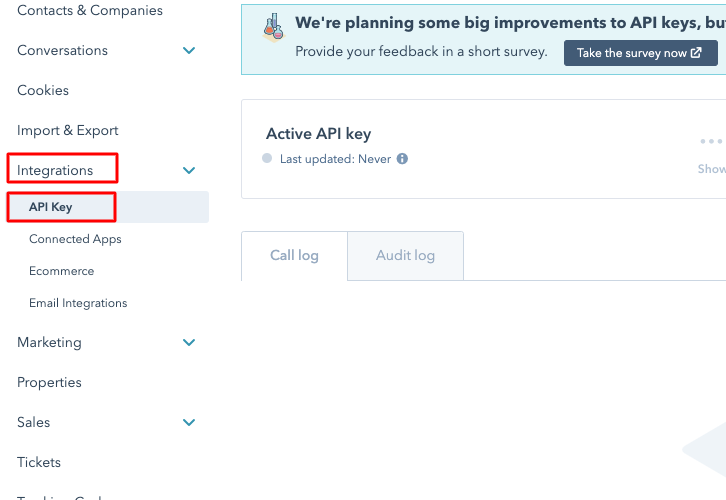
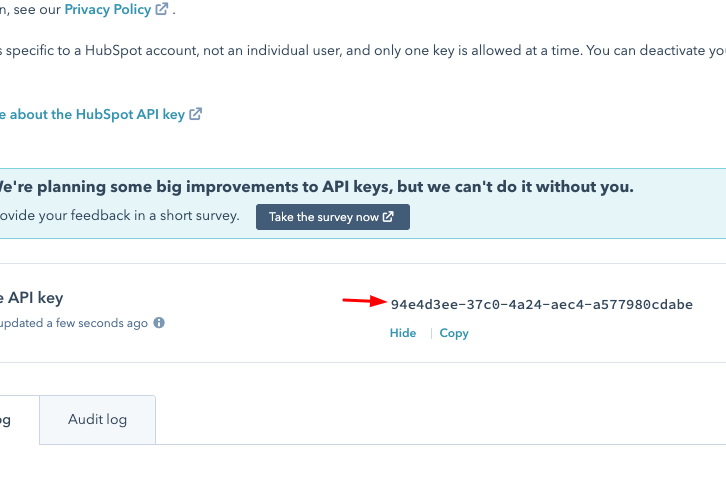
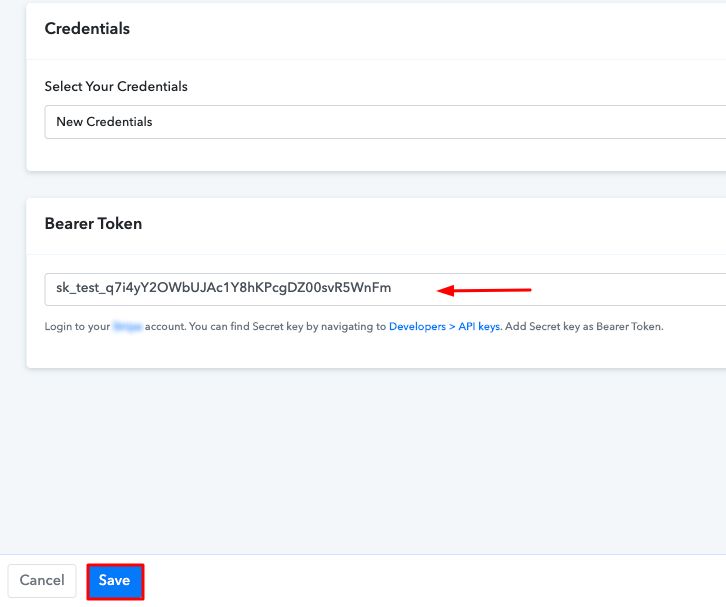
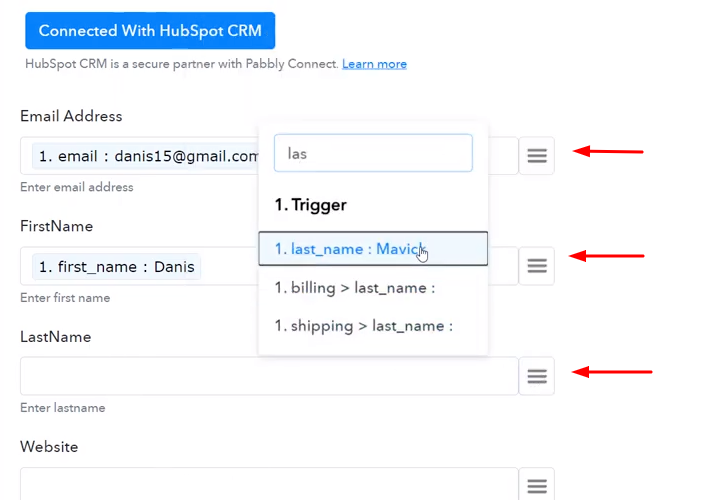
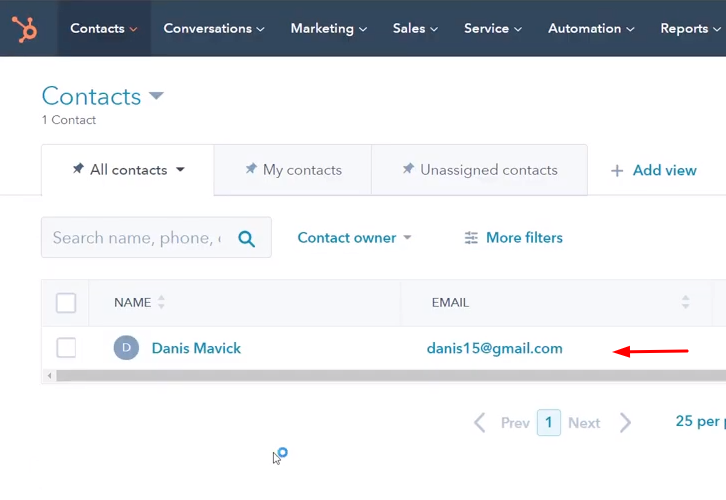
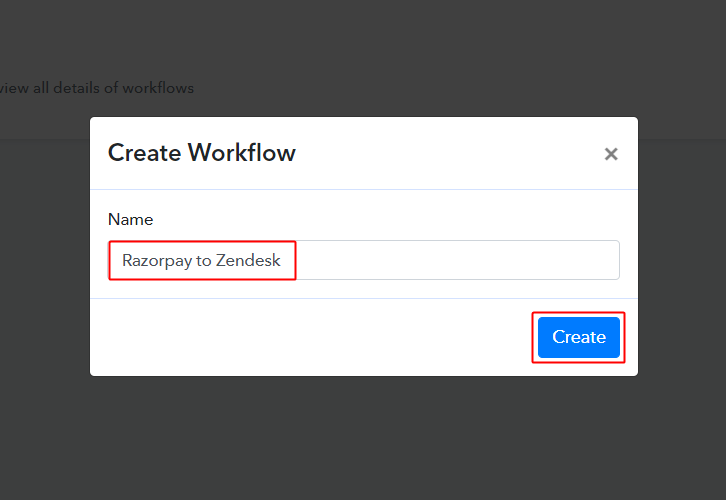
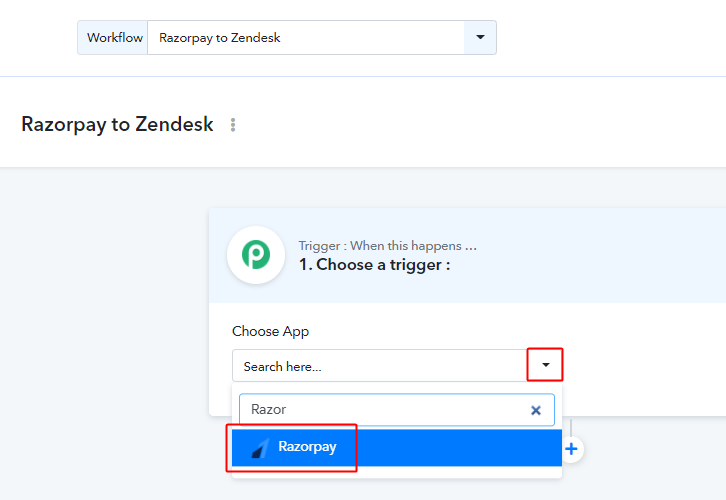
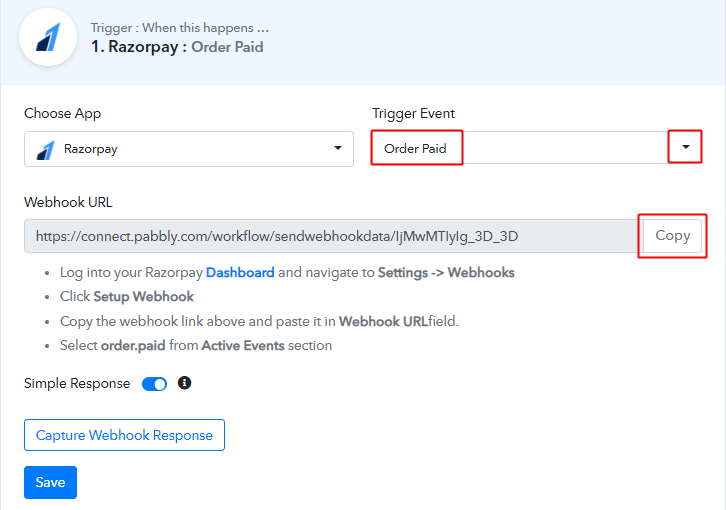
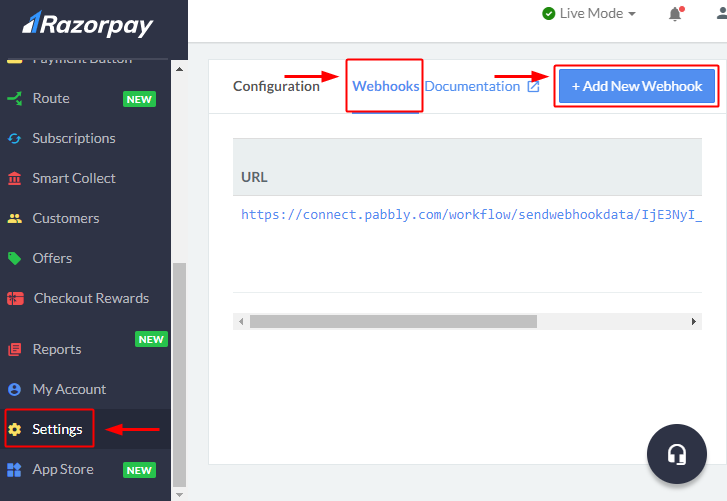
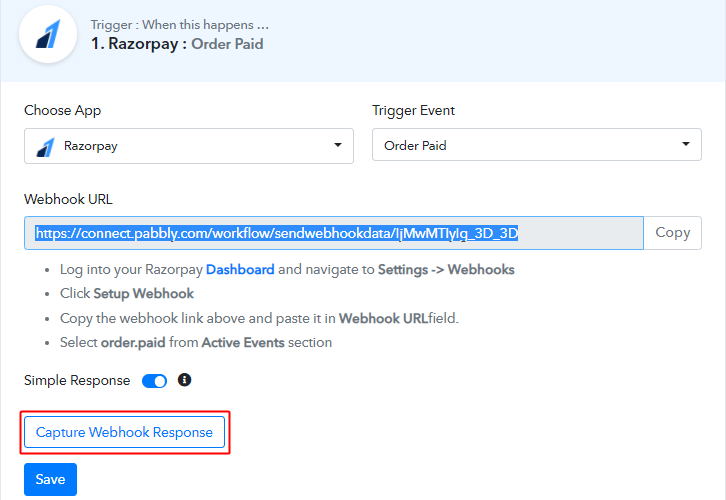
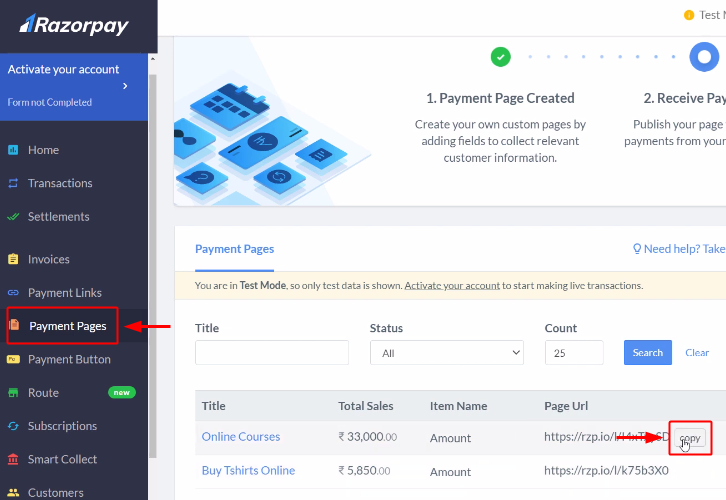
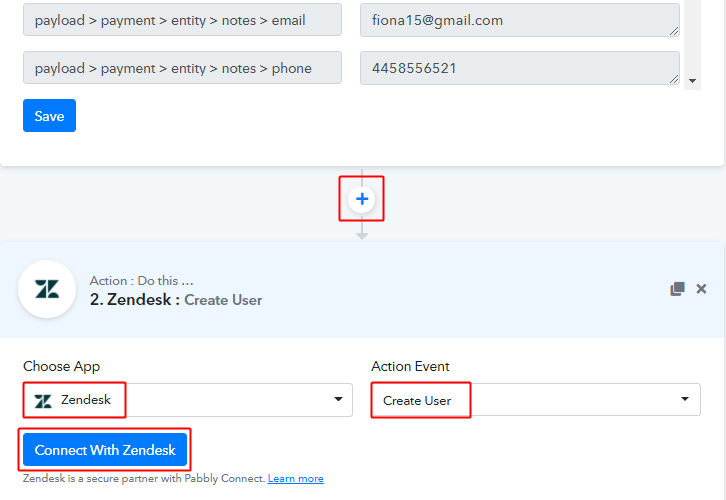
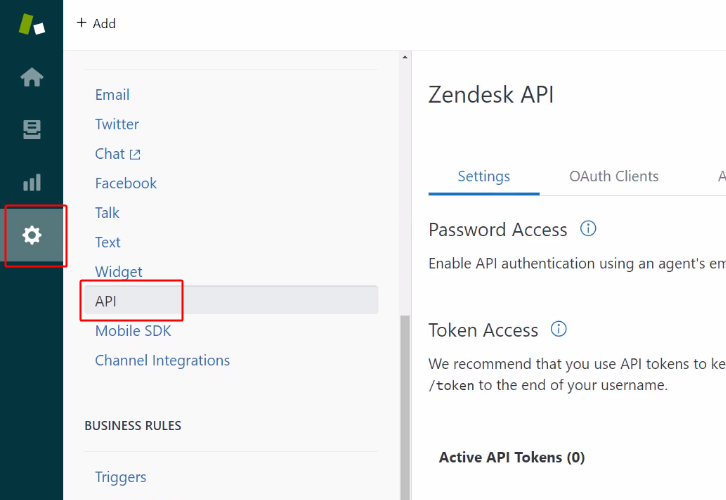
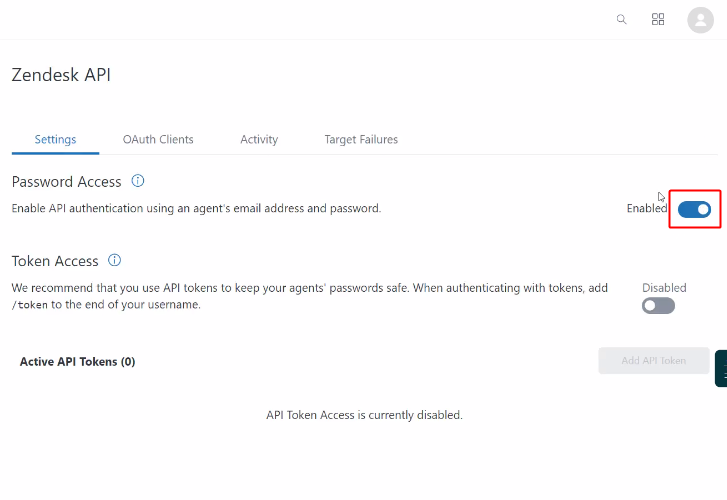
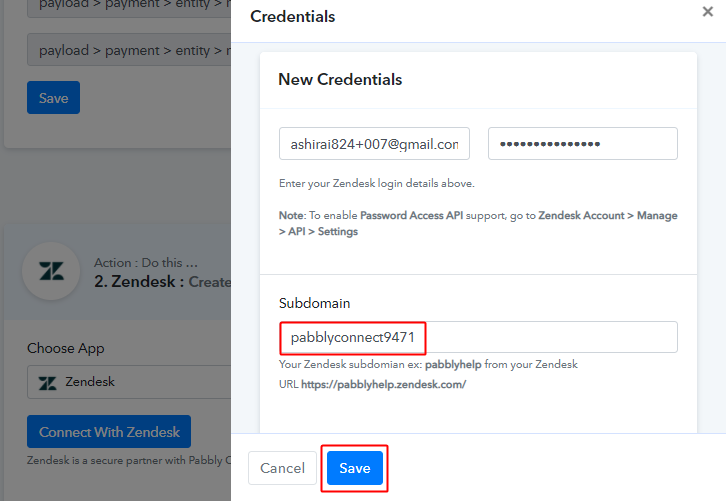
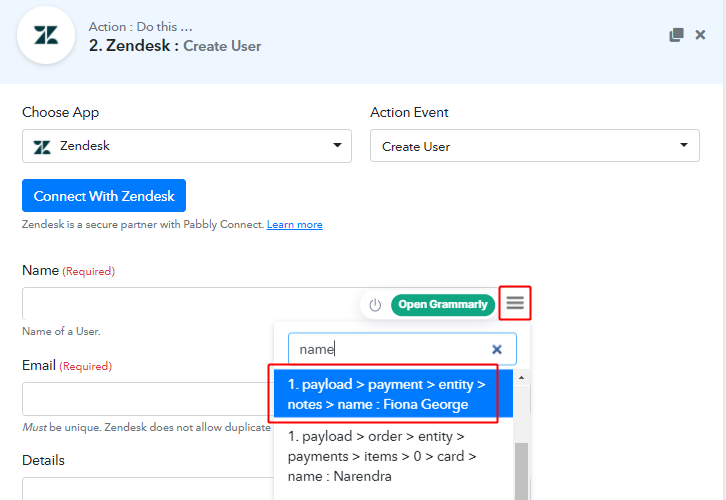
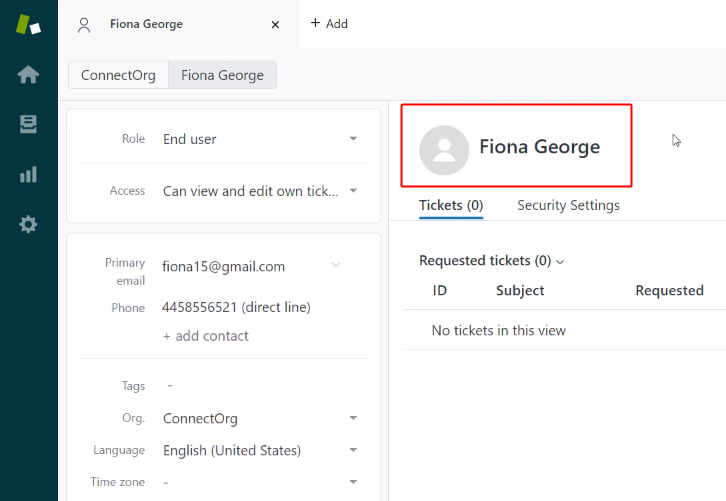
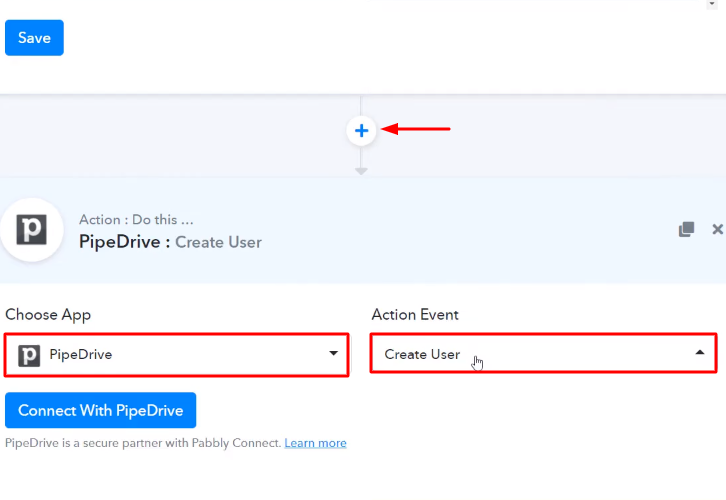
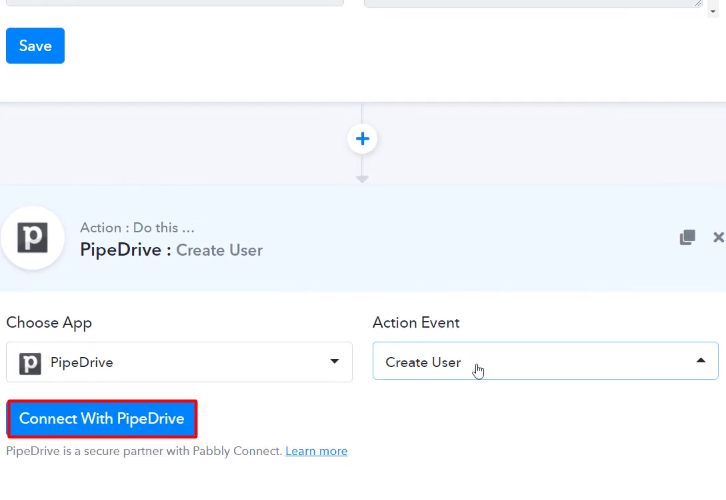
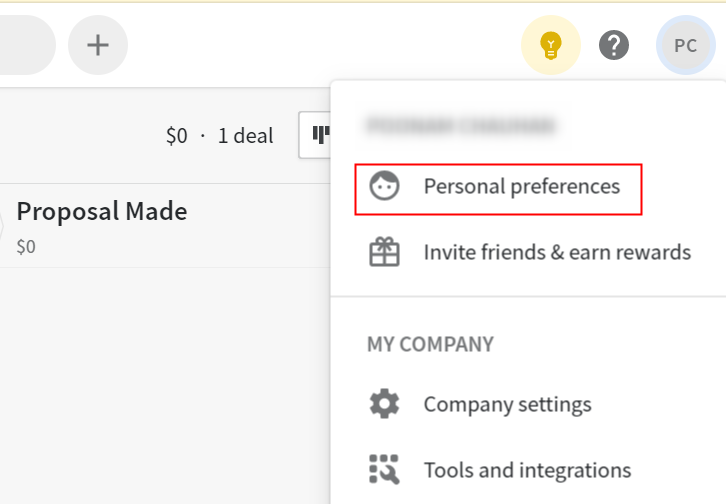
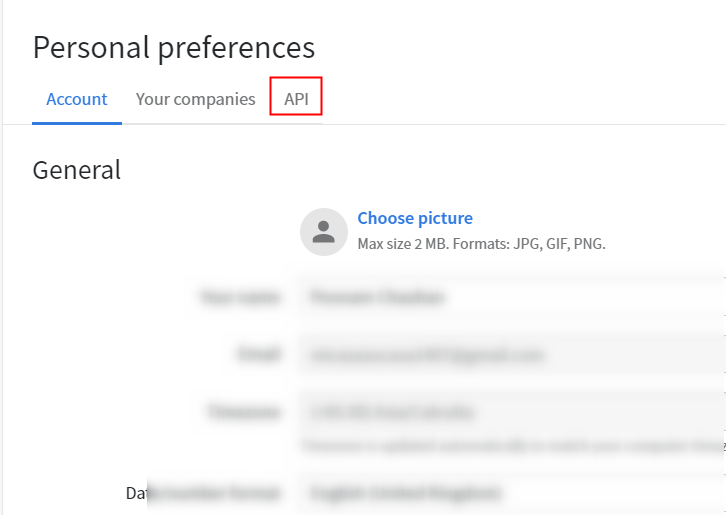
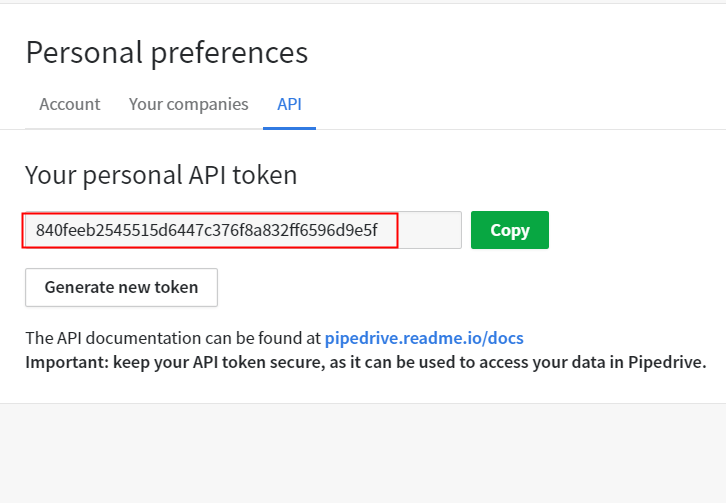
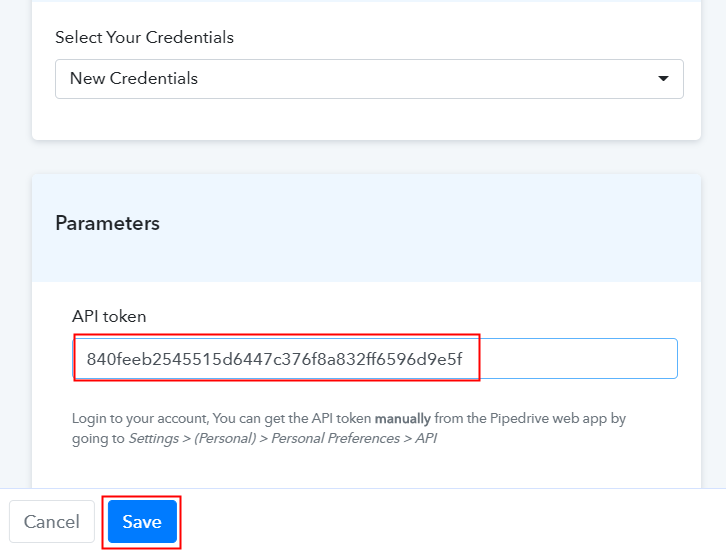
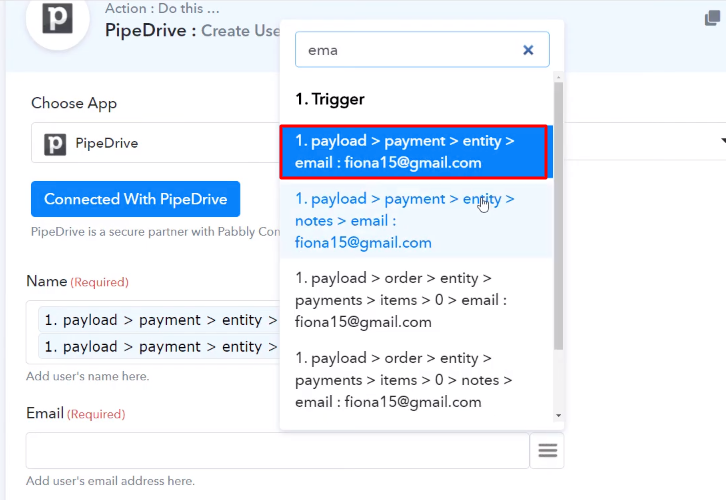
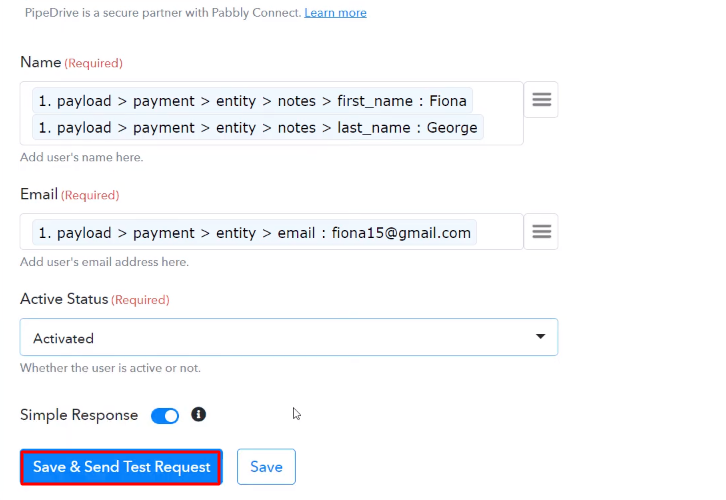
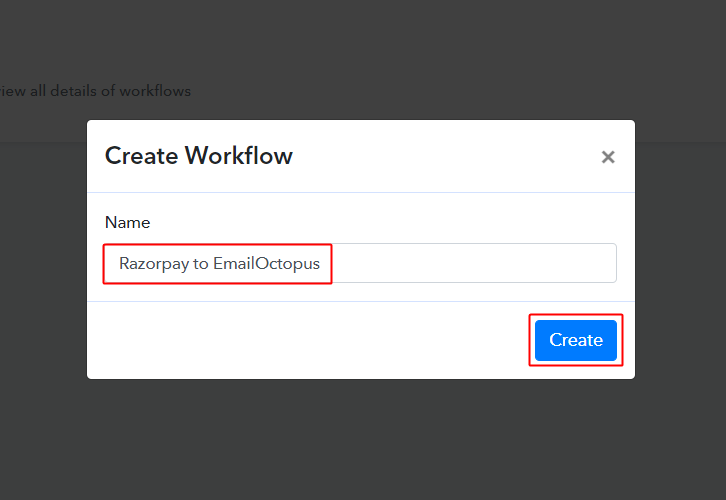
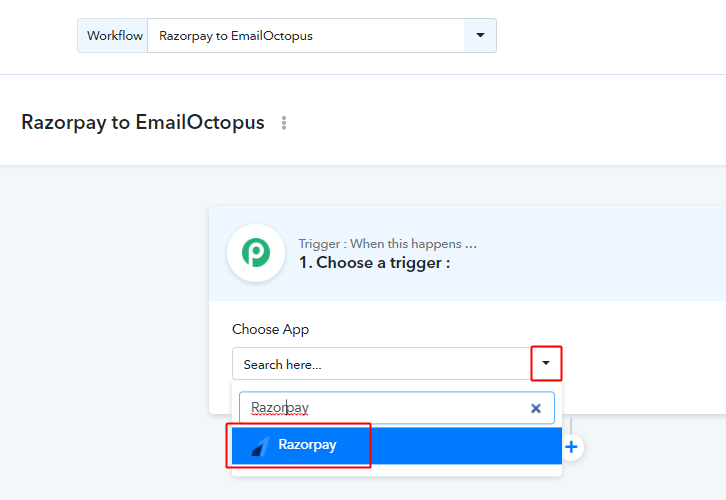
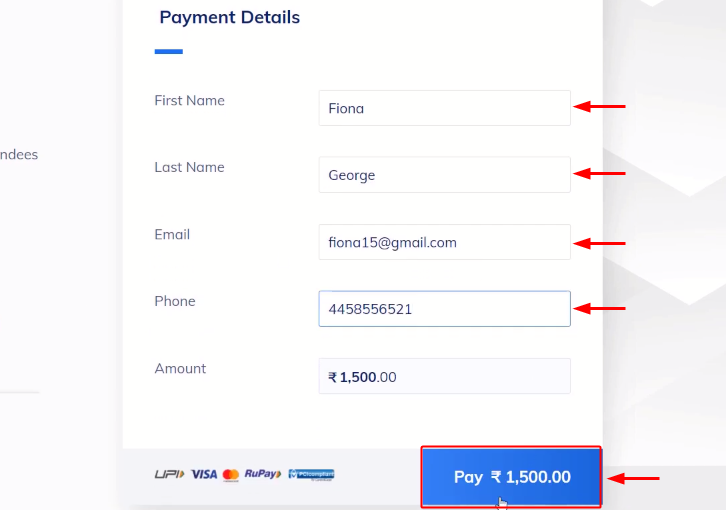
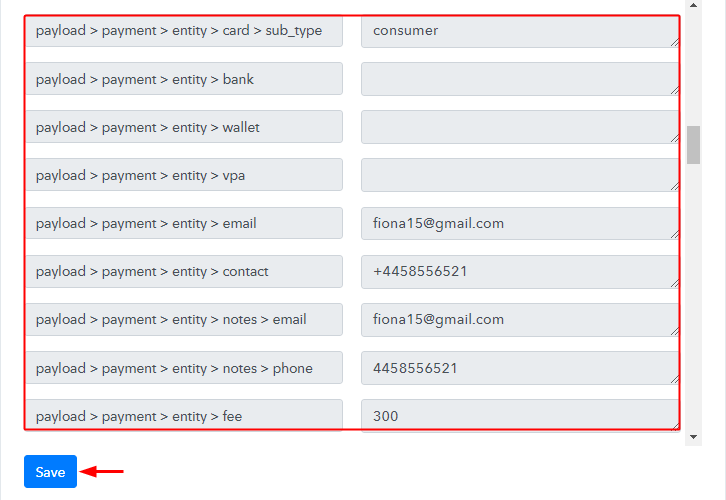
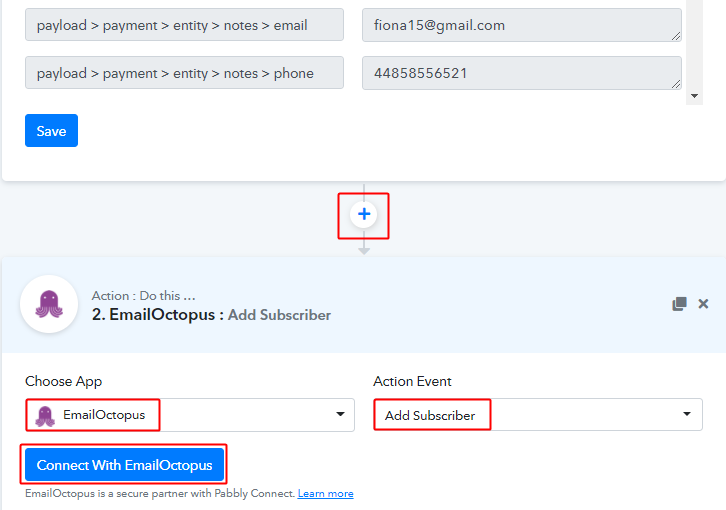
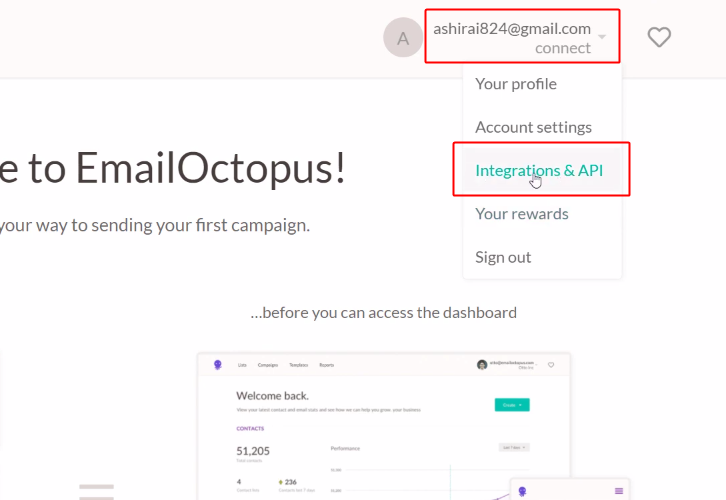
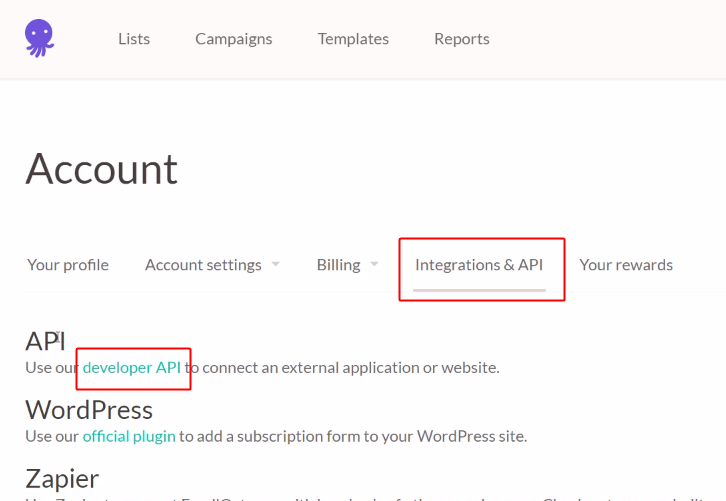
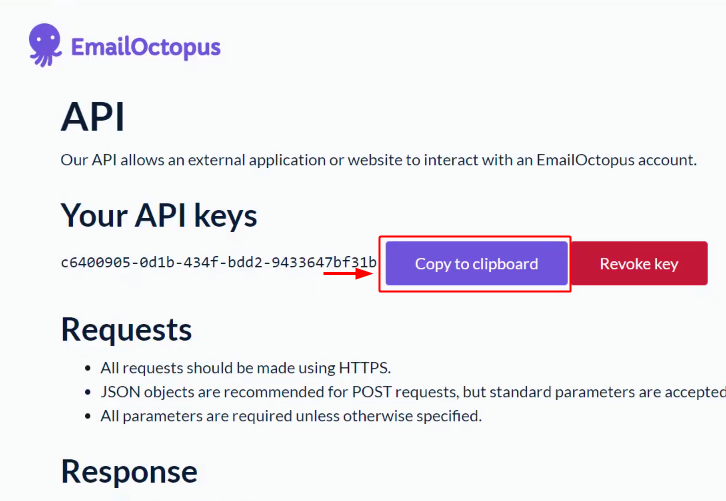
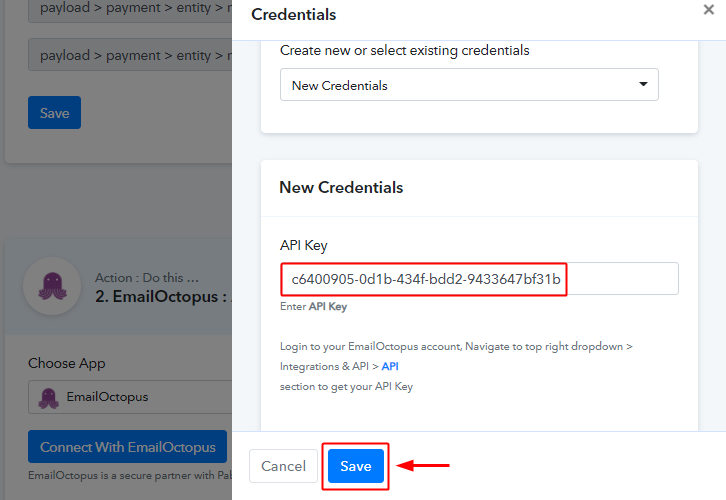
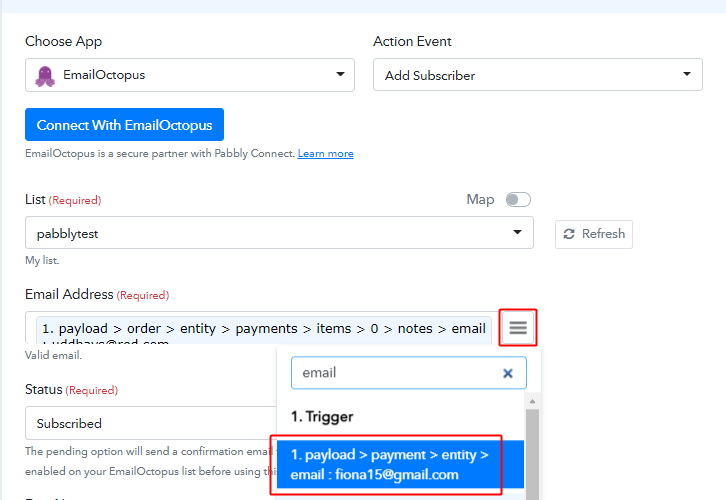
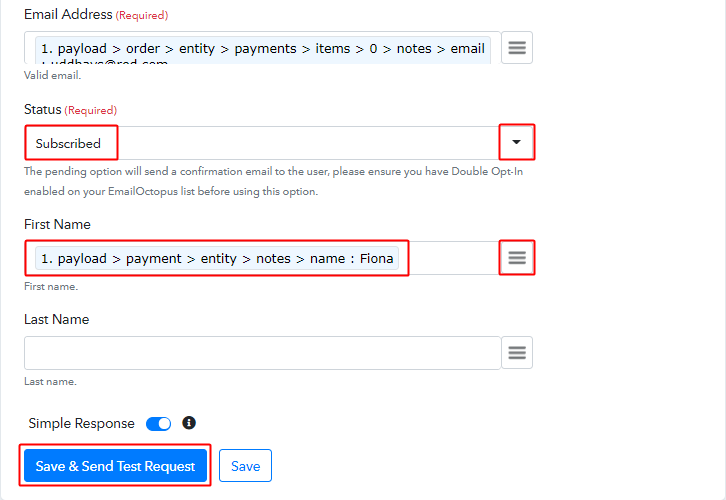
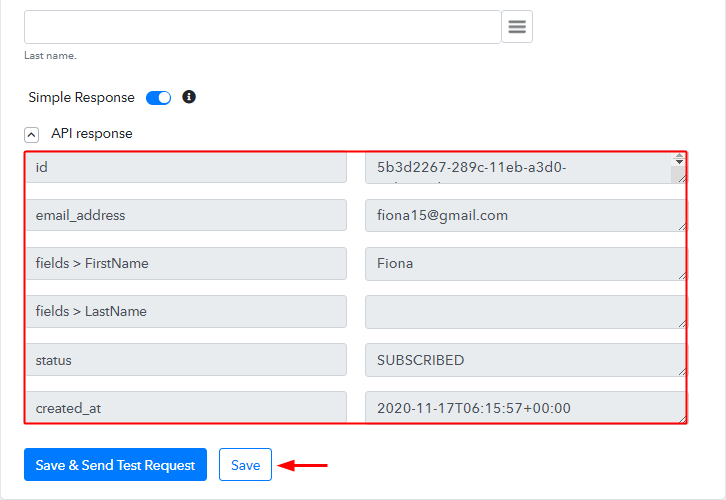
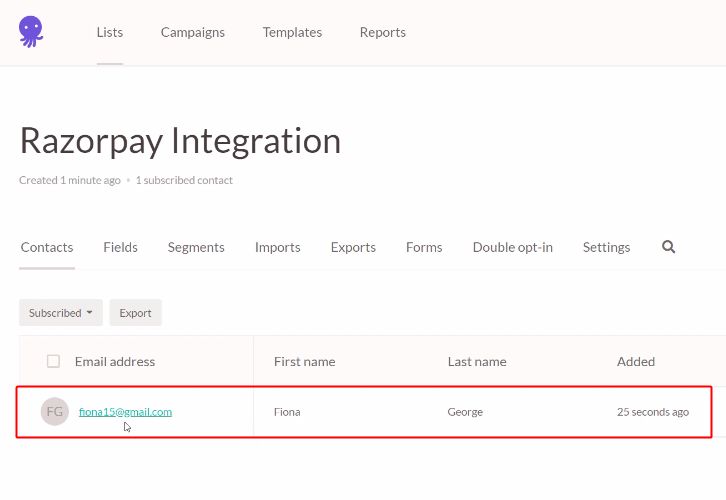
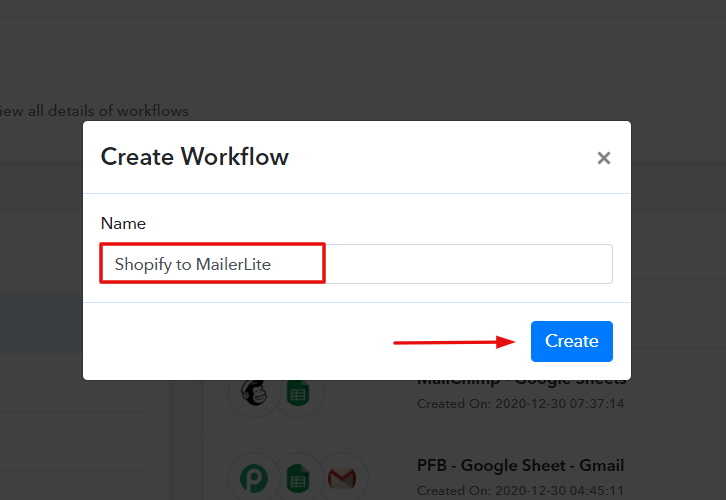
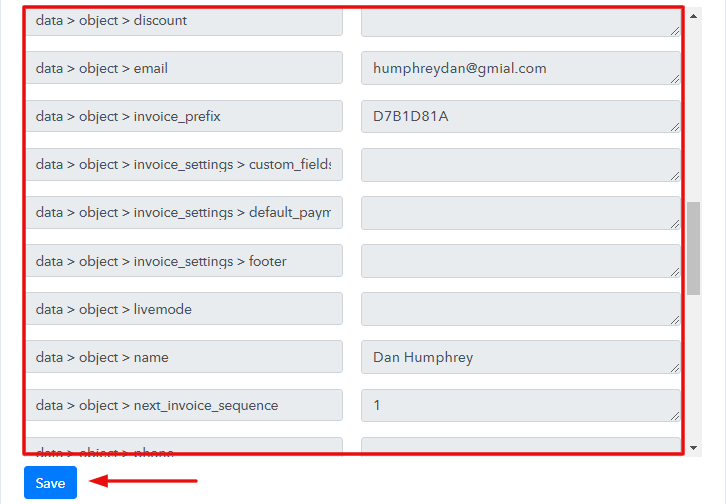
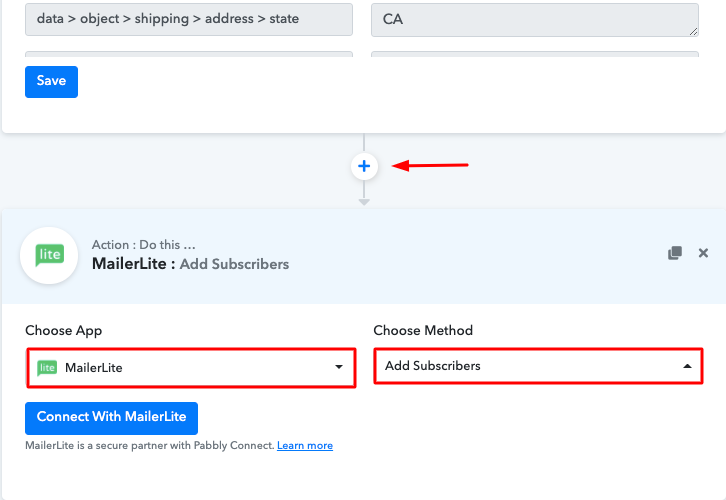
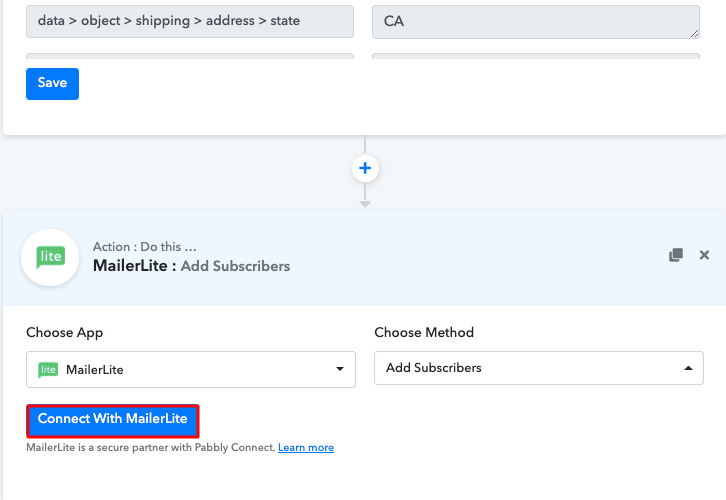
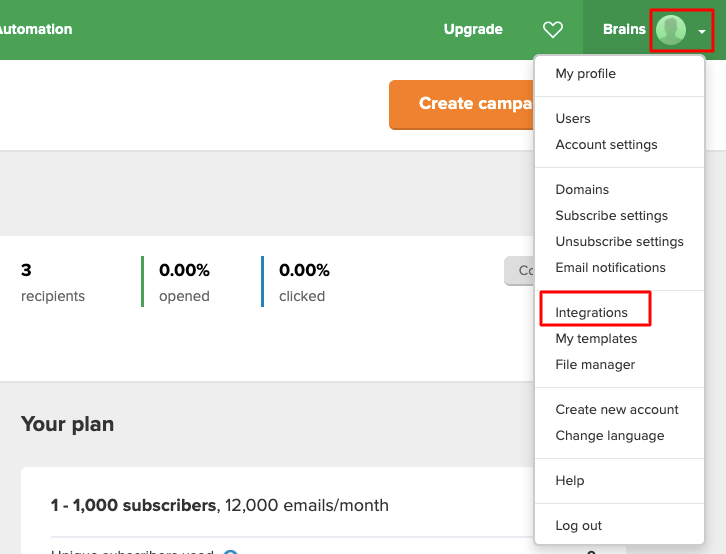
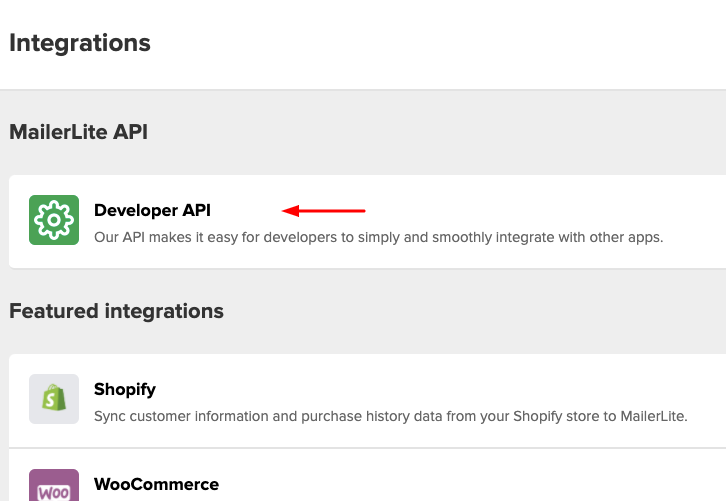
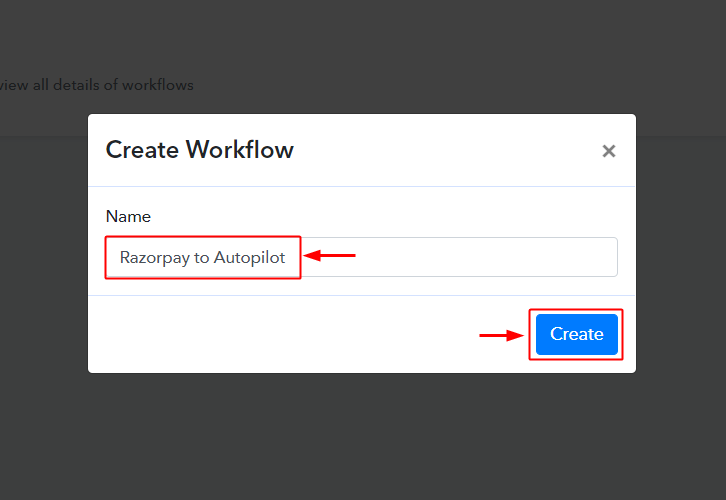
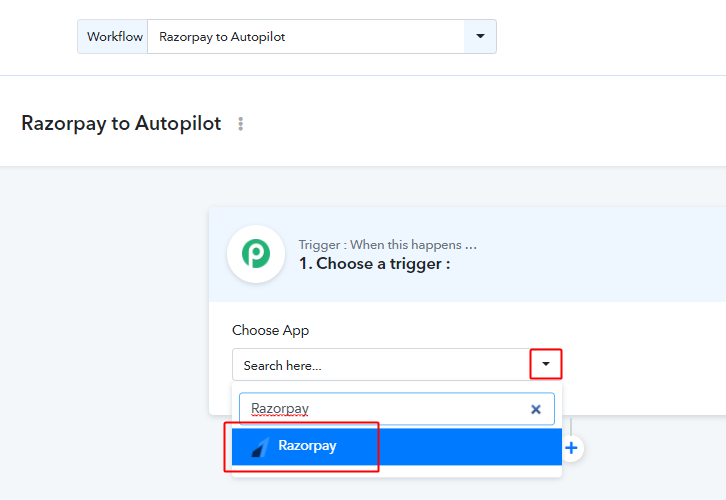
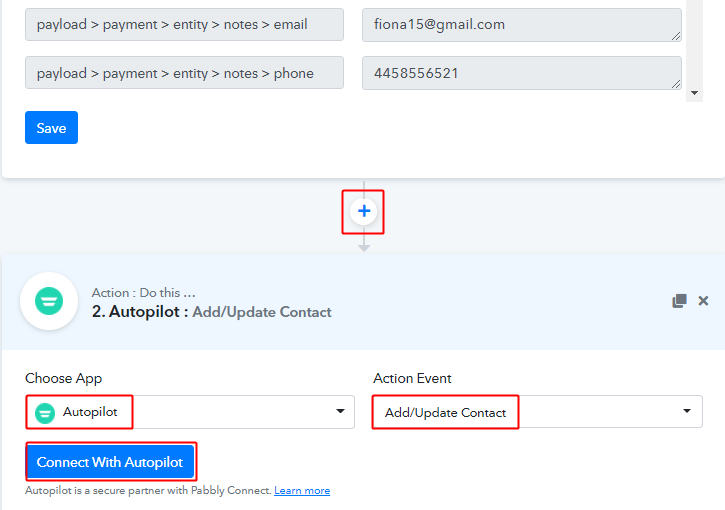
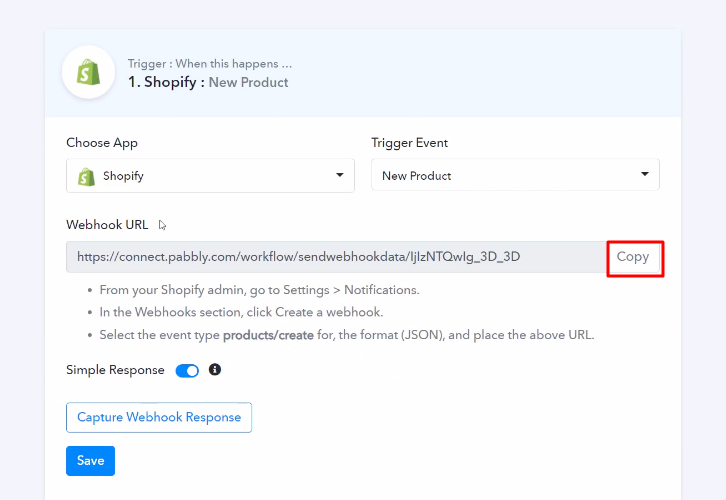
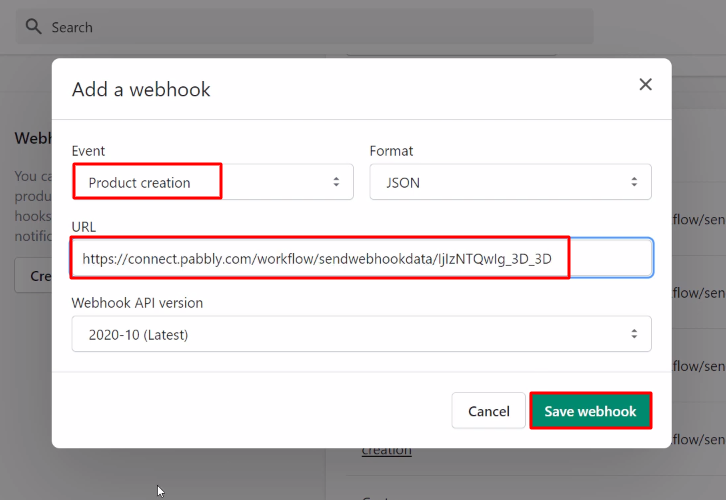
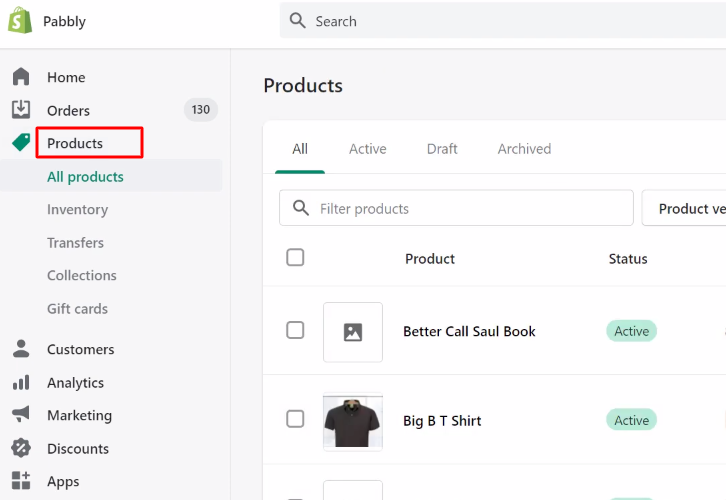
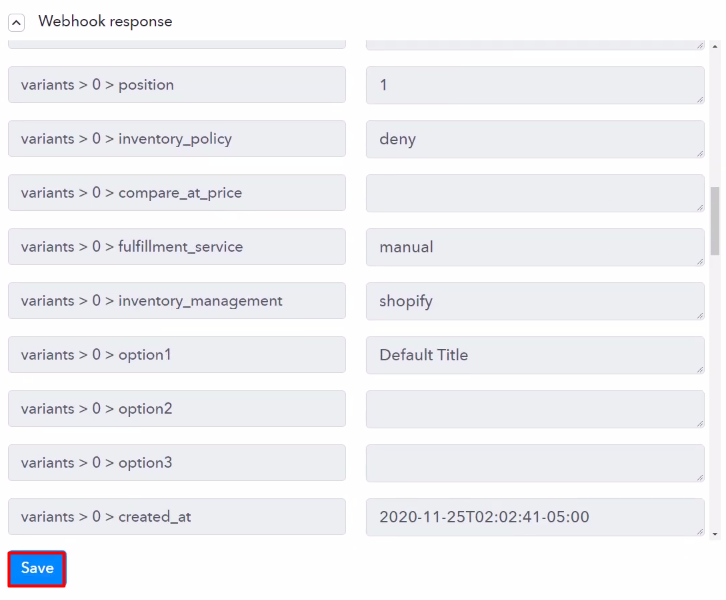
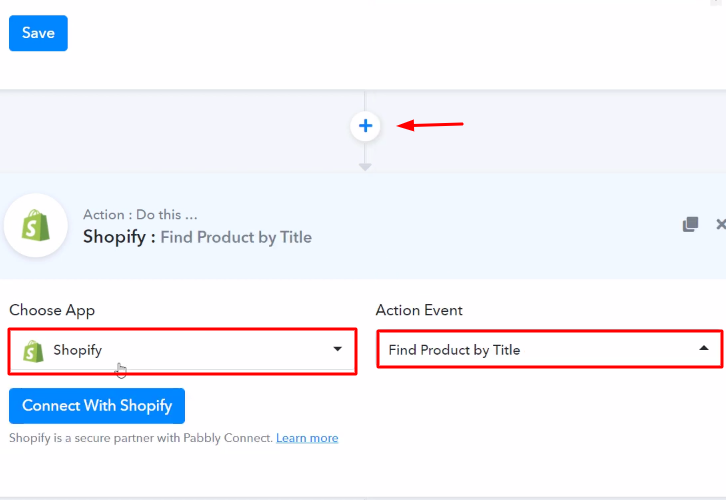
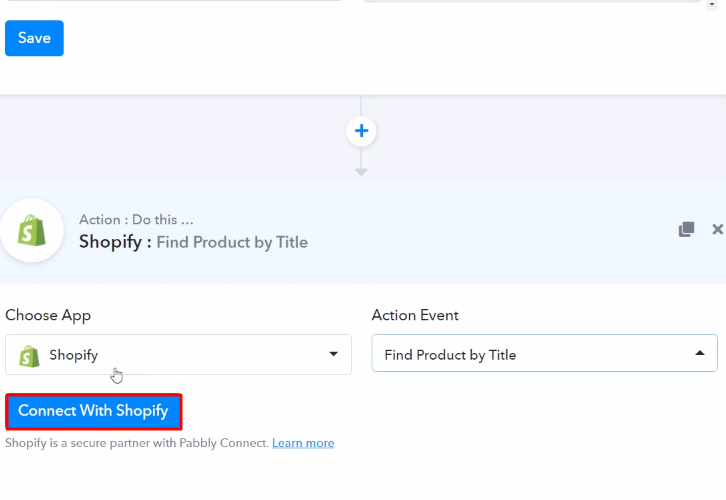
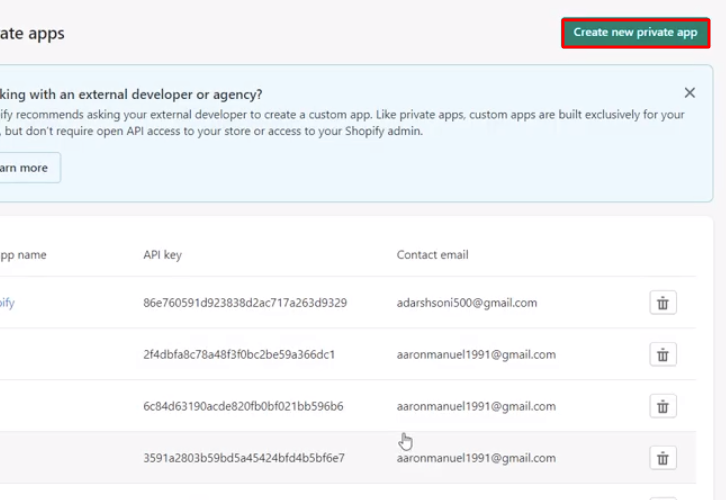
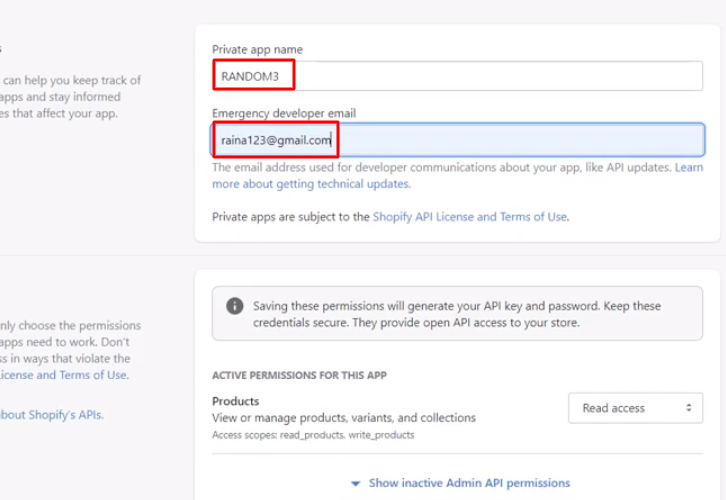
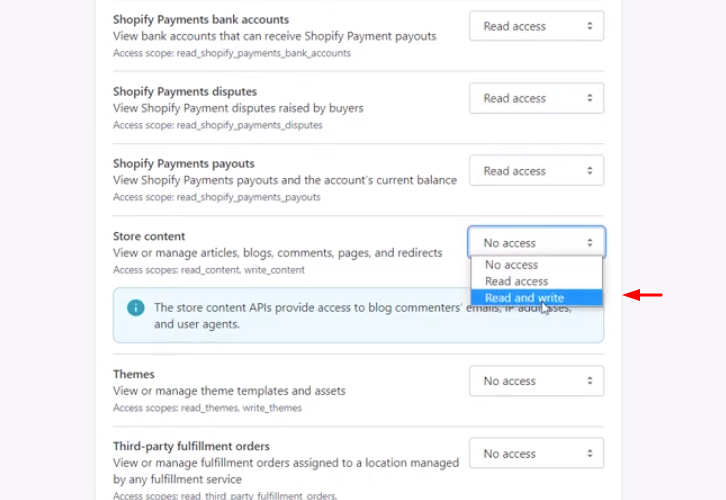
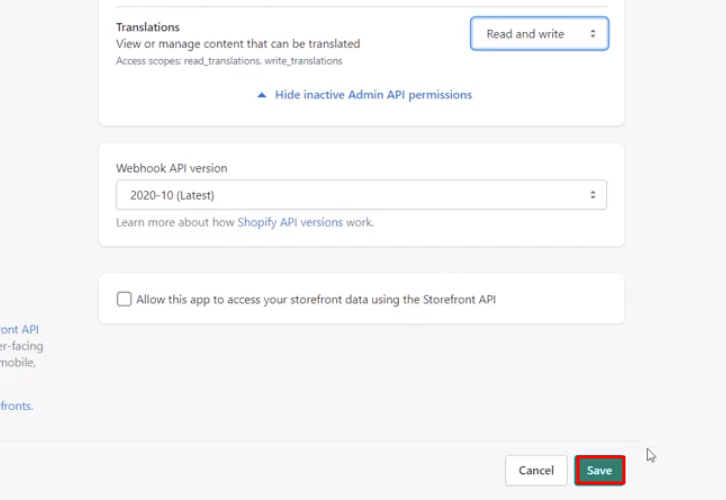
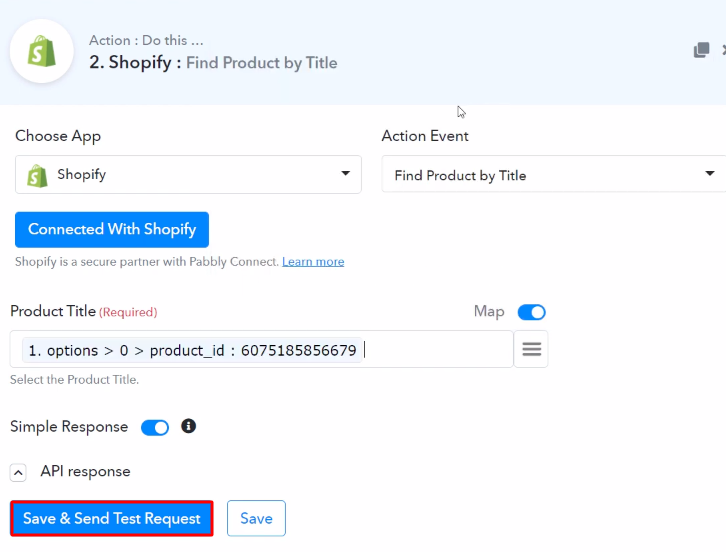
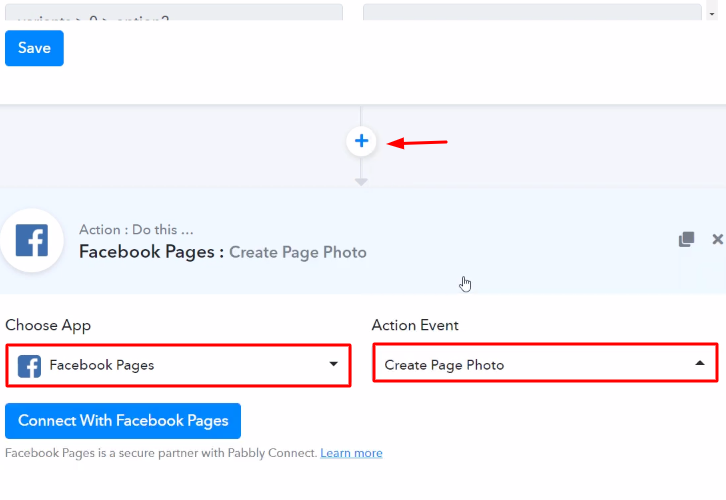
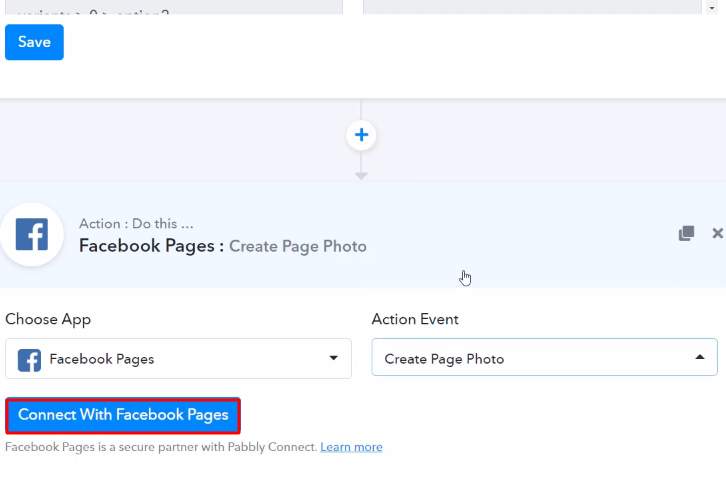
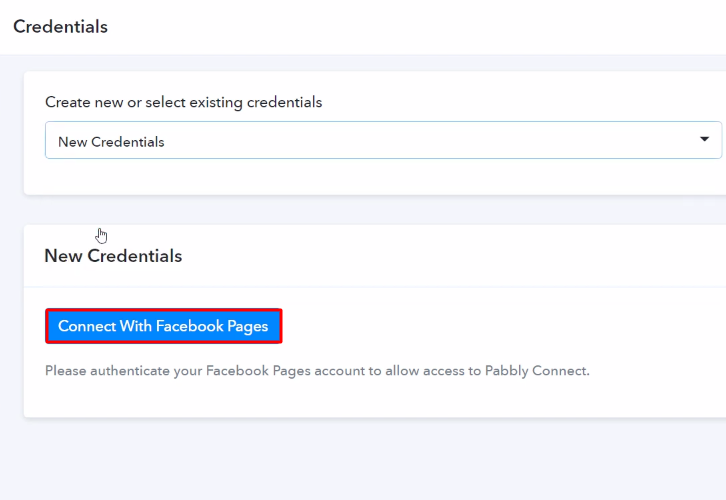
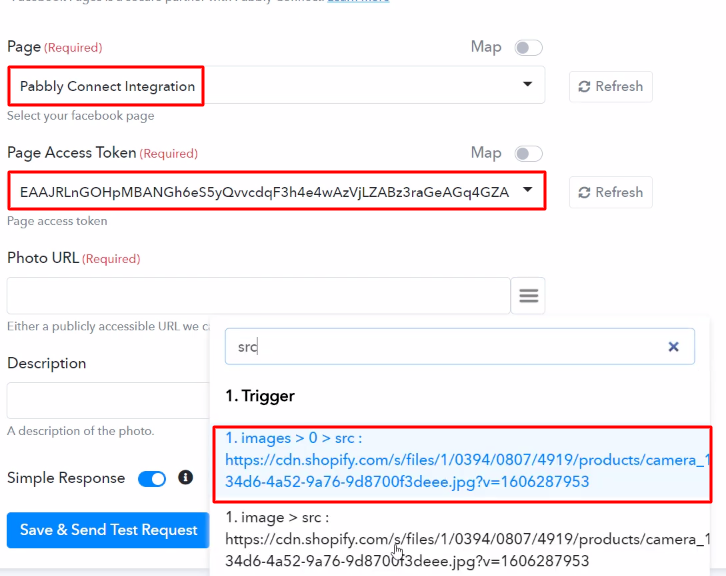
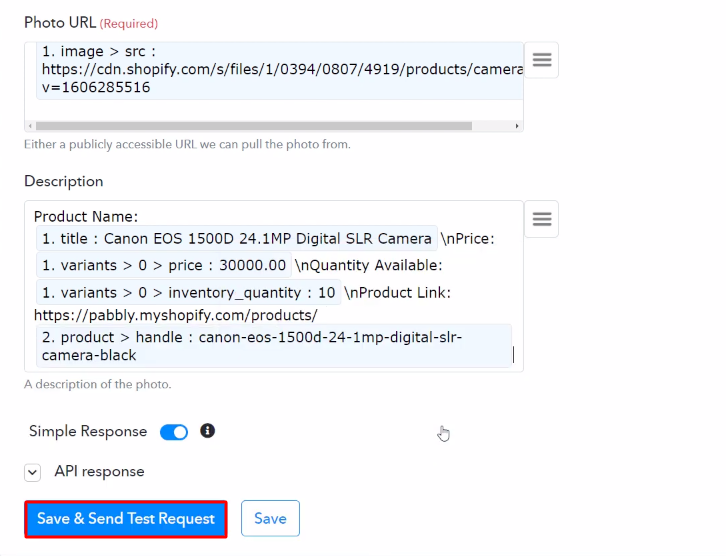
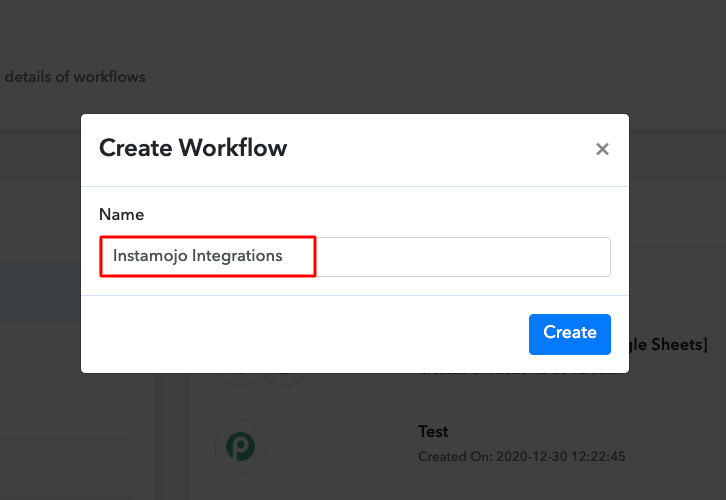
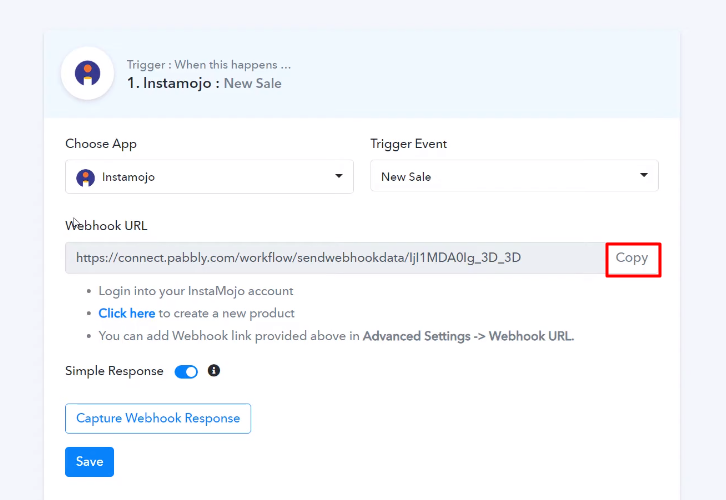
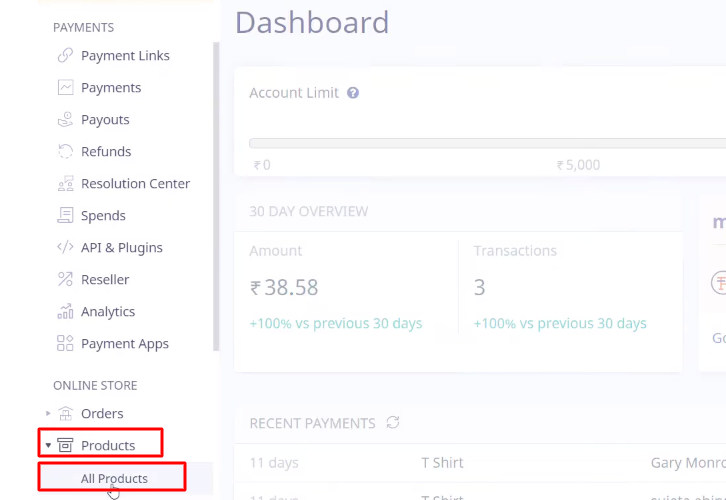
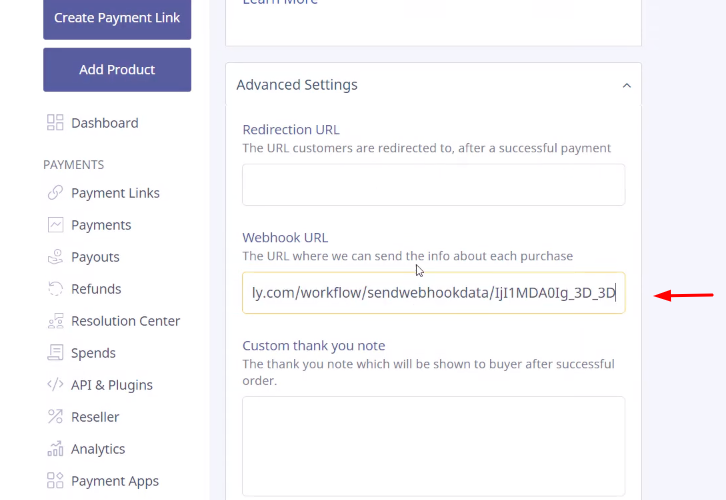
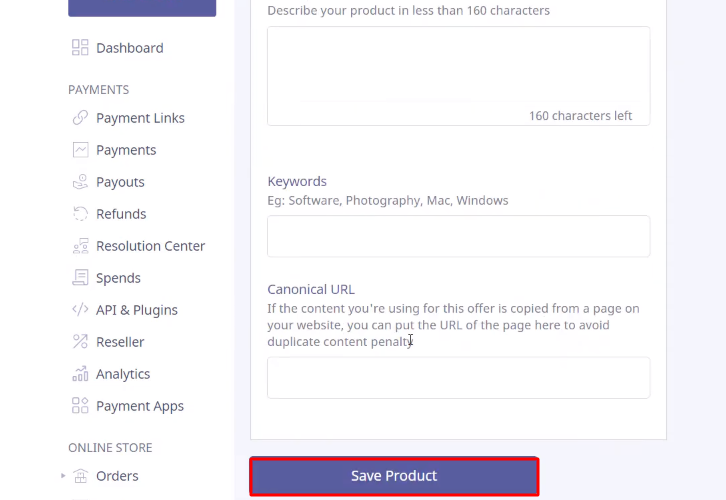
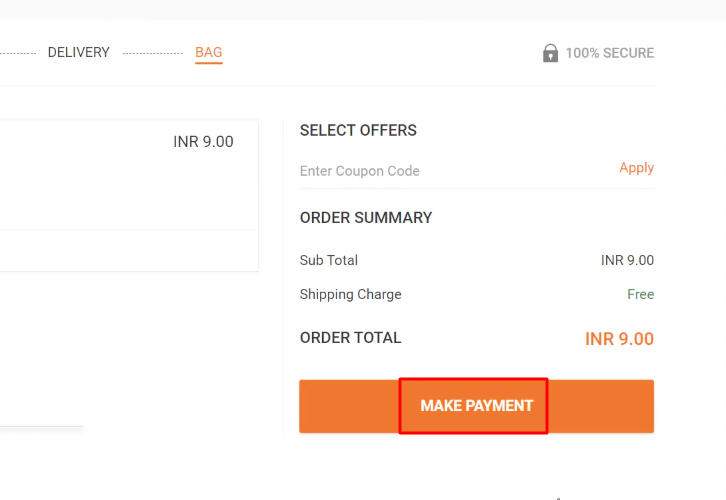
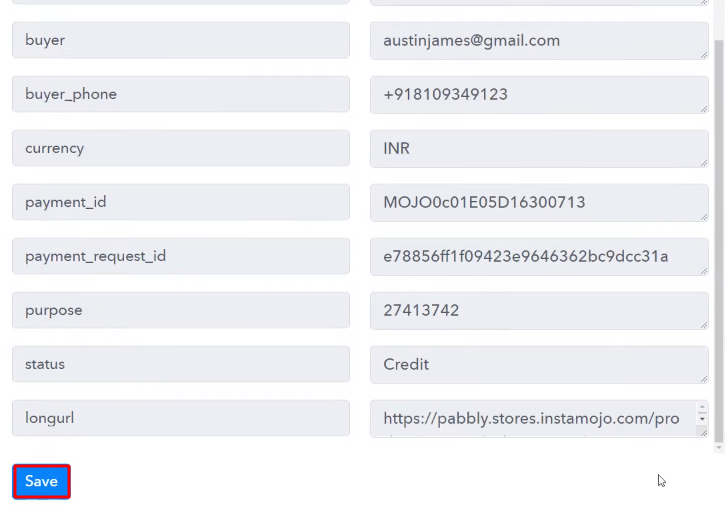
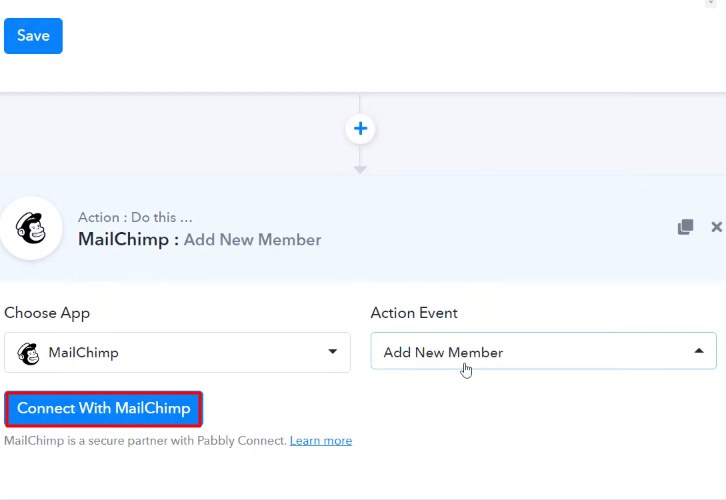
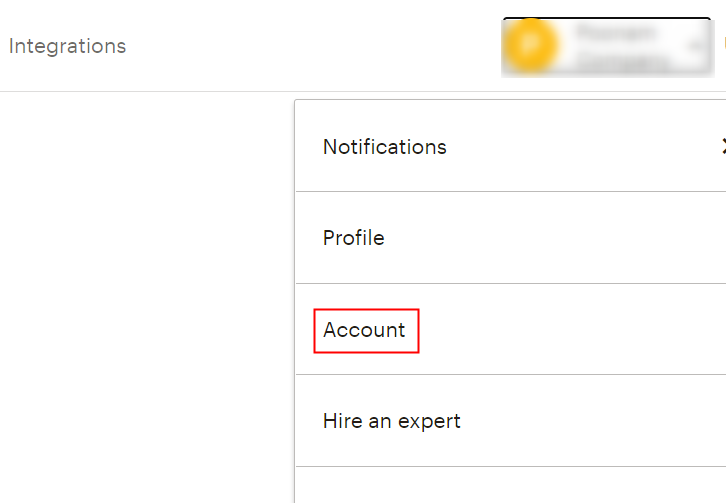
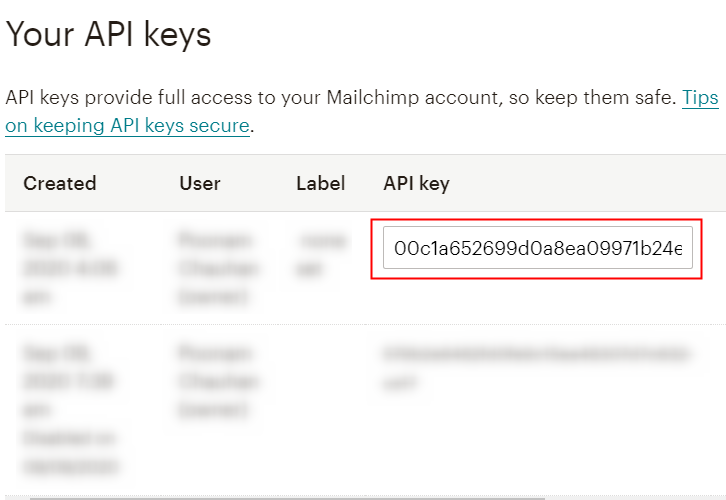
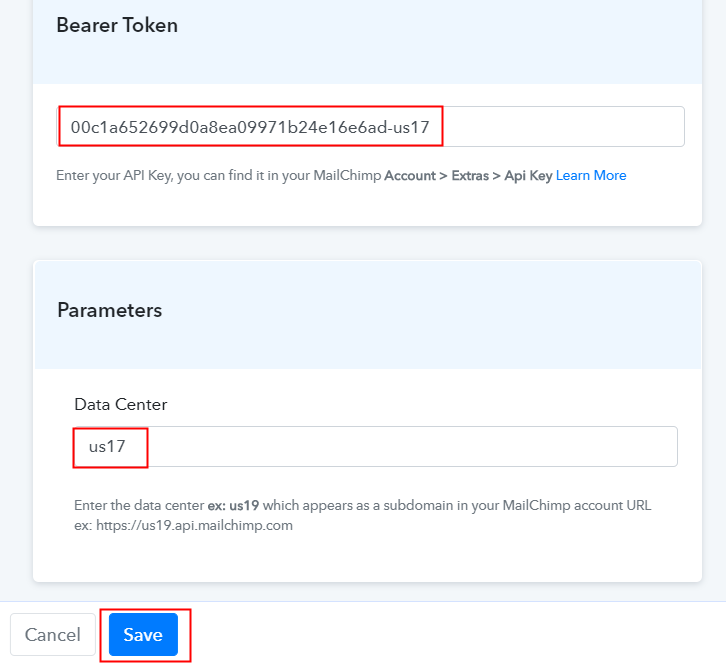
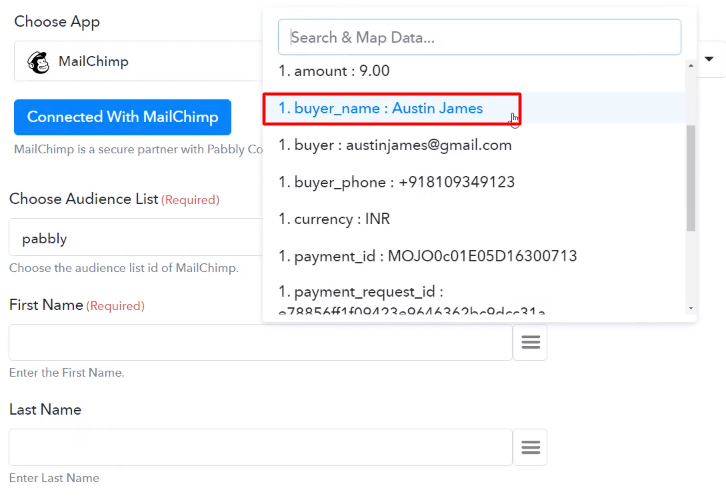
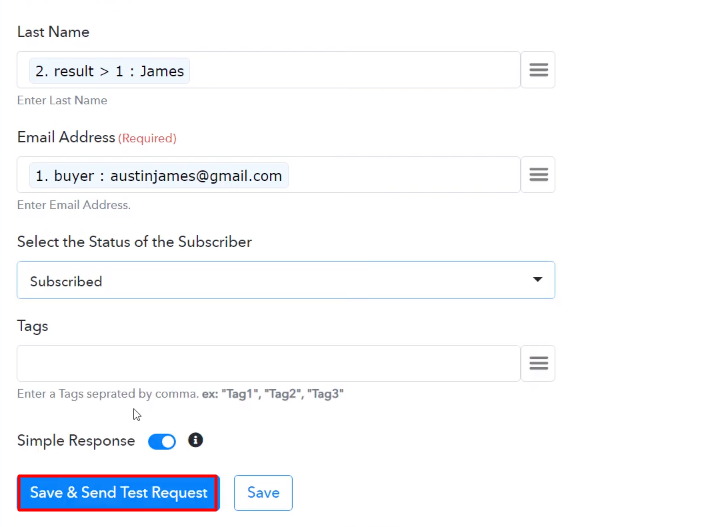
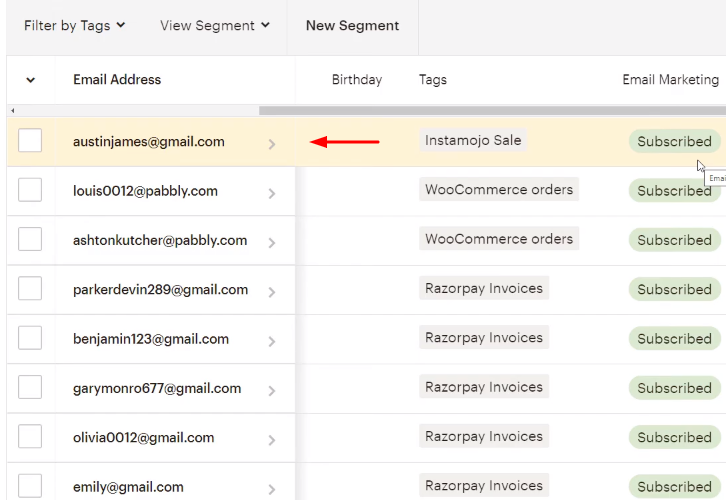
Next, after logging into the account, click on the ‘Access Now’ button as shown in the above image. Start with creating a workflow for your project by clicking on the ‘Create Workflow’ button. Now, you need to name the workflow just like in the above-shown image. I named the workflow ‘Instamojo Integrations’, you can obviously name the workflow as per your requirements. As soon as you are done with naming your workflow, you will have to select the application you want to integrate. Pabbly Connect allows you to connect unlimited premium apps, create your free account now. Now, you have to select the application that you want to integrate. In this case, we are choosing ‘Instamojo’ for integration. In the method section, select ‘New Sale’. The next step is to copy the webhook URL which is appearing on the dashboard just like in the above-shown image. To connect Instamojo to Pabbly Connect, you have to paste the copied Webhook URL in the software. For that, you have to log in to your Instamojo account. Now, to paste the webhook URL, click the ‘Products’ option and then select the ‘All Products’ in your Instamojo dashboard. Next, select any of the listed product in your Instamojo account and then click the ‘Edit’ option. Simply scroll down and paste the copied webhook URL in the ‘Webhook URL’ section. After pasting the URL, scroll down and hit the ‘Save Product’ button to save the changes. To check this integration, we will make a dummy purchase in Instamojo to capture the data. Now, from the all products section select the product in which you have pasted the webhook URL. After selecting the product, hit the ‘Add to Cart’ button. Click on the cart icon at the top section of the screen and then click on the ‘Checkout’ button. In this step, add the customer details like name, email, etc. After making all the changes, click the given ‘Make Payment’ button to make the payment. But before that, click the ‘Capture Webhook Response’ button in Pabbly Connect to capture the data. Once you click on the ‘Make Payment’ in Instamojo and on the ‘Capture Webhook Response’ in Pabbly Connect, the customer info will appear on the Pabbly Connect dashboard. Then, click on the ‘Save’ option. To make this Instamojo-MailChimp integration work, you have to choose an action for your trigger. Now in this step, click on the + button below and choose the application that you want to integrate. Here we will choose ‘MailChimp’ to integrate and in the method section select ‘Add New Member’. After choosing the application click on the ‘Connect with MailChimp’ button to move forward. To connect MailChimp to Pabbly Connect, you have to paste the “Bearer Token” for which you have to log in to your MailChimp account. After logging into your MailChimp account, click on the ‘Account’ on the uppermost section of the dashboard. When you click on ‘Account’ it will open up the new window. There you will see the ‘Extras’ option, simply click on it. Then, click on the ‘API Keys’ option. As soon as you will click on the ‘Create a Key’ button, it will generate the key. Just copy it. Just paste API Key in the bearer token section, and in the ‘Data Center’ column, mention MailChimp id which appears in the starting of your MailChimp URL. After ensuring all this, click the ‘Save’ button. Next, map the required field from the drop-down such as for the email field, select the email option, and for the name field select the name option. After filling in all the details, hit the ‘Send Test Request’ button. Lastly, when you check the Audience section in MailChimp, your entry will automatically appear there. Now you know how to add MailChimp member from new Instamojo sale. This is a one-time process, now all your manual work will be done by the online business automation and integration tool i.e Pabbly Connect. So this was the easiest and fastest method that you could use to integrate Instamojo to MailChimp. Not only these two applications, but you can connect thousands of applications on Pabbly Connect easily. It’s simple and easy to use and you won’t have to go for any other software after using it. Now the data transmission is a child’s play, all thanks to Pabbly Connect. If you have any suggestions or queries, please drop them down in the comment section, we will get back to you as soon as possible.Step 2: Access Pabbly Connect

Step 3: Workflow for Instamojo to MailChimp Integration
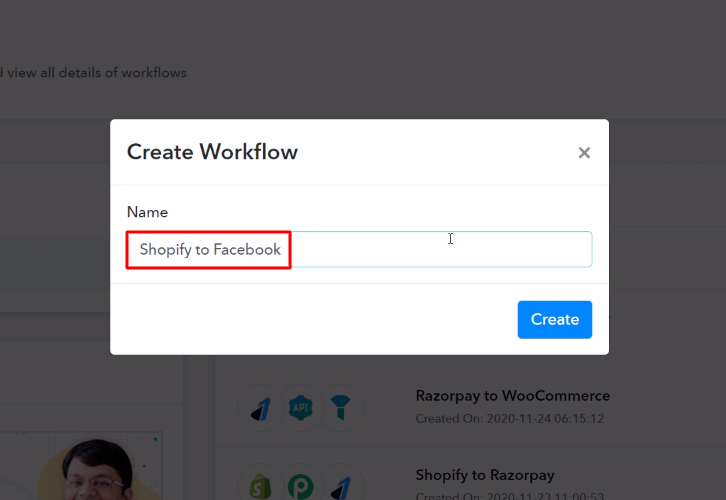
(a) Start with a New Workflow

(b) Name the Workflow
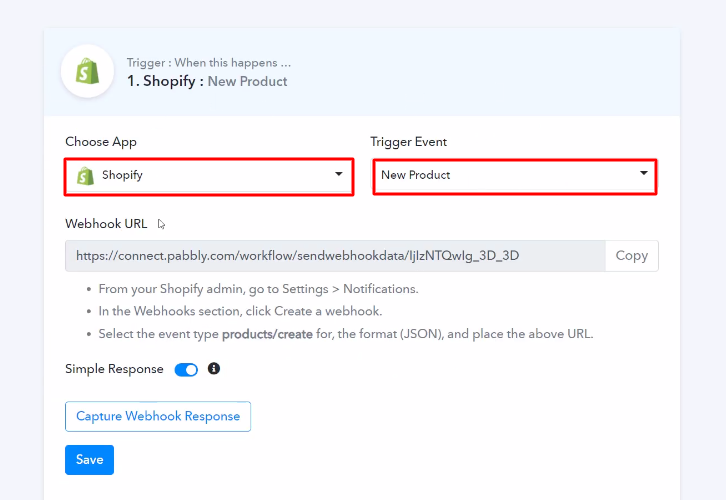
Step 4: Setting Trigger for Instamojo to MailChimp Integration
(a) Select Application you Want to Integrate
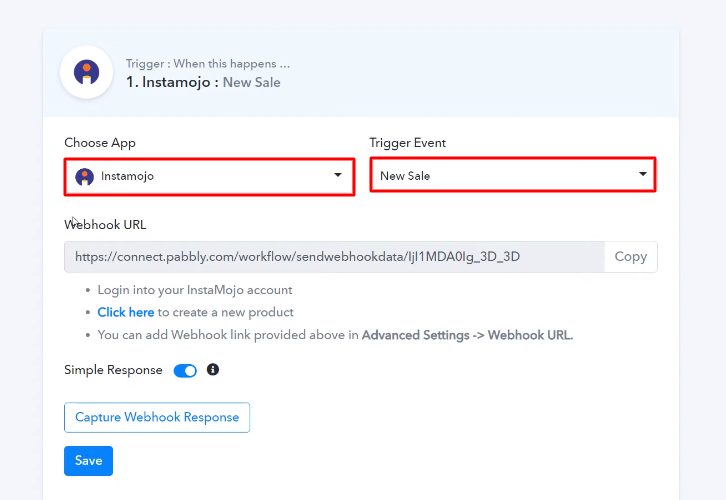
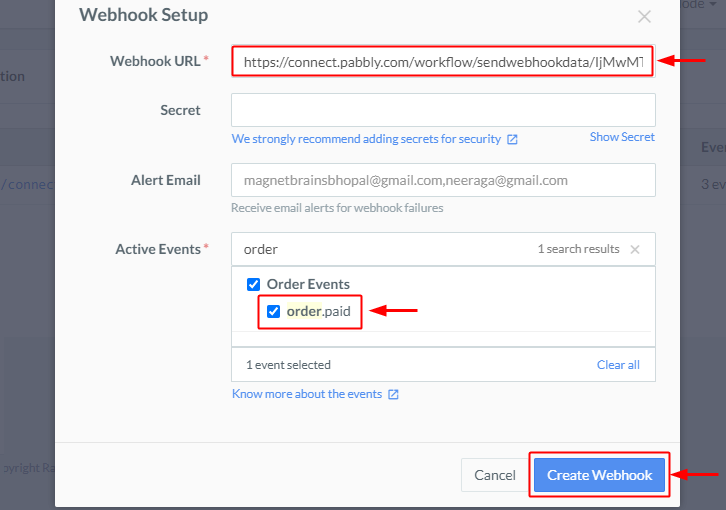
(b) Copy the Webhook URL
Step 5: Connecting Instamojo to Pabbly Connect
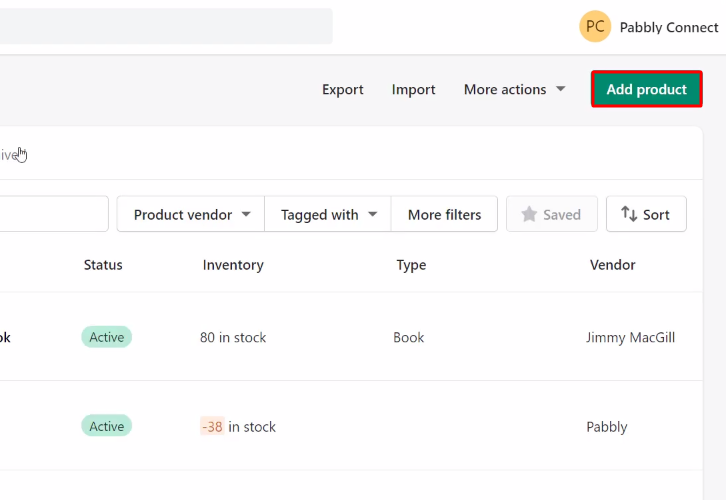
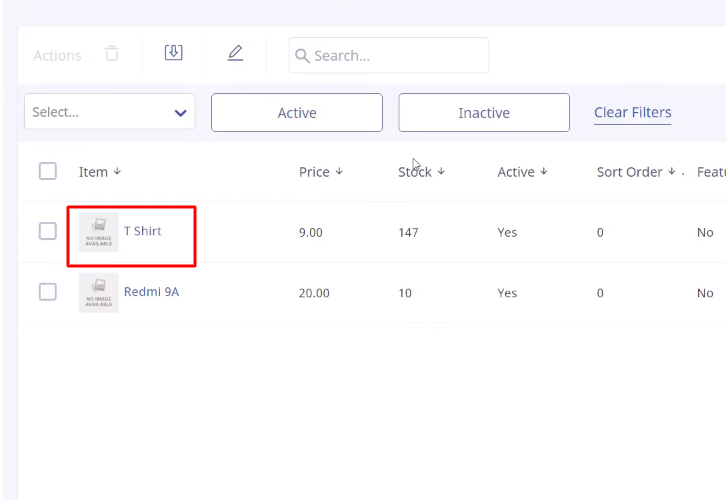
(a) Click on Products
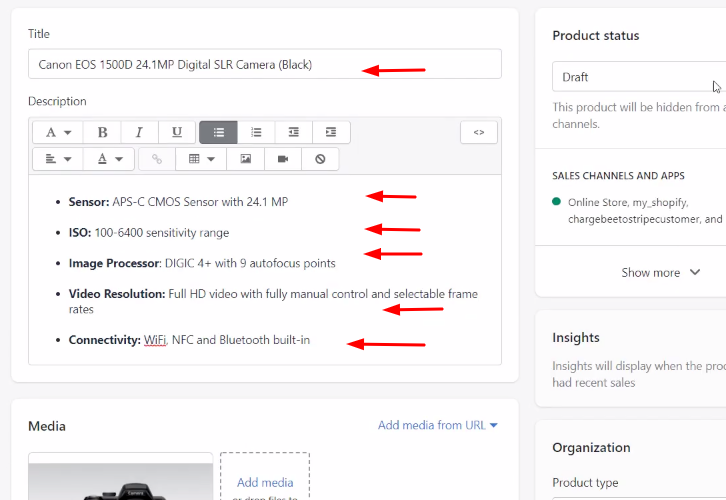
(b) Edit a Product

(c) Paste the Webhook URL
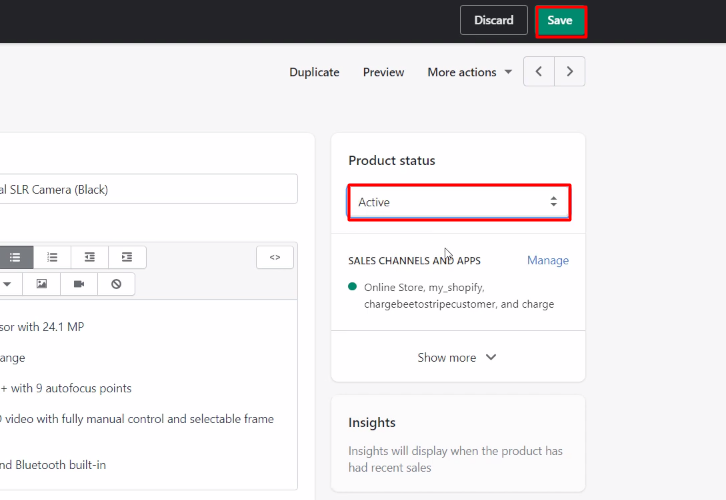
(d) Save Product
Step 6: Make a Test Purchase
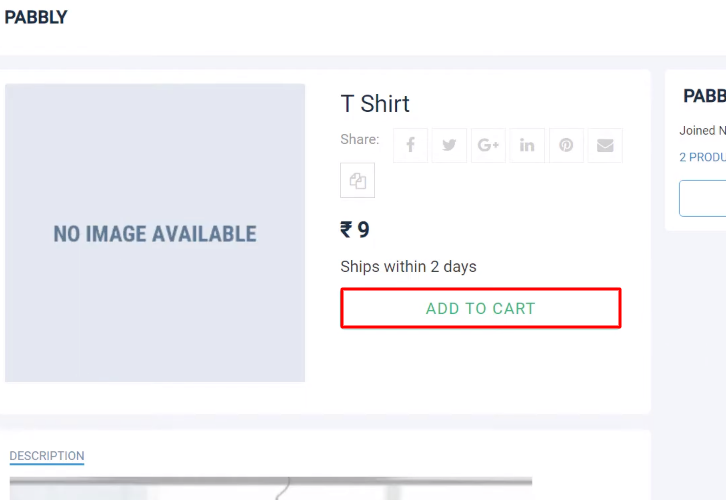
(a) Select a Product
(b) Add to Cart
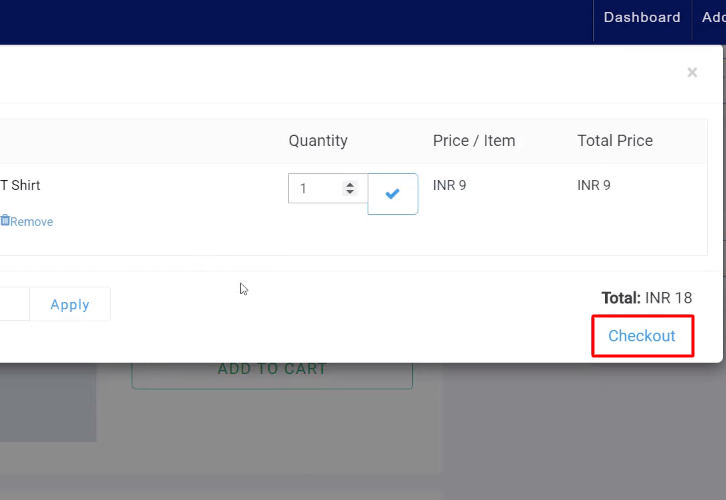
(c) Click Checkout
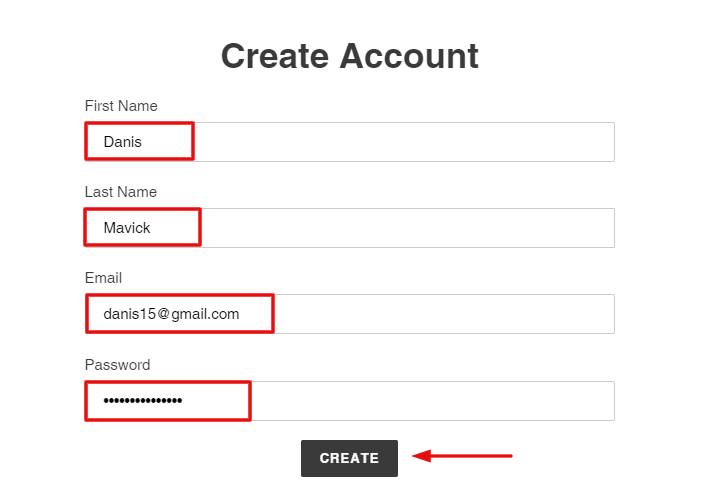
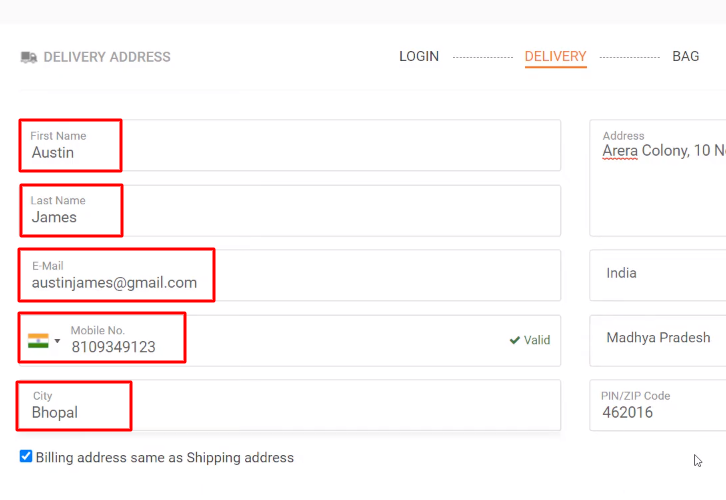
(d) Add Details
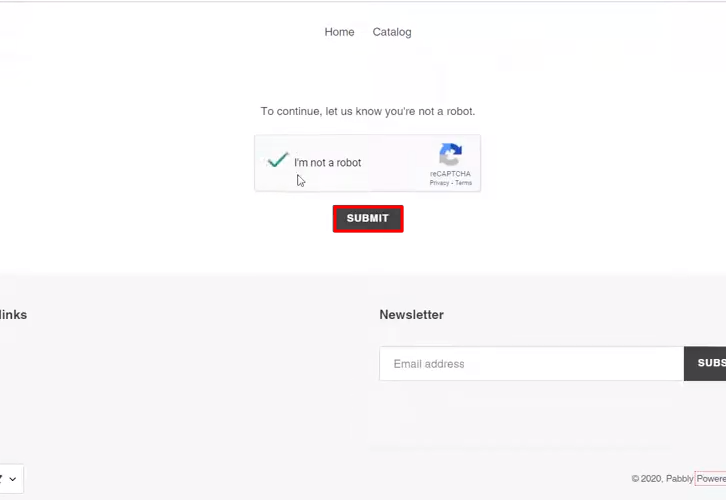
(e) Make Payment
Step 7: Test the Response in Pabbly Connect Dashboard
Step 8: Setting Actions for Instamojo to MailChimp Integration
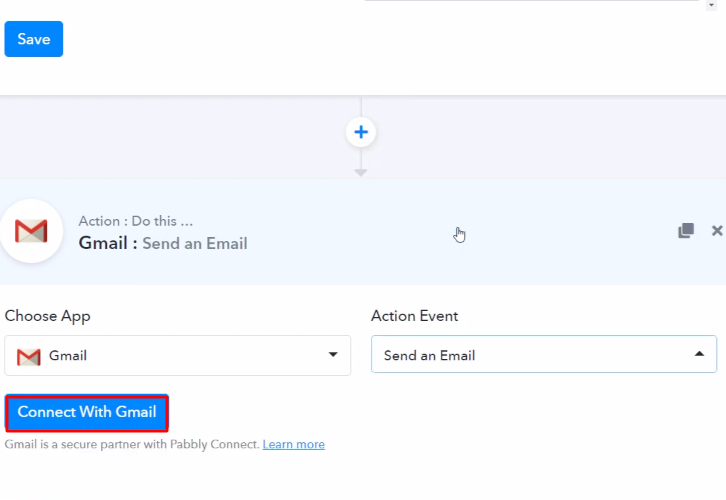
(a) Select Application you Want to Integrate
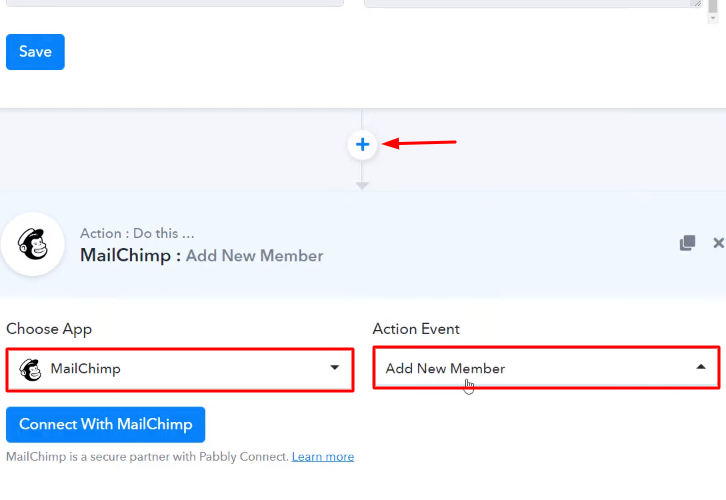
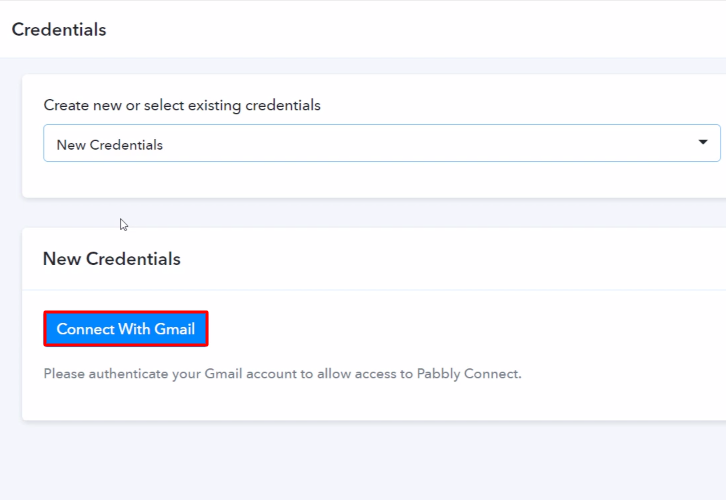
(b) Click the Connect Button
Step 9: Connecting MailChimp to Pabbly Connect
(a) Click on MailChimp Account
(b) Move to Extras
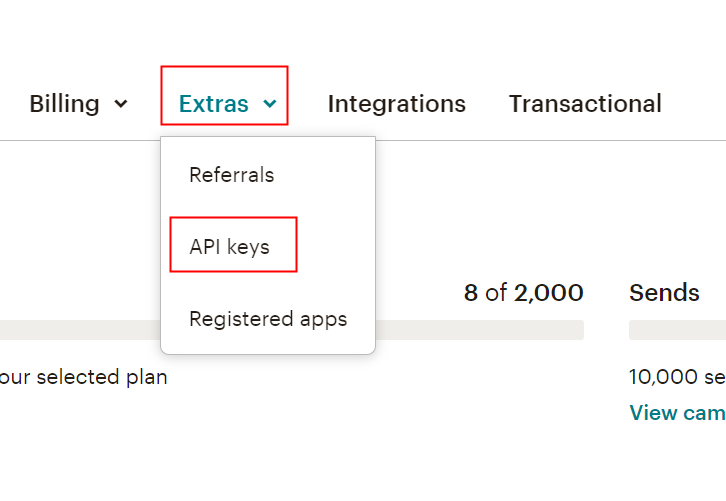
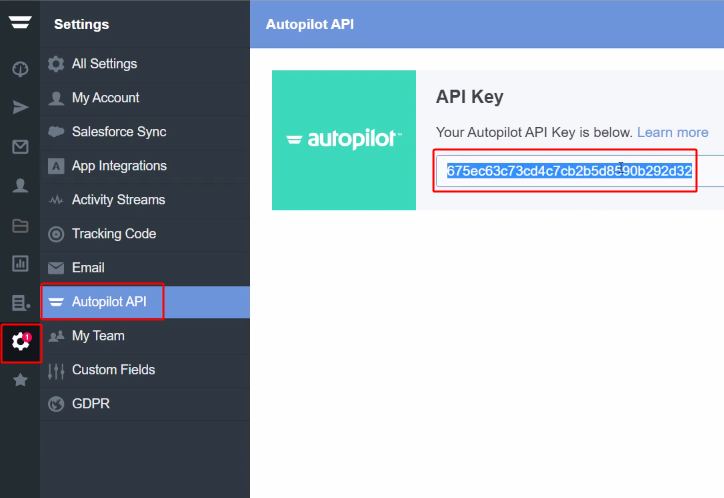
(c) Copy the API Key
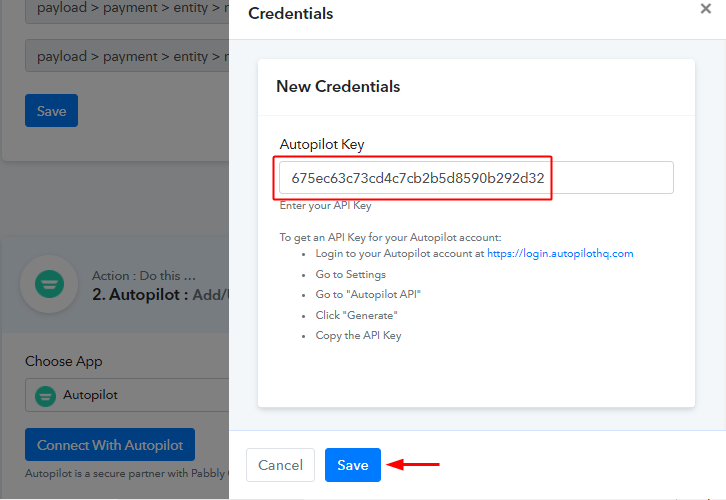
(d) Paste the API Key
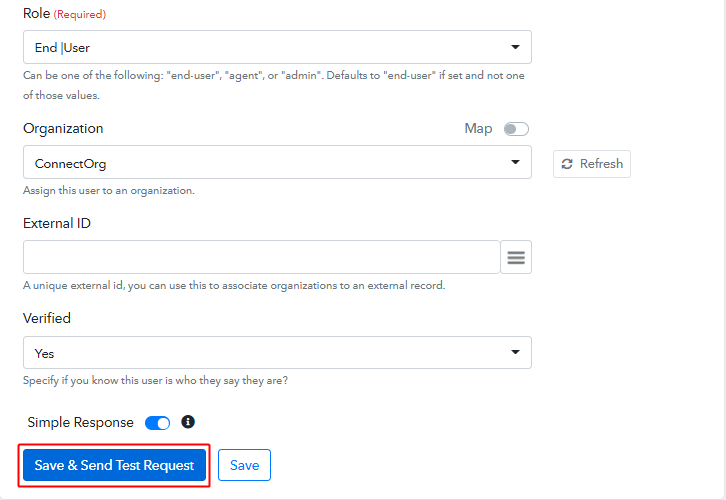
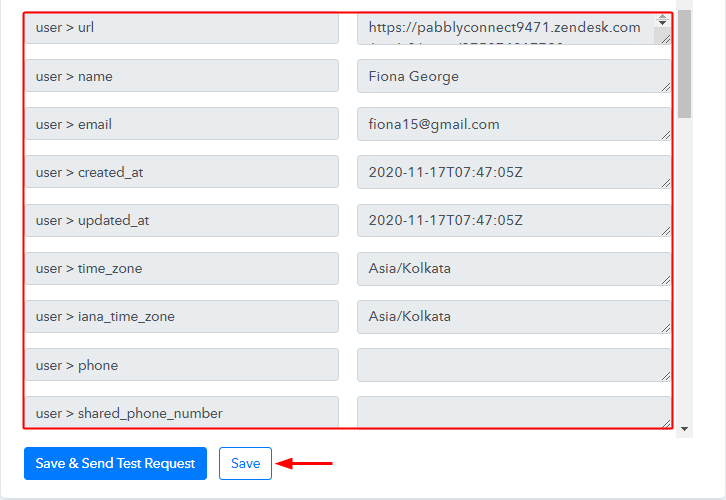
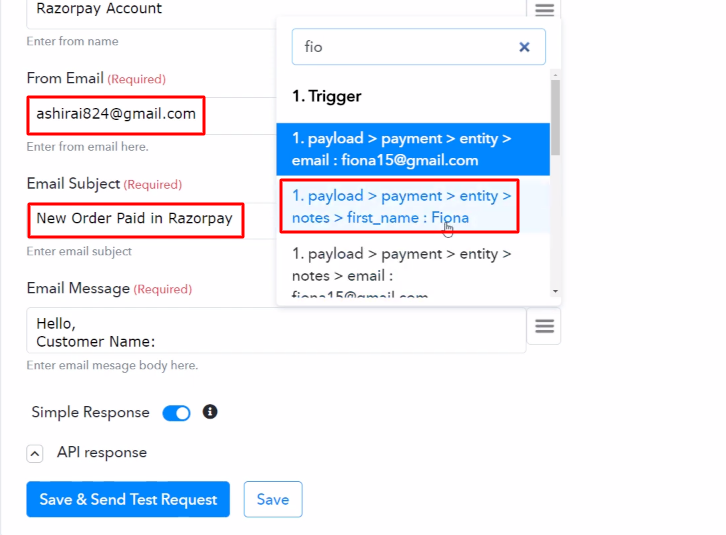
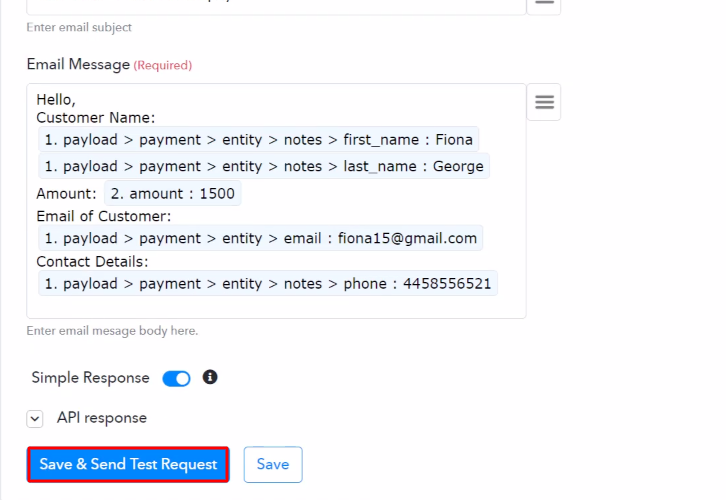
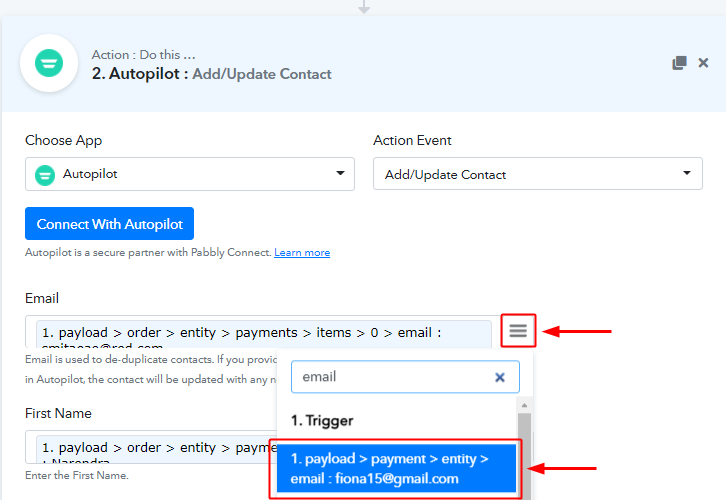
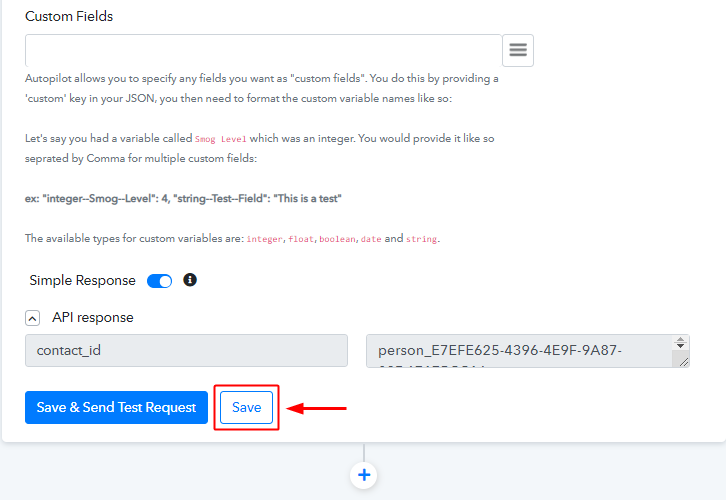
(e) Map the Fields
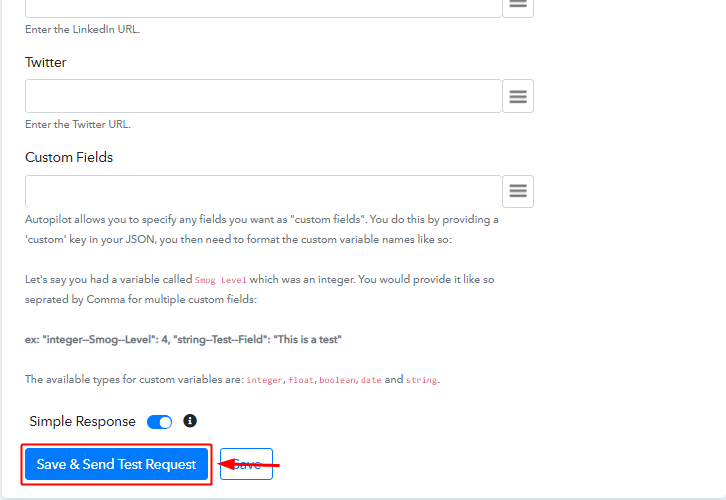
(f) Save and Send Test Request
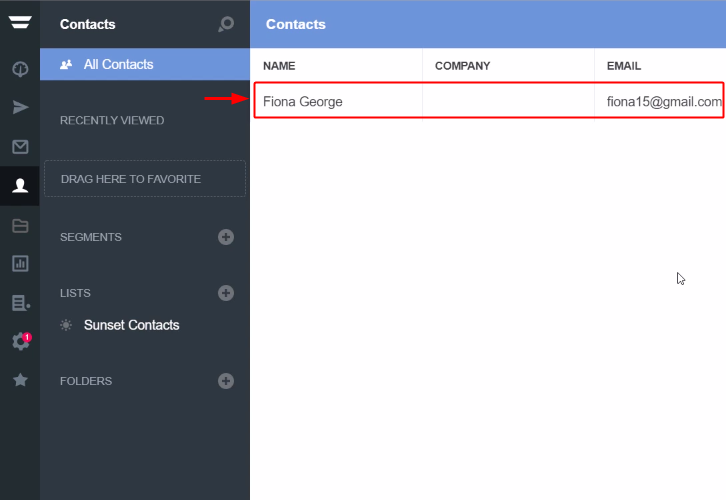
Step 10: Check Response in MailChimp Dashboard
Conclusion –
You May Also Like To Read –