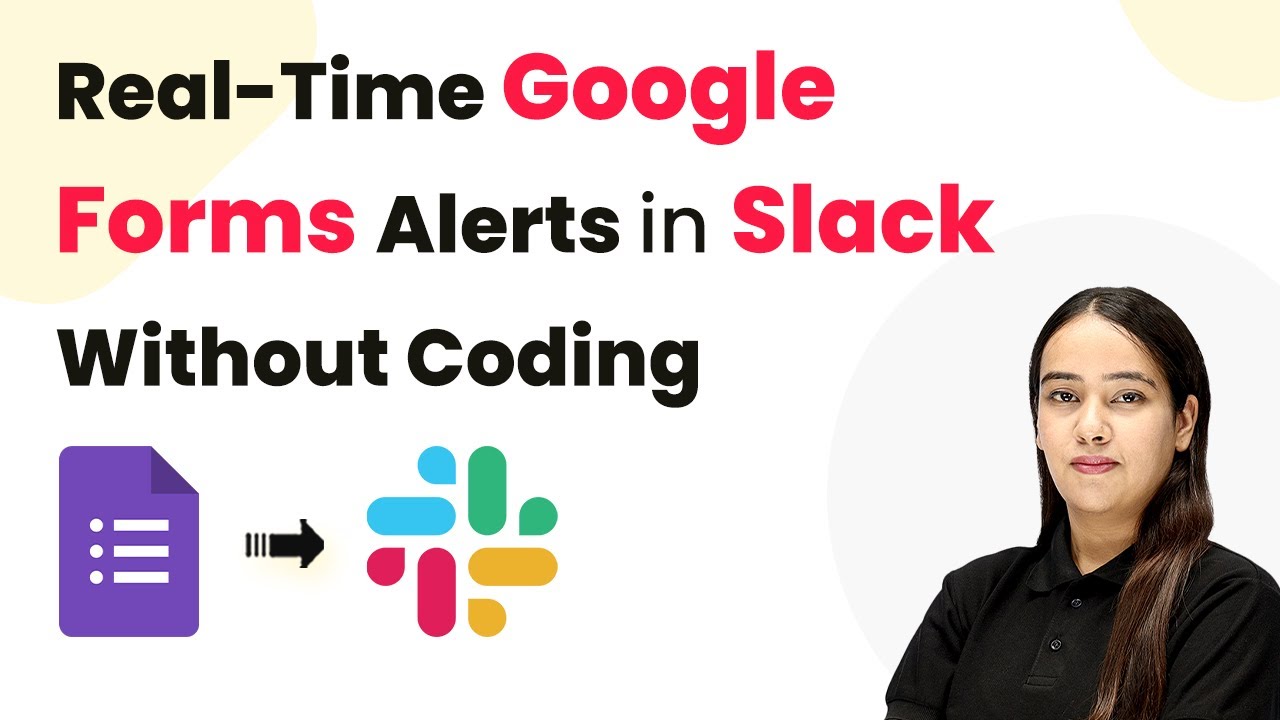
How to Send Automated Product Recommendations After Purchase via Stripe Using Pabbly Connect

Learn how to use Pabbly Connect to send automated product recommendations via Gmail after a purchase through Stripe. Follow our step-by-step tutorial. Master proven automation processes with practical implementation examples and strategic recommendations you can apply immediately in your workflow.

Watch Step By Step Video Tutorial Below


1. Accessing Pabbly Connect for Integration

To send automated product recommendations after a purchase via Stripe, you need to access Pabbly Connect. Start by visiting the Pabbly website and signing up for an account if you haven’t already.

Once you are logged in, navigate to the Pabbly Connect dashboard where you can create a new workflow. This platform will enable you to connect Stripe with Gmail seamlessly.


2. Creating a New Workflow in Pabbly Connect

After accessing Pabbly Connect, the next step is to create a new workflow. Click on the ‘Create Workflow’ button at the top right corner of the dashboard.

In the workflow setup window, you will need to name your workflow. For instance, you can name it ‘Send Automated Product Recommendations After Purchase via Stripe’. You will also have the option to select a folder for organizing your workflows. Choose a relevant folder or create a new one if necessary.

  • Click on the ‘Create’ button to finalize your workflow creation.
  • Select the ‘New Beta’ option for a modern workflow building experience.

After creating the workflow, you will be prompted to set up triggers and actions for your automation process.


3. Setting Up the Trigger with Stripe

In this step, you will set up the trigger for your workflow using Pabbly Connect. Click on the ‘Add Trigger’ button and select Stripe as your trigger application.

Choose the event type as ‘New Charge’. This event will trigger the workflow whenever a new payment is received through your Stripe account. After selecting the event, follow the prompts to connect your Stripe account with Pabbly Connect.

  • Copy the webhook URL provided by Pabbly Connect.
  • Log in to your Stripe account and navigate to the Developers section.
  • Add a new webhook endpoint using the copied URL and select the ‘Charge Succeeded’ event.

Once the webhook is set up, return to Pabbly Connect to test the trigger by making a test payment through Stripe.


4. Setting Up the Action with Gmail

After successfully setting up the trigger, it’s time to configure the action step using Pabbly Connect. Click on ‘Add Action’ and select Gmail as the action application.

Choose the action event as ‘Send Email’. You will need to connect your Gmail account to Pabbly Connect by following the on-screen instructions. Make sure to grant the necessary permissions for Pabbly to access your Gmail account.

Enter the recipient’s email address, which can be mapped from the Stripe trigger response. Fill in the email subject and body with personalized content, including product recommendations.

Once all fields are filled out, click on ‘Save and Send Test Request’ to verify that the email is sent correctly to the recipient.


5. Testing and Finalizing the Automation

With the trigger and action set up, it’s crucial to test your workflow in Pabbly Connect. Make a test payment through Stripe and check if the automated email is sent to the customer’s Gmail account.

If the email is received successfully, your automation is working as intended. You can now finalize the setup by saving the workflow. This automation will ensure that every customer receives personalized product recommendations after their purchase.

To summarize, Pabbly Connect seamlessly integrates Stripe with Gmail, allowing you to automate the sending of product recommendations. This not only enhances customer engagement but also boosts repeat purchases.


Conclusion

In this tutorial, you learned how to send automated product recommendations after a purchase via Stripe using Pabbly Connect. This process enhances customer engagement and streamlines communication effectively.

Ensure you check out Pabbly Connect to create business automation workflows and reduce manual tasks. Pabbly Connect currently offer integration with 2,000+ applications.

Automatically Post New Blog Updates to LinkedIn from WordPress Using Pabbly Connect

Learn how to automatically post new blog updates from WordPress to LinkedIn using Pabbly Connect. Step-by-step tutorial for seamless integration. This comprehensive guide reveals exactly how to connect your applications and automate repetitive tasks — accessible for professionals of all technical backgrounds.

Watch Step By Step Video Tutorial Below


1. Accessing Pabbly Connect for Integration

To start automating the process of posting new blog updates to LinkedIn, you first need to access Pabbly Connect. Open your web browser and navigate to Pabbly.com/connect. This platform allows you to integrate various applications seamlessly without any coding knowledge.

Once on the Pabbly Connect landing page, you will see two options: ‘Sign In’ and ‘Sign Up for Free.’ If you’re a new user, click on ‘Sign Up for Free’ to create your account. Existing users can simply click ‘Sign In’ to access their dashboard. After signing in, you will be ready to create your workflow.


2. Creating a Workflow in Pabbly Connect

After signing into Pabbly Connect, the next step is to create a new workflow. Click on the ‘Create Workflow’ button. You will be prompted to select the workflow builder; choose the new workflow builder for a modern interface.

  • Select a name for your workflow, such as ‘Automatically Post New Blog Updates to LinkedIn from WordPress’.
  • Choose a folder to save your workflow or create a new one.
  • Click on the ‘Create’ button to proceed.

Once the workflow is created, you will be directed to the workflow window where you can set up triggers and actions. This is essential for automating the process of posting updates to LinkedIn.


3. Setting Up the Trigger in Pabbly Connect

To automate the posting, you need to set up a trigger. In the workflow window, click on ‘Add Trigger’ and select WordPress as your trigger application. The trigger event should be set to ‘New Blog Publish’ to ensure that the workflow is activated whenever a new blog is published. using Pabbly Connect

After selecting the trigger event, Pabbly Connect will provide you with a webhook URL. Copy this URL as it will be used in your WordPress settings to establish the connection.

  • Go to your WordPress dashboard and navigate to Plugins > Add New.
  • Install the ‘WP Webhooks’ plugin and activate it.
  • In WP Webhooks settings, add a new webhook URL using the copied URL from Pabbly Connect.

Ensure that the settings are saved correctly. This configuration allows Pabbly Connect to receive data from WordPress whenever a new blog is published.


4. Connecting LinkedIn in Pabbly Connect

With the trigger set up, the next step is to add an action. Click on ‘Add Action’ and select LinkedIn as your action application. For the action event, choose ‘Share a Simple Text’ to post a notification about the new blog. using Pabbly Connect

Pabbly Connect will prompt you to connect your LinkedIn account. Click on ‘Connect with LinkedIn’ and enter your LinkedIn credentials. Once connected, you can proceed to map the data from the trigger to the action.

Select the author for the LinkedIn post. Map the title and permalink from the WordPress trigger to the LinkedIn post content. Set the visibility to Pabbly and save the configuration.

After saving, you can send a test request to ensure everything is functioning correctly. If successful, your LinkedIn profile should reflect the new blog post notification.


5. Testing the Automation with Pabbly Connect

Now that you have configured both WordPress and LinkedIn in Pabbly Connect, it’s time to test the automation. Create a new blog post in your WordPress account and publish it. This action will trigger the webhook and send the data to Pabbly Connect.

Once the post is published, check your LinkedIn profile to see if the notification appears. If everything is set up correctly, you should see the new post title and link shared on your LinkedIn feed shortly after publishing.

This seamless integration allows you to keep your LinkedIn audience updated without any manual effort. You can now relax and let Pabbly Connect handle the notifications automatically.


Conclusion

In this tutorial, we explored how to automatically post new blog updates from WordPress to LinkedIn using Pabbly Connect. This integration process not only saves time but also enhances engagement on your blog posts. By following the steps outlined, you can effortlessly notify your LinkedIn audience whenever you publish a new article.

Ensure you check out Pabbly Connect to create business automation workflows and reduce manual tasks. Pabbly Connect currently offer integration with 2,000+ applications.

How to Add New Clients from Google Contacts to Zoho CRM Using Pabbly Connect

Learn how to automate adding new clients from Google Contacts to Zoho CRM using Pabbly Connect. Step-by-step guide with detailed instructions. Transform complex automation concepts into accessible, actionable steps that eliminate unnecessary manual work while maximizing existing application capabilities.

Watch Step By Step Video Tutorial Below


1. Accessing Pabbly Connect for Integration

To begin the integration process between Google Contacts and Zoho CRM, you first need to access Pabbly Connect. This platform allows you to automate workflows seamlessly. Start by visiting the Pabbly Connect website at Pabbly.com/connect.

If you are a new user, click on the ‘Sign Up Free’ button. Existing users can simply click on the ‘Sign In’ option. After signing in, you will be directed to the Pabbly Connect dashboard, where you can create your automation workflows.


2. Creating a Workflow in Pabbly Connect

Once you are on the dashboard of Pabbly Connect, you need to create a new workflow. Click on the ‘Create Workflow’ button. You will be prompted to select a workflow builder. Choose the new workflow builder for a more modern experience.

  • Click on the ‘Select’ button after choosing the workflow builder.
  • Enter a name for your workflow, like ‘Google Contacts to Zoho CRM’.
  • Click on the ‘Create’ button to finalize your workflow setup.

After creating the workflow, you will see the option to add a trigger. This trigger will initiate the workflow when a new contact is added to Google Contacts.


3. Setting Up the Trigger for Google Contacts

In the newly created workflow, you need to set up the trigger by clicking on the ‘Add Trigger’ button. Choose Google Contacts as your trigger app. This selection ensures that any new contact added will initiate the workflow. using Pabbly Connect

Next, select the event type as ‘New or Updated Contact’. This will allow the workflow to trigger whenever a new contact is added or an existing one is updated. Click on the ‘Connect’ button to set up the connection.

  • Choose to add a new connection or select an existing one based on your preferences.
  • If adding a new connection, authenticate your Google account.

Once the connection is established, click on ‘Save and Send Test Request’ to verify that the trigger is working correctly. After testing, you can proceed to the next step of your automation.


4. Adding the Action Step for Zoho CRM

After successfully setting up the trigger, the next step is to add an action for Zoho CRM. Right-click on the trigger app and select ‘Add Action Step’. Choose Zoho CRM as your action app to create a new contact in Zoho CRM whenever a new contact is added in Google Contacts.

Select the action event as ‘Create Contact’. Click on the ‘Connect’ button to establish the connection between Pabbly Connect and Zoho CRM. If you have an existing connection, you can select it; otherwise, create a new one.

Map the fields from Google Contacts to Zoho CRM, including first name, last name, and email address. Ensure all mandatory fields are properly filled to avoid errors.

After mapping the fields, click on ‘Save and Send Test Request’ to confirm that the integration works correctly. Check Zoho CRM to see if the new contact has been created successfully.


5. Finalizing Your Automation

Once you have confirmed that the contact has been added to Zoho CRM, you are ready to finalize your automation in Pabbly Connect. Click on the ‘Save’ button to ensure that your workflow is saved and active.

This automation will now run in the background, adding new contacts from Google Contacts to Zoho CRM automatically. This process significantly reduces manual data entry and keeps your client information organized.

With Pabbly Connect, you can also explore more automation possibilities to streamline your business processes. Start using Pabbly Connect today to enhance your productivity and efficiency.


Conclusion

In this tutorial, we explored how to use Pabbly Connect to automate the process of adding new clients from Google Contacts to Zoho CRM. By following these steps, you can enhance your workflow and save time on manual data entry.

Ensure you check out Pabbly Connect to create business automation workflows and reduce manual tasks. Pabbly Connect currently offer integration with 2,000+ applications.

Integrating Facebook Lead Ads with Pipedrive CRM Using Pabbly Connect for Enhanced Sales Tracking

Learn how to integrate Facebook Lead Ads with Pipedrive CRM using Pabbly Connect for seamless sales tracking. Follow our step-by-step tutorial for automation. Discover how to seamlessly connect your essential tools through accessible instructions that make powerful automation available to professionals at every skill level.

Watch Step By Step Video Tutorial Below


1. Accessing Pabbly Connect for Integration

To start integrating Facebook Lead Ads with Pipedrive CRM, you first need to access Pabbly Connect. Begin by visiting the Pabbly website and signing in to your account. If you are a new user, you can sign up for free and receive 100 tasks monthly.

Once logged in, navigate to the Pabbly Connect dashboard. Here, you can create a new workflow for your integration. Click on the ‘Create Workflow’ button, and select either the modern or classic workflow builder. For this tutorial, we will use the classic option.


2. Creating Your Workflow in Pabbly Connect

After selecting the classic builder in Pabbly Connect, name your workflow. For instance, name it ‘Add New Facebook Leads to Pipedrive CRM for Sales Tracking’. Choose a folder to save your workflow, such as ‘Facebook Lead Automations’. Click on ‘Create’ to proceed.

  • Name your workflow appropriately.
  • Select a relevant folder for organization.
  • Click on ‘Create’ to finalize the setup.

Upon creation, you will see two boxes labeled ‘Trigger’ and ‘Action’. The trigger is the event that starts the workflow, and the action is what happens when the trigger occurs. In this case, the trigger will be set to Facebook Lead Ads, and the action will be set to Pipedrive CRM.


3. Setting Up the Trigger with Facebook Lead Ads

To set up the trigger in Pabbly Connect, select Facebook Lead Ads as your trigger application. Then, choose the event ‘New Lead Instant’. Click on connect, and if you don’t have an existing connection, create a new one by selecting ‘Connect with Facebook Lead Ads’.

Authorize the connection by logging into your Facebook account. After successful authorization, enter the required details such as the page name and lead form. For example, enter ‘Prime Properties’ as the page name and select the relevant lead form from the dropdown.

  • Select your Facebook page where the ads are running.
  • Choose the lead form you want to use.
  • Click on ‘Save and Send Test Request’ to verify the connection.

After submitting a test lead, check for the response in Pabbly Connect. This confirms that your trigger is set up correctly and is ready to capture new leads from Facebook.


4. Setting Up Action in Pipedrive CRM

Once the trigger is established, the next step is to set up the action in Pabbly Connect. Select Pipedrive as your action application and choose ‘Create Deal’ as the action event. If you don’t have an existing connection, you will need to create one using your Pipedrive API token.

To find your API token, log into your Pipedrive account, go to your profile settings, and then click on ‘API’ to copy the token. Paste it into Pabbly Connect and click ‘Save’ to establish the connection.

Select the action event as ‘Create Deal’. Enter the required details for the deal creation. Map the person ID from the previous step to link the lead.

After filling in the necessary details, click on ‘Save and Send Test Request’ to verify that a deal is created in your Pipedrive account. This step completes the integration setup.


5. Finalizing the Integration and Testing

With both the trigger and action set up in Pabbly Connect, it’s time to finalize the integration. Ensure that all details are correctly mapped, especially for fields like name, email, and phone number from the lead form.

Once everything is set, perform a final test by submitting a new lead through your Facebook Lead Ads. Check your Pipedrive account to confirm that the lead appears as a new deal with all associated details. This confirms that your automation is working seamlessly.

In summary, using Pabbly Connect allows you to automate the process of adding new Facebook leads to Pipedrive for effective sales tracking. This integration saves time and ensures that no lead is missed.


Conclusion

In this tutorial, we explored how to integrate Facebook Lead Ads with Pipedrive CRM using Pabbly Connect. By following the steps outlined, you can automate the lead capture process, enhancing your sales tracking efficiency. This integration ensures that every lead is accounted for without manual effort.

Ensure you check out Pabbly Connect to create business automation workflows and reduce manual tasks. Pabbly Connect currently offer integration with 2,000+ applications.

Automate Promotional SMS with Pabbly Connect and Twilio After Stripe Payments

Learn how to automate sending promotional SMS using Pabbly Connect and Twilio after receiving payments via Stripe. Step-by-step guide included. Master proven automation processes with practical implementation examples and strategic recommendations you can apply immediately in your workflow.

Watch Step By Step Video Tutorial Below


1. Accessing Pabbly Connect for Automation

To send automated promotional SMS using Pabbly Connect, start by accessing the Pabbly Connect landing page. Simply search for ‘Pabbly.com/connect’ in your browser. This platform will facilitate the integration between Stripe and Twilio.

Once on the landing page, you will see options to either sign in or sign up for free. If you’re a new user, click on ‘Sign up for free’ to explore the application, which gives you 100 free tasks each month. Existing users can click on ‘Sign in’ to access their accounts.


2. Creating a New Workflow in Pabbly Connect

After signing in to Pabbly Connect, click on the ‘Create Workflow’ button to begin setting up your automation. You will be prompted to choose between the new or classic workflow builder. Select the new one for a modern experience.

  • Select a workflow name, e.g., ‘Send Automated Promotional SMS Using Twilio After New Stripe Payment’.
  • Choose a folder to save your workflow, such as ‘Automations’.
  • Click on the ‘Create’ button to proceed.

Once created, you will see the workflow window, which is crucial for setting up triggers and actions. The trigger is an event that starts the workflow, while the action is what happens as a result.


3. Setting Up Stripe as the Trigger Application

To set up your trigger in Pabbly Connect, click on the ‘Add Trigger’ button and select Stripe as your application. This is essential because you want the workflow to trigger whenever a new payment is received.

Choose the trigger event as ‘New Charge’ and click on ‘Connect’. Pabbly Connect will provide you with a webhook URL, which you need to copy. This URL will allow Stripe to communicate with Pabbly Connect.

  • Open your Stripe account and navigate to the ‘Developers’ section.
  • Click on ‘Webhooks’ and then ‘Add Endpoint’.
  • Paste the copied webhook URL into the endpoint URL field.
  • Set the event to ‘Charge Succeeded’ and click ‘Add Endpoint’.

After adding the endpoint, you can test the connection to ensure everything is set up correctly. This step is crucial for capturing the webhook response.


4. Connecting Twilio for Sending SMS

Now that your trigger is set up, the next step in Pabbly Connect is to add the action application, which in this case is Twilio. Click on ‘Add Action’ and select Twilio as the action application.

For the action event, select ‘Send SMS’ and click on ‘Connect’. You will need to enter your Twilio account SID and authorization token to establish the connection. These credentials can be found in your Twilio dashboard.

Copy the Account SID and Authorization Token from Twilio. Paste these credentials into the respective fields in Pabbly Connect. Click ‘Save’ to complete the connection.

After successfully connecting Twilio, you can now configure the SMS message details, including the recipient’s phone number and the message body.


5. Sending Automated SMS After Payment

In this final step using Pabbly Connect, you will set up the SMS content that will be sent to customers. Enter the body of the SMS message and map the customer’s name from the Stripe payment details.

For the sender’s number, input your Twilio phone number. Then, for the recipient’s number, you can map the phone number from the Stripe payment response. However, for testing, you may enter your own number to receive the SMS.

Once everything is set, click on ‘Save and Send Test Request’ to send a test SMS. If successful, you will receive a confirmation that the SMS was sent, and you can check your phone for the message.

With this setup, you have successfully automated the process of sending promotional SMS using Pabbly Connect after a new payment is received through Stripe. This automation will run in the background, allowing you to focus on other aspects of your business.


Conclusion

By using Pabbly Connect, you can efficiently automate sending promotional SMS via Twilio whenever a new payment is made through Stripe. This integration enhances customer engagement and streamlines your communication process.

Ensure you check out Pabbly Connect to create business automation workflows and reduce manual tasks. Pabbly Connect currently offer integration with 2,000+ applications.

How to Add New Subscribers from Kit to Google Sheets Using Pabbly Connect

Learn how to automate the addition of new subscribers from Kit to Google Sheets using Pabbly Connect with this step-by-step tutorial. This comprehensive guide reveals exactly how to connect your applications and automate repetitive tasks — accessible for professionals of all technical backgrounds.

Watch Step By Step Video Tutorial Below


1. Accessing Pabbly Connect for Integration

To add new subscribers from Kit to Google Sheets, you first need to access Pabbly Connect. This platform serves as the automation tool that connects your Kit account with Google Sheets.

Open your web browser and navigate to www.Pabbly.com/connect. If you are a new user, click on ‘Sign Up Free’; otherwise, log in with your existing account. Once logged in, click on ‘Access Now’ under Pabbly Connect to enter the dashboard.


2. Creating a New Workflow in Pabbly Connect

In this step, you will create a new workflow to automate the addition of subscribers. Click on the ‘Create Workflow’ button in your Pabbly Connect dashboard. This will initiate the process of setting up your automation.

  • Select the ‘New Beta’ option for a modern workflow experience.
  • Name your workflow, for example, ‘Add New Subscribers’.
  • Click on ‘Create’ to finalize your workflow setup.

Your workflow is now created, and you will see a pop-up confirming its successful creation. This workflow will facilitate the connection between Kit and Google Sheets using Pabbly Connect.


3. Setting Up the Trigger from Kit

Next, you need to set up a trigger that will initiate the workflow when a new subscriber is added in Kit. Click on ‘Add Trigger’ and select Kit as your trigger application. using Pabbly Connect

After selecting Kit, choose the event ‘New Subscriber’. Then, click on the ‘Connect’ button. If you have an existing connection, select it; otherwise, create a new connection. Save the configuration and test the trigger to ensure it captures new subscriber data correctly.


4. Adding Action Step to Google Sheets

Now that the trigger is set, you need to add an action step to send subscriber details to Google Sheets. Right-click on the workflow and select ‘Add Action Step’. Choose Google Sheets as the application. using Pabbly Connect

  • Select the app event as ‘Add New Row’.
  • Connect to your Google Sheets account.
  • Choose the spreadsheet and sheet where you want to save subscriber details.

Map the fields for the subscriber’s name and email from Kit to the respective columns in Google Sheets. This mapping ensures that data flows seamlessly from Kit to your Google Sheets.


5. Testing the Integration

With your action step configured, it’s time to test the integration. Create a new subscriber in Kit with a name and email address. After adding the subscriber, check Pabbly Connect to see if the data was received correctly.

If successful, the subscriber details will appear in your specified Google Sheets. This confirms that Pabbly Connect has effectively automated the process of adding new subscribers from Kit to Google Sheets.


Conclusion

By using Pabbly Connect, you can easily automate the process of adding new subscribers from Kit to Google Sheets. This integration helps streamline your workflow and enhances data management without manual effort. Start using Pabbly Connect today to simplify your automation tasks!

Ensure you check out Pabbly Connect to create business automation workflows and reduce manual tasks. Pabbly Connect currently offer integration with 2,000+ applications.

How to Send Welcome Emails to New Leads from Typeform Submissions Using Pabbly Connect

Learn how to automate sending welcome emails to new leads from Typeform submissions using Pabbly Connect in this detailed tutorial. Eliminate manual repetitive tasks from your workflow. Discover proven automation methods with intuitive steps designed for efficiency-minded professionals.

Watch Step By Step Video Tutorial Below


1. Accessing Pabbly Connect for Automation

To send welcome emails to new leads from Typeform submissions, you first need to access Pabbly Connect. This platform will facilitate the integration between Typeform and Gmail, allowing you to automate the email sending process.

Start by visiting the Pabbly Connect website at www.Pabbly.com/connect. Here, you can either sign in if you already have an account or sign up for free if you are a new user. Once logged in, you’ll be directed to the Pabbly Connect dashboard where you can create new workflows.


2. Creating Your Workflow in Pabbly Connect

After accessing Pabbly Connect, the next step is to create a workflow that will automate the sending of welcome emails. Click on the ‘Create Workflow’ button, and you will be prompted to choose between the beta and classic workflow builders. Select the beta option for a more modern experience.

  • Click on ‘Create Workflow’
  • Choose a name for your workflow (e.g., Welcome Email)
  • Select a folder for your workflow, if necessary

Once you have named your workflow and selected a folder, click on the ‘Create’ button. You will then see the workflow page where you can add triggers and actions to automate your tasks.


3. Setting Up the Trigger with Typeform

The next step in using Pabbly Connect is to set up a trigger. Click on the ‘Add Trigger’ button and select Typeform as your trigger app. This will initiate the workflow whenever a new entry is submitted through your Typeform.

Choose the ‘New Entry’ event as your trigger. After this, click on the ‘Connect’ button to build the connection between Pabbly Connect and Typeform. You can either select an existing connection or add a new one based on your Typeform login details.


4. Configuring the Action Step to Send Emails via Gmail

After setting up the trigger, it’s time to configure the action step. Click on the ‘Add New Action Step’ button and select Gmail as your action app. Here, you will choose the event as ‘Send Email’ to send a welcome email to the new lead.

  • Select ‘Send Email’ as the action event
  • Connect your Gmail account to Pabbly Connect
  • Map the recipient’s email address from the Typeform submission

After mapping the recipient’s email and entering the email subject and content, click on ‘Save and Send Test Request’ to verify that the email is sent successfully. You should receive a welcome email in your Gmail inbox.


5. Finalizing the Integration and Testing

With your workflow set up in Pabbly Connect, it’s essential to test the integration. Fill out your Typeform with a new entry to see if the welcome email is sent automatically. Check your Gmail inbox to confirm that the email has arrived.

Once you confirm that everything is working correctly, your automation is complete. This means that every time a new lead submits a response in Typeform, they will receive a personalized welcome email in their Gmail account, thanks to Pabbly Connect.


Conclusion

In this tutorial, we explored how to use Pabbly Connect to automate sending welcome emails to new leads from Typeform submissions. By following the steps outlined, you can streamline your email communication and enhance your lead engagement effectively.

Ensure you check out Pabbly Connect to create business automation workflows and reduce manual tasks. Pabbly Connect currently offer integration with 2,000+ applications.

How to Log New Client Information from Google Forms to Zoho CRM Using Pabbly Connect

Learn how to log new client information from Google Forms to Zoho CRM using Pabbly Connect. Step-by-step tutorial for seamless integration. Learn to create powerful connections between your critical applications without requiring specialized programming knowledge or extensive technical background.

Watch Step By Step Video Tutorial Below


1. Accessing Pabbly Connect to Create Automation

To log new client information from Google Forms to Zoho CRM, you will need to access Pabbly Connect. Start by visiting the Pabbly Connect URL at www.Pabbly.com/connect. This platform allows you to automate workflows seamlessly.

Once on the landing page, you will see options for ‘Sign In’ and ‘Sign Up Free.’ If you are a new user, click on ‘Sign Up Free’ to create an account. Existing users can simply click on ‘Sign In.’ After signing in, you will land on the Pabbly apps page where you can access various Pabbly products.


2. Creating a New Workflow in Pabbly Connect

After accessing Pabbly Connect, click on the ‘Access Now’ button to enter the dashboard. Here, you can manage your workflows. To create a new workflow, click on the ‘Create Workflow’ button. You will be prompted to choose between the new beta feature and the classic option; select the beta feature for a modern experience.

  • Select a name for your workflow, such as ‘Log New Client Information.’
  • Choose a folder for the workflow; the default home folder works fine.
  • Click the ‘Create’ button to finalize your workflow setup.

After clicking ‘Create,’ a notification will confirm that your workflow has been created successfully. Now, you will need to set up a trigger to initiate the workflow.


3. Setting Up Google Forms as a Trigger

In this step, you will set Google Forms as the trigger app in Pabbly Connect. Click on the ‘Add Trigger’ button. From the options, select Google Forms as your trigger app. Then, choose the event ‘New Response Received’ to initiate the workflow whenever a new form submission occurs.

After selecting the trigger, click the ‘Connect’ button. This action will generate a webhook URL, which you will need to paste into your Google Form’s connected Google Sheet. This integration ensures that every new response in Google Forms is captured.

  • Create your Google Form and link it to a Google Sheet.
  • In the Google Sheets, navigate to Extensions > Add-ons > Get Add-ons.
  • Search for and install the Pabbly Connect Webhooks add-on.

Once the add-on is installed, you can set it up to send data to Pabbly Connect automatically.


4. Connecting Google Sheets to Pabbly Connect

Now that your Google Form is set up, you need to connect it to the Google Sheet using the Pabbly Connect Webhooks. In the Google Sheet, click on Extensions, then Pabbly Connect Webhooks, and select ‘Initial Setup.’ Paste the webhook URL generated in Pabbly Connect into the designated field.

Next, select the last column in your Google Sheet as the trigger column, which is where the responses will be recorded. In this case, if the last column is designated for phone numbers, select that column. After this setup, click on ‘Send Test’ to ensure that data is being sent from Google Sheets to Pabbly Connect.

Finally, enable the ‘Send on Event’ option to automate the data fetching process, allowing Pabbly Connect to receive new responses without manual intervention.


5. Creating a New Contact in Zoho CRM

With the Google Forms and Sheets connected, it’s time to set Zoho CRM as the action app in Pabbly Connect. Click on the ‘Add New Action Step’ and select Zoho CRM. Choose the event ‘Create Contact’ to add new client information to Zoho CRM automatically.

Connect to your existing Zoho CRM account or create a new connection. Map the fields from the Google Form responses to the corresponding fields in Zoho CRM, ensuring that the first name, last name, and email are accurately filled. After mapping, click on ‘Save and Send Test Request’ to check if the contact is created successfully in Zoho CRM.

Once the test is successful, you will see the new contact details in your Zoho CRM account, confirming that your integration is working flawlessly. This demonstrates how Pabbly Connect simplifies the process of logging client information efficiently.


Conclusion

Using Pabbly Connect, you can effortlessly log new client information from Google Forms to Zoho CRM. This integration automates the process, saving time and reducing manual workload. Start utilizing Pabbly Connect today to enhance your workflow!

Ensure you check out Pabbly Connect to create business automation workflows and reduce manual tasks. Pabbly Connect currently offer integration with 2,000+ applications.

How to Create Discord Notification for Booking via Contact Form 7 Using Pabbly Connect

Learn how to create Discord notifications for bookings via Contact Form 7 using Pabbly Connect. Step-by-step guide to set up this automation. Build sophisticated automated workflows in less time than you think. This guide translates complex integrations into straightforward steps for immediate implementation.

Watch Step By Step Video Tutorial Below


1. Accessing Pabbly Connect for Integration

To create Discord notifications for bookings via Contact Form 7, you need to access Pabbly Connect. Start by typing the URL Pabbly.com/connect in your browser. Upon reaching the landing page, you will see options to either sign in or sign up for free.

If you are a new user, click on the ‘Sign Up Free’ button. Existing users should click on ‘Sign In’. After signing in, you will be directed to the Pabbly apps page, where various products are listed. Click on the ‘Access Now’ button for Pabbly Connect to proceed with the integration.


2. Creating a Workflow in Pabbly Connect

Once you are in Pabbly Connect, you need to create a new workflow. Click on the ‘Create Workflow’ button. You will be prompted to select between the new workflow builder and the classic one. Choose the new workflow builder for a more modern experience.

After selecting the builder, provide a name for your workflow, such as ‘Contact Form Booking Notification’. You can also choose a folder for better organization. Click on the ‘Create’ button, and you will be taken to the workflow setup page where you will add a trigger.


3. Setting Up the Trigger with Contact Form 7

In this step, you will establish the trigger for your workflow in Pabbly Connect. Click on the ‘Add Trigger’ button and select Contact Form 7 as your trigger app. For the app event, choose ‘New Form Submission’. This will initiate the workflow when a new submission is received.

After selecting the app event, click on the ‘Connect’ button. A webhook URL will be generated. Copy this URL, as it will be used to connect your Contact Form 7 to Pabbly Connect. Next, you will need to set up your Contact Form 7 in WordPress.


4. Configuring Contact Form 7 in WordPress

Now, navigate to your WordPress dashboard and go to the ‘Contact’ section in the sidebar. Click on ‘Add Contact Form’ to create a new form. Title your form ‘Booking’ and add the necessary fields such as name, email, subject, and message.

  • Provide a title for your form.
  • Add fields for name, email, subject, and message.
  • Click ‘Save’ to store your form settings.

After saving, select the form you just created and paste the webhook URL you copied from Pabbly Connect into the webhook section. Enable the ‘Send to Webhook’ option and save the form.


5. Testing the Integration with Discord

To test the integration, fill out the booking form on your website. After submitting, return to Pabbly Connect to check if the data has been received correctly. You should see the details from the Contact Form 7 submission appear in your workflow.

Next, set up the action step by clicking on ‘Add Action Step’. Choose Discord as your action app and select ‘Send Channel Message’. Connect this app and paste the Discord webhook URL you created for your channel. Map the fields from your Contact Form 7 submission to the Discord message template.

Finally, click on ‘Save and Send Test Request’ to check if the message is sent to your Discord channel successfully. If everything is set up correctly, you will see the message appear in your Discord channel, confirming that the integration is working as intended.


Conclusion

In this tutorial, we demonstrated how to create Discord notifications for bookings via Contact Form 7 using Pabbly Connect. This integration automates the process, ensuring that your team receives timely notifications for new bookings. Start using Pabbly Connect today to streamline your workflows and enhance productivity.

Ensure you check out Pabbly Connect to create business automation workflows and reduce manual tasks. Pabbly Connect currently offer integration with 2,000+ applications.

Capture New Leads from Google Ads and Sync to Zoho CRM Using Pabbly Connect

Learn how to capture new leads from Google Ads and sync them to Zoho CRM using Pabbly Connect in this detailed tutorial. Implement the precise methodologies leading organizations use to automate repetitive tasks, illustrated with practical examples designed for immediate application.

Watch Step By Step Video Tutorial Below


1. Accessing Pabbly Connect for Google Ads and Zoho CRM Integration

To capture new leads from Google Ads and sync them to Zoho CRM, you need to utilize Pabbly Connect. Start by searching for Pabbly Connect in your browser and navigate to the homepage. Here, you can either sign up for a free account or log in if you are an existing user.

Once logged in, you will be directed to the Pabbly Connect dashboard, where you can manage your automation workflows. This platform allows you to integrate various applications seamlessly, making it the perfect choice for your needs.


2. Creating a New Workflow in Pabbly Connect

To begin the integration process, click on the ‘Create Workflow’ button on the top right corner of the Pabbly Connect dashboard. You will be prompted to name your workflow. For this example, name it ‘Capture New Leads from Google Ads and Sync to Zoho CRM.’ Select the appropriate folder to save your workflow.

  • Click on the ‘Create’ button after naming your workflow.
  • Choose the trigger application as ‘Google Ads’.
  • Set the event to ‘New Lead Form Entry’.

After selecting the trigger, click on the ‘Connect’ button. This will allow you to generate a webhook URL that you will use in your Google Ads account to send lead information directly to Pabbly Connect.


3. Setting Up Google Ads for Lead Capture

Now that you have your webhook URL from Pabbly Connect, go to your Google Ads account. Create a new lead form and fill in the necessary fields, such as the business name and the questions you want to ask your leads. Make sure to include fields for first name, last name, email address, and phone number.

In the lead form settings, you will find an option for ‘Lead Delivery’. Here, paste the webhook URL you copied from Pabbly Connect. This setup ensures that every time a lead fills out the form, the data will automatically be sent to your Pabbly workflow.


4. Creating an Action Step in Zoho CRM

After setting up Google Ads, return to your Pabbly Connect workflow. Now, you will add an action step to create a new contact in Zoho CRM. Click on ‘Add Action’ and select ‘Zoho CRM’ as your action application.

Choose the event as ‘Create Contact’. You will need to connect your Zoho CRM account by entering your domain. Once connected, you can map the fields from the Google Ads lead form to the corresponding fields in Zoho CRM, such as first name, last name, and email address.

  • Map the first name from Google Ads to the first name field in Zoho CRM.
  • Map the last name similarly.
  • Ensure the email address is also mapped correctly.

After mapping the fields, click on ‘Save and Send Test Request’ to ensure everything is functioning correctly. If successful, you will see a confirmation message indicating that a new contact has been created in Zoho CRM.


5. Finalizing Your Integration with Pabbly Connect

To finalize the integration, check your Zoho CRM account to confirm that the new lead has been added successfully. Refresh your contacts list to see the newly created contact with the details filled out from the Google Ads lead form.

With this setup, every time you receive a new lead through Google Ads, Pabbly Connect will automatically sync that information to Zoho CRM, streamlining your lead management process. This automation saves you time and ensures that no leads are missed.


Conclusion

In conclusion, using Pabbly Connect to capture new leads from Google Ads and sync them to Zoho CRM is a straightforward process. By following the steps outlined in this tutorial, you can automate lead management efficiently and effectively.

Ensure you check out Pabbly Connect to create business automation workflows and reduce manual tasks. Pabbly Connect currently offer integration with 2,000+ applications.