Send Justdial Leads to Google Sheets Automatically

Watch Step By Step Video Tutorial Below


1. Accessing Pabbly Connect for Integrations

To begin integrating Google Sheets with Jazzal using Pabbly Connect, first, access the platform. If you are a new user, simply open a new tab and search for pabbl.com/connect in your browser. Once on the landing page, click on the “Sign Up for Free” option in the top right corner.

By signing up, you will receive 100 free tasks every month, allowing you to explore Pabbly Connect and set up your automation without any cost. After signing up, you can log in to your account and proceed to the workflow builder to create your integrations.


2. Creating a Workflow in Pabbly Connect

Once you are logged into Pabbly Connect, navigate to the workflow builder. Click on the “Add Trigger” button to begin setting up your automation. For the trigger application, search for “Just Dial” and select it. Choose the event labeled “New Leads” and click on “Connect” to proceed.

  • Search for Just Dial as the trigger application.
  • Select the event “New Leads”.
  • Click on “Connect” to receive the webhook URL.

After clicking “Connect”, you will receive a webhook URL. This URL needs to be configured in your Jazzal account. Contact your account manager from Jazzal to add the webhook URL since the Jazzal portal does not allow users to add it directly.


3. Capturing Lead Details from Jazzal

Once the webhook URL is added to your Jazzal account, Pabbly Connect will start capturing lead details automatically. You will see the webhook response in your workflow, which includes the lead’s name, phone number, email, and city.

To view the captured data, simply check the webhook response section in Pabbly Connect. This information will be vital for the next steps, as it will be mapped into your Google Sheets.


4. Adding Captured Data to Google Sheets

Next, you will add the captured lead details into Google Sheets. Click on the “Add New Action Step” and select Google Sheets as the action application. Choose the event labeled “Add New Row” and click on “Connect” to establish a connection.

  • Select Google Sheets as the action application.
  • Choose the event “Add New Row”.
  • Connect your Google account by allowing the necessary permissions.

After connecting, select the spreadsheet titled “New Leads” and choose the sheet where you want the details to be added. Map the lead details from the previous step into the respective fields in Google Sheets.


5. Testing and Activating Your Workflow

After mapping the fields, click on “Save and Send Test Request” to test your workflow. If everything is set up correctly, you will receive a positive response indicating that the lead details have been successfully added to your Google Sheets.

Now, every time you receive a new lead from Jazzal, the details will automatically populate in your Google Sheets. This automation saves time and ensures that your lead data is organized and accessible for your team.


Conclusion

Integrating Google Sheets with Jazzal using Pabbly Connect allows for seamless automation of lead data management. By following the steps outlined, you can easily capture and organize your leads without manual effort. Start using Pabbly Connect today for efficient workflow automation.

You need to watch this BEFORE you build your next business workflow (Pabbly Connect)

Watch Step By Step Video Tutorial Below


1. Accessing Pabbly Connect for Automation

To start automating your business processes, access Pabbly Connect by visiting the official website. Here, you can sign up for a free account that allows you to explore the platform’s features.

Once you create your account, you will receive 100 free tasks each month. This gives you the opportunity to test various integrations and workflows to see how Pabbly Connect can streamline your operations.


2. Creating Your First Workflow with Pabbly Connect

After logging into Pabbly Connect, navigate to the dashboard and click on the ‘Create Workflow’ button. You will see three options: create from scratch, create using AI, and create using quick builder. Choose the option that best suits your needs.

  • Create from scratch for a manual setup.
  • Use AI to generate automation workflows.
  • Quick builder for faster workflow creation.

For this tutorial, we recommend using the quick builder as it simplifies the workflow creation process. You can type in what you want to automate, and Pabbly Connect will generate the workflow automatically.


3. Integrating Instagram Lead Ads with WhatsApp Using Pabbly Connect

In this section, we will set up a workflow that sends a personalized WhatsApp message whenever someone fills out the Instagram lead form. This is a great use case for marketing agencies and businesses looking to engage leads quickly.

To do this, select Instagram as your trigger app and choose the trigger event as ‘New Lead’. Then, connect your Instagram account to Pabbly Connect. After that, set WhatsApp as your action app and choose the action event as ‘Send Message’. Connect your WhatsApp account as well.


4. Automating Google Sheets and HubSpot CRM with Pabbly Connect

This workflow automates the process of adding new contacts to HubSpot CRM whenever a new record is added in Google Sheets. Start by selecting Google Sheets as your trigger app and the trigger event as ‘New Spreadsheet Row’. Connect your Google Sheets account to Pabbly Connect.

Next, select HubSpot CRM as your action app and choose the action event as ‘Create Contact’. Map the fields from Google Sheets to HubSpot CRM to ensure the data is transferred accurately. This eliminates manual data entry and saves time.

  • Trigger: New Spreadsheet Row in Google Sheets.
  • Action: Create Contact in HubSpot CRM.
  • Ensure proper field mapping for accurate data transfer.

Once everything is set up, click ‘Save and Send Test Request’ to ensure your workflow is functioning correctly.


5. Integrating LinkedIn Lead Ads with Zoho CRM and Gmail Using Pabbly Connect

In this final workflow, we will automate the process of creating a new contact in Zoho CRM and sending a personalized email via Gmail when a lead is submitted through LinkedIn. Start by selecting LinkedIn as your trigger app and the trigger event as ‘New Lead’. Connect your LinkedIn account to Pabbly Connect.

Then, select Zoho CRM as your action app and choose ‘Create Contact’ as the action event. Map the necessary fields from LinkedIn to Zoho CRM. After that, set Gmail as the next action app and choose ‘Send Email’. Connect your Gmail account and configure the email settings.

This integration ensures that your leads are promptly followed up with personalized communication, enhancing your customer engagement strategy.


Conclusion

In this tutorial, we explored how to use Pabbly Connect to automate workflows between various applications like Instagram, Google Sheets, HubSpot CRM, Zoho CRM, and Gmail. By integrating these applications, you can significantly streamline your business processes and save valuable time.

Send Leads to Slack Automatically

Watch Step By Step Video Tutorial Below


1. Accessing Pabbly Connect for Integration

To begin integrating Google Ads with Slack, you first need to access Pabbly Connect. If you are a new user, open your browser and navigate to pabbli.com/connect. Here, you can sign up for free and get 100 tasks per month.

Once logged in, you will be directed to the workflow builder of Pabbly Connect. This is where you will set up the automation process. The workflow consists of triggers and actions, which are essential for the integration.


2. Setting Up the Trigger in Pabbly Connect

The first step in the integration process is to set up the trigger in Pabbly Connect. Click on the “Add Trigger” button. For the application, select Google Ads, and for the event, choose “New Lead Form Entry”. After this, click on “Connect”.

  • Select Google Ads as the trigger application.
  • Choose the “New Lead Form Entry” event.
  • Click on “Connect” to proceed.

After connecting, you will receive a webhook URL. This URL is crucial as it links Google Ads to Pabbly Connect. Copy this URL and paste it into your Google Ads lead form settings to complete the connection.


3. Configuring Google Ads for Lead Collection

Next, you need to configure your Google Ads campaign to utilize the webhook URL provided by Pabbly Connect. Within the lead form settings, locate the option for lead delivery and paste the webhook URL you copied earlier.

Ensure that you have selected the necessary lead details such as name, email, phone number, and city. This information will be sent to Pabbly Connect whenever a new lead is generated.


4. Setting Up Slack Action in Pabbly Connect

Now that you have configured Google Ads, it’s time to set up the action step in Pabbly Connect. Click on “Add New Action Step” and search for Slack. Select Slack as the action application and choose “Send Channel Message” as the event.

  • Search for Slack and select it as the action application.
  • Select “Send Channel Message” for the event.
  • Connect to your Slack account.

Once connected, you will need to select the channel where the lead notifications will be sent. Ensure that your Slack account is logged in and grant all necessary permissions to Pabbly Connect.


5. Mapping Lead Details and Sending Notifications

In this final step, you will map the lead details from Google Ads to the message format in Slack. Use the mapping feature of Pabbly Connect to insert the lead’s name, phone number, email, and city dynamically into the message.

After mapping, click on “Save and Send Test Request”. This will send a test message to your selected Slack channel. You should see a confirmation that the message has been sent successfully, indicating that the integration is working correctly.


Conclusion

This guide has detailed how to integrate Google Ads with Slack using Pabbly Connect. By following these steps, you can automate lead notifications and streamline communication within your team. Start using Pabbly Connect today to enhance your workflow efficiency!

Automatically Create Tasks for your Team!

Watch Step By Step Video Tutorial Below


1. Setting Up Pabbly Connect for Slack and ClickUp Integration

To start automating Slack messages into ClickUp tasks, you will need to access Pabbly Connect. First, log in to your Pabbly Connect dashboard. If you are new, you can find helpful resources on how to navigate the dashboard.

Once on your dashboard, click on the “Create Workflow” button. This is where you will begin to set up your integration. You will be prompted to name your workflow, and for this purpose, you can name it something like “Slack to ClickUp Task Automation”.


2. Creating Your Workflow in Pabbly Connect

After naming your workflow, you will select the option to create using the quick builder. In the prompt, type: “Create a workflow where Slack messages will get created as a task inside ClickUp”. This will allow Pabbly Connect to generate the structure of your workflow.

Next, you will choose the trigger application, which is Slack, and the event as “Message”. For the action application, select ClickUp and choose the “Create Task” event. This sets the foundation for your automation.


3. Connecting Slack to Pabbly Connect

To link Slack with Pabbly Connect, click on the “Connect” button next to the Slack option. You will see a prompt to add a new connection. Here, you will need to enter your Slack token, which can be obtained through your Slack account settings.

  • Navigate to your Slack settings to find the token.
  • Select the appropriate token type (user or bot).
  • Paste the token into Pabbly Connect and click “Save”.

Once your connection is established, select the Slack channel from which you want to capture messages. After that, click on the “Save and Send Test Request” button to ensure everything is working correctly. You will see the last message captured as a test response.


4. Connecting ClickUp to Pabbly Connect

The next step is to connect ClickUp with Pabbly Connect. Click on the “Connect” button next to ClickUp. Similar to Slack, you will need to create a new connection here as well.

To do this, you will need your ClickUp API token. Go to your ClickUp account settings, find the API section, and regenerate your token. Copy this token and paste it into Pabbly Connect.

  • Select your workspace, space folder name, and list where tasks will be created.
  • Map the task name to include the message received from Slack.
  • Set additional task details like description, priority, and due date if needed.

After mapping the necessary fields, click on the “Save and Send Test Request” button to create a test task in ClickUp. This confirms that your integration is functioning correctly.


5. Setting Up a Filter for Task Creation

To refine your workflow further, you can set up a filter in Pabbly Connect. This will ensure that only specific messages trigger task creation in ClickUp. Click on the plus button and select the filter option.

Choose the message label as your filter criteria and set it to “contains”. Here, you can specify keywords like “urgent”. This means that only messages containing the word “urgent” will create a task in ClickUp.

After setting the filter, click on the “Save and Send Test Request” button. If the condition is met, you will receive a confirmation that the workflow is working as intended. This helps maintain accountability and ensures only important messages are tracked as tasks.


Conclusion

Using Pabbly Connect, you can seamlessly automate the process of converting Slack messages into ClickUp tasks. This integration enhances team collaboration and task management, ensuring that important messages are never lost in chat history. Start automating your workflows today!

Send Real-Time Facebook Lead Alerts to Slack

Watch Step By Step Video Tutorial Below


1. Accessing Pabbly Connect for Integration

To start integrating Facebook Lead Ads with Slack, you need to access Pabbly Connect. Visit the Pabbly Connect website by entering the URL in your browser. If you are a new user, click on the “Sign Up Free” button to create an account. Existing users can simply click on “Sign In” to access their dashboard.

Once logged in, you will find the option to create a new workflow. This is where you will set up the automation between Facebook Lead Ads and Slack. New users can explore the platform with 100 free tasks every month, allowing you to practice and create automations without any cost.


2. Creating a Workflow in Pabbly Connect

After accessing your dashboard, the next step is to create a new workflow in Pabbly Connect. Click on the “Create Workflow” button. You can use the Quick Builder for a streamlined setup. Enter the prompt as “Integrate Facebook Lead Ads and Slack” to let the AI assist you in setting up the necessary connections.

  • Select the trigger as “New Lead” from Facebook Lead Ads.
  • Choose the action as “Send Channel Message” in Slack.
  • Click on “Approve” to proceed.

After setting up the trigger and action, you will see both applications integrated on the workflow page. This is where you will configure the details for each application to ensure smooth data flow.


3. Connecting Facebook Lead Ads and Slack in Pabbly Connect

With your workflow ready, it’s time to connect Facebook Lead Ads to Slack using Pabbly Connect. Click on the “Connect” button next to Facebook Lead Ads to establish a new connection. If you have existing connections, you can select them, but for a new setup, choose “Add New Connection”.

Log into your Facebook account when prompted. Select the Facebook page associated with your lead ads, and then choose the specific form from which you want to collect leads. Make sure to set the response format to “Simple” and click on “Save and Send Test Request” to test the connection.

Now, your connection is established, and you can move on to setting up the Slack integration. Click on the “Connect” button for Slack, enter your token as a user, and allow access to complete the connection. This will enable Pabbly Connect to send messages to your Slack channel whenever a new lead is captured.


4. Mapping Fields for Slack Notifications

After connecting both applications, you need to map the fields from Facebook Lead Ads to Slack using Pabbly Connect. This process ensures that the data captured from leads is correctly formatted and sent to your Slack channel. Start by selecting the channel ID where you want the notifications to be sent.

  • Enter the message you want to send to Slack, including dynamic fields.
  • Map the fields such as first name, last name, and email address from the lead form.
  • Click on “Save and Send Test Request” to check if the notification is sent successfully.

This mapping process allows you to automate the notifications without manually entering the details each time. Once you have mapped all necessary fields, you can test the setup to ensure everything is working smoothly.


5. Testing the Automation with Pabbly Connect

Now that you have set up the mapping, it’s time to test the automation using Pabbly Connect. Go back to your Facebook Lead Ads and submit a test lead by filling out the form. After submitting, check your Slack channel to confirm that the notification has been received.

If everything is configured correctly, you should see the details of the new lead appear in your Slack channel almost instantly. This demonstrates the effectiveness of using Pabbly Connect to automate the process of notifying your team about new leads from Facebook.

By following these steps, you have successfully integrated Facebook Lead Ads with Slack using Pabbly Connect. This automation will save you time and ensure that your team is always informed about new leads without manual intervention.


Conclusion

In this tutorial, we demonstrated how to integrate Facebook Lead Ads with Slack using Pabbly Connect. This automation streamlines the process of notifying your team about new leads, enhancing efficiency and response time.

Build a Free WhatsApp AI Bot Without Coding

Watch Step By Step Video Tutorial Below


1. Introduction to Creating a WhatsApp Bot with Pabbly Connect

Creating a WhatsApp bot using Pabbly Connect allows businesses to automate their customer interactions effectively. This automation is crucial for handling numerous customer queries without human intervention. In this section, we will explore the benefits of using a WhatsApp bot to enhance customer service.

With Pabbly Connect, you can set up a bot that responds to customer inquiries instantly. This feature is essential for businesses that receive frequent questions and need a reliable way to address them. The WhatsApp bot can handle various queries, from product recommendations to order status updates, ensuring customer satisfaction.


2. Accessing Pabbly Connect for Your WhatsApp Bot

To begin, you need to access Pabbly Connect by visiting the official website. Here, you can either sign up for a new account or log in if you already have one. Once logged in, you can navigate to the dashboard where you will set up your WhatsApp bot.

  • Visit the Pabbly Connect website and log in.
  • Navigate to the dashboard to start the setup process.
  • Select the option to create a new workflow.

After creating your workflow, you will be directed to set up the necessary integrations. This is where Pabbly Connect shines, as it allows seamless integration with WhatsApp and other applications necessary for your bot’s functionality.


3. Setting Up Your WhatsApp Bot Using Pabbly Connect

Once you’re in the workflow setup, you can begin configuring your WhatsApp bot. Start by selecting WhatsApp as the trigger application. This step is crucial as it establishes the foundation for your bot’s functionality.

Next, you will need to configure the bot’s settings. This includes defining the types of queries your bot will handle and setting up responses. Utilizing Pabbly Connect, you can create predefined responses for common customer questions.

  • Choose WhatsApp as the trigger application.
  • Define the types of queries your bot will handle.
  • Set up predefined responses using Pabbly Connect.

Once these configurations are complete, your WhatsApp bot will be ready to handle customer inquiries automatically, showcasing the efficiency of Pabbly Connect in streamlining customer service operations.


4. Testing Your WhatsApp Bot Created with Pabbly Connect

After setting up your WhatsApp bot, it’s essential to test its functionality. Use your WhatsApp account to send a message to the bot and observe how it responds. This step ensures that all configurations are working as intended.

During the testing phase, you can refine the bot’s responses based on customer interactions. If certain queries are not handled properly, you can return to Pabbly Connect to adjust the settings and improve the bot’s performance.

  • Send a test message to your WhatsApp bot.
  • Observe the response and make necessary adjustments.
  • Refine the bot’s responses based on testing feedback.

By thoroughly testing your bot, you ensure a smooth customer experience, making Pabbly Connect an invaluable tool for effective communication.


5. Launching Your WhatsApp Bot with Pabbly Connect

Once testing is complete, you can officially launch your WhatsApp bot. This is the final step where your bot goes live, allowing customers to interact with it. Ensure that you monitor its performance regularly to address any issues promptly.

Utilizing Pabbly Connect for your WhatsApp bot not only automates responses but also enhances customer engagement. You can gather feedback and improve the bot over time, ensuring it meets customer needs effectively.

As your bot operates, consider adding more features or expanding its capabilities. With Pabbly Connect, you can continuously develop your bot to keep up with evolving customer expectations.


Conclusion

Creating a WhatsApp bot using Pabbly Connect enables businesses to automate customer interactions efficiently. By following the steps outlined, you can enhance your customer service experience and streamline communication without any coding skills.

Manage Your 99acres Leads with Pabbly Connect 🤯

Watch Step By Step Video Tutorial Below


1. Setting Up Pabbly Connect for 99 Acres Integration

To start automating your real estate leads from 99 Acres to Google Sheets, you need to access Pabbly Connect. Open a new tab and search for pave.com/connect. If you’re a first-time user, sign up for free to receive 100 tasks every month. This allows you to test the setup without any coding skills.

Once logged into your account, you can create automations for your real estate agency. You can purchase a yearly or lifetime plan for unlimited tasks if needed. Now, let’s proceed with setting up the integration.


2. Creating a Trigger for New Leads from 99 Acres

In Pabbly Connect, the first step is to set up a trigger that captures new leads from 99 Acres. Use the trigger option and select “99 Acres New Leads”. This will allow you to capture lead information as soon as it is generated.

Next, you will receive a webhook URL. Copy this URL and send it to your account manager at 99 Acres. They will add this URL to your 99 Acres account. After this, click on the “Recapture Webhook Response” button. This action will enable you to see the response of the lead that has been generated.

  • Set up the trigger as “99 Acres New Leads”.
  • Copy the webhook URL and send it to your account manager.
  • Click on “Recapture Webhook Response” to capture lead details.

Once the webhook is set up, you can see the lead details captured, including phone number, project name, and email address. This confirms that the connection between 99 Acres and Pabbly Connect is successfully established.


3. Adding Leads to Google Sheets via Pabbly Connect

After capturing the lead information, the next step is to set up the action to add this data into Google Sheets using Pabbly Connect. Select the “Google Sheets” action and choose “Add New Row” to store the lead data.

Click the connect button and then select “Add New Connection”. Sign in with your Google account that you used to create the spreadsheet. Grant permission to Pabbly Connect to access your Google Sheets. Select the spreadsheet named “Leads Data” and the sheet named “Sheet1” where the data will be stored.

  • Select “Google Sheets” and choose “Add New Row”.
  • Sign in with your Google account and allow access.
  • Choose the spreadsheet and sheet for data storage.

Map the lead details to the corresponding fields in your Google Sheets. Ensure that the first name, last name, email, phone number, and message are correctly mapped from the previous step’s response. This dynamic mapping ensures that every new lead is automatically updated in Google Sheets.


4. Finalizing the Setup and Testing the Integration

Once all fields are mapped correctly, click on the “Save and Send Test Request” button in Pabbly Connect. This action will send the lead information to Google Sheets and create a new record.

After successfully sending the test request, you will see a positive response indicating that the data has been successfully added to your Google Sheets. Check your “Leads Data” spreadsheet to confirm that the new lead record has been created with all the details accurately filled in.

This integration not only saves time but also ensures that all your leads are organized and easily accessible in Google Sheets. With Pabbly Connect, you can automate this process without any manual effort.


5. Exploring More Automations with Pabbly Connect

Now that you have successfully set up the integration between 99 Acres and Google Sheets using Pabbly Connect, you can explore other automations as well. If you use different real estate applications like Magic Bricks or Just Dial, you can integrate them in a similar manner.

Creating various workflows with Pabbly Connect allows you to automate numerous tasks related to your real estate agency. If you have any questions or need further assistance, feel free to comment below, and we will respond promptly.


Conclusion

This tutorial demonstrates how to automate the process of managing your real estate leads from 99 Acres to Google Sheets using Pabbly Connect. With this setup, you can efficiently capture and organize leads without manual effort, enhancing your workflow significantly.

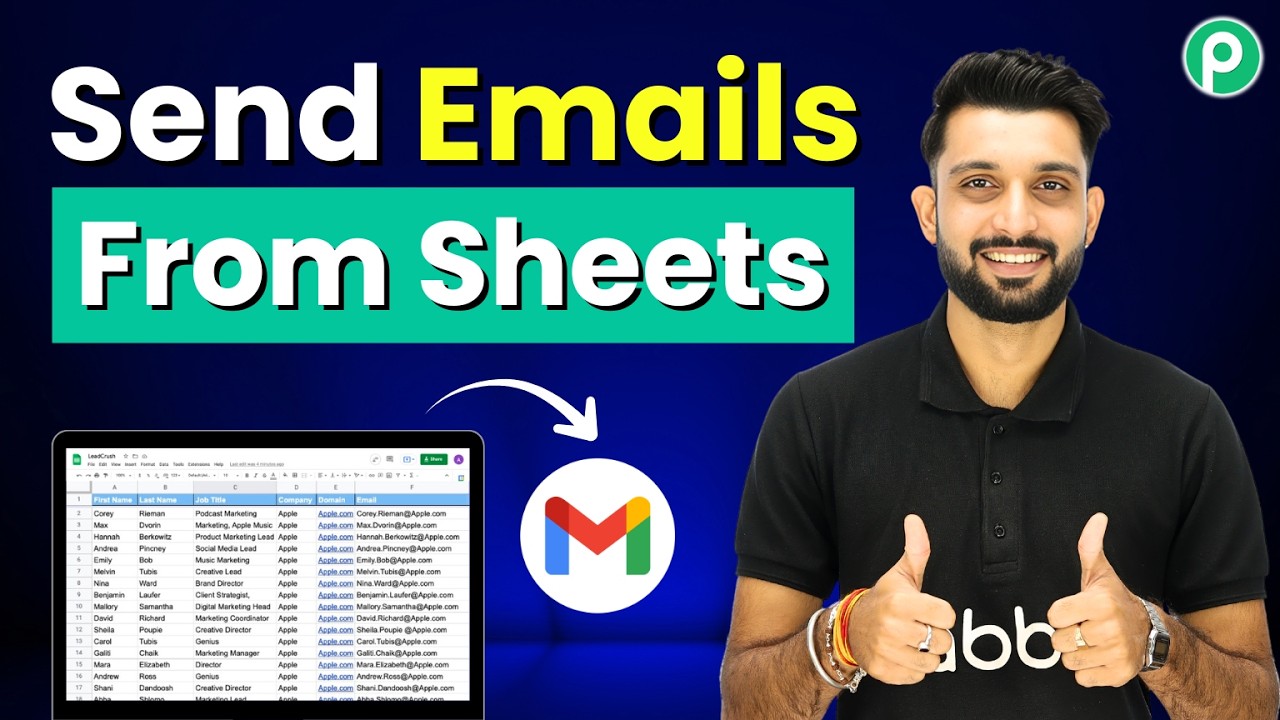
Send Emails Automatically from Google Sheets

Watch Step By Step Video Tutorial Below


1. Accessing Pabbly Connect for Integration

To start integrating Google Sheets with Gmail, first, you need to access Pabbly Connect. Open your web browser and type in pably.com/connect. This will take you to the Pabbly Connect landing page.

If you are a new user, click on the “Sign Up for Free” button to create your account. Existing users should click on the “Sign In” button. Pabbly Connect allows you to automate workflows between multiple applications with ease.


2. Creating a Workflow in Pabbly Connect

Once logged in, you can create a new workflow by clicking on the “Create Workflow” button. This is where you will set up the integration between Google Sheets and Gmail using Pabbly Connect.

Follow these steps to create your workflow:

  • Click on “Create New Workflow”.
  • Name your workflow, for example, “Connect Google Sheets to Gmail”.
  • Select the trigger application as Google Sheets.

After creating the workflow, you will need to set the trigger event. This will be activated whenever new data is added to your Google Sheets. This is how Pabbly Connect facilitates the automation process.


3. Setting Up Google Sheets with Pabbly Connect

Next, you need to set up Google Sheets to work with Pabbly Connect. In your Google Sheets, ensure that you have a column for the data you want to send via email.

To connect Google Sheets with Pabbly Connect, follow these steps:

  • Go to the Extensions menu and select Add-ons.
  • Search for Pabbooks and install it if you haven’t done so.
  • Once installed, go back to Extensions, select Pabbooks, and click on Initial Setup.

In the Initial Setup window, paste the webhook URL provided by Pabbly Connect and select the trigger column where you will enter new data. This setup will ensure that whenever new data is added, it triggers the workflow in Pabbly Connect.


4. Integrating Gmail to Send Emails

After setting up Google Sheets, the next step is to integrate Gmail within Pabbly Connect. This is crucial for sending automated emails based on the data captured from Google Sheets.

To connect Gmail, follow these steps:

  • Click on “Add New Connection” in Pabbly Connect.
  • Choose “Sign in with Google” and select your Gmail account.
  • Allow the necessary permissions for Pabbly Connect to access your Gmail account.

Once Gmail is connected, configure the email settings by entering the sender name, recipient email address, subject, and email content. Use mapping to automatically fill in the recipient’s details from the data captured in Google Sheets. This is where Pabbly Connect enhances your workflow by automating the email sending process.


5. Testing and Activating the Workflow

Finally, after setting up both Google Sheets and Gmail, it’s time to test your workflow in Pabbly Connect. This ensures everything is functioning as expected.

To test and activate your workflow, follow these steps:

  • Click on “Send Test Request” to verify that the email is sent correctly.
  • Check your Gmail account to see if the test email has been received.
  • If successful, activate your workflow by clicking on the “Activate” button in Pabbly Connect.

With the workflow activated, every time new data is added to Google Sheets, an email will be automatically sent via Gmail. This seamless integration is made possible through Pabbly Connect, allowing for efficient communication and automation.


Conclusion

In this tutorial, you learned how to use Pabbly Connect to integrate Google Sheets with Gmail, enabling automated email notifications. This process eliminates manual efforts and enhances productivity by automating your workflows effectively.

Add New Shopify Orders to Notion Automatically

Watch Step By Step Video Tutorial Below


1. Accessing Pabbly Connect for Shopify and Notion Integration

To automate the process of adding new Shopify orders to Notion, first, you need to access Pabbly Connect. This platform allows seamless integration between various applications, including Shopify and Notion.

Visit the Pabbly Connect dashboard by typing pabbly.com/connect in your browser. If you are a new user, click on “Sign Up Free” to create an account. Existing users can simply log in. New users can explore 100 free tasks each month for practice.


2. Creating a Workflow in Pabbly Connect

Once logged into Pabbly Connect, click on the “Create Workflow” button to initiate your integration setup. You can use the Quick Builder feature, which simplifies the process by automatically selecting the necessary applications based on your prompt.

  • Enter the prompt: “Integrate Shopify and Notion”.
  • Select the trigger as “New Order” from Shopify.
  • Choose the action as “Create Database Item” in Notion.

After setting up these parameters, click on “Approve” to finalize the workflow setup. This action prepares Pabbly Connect to handle incoming data from Shopify.


3. Setting Up Webhook in Shopify

To enable communication between Shopify and Pabbly Connect, set up a webhook in your Shopify account. Navigate to the “Settings” option on the sidebar and select “Notifications”.

  • Click on “Webhooks” and then “Create Webhook”.
  • Select the event “Order Creation”.
  • Paste the webhook URL provided by Pabbly Connect.
  • Click “Save” to finalize the setup.

Once the webhook is saved, Shopify will send order data to Pabbly Connect whenever a new order is created, enabling the integration to function smoothly.


4. Testing the Integration with Sample Data

To ensure that the integration is working correctly, create a test order in your Shopify store. Go through the checkout process by entering the required customer details.

After placing the order, return to Pabbly Connect to check if the order details have been received. You should see a response containing all the order information, including customer name, email, and items purchased.

This response confirms that Pabbly Connect is successfully capturing data from Shopify, allowing you to proceed to the next step of adding this information to Notion.


5. Adding Order Details to Notion

Now that you have verified that Pabbly Connect is receiving order data, it’s time to add this information to your Notion database. Click on the “Connect” button in Pabbly Connect to establish a connection with Notion.

  • Select your Notion database named “Shopify Data”.
  • Map the fields from the Shopify response to the corresponding fields in Notion.
  • Click “Save and Send Request” to finalize the data entry.

Upon successful completion, you should see the order details reflected in your Notion database, confirming that the automation is fully functional. This process showcases how Pabbly Connect simplifies the integration of Shopify and Notion.


Conclusion

By following this detailed tutorial, you can automate the process of adding new Shopify orders to Notion using Pabbly Connect. This integration streamlines your workflow, saving you time and effort in managing orders.

Automatically Add Google Forms Leads to Kit Email Marketing

Watch Step By Step Video Tutorial Below


1. Accessing Pabbly Connect for Integration

To start integrating Google Forms with Kit, first access Pabbly Connect by visiting the Pabbly website. Simply type paby.com in your browser’s address bar. This is the central platform for managing your integrations.

Once on the Pabbly site, sign in to your account. You can either click on “Sign In” if you are an existing user or select “Sign Up for Free” to create a new account. New users get 100 free tasks monthly to explore the features of Pabbly Connect.


2. Creating a New Workflow in Pabbly Connect

After logging into Pabbly Connect, navigate to the dashboard where you can manage your workflows. Click on “Create Workflow” to initiate a new workflow for integrating Google Forms with Kit.

  • Name your workflow, for example, “Automatically Add Google Forms Leads to Kit”.
  • Select a folder for organization, such as “Forms Automation”.
  • Click on “Create” to finalize your new workflow.

Once the workflow is created, you will see a prompt to set up your trigger application. This is where you will specify Google Forms as the trigger app for your workflow.


3. Setting Up Google Forms as the Trigger

In your newly created workflow, select Google Forms as the trigger application in Pabbly Connect. The trigger event to choose is “New Response Received”. This event will initiate the workflow whenever a new form submission occurs.

Click on “Connect” to establish a connection between Pabbly Connect and Google Forms. A webhook URL will be generated, which acts as a bridge between the two applications. Copy this URL to use in your Google Forms setup.

Next, open your Google Forms and navigate to the form you created for this integration. Make sure to set the required fields and link the form responses to a Google Sheets document. This will ensure that the data is properly captured and can be sent to Pabbly Connect.


4. Configuring Google Sheets for Data Submission

Once your Google Forms are set up, you need to ensure that the responses are being collected in a Google Sheets document. Access the responses tab in your Google Forms and click on “View in Sheets” to open the linked spreadsheet.

To connect Google Sheets to Pabbly Connect, you will need to install the Pabbly Webhooks add-on. Go to Extensions > Add-ons > Get add-ons, and search for “Pabbly Webhooks” to install it. After installation, refresh your Google Sheets to see the new add-on options.

  • Open the Pabbly Webhooks add-on and select “Initial Setup”.
  • Paste the copied webhook URL into the designated field.
  • Set the trigger column, typically the last column where data will be entered.

After configuring these settings, click on “Send Test” to verify the connection. You should see a successful response in your Pabbly Connect dashboard, indicating that the setup is working properly.


5. Adding Kit as the Action Application

With Google Forms and Sheets set up, it’s time to add Kit as the action application in your Pabbly Connect workflow. Click on “Add New Action Step” and search for Kit V4.

Select “Insert or Update Subscriber by Email” as the action event and click on “Connect”. If you have an existing connection, you can choose to save it, or create a new connection by granting access to Pabbly Connect to manage your Kit account.

Map the fields from Google Forms to the Kit fields. For example, enter the email address and first name using the mapped data from your Google Sheets. Once everything is set, click on “Save and Send Test”. You should see a confirmation that the subscriber has been successfully created in Kit.


Conclusion

In this tutorial, we explored how to integrate Google Forms with Kit using Pabbly Connect. By following these steps, you can automate the process of adding subscribers from your forms directly into your Kit account, enhancing your email marketing efforts.