How to Generate Social Media Captions Using AI (Step-by-Step)

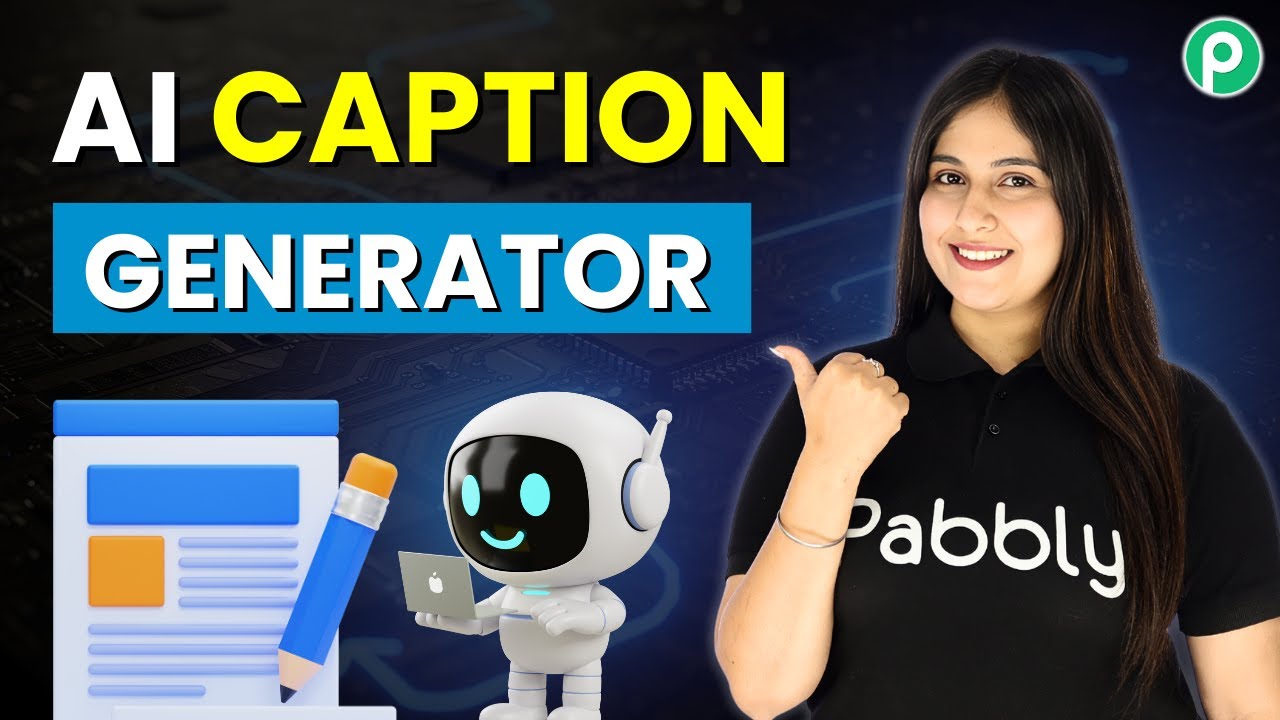
Discover how to automate social media caption generation using Pabbly Connect, Google Sheets, and AI tools in this detailed step-by-step tutorial. Discover how to seamlessly connect your essential tools through accessible instructions that make powerful automation available to professionals at every skill level.

Watch Step By Step Video Tutorial Below


1. Accessing Pabbly Connect for Automation

To start generating social media captions using AI, first, access Pabbly Connect by visiting pav.com/connect. This platform allows you to automate workflows seamlessly.

Once on the homepage, you will see options to sign in or sign up. If you are a new user, click on ‘sign up free’ to get 100 free tasks each month. Existing users can simply sign in to their accounts.


2. Setting Up Your Workflow in Pabbly Connect

After signing in, navigate to the Pabbly apps window and select Pabbly Connect. Click on the ‘Create’ button to start a new workflow. Here, you can choose between the new beta version and the classic version; select the beta version for a modern experience.

  • Click on ‘Select’ to enter the workflow builder.
  • Name your workflow as ‘Generate Social Media Captions Using AI.’
  • Choose a folder for organization, such as ‘Automations.’

After naming your workflow, click on the ‘Create’ button to finalize the setup. You now have a blank canvas to build your automation.


3. Setting Up the Trigger with Google Sheets

In this step, we will set up the trigger that initiates the automation process. Select Google Sheets as the trigger application and choose ‘New or Updated Spreadsheet Row’ as the trigger event.

Click on ‘Connect’ to receive a webhook URL. This URL will link your Google Sheets to Pabbly Connect. Copy the URL and head over to your Google Sheets where you have your data.

  • Install the Pabbly Connect Webhooks add-on from the Google Workspace Marketplace.
  • Set up the webhook URL and indicate the trigger column in Google Sheets.
  • Test the connection by sending test data to ensure everything is working correctly.

Once the setup is complete, you will see that the data from Google Sheets is successfully captured in Pabbly Connect.


4. Generating Captions Using AI

Now that we have set up the trigger, it’s time to generate the social media captions. Choose your AI tool (such as Gemini) as the action application and select ‘Generate Content’ as the action event.

Connect your AI tool to Pabbly Connect by entering the API key. This key can be obtained from your AI tool’s settings. After connecting, you will need to map the input fields to pull in data from Google Sheets.

Map the post idea, platform, tone, length, and CTA from your Google Sheets data. Select the AI model and method for generating the content. Send a test request to ensure the AI generates the caption correctly.

Once the test is successful, you will see the generated caption ready for use in your Google Sheets.


5. Updating Google Sheets with Generated Captions

The final step is to update your Google Sheets with the generated captions. Select Google Sheets as the action application and choose ‘Update a Cell Value’ as the action event.

Connect to Google Sheets again through Pabbly Connect and specify the spreadsheet and sheet name. You will also need to define the range where the caption should be updated.

Map the column for the caption generated and the row index for dynamic updates. Send a test request to confirm the caption updates successfully.

After completing this step, you will see the new caption reflected in your Google Sheets under the designated column.


Conclusion

In this tutorial, we explored how to automate the generation of social media captions using Pabbly Connect, Google Sheets, and an AI tool. By setting up triggers and actions, you can streamline your social media management effectively.

Ensure you check out Pabbly Connect to create business automation workflows and reduce manual tasks. Pabbly Connect currently offer integration with 2,000+ applications.

This process not only saves time but also ensures that your captions are generated quickly and accurately, allowing you to focus on other important aspects of your business.

This WhatsApp Automation Saves Every Lead Automatically (INSANE!)

Learn how to automate WhatsApp messages and store leads in Google Sheets using Pabbly Connect with this step-by-step tutorial. Transform complex automation concepts into accessible, actionable steps that eliminate unnecessary manual work while maximizing existing application capabilities.

Watch Step By Step Video Tutorial Below


1. Accessing Pabbly Connect for Automation

To start automating your WhatsApp messages and storing leads in Google Sheets, the first step is to access Pabbly Connect. Open a new tab and visit Pabbly.com/connect. Here, you can either sign up for a free account or log in if you are an existing user.

Once logged in, navigate to the Pabbly Connect dashboard. Click on the ‘Access Now’ button to enter the automation workspace. You’ll find options to create a new workflow. Select the ‘Create Workflow’ button to begin setting up your automation.


2. Setting Up Trigger in Pabbly Connect

The next step is to set up the trigger for your workflow. In this case, you want to select Facebook Lead Ads as your trigger application. Click on the dropdown menu and choose ‘Facebook Lead Ads’. using Pabbly Connect

  • Select ‘New Lead Instant’ as the event.
  • Click on ‘Connect’ to establish a connection.
  • Choose ‘Add New Connection’ to create a new link with your Facebook account.

After connecting your Facebook account, select the page and form associated with your leads. Once this is established, you can test the connection to ensure it’s working correctly.


3. Sending WhatsApp Messages Using Pabbly Connect

Now that your trigger is set, it’s time to configure the action step to send WhatsApp messages. Select Pabbly Chatflow as the action application. Choose the event as ‘Send Text Message’.

  • Click ‘Connect’ and choose ‘Add New Connection’.
  • Enter the API token from your Pabbly Chatflow account.
  • Map the recipient’s WhatsApp number from the previous step.

After mapping, insert the message content you want to send. Utilize dynamic fields from the Facebook lead data to personalize your message. This setup ensures that each lead receives a tailored response.


4. Storing Leads in Google Sheets Using Pabbly Connect

To store the leads captured from Facebook in Google Sheets, you will again use Pabbly Connect. Select Google Sheets as your action application and choose ‘Add New Row’ as the event.

Click ‘Connect’ and select ‘Add New Connection’. Authorize your Google account to allow access. Map the fields from the Facebook lead data to the corresponding columns in your Google Sheet.

Once all fields are mapped correctly, click ‘Save & Send Test Request’. This will add a new row in your Google Sheet with the lead details, confirming that the integration is successful.


5. Finalizing Your Automation in Pabbly Connect

After successfully setting up your workflow, make sure to enable the toggle to activate your automation. This is crucial; without enabling it, your workflow will not function.

Additionally, review your workflow to ensure all connections are properly configured. You can also test the entire process by submitting a new lead from Facebook to see if the WhatsApp message is sent and the details are stored in Google Sheets.

With Pabbly Connect, you can automate not just WhatsApp messages but a wide range of applications, enhancing your business efficiency. Feel free to explore more integrations to maximize your workflow automation.


Conclusion

In this tutorial, we demonstrated how to automate WhatsApp messages and store leads in Google Sheets using Pabbly Connect. By following these steps, you can streamline your lead management process effectively.

Ensure you check out Pabbly Connect to create business automation workflows and reduce manual tasks. Pabbly Connect currently offer integration with 2,000+ applications.

Hands-Free Follow-Ups: Instagram to WhatsApp Template Automation

Learn how to automate WhatsApp messages from Instagram leads using Pabbly Connect in this step-by-step tutorial. Enhance your follow-up process effortlessly! Discover how to seamlessly connect your essential tools through accessible instructions that make powerful automation available to professionals at every skill level.

Watch Step By Step Video Tutorial Below


1. Accessing Pabbly Connect for Automation

To start automating WhatsApp messages from Instagram leads, first, access Pabbly Connect. Open a new tab and type in the URL Pabbly.com/connect. Here, you will find options to sign in or sign up for free. Signing up gives you access to 100 free tasks every month, perfect for testing your automations.

Once logged in, you will land on the Pabbly apps page. Select Pabbly Connect to begin creating your automation workflow. You can organize your workflows into folders for better management. This initial setup is crucial for streamlining your automation process.


2. Creating Your Workflow in Pabbly Connect

After accessing Pabbly Connect, click on the ‘Create Workflow’ button. You have two options: create from scratch or use AI. Choose to create from scratch for full control over your automation. Then, select the beta workflow builder for a modern experience.

  • Select a name for your workflow, such as ‘Send WhatsApp Template Message to Instagram Leads’.
  • Choose a folder for better organization, like ‘Automation’.
  • Click the ‘Create’ button to finalize your workflow setup.

This step sets the foundation for your automation, allowing you to initiate actions based on Instagram leads seamlessly.


3. Setting Up the Trigger in Pabbly Connect

In your newly created workflow, the next step is to set up the trigger. This trigger will initiate the workflow when a new lead is captured via Instagram lead ads. Select the Instagram Lead Ads as your trigger app and choose the event ‘New Lead Instant’. using Pabbly Connect

Click the ‘Connect’ button to establish a connection. You will need to log into your Facebook account, which is linked to your Instagram account. Once connected, select the appropriate Facebook page and form that corresponds to your Instagram lead ads. This ensures that the right data flows into your workflow.


4. Sending WhatsApp Template Message via Pabbly Connect

Once the trigger is set, the next step involves sending a WhatsApp template message using the WhatsApp Cloud API. Add a new action step in your workflow and search for the WhatsApp Cloud API app. Select the action event ‘Send Template Message’. using Pabbly Connect

  • Enter your WhatsApp API token, phone number ID, and business account ID to establish the connection.
  • Map the receiver’s phone number dynamically from the previous step to personalize the message.
  • Select the template ID for your message, ensuring it matches the one created in your WhatsApp manager.

This process allows your leads to receive a personalized WhatsApp message immediately after they submit their information through Instagram, enhancing customer engagement.


5. Testing and Activating Your Automation

After setting up the WhatsApp message, it’s crucial to test the automation. Submit a test lead through your Instagram form and monitor the response in Pabbly Connect. Ensure that the WhatsApp message is received correctly, containing all the mapped details.

Once confirmed, activate your workflow in Pabbly Connect. This will enable the automation to run in real-time, sending WhatsApp messages to every new lead captured from Instagram. This hands-free follow-up system will save you time and improve customer communication.


Conclusion

In this tutorial, we demonstrated how to automate WhatsApp messages from Instagram leads using Pabbly Connect. By following these steps, you can streamline your follow-up process and enhance customer interaction effortlessly. Start utilizing Pabbly Connect today to elevate your business operations!

Ensure you check out Pabbly Connect to create business automation workflows and reduce manual tasks. Pabbly Connect currently offer integration with 2,000+ applications.

I Stopped Running Ads… This Email System Worked Better

Learn how to integrate YouTube, Gmail, and more using Pabbly Connect for successful email marketing campaigns without running ads. Transform complex automation concepts into accessible, actionable steps that eliminate unnecessary manual work while maximizing existing application capabilities.

Watch Step By Step Video Tutorial Below


1. Accessing Pabbly Connect for Email Marketing

To start using Pabbly Connect for your email marketing, first, visit the Pabbly website. You can easily access the Pabbly Email Marketing tool through Pabbly Connect. Simply go to Pabbly.com/email-marketing and log in or sign up for a free account.

Once logged in, you will see various Pabbly applications. Click on the Pabbly Email Marketing option and select the new beta version to access the latest features. This version includes enhanced functionalities that are beneficial for creating email campaigns.


2. Creating Email Campaigns with Pabbly Connect

After accessing Pabbly Connect, you can create an email campaign by navigating to the campaign section. Click on the ‘Create Email’ button to start setting up your campaign. Select the campaign type as regular and enter your campaign name, like ‘Flash Sale Email.’ This is where you’ll define how your email will look and what it will communicate.

  • Choose a compelling subject line, e.g., ‘Flash Sale Live: Up to 75% Off!’
  • Add a preheader for additional context, such as ‘Limited time flash sale on bestselling natural skincare.’
  • Preview the email details on the left side of the screen as you enter them.

Once you have set these details, click on the continue button to move to the next step of selecting an email template. You can choose to create a new template using the drag-and-drop builder available in Pabbly Connect.


3. Designing Your Email in Pabbly Connect

When designing your email, you can utilize the drag-and-drop builder in Pabbly Connect. Start by adding a header, title, and image to your email layout. You can easily upload images from your computer to personalize your email further. This visual appeal is crucial for attracting your audience.

After setting up the basic structure, customize the content by adding text blocks and buttons. For instance, you can create a call-to-action button labeled ‘Buy Now’ that links to your website. Ensure that all images and text align with your brand and campaign message.

  • Use engaging text to describe your offer, like ‘Enjoy 50 to 75% off on selected bestselling skincare!’
  • Add social media links to connect with your audience on different platforms.

After finalizing your design, make sure to review the email layout and save your template for future use.


4. Sending Your Campaign Using Pabbly Connect

Once your email design is complete, it’s time to send your campaign. Go back to the campaign settings in Pabbly Connect, and finalize the details, including the recipient list. You can select an existing subscriber list or add individual email addresses to whom you want to send the email.

To send the email, you have the option to either send it immediately or schedule it for a later time. If you choose to schedule, select the date and time for sending the email. This flexibility allows you to optimize your campaign timing for maximum engagement.

Confirm all details before hitting the send button. You can preview the email to ensure it looks right across devices.

Once sent, you can track the status of your campaign within Pabbly Connect and view reports to analyze the performance of your email marketing efforts.


5. Analyzing Results of Your Email Campaign

After your campaign is sent, Pabbly Connect allows you to analyze the results. You can view detailed reports on open rates, click-through rates, and overall engagement. This data is essential for understanding how your audience responds to your campaigns.

Utilizing the insights gained from these reports, you can refine future email marketing strategies. This helps in improving your campaigns and ensuring better performance over time. The ability to track results is one of the significant advantages of using Pabbly Connect.

Review metrics like delivery rates and bounces to optimize future campaigns. Make adjustments based on subscriber feedback and engagement levels.

With this data, you can continuously improve your email marketing efforts without the need for expensive ads.


Conclusion

In conclusion, using Pabbly Connect for email marketing allows you to create effective campaigns without relying on ads. By following the steps outlined, you can leverage Pabbly’s features to engage your audience and drive sales effectively.

Ensure you check out Pabbly Connect to create business automation workflows and reduce manual tasks. Pabbly Connect currently offer integration with 2,000+ applications.

Automatically Save Instamojo Order Details

Learn how to automatically save Instamojo order details to Google Sheets using Pabbly Connect. Step-by-step tutorial with detailed instructions. This comprehensive guide reveals exactly how to connect your applications and automate repetitive tasks — accessible for professionals of all technical backgrounds.

Watch Step By Step Video Tutorial Below


1. Accessing Pabbly Connect for Automation

To automatically save Instamojo order details, start by accessing Pabbly Connect. Open a browser and navigate to the Pabbly Connect landing page by searching for ‘Pabbly.com/connect’. If you are new, click on the ‘Sign up for free’ option in the top right corner.

Once signed up, you can utilize 100 free tasks per month to explore Pabbly Connect. This allows you to automatically add up to 100 Instamojo order details into Google Sheets, streamlining your order management process.


2. Setting Up the Trigger with Instamojo

The first step in the automation process is to set up the trigger in Pabbly Connect. Click on the ‘Add Trigger’ button and search for ‘Instamojo’. Select ‘Instamojo V2’ and choose ‘New Sale’ as the event. After that, click on the ‘Connect’ button to generate a webhook URL.

  • Search for Instamojo and select Instamojo V2.
  • Choose ‘New Sale’ as the event.
  • Click on ‘Connect’ to receive your webhook URL.

Copy this webhook URL and go to your Instamojo dashboard. Edit the page for which you want to set up the automation, navigate to page settings, and find the webhook section. Toggle the switch to enable webhooks and paste the copied URL, ensuring that it is set to trigger on successful payments.


3. Testing the Webhook Response

After setting up the webhook in Instamojo, you need to test it to ensure that Pabbly Connect receives the data correctly. To do this, share the page URL and make a test purchase to trigger the webhook. Fill out the necessary details like name, email, and payment information to complete the transaction.

Once the payment is successful, return to Pabbly Connect and check if it captures the webhook response. This response should include all relevant order details, confirming that your setup is working correctly.


4. Adding Order Details to Google Sheets

Now that the webhook is successfully capturing order details, the next step is to add these details to Google Sheets using Pabbly Connect. Click on ‘Add New Action Step’ and select ‘Google Sheets’ as the application. Choose ‘Add New Row’ as the event and click on ‘Connect’ to establish the connection.

  • Select ‘Google Sheets’ and choose ‘Add New Row’ as the action.
  • Connect your Google account to allow Pabbly Connect access.
  • Choose the spreadsheet and sheet where you want to save the order details.

Map the data fields from the Instamojo order to the corresponding columns in your Google Sheet. This dynamic mapping will ensure that every new order automatically populates the sheet with the correct information.


5. Finalizing the Automation Process

After mapping all the required fields, click on ‘Save’ and send a test request to confirm that the order details are correctly added to your Google Sheets. Once confirmed, your automation is complete. From now on, every successful order through Instamojo will automatically save the details in your Google Sheets without any manual intervention.

This powerful automation using Pabbly Connect not only saves time but also minimizes errors associated with manual data entry. Now you can focus on other important aspects of your business while Pabbly Connect handles the order details for you.


Conclusion

In summary, using Pabbly Connect allows you to seamlessly integrate Instamojo with Google Sheets, automating the process of saving order details. This tutorial provides a step-by-step guide to set up the automation effectively, ensuring efficiency and accuracy in your order management.

Ensure you check out Pabbly Connect to create business automation workflows and reduce manual tasks. Pabbly Connect currently offer integration with 2,000+ applications.

Build Once, Reply Forever — WhatsApp Chatbot Explained

Learn how to create a WhatsApp Chatbot using Pabbly Chatflow. Automate responses, integrate with YouTube, and enhance customer communication seamlessly. Discover practical methods for designing chat sequences that capture leads, answer questions, and guide users to the next step in your funnel.

Watch Step By Step Video Tutorial Below


1. Accessing Pabbly Chatflow for Your WhatsApp Chatbot

To start creating your WhatsApp Chatbot, the first step is accessing Pabbly Chatflow. Open a new tab and type in the URL Pabbly.com/chatflow. This will take you to the Pabbly homepage where you can either sign in or sign up for a free account.

If you’re a new user, select the ‘Sign Up Free’ option to create your account. This allows you to receive 100 free credits every month for using Pabbly Chatflow. Existing users can simply log in. Once logged in, navigate to the Pabbly apps page and select ‘Access Now’ under Pabbly Chatflow.


2. Adding Your WhatsApp Number to Pabbly Chatflow

After accessing Pabbly Chatflow, the next step is to add your WhatsApp number. Click on the ‘Add WhatsApp Number’ button on the dashboard. You will be given two options: WhatsApp Connect or Manual Token Connect.

  • Choose WhatsApp Connect for a seamless integration.
  • Select Manual Token Connect if you prefer to connect using a token.

Once your WhatsApp number is added, you can proceed to the sidebar where you will see various features of Pabbly Chatflow. This is essential for creating your chatbot flow.


3. Creating Your WhatsApp Chatbot Flow

The next step is to create the actual flow for your WhatsApp chatbot using Pabbly Chatflow. Click on the ‘Flows’ option in the sidebar to access the flow builder page. Here, you can see any existing flows and create new ones.

To create a new flow, select the ‘Add Flow’ button. Enter a name for your flow, such as ‘Build Once Reply Forever WhatsApp Chatbot Explained’. You will also need to set a trigger for the flow. This can be a keyword or a quick reply button initiated by the user.

  • Set the trigger to ‘Keyword Reject Match’.
  • Define keywords like ‘hello’ to initiate the chatbot.

With the trigger set, you can now start building your flow by dragging and dropping message blocks from the left-hand side.


4. Adding Messages and Action Buttons in Pabbly Chatflow

Once your flow is set up, it’s time to add messages and action buttons. Start by dragging a message block into the flow and inputting a welcome message. For instance, you can say, ‘Hi, welcome to Cloudflow. We help businesses automate workflows.’ After this, you can add buttons for user interaction. using Pabbly Connect

For example, create buttons such as ‘Services’ and ‘Plans and Pricing’. Set the type of these buttons to ‘Quick Reply’. This allows users to interact easily with the chatbot. When a user clicks on one of these buttons, you can direct them to a list of services offered.

Add a list block to show the services. Include items like ‘Automation Solutions’ and ‘Technical Support’.

Each item in the list can also have buttons for further actions, ensuring that users have a seamless experience.


5. Finalizing and Testing Your WhatsApp Chatbot

After setting up your messages and buttons, it’s crucial to finalize your flow by saving it. Click the ‘Save’ button, and a confirmation pop-up will indicate that your flow has been successfully created. Now you can test your chatbot to ensure it functions as intended.

To test, send a message to your WhatsApp number that triggers the chatbot. You should receive the welcome message followed by the options you created. This confirms that your Pabbly Chatflow setup is working correctly.

Ensure all buttons lead to the correct responses. Check that user inputs are captured accurately.

Once everything is functioning, you can share your flow with colleagues or friends to showcase your new WhatsApp Chatbot created using Pabbly Chatflow.


Conclusion

Creating a WhatsApp Chatbot using Pabbly Chatflow allows businesses to automate customer interactions effectively. By following the steps outlined in this tutorial, you can build a chatbot that replies instantly, enhancing customer satisfaction and operational efficiency. Start using Pabbly Chatflow today to streamline your communication!

Ensure you check out Pabbly Connect to create business automation workflows and reduce manual tasks. Pabbly Connect currently offer integration with 2,000+ applications.

Auto-Sync BigCommerce Customers to Zoho CRM & Notify via Gmail

Learn how to use Pabbly Connect to automatically sync BigCommerce customers to Zoho CRM and send notifications via Gmail in this detailed step-by-step tutorial. Discover hidden automation capabilities within your existing tools. This guide shows you how to connect your essential applications and permanently eliminate redundant manual processes.

Watch Step By Step Video Tutorial Below


1. Accessing Pabbly Connect for BigCommerce and Zoho CRM Integration

To start using Pabbly Connect, navigate to the Pabbly website by typing Pabbly.com in your browser. Once on the site, sign in to your account. If you are a new user, you can sign up for free and receive 100 tasks monthly to test the platform.

After signing in, you will be directed to the Pabbly applications page. Here, find and click on Pabbly Connect to access the dashboard where you can manage your workflows. To create a new workflow, click on the ‘Create Workflow’ button and select the workflow builder. Choose the new beta option for a more modern experience.


2. Creating a Workflow to Sync BigCommerce Customers to Zoho CRM

In this section, we will create a workflow to sync customers from BigCommerce to Zoho CRM using Pabbly Connect. Name your workflow appropriately, such as ‘Auto-Sync BigCommerce Customers to Zoho CRM and Notify via Gmail’. After naming, select a folder for your workflow.

  • Click on ‘Create’ to initialize the workflow.
  • Select BigCommerce as your trigger application.
  • Choose the trigger event ‘New Order Created’.

After setting the trigger, connect your BigCommerce account by entering your store hash key, client ID, and access token. You can find these details in your BigCommerce account settings. Once you have entered the correct information, click on ‘Save’ to create the connection.


3. Testing the Connection Between BigCommerce and Pabbly Connect

Once your BigCommerce account is connected to Pabbly Connect, it’s time to test the connection. Click on ‘Save and Send Test Request’ to initialize the connection. This will change the status to ‘Waiting for Webhook Response’.

Next, create a new order in your BigCommerce store. Fill in the required details such as customer name, email, and address. After placing the order, return to Pabbly Connect to check if the order details have been captured. You should see the order ID and other relevant details displayed in the workflow.


4. Fetching Order Details from BigCommerce

With the order successfully captured, the next step is to fetch the complete order details using Pabbly Connect. Add a new action step and select BigCommerce as the action application. Choose the action event ‘Get Order by ID’.

  • Map the order ID from the previous step to fetch specific order details.
  • Click ‘Save and Send Test Request’ to retrieve the order information.

Once the request is successful, you will receive a response containing all necessary customer details such as name, email, and address. This information will be used to create a new lead in Zoho CRM.


5. Creating a Lead in Zoho CRM Using Pabbly Connect

Now that we have the order details, we can create a lead in Zoho CRM. Add another action step and select Zoho CRM as the action application. Choose the action event ‘Insert Update Record with Subform Data’.

Connect your Zoho CRM account by entering the necessary authentication details. After establishing the connection, you will need to map the fields from the BigCommerce order response to the corresponding fields in Zoho CRM. This includes fields like company name, first name, last name, email, and phone number.

Ensure all relevant fields are filled in correctly to create a comprehensive lead. Click ‘Save and Send Test Request’ to finalize the lead creation.

Upon successful execution, the lead should now appear in your Zoho CRM account, confirming that the integration via Pabbly Connect was successful.


Conclusion: Sending Email Notification via Gmail

After creating the lead in Zoho CRM, the final step is to notify the customer via Gmail. Add a new action step, select Gmail as the action application, and choose the action event ‘Send Email’. Connect your Gmail account and fill in the required fields such as sender name, recipient email, subject, and content of the email.

Ensure you check out Pabbly Connect to create business automation workflows and reduce manual tasks. Pabbly Connect currently offer integration with 2,000+ applications.

Check out Pabbly Connect – Automate your business workflows effortlessly! Sign Up Free – Start your journey with ease! 10,000+ Video Tutorials – Learn step by step! Join Pabbly Facebook Group – Connect with 21,000+ like minded people!

Make sure to personalize the email content by mapping the customer’s name from the previous steps. Once all details are filled in, click on ‘Save and Send Test Request’ to send the email. You should receive a confirmation that the email was sent successfully.

This entire workflow demonstrates how Pabbly Connect allows for seamless integration between BigCommerce, Zoho CRM, and Gmail, automating the process of customer management and communication efficiently.

Financial Advisors: Capture Clients via WhatsApp 24/7

Learn how to automate client inquiries via WhatsApp using Pabbly Chatflow. This tutorial covers everything from setup to integration with YouTube and more. Discover how to design chat experiences that feel personal and responsive while handling customer inquiries automatically around the clock.

Watch Step By Step Video Tutorial Below


1. Accessing Pabbly Chatflow for Automation

To create an automated WhatsApp chatbot for financial advisors, you first need to access Pabbly Chatflow. Start by opening a new tab and navigating to the Pabbly Chatflow official page.

On the right side of the page, you will see options to either sign in or sign up for free. If you are new to Pabbly, click on the ‘Sign Up Free’ option to receive 100 credits every month to explore the software. Existing users should select ‘Sign In’ to access their dashboard.


2. Creating Your WhatsApp Chatbot in Pabbly Chatflow

Once logged into Pabbly Chatflow, navigate to the dashboard where you can manage your WhatsApp numbers. Click on the ‘Flows’ option to enter the flow builder page. This is where you will design your WhatsApp chatbot.

  • Click on the ‘+ Add Flow’ button to start a new flow.
  • Name your flow as ‘Financial Advisor Capture Clients via WhatsApp 24/7’.
  • Select the trigger event, in this case, keywords.

For the keyword trigger, enter common greetings such as ‘hi’ and ‘hello’. This setup allows the bot to respond automatically when these keywords are detected in incoming messages.


3. Designing the Chatbot Flow in Pabbly Chatflow

Now that your keywords are set, it’s time to design the response messages in Pabbly Chatflow. Start by adding a text message that welcomes users to your service, such as ‘Welcome to Elite Wealth Advisory. How may I assist you today?’.

Next, create three quick reply buttons labeled ‘Book Consultation’, ‘Our Services’, and ‘Talk to Agent’. Link these buttons to the welcome message so users can easily navigate the chatbot.

  • Add a button for ‘Book Consultation’ to guide users to book services.
  • Include a button for ‘Our Services’ to showcase available offerings.
  • Create a ‘Talk to Agent’ button for direct communication.

By linking these buttons to appropriate responses, you can provide a seamless experience for your clients.


4. Capturing Client Information via Pabbly Chatflow

After users select ‘Book Consultation’, the bot should prompt them to choose a service type. Use a list message to present service options such as ‘Investment Planning’, ‘Wealth Management’, and ‘Retirement Planning’.

Once the user selects a service, the bot will request their full name, primary financial goal, budget range, planned start date, and contact number. Each of these fields should be linked to custom fields in Pabbly Chatflow for dynamic data capture.

Set up custom fields for each data point: full name, goal, budget, start date, and contact number. Make sure to validate user inputs for accuracy. Provide a summary message to confirm the consultation request.

This process ensures that all client inquiries are captured efficiently and accurately.


5. Finalizing Your Chatbot Setup in Pabbly Chatflow

After capturing client information, it’s essential to provide a confirmation message that summarizes their request. This message should include their selected service type, full name, goal, budget range, and contact number.

Finally, add the responses for the ‘Our Services’ and ‘Talk to Agent’ buttons to provide users with additional information or direct contact options. Save your flow to ensure all changes are updated in Pabbly Chatflow.

Test the flow to ensure all buttons and responses work as intended. Make adjustments based on user feedback to improve functionality.

Once everything is set up, your automated WhatsApp chatbot will be ready to assist clients 24/7, providing instant responses even while you sleep.


Conclusion

In this tutorial, we explored how to automate client inquiries using Pabbly Chatflow and WhatsApp. By following these steps, financial advisors can efficiently capture client information and provide timely responses, enhancing client engagement and satisfaction.

Ensure you check out Pabbly Connect to create business automation workflows and reduce manual tasks. Pabbly Connect currently offer integration with 2,000+ applications.

I Built a WhatsApp AI Assistant for FREE 🤯

Learn how to build a WhatsApp AI Assistant for free using Pabbly Chatflow. Follow our step-by-step tutorial to automate your WhatsApp inquiries effectively. Learn how to create intelligent chat workflows that provide instant customer support while qualifying leads 24/7 without human intervention.

Watch Step By Step Video Tutorial Below


1. Accessing Pabbly Chatflow to Build Your WhatsApp AI Assistant

To create your WhatsApp AI Assistant, start by accessing Pabbly Chatflow. Open a new tab and navigate to pabby.com/chatflow. This will lead you to the Pabbly Chatflow landing page where you can either sign in or sign up for free.

If you are a new user, click on the sign-up option. You will receive 100 free credits that allow you to create your AI assistant. Once signed up, click the ‘Access Now’ button to enter the Pabbly Chatflow dashboard.


2. Creating Your AI Assistant in Pabbly Chatflow

After logging into Pabbly Chatflow, locate the AI Assistant section. Click on the ‘Add Assistant’ button to start creating your assistant. Name your assistant, for example, ‘WhatsApp AI Assistant’. This name can be customized based on your business needs.

  • Choose the instruction type as ‘AI Agent’.
  • Set the temperature to 0.5 for balanced responses.
  • Select ‘Open AI’ as the AI option and choose the model as ‘GPT-3 Mini’.

Next, enter the API key from your OpenAI account. Ensure your OpenAI account is paid to send responses through WhatsApp. After entering the API key, click the ‘Connect’ button to finalize your assistant’s setup.


3. Configuring Assistant Settings in Pabbly Chatflow

With your assistant created, it’s time to configure the settings in Pabbly Chatflow. You can add header and footer messages, set stop keywords, and adjust retry attempts according to your preferences. The fallback message will be sent if the API key fails to work properly.

Next, create a knowledge source that details your business. This knowledge base can be extensive, allowing you to upload text files or PDFs explaining your services. Click the button to upload your knowledge base and ensure it is comprehensive for effective responses.

  • You can upload text files without a page limit.
  • PDFs can contain images but are limited to 10 pages.

Once your knowledge base is uploaded, you can customize the assistant interface, including brand name and colors, to match your business identity.


4. Testing Your WhatsApp AI Assistant

After configuring your assistant in Pabbly Chatflow, it’s time to test its functionality. Open WhatsApp and ask your assistant a question, such as ‘Are Lush Berry products authentic and safe to use?’. Wait a few seconds for the AI to respond.

You should receive a detailed reply confirming the authenticity and safety of your products. Continue testing by asking various questions related to your business, such as product expiry dates and sample sizes.

Ask about the manufacturing and expiry dates of your products. Inquire if sample sizes are available for your products.

Ensure that the assistant provides accurate and prompt responses to all queries, demonstrating its effectiveness in automating customer interactions.


5. Enabling Auto Replies in Pabbly Chatflow

To further enhance your assistant’s functionality, navigate to the settings in Pabbly Chatflow and find the inbox settings section. Scroll down to enable the AI auto-reply settings. Select the contact list for which you want to activate the assistant.

You can choose to enable the assistant for all contacts or specific ones. If you want to assign the assistant to a specific contact, go to the inbox, select the chat, and toggle the assistant option on. This will ensure that your assistant is ready to respond to customer inquiries automatically.

By following these steps, you can effectively automate your WhatsApp conversations using Pabbly Chatflow, allowing you to focus on other aspects of your business.


Conclusion

In this tutorial, you learned how to create a WhatsApp AI Assistant using Pabbly Chatflow. By following the detailed steps, you can automate your customer inquiries effectively and enhance your business communication.

Ensure you check out Pabbly Connect to create business automation workflows and reduce manual tasks. Pabbly Connect currently offer integration with 2,000+ applications.

From Zero to Your First WhatsApp AI Agent in Minutes (No Coding)

Learn how to create your first WhatsApp AI agent in minutes using Pabbly Chatflow. Follow this step-by-step tutorial for seamless integration. Create intelligent chat experiences that delight users while collecting valuable information and moving prospects through your sales process.

Watch Step By Step Video Tutorial Below


1. Accessing Pabbly Chatflow for WhatsApp AI Agent Setup

To create your first WhatsApp AI agent, you will need to access Pabbly Chatflow. Start by visiting the Pabbly website and navigating to the Chatflow section. If you’re a new user, click on the ‘Sign Up Free’ button to create an account.

For existing users, simply click on the ‘Sign In’ button. Once logged in, you will be directed to the Pabbly Chatflow dashboard, where you can start setting up your WhatsApp AI agent.


2. Connecting Your WhatsApp Number to Pabbly Chatflow

After accessing Pabbly Chatflow, the next step is to connect your WhatsApp number. Click on the ‘Add WhatsApp Number’ button, and you will see two methods to connect. Choose the method that suits your needs.

  • Method 1: Using a WhatsApp Business Account
  • Method 2: Using the Pabbly API

Once your WhatsApp number is connected, you can start creating your AI agent. This integration is crucial as it allows your AI agent to interact with customers directly through WhatsApp.


3. Creating Your WhatsApp AI Agent in Pabbly Chatflow

To create your WhatsApp AI agent, go to the ‘AI Assistant’ section in Pabbly Chatflow. Click on the ‘Add’ button to start the setup process. You will need to name your assistant and select the instruction type from a dropdown menu.

Choose ‘AI Agent’ from the options. As you select this, basic instructions will automatically populate. You can customize these instructions according to your business needs.

  • Set the temperature to define creativity in responses.
  • Select the AI model to be used for generating responses.

After configuring these settings, click on the ‘Save’ button to store your AI agent.


4. Configuring AI Settings for Your WhatsApp Agent

Once your AI agent is created, it’s time to configure the AI settings within Pabbly Chatflow. Start by adding header messages that will be displayed when users initiate a conversation. You can customize these messages to reflect your brand’s voice.

Additionally, set up fallback messages for scenarios when the AI fails to respond appropriately. This ensures that customers always receive a reply, enhancing user experience.

Add keywords that users can type to stop the assistant. Specify the number of retry attempts if the AI does not respond correctly.

After configuring these settings, remember to click the ‘Save’ button to apply all changes. This setup is essential for ensuring a smooth interaction between your AI agent and customers.


5. Activating Your WhatsApp AI Agent

To activate your newly created WhatsApp AI agent, navigate back to the inbox settings in Pabbly Chatflow. Here, you can enable the AI auto-reply feature by selecting the contact list and assigning your AI assistant to it.

After assigning, click on the ‘Save’ button to finalize the activation process. Your WhatsApp AI agent is now ready to respond to customer inquiries automatically!

To test your setup, send a message to your WhatsApp number and observe how your AI agent interacts. This hands-on approach will ensure everything is functioning as expected.


Conclusion

In this tutorial, we explored how to create your first WhatsApp AI agent using Pabbly Chatflow. By following these detailed steps, you can enhance your business communication and provide instant support to your customers.

Ensure you check out Pabbly Connect to create business automation workflows and reduce manual tasks. Pabbly Connect currently offer integration with 2,000+ applications.

Utilizing Pabbly Chatflow not only streamlines the setup process but also ensures that your AI agent is effective and user-friendly. Start automating your WhatsApp interactions today!