The WhatsApp Broadcast Hack Every Business Needs

Watch Step By Step Video Tutorial Below


1. Accessing Pabbly Connect to Start Your WhatsApp Broadcast

To begin using Pabbly Connect for your WhatsApp broadcasts, first, access the Pabbly Connect dashboard. This is where you’ll manage all your integrations and broadcasts efficiently. If you are a new user, go to Pabbly Connect by searching for pabbly.com/chartflow in your browser.

Once on the landing page, click on the “Sign Up for Free” button in the top right corner. This allows you to start a free trial of Pabbly Connect, giving you access to all features for a limited time. After signing up, you can explore the platform and decide if you’d like to continue with a paid subscription.


2. Adding Your WhatsApp Number in Pabbly Connect

The next crucial step is to add your WhatsApp number to Pabbly Connect. This step is essential for sending messages through WhatsApp. Navigate to the dashboard and locate the option to add your WhatsApp number.

  • Click on the “Add WhatsApp Number” button.
  • Follow the prompts to enter your WhatsApp number.
  • Ensure your number is verified to send messages.

Once your number is added, you are ready to create your WhatsApp broadcast campaign. This is a vital step that ensures your messages reach your audience effectively through Pabbly Connect.


3. Creating a WhatsApp Broadcast Campaign Using Pabbly Connect

Creating a broadcast campaign is the next step in using Pabbly Connect. Go to the “Broadcast” section on the left-hand sidebar of your dashboard. Click on the “Add Broadcast” button to start.

In this section, you will need to:

  • Select the broadcast type as “Broadcast Campaign”.
  • Name your broadcast (e.g., “New Product Launch”).
  • Choose a contact list from previously created lists.

Once you have set these options, you can refine your audience by excluding certain contacts or lists if necessary. This feature allows you to target your message effectively using Pabbly Connect.


4. Sending Your WhatsApp Broadcast Through Pabbly Connect

After setting up your broadcast, it’s time to send it. You can choose to send your broadcast immediately or schedule it for a later time. In Pabbly Connect, select the option to send instantly or schedule it.

For scheduling, pick a date and time from the calendar interface. Once you have confirmed your details, click on the “Add Broadcast” button to finalize your setup. This step ensures your message reaches your audience at the right time.

  • You can view the stats of your broadcast after sending.
  • Check how many messages were sent, delivered, read, or failed.

Using Pabbly Connect, you can efficiently manage your WhatsApp broadcasts and analyze their performance.


5. Conclusion: Streamline Your Communication with Pabbly Connect

In this tutorial, we explored how to use Pabbly Connect to send WhatsApp broadcasts efficiently. By following the steps outlined, you can effectively communicate with your customers, saving time and effort.

Utilizing Pabbly Connect allows you to manage your broadcasts from one central platform, making your business communication seamless and professional. Start leveraging this powerful tool today!


Automatically Add 99acres Property Leads to Salesflare CRM

Watch Step By Step Video Tutorial Below


1. Accessing Pabbly Connect for Integration

To start integrating 99 Acres with Salesflare, you first need to access Pabbly Connect. Visit the Pabbly website by typing pabbly.com in your browser. Once there, you can sign in or sign up for a free account.

For new users, signing up grants you 100 free tasks monthly to explore Pabbly Connect. Existing users can simply click on the sign-in option located in the top right corner. Once logged in, navigate to the Pabbly Connect app to begin creating your workflow.


2. Creating a New Workflow in Pabbly Connect

After accessing Pabbly Connect, click on ‘Create from Scratch’ to start a new workflow. Name your workflow something descriptive, like “Automatically Add 99 Acres Property Leads to Salesflare CRM.” Choose the appropriate folder for organization.

  • Click on the plus icon to create a new folder if needed.
  • Select ‘Create from Scratch’ to initiate a new workflow.
  • Name your workflow and select a folder.

Once the workflow is created, you will be prompted to set up a trigger application. This is crucial as it starts the automation process whenever a new lead is captured from 99 Acres.


3. Setting Up the Trigger Application

In this step, you will configure the trigger application within Pabbly Connect. Choose 99 Acres as your trigger application and select the event “New Leads” to begin the automation.

After selecting the trigger, you will receive a webhook URL. This URL acts as a bridge between 99 Acres and Pabbly Connect. You must provide this webhook URL to your account manager at 99 Acres to complete the integration setup.

Once the webhook is set up, click on “Capture Webhook Response” in Pabbly Connect. This will initiate the system to wait for incoming lead data. When a new lead is captured, you will see the details populate, confirming that the connection is working correctly.


4. Configuring the Action Application to Add Leads

Now that the trigger is set, it’s time to configure the action application in Pabbly Connect. Select Salesflare as your action application and choose the event “Create Contact” to proceed.

To connect Salesflare with Pabbly Connect, you will need to enter your API key. Access your Salesflare account, navigate to settings, and find the API keys section to copy your key.

  • Log into Salesflare and go to settings.
  • Copy your API key from the API keys section.
  • Paste the API key into Pabbly Connect to establish the connection.

After saving the connection, you can map the fields from the webhook response to create the contact in Salesflare. This ensures that every new lead is captured accurately and automatically.


5. Finalizing the Integration and Testing

With the action application configured, you can now finalize the integration in Pabbly Connect. Map the relevant fields such as first name, last name, email, and phone number from the webhook response to the corresponding fields in Salesflare.

Once all fields are mapped, hit the “Save and Send Test Request” button to test the setup. If successful, you will receive a confirmation along with the contact ID, indicating that the lead has been created in Salesflare.

To verify, log into your Salesflare account and search for the newly created contact. This process confirms that your integration between 99 Acres and Salesflare is working seamlessly through Pabbly Connect.


Conclusion

In this tutorial, we demonstrated how to automate the process of capturing leads from 99 Acres to Salesflare using Pabbly Connect. By following these steps, you can streamline your lead management process effectively.

Automatically Add Google Ads Leads to Salesmate CRM

Watch Step By Step Video Tutorial Below


1. Accessing Pabbly Connect for Integration

To start integrating Google Ads with Salesmate, you need to access Pabbly Connect. Open a new tab and search for www.pabbly.com/connect. This platform is designed to help you automate workflows without coding.

If you are new to Pabbly Connect, you can sign up for free. This gives you access to 100 free tasks every month, allowing you to set up your integrations right away. For more extensive use, consider their one-time plans for unlimited access.


2. Setting Up Google Ads Trigger in Pabbly Connect

The first step in the integration process is to set up a trigger in Pabbly Connect. Choose “Google Ads: New Lead Form Entry” as your trigger. This means that every time a lead is generated through Google Ads, it will trigger the workflow in Pabbly Connect.

  • Select “Google Ads” from the app list.
  • Choose the trigger event as “New Lead Form Entry”.
  • Copy the webhook URL provided by Pabbly Connect.

Next, go to your Google Ads account and navigate to the lead form you have created. Under the lead delivery options, you will find the option for webhook integration. Paste the copied URL from Pabbly Connect in the designated field.


3. Capturing Lead Details from Google Ads

Once the webhook URL is set, you need to capture the lead details. In Pabbly Connect, click on the “Capture Response” button. This will allow the platform to receive the lead information from Google Ads.

After clicking, you will see a message indicating that it is waiting for a response. Go back to Google Ads and send test data to verify the integration. If successful, Pabbly Connect will show the captured lead details in the dashboard.

  • Ensure the test data is sent successfully.
  • Check that the lead details appear correctly in Pabbly Connect.

Once the lead details are captured, you can proceed to add this information to your Salesmate account.


4. Connecting to Salesmate via Pabbly Connect

The next step is to connect Pabbly Connect to your Salesmate account. You will need to provide your account URL, host name, and session token. This allows Pabbly Connect to send the captured lead details directly to Salesmate.

To get your account URL, log into Salesmate and copy the URL from your browser. For the hostname, you can find it in your Salesmate settings. The session token can be accessed from your profile section under the access key. Paste these details into Pabbly Connect to establish the connection.


5. Mapping Lead Data to Salesmate

After successfully connecting to Salesmate, the next step is to map the lead data. Mapping is crucial as it allows Pabbly Connect to transfer the lead details like first name, last name, email, and phone number into the correct fields in Salesmate.

In the mapping section, select the fields from the previous step that correspond to the contact details you want to save. For example, map the first name, last name, and email address to their respective fields in Salesmate.

  • Map the first name to the corresponding field.
  • Map the last name and email address similarly.
  • Ensure all required fields are filled correctly.

Once mapping is complete, click on “Save and Send Test Request”. If successful, you will see a confirmation message, and the new lead will be created in your Salesmate account.


Conclusion

In conclusion, integrating Google Ads with Salesmate using Pabbly Connect is a straightforward process that automates lead management. By following the steps outlined above, you can ensure that every lead generated through Google Ads is captured and added to Salesmate seamlessly.

Build a 24/7 WhatsApp AI Salesperson That Closes Deals While You Sleep

Watch Step By Step Video Tutorial Below


1. Setting Up Pabbly Connect for WhatsApp AI Integration

To create a 24/7 WhatsApp AI salesperson, you first need to access Pabbly Connect. This integration platform allows you to connect various applications seamlessly. Start by visiting Pabbly’s website and signing up for an account.

Once you’ve signed up, you will receive 100 free credits every month to explore the features of Pabbly Connect. After logging in, navigate to the Pabbly Connect dashboard to begin the integration process.


2. Creating Your WhatsApp Assistant with Pabbly Connect

After accessing Pabbly Connect, you can create your WhatsApp assistant. Click on the assistant feature in the left sidebar. This will take you to a page where you can train your assistant using a knowledge base.

  • Click the button to create a new assistant.
  • Assign a descriptive name to your assistant.
  • Select the instruction type for your assistant.

Once you’ve named your assistant, you can set the instructions type. Choose the AI agent option to define how the assistant should behave. This process is crucial as it sets the rules for how the assistant responds to user queries.


3. Configuring Your Assistant’s Settings

In this step, you will configure various settings for your WhatsApp assistant using Pabbly Connect. Adjust the temperature to control the creativity of your AI. A lower temperature provides stable responses, while a higher one allows for more creativity.

Next, you need to input your OpenAI API key. To obtain this key, go to your OpenAI API keys page, create a new secret key, and paste it into the appropriate field in Pabbly Connect. Ensure that you click the connect button after pasting the key.

  • Add stop keywords to control when the assistant requires human input.
  • Set retry attempts for how many times the assistant will attempt to respond.

These settings are essential for ensuring your assistant operates effectively and can handle various user inquiries automatically.


4. Uploading Your Knowledge Base to Pabbly Connect

The knowledge base is critical for your assistant to provide accurate responses. In Pabbly Connect, you can upload a knowledge base file that contains all relevant information about your products or services. This file can be in PDF or text format, ensuring it is under the size limit specified by Pabbly.

To upload, click on the add new file option and select your knowledge base document. This document should contain detailed information that your assistant will use to answer customer queries effectively.

  • Ensure the file size is less than 90 MB.
  • Make sure the PDF does not exceed 10 pages if applicable.

Having a well-structured knowledge base will significantly enhance the assistant’s ability to provide accurate and helpful information to users.


5. Activating Your WhatsApp AI Salesperson

After configuring and uploading your knowledge base, it’s time to activate your WhatsApp assistant through Pabbly Connect. Navigate to the settings option and select inbox settings. Here, enable the AI auto-reply settings and choose the contact list to which you want to assign the assistant.

Once you have selected your contact list, choose your newly created assistant from the dropdown menu and save your settings. This step ensures that your assistant is active and ready to respond to customer inquiries automatically.

Finally, you can add contacts into Pabbly Connect to ensure that your assistant is set up for all potential customer interactions. This integration will allow your WhatsApp AI salesperson to function 24/7, handling queries even when you are not available.


Conclusion

In this tutorial, we explored how to create a 24/7 WhatsApp AI salesperson using Pabbly Connect. By following these steps, you can automate customer interactions and enhance your business efficiency. Start implementing these strategies today for better sales automation!

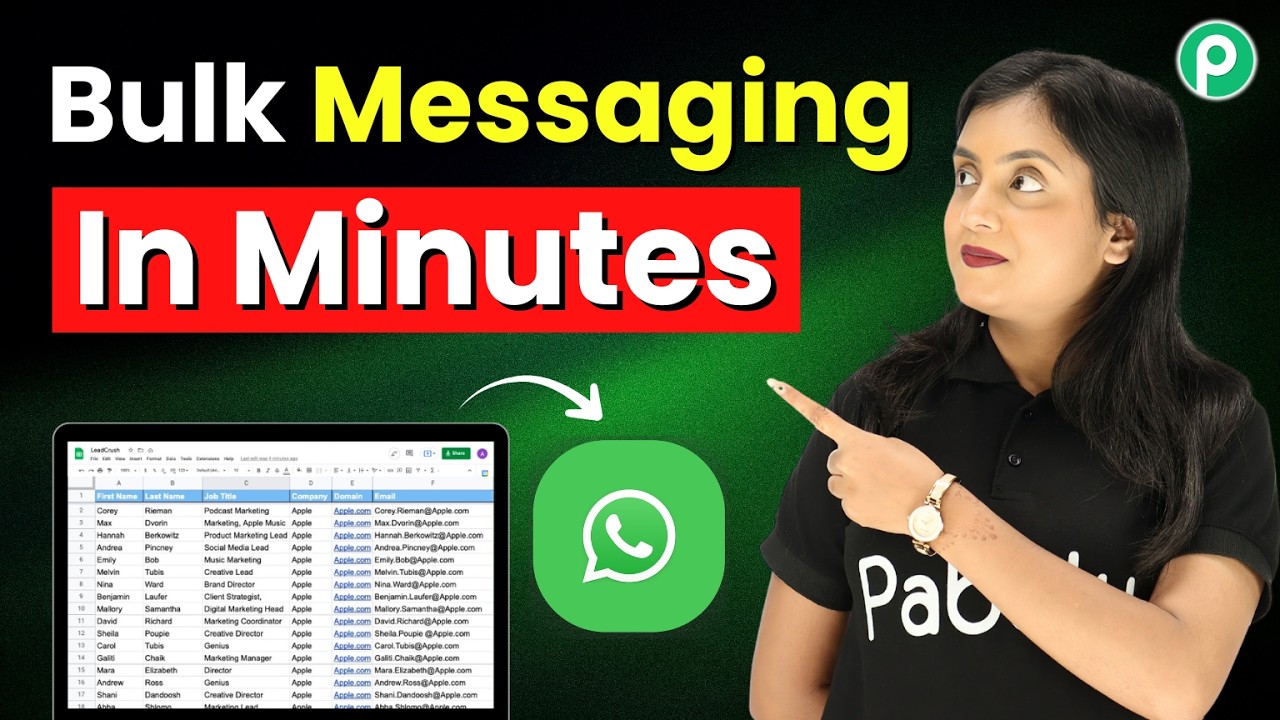
Send Bulk WhatsApp Messages from Google Sheets in 5 Minutes 😱

Watch Step By Step Video Tutorial Below


1. Setting Up Pabbly Connect for Google Sheets and WhatsApp Integration

To integrate Google Sheets with WhatsApp, you need to set up Pabbly Connect. Start by accessing Pabbly Connect by searching for www.pabbly.com/connect. Here, you can create an account or log in if you already have one.

Once logged in, you can create a new workflow. This workflow will enable you to capture new entries from Google Sheets and send them as WhatsApp messages. Remember, Pabbly Connect is essential for this integration.


2. Setting Google Sheets as the Trigger in Pabbly Connect

The next step is to set Google Sheets as the trigger application in Pabbly Connect. You will select the trigger event as “New Updated Spreadsheet Row”. This allows Pabbly Connect to monitor your Google Sheets for any new entries.

  • Select Google Sheets as the trigger application.
  • Choose the trigger event: New Updated Spreadsheet Row.
  • Connect your Google account to Pabbly Connect.

After setting the trigger, copy the webhook URL provided by Pabbly Connect. This URL will be used in Google Sheets to send data whenever a new row is added. Ensure you keep this URL handy for the next steps.


3. Configuring Google Sheets with Pabbly Connect

Now, you need to configure Google Sheets to send data to Pabbly Connect. Go to Google Sheets, click on Extensions, then Add-ons, and select Get Add-ons. Search for “Pabbly Connect Webhooks” and install it.

After installation, refresh your Google Sheet. Go back to Extensions, find Pabbly Connect Webhooks, and select Initial Setup. Here, paste the webhook URL you copied earlier and set the trigger column, which should be the final data column (e.g., Column D for phone numbers).


4. Setting Up WhatsApp Action Using Pabbly Connect

With Google Sheets configured, the next step is to set up WhatsApp to send messages. In Pabbly Connect, select “Pabbly Chatflow” as the action application and choose the action event as “Send Template Message”.

  • Connect to Pabbly Chatflow by entering your API token.
  • Map the recipient’s phone number from the trigger data.
  • Select the template you want to use for the WhatsApp message.

Once these steps are completed, click on Save and Send Test Request. This will send a test message to the mapped phone number, confirming that your setup is working correctly through Pabbly Connect.


5. Sending Bulk WhatsApp Messages with Pabbly Connect

After successfully testing the single message, you can now send bulk WhatsApp messages. To do this, go back to your Google Sheets and add multiple entries. Once you have added all your customer data, return to Pabbly Connect.

In Pabbly Connect, go to Extensions, select Pabbly Webhooks, and click on “Send All Data”. This action will trigger the sending of WhatsApp messages to all the contacts listed in your Google Sheets. Each entry will receive the promotional message you set up.

By following these steps, you can efficiently send bulk WhatsApp messages to your customers using the powerful integration capabilities of Pabbly Connect.


Conclusion

In this tutorial, we demonstrated how to integrate Google Sheets with WhatsApp using Pabbly Connect. This setup allows you to send bulk WhatsApp messages efficiently to your customers. By following the steps outlined, you can leverage the power of automation to enhance your communication strategy.

Capture Facebook Leads & Save Them to Google Sheets Automatically

Watch Step By Step Video Tutorial Below


1. Accessing Pabbly Connect for Integration

To start integrating Facebook leads into Google Sheets, you first need to access Pabbly Connect. Open your browser and type in the URL: pabbly.com/connect. This will take you to the Pabbly Connect landing page.

If you are a new user, click on the “Sign Up for Free” button to create an account. Existing users can simply click on the “Sign In” button. Once logged in, you will be directed to the Pabbly Connect dashboard where you can create workflows.


2. Creating a New Workflow in Pabbly Connect

Once in the Pabbly Connect dashboard, click on “Create Workflow” to begin setting up your automation. You can name your workflow something like “Facebook Leads to Google Sheets” to keep it organized. This is where Pabbly Connect becomes the central platform for your integration.

  • Click on “Create Workflow”.
  • Enter a name for your workflow.
  • Select “Connect Facebook Leads with Google Sheets” as your workflow type.

After naming your workflow, you will be prompted to set up the trigger event. Choose “Facebook Leads” as your trigger application. This step is crucial as it allows Pabbly Connect to capture leads from your Facebook ads.


3. Connecting Facebook Leads to Pabbly Connect

To connect Facebook to Pabbly Connect, click on the “Connect” button and select “Add New Connection”. Here, you will need to authorize your Facebook account. This will allow Pabbly Connect to access your Facebook lead data seamlessly.

Once connected, select the specific Facebook page and lead form you want to capture leads from. This is essential for ensuring that the correct data is sent to Google Sheets. After selecting the form, click on “Save and Send Test Request” to verify the connection.


4. Setting Up Google Sheets Integration

After successfully connecting Facebook, the next step is to connect Google Sheets. In the workflow, add another action step and select “Google Sheets” as the application. Once again, Pabbly Connect will facilitate this integration.

Click on “Connect” and choose “Sign in with Google” to link your Google account. After authorization, select the specific Google Sheets file where you want the leads to be recorded. Make sure the columns in your Google Sheets match the data fields from Facebook leads.

  • Choose the Google Sheets file for leads.
  • Map the fields from Facebook leads to the corresponding columns in Google Sheets.
  • Click on “Save and Send Test Request” to ensure everything is set up correctly.

This mapping process is vital as it ensures that the data flows correctly from Facebook to Google Sheets via Pabbly Connect.


5. Testing the Integration

With both Facebook and Google Sheets connected, it’s time to test your integration. Fill out a test lead form on Facebook and submit it. This will trigger the workflow in Pabbly Connect and should automatically add the lead details into your specified Google Sheets.

Check your Google Sheets to see if the new lead appears correctly. If everything is set up properly, you will see the lead details populated in the designated columns. This confirms that your automation is working flawlessly, allowing you to manage your leads efficiently.


Conclusion

Using Pabbly Connect, you can seamlessly integrate Facebook leads into Google Sheets, automating your lead management process. This step-by-step tutorial highlights the ease of using Pabbly Connect for efficient data handling.

Send Tech News to Discord Automatically

Watch Step By Step Video Tutorial Below


1. Accessing Pabbly Connect for Integration

To start automating tech news delivery to Discord, access Pabbly Connect by visiting pabbl.com/connect. If you are a new user, click on the “Sign Up for Free” button in the top right corner.

This free trial allows you to explore Pabbly Connect with 100 tasks every month. After signing up, you can choose a subscription plan using a discount code for savings.


2. Creating a Workflow in Pabbly Connect

Once logged into Pabbly Connect, navigate to the workflow builder. Here, you will set up the trigger and action for your automation.

  • Click the “Add Trigger” button.
  • Search for “RSS by Pabbly” and select it.
  • Choose “New Item in Feed” as the event.

After selecting the event, connect it by entering the feed URL of the tech news source you want to monitor, such as Times of India or The Hindu.


3. Configuring the RSS Feed in Pabbly Connect

To configure the RSS feed, input the URL you obtained from the news source into the feed URL section of Pabbly Connect. Select the filter type as “Default” and click on “Save and Send Test Request”.

This action allows Pabbly Connect to retrieve the latest news items. You will see details like the title, link, date, and description of the news displayed in the response.

Keep in mind that RSS by Pabbly is a polling-based application, meaning it checks for new data at defined intervals. Set your preferred trigger time, which can range from 10 minutes to 24 hours.


4. Sending News to Discord via Pabbly Connect

Next, add a new action step in Pabbly Connect to send the retrieved news to your Discord channel. Search for “Discord” and select it.

  • Choose “Send Channel Message” as the event.
  • Connect to Discord by authorizing the app.
  • Select the channel where you want to send the message.

Once connected, configure the message settings, including the message text and dynamic fields for title and link using the mapping feature in Pabbly Connect.


5. Testing and Activating Your Workflow

After setting everything up in Pabbly Connect, click on “Save and Send Test Request” to test the workflow. If successful, the message will appear in your Discord channel.

Now, your workflow is ready to check for new tech news every 30 minutes and post updates to Discord automatically. You can delete any unnecessary action steps to optimize task usage.

With this setup, Pabbly Connect effectively automates the delivery of tech news to your Discord channel, enhancing your team’s communication and updates.


Conclusion

By using Pabbly Connect, you can effortlessly automate the process of sending tech news to your Discord channel. This integration not only saves time but also keeps your team informed with the latest updates.

Build a FREE AI Customer Support Agent for WhatsApp

Watch Step By Step Video Tutorial Below


1. Accessing Pabbly Connect for Integration

To start integrating WhatsApp with Pabbly Connect, first, visit Pabbly.com on your browser. This is where you will find the necessary tools to set up your integration seamlessly.

If you are a new user, click on “Sign Up for Free” to create an account. Existing users can simply log in. Once logged in, navigate to Pabbly Chatflow to begin the integration process.


2. Setting Up Your WhatsApp AI Agent with Pabbly Connect

Once you are in Pabbly Chatflow, you can create an AI agent for WhatsApp. This agent will automatically respond to customer inquiries. To start, click on the “Create New Assistant” button.

  • Give your assistant a unique name.
  • Select the type of agent you want to create, such as Customer Support Agent.
  • Configure the AI settings according to your business needs.

After setting up your AI agent, click on the “Save” button to keep your changes. This will allow your WhatsApp AI agent to start interacting with customers effectively.


3. Configuring AI Settings in Pabbly Connect

Next, you need to configure the AI settings within Pabbly Connect. This step is crucial for ensuring that your agent responds accurately to customer queries. You will need to specify the AI model, such as OpenAI’s GPT-3.

  • Set the temperature for the AI responses. A lower value means more focused answers.
  • Enter your OpenAI API key to connect the AI model.
  • Configure any fallback messages for when the AI fails to respond.

Once you have configured these settings, click on the “Connect” button to finalize the integration of your AI assistant with WhatsApp.


4. Assigning Your Assistant to WhatsApp Chats

After creating your AI assistant, the next step is to assign it to your WhatsApp chats using Pabbly Connect. Navigate to the inbox settings to set this up.

  • Enable the Auto Reply feature for your WhatsApp account.
  • Select the contacts you want to assign the assistant to.
  • Click on the “Save” button to apply these settings.

By doing this, your assistant will now automatically respond to messages from the selected contacts, enhancing your customer support capabilities.


5. Testing and Optimizing the Integration

Finally, it’s important to test your WhatsApp AI assistant to ensure it functions as expected. Use Pabbly Connect to send test messages to your WhatsApp number.

Monitor the responses and make adjustments as necessary. You can tweak the AI settings or modify the fallback messages to improve the interaction quality. Regular testing will help you maintain an effective customer support system.


Conclusion

In this tutorial, we explored how to integrate WhatsApp with Pabbly Connect to create an AI customer support agent. Following these steps will streamline your customer interactions and improve response times.

Automatically Track Every Instagram Post in Google Sheets

Watch Step By Step Video Tutorial Below


1. Accessing Pabbly Connect for Integration

To start using Pabbly Connect, navigate to www.pabbly.com/connect. This platform is essential for automating the integration between Instagram and Google Sheets. If you’re a new user, sign up for free to access 100 tasks monthly, allowing you to explore the features of Pabbly Connect.

Once registered, you can create the setup for tracking your Instagram posts in Google Sheets. The free plan enables you to test the integration before deciding on a paid plan, which offers additional features and discounts.


2. Setting Up Instagram Trigger in Pabbly Connect

In Pabbly Connect, you will first set up a trigger for Instagram. Click on the “Add New Connection” option and select “Instagram for Business”. You will be prompted to grant permissions for your Instagram account, ensuring that Pabbly Connect can access your data safely.

  • Click on the “Connect with Instagram for Business” button.
  • Select your Instagram account from the dropdown menu.
  • Click on the “Save and Send Test Request” button.

After completing these steps, the most recent post from your Instagram profile will be captured in the trigger response, allowing you to track your posts effectively.


3. Creating a Google Sheets Action in Pabbly Connect

Next, you’ll set up an action in Pabbly Connect to add new rows to Google Sheets. Click on the “Add New Connection” option and select “Google Sheets”. You will need to sign in with the Google account linked to your spreadsheet.

After signing in, grant access to Pabbly Connect to manage your Google Sheets. Then, select the specific spreadsheet where you want to store your Instagram post details. You will be prompted to choose the sheet within that spreadsheet.

  • Choose the spreadsheet named “Instagram content”.
  • Select “Sheet1” as the target sheet for data insertion.
  • Map the data fields for caption and media URL from the Instagram trigger.

This mapping process ensures that every new Instagram post is automatically recorded in your Google Sheets, making it easy to track your content.


4. Testing the Integration with Pabbly Connect

After setting up both the trigger and action, it’s time to test the integration. Create a new post on your Instagram account and ensure it has a distinct caption and image. Once posted, return to Pabbly Connect and click on “Save and Send Test Request” for the Google Sheets action.

Check your Google Sheets to verify that the new post details have been added correctly. You should see the caption and image URL from your latest Instagram post. This confirms that Pabbly Connect is successfully automating the data transfer.

If the data appears correctly, your integration is complete. You can now automate this process for any future posts, ensuring your Instagram content is always backed up in Google Sheets.


5. Conclusion: Automate Instagram with Pabbly Connect

In this tutorial, you learned how to seamlessly integrate Instagram with Google Sheets using Pabbly Connect. This setup allows you to automatically track your Instagram posts, ensuring you have a systematic record of your content. With Pabbly Connect, managing your social media posts becomes efficient and straightforward.

By following the steps outlined, you can enhance your content management process and focus more on creating engaging posts for your audience. Start using Pabbly Connect today to automate your workflows and improve productivity.

Generate Blog Articles Automatically Using AI

Watch Step By Step Video Tutorial Below


1. Accessing Pabbly Connect for Blog Automation

To start automating your blog posts, first access Pabbly Connect. Open a new tab and type in pably.com/connect. Once you hit enter, the landing page for Pabbly Connect will appear.

If you are a new user, click on “Sign Up for Free” to create an account and get 100 free tasks every month. Existing users can simply click on “Sign In” to access their dashboard.


2. Creating a Workflow in Pabbly Connect

After logging into Pabbly Connect, the next step is to create a new workflow. Click on the “Create Workflow” button. You can either build from scratch or use the quick workflow builder.

  • Click on “Create Workflow”.
  • Choose to build from scratch or use the quick builder.
  • Name your workflow according to your needs.

Once named, you’ll be prompted to define what you want to automate. This is where you can specify that you want to schedule posts from Google AI Studio to Google Blogger.


3. Scheduling Blog Posts with Pabbly Connect

In this section, you will set up the scheduling for your blog posts. With Pabbly Connect, you can decide how often to post your blogs. For example, you can choose to post daily, weekly, or at specific intervals.

  • Select the frequency for posting: daily, weekly, or custom intervals.
  • Specify the days of the week for posting.
  • Set the exact time for the posts to go live.

After setting your desired schedule, click on “Save”. Your workflow is now configured to run automatically based on the schedule you set.


4. Generating Blog Content Using Google AI Studio

Next, you will connect Google AI Studio to Pabbly Connect to generate blog content. Click on “Add New Connection” and follow the prompts to authenticate your Google AI Studio account.

Once connected, specify what kind of blog content you want to generate. You can provide instructions regarding the type of content, headings, and other relevant details. This ensures that the generated content meets your requirements.


5. Posting the Generated Content to Google Blogger

Finally, you will connect your Google Blogger account with Pabbly Connect. Select your blog ID and map the title and content generated from Google AI Studio to the respective fields in Google Blogger.

After mapping the fields, click on “Save and Send Test Request”. This will create a new blog post on your Google Blogger account based on the content generated by Google AI Studio.


Conclusion

By following these steps, you can automate your blog posting process using Pabbly Connect and Google AI Studio. This integration allows for efficient content generation and posting, saving you time and effort.