Automate Event Catering Orders on WhatsApp with Pabbly Chatflow

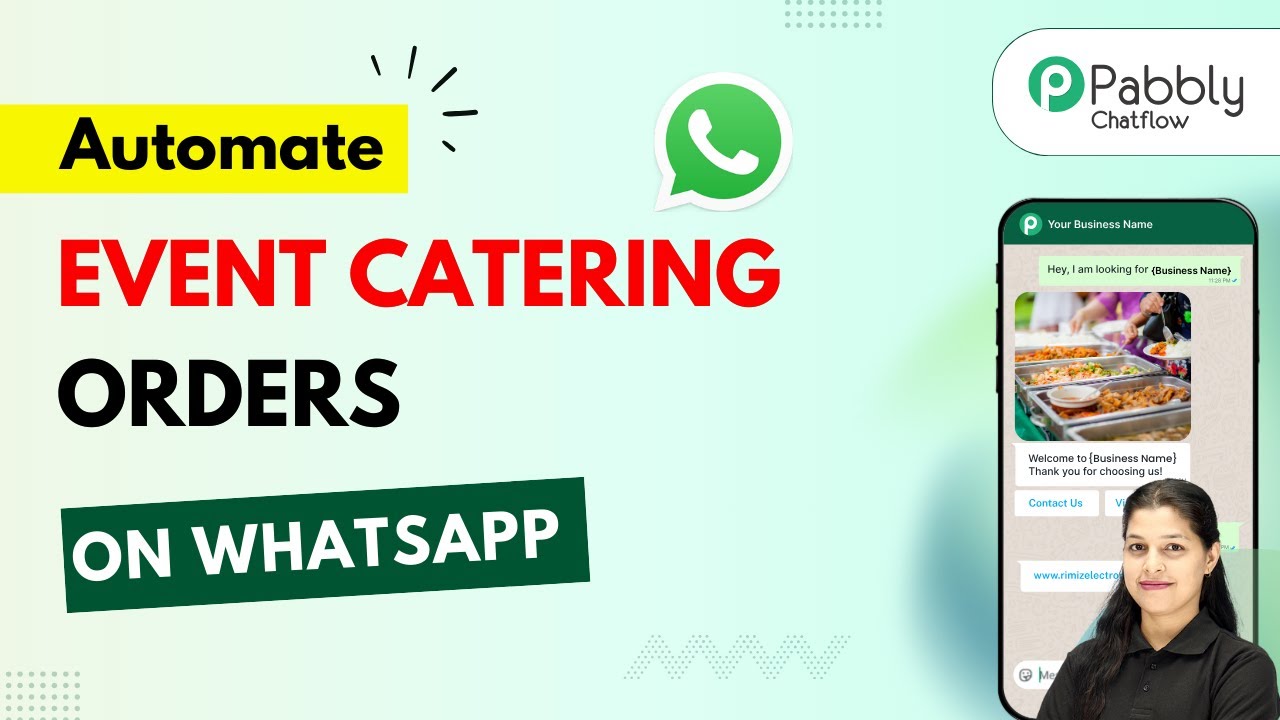
Learn how to automate event catering orders on WhatsApp using Pabbly Chatflow and Pabbly Chatflow. Step-by-step tutorial for seamless integration. Discover how to design chat experiences that feel personal and responsive while handling customer inquiries automatically around the clock.

Watch Step By Step Video Tutorial Below


1. Setting Up Pabbly Chatflow for WhatsApp Automation

To automate event catering orders on WhatsApp, the first step is to set up Pabbly Chatflow. Begin by navigating to the Pabbly Chatflow website at Pabbly.com/chatflow. If you’re a new user, click on ‘Sign Up Free’ to create an account. Existing users can simply sign in.

Once signed in, you will see the dashboard of Pabbly Chatflow. Here, you can connect your WhatsApp number by clicking on the ‘Add WhatsApp Number’ button. Choose between WhatsApp Connect and Manual Token Connect to integrate your number seamlessly.


2. Creating Your WhatsApp Chatbot Using Pabbly Chatflow

After setting up your WhatsApp number, you can start creating your chatbot. Click on the ‘Flows’ option in the sidebar and then ‘Add Flow’ to initiate a new chatbot. Name your flow (e.g., ‘Automate Event Catering Orders on WhatsApp’) and set a trigger for the chatbot.

  • Choose a trigger event (e.g., Keywords Match).
  • Define keywords that will activate the chatbot (e.g., ‘food’).
  • Set up an automatic welcome message to greet users.

These steps will allow Pabbly Chatflow to interact with your customers effectively, providing them with options to view the menu or book an event.


Within Pabbly Chatflow, once users select the option to view the menu, you can set up a list message that displays different menu categories. Use the List Node feature to create a structured menu that includes sections such as starters, main courses, and desserts.

For the booking process, use the Ask Questions feature to collect essential information from users. This includes:

  • Full Name
  • Event Date
  • Event Location
  • Number of Guests

>These inputs will help you manage catering orders efficiently.


4. Integrating Pabbly Connect for Google Sheets

To save customer responses in Google Sheets, you will need to integrate Pabbly Connect with your Pabbly Chatflow setup. First, create a workflow in Pabbly Connect. Set the trigger app as Pabbly Chatflow and choose the event ‘New Message Received’.

Once the trigger is configured, copy the webhook URL provided by Pabbly Connect and paste it into the API request section of your Pabbly Chatflow flow. This will allow the data collected from users to be sent directly to your Google Sheets.


5. Finalizing and Testing Your Chatbot

After setting up the API request in Pabbly Chatflow, ensure that you map the fields correctly from the responses to your Google Sheets. Test the integration by sending a message through WhatsApp and checking if the data appears in your Google Sheets.

Once confirmed, finalize your flow by clicking the ‘Save’ button. You can monitor incoming messages and automated replies through the inbox feature in Pabbly Chatflow, ensuring that your chatbot provides a seamless experience for customers.


Conclusion

By following this tutorial, you can effectively automate event catering orders on WhatsApp using Pabbly Chatflow. This integration not only streamlines your customer interactions but also organizes your data efficiently with Google Sheets. Start enhancing your catering service today!

Ensure you check out Pabbly Connect to create business automation workflows and reduce manual tasks. Pabbly Connect currently offer integration with 2,000+ applications.

Automate Pest Control Bookings on WhatsApp with Pabbly Chatflow

Learn how to automate pest control bookings on WhatsApp using Pabbly Chatflow and Pabbly Chatflow. Step-by-step tutorial for seamless integration. Discover how to design chat experiences that feel personal and responsive while handling customer inquiries automatically around the clock.

Watch Step By Step Video Tutorial Below


1. Creating a WhatsApp Chatbot Using Pabbly Chatflow

In this section, we will discuss how to create a WhatsApp chatbot using Pabbly Chatflow. This platform allows you to automate pest control bookings effectively. Start by navigating to Pabbly Chatflow and logging into your account.

Once logged in, click on the ‘Add WhatsApp Number’ button to connect your WhatsApp account. You can choose between WhatsApp connect or manual token connect options. After connecting your WhatsApp, you will be directed to the flow builder page where you can create your chatbot flow.


2. Designing the Chatbot Flow in Pabbly Chatflow

After setting up your WhatsApp connection, the next step is to design the chatbot flow. Use the flow builder in Pabbly Chatflow to create a seamless interaction for users. Start by naming your flow, such as ‘Automate Pest Control Bookings on WhatsApp’.

  • Select a trigger event, such as keyword match to initiate the chatbot when users type specific words like ‘pest control’.
  • Add a welcome message to greet users and provide a list of services.
  • Create a list of services, such as termite control, mosquito control, and others.

Once users select a service, you can ask them questions related to their issues. This interaction enhances user experience and streamlines the booking process.


3. Integrating HubSpot CRM with Pabbly Connect

To manage bookings effectively, you can integrate HubSpot CRM with Pabbly Connect. This integration allows you to create a new contact in HubSpot whenever a user books a service through your WhatsApp chatbot.

In Pabbly Chatflow, after the user provides their details, use the API request action to connect with Pabbly Connect. This is where you will set up the webhook URL from Pabbly Connect to receive data from Pabbly Chatflow.

  • Create a workflow in Pabbly Connect and select the trigger as ‘New Message Received’ from Pabbly Chatflow.
  • Copy the webhook URL provided by Pabbly Connect and paste it into your API request in Pabbly Chatflow.
  • Map the necessary fields such as issues, full name, email, and location to ensure data is transferred correctly.

This integration ensures that all customer data is captured and stored in HubSpot for future reference and follow-ups.


4. Testing the Chatbot Functionality in Pabbly Chatflow

Once your chatbot flow is set up and integrated with HubSpot CRM through Pabbly Connect, it’s time to test its functionality. Send a message to your WhatsApp number connected to Pabbly Chatflow to see how the chatbot responds.

For example, when you type ‘pest control,’ the chatbot should greet you and display the list of services. After selecting a service, the chatbot will prompt you for further details, such as your name and email. Finally, ensure that the contact is created in HubSpot CRM with the details provided.


Conclusion

In conclusion, automating pest control bookings on WhatsApp is made simple with Pabbly Chatflow and Pabbly Connect. By following the steps outlined in this tutorial, you can create a seamless booking experience for your customers while efficiently managing their data in HubSpot CRM. Start using Pabbly Chatflow today to enhance your business operations.

Ensure you check out Pabbly Connect to create business automation workflows and reduce manual tasks. Pabbly Connect currently offer integration with 2,000+ applications.

Automate Legal Consultations via WhatsApp with Pabbly Chatflow

Learn how to automate legal consultations via WhatsApp using Pabbly Chatflow and Pabbly Chatflow. Follow this detailed step-by-step tutorial for seamless integration. Discover how to design chat experiences that feel personal and responsive while handling customer inquiries automatically around the clock.

Watch Step By Step Video Tutorial Below


1. Accessing Pabbly Chatflow for Legal Consultations

To automate legal consultations via WhatsApp, first, access Pabbly Chatflow. You can do this by visiting the URL Pabbly.com/chatflow. Here, you will need to either sign in or sign up for a free account. New users receive 100 free credits each month to practice building chatbots.

Once logged in, navigate to the dashboard. You will see options to add your WhatsApp number. Click on the ‘Add WhatsApp Number’ button, where you can choose between WhatsApp connect or manual token connect. This step is crucial as it allows Pabbly Chatflow to send automated messages on WhatsApp.


2. Creating Your WhatsApp Chatbot in Pabbly Chatflow

After accessing Pabbly Chatflow, you can begin creating your chatbot. Click on ‘Flows’ in the sidebar and then select ‘Add Flow’. Name your flow, such as ‘Automate Legal Consultation via WhatsApp’. This flow will handle user interactions and automate responses.

  • Provide a trigger event, such as a keyword match, to initiate the chatbot.
  • Set a welcome message for users when they start a conversation.
  • Add buttons for users to book consultations or view services.

By using Pabbly Chatflow, you can create a seamless interaction where users can select options and provide information regarding their legal issues. This automation reduces manual workload and enhances user experience.


3. Integrating HubSpot CRM with Pabbly Connect

To keep track of client details, integrate Pabbly Chatflow with HubSpot CRM using Pabbly Connect. After setting up your chatbot, you will need to create a workflow in Pabbly Connect. Click on ‘Create Workflow’ and name it similarly to your chatbot.

In the workflow, select Pabbly Chatflow as your trigger application and choose ‘New Message Received’ as the event. This setup allows you to capture user responses directly from WhatsApp. After configuring the trigger, you will receive a webhook URL.

  • Copy the webhook URL and paste it into your API request in Pabbly Chatflow.
  • Map the necessary fields, such as case details, full name, and email address.
  • Test the integration to ensure data is sent correctly to HubSpot CRM.

This integration allows you to automate the creation of client records in HubSpot CRM, ensuring that all consultation requests are logged efficiently.


4. Finalizing Your Chatbot Setup in Pabbly Chatflow

Once your chatbot is configured and integrated with HubSpot CRM, finalize your setup in Pabbly Chatflow. Ensure that the confirmation messages sent to users include their case details and a thank you message upon booking a consultation. You can also add a fallback message for any unexpected responses.

To enhance user experience, create a list of services offered by your legal firm. This can be done by adding a list section in your chatbot flow. Users will be able to view services by clicking the corresponding button.

Drag and drop a list component into your flow. Add items to the list, such as property dispute, family law, and business agreements. Save the flow to ensure all changes are applied.

By using Pabbly Chatflow, you can automate responses and provide detailed information to clients, improving their experience and streamlining your legal consultation process.


5. Testing Your Chatbot and Workflow

After setting up your chatbot and integrating it with HubSpot CRM via Pabbly Connect, it’s essential to test the entire workflow. Send a message to your WhatsApp number connected to Pabbly Chatflow and check if the automated replies function correctly.

Ensure that when a user books a consultation, all provided details are accurately captured in HubSpot CRM. This step is crucial for maintaining a record of client interactions and ensuring that your automation is working as intended.

Verify that the welcome message is sent upon initial contact. Check that all user responses are logged in HubSpot CRM. Test the cancellation and confirmation buttons to ensure functionality.

With these tests, you can confirm that your legal consultation automation via WhatsApp is running smoothly, leveraging the capabilities of Pabbly Chatflow and Pabbly Connect.


Conclusion

In summary, automating legal consultations via WhatsApp using Pabbly Chatflow and Pabbly Connect enhances client interaction and streamlines your workflow. By following the steps outlined in this tutorial, you can create an efficient system that saves time and improves client satisfaction.

Ensure you check out Pabbly Connect to create business automation workflows and reduce manual tasks. Pabbly Connect currently offer integration with 2,000+ applications.

Automate Music Class Scheduling for Schools via WhatsApp with Pabbly Chatflow

Learn how to automate music class scheduling for schools using Pabbly Chatflow and WhatsApp. Follow this step-by-step tutorial for seamless integration. Learn how to create intelligent chat workflows that provide instant customer support while qualifying leads 24/7 without human intervention.

Watch Step By Step Video Tutorial Below


1. Accessing Pabbly Chatflow for WhatsApp Automation

To begin automating music class scheduling via WhatsApp, you must access Pabbly Chatflow. Start by opening a new tab and navigating to the official Pabbly Chatflow page at Pabbly.com/chatflow. This platform is designed for seamless WhatsApp automation.

Once on the Pabbly Chatflow homepage, you will find options to sign in or sign up. If you’re a new user, choose the ‘Sign Up Free’ option to receive 100 free credits. Existing users can simply click on the ‘Sign In’ button to access their accounts.


2. Setting Up Your WhatsApp Number in Pabbly Chatflow

After signing in, you will be directed to the Pabbly Chatflow dashboard. Here, you can manage your WhatsApp numbers. To add a new WhatsApp number, click on the ‘+ Add WhatsApp Number’ button.

  • Select ‘WhatsApp Connect’ or ‘Manual Token Connect’ as per your requirement.
  • Follow the prompts to successfully add your WhatsApp number.

Now that your WhatsApp number is integrated into Pabbly Chatflow, you can begin creating your automated chatbot for music class scheduling.


3. Creating Your Music Class Scheduling Chatbot

To create your chatbot, navigate to the ‘Flows’ section in Pabbly Chatflow. Click on the ‘+ Add Flow’ button to start building your automation. Name your flow something descriptive, like ‘Automate Music Class Scheduling for Schools via WhatsApp’.

Next, you will set up the trigger event for your chatbot. Choose the ‘Keyword’ option, which allows the bot to respond when users send specific keywords. Enter keywords like ‘music class’ and ‘schedule class’ to initiate the flow.

  • Add your welcome message, such as ‘Welcome to Melo Music School! Ready to schedule your next music class?’
  • Include buttons for users to select options like ‘Schedule Class’ or ‘View Courses’.

By using Pabbly Chatflow, you can ensure that your users receive instant responses, enhancing their experience and streamlining the scheduling process.


4. Capturing User Input for Class Scheduling

Once your users select the ‘Schedule Class’ button, your bot needs to capture their input regarding the instrument type. Use a list button to display options such as guitar, piano, and violin. This can be done by dragging the list button into your flow and filling out the respective fields.

As users select their preferred instrument, set custom fields to store their choices. For example, if a user selects ‘guitar’, you would set a custom field named ‘Instrument Type’ to capture this information for future reference.

After capturing the instrument, ask users to select the class type (Group Class, Private Lesson, Online Class). Continue capturing necessary details like class date, time, full name, age, and contact number.

Utilizing Pabbly Chatflow allows you to create a structured dialog that effectively gathers all necessary information from users, ensuring smooth scheduling of music classes.


5. Confirming Class Booking with Pabbly Chatflow

After collecting all the necessary user information, the final step is to confirm the class booking. Use a text button to send a confirmation message that includes all the details the user provided, such as their name, instrument type, class type, date, time, and age.

Utilize dynamic fields by using the dollar symbol ($) before each custom field name to pull in the user’s input directly into the confirmation message. For example, your message could read: ‘Your class booking is confirmed, $FullName! You are scheduled for a $InstrumentType class on $ClassDate at $ClassTime.’

Finally, ensure that your flow is saved and activated in Pabbly Chatflow so that your automated WhatsApp chatbot is ready to assist users in scheduling their music classes.


Conclusion

This tutorial has demonstrated how to automate music class scheduling for schools via WhatsApp using Pabbly Chatflow. By following the outlined steps, you can create an efficient, automated system that enhances communication and scheduling for your music school.

Ensure you check out Pabbly Connect to create business automation workflows and reduce manual tasks. Pabbly Connect currently offer integration with 2,000+ applications.

Automate Photography Session Bookings with Pabbly Chatflow

Learn how to automate photography session bookings using Pabbly Chatflow and Pabbly Chatflow. Step-by-step guide for seamless integration. Discover how to design chat experiences that feel personal and responsive while handling customer inquiries automatically around the clock.

Watch Step By Step Video Tutorial Below


1. Create a WhatsApp Chatbot Using Pabbly Chatflow

To begin automating photography session bookings, you need to create a WhatsApp chatbot using Pabbly Chatflow. This chatbot will handle customer inquiries and bookings efficiently. Start by accessing Pabbly Chatflow through its website.

Once on the landing page, log in or sign up for a free account. After logging in, navigate to the ‘Flows’ section from the sidebar. Click on the ‘Add Flow’ button to create a new flow. Name your flow ‘Automate Photography Session Bookings’ to keep it organized.


2. Setting Up the Chatbot Flow in Pabbly Chatflow

In this step, you’ll set up the flow for your WhatsApp chatbot using Pabbly Chatflow. After naming your flow, you need to define the trigger event that initiates the chatbot. Select the trigger as ‘Keyword Match’ and enter the keyword ‘photo shoot’.

  • Select the ‘Keyword Match’ event.
  • Enter the keyword ‘photo shoot’ to activate the chatbot.
  • Drag and drop a text button to send a welcome message.

After setting your trigger, add a welcome message to greet users. Include buttons like ‘Book Photo Shoot’ and ‘View Packages’ to guide users through the booking process. This interactive approach enhances user experience.


3. Collecting User Information for Bookings

After users select the ‘Book Photo Shoot’ button, your chatbot should prompt them for their preferred photo shoot type, date, time, and location. This is where Pabbly Chatflow excels in collecting user information.

  • Use list messages to present photo shoot types like wedding, birthday, and product shoot.
  • Ask for the preferred date and time using question prompts.
  • Store responses using contact custom fields for easy retrieval.

This method allows you to create a personalized experience for users. Once the information is collected, confirm the booking details with an option to confirm or cancel.


4. Integrating Pabbly Chatflow with Google Sheets Using Pabbly Connect

To save the collected booking information, you will integrate Pabbly Chatflow with Google Sheets using Pabbly Connect. When the user confirms their booking, the data should be sent to your Google Sheet automatically.

Begin by creating a new workflow in Pabbly Connect. Set the trigger as ‘New Message Received’ from Pabbly Chatflow. Copy the webhook URL provided and paste it into the API request action in your Pabbly Chatflow flow.

Select ‘Google Sheets’ as the action app in Pabbly Connect. Map the fields from the previous step to the Google Sheet columns. Test the connection to ensure data is saved correctly.

This integration ensures that all booking details are stored securely in your Google Sheets, allowing for easy management and follow-up.


5. Finalizing the Chatbot Experience

After setting up the integration, finalize your chatbot experience by adding a confirmation message for users. This message should thank them for their booking and confirm the details they provided.

Additionally, enhance the ‘View Packages’ button by providing a document with your photography packages. This can be done by uploading a file in the media section of Pabbly Chatflow. Make sure to save all changes and test your chatbot to ensure it functions as intended.

By following these steps, you will have a fully functional WhatsApp chatbot that automates photography session bookings, providing a seamless experience for your clients. With Pabbly Chatflow, you can enhance your business efficiency and customer satisfaction.


Conclusion

In conclusion, using Pabbly Chatflow to automate photography session bookings streamlines the entire process, ensuring your clients receive immediate responses and confirmations. By integrating with Pabbly Connect and Google Sheets, you can manage bookings effectively, enhancing your photography business.

Ensure you check out Pabbly Connect to create business automation workflows and reduce manual tasks. Pabbly Connect currently offer integration with 2,000+ applications.

How to Automatically Generate Blog Posts Using Pabbly Connect and OpenAI

Learn how to use Pabbly Connect to automate blog post generation with OpenAI, Google Sheets, and WordPress without writing a single word. Discover hidden automation capabilities within your existing tools. This guide shows you how to connect your essential applications and permanently eliminate redundant manual processes.

Watch Step By Step Video Tutorial Below


1. Accessing Pabbly Connect for Automation

To start automating blog post generation, you first need to access Pabbly Connect. Visit the Pabbly website and log into your account. If you’re new, you can sign up for a free account to get started with 100 tasks per month.

Once logged in, navigate to the Pabbly Connect dashboard. Here, you can view your existing workflows or create a new one. Click on the ‘Create Workflow’ button, select the new workflow builder, and name your workflow, for example, ‘Auto-generate Blog Posts Using Pabbly and OpenAI’.


2. Setting Up Google Sheets as the Trigger

In this step, you will set Google Sheets as the trigger application in Pabbly Connect. This means that whenever you add a new title or keyword to Google Sheets, it will trigger the workflow. Click on the trigger application and select Google Sheets.

  • Select ‘New or Updated Spreadsheet Row’ as the trigger event.
  • Connect your Google Sheets account by following the prompts.
  • Copy the webhook URL provided by Pabbly Connect.

After setting up the trigger, you need to configure your Google Sheets. Open your spreadsheet and navigate to Extensions > Add-ons > Get Add-ons. Search for Pabbly Connect Webhooks and install it. Once installed, go back to your Google Sheets, click on Extensions > Pabbly Connect Webhooks, and enter the webhook URL. Set your trigger column, typically the last column where data will be entered.


3. Using OpenAI to Generate Content

Now that Google Sheets is set up as the trigger, the next step is to use OpenAI to generate the content based on the data from your spreadsheet. In Pabbly Connect, add an action step and choose OpenAI as your action application.

Select ‘Chat GPT’ as the action event. Connect your OpenAI account by entering your API token. You can create a new API key in your OpenAI account settings if you don’t have one. Once connected, you will need to enter the prompt that instructs OpenAI on how to generate the blog post.

  • Write a prompt like: ‘Generate a blog post using the following details: keyword, target audience, tone, and CTA.’
  • Map the data from Google Sheets to the prompt to keep it dynamic.
  • Test the action to ensure OpenAI generates the content correctly.

After setting up the prompt, you can test the action to see if OpenAI returns the expected blog post format. Make sure to check the response to confirm the content is generated successfully.


4. Posting the Generated Content to WordPress

With the content generated by OpenAI, the final step is to post this content directly to WordPress using Pabbly Connect. Add another action step and select WordPress as your action application.

Choose ‘Create a Post’ as the action event. Connect your WordPress account by entering the base URL and your WordPress credentials. Once connected, you can map the title and content generated by OpenAI into the appropriate fields in the WordPress action.

Set the post type to ‘Post’. Map the title and content fields with the data received from OpenAI. Choose the post status (published, draft, etc.) as per your requirement.

After configuring the WordPress post action, test the workflow to ensure that the blog post appears on your WordPress site as expected. You should now see the newly generated post listed in your WordPress dashboard.


5. Conclusion: Automate Your Blogging with Pabbly Connect

By following these steps, you have successfully set up an automation workflow using Pabbly Connect, Google Sheets, OpenAI, and WordPress. This powerful integration allows you to generate blog posts automatically without writing any content yourself.

Ensure you check out Pabbly Connect to create business automation workflows and reduce manual tasks. Pabbly Connect currently offer integration with 2,000+ applications.

Now, you can focus on growing your blog while Pabbly Connect handles the content generation and publishing process. This automation not only saves time but also enhances your productivity, allowing you to maintain an active online presence effortlessly.


In summary, using Pabbly Connect to link Google Sheets, OpenAI, and WordPress provides a seamless solution for automatic blog post generation. Embrace this technology to streamline your blogging efforts and watch your content strategy flourish.

How to Send Custom SMS After Google Calendar Event Creation Using Twilio with Pabbly Connect

Learn how to automate sending custom SMS after Google Calendar event creation using Pabbly Connect and Twilio in this detailed tutorial. Implement the precise methodologies leading organizations use to automate repetitive tasks, illustrated with practical examples designed for immediate application.

Watch Step By Step Video Tutorial Below


1. Accessing Pabbly Connect for SMS Automation

To send custom SMS after Google Calendar event creation, you need to access Pabbly Connect. Begin by visiting the Pabbly Connect website and signing in or creating a new account. Once logged in, you can start creating your automation workflows.

On the Pabbly Connect dashboard, you will find the option to create a new workflow. This is where you will set up the integration between Google Calendar and Twilio to automate SMS sending. Click on the ‘Create Workflow’ button to get started.


2. Creating Your Workflow in Pabbly Connect

In this section, you will set up the workflow to automate SMS notifications. After clicking on the ‘Create Workflow’ button, you will be prompted to name your workflow. For this integration, you can name it ‘Send SMS After Google Calendar Event Using Twilio’.

  • Select the new beta builder for a modern experience.
  • Choose Google Calendar as your trigger application.
  • Set the trigger event to ‘New Event’.

After setting your trigger, you will need to connect your Google Calendar account to Pabbly Connect. This connection allows Pabbly Connect to access your calendar events and send SMS through Twilio whenever a new event is created.


3. Setting Up Google Calendar Trigger

To set up the Google Calendar trigger in Pabbly Connect, you will need to select your calendar and authorize the connection. Once the connection is established, you can create an event on Google Calendar to test the trigger.

After creating an event, go back to Pabbly Connect to test the trigger. You should receive a response indicating that the event has been successfully captured. This step is crucial as it confirms that your integration is working correctly.


4. Configuring Twilio SMS Action in Pabbly Connect

Now that you have set up the Google Calendar trigger, it’s time to configure the Twilio SMS action. In Pabbly Connect, select Twilio as your action application and choose the ‘Send SMS Message’ event. This action will send an SMS to the specified number whenever a new event is created.

  • Connect your Twilio account using your Account SID and Auth Token.
  • Map the phone number and message body from the previous steps.
  • Test the action to ensure SMS is sent successfully.

Once the setup is complete, you can send a test SMS to verify that the integration works as expected. This step is essential to ensure that your automation is functioning correctly.


5. Testing and Verifying Your Integration

After configuring Twilio, it’s important to test the entire workflow in Pabbly Connect. Create a new event in your Google Calendar and check if the SMS is sent to the designated number. This testing phase ensures that all components of your integration are working in harmony.

Upon successful testing, you can finalize your workflow and start using it for real-time SMS notifications after Google Calendar event creation. This automation will save you time and streamline your communication process.


Conclusion

In this tutorial, we explored how to use Pabbly Connect to automate sending custom SMS after Google Calendar event creation using Twilio. This integration not only saves time but also enhances communication efficiency. By following the steps outlined, you can easily set up your automation and enjoy seamless notifications.

Ensure you check out Pabbly Connect to create business automation workflows and reduce manual tasks. Pabbly Connect currently offer integration with 2,000+ applications.

Automate Recipe Writing for Your Food Blog with AI Using Pabbly Connect

Learn how to automate recipe writing for your food blog using Pabbly Connect and Google Sheets. Step-by-step tutorial on integrating AI for seamless blog updates.

Watch Step By Step Video Tutorial Below


1. Accessing Pabbly Connect for Automation

To automate recipe writing for your food blog, start by accessing Pabbly Connect. Navigate to Pabbly.com/connect in your browser. If you are a new user, click on ‘Sign Up Free’ to create an account and get 100 free tasks each month.

Existing users can simply log in. Once logged in, you will see the dashboard of Pabbly Connect, where you can integrate various applications. To begin, click on the ‘Create Workflow’ button located at the top right corner of the dashboard.


2. Setting Up Google Sheets for Recipe Details

Next, set up your Google Sheets to collect recipe details. Create a new sheet titled ‘Food Recipe’ and add the following columns: Recipe Title, Main Ingredients, Cuisine Type, Cooking Time, Serving Size, and Special Instructions. This setup is essential for the automation process.

  • Recipe Title
  • Main Ingredients
  • Cuisine Type
  • Cooking Time
  • Serving Size
  • Special Instructions

After creating the sheet, you will need to connect it to Pabbly Connect. This integration allows Pabbly Connect to capture the data entered into the Google Sheet and automate the blog post creation process.


3. Creating the Workflow in Pabbly Connect

To create the workflow, return to Pabbly Connect and click on ‘Create New Workflow’. Name your workflow something descriptive, like ‘Automate Recipe Writing for Your Food Blog with AI’. This will help you identify it later.

After naming your workflow, you will need to set up a trigger. Click on ‘Add Trigger’ and select Google Sheets as the application. Choose the event as ‘New or Updated Spreadsheet Row’. This setup will allow Pabbly Connect to react whenever new recipe details are added to your Google Sheet.


4. Testing the Integration with Pabbly Connect

Once the trigger is set, it’s time to test the integration. Click on the ‘Send Test’ button in Pabbly Connect to ensure that it captures the data correctly from your Google Sheet. You should see a success message indicating that the test data has been sent successfully.

Next, check your Google Sheet to confirm that the data has been captured. This step is crucial to ensure that your automation will work seamlessly in the future. If the test is successful, proceed to the next step of integrating OpenAI for generating the recipe content.


5. Generating Recipe Content Using OpenAI

In this step, you will use OpenAI to generate the recipe content based on the details captured from your Google Sheet. In Pabbly Connect, add a new action step and select OpenAI as the application. Choose the event as ‘Create Content’.

Map the fields from your Google Sheet to the OpenAI content generation fields. For example, map the Recipe Title to the title field and the Main Ingredients to the content field. This mapping ensures that OpenAI generates relevant content based on your inputs.

After mapping the fields, click on ‘Save and Send Test Request’. If successful, you will receive generated content from OpenAI. This content can then be automatically posted on your WordPress blog by adding another action step in Pabbly Connect, selecting WordPress, and setting the event to ‘Create Post’.


Conclusion

By following these steps, you can effectively automate recipe writing for your food blog using Pabbly Connect. This integration not only saves time but also enhances the quality and consistency of your blog posts, allowing you to focus more on creativity and less on manual tasks.

Ensure you check out Pabbly Connect to create business automation workflows and reduce manual tasks. Pabbly Connect currently offer integration with 2,000+ applications.

Automate YouTube SEO with Pabbly Connect: A Step-by-Step Guide

Learn how to automate YouTube SEO using Pabbly Connect with Google Sheets and YouTube for efficient video management. Follow our detailed guide! Build sophisticated automated workflows in less time than you think. This guide translates complex integrations into straightforward steps for immediate implementation.

Watch Step By Step Video Tutorial Below


1. Accessing Pabbly Connect for YouTube SEO Automation

To automate your YouTube SEO, you first need to access Pabbly Connect. Start by visiting the landing page of Pabbly Connect, where you can sign up for a free account if you’re a new user. Existing users can log in to their accounts to access the workflow builder.

After logging in, you will see the workflow builder interface. This is where you can create automation workflows. The first step in your automation process is to set up a trigger and action, which are essential components in Pabbly Connect for this integration.


2. Setting Up Google Sheets as a Trigger in Pabbly Connect

In this section, we will set up Google Sheets as the trigger application in Pabbly Connect. Click on the add trigger button and search for Google Sheets. Select it and then choose the event as ‘New or Updated Spreadsheet Row’.

  • Search for Google Sheets in the trigger application.
  • Select the event ‘New or Updated Spreadsheet Row’.
  • Connect your Google account to enable access.

After setting this up, you will receive a webhook URL. Copy this URL and head to your Google Sheets. In Google Sheets, navigate to Extensions and then to Add-ons, where you can find and install the Pabbly Connect Webhooks add-on. Remember to refresh your Google Sheets after installation to ensure the add-on is active.


3. Initializing the Webhook in Google Sheets

Once you have installed the Pabbly Connect Webhooks add-on, you need to initialize it. Go to Extensions, select Pabbly Connect Webhooks, and then choose Initial Setup. Here, paste the webhook URL you copied earlier and specify the trigger column, which is the column that will send data to Pabbly Connect.

  • Paste the webhook URL in the designated field.
  • Enter the trigger column (e.g., C) that will activate the webhook.
  • Click on Submit to save your settings.

After submitting, you will see a message indicating that the setup was successful. Now, you need to perform a test submission in Google Sheets to capture the webhook response in Pabbly Connect. Ensure that the button in the Pabbly Connect Webhooks menu is switched on to send data.


4. Generating SEO Title, Description, and Tags Using OpenAI

Now that you have set up the trigger, the next step is to generate SEO details using OpenAI. In Pabbly Connect, add a new action step and search for OpenAI. Select it and choose the event ‘Chat GPT’. Connect your OpenAI account by entering your API token obtained from the OpenAI API key page.

Select OpenAI and the event ‘Chat GPT’ in the action application. Enter your OpenAI API token to establish the connection. Map the input fields using data from the previous step.

When entering your prompt, ensure it specifies that the output should be in JSON format. This will help you receive the title, description, and tags separately. After setting this up, click on ‘Save and Send Test Request’ to generate the SEO details, which will be used in the next step.


5. Updating Google Sheets with Generated SEO Details

In this final step, you will update Google Sheets with the SEO details generated by OpenAI. Add another action step in Pabbly Connect and select Google Sheets again. This time, choose the event ‘Update Row’ to insert the new title, description, and tags into your spreadsheet.

Select Google Sheets and the event ‘Update Row’. Connect your Google account if not already done. Map the row index and the new SEO details into the appropriate fields.

After setting this up, send a test request to ensure the details are successfully updated in Google Sheets. You will see the newly generated title, description, and tags reflected in your spreadsheet. This completes the automation process using Pabbly Connect, allowing you to streamline your YouTube SEO efforts efficiently.


Conclusion

By following this step-by-step guide, you can effectively automate your YouTube SEO using Pabbly Connect with Google Sheets and OpenAI. This integration simplifies the process of generating SEO titles, descriptions, and tags, saving you time and effort.

Ensure you check out Pabbly Connect to create business automation workflows and reduce manual tasks. Pabbly Connect currently offer integration with 2,000+ applications.

Streamline Real Estate Lead Management with Pabbly Connect and HubSpot CRM

Learn how to automate your real estate lead management using Pabbly Connect and HubSpot CRM. Follow our detailed step-by-step tutorial for seamless integration. Transform complex automation concepts into accessible, actionable steps that eliminate unnecessary manual work while maximizing existing application capabilities.

Watch Step By Step Video Tutorial Below


1. Accessing Pabbly Connect for Automation

To begin managing your real estate leads easily, access Pabbly Connect by navigating to Pabbly.com/n in your browser. This is the first step in connecting your 99acres account with HubSpot CRM.

Once on the Pabbly Connect homepage, you will see options to sign in or sign up for free. If you are a new user, click on ‘Sign Up Free’ to create an account and receive 100 free tasks every month. Existing users can simply sign in to access their dashboard.


2. Creating a Workflow in Pabbly Connect

After signing in, you will be directed to the Pabbly Connect dashboard. Here, you need to create a new workflow to automate the lead management process. Click on the ‘Create Workflow’ button located in the top right corner.

  • Select the workflow filter as Beta for a more modern and flexible approach.
  • Name your workflow, for example, ‘Manage 99acres Real Estate Leads Easily’.
  • Choose an appropriate folder for your workflow.

Once you have named your workflow and selected a folder, you are ready to set up the automation process. This involves defining the trigger and action steps that will facilitate the integration of 99acres with HubSpot CRM through Pabbly Connect.


3. Setting Up Triggers in Pabbly Connect

The next step is to set up the trigger that will initiate the automation process. Click on the ‘Add Trigger’ button and select your trigger application, which is 99acres, and the event as ‘New Lead’. This means that whenever a new lead is received through your 99acres account, it will trigger the workflow.

After selecting the trigger, you will be provided with a webhook URL. Copy this URL and configure it in your 99acres account to ensure that leads are sent to Pabbly Connect. You may need to reach out to your account manager at 99acres to activate this integration.


4. Adding Action Steps to Create Contacts in HubSpot CRM

With the trigger set up, it’s time to add action steps. Click on ‘Add Action’ and choose HubSpot CRM as your action application. From the event dropdown, select ‘Create a Contact’. This action will create a new contact in your HubSpot CRM whenever a new lead is received.

Next, you will need to connect your HubSpot CRM account to Pabbly Connect. Select your connected account or create a new connection. After connecting, you will need to map the fields from the 99acres lead data to the corresponding fields in HubSpot, such as first name, last name, email address, and phone number.

  • Map the first name and last name from the lead data.
  • Include the email address and phone number for contact creation.
  • Select the status of the lead as ‘Active’.

Once all fields are mapped correctly, you can test the action to ensure that a new contact is created in HubSpot CRM successfully. This demonstrates how Pabbly Connect seamlessly integrates your lead data into HubSpot CRM.


5. Testing and Verifying the Integration

After setting up the action steps, it is crucial to test the entire workflow to ensure that everything functions correctly. Click on the ‘Test’ button to send a test lead from 99acres to HubSpot CRM through Pabbly Connect.

Once the test is complete, verify in your HubSpot CRM account that the new contact has been created successfully with the correct details. Refresh your HubSpot dashboard to see the newly created contact. This confirms that the integration between 99acres and HubSpot CRM via Pabbly Connect is working flawlessly.


Conclusion

In this tutorial, we explored how to manage real estate leads easily by integrating 99acres with HubSpot CRM using Pabbly Connect. By setting up triggers and actions, you can automate the lead management process, ensuring that every new lead is captured and organized efficiently.

Ensure you check out Pabbly Connect to create business automation workflows and reduce manual tasks. Pabbly Connect currently offer integration with 2,000+ applications.