How to Export Shopify Orders to Excel Automatically Using Pabbly Connect

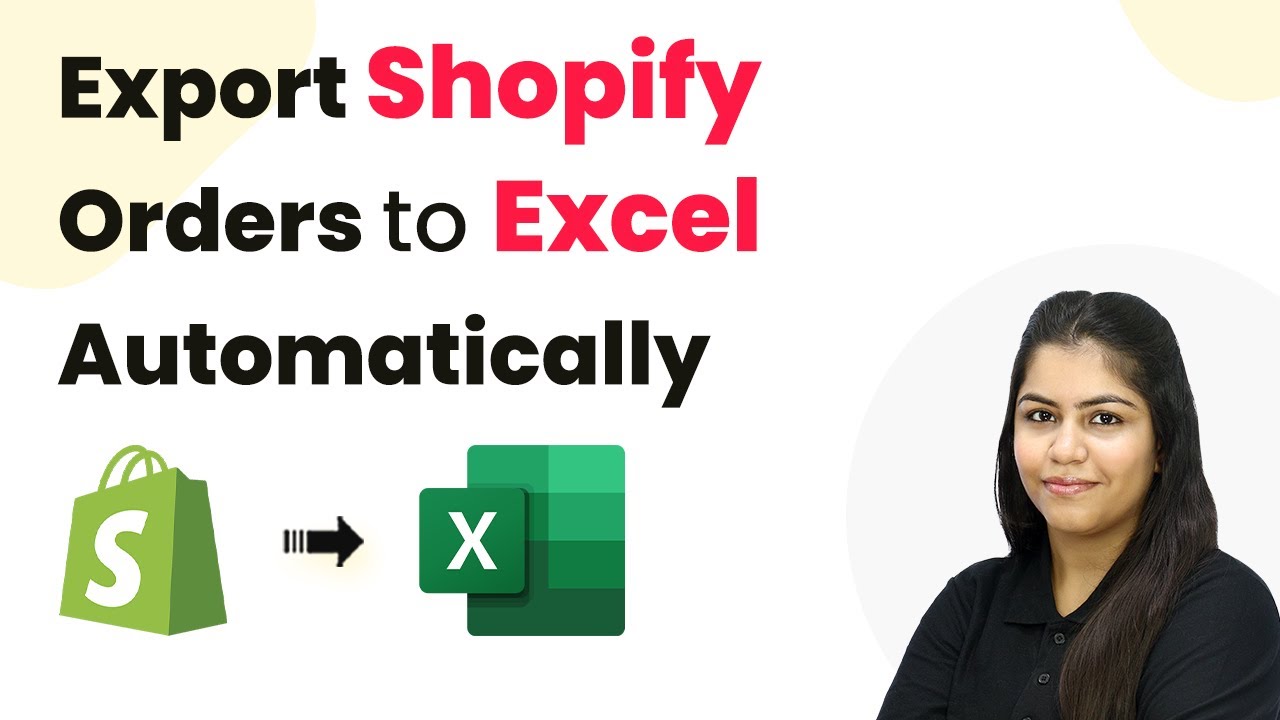
Learn how to automate the process of exporting Shopify orders to Excel using Pabbly Connect. Follow this step-by-step tutorial for seamless integration. Discover how to seamlessly connect your essential tools through accessible instructions that make powerful automation available to professionals at every skill level.

Watch Step By Step Video Tutorial Below


1. Accessing Pabbly Connect for Automation

To start exporting Shopify orders to Excel automatically, you first need to access Pabbly Connect. This powerful automation platform allows you to create workflows without any coding knowledge.

New users can sign up for free on the Pabbly Connect landing page. After signing up, you will gain access to numerous tasks every month, enabling you to explore the platform’s capabilities. Existing users can directly log in to access the workflow builder.


2. Setting Up Shopify Trigger in Pabbly Connect

Once you are in the workflow builder of Pabbly Connect, the first step is to set up a trigger for the Shopify application. This trigger will activate the workflow whenever a new order is created.

  • Search for and select Shopify V2 as the trigger application.
  • Choose ‘New Order’ as the trigger event.
  • Copy the provided webhook URL.

Next, open your Shopify account, navigate to Settings, then Notifications, and click on Webhooks. Create a new webhook by selecting ‘Order Creation’ as the event and pasting the copied URL. This step establishes the connection between Shopify and Pabbly Connect.


3. Testing the Webhook Response

After setting up the webhook in Shopify, it’s essential to test the connection to ensure it works correctly with Pabbly Connect. To do this, create a test order in your Shopify store.

  • Select a product and proceed to checkout.
  • Fill in the required details and complete the purchase.
  • Return to Pabbly Connect to see if the order details are captured.

Upon successful order placement, Pabbly Connect should capture the order details, confirming that the webhook is functioning correctly. This step is crucial for ensuring that your automation will run smoothly.


4. Adding Order Details to Excel

With the trigger successfully set up and tested, the next step is to add the captured order details into an Excel sheet using Pabbly Connect. Select Microsoft Excel as the action application.

Choose ‘Add Row to Worksheet’ as the action event. Connect your Microsoft Excel account to Pabbly Connect. Select the workbook and worksheet where you want to add the order details.

After selecting the appropriate workbook, map the order details from Shopify to the corresponding columns in Excel. This mapping ensures that the data is dynamically inserted into the sheet with each new order.


5. Finalizing the Automation Process

Once all the necessary details are mapped, it’s time to finalize the automation in Pabbly Connect. Click on ‘Save and Send Test Request’ to confirm that the data is being sent to Excel correctly.

Check the response from Pabbly Connect to ensure all details were added successfully. Open your Excel file to verify that the order details appear as expected.

With this, you have successfully set up an automated process using Pabbly Connect. From now on, every new order placed in Shopify will automatically populate in your Excel sheet without additional effort from you.


Conclusion

In conclusion, using Pabbly Connect to automate the export of Shopify orders to Excel streamlines your workflow significantly. By following the steps outlined, you can ensure that your order details are captured and organized efficiently.

Ensure you check out Pabbly Connect to create business automation workflows and reduce manual tasks. Pabbly Connect currently offer integration with 2,000+ applications.

Auto-Track Facebook Leads in Google Sheets & Get Instant Slack Alerts Using Pabbly Connect

Learn how to auto-track Facebook leads in Google Sheets and receive instant Slack alerts using Pabbly Connect. Step-by-step tutorial included. Explore systematic approaches to creating efficient automation solutions that convert technical concepts into practical, implementable instructions.

Watch Step By Step Video Tutorial Below


1. Accessing Pabbly Connect to Set Up Integration

To begin auto-tracking Facebook leads in Google Sheets and receiving instant Slack alerts, you first need to access Pabbly Connect. Visit the Pabbly Connect website at www.Pabbly.com/connect and sign in or sign up for a free account.

Once logged in, you’ll be directed to the Pabbly Connect dashboard. Here, you can create a new workflow by clicking on the ‘Create Workflow’ button. This will allow you to set up the integration process for tracking Facebook leads.


2. Creating a Workflow in Pabbly Connect

After accessing Pabbly Connect, the next step is to create a workflow that will facilitate the integration of Facebook Leads with Google Sheets and Slack. Click on the ‘Create Workflow’ button in the dashboard. using Pabbly Connect

  • Name your workflow, e.g., ‘Track Facebook Leads in Google Sheets and Get Instant Slack Alerts’.
  • Select the folder where you want to save your workflow.

Now that your workflow is created, you can proceed to set up the trigger for Facebook Leads. This step is crucial as it tells Pabbly Connect when to initiate the automation process.


3. Setting Up the Trigger for Facebook Leads

The next step involves setting up the trigger event in Pabbly Connect. Click on the ‘Add Trigger’ button and select ‘Facebook Lead Ads’ as your trigger application. using Pabbly Connect

Choose the event as ‘New Lead Instant’ and connect your Facebook account. Ensure you are logged into your Facebook account in the same browser to avoid connection issues. Once connected, select the Facebook page and the lead form you want to track.

  • Select the Facebook page linked to your lead ads.
  • Choose the lead form that you want to capture leads from.

After setting up the trigger, you can test it by generating a test lead to ensure that everything is functioning correctly.


4. Adding Action Steps to Google Sheets and Slack

Once the trigger is successfully set up, the next step is to add action steps that will send the lead details to Google Sheets and Slack. Start by clicking on the ‘Add Action’ button. using Pabbly Connect

Select ‘Google Sheets’ as the action application and choose the event as ‘Add a New Row’. Connect your Google account to allow Pabbly Connect to access your Google Sheets. Once connected, select the spreadsheet and the specific sheet where you want to add the lead details.

Map the fields from the Facebook lead to the corresponding columns in Google Sheets. Ensure all required fields are mapped correctly.

After setting up the Google Sheets action, add another action step for Slack. Select ‘Slack’ as the action application and choose ‘Send Channel Message’ as the event. Connect your Slack account and select the channel where you want to send alerts.


5. Finalizing the Integration and Testing

With all the action steps configured, it’s time to finalize the integration. Review all your settings in Pabbly Connect to ensure everything is correct. Make sure that the lead details are set to be sent to both Google Sheets and Slack.

Once you have verified the settings, conduct a final test by submitting a new lead through your Facebook lead form. Check both Google Sheets and Slack to confirm that the lead details are being recorded and alerts are being sent as expected.

Ensure the lead appears as a new row in Google Sheets. Check Slack for an alert message containing the lead details.

After successful testing, your automation using Pabbly Connect is complete, and you can now track Facebook leads seamlessly and receive instant alerts on Slack.


Conclusion

This tutorial demonstrated how to auto-track Facebook leads in Google Sheets and get instant Slack alerts using Pabbly Connect. With these automated processes, you can streamline your lead management effectively.

Ensure you check out Pabbly Connect to create business automation workflows and reduce manual tasks. Pabbly Connect currently offer integration with 2,000+ applications.

Automate Rental Bookings for Vacation Homes via WhatsApp with Pabbly Chatflow

Learn how to automate rental bookings for vacation homes through WhatsApp using Pabbly Chatflow in this step-by-step tutorial. Discover how to design chat experiences that feel personal and responsive while handling customer inquiries automatically around the clock.

Watch Step By Step Video Tutorial Below


1. Accessing Pabbly Chatflow for Automation

To automate rental bookings for vacation homes via WhatsApp, you first need to access Pabbly Chatflow. Start by navigating to the Pabbly Chatflow website. This platform is essential for creating your WhatsApp chatbot.

Once on the homepage, you can either sign up for a new account or log in if you are an existing user. New users can benefit from 100 free credits to explore the features of Pabbly Chatflow. After signing in, you will be directed to the dashboard where you can manage your WhatsApp numbers and flows.


2. Creating Your WhatsApp Chatbot with Pabbly Chatflow

After accessing your Pabbly Chatflow account, the next step is to create a WhatsApp chatbot designed for rental bookings. Click on the ‘Add Flow’ button to start the creation process. You will need to name your flow, for instance, ‘Automate Rental Bookings for Vacation Homes via WhatsApp.’ This name will help you identify the flow later.

  • Select your trigger event, such as keywords that will activate the bot.
  • Add welcome messages and buttons for user interaction.
  • Connect the trigger to the messages using the flow builder.

By using Pabbly Chatflow, you can create a seamless interaction for users who wish to book vacation homes. Ensure to save your flow regularly to avoid losing any progress.


3. Setting Up User Interaction in Pabbly Chatflow

In this section, you will set up how users interact with your WhatsApp chatbot. Utilize the flow builder in Pabbly Chatflow to create buttons that users can click to browse homes or book directly. For example, when a user sends a message like ‘book vacation,’ your bot should respond with a welcome message and options for browsing homes.

  • Create a list of properties available for booking.
  • Ask for user details like full name and contact number.
  • Confirm booking details before finalization.

By structuring the interaction in Pabbly Chatflow, you ensure users receive a tailored experience that makes booking vacation homes easy and efficient.


4. Finalizing Bookings Through Pabbly Chatflow

After collecting the necessary information from users, your WhatsApp chatbot should summarize the booking details. This includes the selected property, user name, contact number, and stay dates. Use Pabbly Chatflow to dynamically insert these details into the confirmation message.

For example, your bot can say, ‘Thank you for sharing your details. Here’s a summary of your booking: [property type], [full name], [contact number], [stay dates]. Would you like to proceed with this booking?’ This provides a clear summary and prompts the user to confirm or change their booking.


5. Wrapping Up the Automation Process with Pabbly Chatflow

Once the flow is complete and tested, ensure to enable it in Pabbly Chatflow so that it can respond to user inquiries effectively. You can also share your flow with others, but remember that only the layout will be shared; contact custom fields must be created separately.

By using Pabbly Chatflow, you can automate your rental bookings and provide users with a 24/7 responsive service. This not only enhances the customer experience but also frees up your time for other important tasks.


Conclusion

In conclusion, automating rental bookings for vacation homes via WhatsApp using Pabbly Chatflow streamlines the booking process significantly. By following the steps outlined in this tutorial, you can create an efficient chatbot that handles inquiries and bookings seamlessly.

Ensure you check out Pabbly Connect to create business automation workflows and reduce manual tasks. Pabbly Connect currently offer integration with 2,000+ applications.

Create Your Custom CRM with Pabbly Connect: Full Tutorial

Learn how to create a custom CRM for your business using Pabbly Connect. This step-by-step tutorial covers integrations with Salesforce, HubSpot, and Zoho CRM. Explore systematic approaches to creating efficient automation solutions that convert technical concepts into practical, implementable instructions.

Watch Step By Step Video Tutorial Below


1. Accessing Pabbly Connect for Your Custom CRM

To create your custom CRM, the first step is to access Pabbly Connect. You can do this by visiting the Pabbly Connect homepage at w.Pabbly.com/connect. This platform allows you to integrate various applications seamlessly.

Once on the homepage, you will see options to either sign in or sign up for free. New users can click on ‘Sign Up Free’ to get access to 100 tasks every month. Existing users should simply sign in to their accounts. After signing in, navigate to the dashboard where you can access Pabbly Connect.


2. Creating a Workflow in Pabbly Connect

After accessing Pabbly Connect, the next step is to create a new workflow. Click on the ‘Create Workflow’ button located at the top right corner of the dashboard. You will be prompted to select a workflow builder, where you can choose between the new beta version or the classic version.

  • Select the beta version for a more modern experience.
  • Name your workflow, for example, ‘Custom CRM for Your Business Full Tutorial’.
  • Choose a folder to save your workflow.

Once you have named your workflow and selected a folder, click on the ‘Create’ button. This will set up the workflow and prepare it for the next steps in your CRM integration.


3. Setting Up Triggers in Pabbly Connect

In this step, you will set up triggers that will initiate your CRM automation. Click on the ‘Add Trigger’ button and select ‘Webhook by Pabbly’ as your trigger application. This feature allows you to capture data from your forms automatically.

After selecting Webhook, choose ‘Catch Webhook’ as the event and click on ‘Connect’. You will receive a unique webhook URL, which you will use to connect your form application with Pabbly Connect. Copy this URL as you will need it for the next steps.

  • Paste the copied webhook URL in your form application settings.
  • Test the submission to ensure that data is being received correctly.

Once the test submission is successful, you will see the response data in your Pabbly Connect dashboard, confirming that the trigger is set up correctly.


4. Integrating Salesforce with Pabbly Connect

Now that your trigger is set, it’s time to integrate Salesforce. Click on ‘Add Action’ and select Salesforce as your action application. Choose ‘Create Contact’ as the action event, then click on ‘Connect’. using Pabbly Connect

If this is your first time connecting Salesforce, you will need to add a new connection. Make sure you are logged into your Salesforce account in the same browser for a seamless connection. After granting access, you will be able to map the data from your form submission to the Salesforce fields.

Map the first name, last name, email address, and phone number from the webhook response. Click on ‘Save and Send Request’ to create the contact in Salesforce.

After successfully saving the request, you can verify by refreshing your Salesforce account to see the newly created contact.


5. Integrating HubSpot and Zoho CRM with Pabbly Connect

Following the Salesforce integration, you can now connect HubSpot. Again, click ‘Add Action’ and select HubSpot as the action application. Choose ‘Create Contact’ and proceed to connect your HubSpot account. using Pabbly Connect

Similar to Salesforce, ensure you are logged into HubSpot to allow for a smooth connection. Once connected, map the necessary fields from the form submission just as you did for Salesforce.

Map the first name, last name, email, and phone number. Click on ‘Save and Send Request’ to finalize the contact creation in HubSpot.

Finally, repeat the same process for Zoho CRM. Select Zoho CRM as the action application, choose ‘Create Contact’, and connect your account. Map the fields accordingly and save the request. This will ensure that all your leads are captured across all three CRMs.


Conclusion

In conclusion, using Pabbly Connect allows you to create a custom CRM for your business effortlessly. By integrating Salesforce, HubSpot, and Zoho CRM, you can automate lead management and streamline your processes. Follow the steps outlined in this tutorial to set up your own custom CRM and enhance your business operations.

Ensure you check out Pabbly Connect to create business automation workflows and reduce manual tasks. Pabbly Connect currently offer integration with 2,000+ applications.

Turn WhatsApp Chats into Airtable Records Automatically with Pabbly Connect

Learn how to automate the process of turning WhatsApp chats into Airtable records using Pabbly Connect for seamless lead tracking. Implement the precise methodologies leading organizations use to automate repetitive tasks, illustrated with practical examples designed for immediate application.

Watch Step By Step Video Tutorial Below


1. Accessing Pabbly Connect for Automation

To start automating WhatsApp chats into Airtable records, first, access Pabbly Connect. Navigate to the Pabbly Connect website and either sign in or create a free account. This platform is essential for integrating WhatsApp with Airtable, ensuring seamless automation of your lead tracking process.

Once logged in, you will see the dashboard where you can manage your workflows. Click on the ‘Create Workflow’ button to begin setting up your automation. This is where you will define how WhatsApp messages trigger the creation of records in Airtable.


2. Creating a Workflow in Pabbly Connect

In Pabbly Connect, after clicking ‘Create Workflow’, you will be prompted to name your workflow. A meaningful name like ‘Record WhatsApp Leads in Airtable’ helps keep your automation organized. Select a folder for this workflow to maintain clarity in your dashboard.

  • Click on the ‘Create’ button to proceed.
  • Choose the trigger application as WhatsApp Cloud API.
  • Select the event as ‘Message Notification’.

After selecting the trigger, you will receive a webhook URL. This URL is crucial as it connects WhatsApp to Pabbly Connect. Copy this URL for later use in your WhatsApp Cloud API settings.


3. Connecting WhatsApp Cloud API to Pabbly Connect

To integrate WhatsApp with Pabbly Connect, you need to set up your WhatsApp Cloud API. First, navigate to the Meta for Developers page and create an application. Follow the prompts to set up your WhatsApp account.

  • Enter the webhook URL you copied from Pabbly Connect.
  • Paste the verify token from your Pabbly Connect account.
  • Enable message notifications to receive updates.

After configuring these settings, send a test message from your WhatsApp account to verify that the integration is working. Check Pabbly Connect to see if the message data appears correctly, confirming that your WhatsApp is now connected.


4. Setting Up Airtable Integration in Pabbly Connect

Next, you will set up Airtable as your action application in Pabbly Connect. Choose Airtable and select the action event as ‘Create Record’. This step is crucial as it defines what happens when a new message is received on WhatsApp.

Connect your Airtable account to Pabbly Connect. Select the base where records will be stored, such as ‘WhatsApp Responses’. Map the fields such as profile name, phone number, and message.

Mapping these fields ensures that the correct data from WhatsApp is stored in Airtable. Once everything is mapped, click on the ‘Save and Send Test Request’ button to finalize your setup. This will create a new record in Airtable based on the WhatsApp message received.


5. Testing and Verifying the Integration

After setting up both applications in Pabbly Connect, it’s time to test the integration. Send a new message from your WhatsApp account and check Airtable to see if a new record appears. This step confirms that the automation is functioning correctly.

Refresh your Airtable base to view the newly created record. You should see the profile name, phone number, and message populated based on the WhatsApp chat. If everything appears as expected, your integration is successful!

With this setup, you’ve automated the process of turning WhatsApp chats into Airtable records, streamlining your lead management. This integration not only saves time but also enhances your productivity by allowing you to focus on other important tasks.


Conclusion

In this tutorial, we explored how to use Pabbly Connect to automate the conversion of WhatsApp chats into Airtable records. By following the steps outlined, you can efficiently manage leads and improve your workflow. Embrace automation with Pabbly Connect for better productivity!

Ensure you check out Pabbly Connect to create business automation workflows and reduce manual tasks. Pabbly Connect currently offer integration with 2,000+ applications.

How to Add Housing.com Leads in Notion Using Pabbly Connect

Learn how to integrate Housing.com leads into Notion using Pabbly Connect with this step-by-step tutorial. Automate your lead management effortlessly! Learn to create powerful connections between your critical applications without requiring specialized programming knowledge or extensive technical background.

Watch Step By Step Video Tutorial Below


1. Access Pabbly Connect for Integration

To start integrating Housing.com leads into Notion, you first need to access Pabbly Connect. This powerful automation tool allows you to create workflows without any coding knowledge. Begin by visiting the landing page URL of Pabbly Connect provided in the description.

Once on the landing page, you will see two options: ‘Sign In’ and ‘Sign Up for Free.’ If you’re an existing user, click on ‘Sign In’ to log into your account. New users should select ‘Sign Up for Free’ to get started with 100 free tasks every month to explore Pabbly Connect.


2. Create a Workflow in Pabbly Connect

After logging into Pabbly Connect, navigate to the workflow builder, which is crucial for setting up your automation. The workflow consists of triggers and actions. The trigger initiates the process, while the action defines what happens next.

Click on the ‘Add Trigger’ button and search for ‘Housing.com’ to select it. For the event, choose ‘New Leads’ and click on ‘Connect.’ You will receive a webhook URL that you need to copy and configure in your Housing.com account. This step requires you to reach out to your Housing.com account manager to add the webhook URL since it cannot be done through the user interface.


3. Capture Lead Details from Housing.com

Once the webhook URL is successfully added to your Housing.com account, Pabbly Connect will start capturing lead details automatically. You can view the captured lead details, which typically include the first name, last name, phone number, email address, and area.

  • First Name
  • Last Name
  • Phone Number
  • Email Address
  • Area

Now that you have the lead details, it’s time to add them to your Notion database. Close the trigger and proceed to add a new action step.


4. Add Lead Details to Notion Using Pabbly Connect

To add the captured lead details into Notion, click on ‘Add New Action Step’ and search for ‘Notion.’ Select it and choose the event ‘Create Database Item.’ Then click on ‘Connect’ to establish a connection between Pabbly Connect and Notion.

You will have two options: ‘Add a New Connection’ or ‘Select Existing Connection.’ If you haven’t created a connection yet, click on ‘Add a New Connection’ and then ‘Connect with Notion.’ Log into your Notion account if prompted and grant the necessary permissions for the pages you want to access.


5. Map Data and Test the Workflow

After establishing the connection, you need to select the database in Notion where you want to add the lead details. Instead of entering the details manually, use the mapping feature in Pabbly Connect. Mapping allows you to dynamically insert data from the previous step, ensuring that every new lead is automatically updated in Notion.

Once you have mapped the fields, click on ‘Save and Send Test Request’. You should receive a positive response indicating that a new database item has been successfully created in Notion. Check your Notion database to confirm that all lead details are accurately reflected.


Conclusion

Integrating Housing.com leads into Notion using Pabbly Connect streamlines your lead management process. By following these steps, you can automate the addition of new leads effortlessly, ensuring that your database is always up-to-date. Try this automation today and enhance your workflow efficiency!

Ensure you check out Pabbly Connect to create business automation workflows and reduce manual tasks. Pabbly Connect currently offer integration with 2,000+ applications.

Automate Follow-Up Emails from Typeform Submissions with Pabbly Connect and SendGrid

Learn how to use Pabbly Connect to automate follow-up emails from Typeform submissions to SendGrid with this step-by-step tutorial. Develop expertise in application integration and learn how to design streamlined automation workflows using proven, simplified approaches.

Watch Step By Step Video Tutorial Below


1. Accessing Pabbly Connect for Integration

To automate follow-up emails after Typeform submissions, the first step is to access Pabbly Connect. You can do this by visiting the Pabbly website and logging into your account. If you don’t have an account, you can create one for free, which gives you access to 100 tasks monthly.

Once logged in, navigate to the Pabbly Connect dashboard. Here, you can create and manage your workflows. Click on the ‘Create Workflow’ button to start setting up the integration. This setup will allow you to connect Typeform with SendGrid seamlessly using Pabbly Connect.


2. Creating a Workflow in Pabbly Connect

In this section, you will create a new workflow to connect Typeform and SendGrid using Pabbly Connect. After clicking the ‘Create Workflow’ button, you will be prompted to select a workflow builder. Choose the new beta version for a more efficient experience.

  • Name your workflow as ‘Send Personalized Follow-Up Emails Automatically Using SendGrid for Typeform Leads.’
  • Select the folder where you want to save this workflow.
  • Click on ‘Create’ to finalize the workflow setup.

After creating the workflow, you will see a prompt to select a trigger application. Here, choose Typeform as your trigger application, which will initiate the workflow when a new entry is submitted. This is how Pabbly Connect facilitates the integration process.


3. Setting Up Typeform Trigger in Pabbly Connect

To set up Typeform as your trigger in Pabbly Connect, select ‘New Entry’ as the trigger event. Click on ‘Connect’ to establish a connection. If you don’t have an existing connection, select ‘Add New Connection’ and log into your Typeform account to grant necessary permissions.

Once connected, you will need to select the specific Typeform you want to use. Choose the form that collects the lead data, ensuring that the ‘Simple Response’ toggle is turned on. This will allow you to receive data in a JSON format, making it easier to map the responses in the next steps.

  • Select the Typeform you created for capturing leads.
  • Toggle on ‘Simple Response’ to receive data in a manageable format.
  • Click ‘Save and Send Test Request’ to capture the response from your Typeform.

After submitting a test entry in your Typeform, check Pabbly Connect to ensure that the response has been captured correctly. This confirms that the integration between Typeform and Pabbly Connect is functioning properly.


4. Sending Emails with SendGrid Through Pabbly Connect

After successfully setting up the Typeform trigger, the next step is to send emails using SendGrid. In the action application section of Pabbly Connect, search for SendGrid and select the action event ‘Send an Email.’ Click on ‘Connect’ to establish the connection.

If you don’t have an existing connection, you will need to create one by entering an API key from your SendGrid account. Navigate to your SendGrid settings, create a new API key with full access, and paste it into Pabbly Connect. This step is crucial as it allows Pabbly Connect to send emails on your behalf.

Enter the recipient’s email address by mapping it from the Typeform response. Set the subject of the email, such as ‘Thank You for Signing Up.’ Compose the email body with personalized content, including the user’s name.

After entering all necessary details, click on ‘Save and Send Test Request.’ Check your email inbox to confirm that the confirmation email has been sent successfully. This demonstrates how Pabbly Connect effectively automates your email communication.


5. Adding a Delay for Follow-Up Emails

To ensure that follow-up emails are sent after a specific period, you need to add a delay step in your workflow using Pabbly Connect. Click on ‘Add New Action Step’ and search for the ‘Delay by Pabbly’ action application. Set the delay to 2 days, which will allow you to send follow-up emails after the initial confirmation.

Once the delay is set, click on ‘Save and Send Test Request’ to confirm that the delay has been correctly implemented. After the delay period, proceed to add another action step to send the follow-up email using SendGrid.

Select SendGrid again as the action application. Map the recipient’s email address and customize the follow-up email content. Click on ‘Save and Send Test Request’ to finalize the follow-up email setup.

This step completes the workflow, allowing Pabbly Connect to send both the confirmation and follow-up emails automatically based on Typeform submissions.


Conclusion

By following this tutorial, you have successfully integrated Typeform with SendGrid using Pabbly Connect. This automation allows you to send immediate confirmation emails and follow-up messages to your leads, enhancing your engagement and nurturing process. Automate your email communications today with Pabbly Connect for efficient lead management.

Ensure you check out Pabbly Connect to create business automation workflows and reduce manual tasks. Pabbly Connect currently offer integration with 2,000+ applications.

Create a WhatsApp AI Chatbot Using Pabbly Chatflow: A Step-by-Step Guide

Learn how to create a WhatsApp AI Chatbot using Pabbly Chatflow. Follow this detailed tutorial for seamless integration with YouTube, Google, and more! Learn how to create intelligent chat workflows that provide instant customer support while qualifying leads 24/7 without human intervention.

Watch Step By Step Video Tutorial Below


1. Create WhatsApp AI Chatbot Using Pabbly Chatflow

To create a WhatsApp AI chatbot, you will utilize Pabbly Chatflow. This platform allows you to automate responses to user queries on WhatsApp efficiently. Start by accessing your Pabbly Chatflow dashboard and ensure you have your WhatsApp number added to the system.

Follow these steps to set up your chatbot:

  • Log in to your Pabbly Chatflow account.
  • Navigate to the ‘Add WhatsApp Number’ option.
  • Follow the on-screen instructions to add your WhatsApp number.

Once your number is added, you’re ready to build your AI assistant. This setup is crucial for automating responses effectively.


2. Build Your AI Assistant with Pabbly Chatflow

Next, you will build your AI assistant within Pabbly Chatflow. This feature allows you to customize how your chatbot interacts with users. Click on the ‘Add AI Assistant’ button to start creating your assistant.

When prompted, provide a name for your assistant and select a pre-built example or create a custom prompt. This allows the AI to respond appropriately to user queries. Here’s how to proceed:

  • Choose a pre-built example like ‘Customer Support Agent’.
  • Set the temperature to control the creativity of the responses.
  • Select the AI model, preferably GPT-4 mini.

These settings will help tailor the assistant’s responses to user needs effectively. Make sure to save your settings before proceeding to the next step.


3. Upload Your Knowledge Base in Pabbly Chatflow

To enhance your AI assistant’s capabilities, you need to upload a knowledge base using Pabbly Chatflow. This knowledge base will guide the assistant in providing accurate responses to user queries. Start by preparing your knowledge base in a Google Doc.

Follow these steps to upload your knowledge base:

Download your document in TXT format for best results. In Pabbly Chatflow, navigate to the ‘Knowledge Base’ section. Upload the TXT file you prepared.

Once uploaded, your AI assistant will use this knowledge base to answer user questions accurately and efficiently. This step is essential for creating a responsive chatbot experience.


4. Test Your AI Chatbot on WhatsApp

After setting up your AI assistant, it’s time to test it using Pabbly Chatflow. This testing phase ensures that your chatbot responds correctly to user queries. Open WhatsApp and send messages to your chatbot to see how it performs.

Here’s what to do during testing:

Send a message like ‘Hey, I need help’ to initiate interaction. Ask specific questions regarding your knowledge base. Monitor the responses to ensure they are accurate and relevant.

Testing is crucial as it allows you to refine the assistant’s responses and ensure it meets user expectations effectively.


5. Deploy Your AI Chatbot for Business Use

Finally, deploy your AI chatbot created with Pabbly Chatflow for business use. This step involves integrating the chatbot into your website or other platforms where users can access it. Make sure to activate your AI assistant before deployment.

To deploy, follow these instructions:

Switch on the toggle button to activate your AI assistant. Copy the provided script from Pabbly Chatflow. Paste the script into your website’s HTML.

This deployment ensures that users can interact with your AI chatbot seamlessly, enhancing customer service and engagement.


Conclusion

In conclusion, creating a WhatsApp AI chatbot using Pabbly Chatflow is a straightforward process that significantly improves user interaction. By following these steps, you can automate responses and enhance customer satisfaction effectively. Don’t miss out on this opportunity to streamline your business communications!

Ensure you check out Pabbly Connect to create business automation workflows and reduce manual tasks. Pabbly Connect currently offer integration with 2,000+ applications.

Automate Onboarding Emails with Pabbly Connect and Google Forms

Learn how to send onboarding emails automatically using Gmail for new Google Forms clients with Pabbly Connect. Follow our step-by-step guide to streamline your process.

Watch Step By Step Video Tutorial Below


1. Accessing Pabbly Connect for Automation

To send onboarding emails automatically using Gmail for new Google Forms clients, start by accessing Pabbly Connect. This integration platform allows you to automate workflows without any coding skills. Simply visit Pabbly’s website and sign in to your account.

Once logged in, navigate to the Pabbly Connect dashboard where you can create a new workflow. Click on ‘Create Workflow’ and select the new beta workflow builder for a modern experience. Name your workflow as ‘Send Onboarding Emails Automatically Using Gmail for New Google Forms Clients’ and choose a folder for organization.


2. Setting Up Google Forms as Trigger in Pabbly Connect

In this step, you will set Google Forms as the trigger application in your workflow. This means that every time a new form submission occurs, it will trigger the automation to send an email. In the trigger application section, select Google Forms and set the trigger event to ‘New Response Received’. using Pabbly Connect

  • Select Google Forms as the trigger application.
  • Choose ‘New Response Received’ as the trigger event.
  • Connect your Google Forms to Pabbly Connect using the provided webhook URL.

After setting up the trigger, follow the instructions in Pabbly Connect to link it with your Google Forms. This ensures that every new submission is captured and sent through the integration.


3. Linking Google Sheets to Capture Responses

Next, you need to link Google Sheets with Pabbly Connect to capture the responses from the Google Forms submission. Open the spreadsheet linked to your Google Form responses and ensure that the final data column is set correctly for the webhook. using Pabbly Connect

In the Google Sheets, go to Extensions > Add-ons > Get Add-ons, and search for Pabbly Connect Webhooks. Install this add-on if you haven’t done so already. After installation, refresh your Google Sheets to see the Pabbly Connect Webhooks option appear under Extensions.

  • Install the Pabbly Connect Webhooks add-on in Google Sheets.
  • Set the trigger column to the final data column where responses will be sent.
  • Test the connection to ensure data flows correctly to Pabbly Connect.

This step is crucial as it ensures that every submission from Google Forms is recorded in your Google Sheets and subsequently sent to Pabbly Connect for email automation.


4. Sending Onboarding Emails Automatically via Gmail

Now that you have set up the trigger and linked Google Sheets, it’s time to configure Gmail to send the onboarding emails. In Pabbly Connect, add a new action step and select Gmail as the action application. Choose ‘Send Email’ as the action event. using Pabbly Connect

Connect your Gmail account to Pabbly Connect by signing in and granting the necessary permissions. Fill in the required fields such as the sender name, recipient email address (mapped from the Google Forms response), subject, and email content. Make sure to personalize the email by mapping the client’s name from the form submission.

Select Gmail as the action application and ‘Send Email’ as the action event. Map the recipient’s email address to ensure dynamic responses. Personalize the email content with the client’s name and other details.

Once all details are filled, execute the workflow and test to confirm that the onboarding email is sent successfully. Check your Gmail inbox to verify receipt of the email.


5. Summary of Automating Onboarding Emails

In summary, using Pabbly Connect, you can automate the process of sending onboarding emails whenever a new Google Forms submission occurs. This integration streamlines your workflow and saves time by eliminating manual email sending.

To recap, you set Google Forms as the trigger, linked it with Google Sheets to capture responses, and configured Gmail to send personalized onboarding emails. This automation not only enhances efficiency but also improves client experience.

With Pabbly Connect, you can easily set up this workflow and enjoy the benefits of automation. Explore more features of Pabbly Connect to enhance your business processes further.

Conclusion

This guide summarizes the key points and helps you understand the essential features and benefits of using this tool.

Ensure you check out Pabbly Connect to create business automation workflows and reduce manual tasks. Pabbly Connect currently offer integration with 2,000+ applications.


By following this tutorial, you can effectively use Pabbly Connect to automate onboarding emails for new Google Forms clients, ensuring a seamless integration between Google Forms and Gmail.

Automate Laundry Pickup & Delivery via WhatsApp with Pabbly Chatflow

Learn how to automate laundry pickup and delivery using WhatsApp with Pabbly Chatflow. Follow our step-by-step guide to create your own WhatsApp chatbot. Explore how leading businesses automate customer interactions with carefully designed chat sequences that feel natural and helpful.

Watch Step By Step Video Tutorial Below


1. Accessing Pabbly Chatflow for Your WhatsApp Integration

To automate laundry pickup and delivery via WhatsApp, you first need to access Pabbly Chatflow. Start by visiting the Pabbly Chatflow website and signing in or creating a new account. If you are a new user, click on the ‘Sign Up Free’ option to create your account and receive 100 free credits each month.

Once logged in, navigate to the dashboard where you will find various Pabbly applications. Click on the ‘Access Now’ button for Pabbly Chatflow to begin setting up your WhatsApp chatbot. This platform enables seamless integrations with WhatsApp, making it the ideal choice for automating your laundry service.


2. Creating Your Chatbot Flow in Pabbly Chatflow

After accessing Pabbly Chatflow, the next step is to create a flow for your WhatsApp chatbot. Click on the ‘Flows’ option in the sidebar and then select ‘Add Flow’ to initiate the process. Name your flow something like ‘Automate Laundry Pickup and Delivery’ for easy identification.

  • Enter the flow name in the designated field.
  • Set the trigger event to ‘Keyword Rejects Match’.
  • Input your trigger keywords, such as ‘wash’, to initiate the chatbot.

By establishing these settings in Pabbly Chatflow, your chatbot will be ready to respond to customer inquiries efficiently. This flow will help automate the initial interaction with users, making it easier to manage requests for laundry services.


3. Designing Chatbot Interactions Using Pabbly Chatflow

Next, you will design the interactions that users will have with your chatbot. In Pabbly Chatflow, drag and drop the ‘Text’ action to create a welcome message for your users. This message should greet them and provide options for scheduling a pickup or checking prices.

  • Create buttons for ‘Schedule Pickup’ and ‘Check Prices’.
  • Link the ‘Schedule Pickup’ button to a question asking for the service needed.
  • Add follow-up questions for address, pickup date, and time.

With these interactions set up in Pabbly Chatflow, your chatbot will effectively guide customers through the booking process. This structured approach ensures that all necessary information is gathered seamlessly.


4. Confirming Bookings and Providing Pricing Information

Once the customer has provided their details, it’s essential to confirm their booking. In Pabbly Chatflow, create a message that summarizes the booking details, including the service, address, and preferred pickup date and time. This message should also include confirmation buttons.

Additionally, set up a list of services with their respective pricing. When a user selects a service, respond with the pricing information and ask if they want to schedule a pickup. This interaction can be managed through Pabbly Chatflow’s easy-to-use interface, allowing you to customize the responses based on user selections.


5. Testing Your Chatbot in Pabbly Chatflow

After creating your chatbot, it’s crucial to test its functionality. Use the connected WhatsApp number to send a message and observe how Pabbly Chatflow responds. Confirm that the welcome message, service inquiries, and booking confirmations are working as intended.

By testing your chatbot, you can ensure it effectively reduces manual workload and enhances customer experience. This step is vital for fine-tuning your chatbot’s interactions and ensuring it meets the needs of your laundry service.


Conclusion

By following this guide, you can successfully automate laundry pickup and delivery via WhatsApp using Pabbly Chatflow. This integration streamlines the booking process and improves customer satisfaction, making it a valuable tool for your business.

Ensure you check out Pabbly Connect to create business automation workflows and reduce manual tasks. Pabbly Connect currently offer integration with 2,000+ applications.