Auto-Save WhatsApp Photos & Videos Directly to Google Drive Using Pabbly Connect

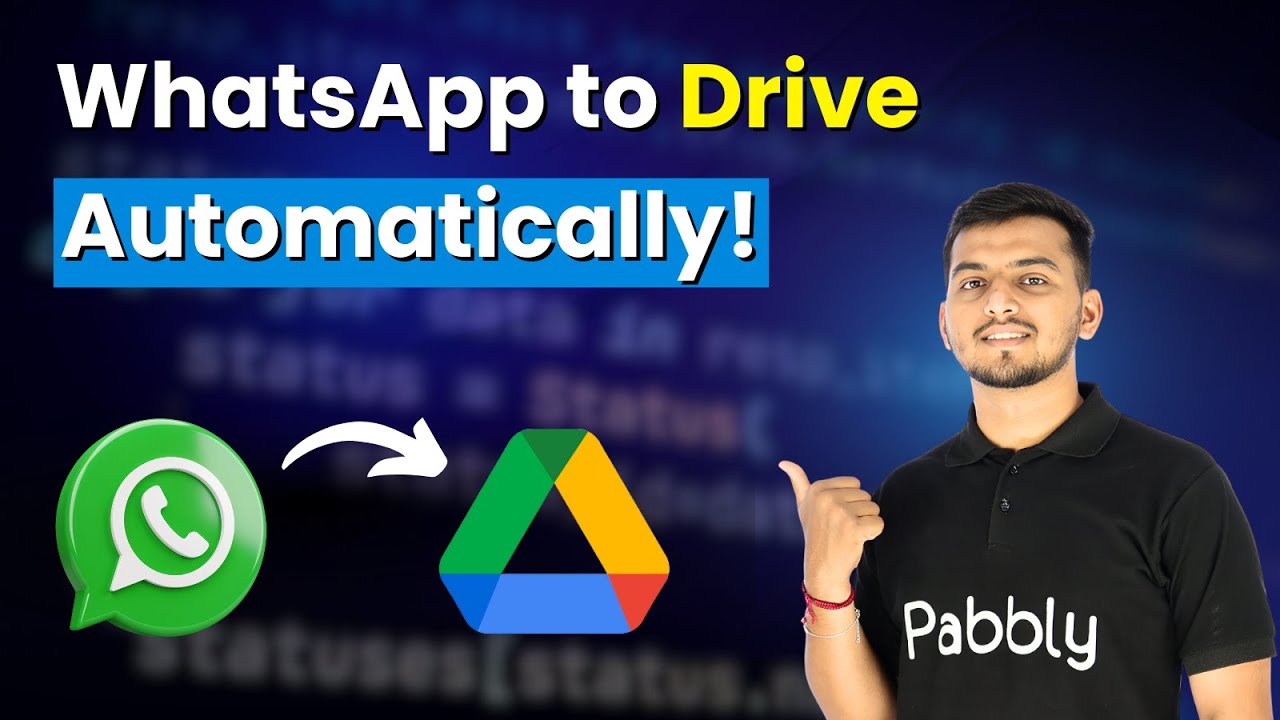
Learn how to automatically save WhatsApp photos and videos to Google Drive step-by-step using Pabbly Connect. This tutorial covers everything you need to know! Follow this definitive guide to creating powerful automated workflows with straightforward, efficiency-focused solutions that save valuable time.

Watch Step By Step Video Tutorial Below


1. Introduction to Pabbly Connect for WhatsApp and Google Drive Integration

To automate the process of saving WhatsApp photos and videos directly to Google Drive, we will use Pabbly Connect. This powerful automation tool allows seamless integration between various applications, including WhatsApp and Google Drive.

By leveraging Pabbly Connect, you can ensure that every time you receive a photo or video on WhatsApp, it is automatically uploaded to your Google Drive. This tutorial will guide you through the necessary steps to set up this integration effectively.


2. Accessing Pabbly Connect and Creating a New Workflow

To get started, navigate to Pabbly Connect by entering Pabbly.com/connect in your browser. If you are a new user, click on the ‘Sign Up Free’ button to create an account. Existing users can simply sign in.

Once logged in, click on the ‘Access Now’ button for Pabbly Connect. On the dashboard, locate the ‘Create Workflow’ button. This will allow you to initiate the process of automating the saving of WhatsApp media to Google Drive.


3. Setting Up the Trigger with WhatsApp Cloud API

In this section, we will set up WhatsApp as the trigger application in Pabbly Connect. Select the WhatsApp Cloud API from the list of available applications. For the trigger event, choose ‘Message Notification’ to ensure the workflow activates whenever a new message is received.

  • Select WhatsApp Cloud API as the trigger application.
  • Choose ‘Message Notification’ as the trigger event.
  • Copy the webhook URL provided by Pabbly Connect.

After copying the webhook URL, follow the instructions to configure your WhatsApp Cloud API settings. This will involve pasting the webhook URL into your WhatsApp API configuration, allowing Pabbly Connect to receive notifications from WhatsApp.


4. Setting Up the Action Step to Save Files to Google Drive

Next, we will configure Google Drive as the action application in Pabbly Connect. Select Google Drive from the application list and choose ‘Upload a File’ as the action event. This setup will enable the integration to save the received media files to your specified Google Drive folder.

  • Select Google Drive as the action application.
  • Choose ‘Upload a File’ as the action event.
  • Connect your Google Drive account with Pabbly Connect.

After connecting your Google Drive account, you will need to specify the folder ID where you want the files to be saved. Use the mapping feature to dynamically insert the file name and media URL based on the incoming WhatsApp message.


5. Testing the Integration and Finalizing the Workflow

With both the trigger and action steps configured, it’s time to test the integration. Send a test image or video through your WhatsApp account. Once the message is sent, Pabbly Connect should automatically upload the media file to your Google Drive.

Check your Google Drive to confirm that the file appears in the designated folder. If everything is set up correctly, you should see the media file uploaded successfully. This confirms that the automation is working as intended!


Conclusion

In this tutorial, we explored how to use Pabbly Connect to automatically save WhatsApp photos and videos directly to Google Drive. By following these steps, you can streamline your workflow and ensure your media files are organized and easily accessible.

Ensure you check out Pabbly Connect to create business automation workflows and reduce manual tasks. Pabbly Connect currently offer integration with 2,000+ applications.

With Pabbly Connect, automation becomes simple and efficient, allowing you to focus on what matters most in your business.

How to Save Instagram Leads to Airtable Using Pabbly Connect

Learn how to save Instagram leads to Airtable using Pabbly Connect with this detailed step-by-step tutorial. Automate your lead management effortlessly! This comprehensive guide reveals exactly how to connect your applications and automate repetitive tasks — accessible for professionals of all technical backgrounds.

Watch Step By Step Video Tutorial Below


1. Setting Up Pabbly Connect for Instagram Leads

To save Instagram leads to Airtable, the first step is to set up Pabbly Connect. This powerful automation platform allows you to create seamless workflows without any coding skills. Begin by visiting the Pabbly Connect website and signing up for a free account if you are a new user. Existing users can simply log in to access the workflow builder.

Once logged in, you will be presented with the workflow builder interface. This is where you will create the automation that connects Instagram to Airtable. In this interface, triggers and actions are essential components of your workflow. The trigger initiates the process, while the action is the result of that trigger.


2. Connecting Instagram Lead Ads to Pabbly Connect

The next step involves connecting Instagram Lead Ads to Pabbly Connect. Click on the ‘Add Trigger’ button and search for ‘Instagram Lead Ads’. Select it, and for the event, choose ‘New Lead Instant’. Click on the connect button to establish the connection.

  • Ensure you have a Facebook page linked to your Instagram account.
  • Select an existing connection or add a new connection as prompted.
  • Log in to your Facebook account if prompted to complete the connection.

After selecting your Facebook page, choose the lead generation form you want to use. Make sure to enable the simple response button to capture the lead details in a straightforward format. Save your settings and send a test request to ensure everything is functioning correctly.


3. Capturing Lead Data from Instagram

Now that your Instagram Lead Ads are connected to Pabbly Connect, it’s time to capture lead data. Open a new tab and navigate to the Meta for Developers site. Find the Lead Ads Debug Tool and select the same page and form you previously set up in Pabbly Connect.

Fill out the lead form with test data, including first name, last name, email, phone number, and company name. After submitting the form, return to Pabbly Connect to see if it has captured the lead data. This step is crucial as it verifies that your automation is working correctly.

Upon successful submission, Pabbly Connect will display the captured lead details. This confirms that the integration between Instagram and Pabbly Connect is functioning as intended, setting the stage for the next step: transferring this data to Airtable.


4. Transferring Data to Airtable Using Pabbly Connect

With the lead data captured, the next step is to transfer this information to Airtable. In your Pabbly Connect workflow, click on ‘Add New Action Step’ and search for ‘Airtable’. Select it and choose the event ‘Create Record’. Click connect to establish the connection. using Pabbly Connect

  • Choose to add all resources or just a specific base for your Airtable connection.
  • Select the base name and table name where the leads will be stored.
  • Map the fields from the Instagram lead data to the corresponding fields in Airtable.

After mapping the data, click on ‘Save and Send Test Request’ to send the lead data to Airtable. Once the test is successful, refresh your Airtable to see the newly added lead details. This integration allows your sales team to follow up promptly with leads captured from Instagram.


5. Finalizing Your Automation with Pabbly Connect

After successfully transferring lead data to Airtable, you have completed the essential steps to automate your lead management process using Pabbly Connect. This automation ensures that every time a new lead is generated from Instagram, the details will be automatically recorded in Airtable without any manual effort.

By using Pabbly Connect, you can sit back and relax, knowing that your lead data is being efficiently managed. This integration saves time and ensures that your sales team can focus on converting leads into customers rather than manually entering data.

Now that your automation is set up, feel free to explore additional features of Pabbly Connect to integrate more applications and enhance your business processes further. Enjoy the benefits of automation and streamline your workflow effectively!


Conclusion

In conclusion, by using Pabbly Connect, you can effortlessly save Instagram leads to Airtable. This automation not only saves time but also enhances your lead management efficiency. Start using Pabbly Connect today to automate your processes!

Ensure you check out Pabbly Connect to create business automation workflows and reduce manual tasks. Pabbly Connect currently offer integration with 2,000+ applications.

How to Send Webinar Reminders Automatically Using Gmail for Google Forms Registrations

Learn how to automate sending webinar reminders using Pabbly Connect to integrate Google Forms and Gmail seamlessly. Follow our step-by-step guide to set it up!

Watch Step By Step Video Tutorial Below


1. Accessing Pabbly Connect for Webinar Reminders

To send webinar reminders automatically using Gmail for Google Forms registrations, you first need to access Pabbly Connect. This platform allows seamless integration between Google Forms and Gmail without any coding skills required.

Start by visiting Pabbly.com and sign in to your account. If you are a new user, you can sign up for free, which provides you with 100 tasks monthly. Once logged in, navigate to the Pabbly Connect application to begin creating your workflow.


2. Creating a Workflow in Pabbly Connect

In Pabbly Connect, the next step is to create a new workflow for sending webinar reminders. Click on ‘Create Workflow’ and select the new beta workflow builder for a more flexible experience. Name your workflow appropriately, such as ‘Send Webinar Reminders Automatically Using Gmail for Google Forms Registrations’.

  • Select the appropriate folder for your workflow.
  • Click on ‘Create’ to finalize the setup of your workflow.

Once your workflow is created, you will be prompted to set the trigger application. In this case, select Google Forms, as this will be the source of your registrations.


3. Setting Up Google Forms as Trigger Application

In the trigger application setup for Pabbly Connect, select Google Forms and choose ‘New Response Received’ as the trigger event. After clicking on ‘Connect’, a webhook URL will be generated. This URL acts as a bridge between Google Forms and Pabbly Connect.

Next, open your Google Forms and ensure the last wheel required button is toggled on. Go to the responses tab and click on ‘View in Sheets’. This will open a Google Sheet connected to your form where all submissions will be recorded. Make sure to check that the fields in the sheet match those in your form.


4. Linking Google Sheets to Pabbly Connect

To link your Google Sheets with Pabbly Connect, go to the Extensions menu in your Google Sheet, then select Add-ons and click on ‘Get Add-ons’. Search for ‘Pabbly Connect Webhooks’ and install it if you haven’t already. Refresh your Google Sheets to see the new options appear under Extensions.

  • Select ‘Pabbly Connect Webhooks’ from the Extensions menu.
  • Enter the webhook URL provided by Pabbly Connect in the setup dialog.

Set the trigger column to the last column of your form responses, typically the final data column. This configuration ensures that every new submission sends the complete row data to your Pabbly Connect workflow.


5. Sending Webinar Reminders via Gmail

After setting up the Google Forms trigger in Pabbly Connect, the next step is to add an action step to delay the reminder email. Click on ‘Add New Action Step’ and select ‘Delay by Pabbly’. This allows you to set a time delay for sending the reminder email, which can be configured to send one day before the event.

Once the delay is configured, add another action step and select Gmail. Choose ‘Send Email’ as the action event. Connect your Gmail account by selecting it and granting the necessary permissions. Fill in the email details, such as the sender name, recipient email (mapped from Google Forms), subject, and email content, which should include personalized elements like the user’s first name.


Conclusion

By following these steps, you can effectively automate sending webinar reminders using Pabbly Connect to integrate Google Forms and Gmail. This process ensures timely communication with your registrants, enhancing their experience while saving you valuable time.

Ensure you check out Pabbly Connect to create business automation workflows and reduce manual tasks. Pabbly Connect currently offer integration with 2,000+ applications.

Integrate Instagram Lead Ads with Zoho CRM Using Pabbly Connect

Learn how to automatically add leads from Instagram Lead Ads to Zoho CRM using Pabbly Connect with this step-by-step tutorial. Explore efficient methods for automating routine tasks with clear, concise instructions suited for both newcomers and experienced professionals.

Watch Step By Step Video Tutorial Below


1. Accessing Pabbly Connect for Integration

To start integrating Instagram Lead Ads with Zoho CRM, you need to access Pabbly Connect. Open your browser and go to pabby.com/connect. Here, you will find options to sign in or sign up for a free account.

If you are a new user, click on ‘Sign Up Free’ to get 100 free tasks every month. Existing users can simply sign in. Once logged in, navigate to the Pabbly apps section and select Pabbly Connect to access the dashboard.


2. Creating a New Workflow in Pabbly Connect

Once you’re on the Pabbly Connect dashboard, click on the ‘Create Workflow’ button located at the top right corner. This will prompt you to select the workflow builder. Choose the ‘New Beta’ version for a modern experience.

  • Click on the ‘Create’ button to initiate a new workflow.
  • Name your workflow (e.g., ‘Add Leads from Instagram Lead Ads to Zoho CRM Automatically’).
  • Select the appropriate folder to save your workflow.

After naming your workflow, click on the ‘Create’ button. Remember, every automation in Pabbly Connect consists of triggers and actions. Let’s set up the trigger for our Instagram leads.


3. Setting Up Instagram Lead Ads Trigger

In Pabbly Connect, click on the ‘Add Trigger’ button. Select ‘Instagram Lead Ads’ as the app and choose ‘New Lead Instant’ as the event. This setup will allow Pabbly Connect to listen for new leads from your Instagram ads.

To connect your Instagram account, click on ‘Add a New Connection.’ Make sure you are logged into your Instagram and Facebook accounts in the same browser to simplify the connection process. After connecting, select your Facebook page and the lead generation form you want to use.


4. Creating a Contact in Zoho CRM

After setting up the trigger, it’s time to add an action. Choose ‘Zoho CRM’ as the application and select ‘Create Contact’ as the app event. Again, click on ‘Add a New Connection’ to link your Zoho account with Pabbly Connect.

Enter the domain of your Zoho account (e.g., zoho.com) and grant access to Pabbly Connect. Once connected, you will need to map the lead details from Instagram to the respective fields in Zoho CRM. This includes first name, last name, email, and phone number.

  • Map the lead’s first name and last name from the Instagram lead data.
  • Ensure to include the email and phone number fields.
  • Leave optional fields blank if not needed.

Once all fields are mapped, click on ‘Save and Send Request’ to complete the setup. Your leads will now automatically be added to Zoho CRM whenever a new lead is generated from Instagram.


5. Testing the Integration

To ensure everything is working correctly, generate a test lead using the Lead Ads Testing Tool by Meta. Delete any existing leads if necessary, and create a new lead with dummy data. Submit the form and check your Zoho CRM account.

Refresh your Zoho CRM to see if the new contact has been added successfully. You should see the details of the test lead you created, confirming that the integration via Pabbly Connect is functioning perfectly.

With this setup, every new lead generated through your Instagram Lead Ads will be automatically added to your Zoho CRM, streamlining your lead management process.


Conclusion

In this tutorial, we explored how to integrate Instagram Lead Ads with Zoho CRM using Pabbly Connect. By following the steps outlined, you can automate lead management efficiently, ensuring that no lead is missed.

Ensure you check out Pabbly Connect to create business automation workflows and reduce manual tasks. Pabbly Connect currently offer integration with 2,000+ applications.

Utilizing Pabbly Connect not only simplifies the process but also enhances your productivity by automating repetitive tasks. Start integrating today to maximize your business potential!

How to Add Housing.com Leads to Google Sheets Using Pabbly Connect

Learn how to integrate Housing.com leads into Google Sheets using Pabbly Connect with this detailed step-by-step tutorial. Build sophisticated automated workflows in less time than you think. This guide translates complex integrations into straightforward steps for immediate implementation.

Watch Step By Step Video Tutorial Below


1. Accessing Pabbly Connect for Integration

To add Housing.com leads to Google Sheets, the first step involves accessing Pabbly Connect. If you are a new user, you can find the landing page URL in the description below. Click on ‘Sign up for free’ in the top right corner to create your account, which gives you access to hundreds of tasks every month.

If you are an existing user, simply log in to your account and navigate to the workflow builder. This is where you will set up your integration. The workflow builder is essential as it contains the trigger and action setup that will automate the lead capture process.


2. Setting Up the Trigger for Housing.com Leads

In this section, we will set up the trigger using Pabbly Connect to capture new leads from Housing.com. Click on the ‘Add Trigger’ button and search for Housing.com. Select it and choose ‘New Leads’ as the trigger event. Then click on ‘Connect’.

  • Select ‘New Leads’ as the trigger event.
  • Click on ‘Connect’ to generate a webhook URL.
  • Copy the webhook URL provided by Pabbly Connect.

This webhook URL needs to be configured in your Housing.com account, which requires contacting your account manager. Once they add the URL, leads will automatically be captured in your Pabbly Connect workflow.


3. Waiting for Lead Response from Housing.com

After configuring the webhook URL, you will need to wait for a lead response. Once a new lead is generated on Housing.com, you will see the lead details appear in Pabbly Connect. This includes essential information such as the phone number, last name, first name, email address, and area.

Once the lead details are received, you can proceed to add these details into Google Sheets. This process is crucial as it ensures that your sales team can follow up quickly and efficiently with new leads.


4. Adding Lead Details to Google Sheets

Next, you will set up the action to add lead details into Google Sheets using Pabbly Connect. Click on the ‘Add New Action Step’ button and search for Google Sheets. Select it and choose ‘Add New Row’ as the action event.

  • Select ‘Add New Row’ as the action event.
  • Click on ‘Connect’ to establish a connection with Google Sheets.
  • Choose to add a new connection or select an existing one.

If you are creating a new connection, sign in with your Google account and grant the necessary permissions. Once connected, select the spreadsheet and sheet where you want to add the lead details. This ensures that all new leads are properly recorded in your Google Sheets.


5. Mapping Lead Details and Testing the Integration

After selecting the spreadsheet, you will need to map the lead details from Housing.com to Google Sheets using Pabbly Connect. This involves inserting the data from the previous step into the corresponding fields in Google Sheets. Mapping is essential as it allows for dynamic data entry.

Once all necessary fields, such as first name, last name, email, and phone number, are mapped, click on ‘Save and Send Test Request’ to test the integration. You should receive a positive response indicating that the data has been successfully added to Google Sheets.

Finally, check your Google Sheets to confirm that the lead details have been added correctly. This automated workflow ensures that every new lead from Housing.com is captured and logged without manual intervention, making your process efficient and effective.


Conclusion

In conclusion, using Pabbly Connect to add Housing.com leads to Google Sheets streamlines your lead management process. This integration allows for real-time updates and efficient follow-ups, enhancing your sales team’s productivity.

Ensure you check out Pabbly Connect to create business automation workflows and reduce manual tasks. Pabbly Connect currently offer integration with 2,000+ applications.

How to Add Justdial Leads to Pipedrive Using Pabbly Connect

Learn how to integrate Justdial leads into Pipedrive using Pabbly Connect with this detailed, step-by-step tutorial. Explore efficient methods for automating routine tasks with clear, concise instructions suited for both newcomers and experienced professionals.

Watch Step By Step Video Tutorial Below


1. Accessing Pabbly Connect for Integration

To start integrating Justdial leads into Pipedrive, the first step is to access Pabbly Connect. Open your browser and type in ‘Pabbly.com/connect’ to reach the Pabbly Connect landing page.

Once there, you will see options to either sign in or sign up for free. If you are a new user, click on ‘Sign up for free’ to gain access to many tasks each month. Existing users should click on ‘Sign in’ to access their dashboard. After signing in, select the option to access Pabbly Connect to begin creating your workflow.


2. Creating a Workflow in Pabbly Connect

After accessing your Pabbly Connect dashboard, the next step is to create a new workflow. Click on the ‘Create Workflow’ button. You will be prompted to choose between the new workflow builder or the classic one. For this tutorial, select the new workflow builder for a more modern interface.

  • Select a folder for your workflow.
  • Enter a name for your workflow, such as ‘Justdial to Pipedrive’.

After entering these details, click on the ‘Create’ button. This will open the workflow window where you can set up the trigger and action for your automation. The workflow will consist of a trigger that initiates the process and actions that define what happens next.


3. Setting Up the Trigger with Justdial

To set up the trigger in Pabbly Connect, click on the ‘Add Trigger’ button. In the application search bar, type ‘Justdial’ and select it. For the event, choose ‘New Leads’ and then click ‘Connect’. This will generate a webhook URL that you need to copy.

To complete the integration, you must configure this webhook URL in your Justdial account. Since Justdial’s user interface does not allow you to add the webhook directly, contact your Justdial account manager and provide them with the copied URL. Once they add it, the lead details will start appearing in your Pabbly Connect workflow as webhook responses.


4. Adding the Action to Create a Person in Pipedrive

With the trigger set, the next step is to define the action. Click on ‘Add New Action Step’ and search for ‘Pipedrive’. Select it and choose the event ‘Create Person’. Click ‘Connect’. If you have not created a connection before, you will need to provide your Pipedrive API token.

To find your API token, log into your Pipedrive account, go to your profile picture, navigate to ‘Personal Preferences’, and then to ‘API’. Copy the token and paste it into Pabbly Connect. After saving, you will have successfully established a connection between Justdial and Pipedrive through Pabbly Connect.


5. Mapping Lead Details into Pipedrive

Now that you have established a connection, it’s time to map the lead details from Justdial into Pipedrive. In the action step, you will see fields for entering lead details such as name, email, and phone number. Instead of entering these manually, utilize the mapping feature of Pabbly Connect.

  • Map the Name field from the Justdial response.
  • Map the Email and Phone Number fields accordingly.

After mapping the necessary fields, click on ‘Save and Send Test Request’. You should receive a confirmation that a new person has been created in Pipedrive. Check your Pipedrive account to verify that the new lead has been added successfully, indicating that your Pabbly Connect workflow is functioning correctly.


Conclusion

This tutorial outlined how to seamlessly integrate Justdial leads into Pipedrive using Pabbly Connect. By following these steps, you can automate your lead management process effectively, ensuring that new leads are captured in real-time without manual intervention. Try this automation for your business and enhance your efficiency today!

Ensure you check out Pabbly Connect to create business automation workflows and reduce manual tasks. Pabbly Connect currently offer integration with 2,000+ applications.

Connect Zoho Forms with HubSpot CRM Easily Using Pabbly Connect

Learn how to connect Zoho Forms with HubSpot CRM easily using Pabbly Connect. Follow this detailed tutorial for seamless integration. Learn to create powerful connections between your critical applications without requiring specialized programming knowledge or extensive technical background.

Watch Step By Step Video Tutorial Below


1. Accessing Pabbly Connect for Integration

To connect Zoho Forms with HubSpot CRM easily, you first need to access Pabbly Connect. Start by visiting Pabbly.com/connect in your browser. This will take you to the Pabbly Connect homepage where you can either sign up for a free account or log in if you are an existing user.

After logging in, you will see the Pabbly apps window. Click on the ‘Access Now’ button under Pabbly Connect to reach the dashboard. This is where you will create the automation workflow to link your Zoho Forms with HubSpot CRM.


2. Creating a Workflow in Pabbly Connect

In the Pabbly Connect dashboard, click on the ‘Create Workflow’ button located at the top right corner. You will be prompted to choose between the new beta and classic workflow builder. For this tutorial, select the beta version for a modern experience. using Pabbly Connect

  • Name your workflow as ‘Connect Zoho Forms with HubSpot CRM Easily’.
  • Select a folder to save your workflow; for instance, choose ‘Automations’.

After setting up the workflow name and folder, click on the ‘Create’ button. This establishes the framework for your automation, which will be triggered by new form submissions from Zoho Forms.


3. Setting Up the Trigger in Pabbly Connect

To initiate the automation, click on the ‘Add Trigger’ button. Choose ‘Zoho Forms’ as the application and select ‘New Form Submitted’ as the event. Click on the ‘Connect’ button to generate a webhook URL, which will facilitate the connection between Zoho Forms and Pabbly Connect.

Copy the webhook URL provided. Navigate to your Zoho Forms account and select the form you wish to connect. Click on the ‘Edit’ option, then go to the ‘Integrations’ section. Here, select ‘Webhooks’ and paste the copied URL into the existing webhook URL field.


4. Configuring the Webhook in Zoho Forms

In the Zoho Forms integration settings, ensure the content type is set to ‘application/json’ and the authorization type is set to ‘general’. Add the necessary payload parameters that match your form fields, such as first name, last name, email, phone number, and organization name.

  • Remove any previous webhook URL if present.
  • Click ‘Save’ to finalize the webhook configuration.

After saving, return to Pabbly Connect, where it will be waiting for a webhook response. To test this, submit a dummy response through your Zoho form and check if the data is received in Pabbly Connect.


5. Adding Action Step to Create a Contact in HubSpot CRM

Once the webhook response is received, you will add an action step to create a new contact in HubSpot CRM. Select ‘HubSpot CRM’ as the application and choose ‘Create a Contact’ as the action event. Click on ‘Connect’ to link your HubSpot CRM account with Pabbly Connect.

If you are not logged in, you will need to enter your HubSpot credentials. Once connected, map the fields from the webhook response to the corresponding fields in HubSpot, such as company name, email address, and phone number. Finally, click on ‘Save and Send Request’ to create the contact.

After completing these steps, verify in your HubSpot CRM account that the new contact has been created successfully. This confirms that the integration between Zoho Forms and HubSpot CRM using Pabbly Connect is working flawlessly.


Conclusion

Integrating Zoho Forms with HubSpot CRM using Pabbly Connect allows for seamless data transfer and automation of contact creation. By following the outlined steps, you can easily set up this integration and enhance your workflow efficiency.

Ensure you check out Pabbly Connect to create business automation workflows and reduce manual tasks. Pabbly Connect currently offer integration with 2,000+ applications.

How to Send Personalized Follow-Up Emails Automatically for Facebook Lead Ads Leads Using Pabbly Connect

Learn how to automate personalized follow-up emails for Facebook Lead Ads leads using Pabbly Connect. Step-by-step tutorial with detailed instructions. Develop expertise in application integration and learn how to design streamlined automation workflows using proven, simplified approaches.

Watch Step By Step Video Tutorial Below


1. Accessing Pabbly Connect for Automation

To send personalized follow-up emails automatically for Facebook Lead Ads leads, the first step is to access Pabbly Connect. This platform allows you to create automated workflows without any coding skills.

Begin by visiting the Pabbly website and signing into your account. If you do not have an account, you can easily sign up for free. Once logged in, navigate to the Pabbly Connect dashboard, where you can create your automation workflows.


2. Creating a New Workflow in Pabbly Connect

After accessing Pabbly Connect, the next step is to create a new workflow. Click on the ‘Create Workflow’ button, and you will be prompted to name your workflow. For this automation, name it ‘Send Personalized Follow-Up Emails Automatically for Facebook Lead Ads Leads’.

  • Select the folder where you want to save your workflow.
  • Choose the trigger application as Facebook Lead Ads.
  • Set the trigger event to ‘New Lead Instant’.

Once you have set up these details, click ‘Create’ to finalize your workflow. This sets the stage for the automation that will send follow-up emails whenever a new lead is captured from Facebook Lead Ads.


3. Connecting Facebook Lead Ads to Pabbly Connect

The next step in the automation process involves connecting Facebook Lead Ads to Pabbly Connect. You will need to authorize Pabbly Connect to access your Facebook account.

Click on the ‘Connect’ button and follow the prompts to log into your Facebook account. Once connected, select the page associated with your lead ads and the specific lead generation form you want to use. After selecting these, click on ‘Save and Send Test Request’ to ensure the connection is working correctly.


4. Setting Up Gmail for Email Notifications

To send confirmation emails, you will now add Gmail as an action application in Pabbly Connect. Click on ‘Add New Action Step’ and select Gmail. Choose the action event as ‘Send Email’.

  • Authorize your Gmail account with Pabbly Connect.
  • Map the recipient’s email address from the lead details captured earlier.
  • Craft a personalized email subject and body using lead information.

After entering all required details, click on ‘Save and Send Test Request’ to verify that the email is sent successfully. This ensures that every new lead receives a confirmation email promptly.


5. Automating Follow-Up Emails with Delays

After sending the confirmation email, you can automate follow-up emails using Pabbly Connect. To do this, add a new action step for delay by Pabbly. Set the delay to 2 days to schedule the follow-up email.

Next, add another action step for Gmail to send the follow-up email. Again, map the necessary fields such as the recipient’s email and personalize the message. After configuring these details, save and test the action to ensure it operates as intended.


Conclusion

Using Pabbly Connect, you can efficiently send personalized follow-up emails automatically for Facebook Lead Ads leads. This automation not only saves time but also enhances communication with your leads, ensuring they receive timely responses.

Ensure you check out Pabbly Connect to create business automation workflows and reduce manual tasks. Pabbly Connect currently offer integration with 2,000+ applications.

Creating an AI Assistant for Fitness Class Scheduling Using Pabbly Chatflow

Learn how to create an AI assistant for fitness class scheduling using Pabbly Chatflow. Follow this detailed tutorial for seamless integration with WhatsApp and Google.

Watch Step By Step Video Tutorial Below


1. Accessing Pabbly Chatflow for Fitness Class Scheduling

To create an AI assistant for fitness class scheduling, you need to access Pabbly Chatflow. Start by visiting the Pabbly website and navigating to the Chatflow section.

Once there, you can either sign in if you already have an account or click on ‘Sign Up Free’ to create a new account. New users receive 100 free credits to explore the features of Pabbly Chatflow.


2. Creating Your AI Assistant in Pabbly Chatflow

After signing in, you will be directed to the Pabbly Chatflow dashboard. Here, you can create a new AI assistant specifically for fitness class inquiries.

  • Click on ‘Add AI Assistant’ to start the creation process.
  • Name your assistant, for example, ‘Fitness Class Assistant’.
  • Select the instruction type as ‘AI Agent’.

This setup allows your assistant to respond to user queries effectively. After configuring the basic settings, you can proceed to customize the responses based on the fitness class schedule.


3. Integrating WhatsApp with Pabbly Chatflow

To enable your AI assistant to communicate via WhatsApp, you must connect your WhatsApp account to Pabbly Chatflow. Click on the ‘Add WhatsApp Number’ button in the dashboard.

  • Choose the preferred method to connect your WhatsApp account.
  • Follow the prompts to authenticate your WhatsApp number.
  • Ensure your WhatsApp account is linked to receive messages from your assistant.

This integration allows your assistant to reply instantly to inquiries received on WhatsApp, enhancing customer engagement for fitness class scheduling.


4. Configuring AI Assistant Settings in Pabbly Chatflow

In this step, you will configure the settings of your AI assistant in Pabbly Chatflow. This includes setting up response templates and customizing the interaction style.

Navigate to the AI settings section where you can define the response parameters. Specify the type of responses you want your assistant to provide, such as class timings, locations, and booking procedures.

Set the temperature for response creativity (0.4 for focused answers). Select the AI model, such as GPT-3, for generating responses. Add fallback messages for cases where the AI fails to respond correctly.

By customizing these settings, your assistant will provide accurate and relevant information to users regarding fitness classes.


5. Testing Your AI Assistant for Effectiveness

After setting up your AI assistant in Pabbly Chatflow, it’s crucial to test its responses. Send a few sample queries through WhatsApp to ensure the assistant replies accurately.

For example, ask about class schedules, locations, and booking procedures. Monitor how effectively the assistant handles these inquiries and make adjustments as necessary.

Check if the assistant provides correct timings for classes. Ensure location details are accurate and up-to-date. Confirm that the booking process is clearly communicated.

Testing ensures that your AI assistant is fully functional and ready to assist clients with their fitness class scheduling needs.


Conclusion

In this tutorial, we explored how to create an AI assistant for fitness class scheduling using Pabbly Chatflow. By integrating WhatsApp and customizing the assistant’s responses, you can provide instant support to your clients, enhancing their experience with your fitness classes.

Ensure you check out Pabbly Connect to create business automation workflows and reduce manual tasks. Pabbly Connect currently offer integration with 2,000+ applications.

AI Assistant for Hotel Booking Assistance Using Pabbly Chatflow

Learn how to set up an AI assistant for hotel booking using Pabbly Chatflow. Follow our detailed tutorial to integrate various applications seamlessly. Create intelligent chat experiences that delight users while collecting valuable information and moving prospects through your sales process.

Watch Step By Step Video Tutorial Below


1. Accessing Pabbly Chatflow for AI Assistance

To create an AI assistant for hotel booking, the first step is to access Pabbly Chatflow. If you are a new user, visit the landing page of Pabbly Chatflow and sign up for free. You’ll receive 100 credits every month to explore the features of Pabbly Chatflow.

Once logged in, navigate to the left sidebar and click on the ‘AI Assistant’ option. From there, select ‘Add AI Assistant’ to begin setting up your assistant. You can name your assistant, which will be the first step in creating a personalized experience for your customers.


2. Creating the AI Assistant in Pabbly Chatflow

After naming your assistant, you need to choose the instruction type. You can select pre-built examples like ‘Customer Support Agent’ or ‘Sales Agent’ from Pabbly Chatflow. This selection helps in defining how your assistant will interact with users.

  • Choose ‘Sales Agent’ for hotel booking assistance.
  • Adjust the temperature setting to 0.2 for focused responses.
  • Select OpenAI as the AI to use and choose GPT-4 Mini model.

Once the AI instructions are set, you will need to enter your OpenAI API key to connect your assistant. This key is essential for the AI to function correctly and provide real-time assistance to your users.


3. Configuring AI Assistant Settings in Pabbly Chatflow

In this section, you will configure additional settings for your AI assistant within Pabbly Chatflow. You can add header and footer messages, set stop keywords, and specify fallback messages for when the AI fails to respond. These settings enhance the user experience.

  • Add a stop keyword like ‘human’ to transfer users to manual review.
  • Set a fallback message with your support email for emergencies.
  • Specify 2 fallback attempts for the AI assistant.

By configuring these settings, you ensure that the AI assistant operates smoothly and can handle various user queries effectively. This setup is crucial for providing seamless hotel booking assistance.


4. Uploading Knowledge Source in Pabbly Chatflow

For your AI assistant to provide accurate information, you must upload a knowledge source. This document should contain FAQs and details specific to your hotel. Use a Google Doc to compile this information and download it in .txt format for optimal use with Pabbly Chatflow.

Once you have your knowledge source ready, go back to the AI interface in Pabbly Chatflow and upload the file. After uploading, you will receive a vector ID confirming the successful upload. This knowledge base will allow the AI to respond accurately to user inquiries.


5. Testing the AI Assistant for Hotel Booking

After setting up your AI assistant in Pabbly Chatflow, it’s time to test its functionality. You can do this by initiating a chat via WhatsApp, where your AI assistant will greet users and respond to their queries in real time.

For example, when you type ‘Hey, show me available rooms for two adults this weekend,’ the AI will respond with room categories and prices from your uploaded knowledge base. This testing phase ensures that all configurations are correctly implemented and that your assistant is ready to assist users effectively.


Conclusion

In this tutorial, we demonstrated how to set up an AI assistant for hotel booking using Pabbly Chatflow. By following the steps outlined, you can create a highly functional assistant that enhances customer interaction and booking efficiency.

Ensure you check out Pabbly Connect to create business automation workflows and reduce manual tasks. Pabbly Connect currently offer integration with 2,000+ applications.