Automatically DM a Link When Someone Comments on Instagram

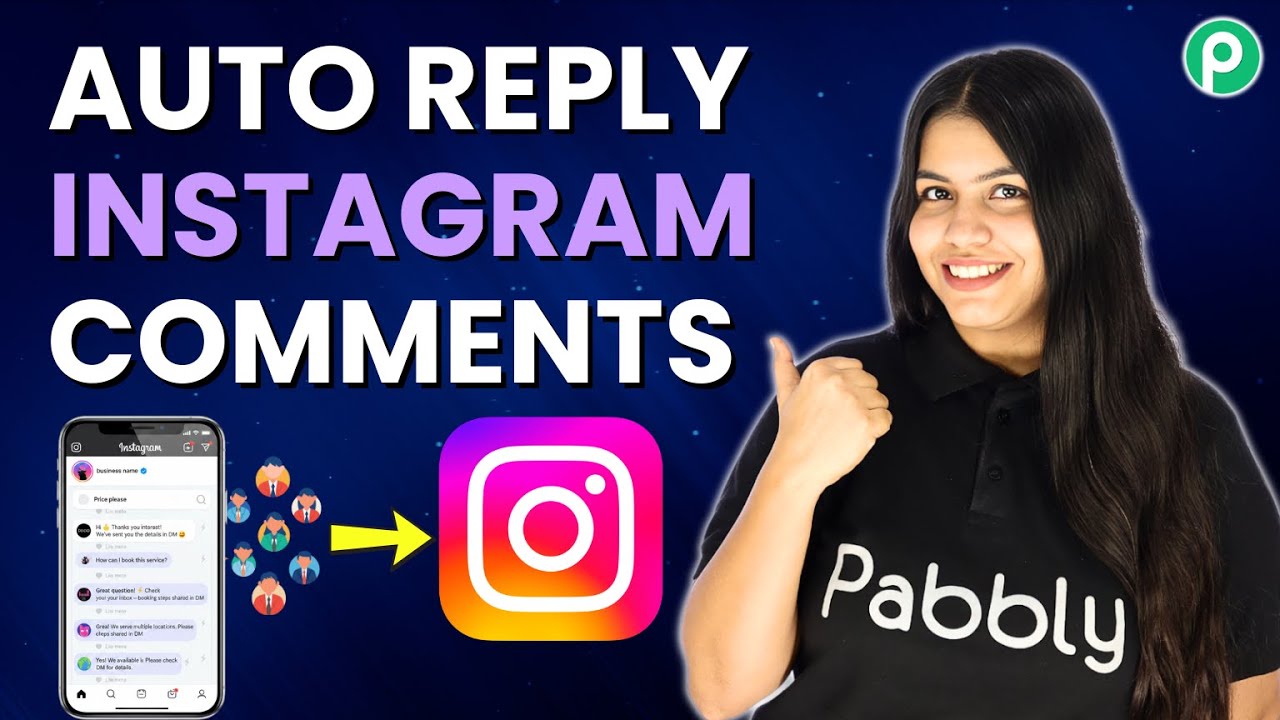
Learn how to automatically send a DM with a product link when someone comments on your Instagram post using Pabbly Connect. Follow this detailed tutorial!

Watch Step By Step Video Tutorial Below


1. Access Pabbly Connect to Automate Instagram DMs

To start automating your Instagram DMs, you need to access Pabbly Connect. Open a new tab and go to pav.com/connect. If you are new, sign up for free to explore 100 tasks per month.

Once logged in, create a new workflow by clicking on the ‘Create Workflow’ button. This is where you will set up the automation that sends a DM when someone comments on your post.


2. Setting Up the Trigger in Pabbly Connect

In this step, you will set up the trigger in Pabbly Connect. Choose Instagram as the trigger application and select the event as ‘New Comment.’ This will activate the workflow whenever a new comment is posted on your Instagram.

  • Select ‘Instagram’ as the trigger application.
  • Choose ‘New Comment’ as the event.
  • Click on the ‘Connect’ button to establish a connection.

After connecting, follow the prompts to enter your Instagram token and account identifier, which you will obtain by creating an app with Instagram. This is crucial for the integration to work properly.


3. Filtering Comments for Relevant Responses

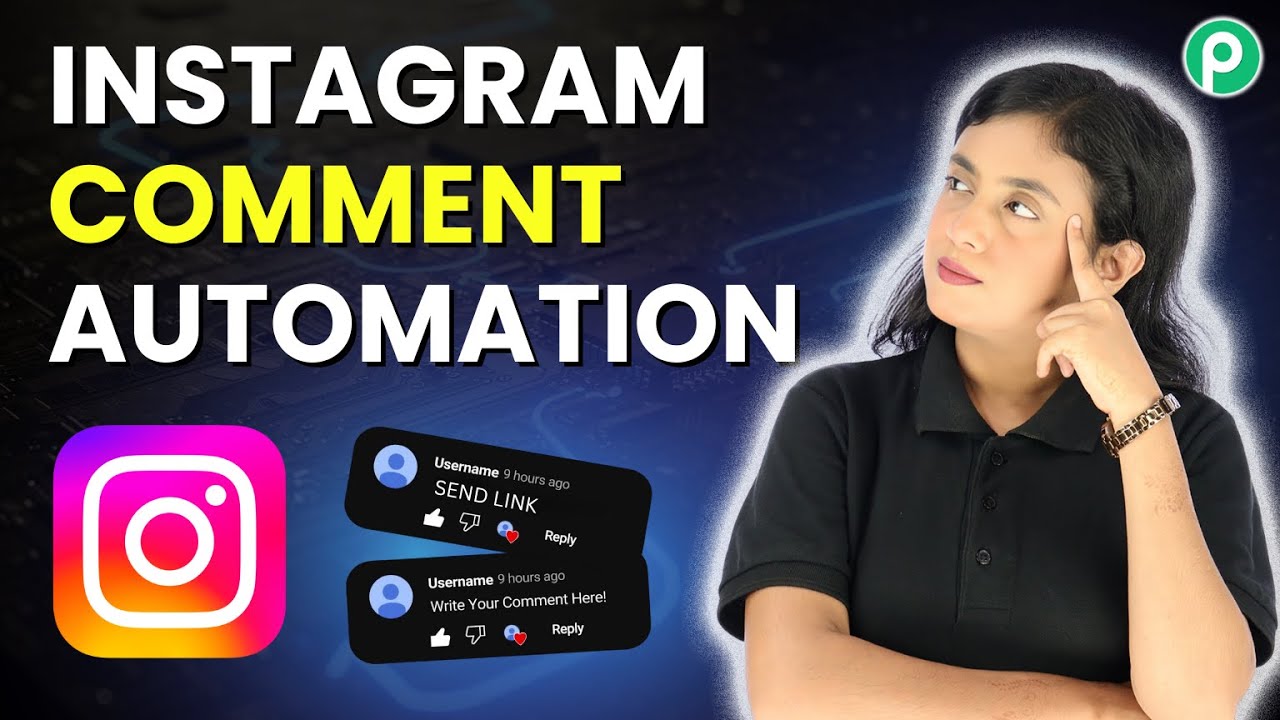
Now that you have set up the trigger, it’s important to filter comments to ensure you only respond to comments that specifically request a link. In Pabbly Connect, add a filter step after the Instagram trigger.

  • Select ‘Filter by Pabbly’ as the action application.
  • Set the condition to check if the comment contains the word ‘link.’
  • Click ‘Save and Send Test Request’ to verify the filter works.

This filtering step ensures that only comments containing the word ‘link’ will trigger the next action, which is sending the DM.


4. Sending a DM with the Product Link

After filtering the comments, the next step is to send a DM to the user who commented. Choose Instagram again as the action application, and select the event ‘Send Private Reply to the Commenter.’ This is where Pabbly Connect sends the DM with the product link.

In this step, you will need to map the comment ID from the previous step to ensure the DM is sent to the correct commenter. You will also enter the message text and the product link you wish to share.

Map the comment ID from the trigger response. Write a message like ‘Hello, thanks for your comment. Here’s the link you asked for.’ Include the product link in the message.

Once you have filled in all the required fields, click ‘Send Test Request’ to ensure that the DM is sent successfully. This step completes the automation process.


5. Conclusion: Automate Your Instagram DMs with Pabbly Connect

In conclusion, using Pabbly Connect to automate your Instagram DMs is a straightforward process. By setting up a trigger for new comments, filtering for specific keywords, and sending a DM with the relevant product link, you can save time and ensure all commenters receive the information they need.

Ensure you check out Pabbly Connect to create business automation workflows and reduce manual tasks. Pabbly Connect currently offer integration with 2,000+ applications.

Check out Pabbly Connect – Automate your business workflows effortlessly! Sign Up Free – Start your journey with ease! 10,000+ Video Tutorials – Learn step by step! Join Pabbly Facebook Group – Connect with 21,000+ like minded people!

This automation not only enhances your engagement on Instagram but also streamlines your communication process. Try implementing this workflow today using Pabbly Connect to maximize your efficiency!

How to Connect Facebook Lead Ads to Your CRM Automatically

Learn how to automate the integration of Facebook Lead Ads with your CRM using Pabbly Connect. Follow this detailed tutorial for seamless automation. Explore efficient methods for automating routine tasks with clear, concise instructions suited for both newcomers and experienced professionals.

Watch Step By Step Video Tutorial Below


1. Accessing Pabbly Connect for Automation

To connect Facebook Lead Ads to your CRM automatically, the first step is accessing Pabbly Connect. If you are a new user, visit pabbl.com/connect in your browser and sign up for free. This free account allows you to utilize 100 tasks monthly, giving you the chance to explore its features.

For existing users, simply log in to your Pabbly Connect dashboard. Once logged in, you will find the workflow builder, where all automation setups occur. This is where you will create your integration between Facebook Lead Ads and your CRM.


2. Setting Up the Trigger in Pabbly Connect

The next step is to set up the trigger for your automation in Pabbly Connect. Click on the ‘Add Trigger’ button and search for ‘Facebook Lead Ads’. Select it, and for the event, choose ‘New Lead Instant’. Click on the connect button to proceed.

  • If you have an existing connection, select it.
  • If not, click on ‘Add a New Connection’ and log into your Facebook account.

After logging in, select the page linked to your lead ads, in this case, ‘Digital Dynamics’, and choose the specific lead form you want to automate. Make sure to keep the response format as simple and click on ‘Save and Send Test Request’ to capture the webhook response.


3. Filling the Lead Form for Testing

To test the automation, fill in the lead form using the Lead Ads Testing Tool. Open a new tab and search for Meta for Developers. Navigate to the ‘Lead Ads Debug Tool’ and select the same page and form you used in Pabbly Connect.

Fill out the lead form with details like name, email, and phone number, and then submit it. Once submitted, switch back to your Pabbly Connect workflow, where you will see the response captured. This confirms that the integration is set up correctly and ready to work automatically.


4. Adding Action Step to Connect with CRM

Now that the trigger is set, the next step is to add an action in Pabbly Connect. Click on ‘Add New Action Step’ and search for your CRM, such as ‘Zoho CRM’. Select it and choose the event ‘Create Contact’ before clicking on the connect button.

  • If you have an existing connection, select it.
  • If not, add a new connection by entering your Zoho CRM domain.

Once connected, map the lead details from the Facebook form to the corresponding fields in Zoho CRM. After mapping, click on ‘Save and Send Test Request’ to ensure the contact is created successfully in your CRM.


5. Conclusion and Next Steps with Pabbly Connect

In conclusion, using Pabbly Connect allows seamless integration of Facebook Lead Ads with your CRM. By following the steps outlined, you can automate the process of capturing leads and managing them efficiently. This automation saves time and enhances your marketing efforts.

Ensure you check out Pabbly Connect to create business automation workflows and reduce manual tasks. Pabbly Connect currently offer integration with 2,000+ applications.

Explore additional CRM options like HubSpot or Salesforce by adding more action steps in Pabbly Connect. If you have any questions or need further assistance, feel free to reach out in the comments below. Start automating your lead management process today!


AI Automation for Daily Social Media Post Creation

Learn how to automate daily social media post creation with Pabbly Connect, integrating Facebook, AI tools, and more for seamless content management. Transform complex automation concepts into accessible, actionable steps that eliminate unnecessary manual work while maximizing existing application capabilities.

Watch Step By Step Video Tutorial Below


1. Accessing Pabbly Connect for Automation

To begin the process of automating daily social media post creation using Pabbly Connect, you first need to access the platform. Open your web browser and navigate to pabby.com/connect. This will take you to the Pabbly Connect homepage where you can either sign in or sign up for free.

If you are a new user, click on the ‘Sign Up Free’ button to create your account and receive 100 free tasks every month. Existing users can simply sign in. Once logged in, you will see the Pabbly apps window. Click on ‘Access Now’ under Pabbly Connect to proceed to the dashboard and start creating your workflow.


2. Creating a Workflow in Pabbly Connect

After accessing Pabbly Connect, the next step is to create a new workflow. Click on the ‘Create Workflow’ button. You will see options for a new beta version and classic version. For this tutorial, select the beta version for a modern and flexible experience.

  • Click on the ‘Select’ button to proceed.
  • Name your workflow, such as ‘AI Automation for Daily Social Media Post Creation.’
  • Choose a folder for your workflow, like ‘Automations.’

Once you have filled in the necessary details, click the ‘Create’ button to finalize your workflow setup. You will now see the workflow window where you can configure triggers and actions for your automation.


3. Setting Up the Trigger for Daily Posts

To automate your daily social media posts, you need to set up a trigger in Pabbly Connect. For this automation, we will use the ‘Scheduled’ trigger feature. This allows you to run your workflow at specific intervals.

Select ‘Schedule Workflow’ as the app event and click on ‘Connect.’ You will then be prompted to choose how often you want to run your workflow. For daily posts, select ‘Every Day’ and set the time to 10:00 AM. After confirming your settings, click on ‘Save.’ You should receive a successful response indicating your automation is scheduled correctly.


4. Integrating AI Tools with Pabbly Connect

Next, you will integrate an AI tool to generate content for your posts. In this tutorial, we will use the Gemini AI tool, but you can also connect other AI platforms like OpenAI. In the action step, select Gemini as your application and choose ‘Generate Content’ as the app event. using Pabbly Connect

  • Click on ‘Connect’ to build a new connection.
  • You will need to enter your API key, which you can obtain from your Google AI Studio account.
  • Once you have the API key, click ‘Save’ to connect.

After successfully connecting, you will need to provide a prompt in the text column that instructs the AI on what to generate. For example, you can specify the type of fitness post you want. After setting the parameters, select the model and click ‘Save and Send Request’ to generate the content.


5. Posting Generated Content to Facebook

The final step in automating your daily social media posts is to share the generated content on your Facebook page. In this step, select ‘Facebook Pages’ as your action application and choose ‘Create Page Post’ as the app event. using Pabbly Connect

Click on ‘Connect’ to build a new connection with your Facebook account. After granting the necessary permissions, select your Facebook page, such as ‘The Yoga Nest.’ In the message section, instead of manually entering the generated content, you will map the data from the previous action step to ensure dynamic content is posted every day.

After mapping the content, click ‘Save and Send Request.’ You should receive a successful response, confirming that your post has been created on Facebook. You can verify this by refreshing your Facebook page to see the newly posted content.


Conclusion

In this tutorial, we explored how to automate daily social media post creation using Pabbly Connect. By integrating Facebook, AI tools, and scheduling capabilities, you can streamline your content management effectively. With this setup, your posts will be generated and published automatically, saving you time and effort in managing your social media presence.

Ensure you check out Pabbly Connect to create business automation workflows and reduce manual tasks. Pabbly Connect currently offer integration with 2,000+ applications.

This AI Bot Converts Casual Chats into Paying Clients

Learn how to use Pabbly Chatflow to turn casual WhatsApp chats into confirmed bookings through an AI assistant. Follow this step-by-step tutorial! Master conversational marketing with practical techniques for creating chatbots that engage visitors at exactly the right moment in their journey.

Watch Step By Step Video Tutorial Below


1. Accessing Pabbly Chatflow for Your AI Assistant

To convert casual chats into paying clients, you need to access Pabbly Chatflow. Start by navigating to the Pabbly Chatflow website. Click on the ‘Sign Up Free’ button if you are a new user, which allows you to create your account and receive 100 free credits monthly.

If you already have an account, click on ‘Sign In’. Once logged in, you’ll be directed to the Pabbly Chatflow dashboard where you can begin setting up your AI assistant. This platform is essential for automating interactions with clients via WhatsApp.


2. Creating Your AI Assistant in Pabbly Chatflow

After accessing Pabbly Chatflow, you can create your AI assistant. Click on ‘AI Assistant’ and then select the ‘Add Assistant’ button. Name your assistant, for example, ‘Glowcraft Studio AI Assistant’ to differentiate it from others.

  • Click on ‘Add AI Assistant’.
  • Fill in the assistant name and details.
  • Proceed to set up AI instructions and knowledge sources.

Make sure to configure the AI instructions properly. This step is crucial as it defines how the AI assistant will respond to user inquiries, ensuring that it effectively converts casual chats into confirmed bookings.


3. Setting Up AI Instructions in Pabbly Chatflow

In this step, you need to configure the AI instructions for your assistant in Pabbly Chatflow. Select the AI agent and fill in the instruction box with the role and constraints of your assistant. This ensures the AI can effectively guide users through the booking process.

  • Set the AI temperature to 0.5 for balanced responses.
  • Choose the OpenAI model for your assistant.
  • Input your OpenAI API key to connect the AI.

By properly configuring these settings, your assistant will be well-equipped to handle inquiries, provide service details, and guide clients through their booking experience.


4. Uploading Knowledge Source in Pabbly Chatflow

The next step involves uploading a knowledge source to your assistant in Pabbly Chatflow. This file should contain essential information about your services, FAQs, and background. You can create this document in Google Docs and download it as a PDF or TXT file.

Ensure the file size is less than 90 MB. Upload the file directly into the Pabbly Chatflow interface. Confirm successful upload and processing.

This knowledge source will empower your AI assistant to provide accurate and helpful responses, enhancing the chances of converting inquiries into bookings.


5. Finalizing Your AI Assistant in Pabbly Chatflow

After configuring the knowledge source, you can finalize your AI assistant in Pabbly Chatflow. Adjust the assistant interface settings, including display name and initial messages. You can also customize the theme and styling options to match your brand.

Once you have completed all settings, turn on your assistant and click ‘Save Assistant’. This activates your AI assistant, making it ready to interact with users on WhatsApp. Testing your assistant is crucial to ensure it operates correctly and responds to user inputs as intended.


Conclusion

Using Pabbly Chatflow to create an AI assistant can significantly enhance your ability to convert casual chats into paying clients. By following the step-by-step process outlined above, you can effectively automate client interactions and increase bookings.

Ensure you check out Pabbly Connect to create business automation workflows and reduce manual tasks. Pabbly Connect currently offer integration with 2,000+ applications.

Save Leads to Airtable & Auto-Send Discounts — Here’s How

Learn how to save leads to Airtable and auto-send discounts using Pabbly Connect in this detailed tutorial. Follow the steps for seamless integration! Follow this definitive guide to creating powerful automated workflows with straightforward, efficiency-focused solutions that save valuable time.

Watch Step By Step Video Tutorial Below


1. Accessing Pabbly Connect for Automation

To begin automating your tasks, you first need to access Pabbly Connect. Open a new tab and navigate to the Pabbly Connect website. Here, you can easily create an account if you’re a new user or log in if you already have an account.

Once logged in, you’ll be directed to the Pabbly Connect dashboard. This is where you can manage all your automation workflows. Click on the ‘Create Workflow’ button to start setting up your integration. Select the ‘New Beta Builder’ for a modern and flexible experience.


2. Setting Up the Trigger in Pabbly Connect

In this step, you will set up the trigger that initiates the automation process. For our integration, the trigger will be a webhook provided by Pabbly Connect. Search for ‘Webhook by Pabbly’ in the trigger options and select it.

  • Choose ‘Catch Webhook’ as the event.
  • Copy the generated webhook URL.
  • Paste this URL into your form’s code to connect it.

After saving the changes, refresh your form and submit a test lead. This will allow Pabbly Connect to capture the lead data, which includes the name, email address, and phone number.


3. Saving Leads to Airtable with Pabbly Connect

Once the trigger captures the lead data, the next step is to save this information into Airtable. To do this, you will add an action step in Pabbly Connect. Search for ‘Airtable’ in the action app options.

  • Select ‘Create Record’ as the action event.
  • Connect your Airtable account by adding a new connection.
  • Choose the base you created for saving leads.

Map the fields from the webhook data to the respective fields in Airtable. This ensures that every time a new lead is captured, their details are automatically saved in your Airtable base.


4. Auto-Sending Discounts via Gmail

After successfully saving the lead data into Airtable, you can set up the next action to auto-send discount coupons via Gmail. In Pabbly Connect, add another action step and search for ‘Gmail’.

Select ‘Send Email’ as the action event. Connect your Gmail account. Fill in the required fields like recipient email, subject, and email content.

While filling out the email fields, map the recipient’s email address from the previous webhook data. This ensures that each lead receives a personalized discount email automatically.


5. Conclusion: Automating Your Business with Pabbly Connect

In this tutorial, we’ve demonstrated how to use Pabbly Connect to automate the process of saving leads to Airtable and sending discount emails via Gmail. This integration not only saves time but also enhances your business efficiency.

Ensure you check out Pabbly Connect to create business automation workflows and reduce manual tasks. Pabbly Connect currently offer integration with 2,000+ applications.

Check out Pabbly Connect – Automate your business workflows effortlessly! Sign Up Free – Start your journey with ease! 10,000+ Video Tutorials – Learn step by step! Join Pabbly Facebook Group – Connect with 21,000+ like minded people!

By following the steps outlined, you can easily set up this automation for your own business. With Pabbly Connect, you can create countless other automations to streamline your workflows and focus on growing your business.


AI Turns Google Business Updates into Facebook Posts (Using Gemini)

Learn how to automate Facebook posts from Google Business updates using Pabbly Connect in this step-by-step tutorial. Perfect for enhancing your social media presence! Revolutionize your productivity approach with just a few strategic clicks. Uncover professional methods for connecting applications and creating workflows that reclaim hours of your week.

Watch Step By Step Video Tutorial Below


1. Accessing Pabbly Connect for Integration

To start the integration process using Pabbly Connect, first visit the Pabbly website by typing Pabbly.com in your browser. Once there, sign in to your existing account or create a new one to get started with 100 free tasks monthly.

After logging in, navigate to the Pabbly apps page and select Pabbly Connect. This is where you will manage your workflows and integrations effectively. If you’re a new user, take advantage of the free trial to understand how Pabbly Connect can benefit your business.


2. Creating a New Workflow in Pabbly Connect

In Pabbly Connect, create a new workflow by clicking on the ‘Create Workflow’ button. Choose the new beta workflow builder for a modern experience. Name your workflow something descriptive, like ‘AI Turns Google Business Updates into Facebook Posts Using Gemini’.

  • Select the appropriate folder for your workflow.
  • Define the trigger application as Google Business Profile.
  • Set the trigger event to ‘New Review’ to initiate the workflow.

Once you have set these parameters, click on ‘Create’ to finalize your workflow setup in Pabbly Connect. This establishes the foundation for automating Facebook posts from Google reviews.


3. Connecting Google Business Profile to Pabbly Connect

After creating the workflow, the next step is to connect your Google Business Profile. In the trigger settings, select Google Business Profile and choose the event ‘New Review’. Click on ‘Connect’ to initiate the connection process.

You will need to sign in with your Google account associated with your business. Grant the necessary permissions for Pabbly Connect to access your Google Business data. Once connected, you can test the integration by submitting a new review on your Google Business Profile.


4. Generating Facebook Post Content Using Google Gemini

With your Google Business Profile connected, the next action in Pabbly Connect involves using Google Gemini to generate engaging content for your Facebook post. Add a new action step and select Google Gemini as the application, choosing the ‘Generate Content’ event.

  • Input your API key to connect Google Gemini with Pabbly Connect.
  • Map the review content and rating to ensure dynamic data is used in your posts.
  • Create a prompt for Gemini to generate a high-engagement Facebook post.

Once you have set up these details, click on ‘Save and Send Test Request’ to generate the content. This content will be used in the next step to post on Facebook.


5. Posting the Generated Content to Facebook

After generating the post content, the final step is to publish it to your Facebook page using Pabbly Connect. Add another action step and select Facebook Pages as your application, with the event set to ‘Create Page Post’.

Connect your Facebook account by following the prompts. Map the generated content from Google Gemini into the message field of your Facebook post. Finally, click on ‘Save and Send Test Request’ to publish the post on your Facebook page.


Conclusion

This tutorial demonstrates how to automate the process of creating Facebook posts from Google Business updates using Pabbly Connect and Google Gemini. By following these steps, you can enhance your social media engagement and streamline your workflow effectively.

Ensure you check out Pabbly Connect to create business automation workflows and reduce manual tasks. Pabbly Connect currently offer integration with 2,000+ applications.

How to Automatically Reply to Instagram Comments

Learn how to automatically reply to Instagram comments using Pabbly Connect. Follow this detailed tutorial to streamline your Instagram engagement. This comprehensive guide reveals exactly how to connect your applications and automate repetitive tasks — accessible for professionals of all technical backgrounds.

Watch Step By Step Video Tutorial Below


1. Accessing Pabbly Connect for Instagram Comment Automation

To automatically reply to Instagram comments, you first need to access Pabbly Connect. If you’re a new user, visit pabbl.com/connect and sign up for free. This gives you access to 100 free tasks per month, allowing you to experiment with automating your Instagram engagement.

Existing users can simply log in to their Pabbly Connect dashboard. Once logged in, navigate to the workflow builder where you can create a new automation. This is the starting point for setting up your Instagram comment replies.


2. Creating Your Workflow in Pabbly Connect

In the workflow builder of Pabbly Connect, you will establish the trigger and action for your automation. Click on the ‘Add Trigger’ button and search for ‘Instagram’. Select the ‘Instagram Developers’ option and choose the event as ‘New Comment’. This will initiate the process whenever someone comments on your post.

  • Select ‘New Comment’ as your trigger event.
  • Connect your Instagram account by using your token and account ID.
  • Test the connection to ensure it works correctly.

After connecting, click on ‘Save and Send Test Request’. This will prompt you to post a comment on your Instagram to capture the webhook response. Once you post a comment, Pabbly Connect will capture both the comment and the user’s name, which will be used for generating replies.


3. Using Google Gemini to Generate Replies

Next, you will set up the action to generate replies using Google Gemini. Click on ‘Add New Action Step’ and search for ‘Gemini’. Select the Google AI Studio option and choose the event as ‘Generate Content’. This allows you to create automated replies based on the comments received.

  • Connect to Gemini by entering your API key.
  • Map the required fields, including the comment text.
  • Test the action to ensure the reply is generated correctly.

Once configured, Pabbly Connect will dynamically generate replies based on the input from Instagram comments. This step is critical for automating your response process effectively.


4. Posting Replies Back to Instagram

Now that you have generated replies, the final step is to post these responses back to Instagram. Click on ‘Add New Action Step’ again and search for ‘Instagram Developers’. This time, select the event as ‘Reply to a Comment’. This will allow Pabbly Connect to send the generated reply back to the original comment.

Map the comment ID and the generated reply text from Gemini. Test the action to confirm that the reply is posted successfully. Once tested, save your workflow to finalize the setup.

After saving, Pabbly Connect will automatically reply to any new comments on your Instagram posts, allowing you to focus on content creation while the automation handles engagement.


5. Conclusion: Automate Your Instagram Engagement with Pabbly Connect

In summary, using Pabbly Connect to automate replies to Instagram comments is a straightforward process that involves setting up triggers and actions through the platform. By integrating Instagram with Google Gemini, you can ensure timely responses to your audience.

Ensure you check out Pabbly Connect to create business automation workflows and reduce manual tasks. Pabbly Connect currently offer integration with 2,000+ applications.

This automation not only saves time but also enhances your engagement strategy on Instagram. Start using Pabbly Connect today to streamline your social media interactions and improve your online presence.

Game-Changing Automations You Can Build in Minutes

Learn how to automate tasks efficiently using Pabbly Connect with Google, Slack, Gmail, and more in this detailed tutorial. Build sophisticated automated workflows in less time than you think. This guide translates complex integrations into straightforward steps for immediate implementation.

Watch Step By Step Video Tutorial Below


1. Accessing Pabbly Connect for Automation

To start automating tasks, access Pabbly Connect by visiting the Pabbly Connect website. Once there, you can create an account or log in if you are an existing user. This platform allows you to connect multiple applications seamlessly.

After signing in, you will be directed to the dashboard where you can manage your automation workflows. Click on the ‘Create Workflow’ button to initiate your first automation setup. This is where the real magic of Pabbly Connect begins, enabling you to automate tasks without any coding.


2. Setting Up the Trigger Using Instagram

In this step, we will set up a trigger in Pabbly Connect using Instagram. Start by selecting Instagram as your app and choose the event ‘New Lead Instant’. This event will activate whenever a new lead is generated from your Instagram lead ads.

  • Select your Instagram account and connect it to Pabbly Connect.
  • Authorize Pabbly Connect to access your Instagram account.
  • Test the connection to ensure it works properly.

Once the trigger is set, you can proceed to create a test lead on Instagram to verify that the trigger captures the lead information correctly. This integration showcases how Pabbly Connect makes it easy to automate lead capturing from social media.


3. Creating a Contact in HubSpot

Next, we will set up an action step to create a contact in HubSpot using Pabbly Connect. After the trigger captures a new lead, you need to select HubSpot as your action app and choose the event ‘Create a Contact’.

To connect HubSpot, you will need to provide your HubSpot account details. Once connected, map the fields from the Instagram lead form to the corresponding fields in HubSpot. This includes:

  • First Name
  • Last Name
  • Email Address
  • Phone Number
  • Company Name

After mapping the fields, save and test the action step to ensure that a new contact is created in HubSpot whenever a lead is captured via Instagram. This step demonstrates how Pabbly Connect simplifies the process of managing leads across different platforms.


4. Sending an Email via Gmail

The next action is to send a personalized email to the new lead using Gmail through Pabbly Connect. Select Gmail as your action app and choose the event ‘Send Email’. Connect your Gmail account to Pabbly Connect to enable this functionality.

When setting up the email, you will need to fill in several fields, including:

Sender Name Sender Email Address Recipient Email Address (mapped from the trigger) Email Subject Email Content

Be sure to personalize the email content by mapping the lead’s name and other details. After completing the setup, save and send a test request to confirm that the email is sent successfully. This step illustrates how Pabbly Connect streamlines communication with leads.


5. Notifying the Team on Slack

Finally, we will set up a notification to alert your team via Slack using Pabbly Connect. Select Slack as your action app and choose the event ‘Send Channel Message’. You will need to connect your Slack account to Pabbly Connect.

In this step, enter the channel ID where you want to send the notification and compose the message. Include details such as:

Lead Name Company Name Lead Capture Time

After finalizing the message, save and send a test request to ensure that your team receives the notification in Slack. This final step highlights how Pabbly Connect enhances team collaboration by providing real-time updates on leads.


Conclusion

In this tutorial, we explored how to automate lead management using Pabbly Connect with applications like Instagram, HubSpot, Gmail, and Slack. By following these steps, you can save time and streamline your workflow, allowing you to focus on more important tasks. Start using Pabbly Connect today to enhance your productivity and efficiency in managing leads.

Ensure you check out Pabbly Connect to create business automation workflows and reduce manual tasks. Pabbly Connect currently offer integration with 2,000+ applications.

Send WhatsApp Business Template Message for New Typeform Entries

Learn how to automate WhatsApp Business template messages for new Typeform entries using Pabbly Connect. Follow this detailed tutorial for seamless integration. This comprehensive guide reveals exactly how to connect your applications and automate repetitive tasks — accessible for professionals of all technical backgrounds.

Watch Step By Step Video Tutorial Below


1. Accessing Pabbly Connect for Automation

To begin automating WhatsApp messages for new Typeform entries, you need to access Pabbly Connect. Simply open a new tab and navigate to Pabbly.com/connect. Here, you will see options to either sign in or sign up for free.

If you are a new user, select the ‘Sign Up Free’ option to create an account. This will grant you 100 free tasks every month to practice using Pabbly Connect. Existing users can click on ‘Sign In’ to access their accounts. Once logged in, you will be directed to the Pabbly apps page where you can select Pabbly Connect.


2. Creating a Workflow in Pabbly Connect

After accessing Pabbly Connect, you will be taken to the dashboard. To create a new workflow, click on the ‘Create Workflow’ button. You will have the option to create from scratch or use AI assistance. For this tutorial, select the ‘Create from Scratch’ option.

  • Click on ‘Create Workflow’ and choose ‘Create from Scratch’.
  • Choose the beta workflow builder for a modern experience.
  • Name your workflow, e.g., ‘Send WhatsApp Business Template Message for New Typeform Entries’.

After naming your workflow, click the ‘Create’ button. You will now see an option to add a trigger, which is essential for initiating your workflow. Select Typeform as your trigger app and choose the ‘New Entry’ event.


3. Connecting Typeform to Pabbly Connect

In this step, you will connect Typeform to Pabbly Connect. Click the ‘Connect’ button and choose to add a new connection. Log into your Typeform account and authorize Pabbly Connect to access your data.

Once connected, select the specific form you want to monitor for new entries. Ensure that your response format is set to ‘Simple’ before clicking the ‘Save and Send Test Request’ button. This will prepare Pabbly Connect to receive data from Typeform.

  • Allow access to Typeform when prompted.
  • Select the form that collects your leads.
  • Test the connection to ensure data is being fetched.

Now that Typeform is connected, you’ll see a response from your form entry in Pabbly Connect. This indicates that the integration is successful.


4. Sending WhatsApp Messages via Pabbly Connect

With Typeform successfully integrated, the next step is to send a WhatsApp message. Click on ‘Add New Action Step’ and search for WhatsApp Cloud API as your action app. Choose the ‘Send Template Message’ event and click ‘Connect’.

To establish this connection, you will need your access token, phone number ID, and WhatsApp business account ID. These can be found in your WhatsApp API setup page. Once you have entered these details into Pabbly Connect, click ‘Save’.

Retrieve your access token from the WhatsApp API setup. Enter the phone number ID and WhatsApp business account ID. Map the receiver’s phone number from the Typeform entry response.

After mapping the phone number, you will also need to set up the template ID and language code. Map the necessary variables such as name, email, and city to personalize your message. Finally, click ‘Save and Send Test Request’ to check if the message is sent successfully.


5. Testing the Integration

To ensure your automation works, fill out the Typeform with a new entry. Once submitted, check your WhatsApp to see if the message is received. This step confirms that Pabbly Connect is functioning correctly and that your WhatsApp template message is being sent as intended.

After testing, you should receive a message that confirms receipt of the Typeform submission, including all relevant details. This shows that the integration between Typeform and WhatsApp through Pabbly Connect is successful and operational.

Submit a new entry through Typeform. Check WhatsApp for the confirmation message. Verify that all mapped fields display correctly.

Now you have successfully set up an automated workflow using Pabbly Connect to send WhatsApp messages for new Typeform entries. This automation will help you respond to leads promptly and efficiently.


Conclusion

In this tutorial, we explored how to use Pabbly Connect to automate WhatsApp messages for new Typeform entries. By following these steps, you can enhance your lead management process and ensure timely communication with potential customers. Start using Pabbly Connect today to streamline your workflows and improve your business efficiency.

Ensure you check out Pabbly Connect to create business automation workflows and reduce manual tasks. Pabbly Connect currently offer integration with 2,000+ applications.

AI Video Automation for Social Media Growth

Learn how to automate video creation and sharing on social media with Pabbly Connect, Google Sheets, and more in this step-by-step tutorial. Build sophisticated automated workflows in less time than you think. This guide translates complex integrations into straightforward steps for immediate implementation.

Watch Step By Step Video Tutorial Below


1. Accessing Pabbly Connect for Video Automation

To begin using Pabbly Connect for your video automation needs, you first need to access the platform. Start by navigating to the Pabbly website at pabby.com. If you are an existing user, click on the ‘Sign In’ button located at the top right corner. For new users, you can sign up for free and receive 100 tasks monthly to explore the platform’s capabilities.

Once signed in, you will be directed to the Pabbly Apps page. From there, click on the ‘Pabbly Connect’ option to access the dashboard. Here, you can create workflows that will automate your video creation and sharing process. If you want to organize your workflows better, you can create folders by clicking on the plus icon.


2. Creating a Workflow in Pabbly Connect

In this section, we will create a new workflow in Pabbly Connect. Click on the ‘Create Workflow’ button and select the new beta workflow builder. Name your workflow, for example, ‘AI Video Automation for Social Media Growth’, and choose the folder where you want to save it.

  • Click on ‘Create’ to finalize your workflow setup.
  • You will see a box to enter your trigger application.
  • Select Google Sheets as your trigger application.

After setting up the trigger, you will configure it to activate whenever a new topic is added to your Google Sheets. This will initiate the automation process, allowing you to create and share videos seamlessly.


3. Integrating Google Sheets with Pabbly Connect

To connect Google Sheets with Pabbly Connect, select the event ‘New or Updated Spreadsheet Row’. Click on the ‘Connect’ button to establish the connection. A webhook URL will be provided, which acts as a bridge between Google Sheets and Pabbly Connect.

Open your Google Sheets and navigate to the Extensions menu. Click on ‘Add-ons’ and then ‘Get add-ons’. Search for ‘Pabbly Connect Webhooks’ and install it. After installation, refresh your Google Sheet, go back to Extensions, and select ‘Pabbly Connect Webhooks’ followed by ‘Initial Setup’. Here, paste the webhook URL and specify the trigger column, which should be the final data column where you will enter your topics.


4. Automating Video Generation with Pabbly Connect

Once your Google Sheets is integrated with Pabbly Connect, the next step is to set up video generation. Add a new action step and select ‘Filter by Pabbly’. In the action event, choose ‘Filter Values’ and connect it. Set the label to ‘Generate’ to ensure videos are created only when this condition is met.

  • Click on ‘Add New Action Step’ and select the AI video generation tool.
  • Enter your API token to connect to the video generation service.
  • Map the data from the Google Sheets response to the required fields in the video generation tool.

After setting up the video generation, you will need to add a delay action to allow the video to process. This ensures that the workflow waits for the video to be created before proceeding to the next steps.


5. Posting the Generated Video on Facebook

After successfully generating the video, the final step is to share it on Facebook using Pabbly Connect. Add a new action step and search for Facebook Pages. Select the action event ‘Create Page Video Post’ and connect your Facebook account.

Choose the Facebook page where you want to post the video and map the video URL from the previous action step. Additionally, you can add a descriptive caption for the video. Once everything is set up, click on ‘Save and Send Test Request’ to post the video on your Facebook page.


Conclusion

This tutorial demonstrated how to automate video creation and sharing on social media using Pabbly Connect, Google Sheets, and Facebook. By following these steps, you can streamline your content promotion process and focus more on creating engaging content for your audience.

Ensure you check out Pabbly Connect to create business automation workflows and reduce manual tasks. Pabbly Connect currently offer integration with 2,000+ applications.