How to Send Emails to Webinar Registrants

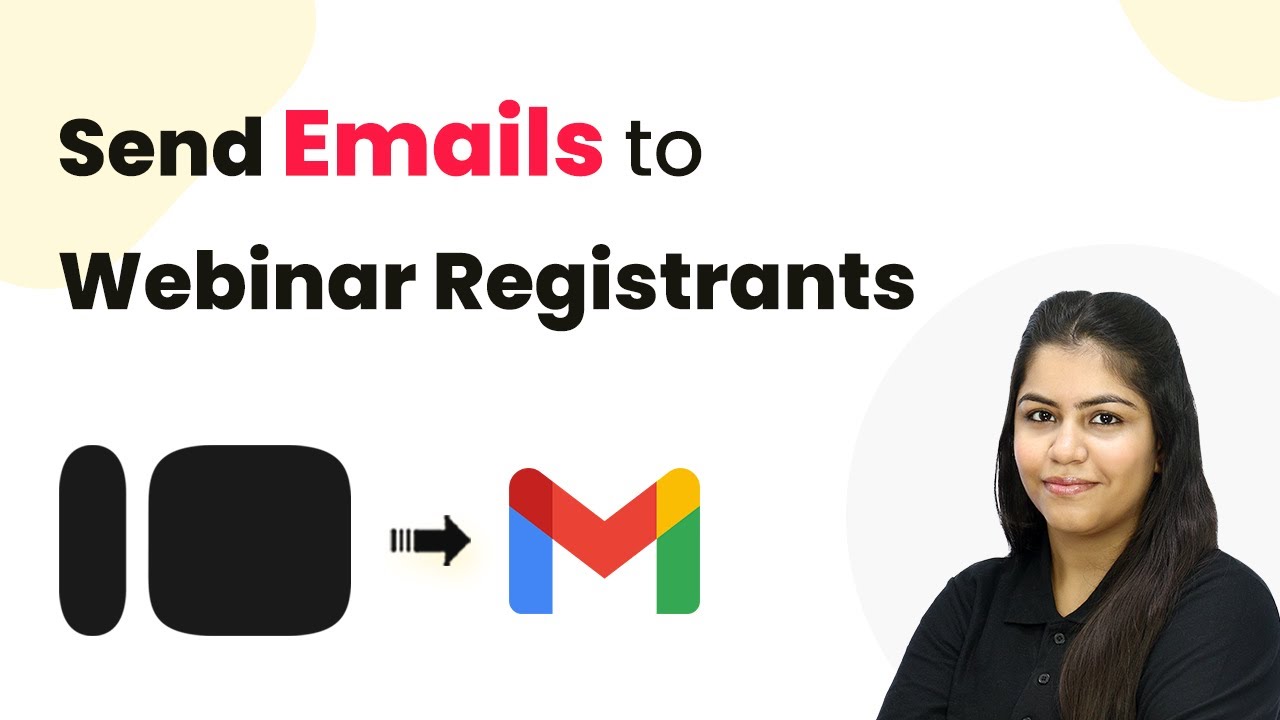
Learn how to automate sending emails to webinar registrants using Pabbly Connect with Mailchimp, Zoom, Gmail, and Typeform in this detailed tutorial. Master proven automation processes with practical implementation examples and strategic recommendations you can apply immediately in your workflow.

Watch Step By Step Video Tutorial Below


1. Accessing Pabbly Connect for Your Webinar Automation

To send emails to webinar registrants, you must first access Pabbly Connect. Start by visiting pabbl.com/connect in your browser. If you’re new to Pabbly Connect, click on the ‘Sign Up for Free’ button in the top right corner. This will allow you to explore the platform with 100 free tasks each month, enabling you to send up to 100 emails for free.

Once signed up, log into your account and navigate to the workflow builder. This interface is crucial as it allows you to set up triggers and actions for your automation. The trigger initiates the process, while the action is the result. In this case, the trigger will be a new registration in Typeform, which will trigger an email to be sent via Gmail.


2. Setting Up the Trigger in Pabbly Connect

To create your automation, click on the ‘Add Trigger’ button in Pabbly Connect. Search for Typeform and select it as your trigger application. Choose the event as ‘New Entry’ and click on ‘Connect’. If you have an existing connection, select it; otherwise, click on ‘Add a New Connection’ to connect to Typeform.

  • Log into your Typeform account and grant necessary permissions.
  • Select the specific webinar registration form you wish to use.
  • Set the response format to ‘Advanced’ and save the test request.

After setting up the trigger, you need to perform a test submission in Typeform to capture the webhook response. Fill out the registration form with new details, and upon submission, Pabbly Connect will display the captured response, confirming that your trigger is successfully set up.


3. Sending Emails to Registrants via Gmail

Next, you need to set up the action step to send emails through Gmail. Click on ‘Add New Action Step’ in Pabbly Connect and search for Gmail. Select the action event as ‘Send Email’ and click on ‘Connect’. Just like before, if a connection already exists, choose it; otherwise, create a new connection by signing in with your Google account.

  • Choose the Gmail account you want to use for sending emails.
  • Provide the sender’s name and email address.
  • Map the recipient’s email address dynamically from the Typeform response.

After setting the necessary fields like the subject and content of the email, you can use HTML for advanced formatting. Ensure to map the registrant’s name in the email content for personalization. Finally, click on ‘Save and Send Test Request’ to verify that the email is sent successfully.


4. Testing and Verifying Your Automation

To ensure everything is functioning correctly, check your Gmail inbox after sending the test email through Pabbly Connect. You should see the email confirming the registration for the webinar with the personalized details included. This step is crucial to validate that your automation works seamlessly.

If the email appears correctly, your automation is successfully set up. This means that every time someone registers for your webinar via Typeform, they will receive an email confirmation automatically. You can now sit back and relax, knowing that the process is automated and efficient.


5. Conclusion

In this tutorial, we explored how to send emails to webinar registrants using Pabbly Connect. By integrating Typeform and Gmail, you can automate the email confirmation process, enhancing your webinar’s professionalism. This setup allows you to focus more on your content while Pabbly Connect handles the communication seamlessly.

Ensure you check out Pabbly Connect to create business automation workflows and reduce manual tasks. Pabbly Connect currently offer integration with 2,000+ applications.

Try this automation for your webinars today and enjoy the benefits of streamlined communication with your registrants!

Send Bulk Promotional Emails to Your Customers

Learn how to send bulk promotional emails to your customers using Pabbly Connect, integrating Google Sheets and Gmail for seamless automation. Discover how to seamlessly connect your essential tools through accessible instructions that make powerful automation available to professionals at every skill level.

Watch Step By Step Video Tutorial Below


1. Accessing Pabbly Connect for Email Automation

To send bulk promotional emails, the first step is to access Pabbly Connect. Start by navigating to the Pabbly Connect website by entering ‘Pabbly.com/connect’ in your browser.

Once there, you’ll see options to sign in or sign up. If you’re new to Pabbly, click on ‘Sign Up Free’ to get started with 100 free tasks each month. Existing users can simply sign in to access their dashboard.


2. Creating a New Workflow in Pabbly Connect

After signing in, you will see the Pabbly Apps window. Click on ‘Access Now’ under Pabbly Connect to go to the dashboard. Here, you can initiate a new workflow by selecting the ‘Create Workflow’ option. using Pabbly Connect

  • Choose the Beta version for a modern interface.
  • Name your workflow, for example, ‘Send Bulk Promotional Emails to Your Customers’.
  • Select a folder for organization, such as ‘Automations’.

Click on the ‘Create’ button to finalize your workflow setup. You now have a framework where you can set triggers and actions.


3. Setting Up the Trigger Using Google Sheets

In this step, we will set the trigger for our workflow. Since customer details are stored in Google Sheets, select Google Sheets as your trigger application.

Choose the event as ‘New or Updated Spreadsheet Row’. Click on ‘Connect’ to establish a connection. You will receive a webhook URL, which you will use to link Google Sheets with Pabbly Connect.

  • Copy the webhook URL provided by Pabbly Connect.
  • Open Google Sheets and install the Pabbly Connect Webhooks add-on.
  • Set up the webhook URL in the add-on settings and define the trigger column.

After setting this up, test the connection by sending a test record from Google Sheets to ensure everything is working correctly.


4. Adding an Action Step to Send Emails via Gmail

Now, we will set up an action step to send promotional emails through Gmail. Select Gmail as your action application and choose ‘Send Email’ as the action event. using Pabbly Connect

Click ‘Connect’ and either select an existing connection or create a new one by signing in with your Google account. Once connected, fill in the required fields including sender name, email address, and subject line for the email.

Map the recipient’s email address from the trigger data. Set a consistent email subject, such as ‘Special Offer Just for You’. Insert the email body content and personalize it using mapped data.

Once all fields are completed, click on ‘Save and Send Test Request’ to send a test email and confirm the setup is correct.


5. Sending Bulk Promotional Emails to Customers

To send bulk promotional emails, return to your Google Sheets and use the Pabbly Connect Webhooks add-on to send all data at once. This feature allows you to send personalized emails to all customers listed in your spreadsheet. using Pabbly Connect

After selecting ‘Send All Data’, every customer will receive their personalized promotional email via Gmail. This automation ensures that any new customer details added to the Google Sheets will also trigger an email automatically.

With this setup, you can efficiently manage your promotional campaigns and maintain customer engagement without manual effort.


Conclusion

In this tutorial, we demonstrated how to use Pabbly Connect to send bulk promotional emails to your customers by integrating Google Sheets and Gmail. This automation simplifies the process of reaching out to your customers effectively.

Ensure you check out Pabbly Connect to create business automation workflows and reduce manual tasks. Pabbly Connect currently offer integration with 2,000+ applications.

By following these steps, you can easily set up your own email campaigns and enhance your marketing efforts. Try using Pabbly Connect today to streamline your email marketing process!

How to Generate Blog Ideas Using Gemini

Learn how to automate blog idea generation with Pabbly Connect and Google AI. Follow this detailed tutorial to streamline your content creation process. Explore efficient methods for automating routine tasks with clear, concise instructions suited for both newcomers and experienced professionals.

Watch Step By Step Video Tutorial Below


1. Accessing Pabbly Connect for Blog Idea Generation

To generate blog ideas using Pabbly Connect, you must first access the platform. If you are a new user, open your browser and navigate to pabbl.com/connect. Here, you can sign up for free and explore the features of Pabbly Connect. You will receive 100 free tasks each month, allowing you to generate up to 100 blog ideas for free.

Once you are signed up, log in to your Pabbly Connect account. You will be directed to the workflow builder, which is essential for setting up your automation. This tool allows you to create a workflow that automatically generates blog ideas daily, saving you time and effort.


2. Setting Up the Trigger in Pabbly Connect

The next step in using Pabbly Connect is to set up a trigger. Click on the ‘Add Trigger’ button in the workflow builder. For the trigger application, select ‘Schedule by Pabbly’ and choose the event as ‘Schedule Workflow’. This setup will allow you to run your workflow on a daily basis.

  • Select the frequency as daily.
  • Set the time for the workflow to run, for example, 1:00 PM.

After configuring these settings, click on ‘Save’. Your workflow is now set to run every day at the specified time, which is crucial for generating timely blog ideas.


3. Generating Blog Ideas Using Gemini

To generate content, you will need to add a new action step in Pabbly Connect. Click on ‘Add New Action Step’ and search for ‘Gemini’, selecting the Google AI studio. Choose the event as ‘Generate Content’ and click on ‘Connect’.

If you have previously connected Gemini to Pabbly Connect, you can select the existing connection. Otherwise, click on ‘Add a New Connection’. You will need an API key from Google AI Studio, which can be obtained by navigating to the ‘Get API Key’ section in your Google AI Studio dashboard.

  • Create and name your API key.
  • Copy the key and paste it into your Pabbly Connect workflow.

After saving the connection, enter the prompt you wish to use for generating blog ideas. For example, you can use a prompt tailored to your specific business needs. Once you have entered the prompt, select the model and method as ‘Generate Content’ and click on ‘Save and Send Test Request’. Gemini will then generate your blog ideas based on the prompt provided.


4. Posting Generated Ideas to Discord

After generating the blog ideas, the next step is to share them with your team via Discord. Add another action step in Pabbly Connect by searching for ‘Discord’ and selecting the event ‘Send Channel Message’. Click on ‘Connect’ to set this up.

You will need a webhook URL from Discord. To obtain this, go to your Discord server, navigate to server settings, and then to integrations. Click on ‘Webhooks’ and create a new webhook. Ensure you select the channel where you want the messages to be sent. Copy the webhook URL and paste it into your Pabbly Connect workflow.

Map the message with the blog ideas generated by Gemini. Use mapping to insert dynamic data from the previous step.

After configuring these settings, click on ‘Save and Send Test Request’. You should receive a confirmation that the message was successfully sent to your Discord channel, allowing your team to access the generated blog ideas.


5. Conclusion: Automate Your Blog Idea Generation with Pabbly Connect

In this tutorial, we explored how to use Pabbly Connect to automate blog idea generation using Gemini and share those ideas with your team via Discord. By following the steps outlined, you can streamline your content creation process and ensure a steady flow of fresh ideas.

Ensure you check out Pabbly Connect to create business automation workflows and reduce manual tasks. Pabbly Connect currently offer integration with 2,000+ applications.

With Pabbly Connect, you can easily connect various applications and automate repetitive tasks, saving valuable time. Start your free trial today and experience the benefits of automation for your business!


This Automation Creates and Sends PDFs Automatically!

Learn how to automate PDF creation and sending using Pabbly Connect, Google Forms, Gmail, and Google Sheets in this detailed tutorial. This comprehensive guide reveals exactly how to connect your applications and automate repetitive tasks — accessible for professionals of all technical backgrounds.

Watch Step By Step Video Tutorial Below


1. Accessing Pabbly Connect for PDF Automation

To start automating your PDF creation and sending process, you first need to access Pabbly Connect. Simply visit the Pabbly website and navigate to the Connect section.

If you are a new user, you can sign up for a free account, which allows you to explore the features of Pabbly Connect with 100 free tasks monthly. Once signed in, create a new workflow.


2. Setting Up Google Forms Trigger in Pabbly Connect

In this step, you will set up a trigger in Pabbly Connect to capture responses from Google Forms. Select Google Forms as the trigger application and choose the event as ‘New Response Received’.

  • Click on the ‘Connect’ button to generate a webhook URL.
  • Copy the webhook URL and go to your Google Form.
  • In the Google Form, navigate to the ‘Responses’ section and link it to a Google Sheet.

This setup ensures that every form submission is captured and sent to Pabbly Connect for further processing.


3. Creating PDF with Google Docs through Pabbly Connect

After capturing the form response, the next step involves creating a PDF document using Google Docs and Pabbly Connect. You’ll need to set up an action step in your workflow.

Select Google Docs as the action application and choose the event ‘Create Document from Template’. Here, you will map the necessary fields such as attendee name, event details, and ticket ID.

  • Choose the template you created earlier in Google Docs.
  • Map the fields to include participant details like name and email.
  • Save and send a test request to ensure the document is created successfully.

This step effectively generates a personalized PDF ticket for each participant using Pabbly Connect.


4. Sharing PDF via Google Drive in Pabbly Connect

Once the PDF document is created, the next action is to make it shareable through Google Drive using Pabbly Connect. Add another action step and select Google Drive.

Choose the event ‘Share a File with Anyone’ and map the document ID from the previous step. This action allows the generated PDF to be accessible to the participant.

Connect to your Google Drive account. Map the document ID to share the PDF file. Send a test request to verify the document is now shareable.

This ensures that the PDF ticket can be accessed by the participant without any manual intervention, showcasing the power of Pabbly Connect.


5. Sending Email with PDF Attachment via Gmail

The final step in this automation is to send an email to the participant with the PDF ticket attached. For this, add another action step and select Gmail as the application.

Choose the event ‘Send Email’ and fill in the details such as sender name, recipient email, subject, and body content. Make sure to attach the PDF link generated earlier.

Map the recipient’s email from the Google Forms response. Write a subject and message body, including dynamic content from the previous steps. Send a test email to ensure everything is working correctly.

With this, you have successfully automated the process of creating and sending PDFs using Pabbly Connect, Google Forms, and Gmail.


Conclusion

In this tutorial, we explored how to automate the creation and sending of PDFs using Pabbly Connect. By integrating Google Forms, Gmail, and Google Docs, you can streamline your processes efficiently. This automation saves time and enhances the participant experience.

Ensure you check out Pabbly Connect to create business automation workflows and reduce manual tasks. Pabbly Connect currently offer integration with 2,000+ applications.

WhatsApp AI Assistant for Sales Automation

Learn how to automate your sales with a WhatsApp AI Assistant using Pabbly Chatflow. Step-by-step tutorial for seamless integration. Learn step-by-step how to create, test, and optimize chatbots that enhance customer experience while reducing support workload.

Watch Step By Step Video Tutorial Below


1. Accessing Pabbly Chatflow for WhatsApp Integration

To start utilizing the WhatsApp AI Assistant for your sales automation, you need to access Pabbly Chatflow. Head over to the Pabbly website and navigate to the Chatflow section. If you are a new user, click on ‘Sign Up Free’ to create an account, or log in if you already have one.

Once logged in, you will be directed to the Pabbly Chatflow dashboard. Here, you can manage your integrations and create your WhatsApp assistant. This platform is essential for integrating various applications seamlessly, such as YouTube and WhatsApp AI, to enhance your sales process.


2. Setting Up Your WhatsApp Assistant in Pabbly Chatflow

After accessing Pabbly Chatflow, the next step is to create your WhatsApp Assistant. Click on the ‘Add WhatsApp Number’ button to start the setup process. You will have options to choose from various methods to connect your WhatsApp account.

  • Select your preferred method for adding the WhatsApp number.
  • Follow the on-screen instructions to complete the connection.

Once your WhatsApp number is added, you can explore the features available on the left sidebar. This includes creating an AI assistant that will handle customer queries effectively, ensuring a smooth sales process.


3. Creating an AI Assistant with Pabbly Chatflow

To create your AI Assistant, navigate to the AI Assistant feature within Pabbly Chatflow. Here, you can see the total number of assistants created. Click on the ‘Add Assistant’ button to begin. You will need to provide a name for your assistant, which will represent your business on WhatsApp.

After naming your assistant, you will be directed to a flow window. Here, you can set up the instructions for your AI Assistant. Select the type of instruction from the dropdown menu, such as a custom prompt or predefined examples like AI agent or customer support agent.

  • Choose an instruction type that suits your business needs.
  • Configure the assistant settings according to your requirements.

Setting up the AI Assistant correctly will ensure that it can respond to customer queries accurately and promptly, enhancing overall customer satisfaction.


4. Configuring Assistant Settings in Pabbly Chatflow

After creating your AI Assistant, the next step is to configure its settings in Pabbly Chatflow. This includes setting the temperature for responses, which determines how focused or creative the answers will be. A lower temperature means more focused responses, while a higher temperature allows for more creative answers.

Additionally, you need to select the AI model from the dropdown, such as OpenAI’s GPT-3.5. To connect to the AI model, you will need an API key from your OpenAI account. Click on the provided hyperlink to generate a new secret key and copy it into the designated field within your assistant settings.


5. Assigning Your Assistant to WhatsApp Contacts

Once your assistant is configured, it’s time to assign it to your WhatsApp contacts through Pabbly Chatflow. Access the inbox settings from the settings option and scroll down to the AI auto-reply settings. Here, enable the auto-reply feature and select the contact list to assign your assistant.

After selecting the appropriate contacts, click on the ‘Save’ button to assign your assistant. This process ensures that your assistant is ready to respond to customer queries automatically, enhancing your sales automation strategy.


Conclusion

In this tutorial, we explored how to set up a WhatsApp AI Assistant for sales automation using Pabbly Chatflow. By following these steps, you can create a responsive assistant that enhances customer interaction and boosts sales efficiency.

Ensure you check out Pabbly Connect to create business automation workflows and reduce manual tasks. Pabbly Connect currently offer integration with 2,000+ applications.

Smart AI Agent for Commercial Solar Lead Collection

Learn how to create a Smart AI Agent for Commercial Solar Lead Collection using Pabbly Chatflow. Follow this detailed tutorial for seamless integration. Master conversational marketing with practical techniques for creating chatbots that engage visitors at exactly the right moment in their journey.

Watch Step By Step Video Tutorial Below


1. Accessing Pabbly Chatflow for Solar Lead Collection

To start using Pabbly Chatflow for collecting commercial solar leads, first, navigate to the Pabbly Chatflow website. You can do this by entering Pabbly.com/chatflow in your browser. If you are new, click on the Sign Up Free button to create an account. This will allow you to access 100 free credits every month.

Once you have created your account, sign in to access the dashboard. From here, you will see multiple applications offered by Pabbly. Click on the Pabbly Chatflow option to start the integration process for your AI agent.


2. Setting Up WhatsApp Integration in Pabbly Chatflow

After accessing Pabbly Chatflow, the next step is to integrate your WhatsApp account. Click on the button to add your WhatsApp number. You can choose between the WhatsApp connect method or the manual token connect method to set this up. This integration is crucial as it allows the AI agent to interact with potential leads.

  • Select the integration method that suits you best.
  • Ensure that your WhatsApp number is verified to start receiving messages.
  • Navigate back to the dashboard once the integration is complete.

With your WhatsApp number integrated, you can now start creating your AI assistant that will handle solar lead inquiries effectively through Pabbly Chatflow.


3. Creating Your AI Assistant in Pabbly Chatflow

To create your AI assistant, click on the AI Assistant option from the left column. You will see a list of existing assistants. To create a new one, click on the Add Assistant button. Name your assistant appropriately, such as AI Agent for Commercial Solar Lead Collection. using Pabbly Connect

Once named, you will be directed to a new page where you will configure your assistant through four steps: AI instructions, knowledge source, assistant interface, and styling. Start with the AI instructions by selecting the AI agent type and filling in the instruction box with the necessary guidelines for your assistant.

  • Set the AI temperature to 0.5 for balanced responses.
  • Choose the OpenAI model, such as GPT 5.2 for enhanced interactions.
  • Save your AI instructions before moving to the next step.

After completing the instructions, you will be ready to upload your knowledge source, which will help the AI agent respond accurately to inquiries.


4. Uploading Knowledge Source for Your AI Assistant

In this step, you will upload a file that contains essential information about your business, such as FAQs and company details. This file must be in PDF or TXT format and should not exceed 90 MB. You can create this document in Google Docs and then download it in the required format.

Once your file is ready, drag and drop it into the designated area in Pabbly Chatflow. Ensure that the file meets the specified requirements to avoid any upload errors. This knowledge base is crucial for your AI assistant to provide accurate responses to potential leads.


5. Testing Your AI Assistant for Lead Collection

After successfully creating your AI assistant and uploading the knowledge source, it’s time to test its functionality. You can do this by sending a keyword, such as solar, through your WhatsApp account. This will trigger the AI assistant to respond.

When you send the keyword, you should receive an instant welcome message from your AI assistant, indicating that it is functioning correctly. This confirms that your Pabbly Chatflow integration is successful and that the assistant is ready to qualify leads effectively.

Now you can begin using your AI assistant to automate lead collection for your commercial solar business.


Conclusion

In this tutorial, we explored how to effectively use Pabbly Chatflow to create a Smart AI Agent for Commercial Solar Lead Collection. By following these steps, you can automate your lead qualification process, ensuring that only high-intent prospects reach your sales team. Implementing this system can significantly improve your business efficiency.

Ensure you check out Pabbly Connect to create business automation workflows and reduce manual tasks. Pabbly Connect currently offer integration with 2,000+ applications.

AI Automation for Content Creation & Posting

Learn how to automate content creation and posting using Pabbly Connect with Box, Facebook, and LinkedIn. Step-by-step guide included. Revolutionize your productivity approach with just a few strategic clicks. Uncover professional methods for connecting applications and creating workflows that reclaim hours of your week.

Watch Step By Step Video Tutorial Below


1. Accessing Pabbly Connect for Automation

To begin automating your content creation and posting processes, you will first need to access Pabbly Connect. Head over to your web browser and search for Pabbly.com/connect. This will take you to the Pabbly Connect homepage.

Once you arrive at the homepage, you will see two options: ‘Sign In’ and ‘Sign Up Free.’ If you are new to Pabbly Connect, click on ‘Sign Up Free’ to create an account. This gives you access to 100 free tasks each month, allowing you to explore the powerful features of Pabbly Connect.


2. Creating a Workflow in Pabbly Connect

After signing in to your Pabbly Connect account, you will be directed to the dashboard. Here, to create a new automation workflow, click on the ‘Create Workflow’ button. This will prompt you to choose between the new beta version and the classic version.

  • Select the beta version for a modern and flexible experience.
  • Name your workflow, for example, ‘AI Automation for Content Creation and Posting.’
  • Choose a folder for your workflow, such as ‘Automations.’

Once you’ve named your workflow and selected a folder, click on the ‘Create’ button. This will set up your workflow, and you can now define your trigger and action steps using Pabbly Connect.


3. Setting Up the Trigger in Pabbly Connect

To set up your automation, you need to define a trigger. In this case, we will use the ‘Schedule by Pabbly’ feature to run this automation daily at a specific time. Select the app event as ‘Schedule Workflow’ and click on ‘Connect’.

  • Choose how often you want to run your workflow; select ‘Every Day’.
  • Set the time for the automation, for example, ’12:00 PM’.

After setting the desired schedule, click on ‘Save’ to confirm the trigger setup. You will see a successful response, indicating that your automation is now scheduled to run daily using Pabbly Connect.


4. Generating Content for Social Media Using AI

Next, you will need to generate content for your social media platforms. For this, we will use OpenAI as our AI tool. Select OpenAI as your action application and choose the app event as ‘Start GPT’. Click on ‘Connect’ to set up the connection. using Pabbly Connect

To establish this connection, you will need an API token. Click on the hyperlink provided to access your OpenAI account’s API keys. Create a new secret key and copy it into Pabbly Connect. Once connected, you can select the model you want to use, such as GPT-5, and provide the necessary prompt for generating your content.


5. Posting Generated Content on Facebook and LinkedIn

Once the content is generated, you can proceed to post it on your social media accounts. Start by adding an action step and selecting ‘Facebook Pages’ as your action application. Choose the app event ‘Create Page Post’ and click on ‘Connect’.

After connecting, select the Facebook page, such as ‘Spark Success Coaching,’ where you want to post the content. Instead of manually entering the message, map the data from the previous step to dynamically insert the AI-generated content into your Facebook post. Click on ‘Save and Send Test Request’ to post your content.

Repeat this process for LinkedIn by selecting it as your action application and choosing the app event ‘Share Simple Text.’ After connecting and mapping the content, click on ‘Save and Send Request’. You will see that the content has been successfully posted on both platforms, demonstrating the power of Pabbly Connect for automating content creation and posting.


Conclusion

In this tutorial, we explored how to use Pabbly Connect for automating content creation and posting on platforms like Facebook and LinkedIn. By utilizing AI for content generation and scheduling posts, you can streamline your social media strategy effectively. This automation saves time and enhances engagement with your audience.

Ensure you check out Pabbly Connect to create business automation workflows and reduce manual tasks. Pabbly Connect currently offer integration with 2,000+ applications.

This Automation Sends Birthday Wishes on WhatsApp Automatically!

Learn how to automate birthday wishes on WhatsApp with Pabbly Connect, integrating Google Sheets and WhatsApp seamlessly without coding. Transform complex automation concepts into accessible, actionable steps that eliminate unnecessary manual work while maximizing existing application capabilities.

Watch Step By Step Video Tutorial Below


1. Accessing Pabbly Connect for Automation

To start automating birthday wishes on WhatsApp, first, access Pabbly Connect by visiting pabby.com/connect. If you don’t have an account, sign up for free and explore its features with 100 free tasks monthly.

Once logged in, create a new workflow. This will allow you to set up the automation process. Pabbly Connect simplifies the integration of various applications, making it easy to send birthday wishes automatically.


2. Setting Up the Trigger in Pabbly Connect

In this step, you will set up the trigger for your automation. Select ‘Schedule by Pabbly’ as your trigger application. This feature allows you to automate workflows based on a schedule. using Pabbly Connect

  • Choose the event as ‘Schedule Workflow’.
  • Set the frequency to run daily.
  • Specify the time to execute the workflow, for example, 10:00 AM.

After saving this setup, Pabbly Connect will automatically trigger the workflow daily at your specified time, ensuring birthday wishes are sent without manual intervention.


3. Fetching Current Date for Birthday Checks

Next, you need to fetch the current date. Add an action step and select ‘DateTime Formatter by Pabbly’. This step is crucial as it allows the workflow to determine which customers have birthdays on the current date.

Set the event to ‘Current Date’ and choose the desired format (DD-MM-YYYY). This formatted date will be used to check against the dates stored in your Google Sheets.

Once the current date is fetched, the workflow can proceed to identify customers whose birthdays match today’s date, leveraging the powerful features of Pabbly Connect.


4. Looking Up Birthdays in Google Sheets

Now, it’s time to look up the birthdays in your Google Sheets. Add another action step and choose ‘Google Sheets’ as the application. Select the event ‘Lookup Spreadsheet Rows V2’ to search for customers whose birthdays are today. using Pabbly Connect

  • Connect your Google account and select the spreadsheet containing customer details.
  • Set the lookup value to the current date format.
  • Specify the columns to search for birthdays (e.g., column E for dates).

Pabbly Connect will process this information and return all matching records, allowing you to send personalized messages to each customer automatically.


5. Sending Birthday Wishes via WhatsApp

Finally, set up the action to send birthday wishes via WhatsApp. Choose ‘WhatsApp Cloud API’ as your action application. This integration allows you to send messages directly to your customers through WhatsApp. using Pabbly Connect

In this step, select the event ‘Send Template Message’. You will need to configure the message template that includes a personalized greeting for each customer.

Map the customer’s phone number from the previous step. Use the template created in the WhatsApp Cloud API for the birthday message. Ensure to include a variable for the customer’s name for personalization.

Once configured, save the settings. Pabbly Connect will now automatically send birthday wishes to all identified customers daily, enhancing customer engagement effortlessly.


Conclusion

In this tutorial, we learned how to automate birthday wishes on WhatsApp using Pabbly Connect. By integrating Google Sheets and WhatsApp, we created a seamless workflow that operates without manual effort, ensuring timely and personalized greetings for your customers.

Ensure you check out Pabbly Connect to create business automation workflows and reduce manual tasks. Pabbly Connect currently offer integration with 2,000+ applications.

Automate Lead Follow-Up Using AI

Learn how to automate lead follow-up using Pabbly Connect with Google Ads and AI for personalized SMS responses. Master proven automation processes with practical implementation examples and strategic recommendations you can apply immediately in your workflow.

Watch Step By Step Video Tutorial Below


1. Accessing Pabbly Connect for Automation

To automate lead follow-up using Pabbly Connect, start by accessing the platform. Visit Pabbly Connect by searching for ‘Pabbly.com Connect’ in your browser. Once on the homepage, you will see options to sign in or sign up for free.

If you are a new user, click on ‘Sign Up Free’ to explore the software with 100 free tasks every month. Existing users can simply log in. After signing in, locate the option to access Pabbly Connect and click on it to reach your dashboard.


2. Creating a Workflow in Pabbly Connect

To build your automation workflow, click on the ‘Create Workflow’ button in the Pabbly Connect dashboard. You will be prompted to choose between the Beta and Classic versions. For this tutorial, select the Beta version for a more modern experience.

  • Click on the ‘Create’ button to initiate your workflow.
  • Name your workflow, for example, ‘Automate Lead Follow-Up Using AI’.
  • Select a folder for organization, such as ‘Automations’.

Once you have created your workflow, you will see the workflow window indicating that it has been successfully created. This is where you will set up your trigger and action steps for the automation.


3. Setting Up the Trigger with Google Ads

Since you will be receiving new leads through Google Ads, select Google Ads as the trigger application in Pabbly Connect. Then, choose the event as ‘New Lead Form Entry’. This step is crucial for initiating the automation process.

After selecting the trigger, click on the ‘Connect’ button. You will receive a webhook URL that will be used to connect your Google Ads account with Pabbly Connect. Copy this URL for later use in your Google Ads lead form.


4. Generating Personalized SMS Using AI

Next, you will set up an action step using an AI tool, such as OpenAI, to generate a personalized SMS for the new lead. In Pabbly Connect, add a new action and select OpenAI as your application. Choose the event as ‘Generate Text’ to create the SMS content.

  • Connect your OpenAI account by providing the required API key.
  • Map the lead’s first name in the prompt to personalize the message.
  • Click on ‘Save and Send Request’ to generate the SMS content.

This step will utilize the AI capabilities to create a tailored SMS that addresses the lead by name, making the follow-up more engaging and effective.


5. Sending the SMS Through Twilio

Finally, to send the generated SMS to the lead, add another action step in Pabbly Connect and select Twilio as your SMS sending application. Choose the event as ‘Send SMS Message’.

Connect your Twilio account by providing the necessary credentials, including the Account SID and Auth Token. After connecting, map the recipient’s phone number and the SMS body generated by the AI. Click on ‘Save and Send Request’ to complete the process.

Once this setup is complete, your automation workflow will automatically send personalized SMS responses to new leads generated from your Google Ads. This seamless integration showcases the power of Pabbly Connect in automating lead follow-ups efficiently.


Conclusion

In this tutorial, we explored how to automate lead follow-up using Pabbly Connect, Google Ads, and AI. By following the steps outlined, you can create a streamlined process for personalized SMS responses that enhance customer engagement and save time.

Ensure you check out Pabbly Connect to create business automation workflows and reduce manual tasks. Pabbly Connect currently offer integration with 2,000+ applications.

Utilizing Pabbly Connect not only simplifies the integration process but also ensures that your business stays responsive to new leads in real-time.

Automatically Post WordPress Blogs to Instagram

Learn how to automatically post WordPress blogs to Instagram using Pabbly Connect. This tutorial provides step-by-step instructions for seamless integration. Learn to create powerful connections between your critical applications without requiring specialized programming knowledge or extensive technical background.

Watch Step By Step Video Tutorial Below


1. Introduction to Pabbly Connect

In this section, we will explore how to use Pabbly Connect to automate the posting of WordPress blogs to Instagram. This integration eliminates the need for manual posting, saving time and effort.

To begin, navigate to Pabbly Connect and sign up for a free account. Once registered, you can access various automation features, including connecting your WordPress and Instagram accounts.


2. Setting Up Pabbly Connect for WordPress and Instagram

To set up the integration, first log into your Pabbly Connect account. After logging in, click on the ‘Create Workflow’ button to start a new automation process. Name your workflow as ‘Automatically Post WordPress Blog to Instagram’.

  • Click on the ‘Create’ button to initiate the workflow.
  • Select ‘WordPress’ as the trigger app.
  • Choose ‘New Post Published’ as the trigger event.

After setting up the trigger, copy the webhook URL provided by Pabbly Connect. This URL will be used to connect your WordPress account to the automation.


3. Configuring the WordPress Webhook

Now, log into your WordPress account and install the WP Webhook plugin. This plugin allows you to connect your WordPress site with Pabbly Connect.

Once the plugin is installed, navigate to the settings and add the webhook URL you copied earlier. You need to specify the event for which the webhook will trigger, which is the creation of a new post.

  • Go to the ‘Send Data’ section in the WP Webhook settings.
  • Scroll to the ‘Post Created’ section and add the webhook URL.
  • Set the trigger to ‘Post’ and the initial post status to ‘Published’.

After saving these settings, your WordPress site is now ready to communicate with Pabbly Connect.


4. Creating an Instagram Post via Pabbly Connect

With the webhook set up, the next step is to create an action to post on Instagram. In Pabbly Connect, add a new action step and select ‘Instagram’ as the app.

Choose the action event as ‘Create and Publish a Post’. This allows the automation to publish the same blog content on Instagram as soon as it goes live on your WordPress site.

Connect your Instagram account to Pabbly Connect. Map the URL and caption fields from the previous step to ensure the correct data is posted. Save and send a test request to verify the connection.

Upon successful testing, your blog post will be published on Instagram automatically whenever you publish a new post on your WordPress site.


5. Conclusion

In conclusion, using Pabbly Connect to automate the posting of WordPress blogs to Instagram is a straightforward process that saves time and enhances productivity. By setting up a webhook and configuring both applications, you can effortlessly manage your social media presence.

Ensure you check out Pabbly Connect to create business automation workflows and reduce manual tasks. Pabbly Connect currently offer integration with 2,000+ applications.

Check out Pabbly Connect – Automate your business workflows effortlessly! Sign Up Free – Start your journey with ease! 10,000+ Video Tutorials – Learn step by step! Join Pabbly Facebook Group – Connect with 21,000+ like minded people!

This integration allows you to focus on creating quality content for your blog while ensuring your Instagram followers are always updated with your latest posts. Start automating your tasks today with Pabbly Connect to enhance your workflow!