The AI Assistant Every Digital Marketing Agency Needs

Watch Step By Step Video Tutorial Below


1. Setting Up Your WhatsApp Assistant with Okay

To automate replies on WhatsApp, the first step is to use Okay to create an AI assistant. This assistant will handle customer queries 24/7 without manual intervention. It is essential for digital marketing agencies that receive numerous inquiries daily.

After logging into your Okay account, navigate to the assistant section. Here, you will create an assistant specifically designed for your digital marketing agency. This setup will ensure that all customer inquiries are managed efficiently.


2. Creating Your AI Assistant in Create

The next step involves using Create to build your AI assistant. Start by clicking on the “Add Assistant” option. Name your assistant appropriately, such as “Digital Marketing Agency Assistant.” This name will help you identify the assistant later.

Once named, you need to fill in the AI instructions and select the assistant type. Choose “AI Agent” to ensure it functions correctly. You can customize the instructions based on your agency’s needs. Here’s how to set it up:

  • Select AI Agent as the type.
  • Customize the AI instructions based on your service offerings.
  • Set the temperature for AI responses to balance creativity and focus.

After setting these parameters, save your assistant settings to proceed. This will help your assistant respond accurately to customer inquiries.


3. Integrating OpenAI for Enhanced Responses

Integrating OpenAI into your assistant is crucial for providing intelligent responses. In this step, you will link OpenAI with your Create assistant. First, ensure you have an OpenAI account and generate an API key.

To integrate, go to the API settings in Create and paste your OpenAI API key. This connection allows your assistant to utilize OpenAI’s powerful language model for generating responses. Follow these steps:

  • Generate your OpenAI API key from your OpenAI account.
  • Paste the key in the API settings of your Create assistant.
  • Click “Connect” to finalize the integration.

This integration is vital as it enhances the AI’s ability to respond to diverse queries effectively, ensuring customer satisfaction.


4. Setting Up Knowledge Sources for Your Assistant

To further enhance your assistant’s capabilities, you need to set up a knowledge source. This is where you provide detailed information about your business. In Create, navigate to the knowledge source section and upload relevant documents.

Make sure to include information that covers your services, policies, and any FAQs. Here’s how to do it:

  • Create a comprehensive document detailing your services.
  • Upload this document in the knowledge source section.
  • Ensure the document is easily understandable and concise.

Once your knowledge base is established, your assistant will be able to provide accurate responses based on this information, significantly improving the user experience.


5. Testing and Activating Your Assistant

After setting up your assistant, it’s time to test its functionality. Engage with your assistant by asking common questions that your clients might have. This will help you gauge how well it responds.

Once satisfied with the performance, activate your assistant. In Create, toggle the activation button and save your settings. Here’s how to ensure everything is set correctly:

  • Test the assistant with various queries to ensure it responds accurately.
  • Activate the assistant in the settings section.
  • Save all settings to finalize the setup.

Once activated, your assistant will automatically handle inquiries on WhatsApp, providing timely responses to your clients without manual intervention.


In conclusion, integrating Okay and Create allows digital marketing agencies to automate their WhatsApp responses effectively. This setup ensures that inquiries are handled promptly and accurately, enhancing customer satisfaction and operational efficiency.
Auto Share Facebook Posts on Telegram

Watch Step By Step Video Tutorial Below


1. Accessing Pabbly Connect for Integration

To begin using Pabbly Connect, open a new tab and type in the URL: pub.com/connect. This will take you to the Pabbly Connect homepage where you can either sign in or sign up for a free account.

If you’re a new user, click on the “Sign Up Free” button to create an account. You will receive 100 free tasks every month to explore the features of Pabbly Connect. Existing users can simply log in to access the workflow page.


2. Creating a Workflow in Pabbly Connect

Once logged in, navigate to the workflow page in Pabbly Connect. Here, you will set up the automation to post from Facebook to Telegram. The first step is to select the trigger application, which in this case is Facebook Pages.

  • Select “Facebook Page” as the trigger application.
  • Choose the event as “New Post” to initiate the workflow.
  • Click on the “Connect” button to establish a connection.

After establishing the connection, select the Facebook page you want to monitor for new posts. Once selected, click “Save and Send Test Request” to ensure the connection works properly.


3. Testing the Facebook Trigger in Pabbly Connect

With the trigger set up, it’s time to test the connection. Go to your Facebook page and create a new post. For instance, title it “Consistency Changes Everything” and add an image to it.

After creating the post, return to Pabbly Connect. You should see the response indicating that the new Facebook post has been detected. This confirms that the trigger is functioning correctly.


4. Setting Up the Action to Notify Telegram

Next, you will configure the action application, which is Telegram. Select “Telegram Bot” as the action application in Pabbly Connect.

  • Choose the event “Send a Text Message”.
  • Click on “Connect” and create a new connection.
  • Enter the bot token obtained from the BotFather in Telegram.

Once the connection is established, enter the chat ID of the Telegram group where you want to send the notifications. You can get the chat ID by adding the bot to the group and promoting it to admin.


5. Mapping Data and Sending Notifications

In this step, you will map the data from the Facebook post to the Telegram message. In Pabbly Connect, you can dynamically insert the post title and link into the message.

For mapping, select the fields from the previous Facebook response. Set the message format to HTML and click “Save and Send Test Request”. You should receive a confirmation that the message has been sent to your Telegram group.

Now, check your Telegram group to see if the notification appears as expected. This completes the automation process, allowing you to notify your audience on Telegram whenever you post on Facebook.


Conclusion

Using Pabbly Connect, you can effortlessly automate the process of sharing Facebook posts to Telegram. This integration is perfect for content creators and businesses looking to keep their audience updated in real-time. Start using Pabbly Connect today to enhance your social media strategy!

How to Upload Instagram Reels to YouTube Automatically

Watch Step By Step Video Tutorial Below


1. Accessing Pabbly Connect for Integration

To begin automating the process of posting Instagram reels to YouTube, you need to access Pabbly Connect. Open a new tab in your browser and type pabb.com/connect, then hit enter. This will take you to the Pabbly Connect landing page, where you can sign up or log in to your account.

Once logged in, you’ll see the dashboard where you can create new workflows. If you’re a new user, opt for the sign-up option to enjoy 100 free tasks monthly. Existing users can simply sign in. The dashboard will display your available tasks and provide options to create new workflows using the Pabbly Connect platform.


2. Creating a Workflow in Pabbly Connect

Now that you are logged into Pabbly Connect, you can create a new workflow. Click on the “Create Workflow” button. Here, you will define what happens when you post a new reel on Instagram. This setup will ensure that every time you upload a video, it automatically posts on your YouTube channel.

  • Click on “Create Workflow”.
  • Name your workflow based on your use case.
  • Select Instagram as your trigger application.

After naming your workflow, select the trigger event as “New Media Posted”. This step allows Pabbly Connect to monitor your Instagram account for any new posts. Next, connect your Instagram account by clicking on “Connect with Instagram for Business” and follow the prompts to authorize.


3. Setting Up the Integration Between Instagram and YouTube

With the Instagram connection established, it’s time to set up the integration between Pabbly Connect, Instagram, and YouTube. After your Instagram account is connected, you will need to capture the media URL of the newly posted reel. This will be used to upload the video to YouTube.

To capture the media URL, click on “Save and Send Test Request”. This action will fetch the details of the latest post from your Instagram account. You will see the media URL and other relevant details displayed on your Pabbly Connect dashboard.

  • Use the media URL to create a public link.
  • Upload the video to Google Drive for sharing.
  • Generate a description and tags using OpenAI.

After these steps, you will upload the video to Google Drive. Connect your Google Drive account to Pabbly Connect and select the option “Upload a File”. Make sure to map the media URL you obtained earlier to upload the video correctly.


4. Finalizing the Upload to YouTube

After successfully uploading the video to Google Drive, the next step is to upload it to YouTube using Pabbly Connect. Connect your YouTube account by clicking on “Connect with YouTube”. You will need to authorize Pabbly Connect to access your YouTube account.

Once connected, you can map the file ID from Google Drive to the YouTube upload action. Provide the title, description, and tags that were generated earlier using OpenAI. This ensures that your video is properly labeled and optimized for search.

  • Map the video title from the Instagram caption.
  • Set the visibility to private or public based on your preference.
  • Select the appropriate category for your video.

Finally, click on “Save and Send Test Request” to upload the video to your YouTube channel. This completes the automation, allowing your Instagram reels to be posted on YouTube without any manual effort.


5. Conclusion

By following this tutorial, you can effectively automate the posting of Instagram reels to YouTube using Pabbly Connect. This seamless integration allows you to save time and effort while ensuring your content reaches a wider audience.

Set up your workflow today and enjoy hassle-free automation between Instagram and YouTube!

Automatically Reply to WhatsApp Messages with AI

Watch Step By Step Video Tutorial Below


1. Accessing Pabbly Connect for WhatsApp Integration

To start integrating WhatsApp with Pabbly Connect, you first need to visit the Pabbly website. This platform allows you to automate your messaging processes seamlessly. Simply search for Pabbly Chatflow in your browser to access the homepage.

Once on the homepage, you will see options to either sign in or sign up for free. For new users, clicking on “Sign Up Free” will allow you to create an account. Existing users can simply sign in to access their dashboard.


2. Connecting Your WhatsApp Number in Pabbly Connect

After signing in, you can connect your WhatsApp number through Pabbly Connect. This step is crucial for enabling automated replies. Navigate to the Chatflow section by clicking on “Access Now”.

  • Click on the “Add Assistant” button.
  • Enter a name for your assistant.
  • Select your WhatsApp number from the dropdown.

Once you have connected your WhatsApp number, you will be directed to a flow window where you can configure your assistant settings. This is how Pabbly Connect facilitates the setup process for WhatsApp integration.


3. Setting Up Your WhatsApp AI Chatbot

To create an AI chatbot for WhatsApp using Pabbly Connect, you need to select the instruction type for your assistant. You can choose from predefined examples or customize your prompts based on your requirements.

After selecting the instruction type, you will need to configure the AI settings. This includes setting parameters such as:

  • Temperature: Determines how creative the AI responses are.
  • API Key: Required to connect your OpenAI account.

By configuring these settings, you enable your chatbot to respond accurately to customer queries, showcasing the powerful capabilities of Pabbly Connect in automating WhatsApp communications.


4. Activating Your WhatsApp AI Assistant

Once your AI assistant is set up, you need to activate it. This is done by enabling the assistant within the Pabbly Connect interface. Click on the “Save” button to ensure all your configurations are stored.

After saving, you can assign this assistant to your WhatsApp chats. You can do this in bulk by accessing the inbox settings and selecting the contacts you want to automate replies for.

To assign the assistant, follow these steps:

  • Enable the auto-reply option.
  • Select the assistant from the list.
  • Click on “Save” to apply changes.

This process highlights how Pabbly Connect streamlines the integration of your AI assistant with WhatsApp, making your customer interactions more efficient.


5. Finalizing Your WhatsApp Chatbot Configuration

To finalize your WhatsApp chatbot setup using Pabbly Connect, ensure all settings are correctly configured. You can customize aspects such as the initial messages and footer text that will appear in the chat.

Additionally, you can upload branding images and modify the appearance of your assistant to align with your business identity. Make sure to review all settings before going live.

Once everything is set, click on the “Activate” button to start using your WhatsApp AI chatbot. This will allow you to handle customer queries efficiently, showcasing the full potential of Pabbly Connect in enhancing your business operations.


Conclusion

Integrating WhatsApp with Pabbly Connect allows businesses to automate messaging efficiently. Follow these steps to set up your WhatsApp AI chatbot for better customer engagement and streamlined communication.

I Built an AI Assistant for My Online Store 😱

Watch Step By Step Video Tutorial Below


1. Introduction to Pabbly Connect for AI Assistant Creation

In this tutorial, we will explore how to use Pabbly Connect to create an AI assistant for your online store. This assistant will help manage customer queries automatically, making your operations smoother. With Pabbly Connect, you can integrate various applications without any coding skills.

To start, you need to access Pabbly Connect. Simply visit the Pabbly website and log in or sign up for a free account. This platform allows you to create automated workflows that connect different applications seamlessly.


2. Setting Up Pabbly Chatflow for Your Assistant

To create your AI assistant, you will utilize Pabbly Chatflow. After logging into your account, navigate to the dashboard and select the option to add a new assistant. This is where you will configure the assistant’s settings.

  • Click on ‘Add Assistant’
  • Name your assistant, e.g., “Online Store Assistant”
  • Select the type as “AI Agent” for your assistant

Once you have completed these steps, your assistant will be created within Pabbly Connect. You can then proceed to configure AI instructions and settings for optimal performance.


3. Configuring AI Instructions in Pabbly Connect

Next, you will configure the AI instructions for your assistant in Pabbly Connect. This involves setting parameters such as temperature, which controls the creativity of responses. A temperature of 0.5 is recommended for balanced replies.

After setting the temperature, you will need to input your OpenAI API key. This key allows Pabbly Connect to connect with OpenAI’s services. Follow these steps to generate your API key:

  • Go to the OpenAI API keys page
  • Create a new key and name it (e.g., “Demo Key”)
  • Copy the key and paste it into Pabbly Connect

After entering the API key, you can finalize the AI configuration settings, including fallback messages and header/footer options.


4. Adding Knowledge Source in Pabbly Connect

The knowledge source is crucial for your AI assistant’s functionality. This is where you provide detailed information about your business, which the assistant will reference when answering customer queries. In Pabbly Connect, you can upload a document that outlines your business policies, products, and services.

To add your knowledge source, click on the upload button and select your document. Ensure that your document is comprehensive, as it will form the basis of the assistant’s responses.

Once uploaded, Pabbly Connect will store this knowledge base, allowing the assistant to learn and respond accurately to customer inquiries based on the information provided.


5. Finalizing and Activating Your Assistant with Pabbly Connect

After configuring your AI assistant and adding the knowledge source, it’s time to finalize and activate it. In Pabbly Connect, you can toggle the activation button to make your assistant live. This means that it will start responding to customer queries automatically.

You can also embed the assistant on your website by copying the provided script and pasting it into your website’s code. This integration allows customers to interact with your assistant directly from your site.

Finally, you can test the assistant by asking it various questions to ensure it responds accurately based on your business policies. This testing phase is crucial for confirming that your assistant is ready to assist your customers effectively.


Conclusion

In conclusion, creating an AI assistant for your online store using Pabbly Connect is a straightforward process. By following these steps, you can automate customer interactions and enhance user experience efficiently. Leverage Pabbly Connect to optimize your business operations today!

Instantly Notify Your Sales Team About New Leads ⚡

Watch Step By Step Video Tutorial Below


1. Setting Up Pabbly Connect for Instant Notifications

To set up instant lead notifications, you first need to access Pabbly Connect. Visit the Pabbly Connect dashboard by navigating to the official website and logging into your account. If you are a new user, you can create a free account to test the platform.

Once you are logged in, click on the “Create Workflow” button. Here, you will name your workflow and choose a folder to store it. This initial step is crucial as it sets the foundation for your integration with other applications.


2. Integrating Google Forms with Pabbly Connect

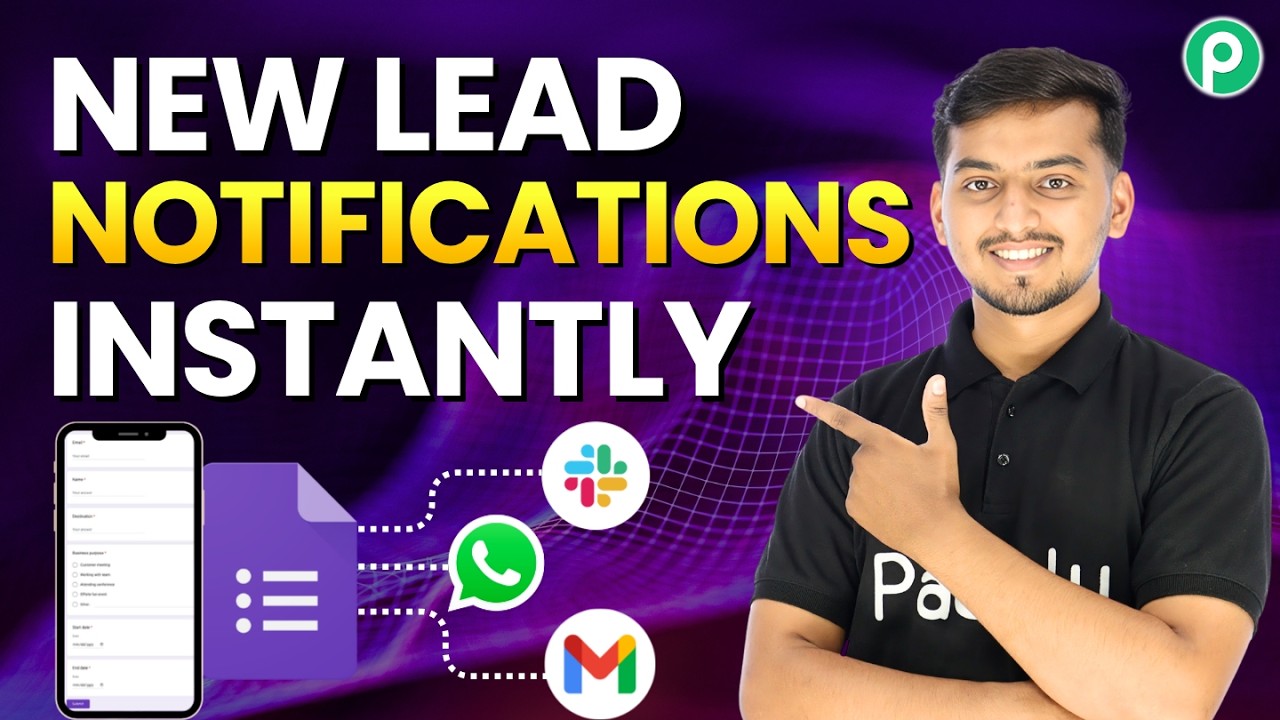
Next, you will integrate Google Forms with Pabbly Connect. Click on the plus button to select your trigger application, which will be Google Forms. Choose the event “New Response Received” to trigger the workflow when someone submits a form.

  • Select Google Forms as the trigger application.
  • Choose “New Response Received” as the event.
  • Connect your Google account to Pabbly Connect.

After connecting, copy the webhook URL provided by Pabbly Connect. This URL will be used in your Google Form settings to send data to Pabbly Connect whenever a new lead is captured.


3. Configuring Google Sheets for Lead Data

Now, you need to set up Google Sheets to store the lead data. In your Google Form, navigate to the “Responses” tab and link it to a Google Sheet. This is where all the lead information will be stored automatically.

Next, you will install the Pabbly Connect webhook add-on in your Google Sheet. After installation, go back to the add-on menu and select the initial setup option. Here, paste the webhook URL you copied earlier and specify the trigger column.

  • Open Google Sheets and link it to your Google Form.
  • Install the Pabbly Connect webhook add-on.
  • Configure the webhook URL and trigger column settings.

By setting this up, every time a new lead fills out the form, their information will be automatically sent to Pabbly Connect via the webhook.


4. Sending Email Notifications via Gmail

After configuring Google Sheets, it’s time to set up email notifications. In Pabbly Connect, click on the plus button to add an action step. Select Gmail as your action application and choose the “Send Email” event.

Next, create a connection between Gmail and Pabbly Connect. You will need to sign in with your Google account to allow Pabbly Connect to send emails on your behalf. Fill in the required fields, including the recipient’s email address and the email content.

  • Select Gmail as the action application.
  • Choose “Send Email” as the action event.
  • Map the dynamic fields from the Google Form responses.

By mapping these fields, every email sent will contain the latest lead information, enabling your sales team to respond promptly.


5. Conclusion: Enhance Your Lead Response Time with Pabbly Connect

In conclusion, using Pabbly Connect to integrate Google Forms and Gmail allows businesses to set up instant notifications for new leads. This automation improves response times and enhances lead management efficiency.

By following the steps outlined in this tutorial, you can ensure that your sales team is always informed about new leads as soon as they are captured. This seamless integration not only saves time but also increases the chances of converting leads into customers.


Send Voice Messages on WhatsApp in Bulk

Watch Step By Step Video Tutorial Below


1. Getting Started with Pabbly Connect for Pabi Chartflow

To begin using Pabbly Connect for sending bulk audio messages, first access the Pabi Chartflow dashboard. If you are a new user, navigate to pabbl.com/chartflow and sign up for free. Existing users can log in directly to their dashboard.

Once you are on the Pabi Chartflow dashboard, ensure that your WhatsApp number is added. If you need assistance, refer to the tutorial linked in the description box. After confirming your WhatsApp number, you can proceed to set up your audio messaging campaign.


2. Creating a Broadcast in Pabbly Connect

In this section, you will learn how to create a broadcast using Pabbly Connect. From the left sidebar, click on the “Broadcast” section and then hit the “Add Broadcast” button. Choose “Broadcast Campaign” as the type.

  • Enter a name for your broadcast, such as “New Audio Message”.
  • Select the contact list you want to use for this broadcast.
  • You can create a new contact list if needed.

After selecting or creating your contact list, you can refine your audience by excluding certain contacts or skipping those who have messaged you in the last 24 hours. This helps avoid redundant messages.


3. Uploading Audio Files for Your Broadcast

Now that your broadcast is set up, it’s time to upload the audio file you wish to send. In Pabbly Connect, select the message type as “Regular Message” and the type as “Audio”. You can upload an audio file either by pasting a URL or by uploading from the media library.

To upload from the media library, click on “Upload from Media Library”, then choose “Add New Audio”. Select the file you want to upload and click on the “Upload Audio” button. Once uploaded, select the audio file and click on “Insert” to add it to your message.


4. Testing and Scheduling Your Broadcast in Pabbly Connect

Before sending the broadcast, it’s crucial to test it. Enter your username and mobile number to send a test message. Click on “Send Test Message” to ensure everything is working correctly. After confirming the test message is received, you can proceed to send the actual broadcast.

  • Choose to send the broadcast instantly or schedule it for later.
  • If scheduling, select the date and time from the calendar.

Once you have made your selections, click on the “Add Broadcast” button. Your broadcast will now be scheduled or sent immediately, depending on your choice.


5. Monitoring Broadcast Results with Pabbly Connect

After your broadcast is sent, you can monitor its performance through Pabbly Connect. Check the stats for how many messages were sent, delivered, read, pending, ignored, or failed. This information is valuable for assessing the effectiveness of your audio messaging campaign.

Utilizing Pabbly Connect for this purpose allows you to streamline your communication efforts, especially useful for sharing podcasts or voice messages with your audience. The insights gained will help you refine future broadcasts.


Conclusion

In this tutorial, we explored how to use Pabbly Connect for integrating Pabi Chartflow to send bulk audio messages via WhatsApp. This process enhances communication efficiency, allowing you to reach your audience effectively. Try it out for your messaging needs today!

Generate & Post Instagram Content Automatically using AI

Watch Step By Step Video Tutorial Below


1. Accessing Pabbly Connect for Automation

To start automating daily Instagram posts, you need to access Pabbly Connect. Open a new tab and type in the URL: pabbly.com/connect. This will take you to the Pabbly Connect landing page.

If you’re a new user, click on the “Sign Up for Free” button to create an account. Existing users should click on the “Sign In” button. Pabbly Connect offers an efficient platform where you can connect multiple applications seamlessly.


2. Creating a Workflow in Pabbly Connect

Once logged in, navigate to the dashboard of Pabbly Connect. Click on the blue “Create Workflow” button to initiate a new automation process. You will have the option to create a flow from scratch or using AI.

  • Select “Create Using AI” for easier setup.
  • Enter a prompt to guide the workflow creation.
  • Choose appropriate scheduling options for daily posts.

This setup will allow Pabbly Connect to automate the process of generating and posting content to Instagram daily. After entering your prompt, click enter to generate the workflow.


3. Integrating Google AI Studio for Content Generation

In this step, you will connect Google AI Studio to Pabbly Connect for content generation. Choose the option to add a new connection and provide the necessary API key from Google AI Studio.

Make sure to specify the prompt for generating engaging Instagram captions. You can input details such as:

  • A motivational theme for daily posts.
  • Keep it under 20 words for brevity.
  • Include relevant hashtags for better engagement.

This information will help Google AI Studio generate suitable content for your Instagram posts. After inputting your details, click “Save and Send Test Request” to verify the connection and ensure it works as expected.


4. Generating Images Using Google AI

After obtaining the caption, the next step is to generate images using Google AI Studio through Pabbly Connect. Reuse the existing connection and specify the model for image generation.

To map the caption generated in the previous step, use the mapping feature provided by Pabbly Connect. This allows you to pull in the caption dynamically for the image generation process. For example, you can input a prompt like:

  • Create a visually appealing Instagram post image based on the caption.

This will ensure that each image corresponds to the generated caption, maintaining consistency in your posts. Once done, click “Save and Send Test Request” to finalize the image generation process.


5. Posting to Instagram Automatically

The final step is to connect your Instagram account to Pabbly Connect for automated posting. Select the existing connection and specify the account where you want to publish the posts.

Map the image URL generated from Google AI Studio and the caption to the Instagram post fields. This mapping allows for seamless integration, ensuring that each post is published with the correct image and caption. After completing the mapping, click “Save and Send Test Request” to verify if the post is successfully created on Instagram.

Once everything is set up, your workflow will automatically run daily, generating new content and posting it to your Instagram account without any manual effort. This automation streamlines your social media management and keeps your audience engaged effortlessly.


Conclusion

Using Pabbly Connect, you can automate daily Instagram posts effortlessly. This tutorial showed how to integrate Pab, Pabbly, Lindin, and Google AI for seamless content generation and posting. With these steps, you can enhance your social media strategy and engagement.

Create a Gemini AI Agent in Minutes (No Code & Free) 🚀

Watch Step By Step Video Tutorial Below


1. Accessing Pabbly Connect for Integration

To start integrating YouTube comments with Gemini AI, you need to access Pabbly Connect. Open a new tab and go to pabyt.com/connect. If you are a new user, sign up for free to receive 100 free tasks, allowing you to create your integrations without any cost.

Once signed up, log in to your Pabbly Connect account. This platform is designed to enable seamless integrations between various applications, making it easier to automate tasks like responding to YouTube comments with Gemini AI.


2. Creating a Workflow in Pabbly Connect

After logging into Pabbly Connect, navigate to the “Create Workflow” option. This is where you will set up the integration between YouTube and Gemini AI. Choose the “Create Using AI” option to initiate the workflow.

In the prompt section, input your request: “I want Google Studio Gemini to automatically generate and post replies to comments on my YouTube channel whenever I receive a new comment.” This request will guide the AI in generating the necessary workflow template.

  • Access Pabbly Connect and log in.
  • Navigate to “Create Workflow” and select “Create Using AI”.
  • Input your request for the workflow.

This setup allows Pabbly Connect to manage the workflow based on your specifications, ensuring that all necessary actions are automated.


3. Setting Up the YouTube Trigger in Pabbly Connect

Next, you need to set up the trigger for your YouTube account within Pabbly Connect. Click on the “Connect” button and select “Add New Connection”. Choose “Sign in with Google” to link your YouTube account.

After selecting your account, grant Pabbly Connect access to your YouTube data. This step is crucial as it allows the platform to capture new comments automatically. Set the maximum result parameter to one to ensure only the latest comment is processed.

  • Click “Connect” and choose “Add New Connection”.
  • Sign in with your Google account linked to YouTube.
  • Set the maximum results to one.

This configuration ensures that every new comment on your YouTube videos triggers the workflow set up in Pabbly Connect.


4. Integrating Gemini AI for Comment Responses

Once the YouTube trigger is set, the next step involves integrating Gemini AI. Click on the “Connect” button again and select “Add New Connection”. Here, you will need to enter the API key from your Gemini account.

To generate your API key, go to the Gemini playground page and create a new API key. Copy this key into the designated field in Pabbly Connect. After entering the key, configure the prompt for Gemini AI to generate responses based on the comments received.

  • Click “Connect” and add a new connection for Gemini AI.
  • Generate and copy your API key from the Gemini playground.
  • Enter the API key in Pabbly Connect.

This integration allows Pabbly Connect to utilize Gemini AI for generating automated responses to YouTube comments, enhancing engagement on your channel.


5. Posting Automated Replies to YouTube Comments

The final step in this integration process is to set up the action that posts replies to YouTube comments. In Pabbly Connect, select the existing connection created for Gemini AI and map the response data to the appropriate fields.

Ensure that the reply text from Gemini AI is mapped correctly to the comment ID field in Pabbly Connect. Once this is set, click on the “Send Test Request” button to verify that the replies are being posted successfully on YouTube.

Upon successful testing, you will see the AI-generated replies appear under the respective comments on your YouTube video. This automation streamlines the interaction process, allowing for timely responses without manual input.


Conclusion

In this tutorial, we have explored how to integrate YouTube comments with Gemini AI using Pabbly Connect. By following the steps outlined, you can automate your comment responses effectively, enhancing user engagement without the need for coding skills.

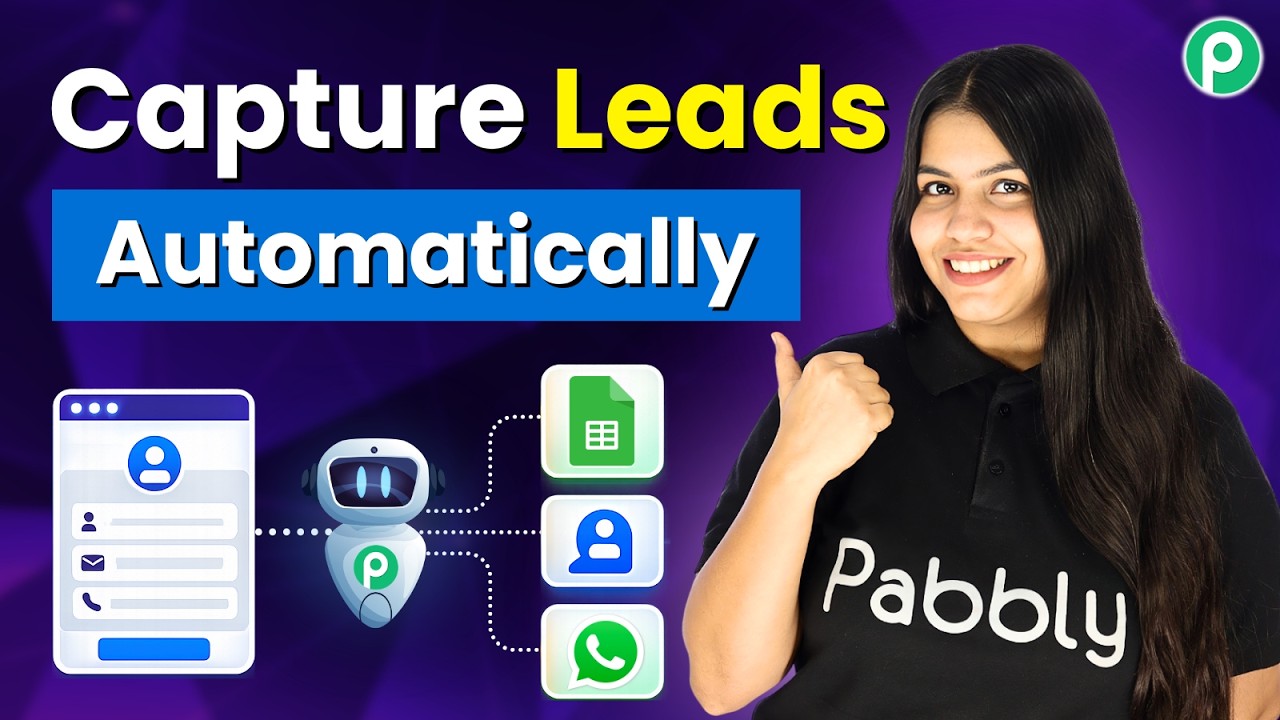
Capture Leads Automatically Using Automation

Watch Step By Step Video Tutorial Below


1. Accessing Pabbly Connect for Integration

To start integrating Google Ads with your CRM and Google Sheets, you need to access Pabbly Connect. If you are a new user, open a new tab and search for pabbl.com/connect in your browser. This will take you to the landing page of Pabbly Connect.

Once on the landing page, you will see the option to “Sign up for free” in the top right corner. Click this button to create an account and get 100 free tasks each month to explore Pabbly Connect. This allows you to set up your automation without any initial cost.


2. Setting Up Your Workflow in Pabbly Connect

After signing into Pabbly Connect, navigate to the workflow builder. This is where you will set up the automation process. The workflow consists of triggers and actions, where a trigger starts the process and actions are the results.

To create your workflow, click on the “Add Trigger” button. For the trigger application, select the application you are using to collect lead details, such as Google Ads. Choose the event as “New Lead Form Entry” and click on “Connect”. You will then be provided with a webhook URL that you need to copy for later use.

  • Click on “Add Trigger”.
  • Select Google Ads as the trigger application.
  • Choose “New Lead Form Entry” as the event.

Now, paste the copied webhook URL into your Google Ads lead form settings under the lead delivery section. Test the connection by sending test data. If successful, you will see the captured response in your Pabbly Connect workflow, confirming the integration.


3. Capturing Lead Details in Google Sheets

Once you have connected Google Ads with Pabbly Connect, the next step is to capture the lead details into Google Sheets. Click on “Add New Action Step” and select Google Sheets as the action application. Choose the event as “Add New Row” and click on “Connect”.

If you have an existing connection, select it; otherwise, create a new one by signing in with your Google account. Grant the necessary permissions and then select the spreadsheet and sheet where you want the lead details to be added. Instead of manually entering the lead details, utilize the mapping feature in Pabbly Connect to automatically insert data from the previous step.

  • Select Google Sheets as the action application.
  • Choose “Add New Row” as the event.
  • Map the lead details to the corresponding fields in your spreadsheet.

After mapping the details, click on “Save and Send Test Request”. If successful, you will see the lead details added to your Google Sheets. From now on, every new lead from Google Ads will automatically populate in your spreadsheet.


4. Adding Leads to Your CRM Using Pabbly Connect

Next, you will set up the integration to add leads to your CRM. Click on “Add New Action Step” again, and this time select your CRM application, such as Zoho CRM. Choose the event “Create Contact” and click on “Connect”.

If you haven’t created a connection yet, you will need to input your Zoho CRM domain. This can be found in your Zoho account URL. After entering the domain, grant the necessary permissions to Pabbly Connect. Then, map the lead details just as you did for Google Sheets. Ensure you include all required fields for creating a contact.

  • Select Zoho CRM as the action application.
  • Choose “Create Contact” as the event.
  • Map the necessary lead details to the contact fields.

After mapping, click on “Save and Send Test Request”. You should receive a confirmation that a new contact has been created in your Zoho CRM. Now, every time a new lead is captured from Google Ads, their details will be automatically added to both Google Sheets and your CRM.


5. Conclusion

In this tutorial, we demonstrated how to use Pabbly Connect to integrate Google Ads with your CRM and Google Sheets. By following the steps outlined, you can automate the process of capturing lead details efficiently. With Pabbly Connect, you can streamline your workflow and ensure that your leads are organized and easily accessible.

Try this automation today and enhance your lead management process with Pabbly Connect. You’ll save time and reduce manual data entry, allowing you to focus on growing your business.