What if we say that there is the easiest way to add Sendinblue contact from new Salesforce lead without doing much manual work? Would you believe us?

You might doubt that! But let us introduce you to the amazing tool named Pabbly Connect, a one-stop solution for all repetitive work.
Pabbly Connect is an integration and automation tool that simplifies all of your boring tasks without knowing any kind of coding skills. You can connect multiple applications and allow data transfer between them in a short period of time.
Why Choose This Method Of Integration?
In contrast with other integration services-
- Pabbly Connect does not charge you for its in-built apps like filters, Iterator, Router, Data transformer, and more
- Create “Unlimited Workflows” and smoothly define multiple tasks for each action
- As compared to other services which offer 750 tasks at $24.99, Pabbly Connect offers 50000 tasks in the starter plan of $29 itself
- Unlike Zapier, there’s no restriction on features. Get access to advanced features even in the basic plan
- Try before you buy! Before spending your money, you can actually signup & try out the working of Pabbly Connect for FREE
But let’s first understand the need for integration. Salesforce is a cloud computing service that allows businesses to use cloud technology to better connect with customers, partners, and potential users. On the other hand, Sendinblue is one of the best tools for trigger-based and transactional emails. Its automation workflow designer allows you to build campaigns triggered by clicks, opens and even webpage visits.
By integrating Salesforce and Sendinblue via Pabbly Connect, you can add a contact in Sendinblue whenever there is a new lead in Salesforce. The task would be automated, you don’t have to do anything. We have attached a video for the same, just look at it.
Besides, we have a template for this integration that can assist you to get started quickly. Tap on the ‘Use Workflow’ button below to begin. Also, you can go to Marketplace & look for more apps/integrations.
Now, without further ado, let’s follow the step-by-step procedure to integrate Salesforce and Sendinblue.
So, buckle up for the process.
Step 1: Sign up to Pabbly Connect
Initiate the process to add Sendinblue contact from new Salesforce lead by clicking on the ‘Sign Up Free‘ icon on the Pabbly Connect home page. Next, either manually fill-up all the details or sign up using your Gmail account.
Try Pabbly Connect for FREE
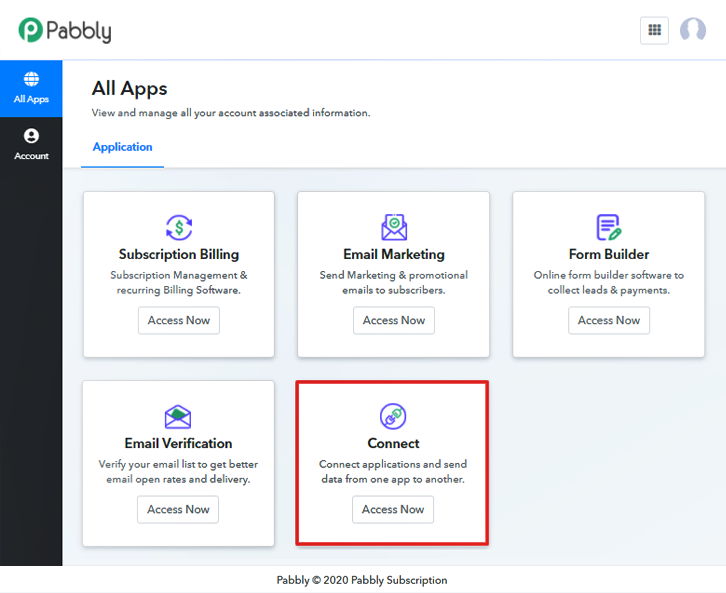
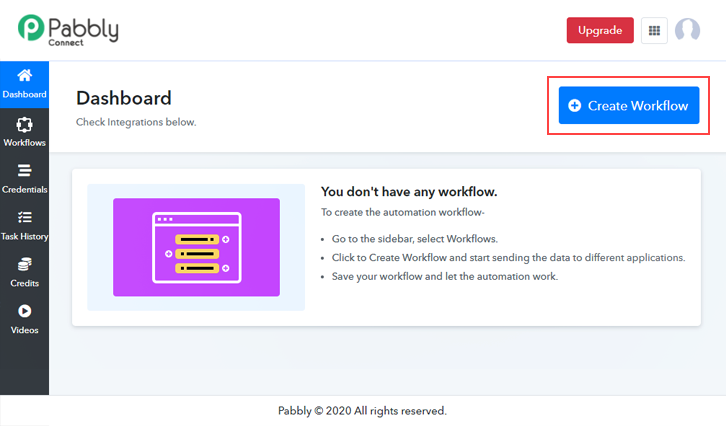
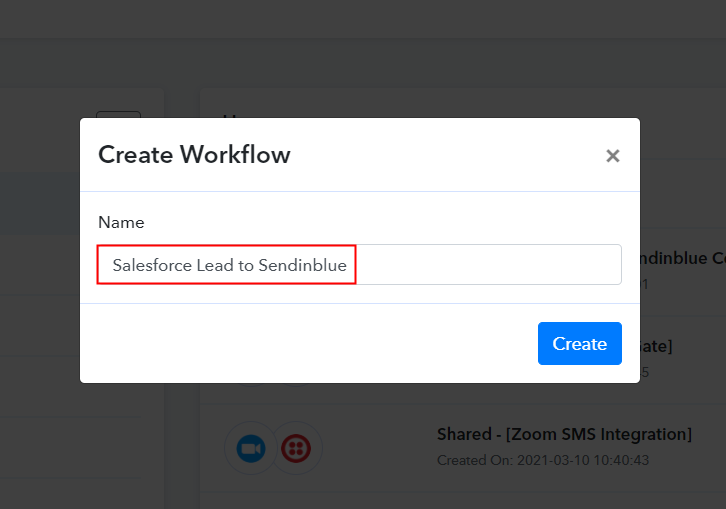
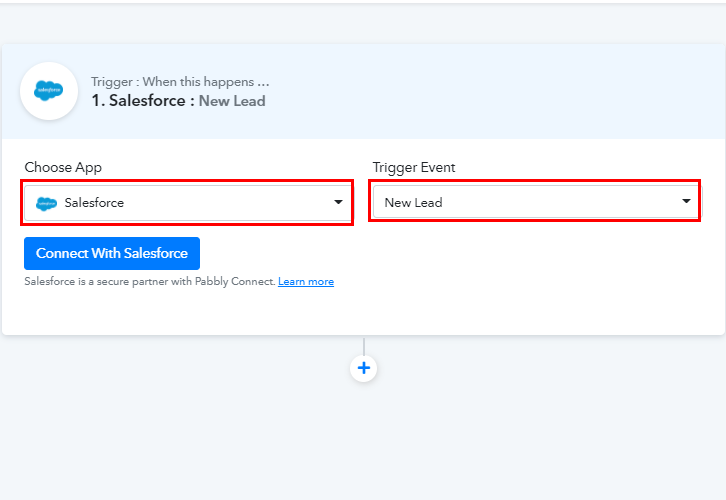
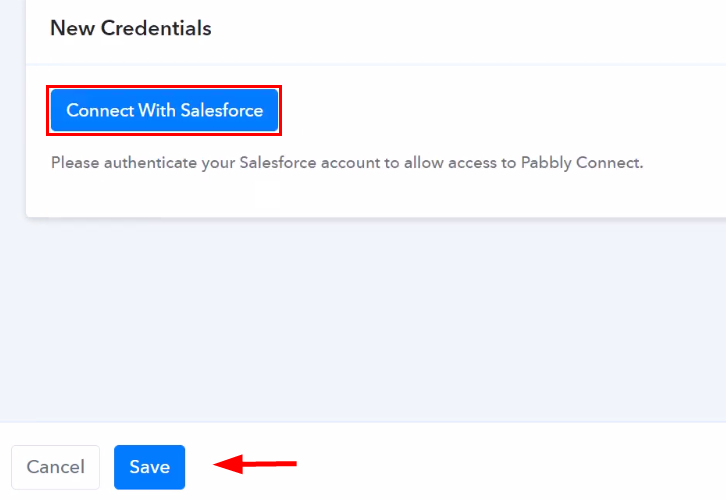
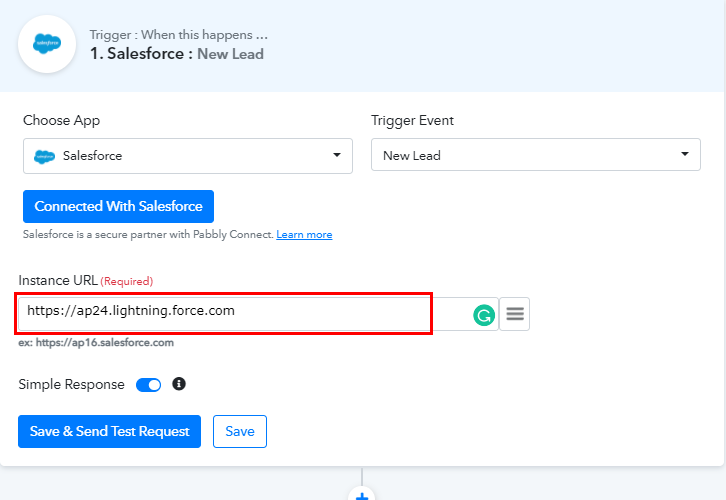
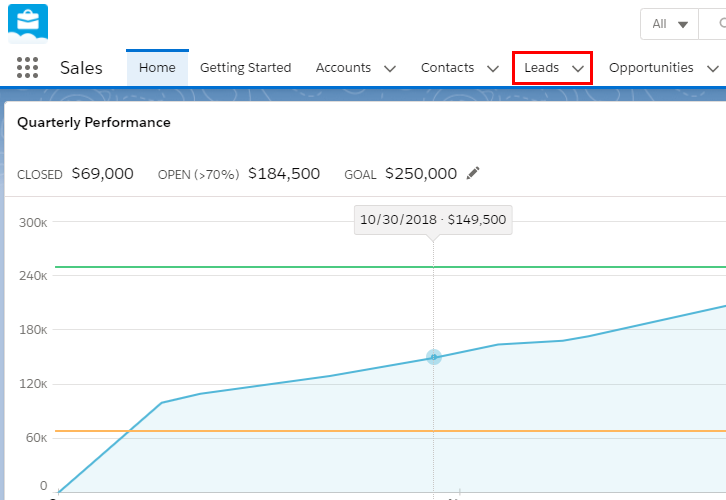
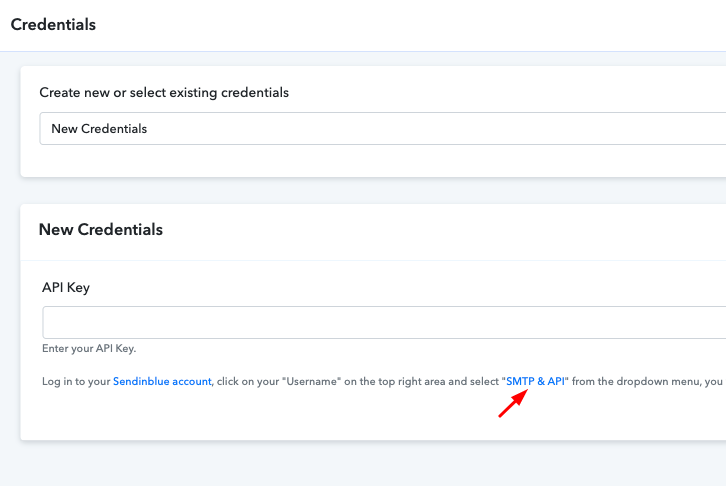
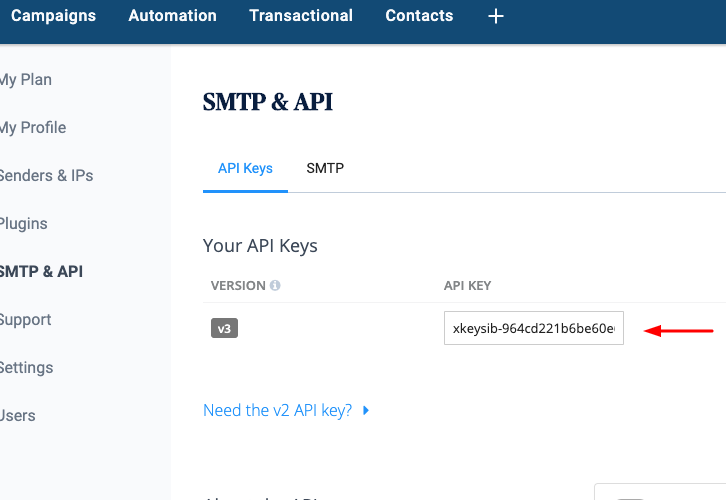
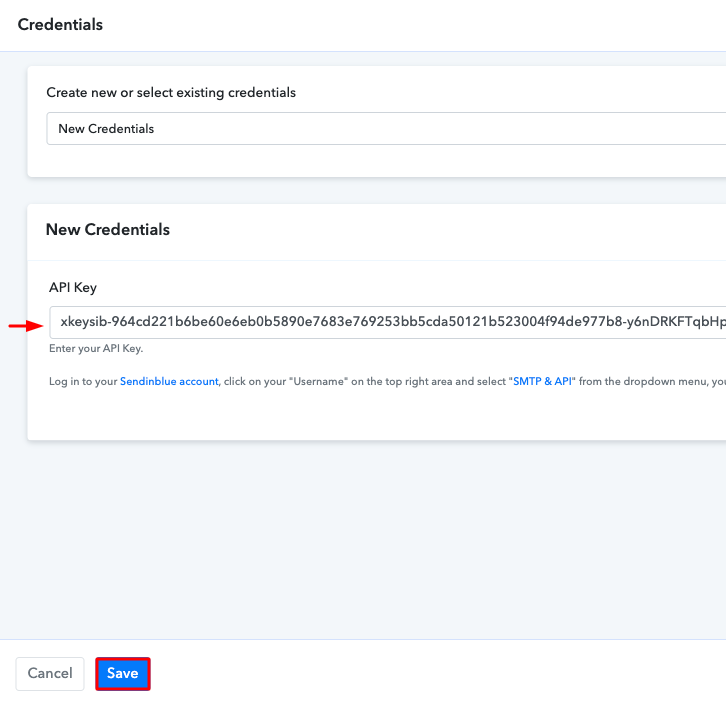
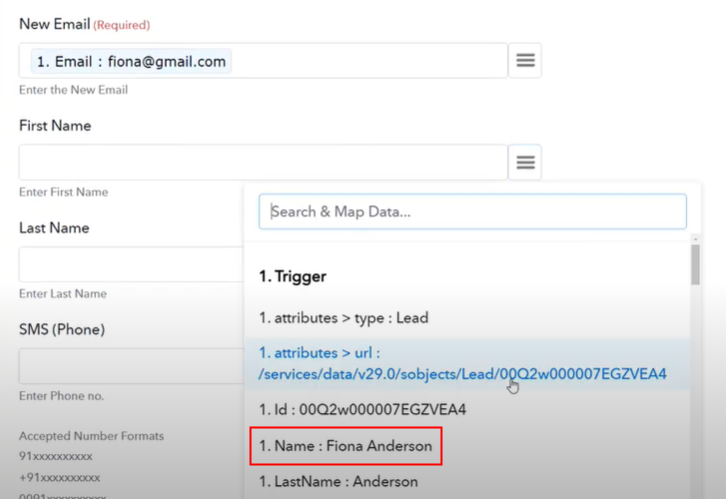
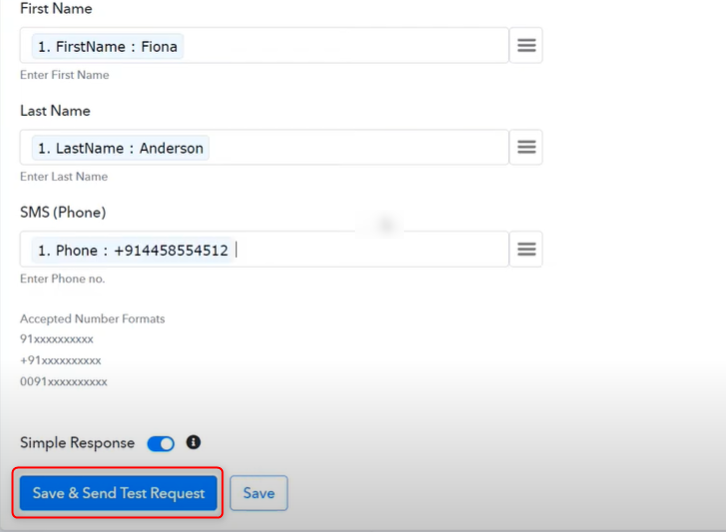
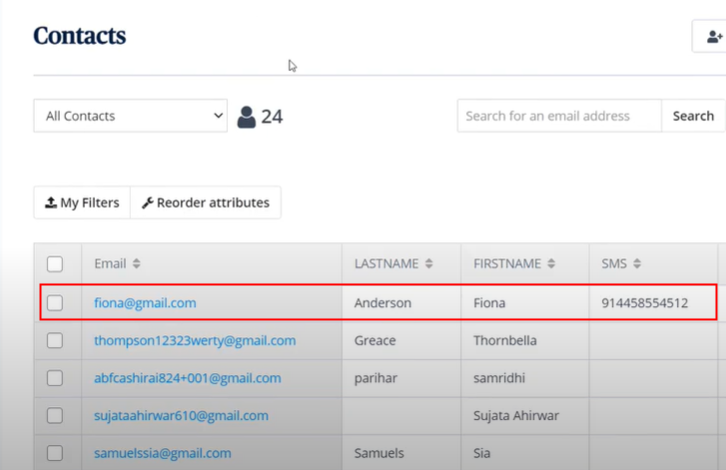
Next, after logging into the account, click on the ‘Access Now’ button of the Connect section in the dashboard. Start with creating a workflow for your project by clicking on the ‘Create Workflow’ button. Further, add the name of workflow which in our case is “Salesforce Lead to Sendinblue”. Nevertheless, you can always name the workflow according to your requirements. Further, you have to choose an app to add Sendinblue contact from new Salesforce lead. Pabbly Connect lets you bind or connect unlimited apps within minutes, click here to sign up for unlimited workflows. In the following step, choose ‘Salesforce’ from the choose app drop-down, and select ‘New Lead’ option from the Trigger Event. After choosing the application click on the ‘Connect With Salesforce’ button for the next step. Later, to connect Salesforce with Pabbly Connect, you have to authorize the application. For this, you have to log into your Salesforce account. In the next window that slides in from the right, again click on the ‘Connect with Salesforce’ button. Authorize your Salesforce account to connect with Pabbly Connect by allowing access. Then, click on the ‘Save’ button. Now, you get the ‘Instance URL’ from Salesforce website URL. Simply copy and paste it in the respective column as shown in the above image. To check if the integration is capturing data or not, we will be going to create a new lead in Salesforce. Now, go to the Salesforce dashboard, and click on ‘Leads’ menu. Promptly, click on the ‘New’ button to create a new lead. Further, you have to enter the new lead details such as first name, last name, address, and so forth. Then, click on the “Save” button to save the details. Subsequently, go to the Pabbly Connect window, and click on the ‘Save and Send Test Request’ button to get the response. At last, hit the ‘Save’ button. To make this Salesforce-Sendinblue integration work, you have to choose the action for your trigger. Later on, hit the + button below & choose the application that you want to integrate. Here we will choose “Sendinblue” to integrate and in the method section select “Create a Contact”. After choosing the application hit the “Connect with Sendinblue” button to move forward. Now, in order to connect Sendinblue to Pabbly Connect, you have to paste the API key into the Pabbly Connect dashboard from your Sendinblue account. Hence for that, you have to log in to your Sendinblue account. Once you hit the “Connect” button, a pop-up will slide in from the right side asking for the API key of your Sendinblue account. Just, hit the given link to get the API key. After you press the API link, you will reach the SMTP & API page of your Sendinblue account. Simply copy the given API key in order to proceed further. Following that, paste the copied API key into the Pabbly Connect dashboard and then tap on the “Save” button. After connecting with your Sendinblue account, map all the fields quickly like list ID, name, etc. Once you are done adding up all field data hit the “Save & Send Test Request” button. After mapping all the details, all you have to do is “Save & Send Test request”. Here, as you can see that our integration was successful and the Salesforce lead has been saved as a contact in your Sendinblue account automatically. Forthwith, whenever there will be any new lead in your Salesforce account, they will be automatically saved as contacts in your Sendinblue account. Finally, now you know “How to Add Sendinblue Contact from New Salesforce Lead“. This is a one-time process, now all your manual work will be done by the online business automation and integration tool i.e Pabbly Connect. Simply follow this step by step procedure mentioned above and your Salesforce to Sendinblue integration is all set. So, what are you waiting for? Go ahead & catch your deal by signing up for a free account. In case of any queries, please drop your comments below. We will get back to you as soon as possible.Step 2: Access Pabbly Connect
Step 3: Workflow for Salesforce with Sendinblue Integration
(a) Start with a New Workflow
(b) Name the Workflow
Step 4: Setting Trigger for Salesforce to Sendinblue Integration
(a) Select Application you Want to Integrate
(b) Connect with Salesforce
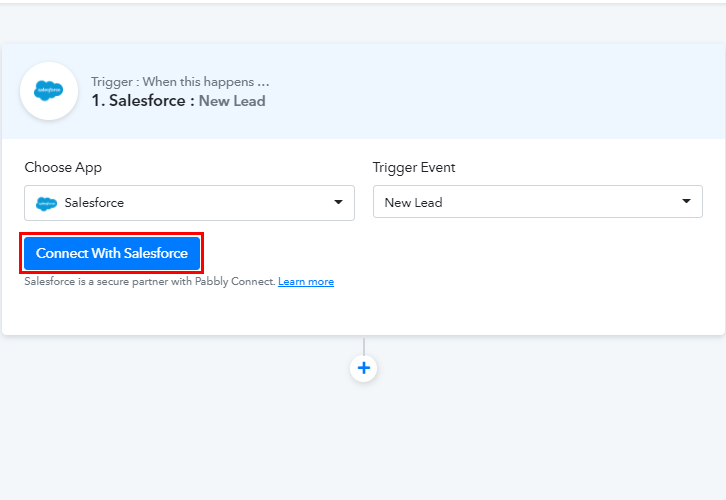
Step 5: Connecting Salesforce to Pabbly Connect
(a) Authorize Salesforce Account
(b) Paste Instance URL
Step 6: Create a New Lead
(a) Click on Leads
(b) Create a New Lead
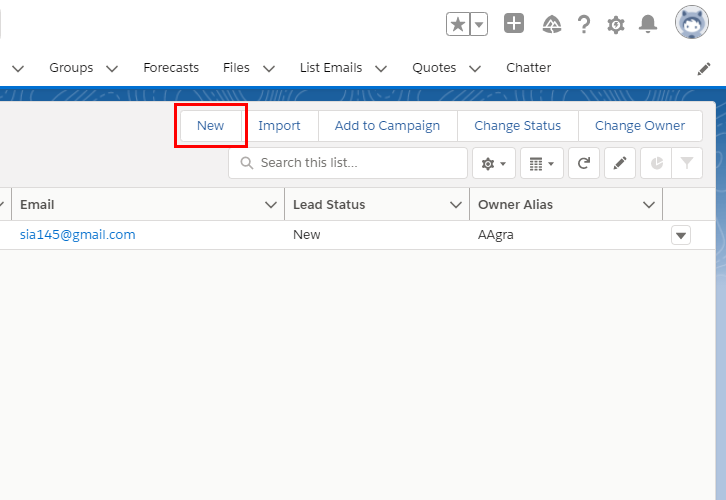
(c) Enter Lead Info
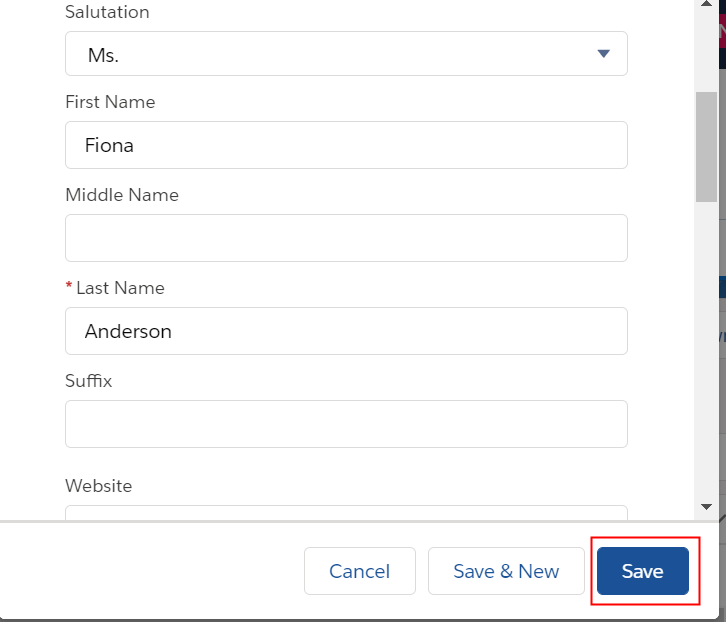
Step 7: Test the Response in Pabbly Connect Dashboard
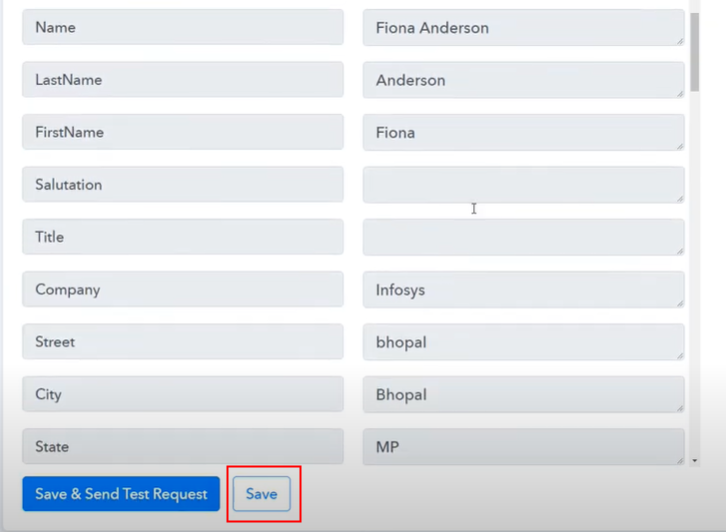
Step 8: Setting Action for Salesforce to Sendinblue Integration
(a) Select Application you Want to Integrate
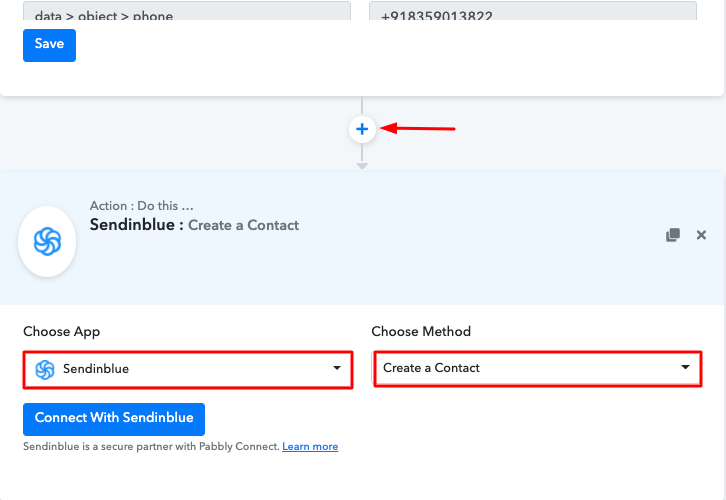
(b) Click the Connect Button
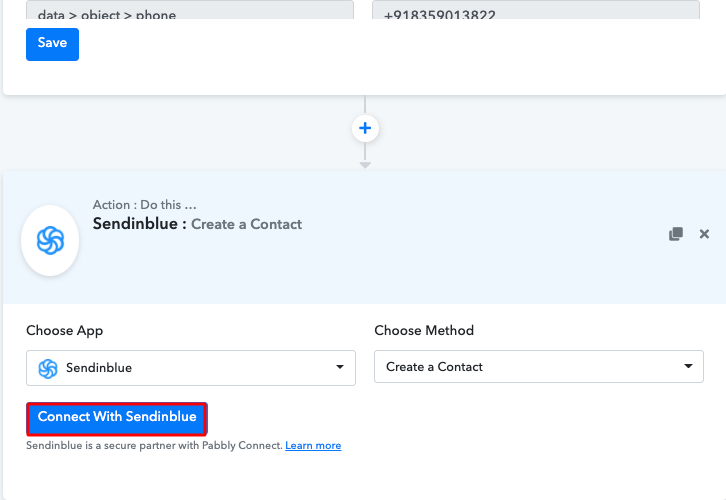
Step 9: Connecting Sendinblue to Pabbly Connect
(a) Click on the API Link
(b) Copy the API Key
(c) Paste the API Key
(d) Map the Fields
(e) Save and Sent Test Request
Step 10: Check Response in Sendinblue Dashboard
Conclusion –
You May Also Like To Read –


