Are you are looking for some way by which you can easily send WhatsApp notifications for WooCommerce orders automatically? If yes, then here we are going to explain you WooCommerce – WhatsApp integration using Pabbly Connect.
Pabbly Connect is an affordable option to connect multiple services for sharing information in real-time. Moreover, it will only take a minute interval to automate your repetitive tasks.
Also, you can use routers, formatters, instant triggers, multi-step calls & many premium features of Pabbly Connect for workflows without any restriction even in the free plan.
Let’s learn a little bit about the services, before getting started with the workflow. WooCommerce is an e-commerce WordPress plugin that enables big & small business owners to sell goods online. Whereas, WhatsApp is a free, multiplatform messaging app that lets you make video and voice calls, send text messages, and more.
Why Choose This Method Of Integration?
In contrast with other integration services-
- Pabbly Connect does not charge you for its in-built apps like filters, Iterator, Router, Data transformer, and more
- Create “Unlimited Workflows” and smoothly define multiple tasks for each action
- As compared to other services which offer 750 tasks at $24.99, Pabbly Connect offers 50000 tasks in the starter plan of $29 itself
- Unlike Zapier, there’s no restriction on features. Get access to advanced features even in the basic plan
- Try before you buy! Before spending your money, you can actually signup & try out the working of Pabbly Connect for FREE
As we are all aware that WhatsApp is an ever-increasing tool for communication and being a WooCommerce seller, you should consider sending order confirmation notifications via WhatsApp instantly. It sounds impracticable to you as there is no way possible to integrate WooCommerce-WhatsApp thus far.
Therefore, we will use Pabbly Connect to automate this task such that when an order is purchased through WooCommerce then automatically send a notification to customer via WhatsApp in real-time.
We have also inserted a video to facilitate the workflow for you-
We have also provided a link of a ready-made template to launch this workflow instantly, simply click on the ‘Use Workflow’ button. Moreover, in search of more premium integrations just visit Marketplace and get the template according to your requirement.
Hence, without taking any more of your time, let’s begin the procedure to integrate WooCommerce – WhatsApp integration.
Step 1: Sign up to Pabbly Connect
Get going through the process to send WhatsApp notifications for WooCommerce orders by visiting the website of Pabbly Connect and then click on the ‘Sign-Up Free‘ button. Next, either signup using an existing Gmail account or manually fill out the form.
Try Pabbly Connect for FREE
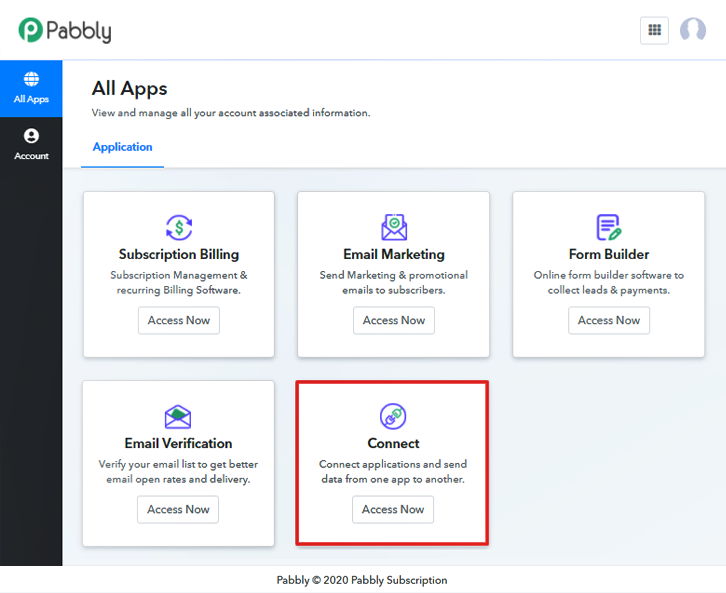
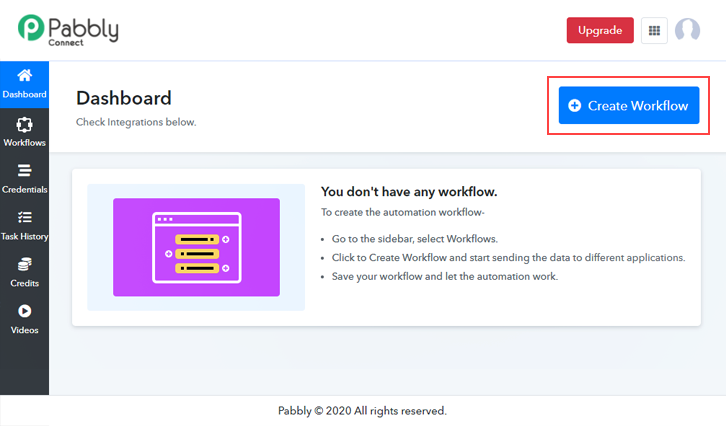
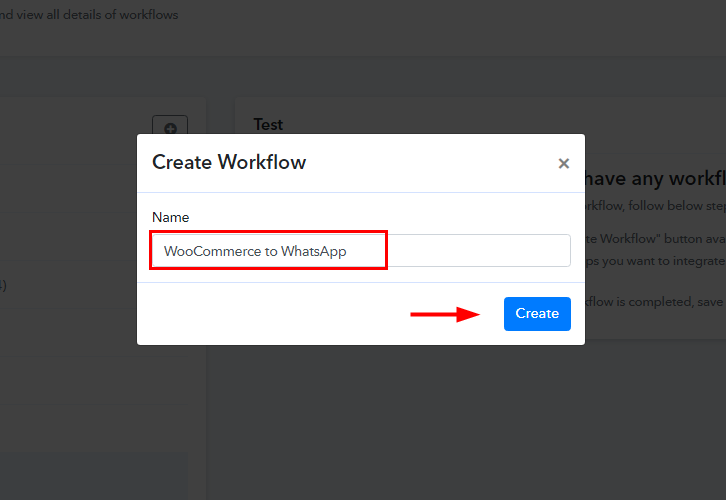
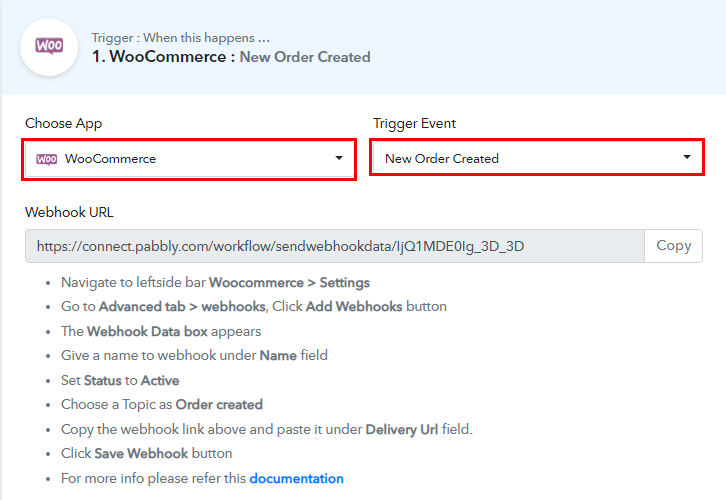
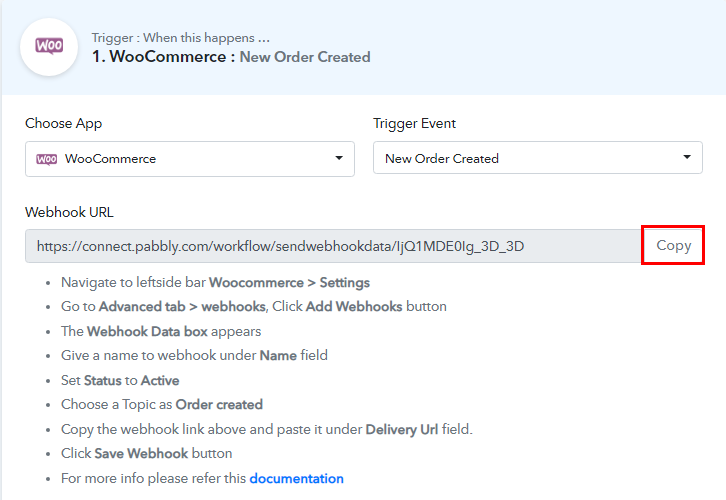
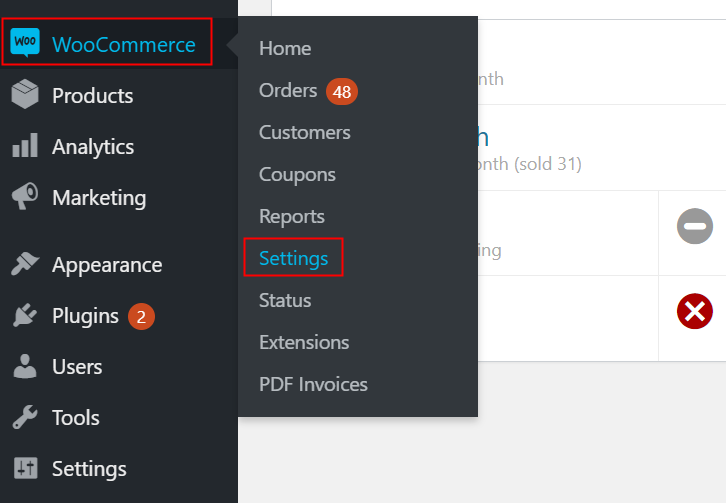
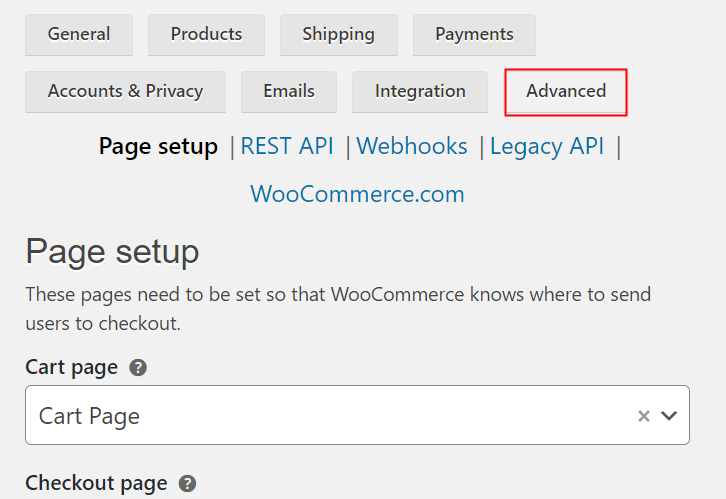
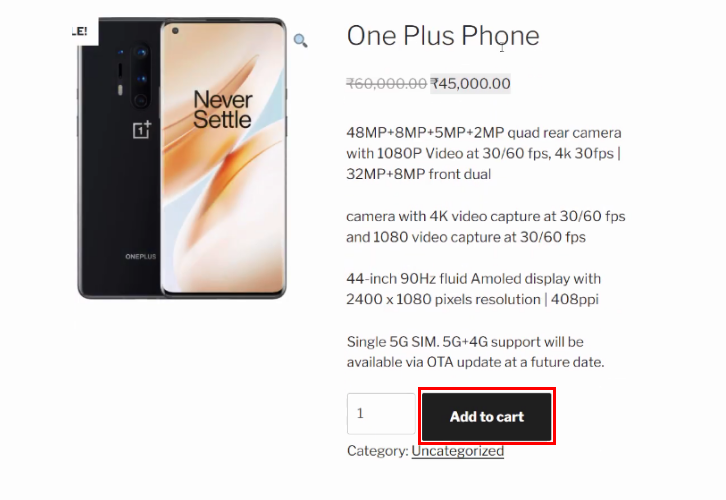
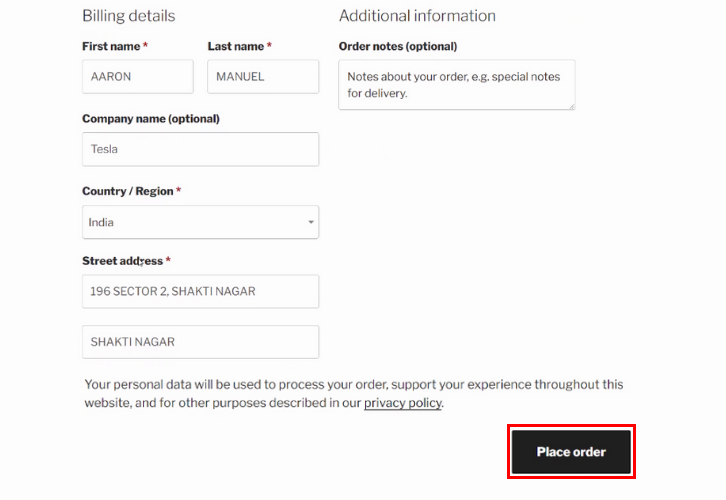
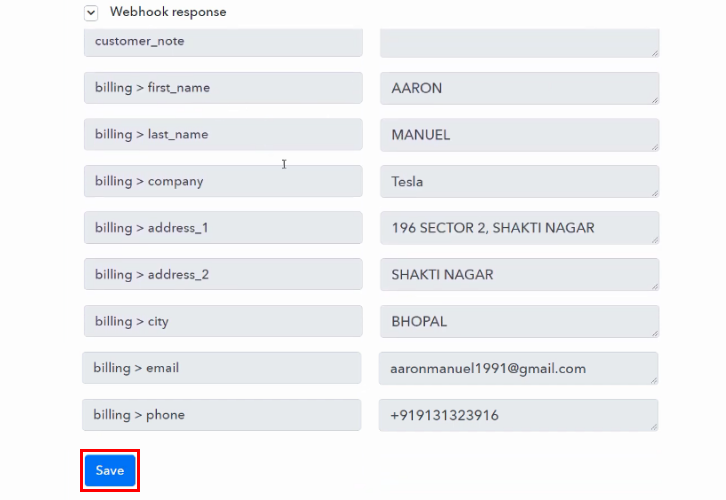
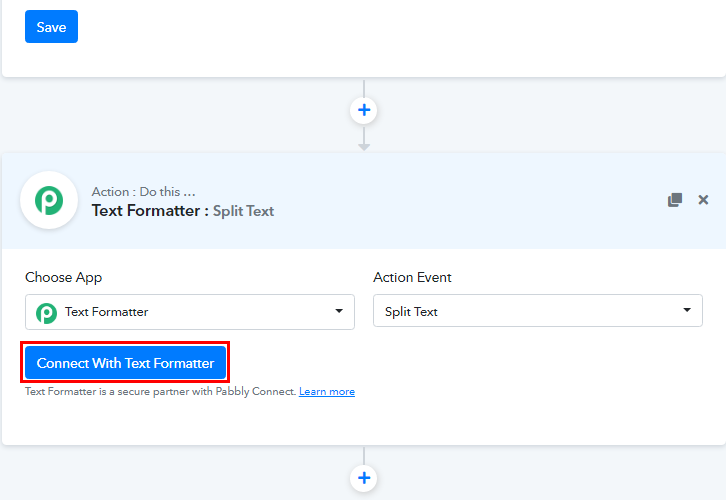
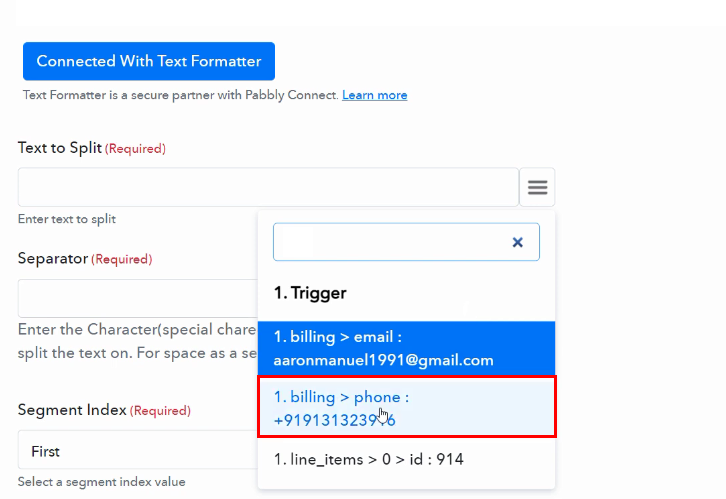
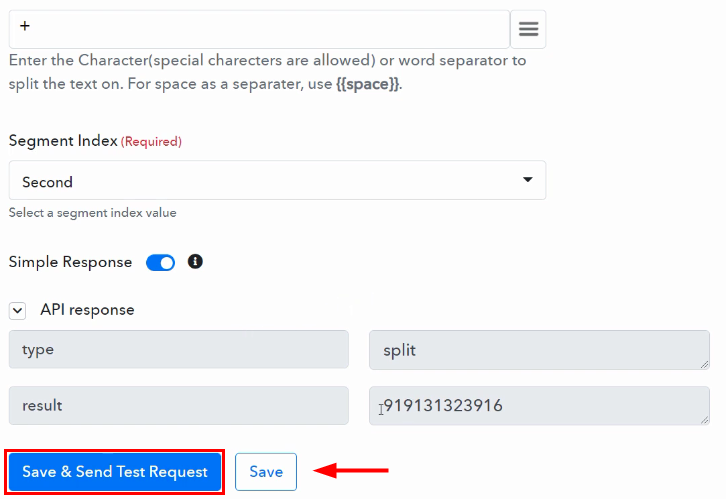
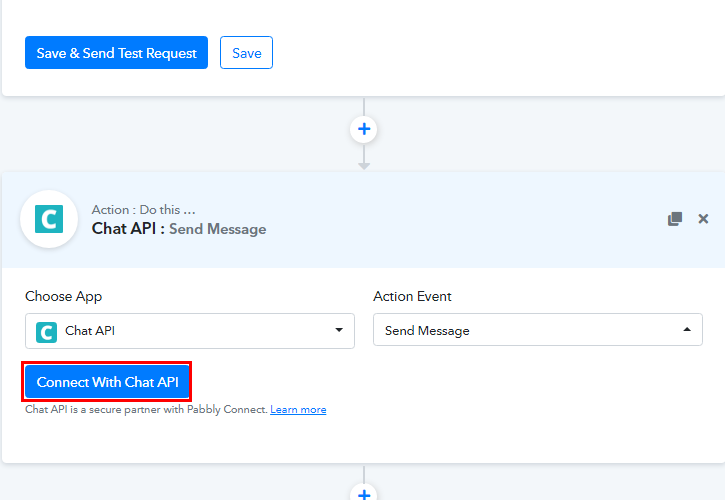
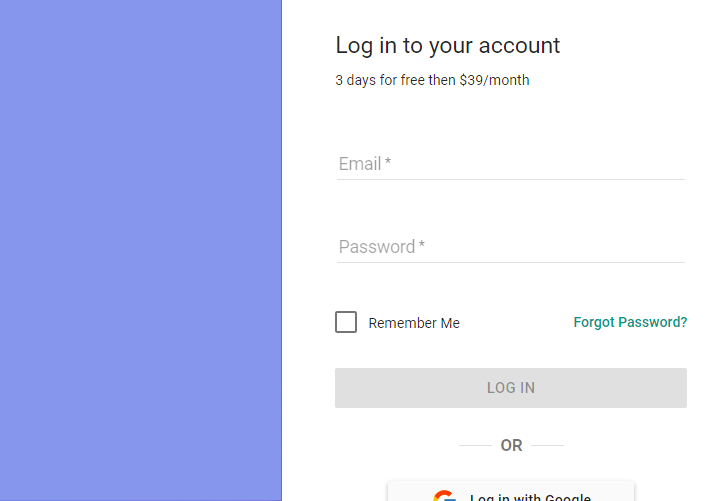
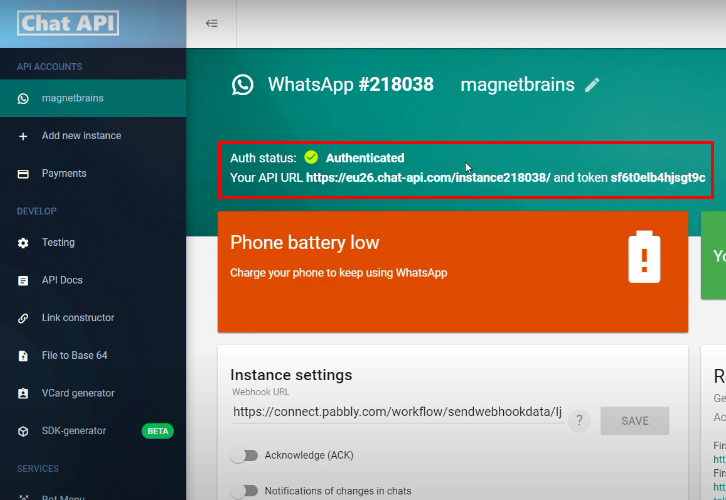
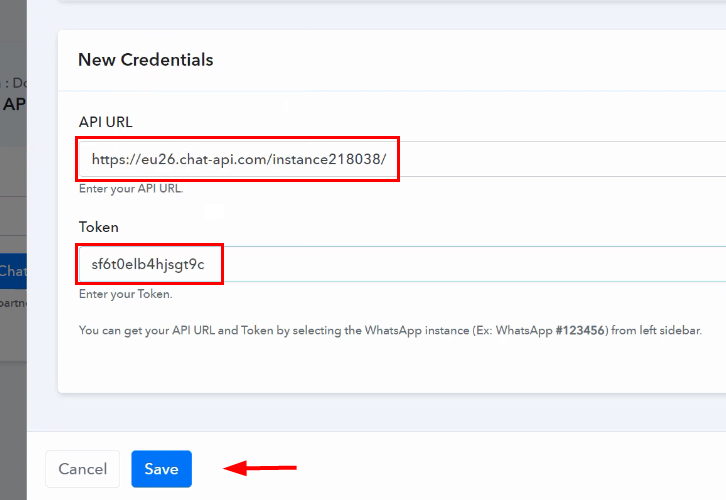
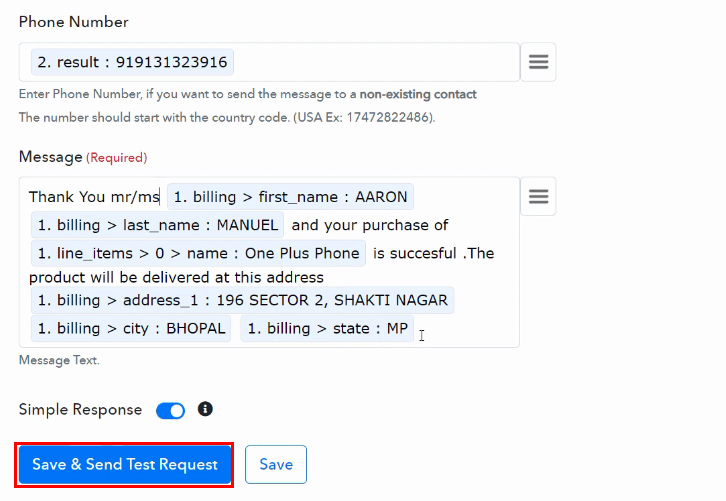
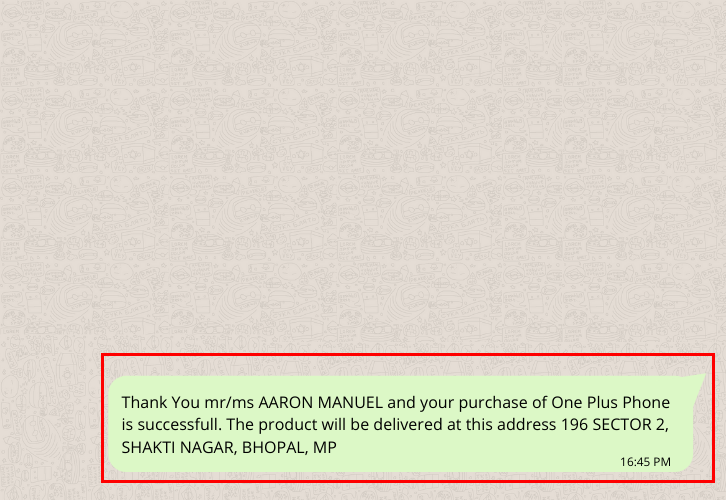
After logging to your account, click on the Connect section in the dashboard to access Pabbly Connect. Start with creating a workflow for your project by clicking on the ‘Create Workflow’ button. Now, you need to name the workflow just like in the above-shown image. I named the workflow ‘WooCommerce to WhatsApp’, you can obviously name the workflow as per your requirements and needs. After naming your workflow, you have to select the application to send WhatsApp notifications for WooCommerce orders. Pabbly Connect allows you to integrate unlimited premium applications, try Pabbly Connect for free now. Now, you have to select the application that you want to integrate. In this case, we are choosing ‘WooCommerce’ for integration and then select ‘New Order Created’ in the choose method section. After selecting the application, now you have to copy the webhook URL just like in the above-shown image to take further the integration process. To connect WooCommerce with Pabbly Connect, you have to paste the copied webhook URL in the software, for that, you need to log in to your WordPress account. Once you have logged into your WordPress account, now click on ‘WooCommerce’ then select ‘Settings’ option. Furthermore, when you hit ‘Settings’, it will open a tab with multiple options. Simply select the ‘Advanced’ option. Afterward, when you hit the ‘Webhooks’ button, a new tab with many options will open up. To paste the Webhook URL, just click on the ‘Add Webhook’ option. Subsequently, you will have to enter the Webhook Data in the mentioned fields like webhook name, topic, along with this paste the above copied Webhook URL in ‘Delivery URL’ section, and make sure to change the status to ‘Active’. At last, press the ‘Save Webhook’ button. To check this integration, we will capture the order from WooCommerce, and for that, we will make a test purchase on WooCommerce. Now, to capture the data from WooCommerce, click on the ‘Capture Webhook Response’ button in Pabbly Connect. After this, again visit your WooCommerce window. Click on ‘Products’ option, then press ‘All Product’ tab and select any product by clicking on ‘View’ button. Next, you will be redirected to a new page, here click on ‘Add to Cart’ button and then tap ‘Proceed to Checkout’ button. Subsequently, place an order by filling up customer details and after that click on ‘Place Order’ button. As soon as you click on the ‘Place Order’ button in WooCommerce, the entry will appear on the ‘Pabbly Connect’ dashboard. Just click on the ‘Save’ button. From the above webhook response, we have got the mobile phone number with a (+) prefix and to remove that we have to add ‘Text Formatter’ in the action step. Now, click on the plus (+) button and from the choose app select ‘Text Formatter’ and choose method as ‘Split Text’. Promptly, click on the ‘Connect With Text Formatter’ button to connect it. Following that, map the field to remove the (+) sign from phone number as shown in above image. Once you are done mapping the fields, click on the ‘Save and Send Test Request’ button and you will see that the (+) sign is now removed from the phone number. After that, click on the ‘Save’ button. Subsequently, to make this WooCommerce – WhatsApp integration work, we have to set up the last action for our workflow. Now, click on the + button below and choose ‘Chat API’ in the choose app and in the method section select ‘Send Message’. After choosing the application click on the ‘Connect with Chat API’ button to move forward. Next, in order to connect Chat API with Pabbly Connect, you need to paste the ‘API URL’ and ‘Token’ from your Chat API account. For that, you have to log in to your Chat API account. Now, login to your ‘Chat API’ account by filling up your credentials or log in with Google. Further, you will be redirected to the dashboard of Chat API. From here, copy the ‘API URL’ and ‘Token’ as shown in above image. Promptly, paste the copied ‘API URL’ and ‘Token’ in the Pabbly Connect window. At last, hit the ‘Save’ button. After this, map all the fields like ‘Phone Number’ and ‘Message’. Once you are done mapping all the fields, click on the ‘Save and Send Test Request’ button. Lastly, when you check your WhatsApp account, notification of a newly purchased order has been sent successfully. In a nutshell, this was all about ‘How to Send WhatsApp Notifications for WooCommerce Orders’. Consequently, after completing the step-by-step procedure, you will end up sending a notification message via WhatsApp for every WooCommerce order automatically. Meanwhile, you can grab Pabbly Connect for FREE with all its premium features. Also, comment below your queries and suggestions.Step 2: Access Pabbly Connect
Step 3: Workflow for WooCommerce to WhatsApp Integration
(a) Create New Workflow
(b) Name the Workflow
Step 4: Setting Trigger for WooCommerce to WhatsApp Integration
(a) Select Application you want to Integrate
(b) Copy the Webhook URL
Step 5: Connecting WooCommerce to Pabbly Connect
(a) Go to WooCommerce Settings
(b) Click on Advanced Option
(c) Click on Webhooks Option
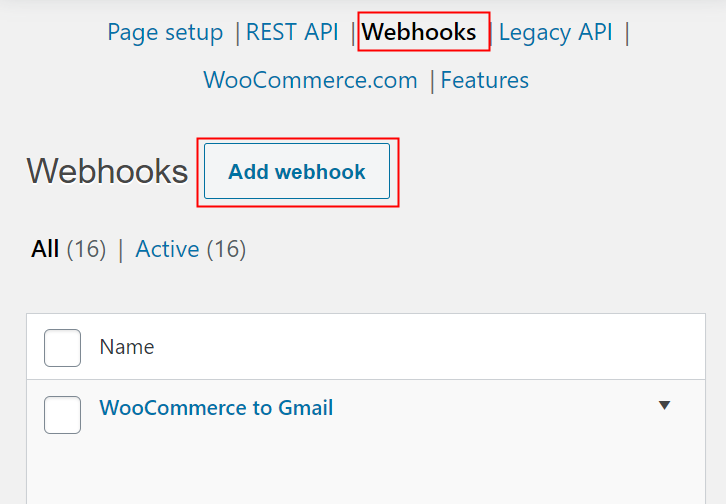
(d) Add Webhook URL
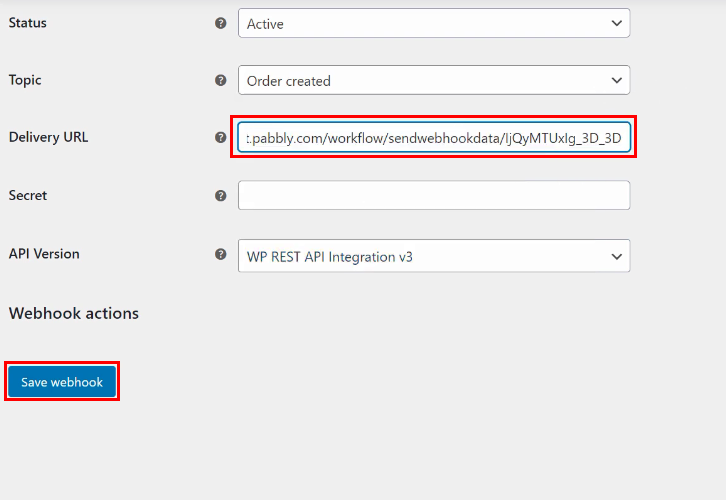
Step 6: Make a Test Purchase
(a) Capture the Webhook Response
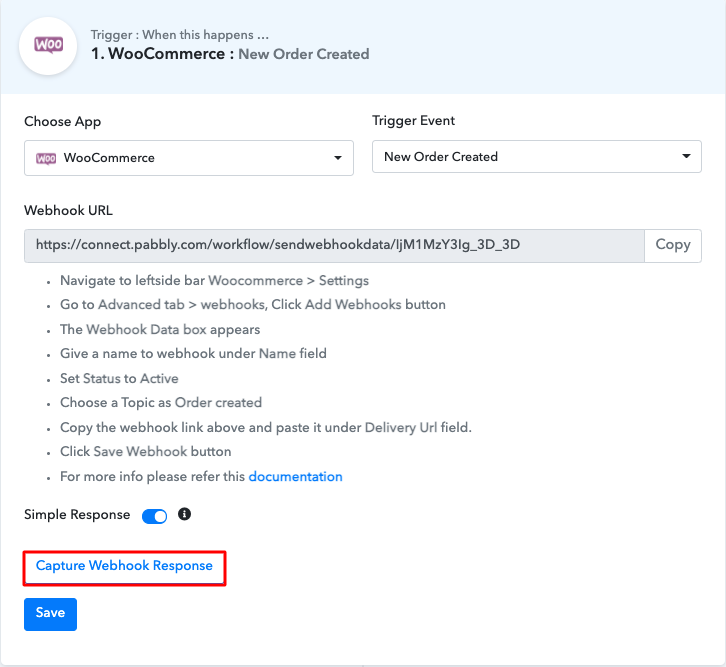
(b) Select any Product
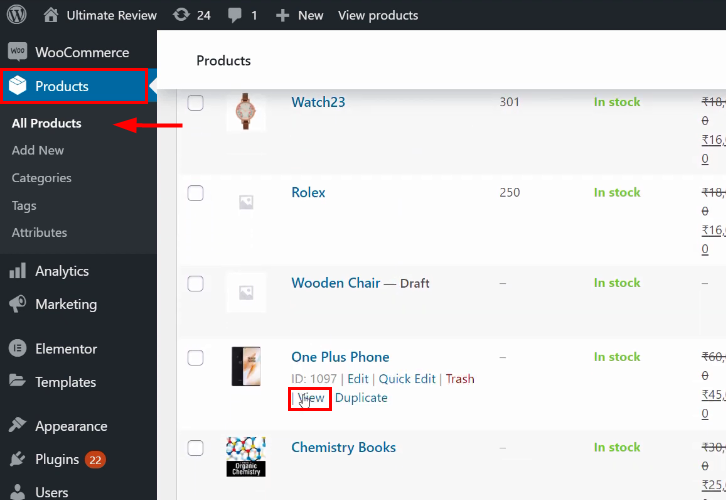
(c) Click on Add to Cart
(d) Fill the Customer Details
(e) Save the Response
Step 7: Setting Action for Text Formatter
(a) Select Application you Want to Integrate
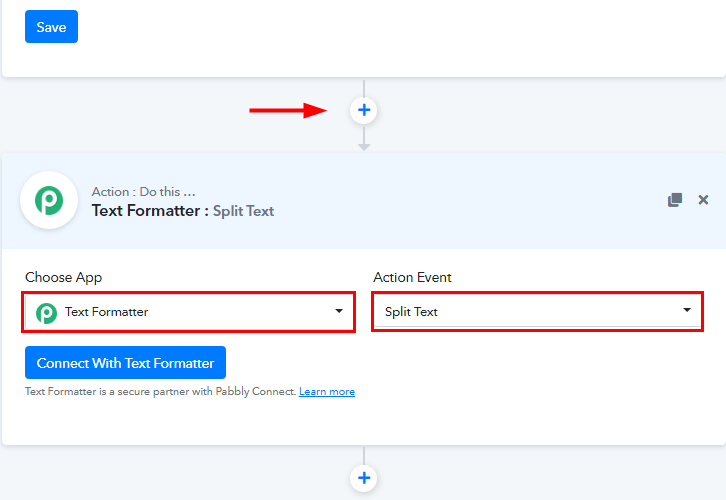
(b) Connect with Text Formatter
(c) Map the Field
(d) Save and Send Test Request
Step 8: Setting Action for WooCommerce to WhatsApp Integration
(a) Select Application you want to Integrate
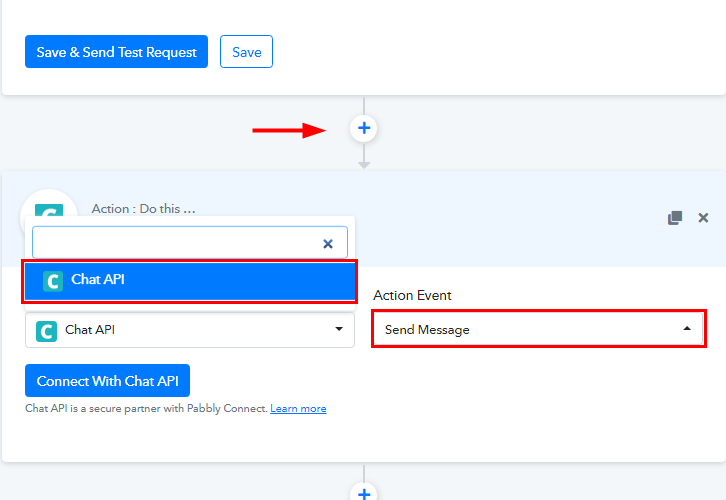
(b) Click on Connect Button
Step 9: Connecting Chat API to Pabbly Connect
(a) Login to Chat API
(b) Copy API URL and Token
(c) Paste API URL and Token
(d) Map the Fields
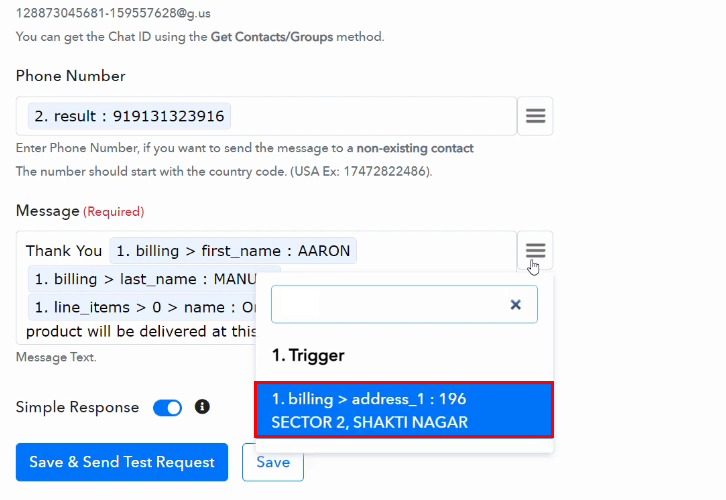
(e) Save & Send Test Request
Step 10: Check Response in WhatsApp Dashboard
Conclusion –
You May Also Like to Read –


