Searching for ways to transfer Razorpay payment details automatically to Google Spreadsheet? Then, you don’t have to look any further, as here you will get a step by step guide to do so using Pabbly Connect.

In this blog, we are going to integrate Razorpay with Google Sheets so that whenever there is a new transaction happens inside Razorpay it will automatically get updated inside Google Sheets.
Hence, to do so, we will be using an integration software named Pabbly Connect that will help you connect different software through a single interface. With this, you can create automated workflows and transmit the data between your favorite apps and services without any manual work or coding skills. Moreover, this is the only software that lets you create unlimited workflows, connect limitless applications, filters, etc., even in its free plan.
Why Choose This Method Of Integration?
In contrast with other integration services-
- Pabbly Connect does not charge you for its in-built apps like filters, Iterator, Router, Data transformer and more
- Create “Unlimited Workflows” and smoothly define multiple tasks for each action
- As compared to other services which offer 750 tasks at $24.99, Pabbly Connect proffers 50000 tasks in the starter plan of $29 itself
- Unlike Zapier, there’s no restriction on features. Get access to advanced features even in the basic plan
- Try before you buy! Before spending your money, you can actually signup & try out the working of Pabbly Connect for FREE
All you need to do is follow the steps below and your automation is set. So, let’s get started.
Step 1 – Sign up to Pabbly Connect

Firstly, visit the Pabbly Connect website and click on the Sign-up Free button. Promptly, either manually enters all the details or sign up using Gmail credentials.
Step 2 – Access Pabbly Connect
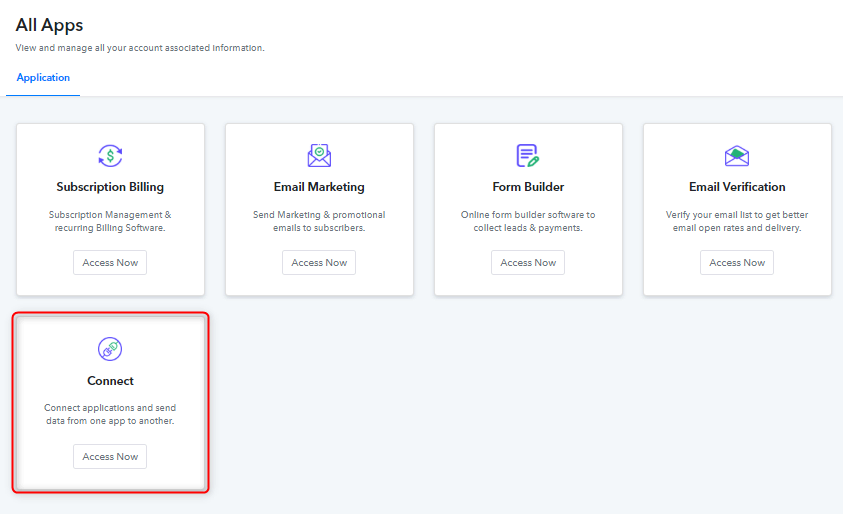
After completing the signup process, click on the “Access Now” button of Connect.
Step 3 – WorkFlow to Integrate Razorpay & Google Sheets
(a) Create New Workflow

Let’s begin the process of creating a workflow to automatically transfer Razorpay payment details to Google Sheet by hitting the ‘Create New Workflow’ button.
(b) Name the Workflow
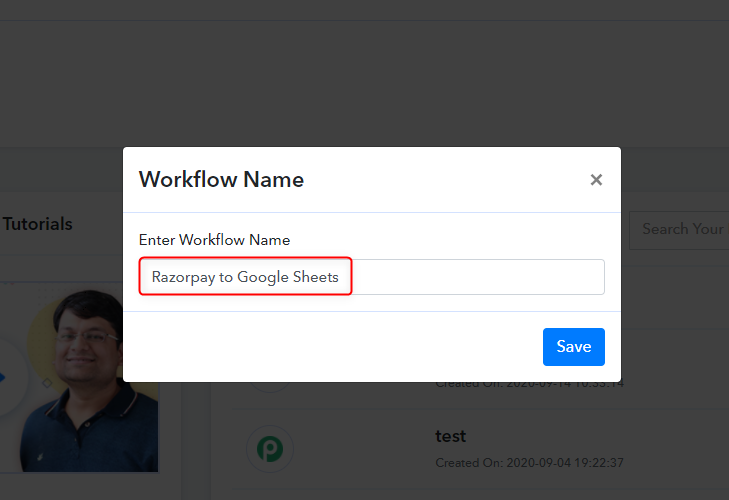
Now, named your workflow which in our case is “Razorpay to Google Sheets.”
Step 4 – Setting Trigger for Razorpay & Google Spreadsheet Integration
With Pabbly Connect, you can integrate or connect unlimited apps and create unlimited workflows, click here to claim your access to unlimited workflows. As soon as you are done with creating a workflow, you will have to select the application you want to integrate.
(a) Select Application you want to Integrate
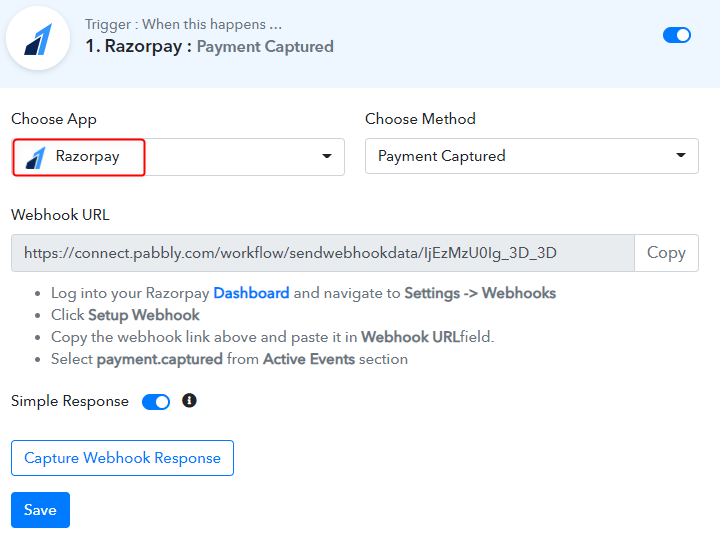
Here, choose the Razorpay application from the drop-down menu and method as “Payment Captured”.
(b) Copy Webhook URL
Now, the next step is to copy the webhook URL which is appearing on the dashboard. Then, click on the “Capture Webhook Response”.
Step 5 – Connecting Razorpay to Pabbly Connect
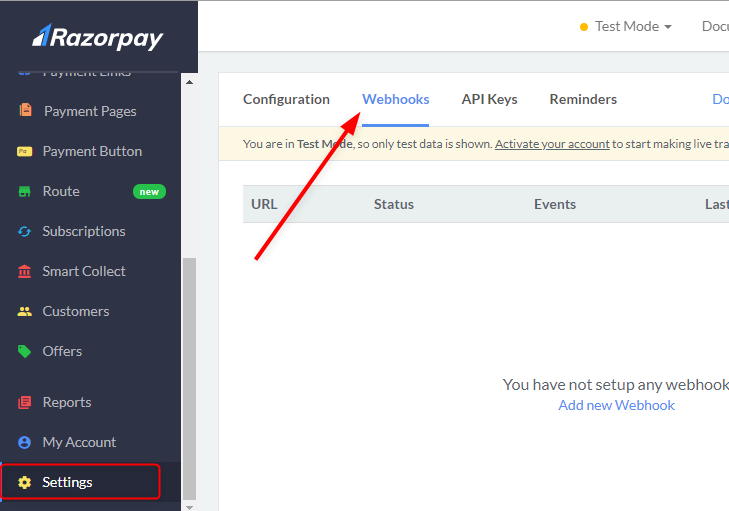
Now, go to your Razorpay account and click on the “Settings” options. As soon you click on the settings Webhooks option will appear on the menu.
(a) Setup Webhook
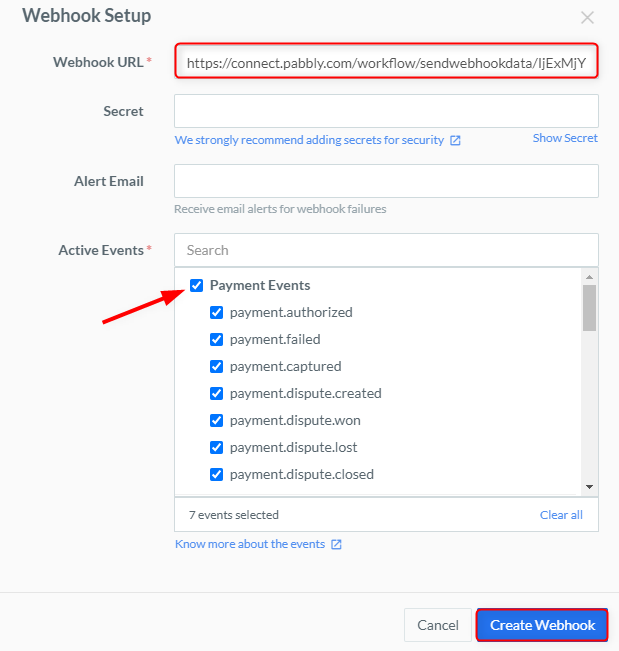
Therefore, just paste the Webhook URL, click on the “Payment Events” and create your Webhook.
(b) Open Your Payment Form
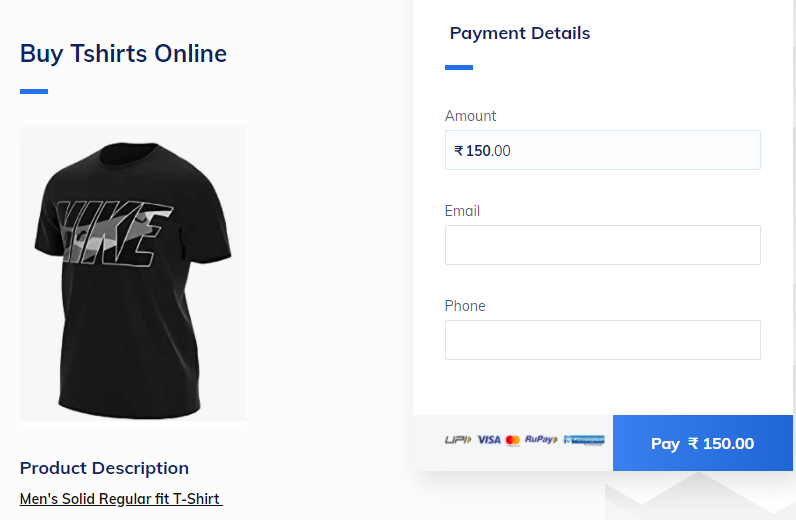
After that, open your payment page and fill all the details given in it like amount, email, phone etc. But before hitting the pay button click on the “Capture Webhook Response” button in the Pabbly Connect dashboard.
Step 6 – Test the Response in Pabbly Connect Dashboard
 As you fill in the details, you can see that it will be shown automatically in the Pabbly Connect’s dashboard. Hereabouts, you can see that the payment amount is visible without any decimal value such as we filled amount 150 Rs in form but here it shows 15000 Rs. So, now we have to convert this amount in Rupees format using our API module.
Step 7 – Trim Amount
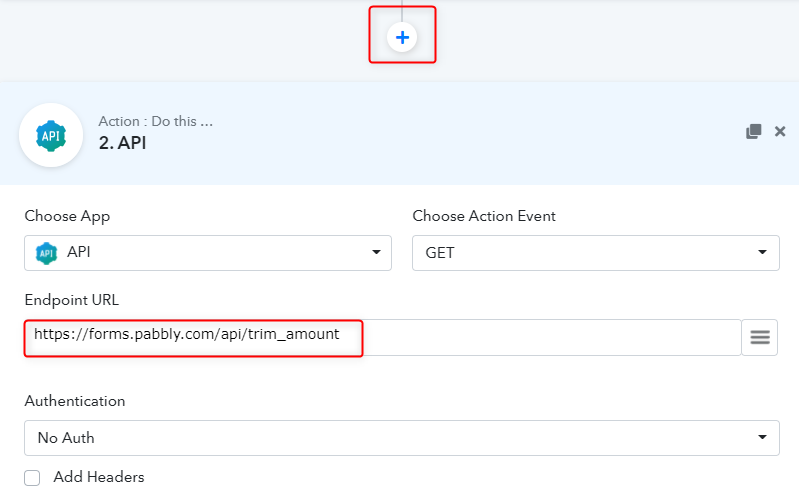
For trimming the amount click on the plus icon and add GET type of API in your workflow. You have to paste the trim amount API (https://forms.pabbly.com/api/trim_amount).
(a) Set Parameter

In this step, set the parameters, map the data module, and click on the “Save & Send Test Request” button. Further, you can see that the amount is trimmed.
Step 8 – Setting Action for Razorpay & Google Sheets Integration
Here, you have to set the action for your workflow which in our case is Google Sheets.
(a) Select Application you Want to Integrate
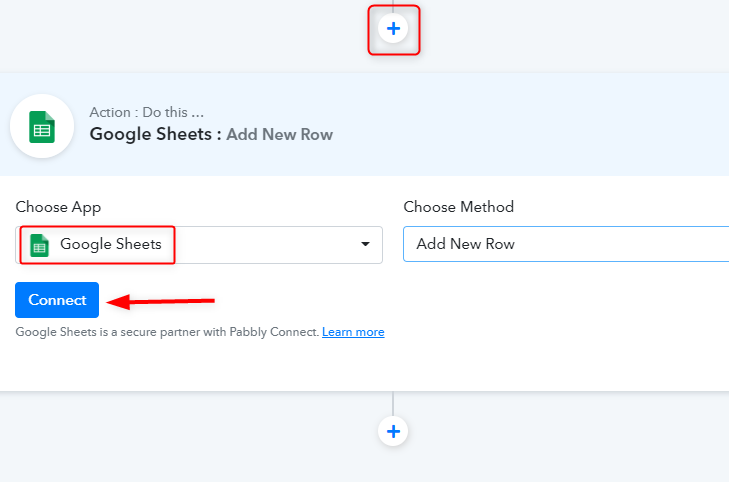
Click on the “+” icon to add an action for your trigger. Select “Google Sheets” from the drop-down list, choose the “Add New Row” option as a method, and hit the “Connect” button.
(a) Authorize your Google Sheets
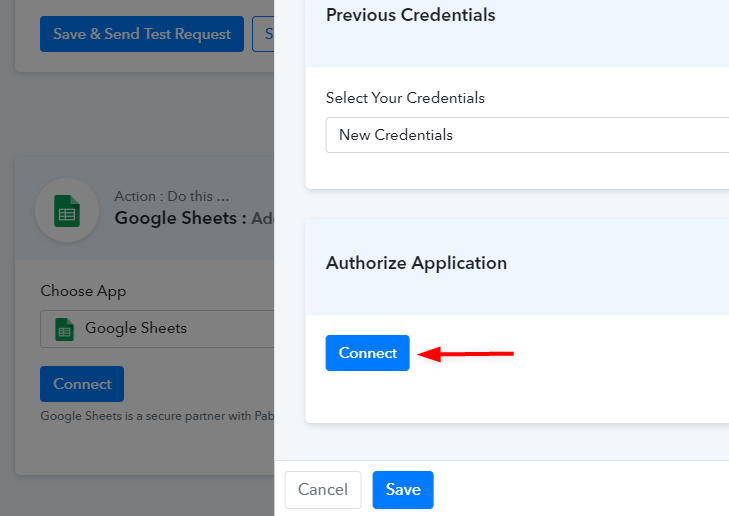
As soon as, you authorize your Google account and give permission to access files it automatically pulled spreadsheet headers in Pabbly Connect’s dashboard.
Step 9 – Mapping the Keys & Values
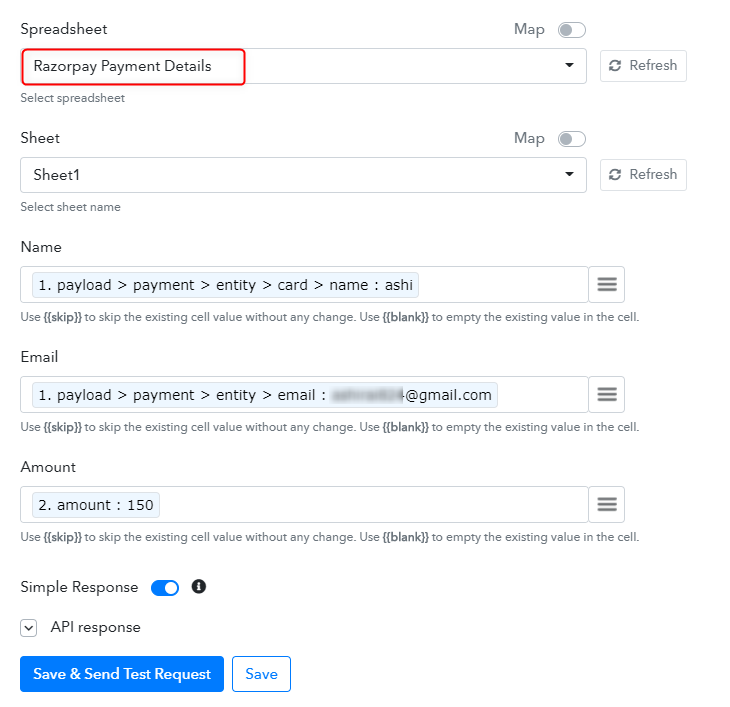
Further, select the sheet in which you want to add data which in our case is “Razorpay Payment Details”. Now, click on the three-line symbol to map the data such as email, name, amount etc according to your needs. After, doing all the changes hit the “Save & Send Test Request” button.
Step 10 – Check Response in Google Sheet
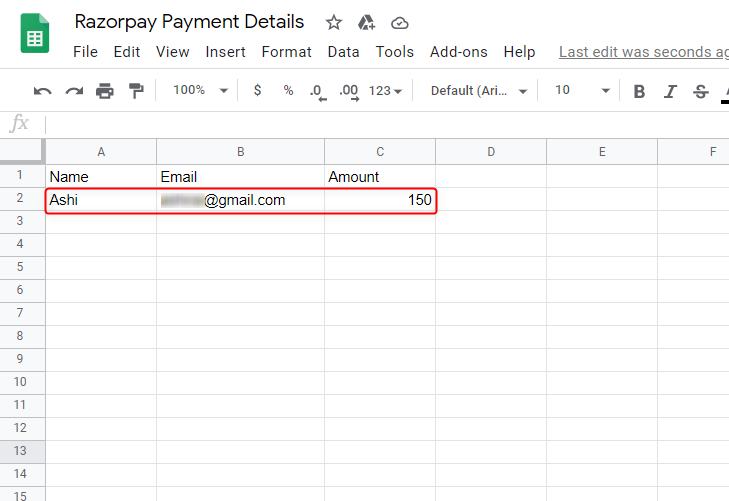
As soon as, you hit the send test request button data will appear on the Google sheet.
Wrapping Up
That’s it! now you have seen transfer Razorpay payment details automatically to Google Spreadsheet via Pabbly Connect. Not only this integration, but you can connect thousands of other applications together with the help of Pabbly Connect. Follow these simple steps and automate your projects by just signing up for a free account.
In case of any queries or suggestions, please leave your comments below.


