Are you shuffling your way to know how to create Pipedrive deals for DocuSign signed envelopes? If yes, then you’re at the right place, here we are going to integrate DocuSign and Pipedrive.

But first, let’s put light on both the software and why there is a need for DocuSign- Pipedrive integration. DocuSign is an e-signature platform used by millions of users. You can send contracts, invoices, and much more in a minute practically from anywhere across the globe. Whereas Pipedrive is a sales platform that helps to manage leads and deals. The software streamlines all the sales and keeps you on top of deals.
Using DocuSign and Pipedrive integration, you can offer deals on signed contracts in real-time. Not just this, integration automates the whole procedure. But the problem most of us face is finding the right tool that can connect DocuSign and Pipedrive.
Why Choose This Method Of Integration?
In contrast with other integration services-
- Pabbly Connect does not charge you for its in-built apps like filters, Iterator, Router, Data transformer, and more
- Create “Unlimited Workflows” and smoothly define multiple tasks for each action
- As compared to other services which offer 750 tasks at $24.99, Pabbly Connect proffers 50000 tasks in the starter plan of $29 itself
- Unlike Zapier, there’s no restriction on features. Get access to advanced features even in the basic plan
- Try before you buy! Before spending your money, you can actually signup & try out the working of Pabbly Connect for FREE
Well! Not anymore. Here we are recommending one of the best business automation tool named Pabbly Connect that can integrate thousands of apps in a matter of time without any coding skill.
The software streamlines the whole data transmission process. Also, it offers various features like unlimited workflows, triggers, actions, and much more even in its free plan.
Here in this article, we will understand how to create Pipedrive deals for DocuSign signed envelopes using an automation tool i.e Pabbly Connect.
So, let’s headstart the process.
Step 1: Sign up to Pabbly Connect

Begin the process of connecting DocuSign to Pipedrive by clicking on the “Sign Up Free” icon on the Pabbly Connect dashboard. Subsequently, either fill-up all the details manually or sign up using Gmail credentials.
Try Pabbly Connect for FREE
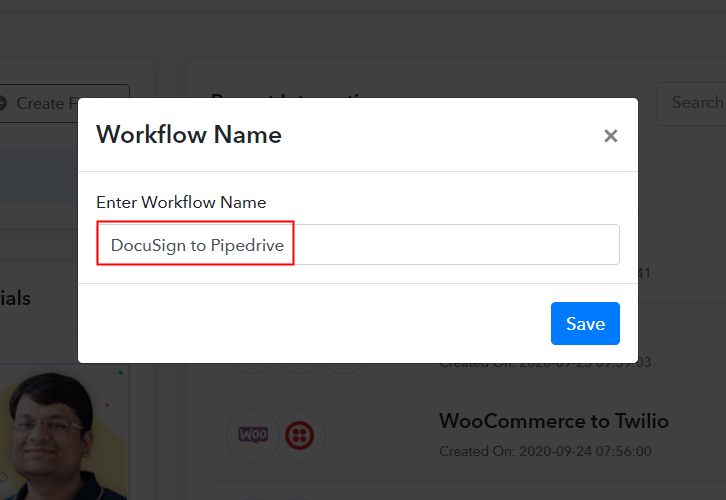
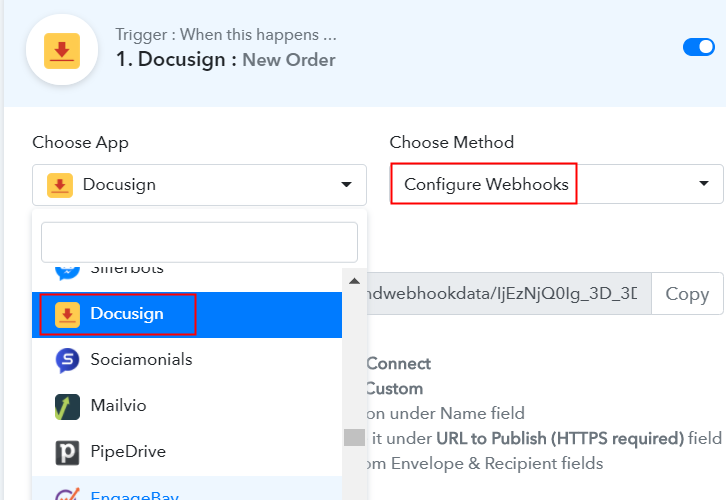
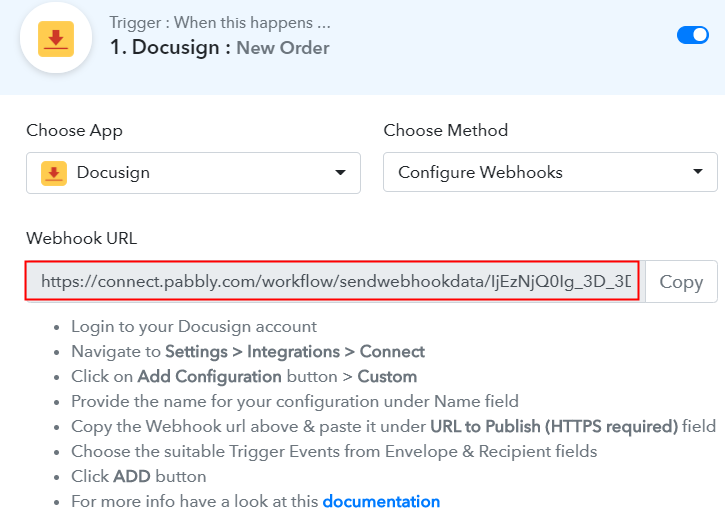
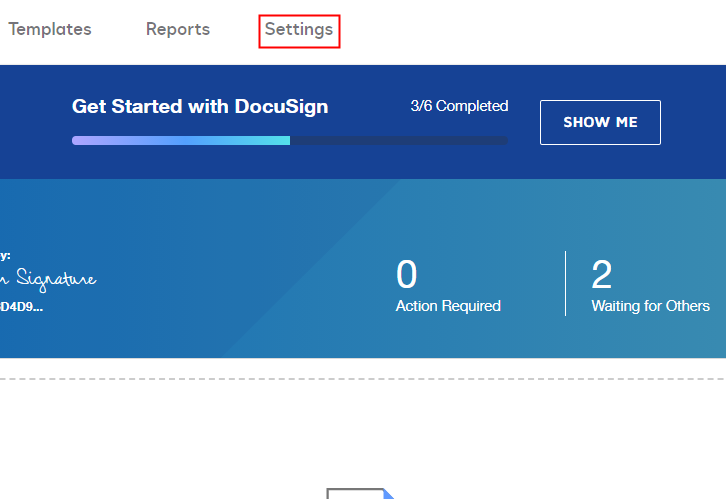
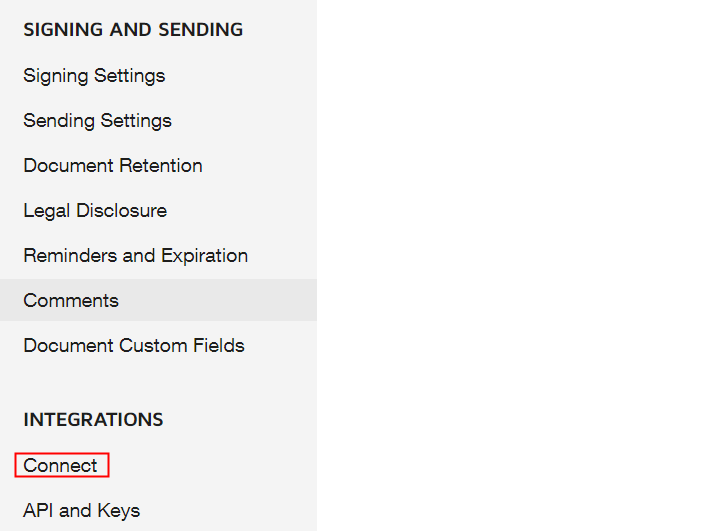
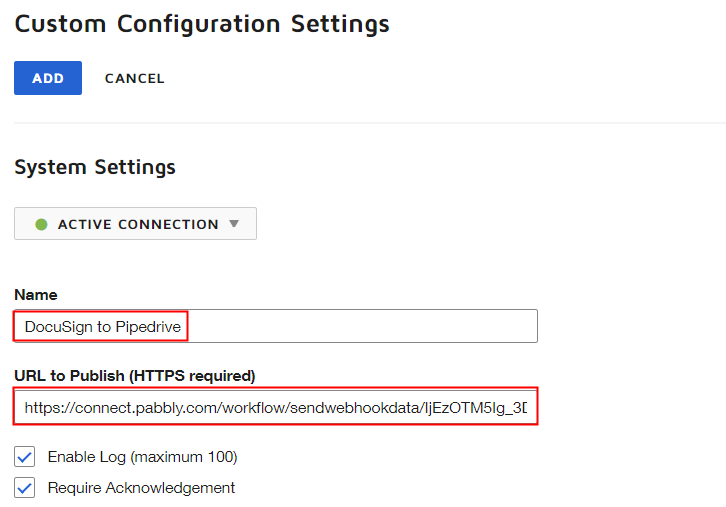
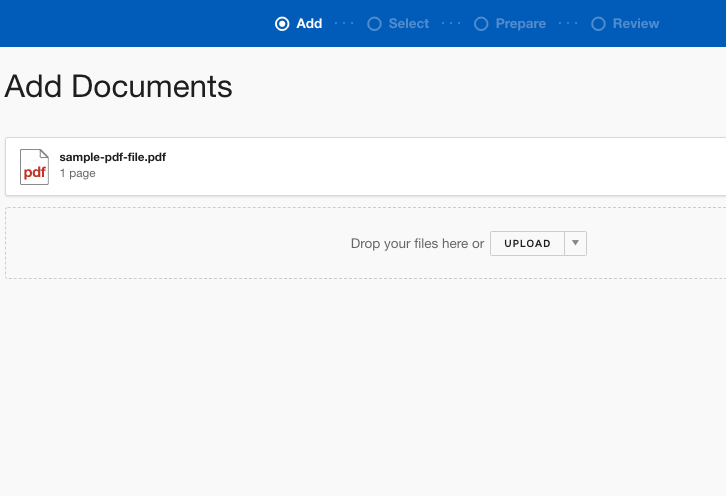
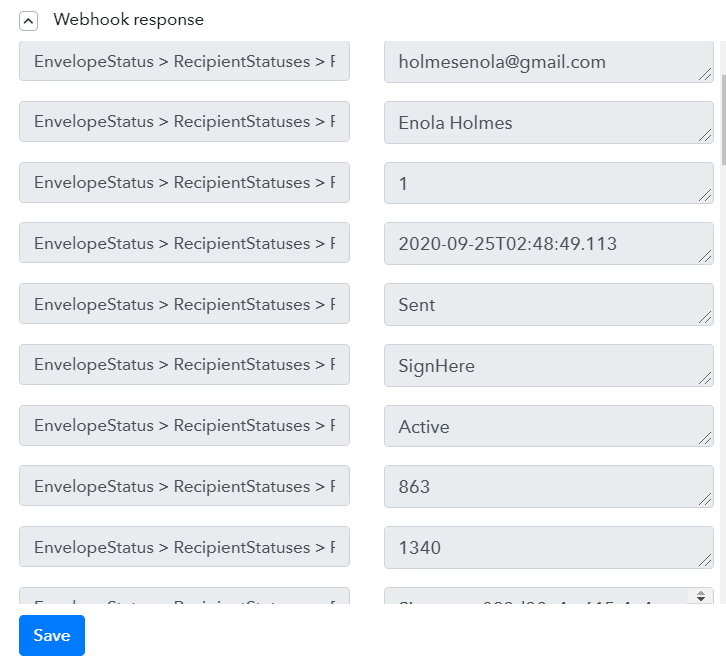
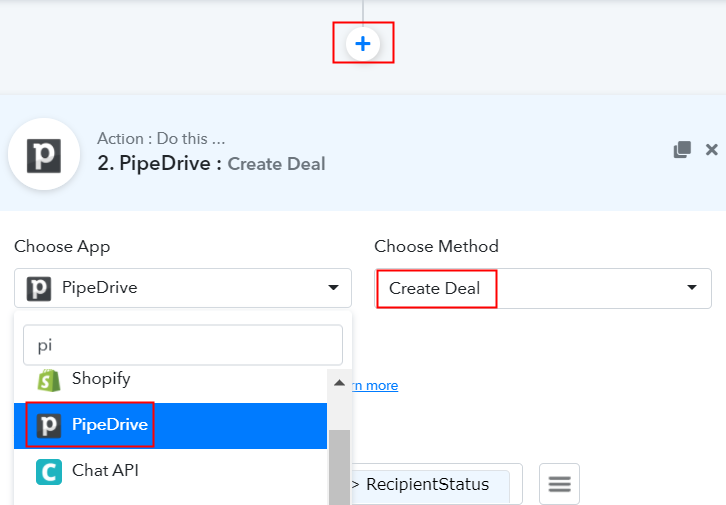
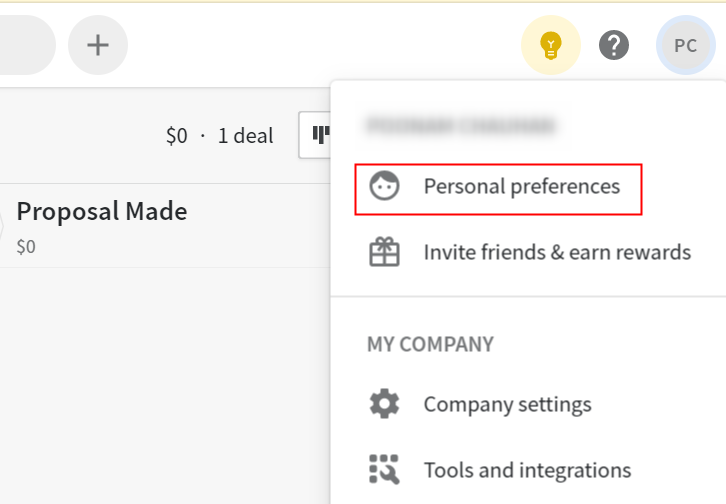
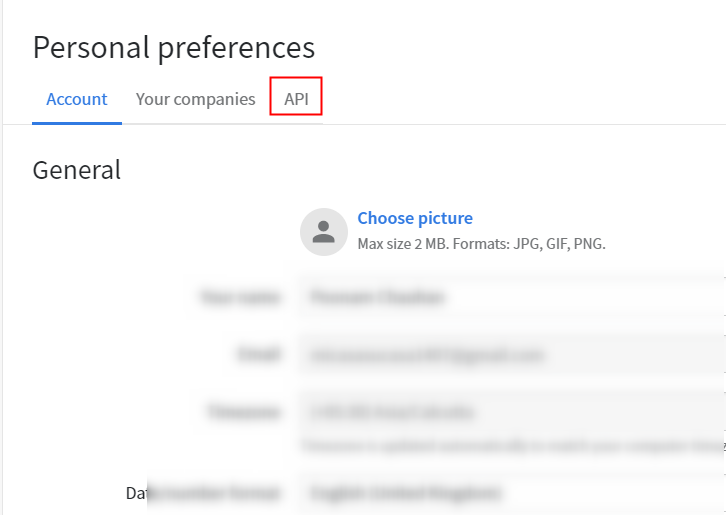
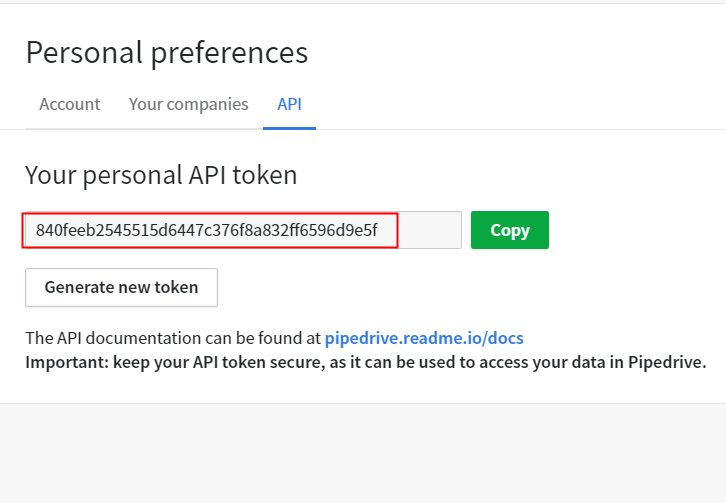
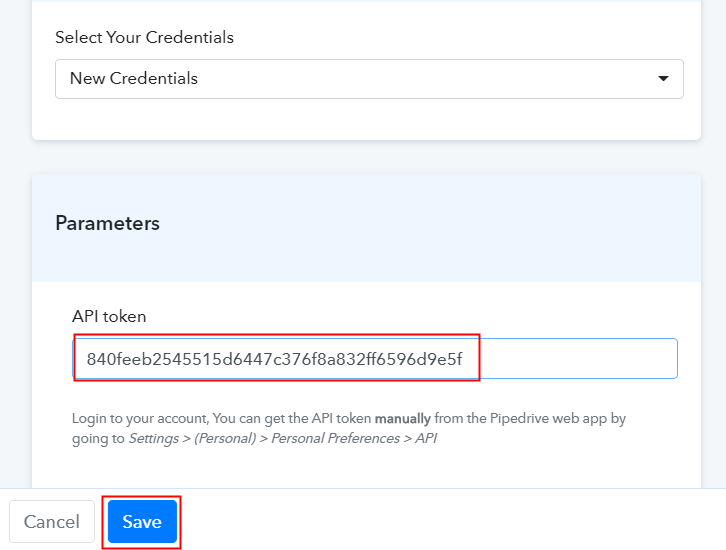
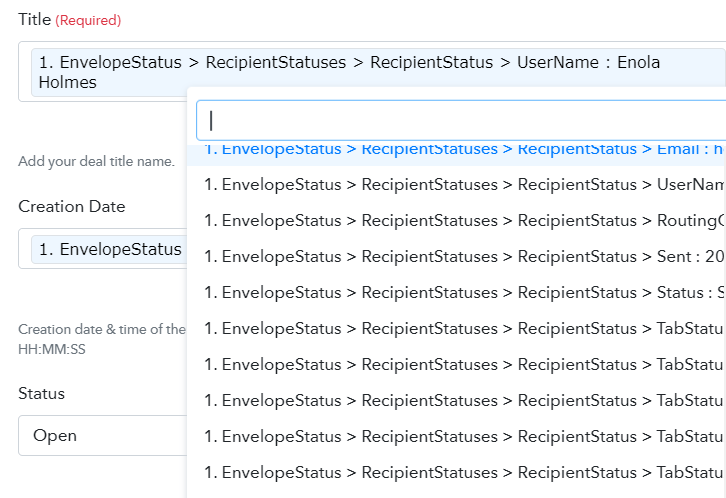
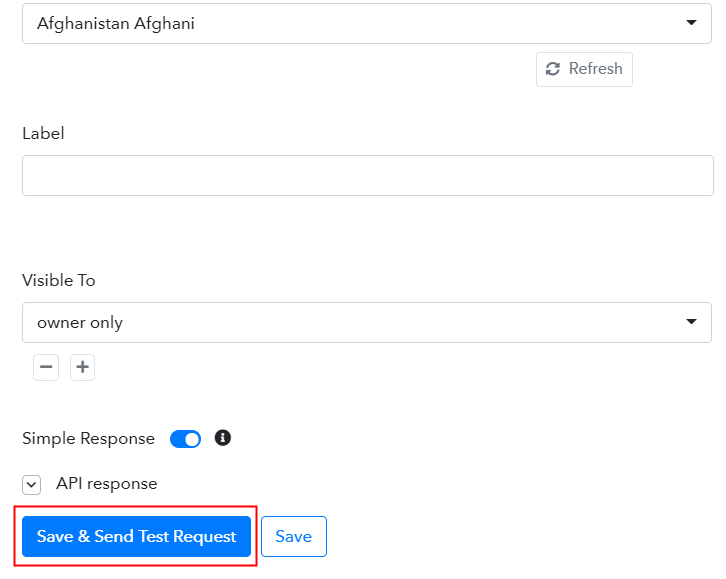
Next, after logging into the account, click on the “Access Now” button as shown in the above image. Start the process of building a workflow for DocuSign- Pipedrive integration by clicking on the “Create New Workflow” button. Moreover, add the name of workflow which in our case is “DocuSign to Pipedrive”. Nevertheless, you can always name the workflow according to your requirements. Next, after building a workflow, you have to choose the integration app to connect your DocuSign account to Pipedrive. Pabbly Connect lets you build unlimited workflows within minutes, click here to sign up for unlimited workflows for free. The accompanying step is to pick “DocuSign” from the dropdown, then choose the “Configure Webhooks” option to add documents in Pipedrive. The next step is to copy the webhook URL which is appearing on the dashboard. To add the DocuSign envelope in Pipedrive, you gotta paste the copied Webhook URL in the software. For that, you have to log in to your DocuSign account. After logging into the DocuSign account, go to the “Settings”. Now, all you need to do is click on the “Connect” tab in the “Integrations” section to add the webhook. Next click on “Add Configuration” and then select the “Custom” option to add the copied webhook. Now, name the Webhook according to your requirement. Make sure that status should be “Active Connection”. Then in the URL to publish, paste your copied URL from Pabbly Connect. Further, always select the trigger for the recipient and envelope field. After making all changes, click the “Add Webhook” button. Now, to make the workflow work, you have to send the document to the recipient. Next, all you have to do upload any document. Here we are using a sample pdf file. After successfully adding a document click on the “Next” button. Further, you have to add the information of the recipients like name and email address. After making all the changes click on the “Next” button. Add full name and signature option in a document before finally sending it then click on the “Next” button. Finally, add the message for your recipient and then hit the “Send” button. But before doing that, make sure to “Capture Webhook Response” in the Pabbly Connect dashboard. As soon as you click on the “Send” option, the entry will appear on the “Pabbly Connect” dashboard. Then, click on the “Save” option. To make this DocuSign Pipedrive integration work, you have to choose the action for your trigger. Click on the “+” icon to add an action for your trigger. In our case, it is “Pipedrive”. Then, select the “Create a Deal” option. After making all the necessary changes, click on the “Connected with PipeDrive” button. Further, it will open the authorization window where you have to fill the API key, for which you have to log in to your Pipedrive account. To connect Pipedrive to Pabbly Connect, you have to paste the API key for which you want to login to your Pipedrive platform. Now in the Pipedrive account, click on the “Personal Preference” option. Next, when you click on the “Personal Preference”, it will offer some option, choose “API”. Just simply copy the API token appearing on the dashboard. Now paste the copied API token and hit the “Save” button. Now map the field according to your need, don’t forget to mention the mandatory field. Subsequently, after filling all the details, save the setting and then “Send Test Request” to test the DocuSign Pipedrive integration. Lastly, when you check the deal section in Pipedrive, your entry will appear there. Now you know how to create deals in Pipedrive for DocuSign signed Envelopes. This is a one-time process, now all your manual work will be done by the online business automation tool i.e Pabbly Connect. Hopefully, Here we have mentioned all the crucial steps to create a Pipedrive deal for DocuSign envelopes using software Pabbly Connect. Now you know how easy is to integrate DocuSign and Pipedrive. One can connect unlimited apps within minutes using this software. Not to forget, the automation market is prevailing to reduces manual effort. Every small or big industry is preferring an automation tool. So, it is high time to give Pabbly Connect a try. Get your access by signing up for a free account.Step 2: Access Pabbly Connect

Step 3: Workflow for Docusign to Pipedrive Integration
(a) Start with a New Workflow

(b) Name the Workflow
Step 4: Setting Trigger for DocuSign to Pipedrive Integration
(a) Select Application you Want to Integrate
(b) Copy the Webhook URL
Step 5: Connecting DocuSign to Pabbly Connect
(a) Go to DocuSign Settings
(b) Click on Connect Option
(c) Head to Add Configuration Option
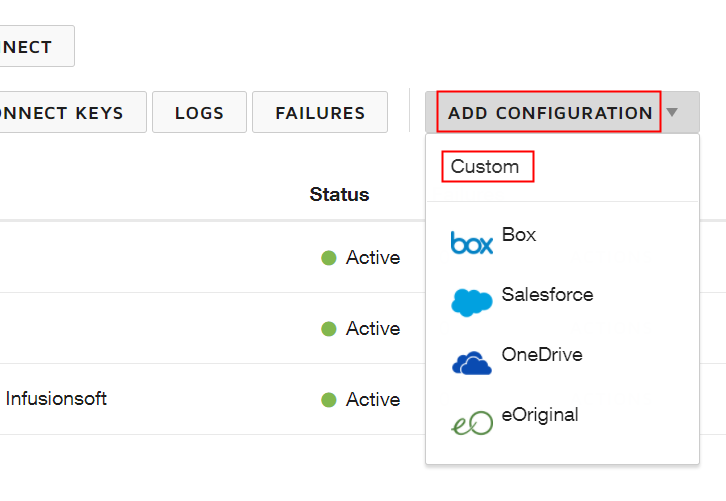
(d) Add Webhook
Step 6: Send the Document to be Signed
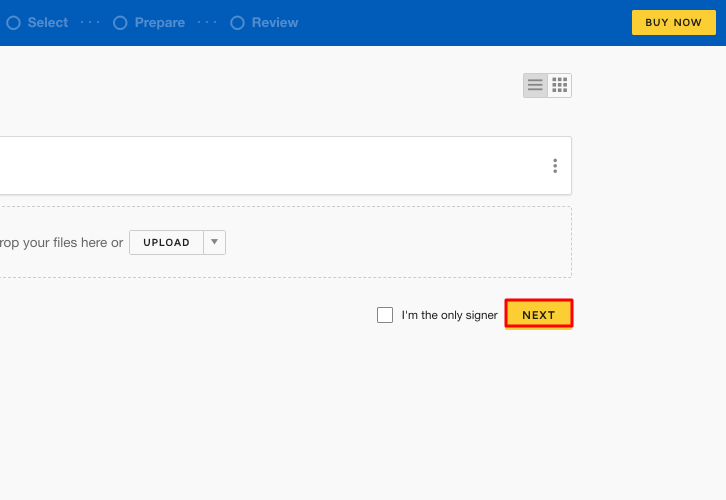
(a) Select Document
(b) Click on Next Button
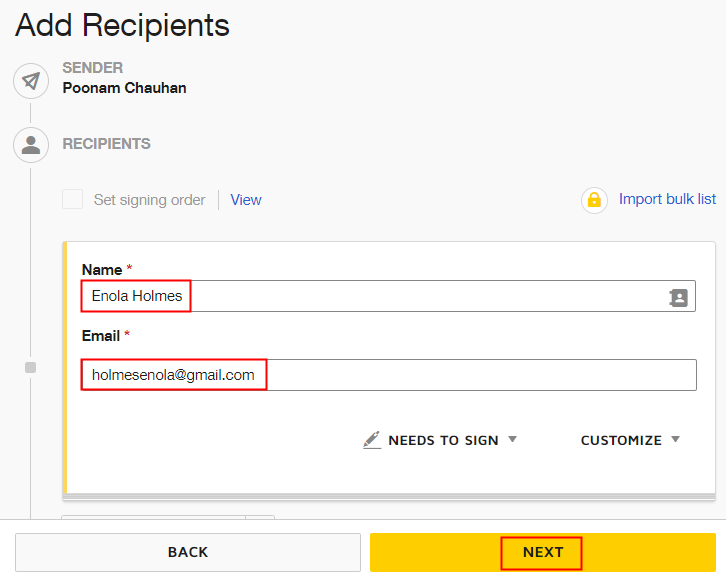
(c) Add Recipients
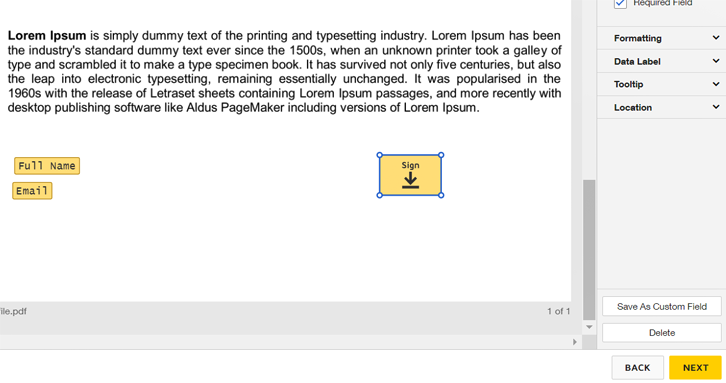
(d) Review the Document
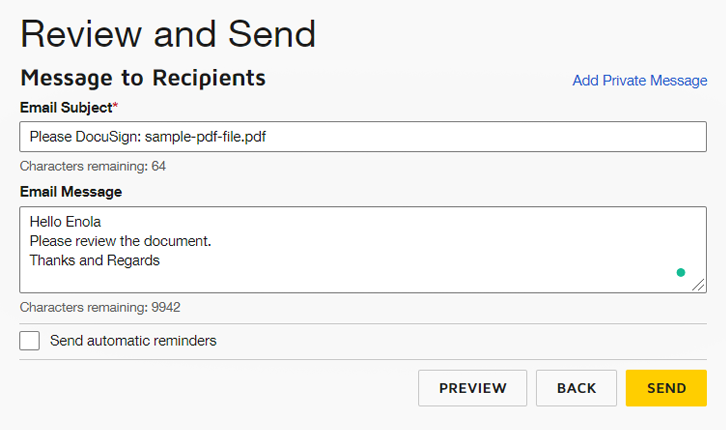
(e) Send the Document
Step 7: Test the Response in Pabbly Connect Dashboard
Step 8: Setting Action for DocuSign & Pipedrive Integration
(a) Select Application you Want to Integrate
(b) Click the Connect Button
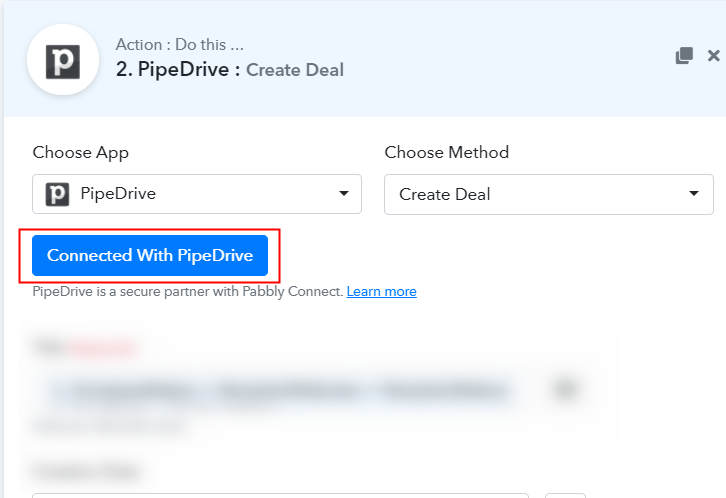
Step 9: Connecting Pipedrive to Pabbly Connect
(a) Go to Personal Preference Option
(b) Click on API Option
(c) Copy the API Key
(d) Paste the API Key
(e) Map Field Details
(f) Save and Send Test Request
Step 10: Check Response in Pipedrive

Conclusion –
You May Also Like To Read –


