If you are looking for some way by which you can easily integrate WooCommerce and Todoist then this could be the end of your search.
As this blog consist, the step by step procedure to automatically add tasks on Todoist for the newly added WooCommerce orders. The manual integration of these services could be both time consuming and difficult. But, I’ll be using Pabbly Connect service, so as to reduce the time consumption to a few minutes and that too without any hard-coding.
Let’s learn a little bit about the services, before getting started with the workflow. WooCommerce is an e-commerce WordPress plugin that enables big & small business owners to sell goods online. Whereas, Todoist is a project management software dedicatedly designed to meet the needs of small as well as midsize businesses for project scheduling, document management, & task management.
Our use case is pretty simple here, whenever an order succeeds on WooCommerce, a task regarding the same will be added on Todoist. This way, you don’t have to create the tasks manually repeatedly.
Why Choose This Method Of Integration?
In contrast with other integration services-
- Pabbly Connect does not charge you for its in-built apps like filters, Iterator, Router, Data transformer and more
- Create “Unlimited Workflows” and smoothly define multiple tasks for each action
- As compared to other services which offer 750 tasks at $24.99, Pabbly Connect offers 50000 tasks in the starter plan of $29 itself
- Unlike Zapier, there’s no restriction on features. Get access to advanced features even in the basic plan
- Try before you buy! Before spending your money, you can actually signup & try out the working of Pabbly Connect for FREE
Pabbly Connect is an affordable option to connect multiple services for sharing information in real-time. Moreover, it will only take a minute interval to automate your repetitive tasks.
Also, you can use routers, formatters, instant triggers, multi-step calls & premium apps for unlimited workflows premium Pabbly Connect features without any restriction even in the free plan.
Now, without any further ado, let’s follow the step by step procedure to integrate WooCommerce and Todoist.
Step 1: Sign up to Pabbly Connect

Initially, visit the Pabbly Connect website & hit the ‘Sign-Up Free‘ button. Next on the registration page that opens subsequently either use your existing Google account or manually fill the registration form to signup.
Step 2: Access Pabbly Connect

After successfully logging in, hit the ‘Access Now’ button of the software ‘Connect’ in the Pabbly application.
Step 3: Workflow for WooCommerce with Todoist Integration
(a) Start with a New Workflow

Start with creating a workflow to add a task on todoist for every new WooCommerce order & to do this push the ‘Create Workflow’ button first.
(b) Name the Workflow
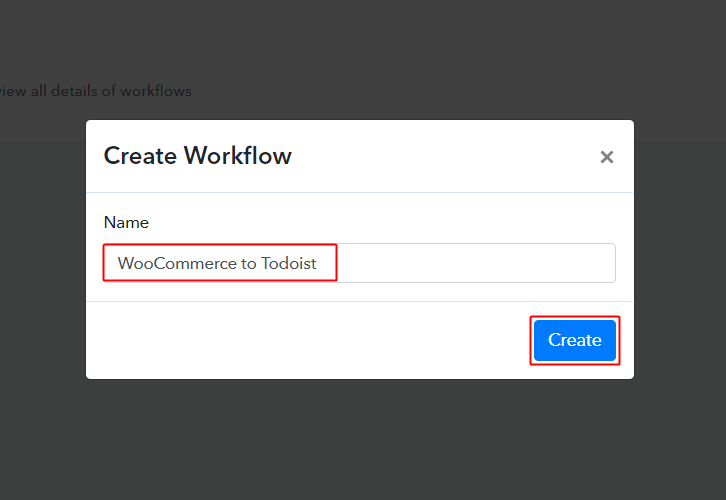
Now, name the workflow as per your need (for instance: WooCommerce to Todoist etc) and push the ‘Create’ button available here.
Step 4: Setting Trigger for WooCommerce to Todoist Integration
To automatically add Todoist tasks for the newly added WooCommerce orders, you’ll need to set-up a trigger condition on the new WooCommerce order entries using Pabbly Connect. And an action for the set trigger condition to add a task on Todoist.
(a) Select Application you want to integrate
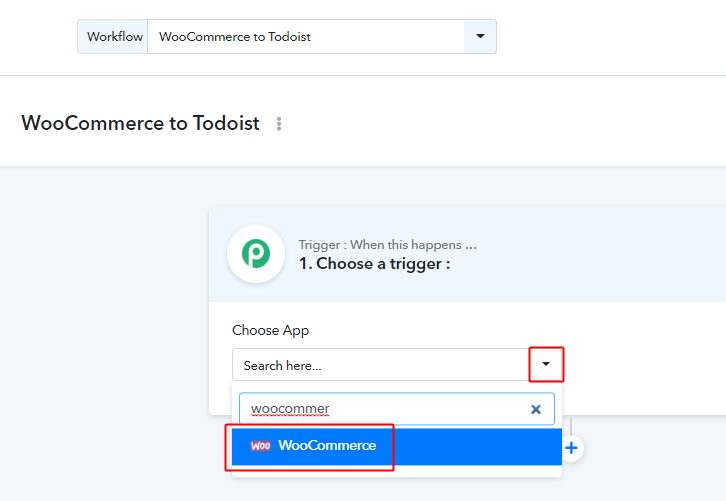
When you click on the create button, a page containing the trigger window will open up next.
Select the ‘WooCommerce’ app from the ‘Choose App’ field’s drop-down options.
(b) Select Method & Copy Webhook URL
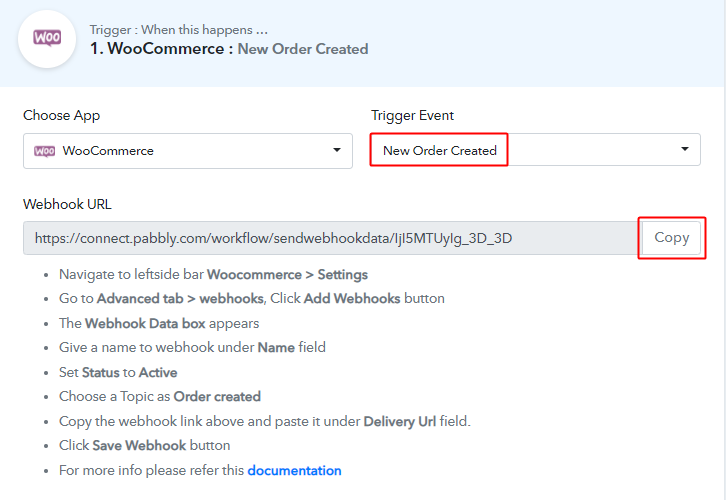
Select the method to be ‘New Order Created’ & then copy the given webhook URL.
Step 5: Connecting WooCommerce to Pabbly Connect
Sign-in your WordPress site & go to the WooCommerce settings.
(a) Go to Your WordPress WooCommerce Settings
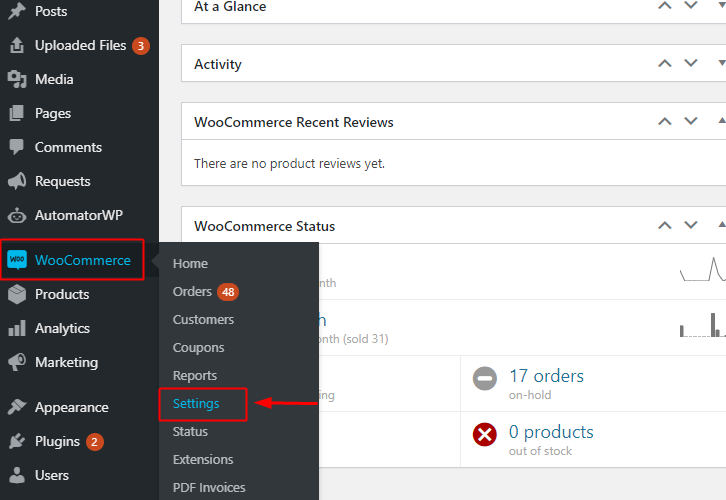
If you have the WooCommerce plugin enabled on your WordPress website then hover on the ‘WooCommerce’ option available in the left-vertical menu. And then click select on the ‘Settings’ option from the secondary menu that becomes visible after clicking/hover on the ‘WooCommerce’ option.
Else, if you don’t have the WooCommerce plugin enabled for your site then install it & enable it first. Then only follow the above-explained step.
(b) Click on the Advanced Settings Option
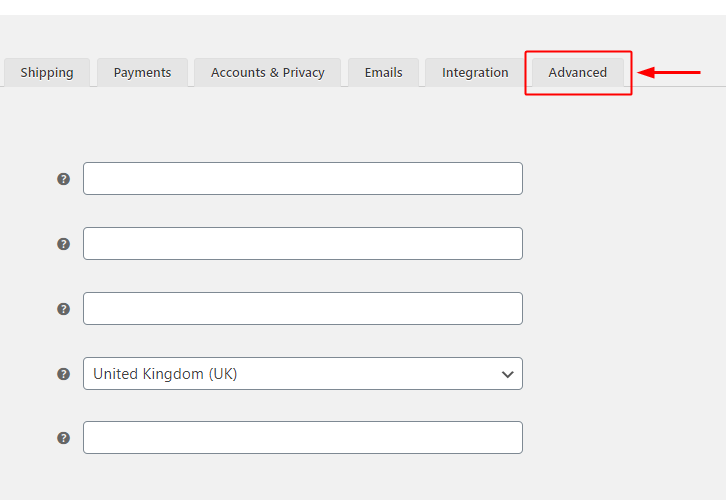
Next, you’ll encounter a page carrying all the WooCommerce general settings. Here, click on the ‘Advanced’ option from this page’s menu.
(c) Click on Webhooks
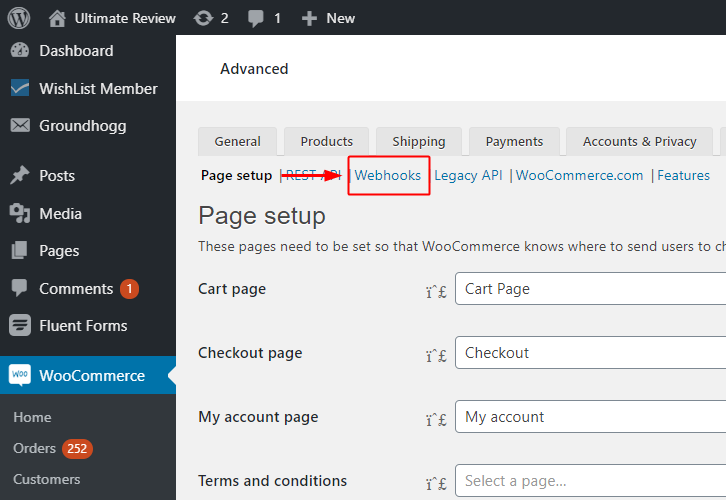
Another page will open up next with a secondary menu below the setting’s menu i.e, Page setup. Strike the ‘Webhook’ option in it.
(d) Click on ‘Add Webhook’ Button
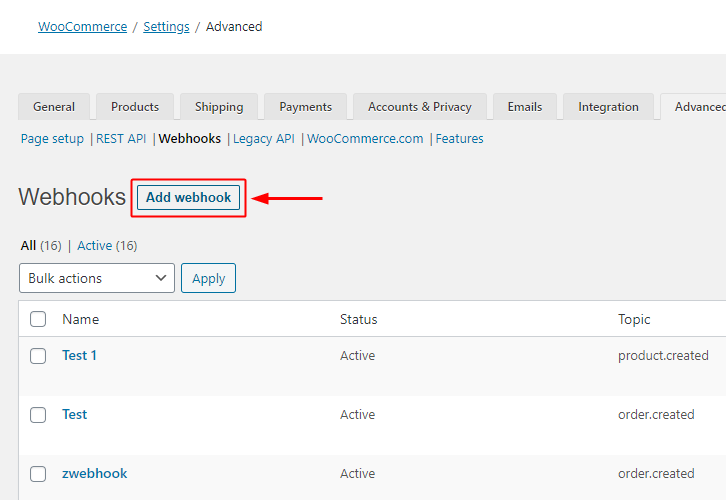
A page carrying all the webhooks created so far on your website will open up.
Click the ‘Add webhook’ button that is right next to the ‘Webhooks’ head.
(e) Paste the Delivery URL
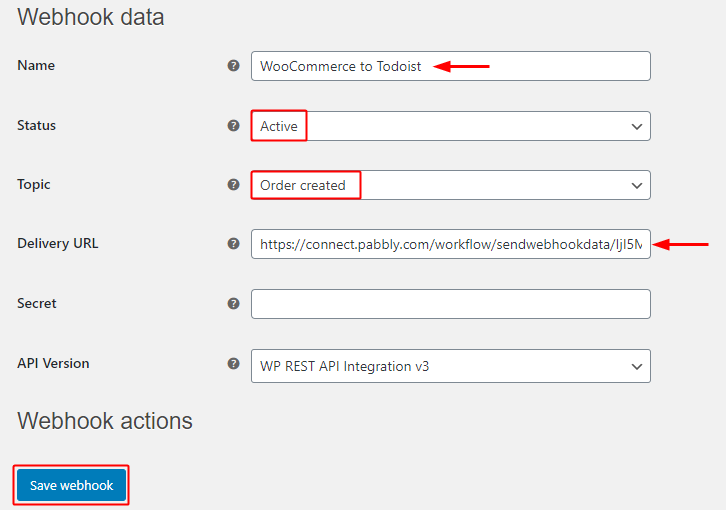
A page will open up asking for ‘Webhook data’, fill in the name of your Webhook.
Set the ‘Status’ as ‘Active’ & select the ‘Topic’ field value to be ‘Order Created’ from this field’s drop-down menu.
Paste the Webhook URL that you copied from Pabbly Connect in the ‘Delivery URL’ field.
Lastly, click on the ‘Save Webhook’ button.
Step 6: Test the Response in Pabbly Connect Dashboard
As we can see we are done setting up the trigger to gather the data of a newly submitted WooCommerce orders. So, let’s test the trigger setting by making a test payment on WooCommerce.
(a) Capture Webhook Response
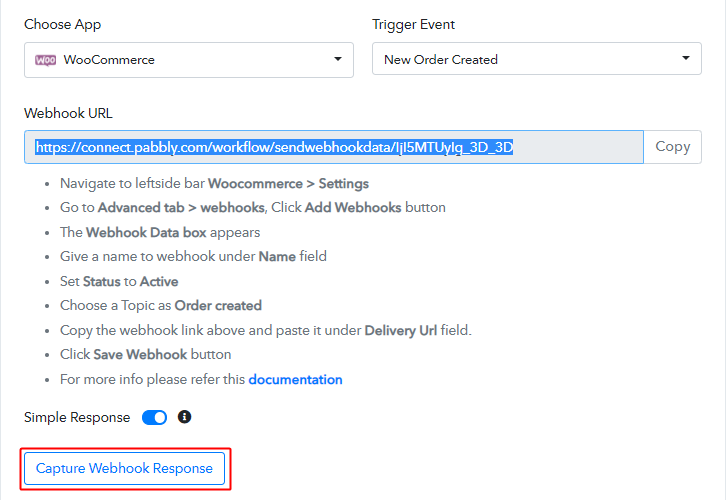
To test a trigger, strike the ‘Capture Webhook Response’ button on your Pabbly Connect trigger window.
(b) Click on ‘Add to Cart’ Button of Any Product
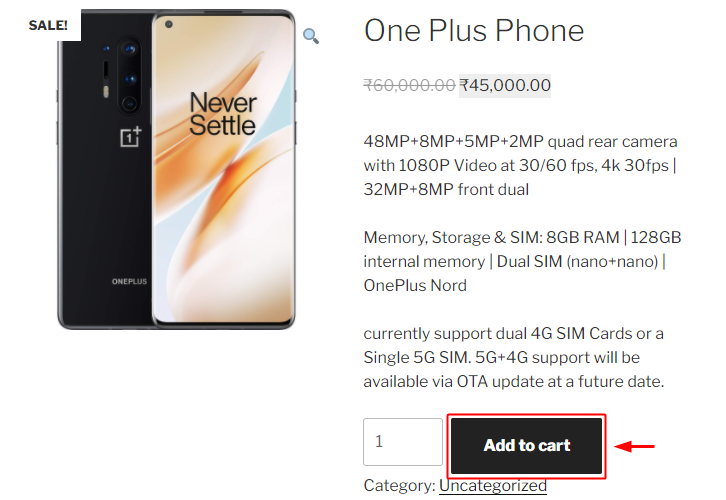
To make a test purchase, click the ‘Add to cart’ button of any of your WooCommerce store product.
(c) Fill the Required Details in Checkout Page
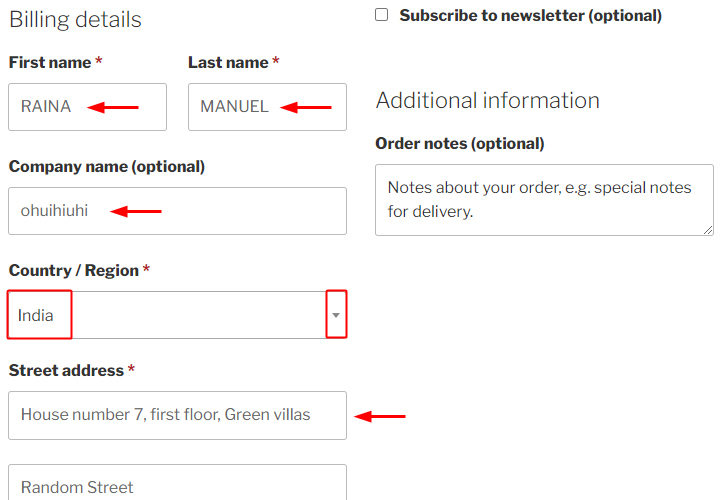
Now, go back to your the WooCommerce account and make a test registration by filling in the required details.
(d) Make a Test Purchase
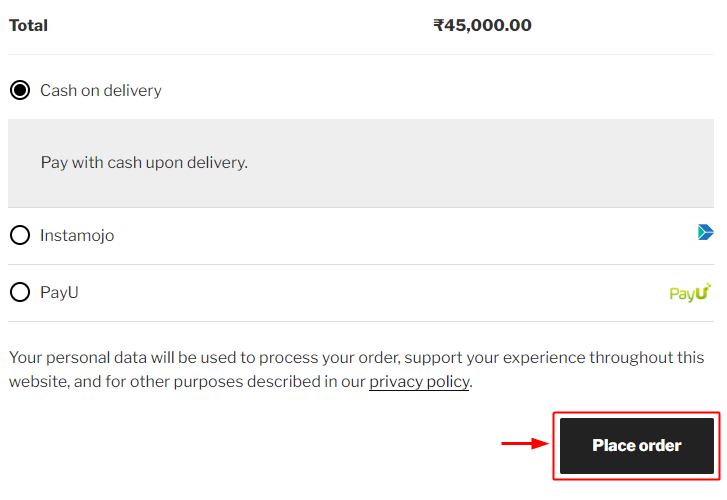
Fill-in all the required details to complete the checkout.
Lastly, click on ‘Place order’ button.
(c) Trigger Response
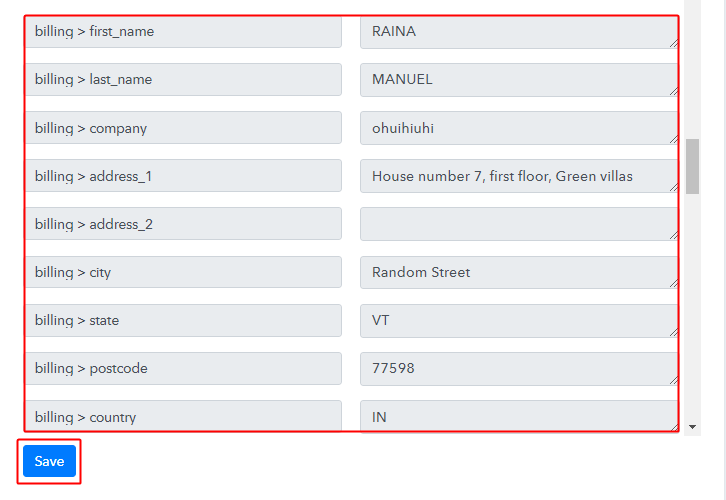
Check the trigger response for all the registration form feeds.
Step 7: Convert Date/Time Format
We’ve gathered all the necessary data from the WooCommerce trigger response but in the further steps we’ll need due date with a much simpler format. For this, one must format the date in accordance with the Todoist format.
(a) Select Application you want to Integrate
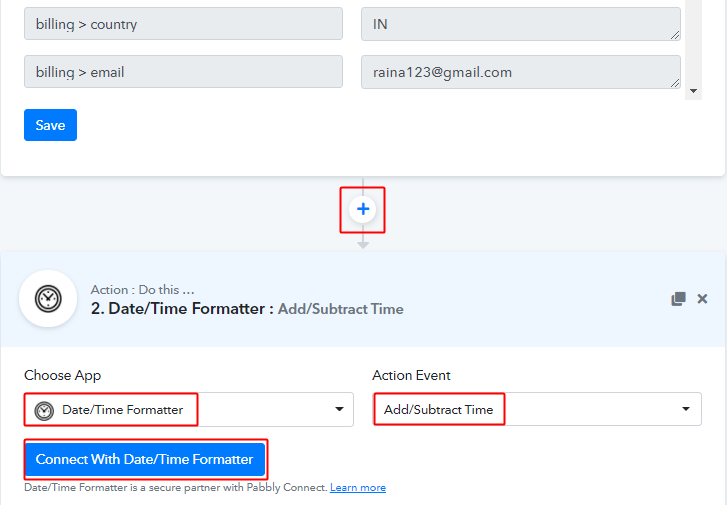
To format the date, first, click the plus button next to your trigger window.
And then select the ‘Date/Time Formatter’ option to integrate from the ‘Choose App’ field.
Select the method in here as ‘Add/Substract Time’ and then click the ‘Connect with Date/Time Formatter’ button.
(b) Map the Date Value

Map the date value from the trigger response in the ‘Date’ field.
To map a value, place your cursor in the field.
Then, click the menu button (three horizontal lines) next to that particular field.
Click-select the value that you want to map with the respective field.
(c) Enter expression Field’s Value & Mention Formats
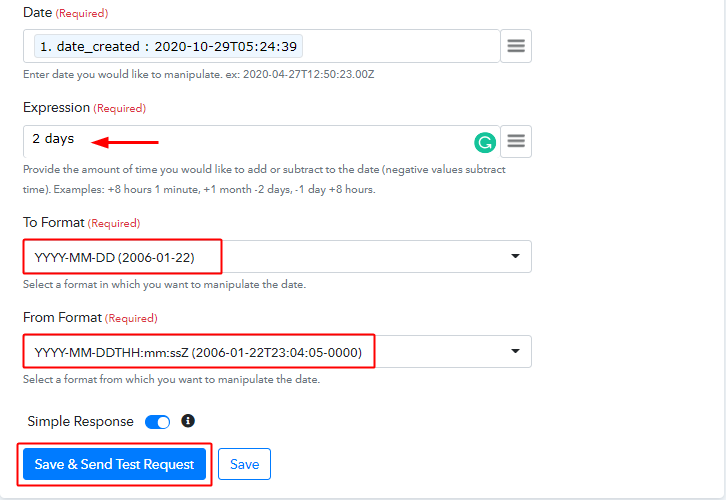
Mention the ‘Expression’ field’s value as per the time that you want to add to the ‘Due Date’ field. Here, I’m adding 2 days to my start date.
Slect the format in which you want to change the date and also select the format in which your date is presently in.
(d) Check API Response & Save
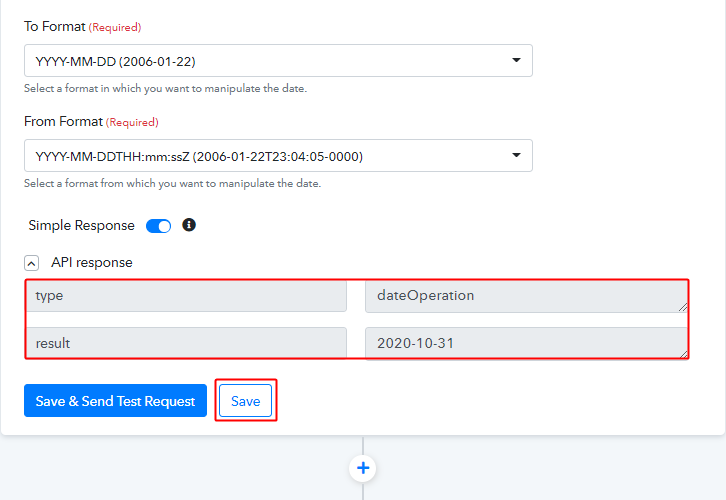
You can check the formatted date in the response.
Save the response to use it in further steps.
Step 8: Setting Action for Woocommerce to Todoist Integration
(a) Select Application you want to Integrate
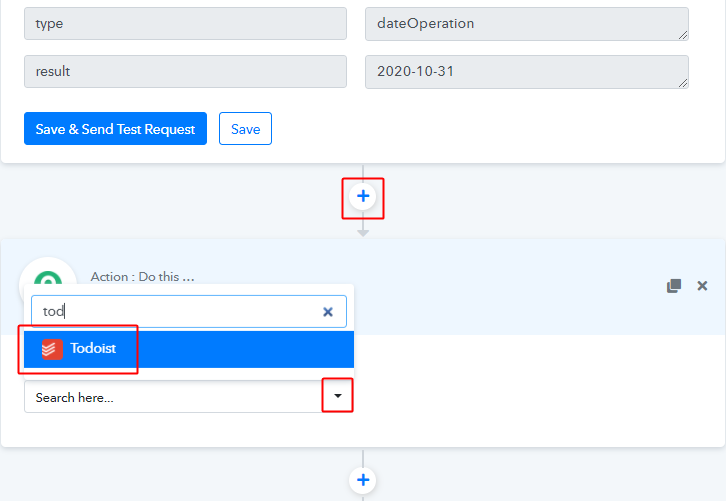
Next, push the plus button next to the converter window.
Select the app to integrate as ‘Todoist’.
(b) Select the Method & Click on ‘Connect with Todoist’
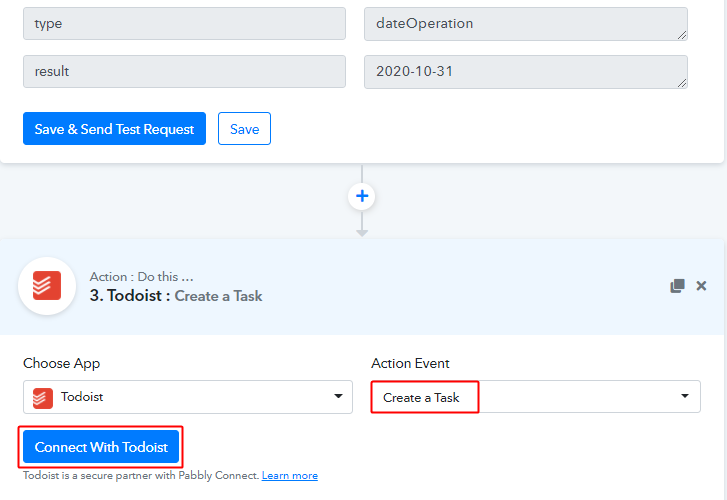
Next, select the method as ‘Create a Task’.
Lastly, click on the ‘Connect with Todoist’ button.
Step 9: Connect Todoist with Pabbly Connect
(b) Go to Your Todoist Account Settings
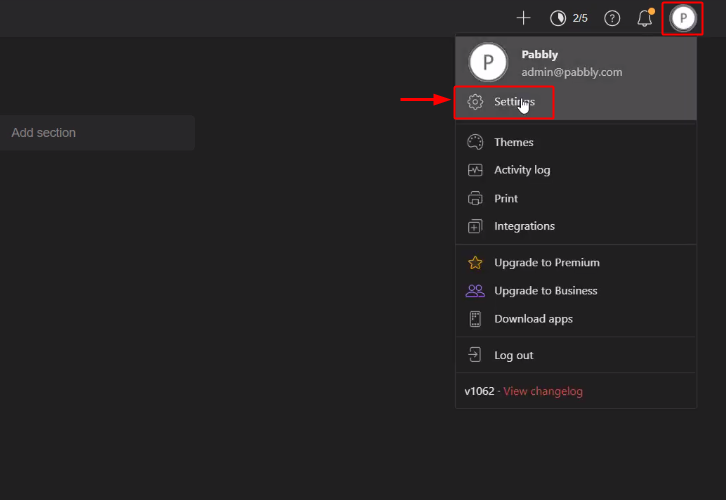
Login to your Todoist account and then click on the profile icon. Select the ‘Settings’ option from the drop-down menu that opens.
(d) Click on Integrations
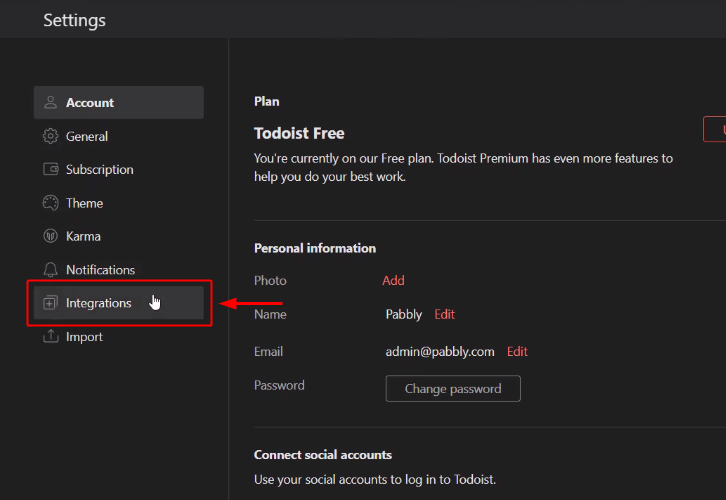
Now, select the ‘Integrations’ option from the Setting’s menu.
(e) Copy the API Token
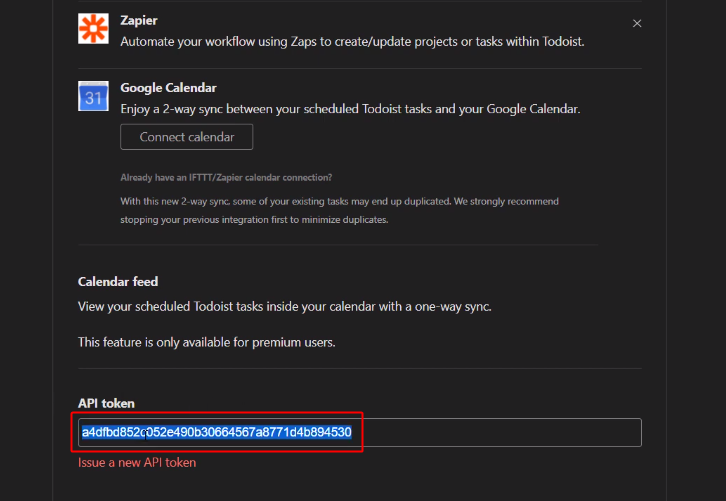
Copy the API token given at the bottom of the integration page.
(f) Paste the API Token
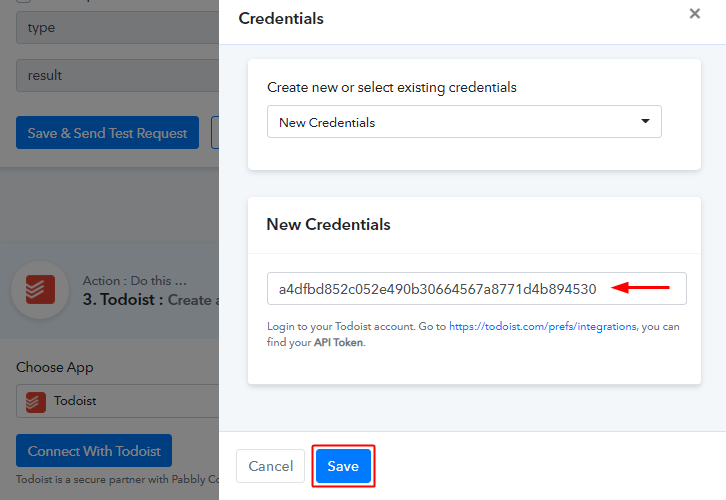
Paste the copied API token in the Pabbly Connect window.
(g) Map Fields & Send Test Request
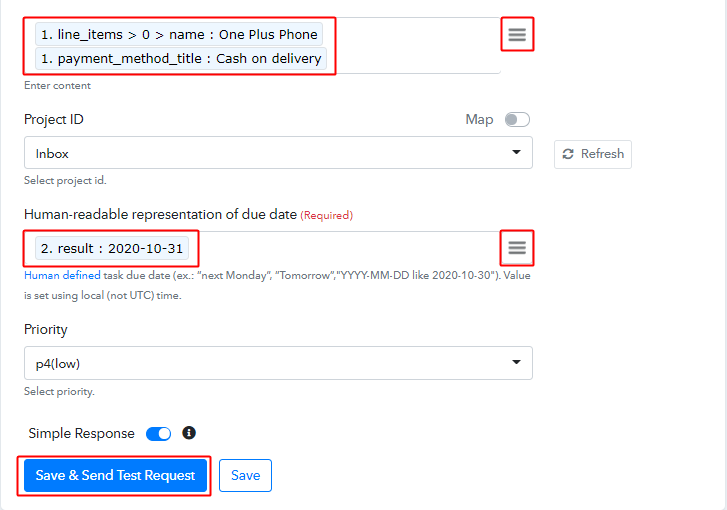
Map the content that you want to send as task on Todoist and the formatted human redable date.
(h) Check & Save Action API Response
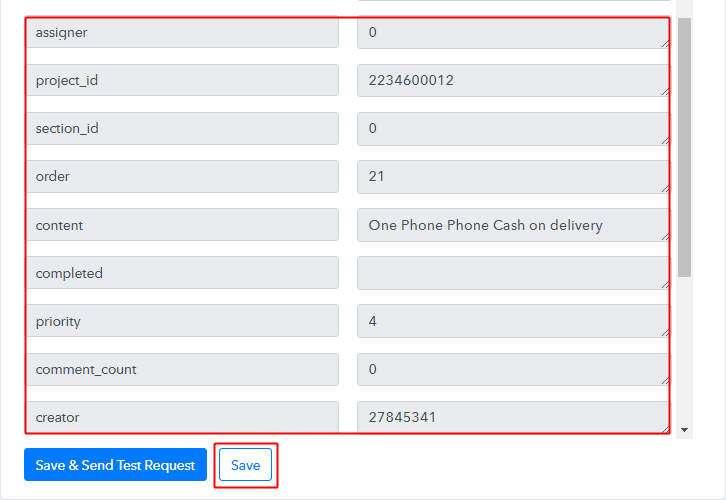
Check the task details in the API response & click the ‘Save’ button.
Step 10: Check Response in Todoist Dashboard
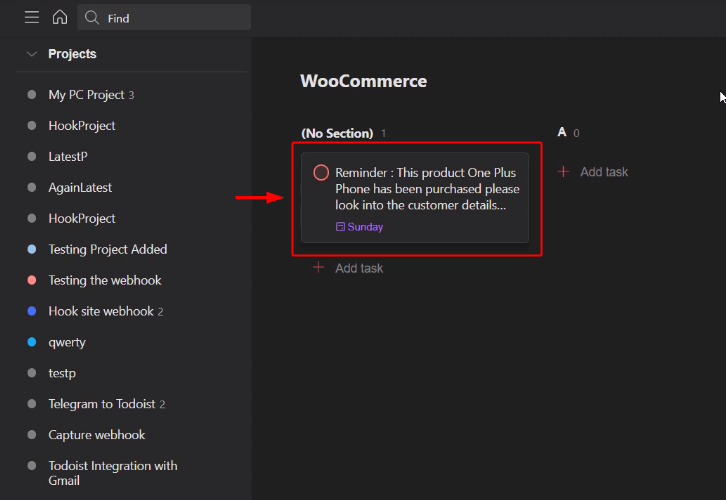
Also, you can check the task added on your connected Todoist account.
Wind-Up
Well, this is all about ‘How to create Todoist task from new WooCommerce orders’. Consequently, after completing the step by step procedure, you will end up adding Todoist tasks from new WooCommerce orders automatically.
Go grab, Pabbly Connect for FREE with all its premium features.
Also, do comment your feedback below over this integration.


