Have you ever thought about if there is a way to create Freshsales lead from new Facebook Leads Ads? If yes, then worry no more as today we have brought you the best solution for all your automation related problems called Pabbly Connect.
Pabbly Connect is an incredible integration and automation service, which allows you to integrate two or more applications to automate all the projects. You just have to do the integration once and then everything will be automatically managed by Pabbly Connect.
Why Choose This Method Of Integration?
In contrast with other integration services-
- Pabbly Connect does not charge you for its in-built apps like filters, Iterator, Router, Data transformer, and more
- Create “Unlimited Workflows” and smoothly define multiple tasks for each action
- As compared to other services which offer 750 tasks at $24.99, Pabbly Connect offers 50000 tasks in the starter plan of $29 itself
- Unlike Zapier, there’s no restriction on features. Get access to advanced features even in the basic plan
- Try before you buy! Before spending your money, you can actually signup & try out the working of Pabbly Connect for FREE
But before moving forward, let’s have a glance on both the software. We all know that Facebook is one of the largest and most popular social media platforms that allow people all over the world to connect and share their thoughts. On the other hand, Freshsales is a cloud-based customer relationship management (CRM) tool that helps businesses to manage interactions with their customers.
Since Facebook and Freshsales have no direct integration between them. But, with the help of Pabbly Connect, you can easily integrate or transfer data from Facebook to Freshsales. And also, with the help of this automation, whenever we get a new lead on Facebook lead ads, it will automatically get auto-populated in Freshsales.
If you want, you can also refer to the below video to easily understand the usage of Pabbly Connect.
You can check for the free template of this integration just by clicking on the ‘Use Workflow’ button below. You can also get the benefits of plenty of apps/integrations just by visiting our Marketplace.

Now, tighten your belt as we are going to discover the procedure to integrate Facebook and Freshsales.
(step by step)
Step 1: Sign up to Pabbly Connect

Launch the process to create Freshsales lead from new Facebook leads ads by pressing the ‘Sign Up Free’ button on the Pabbly Connect dashboard. On the registration page, either signup using an existing Gmail account or manually fill out the form.
Try Pabbly Connect for FREE
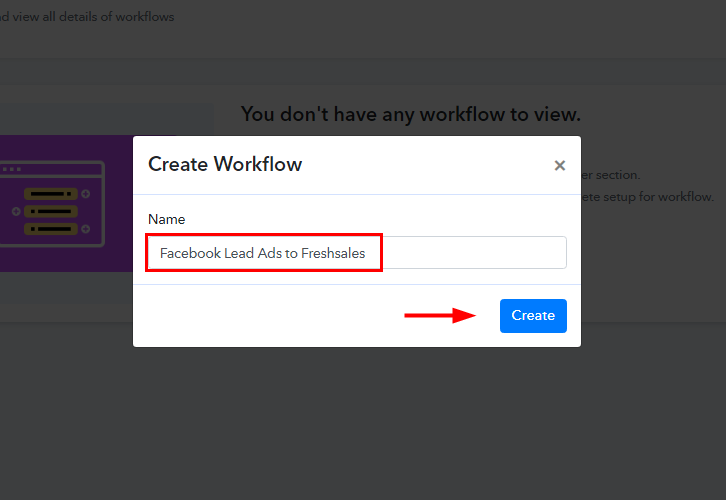
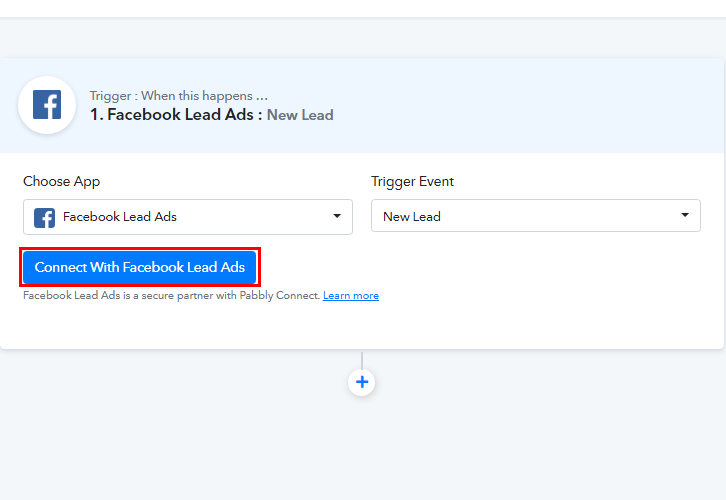
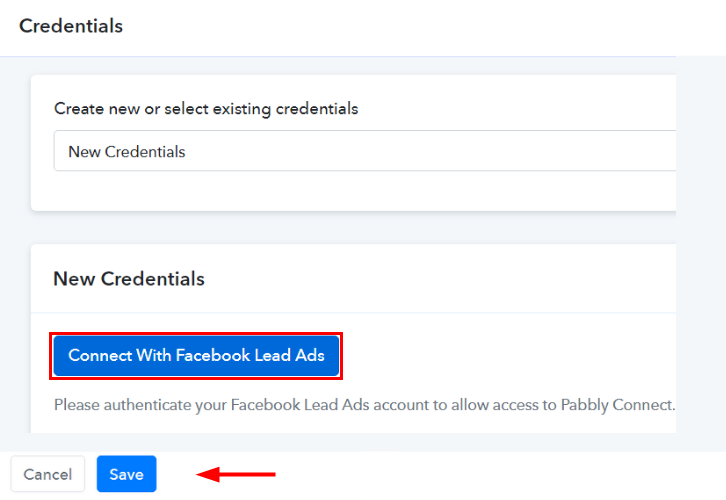
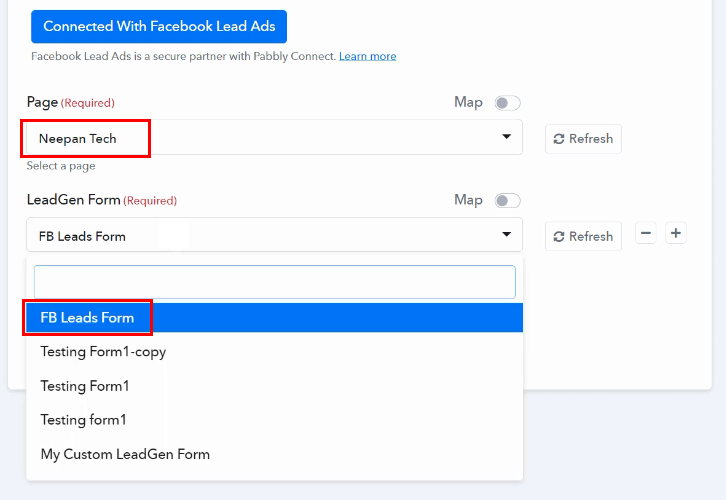
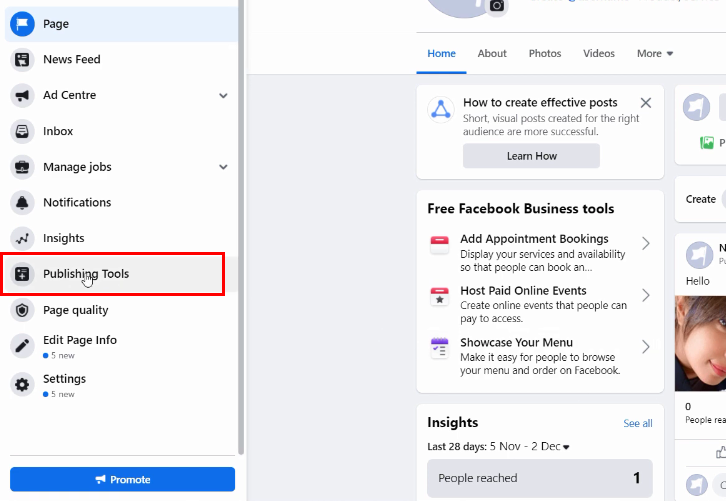
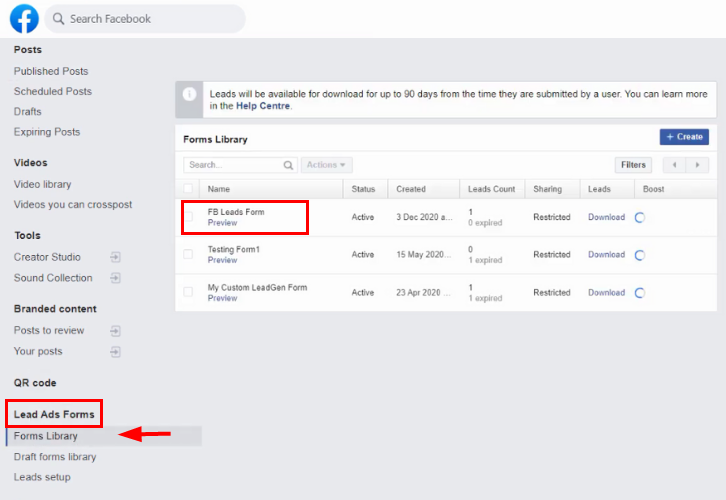
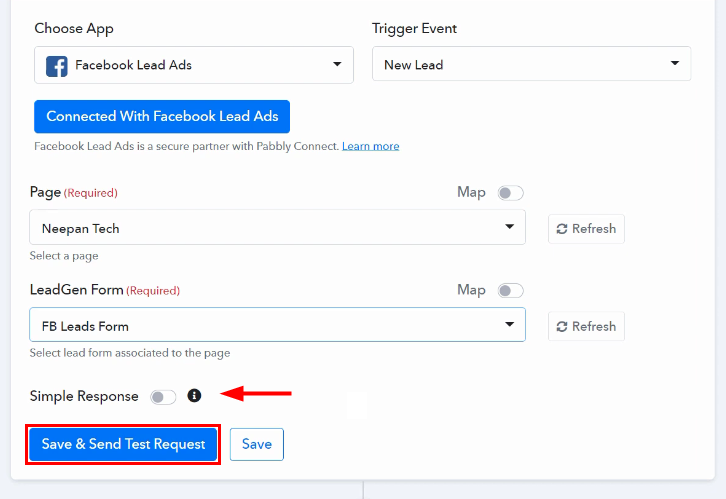
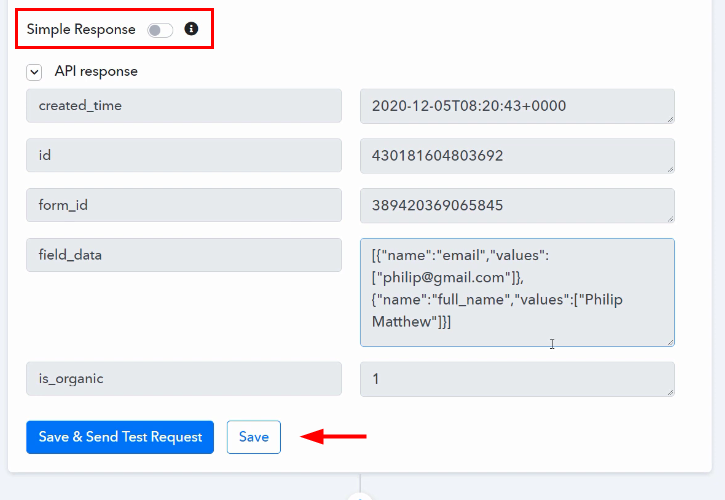
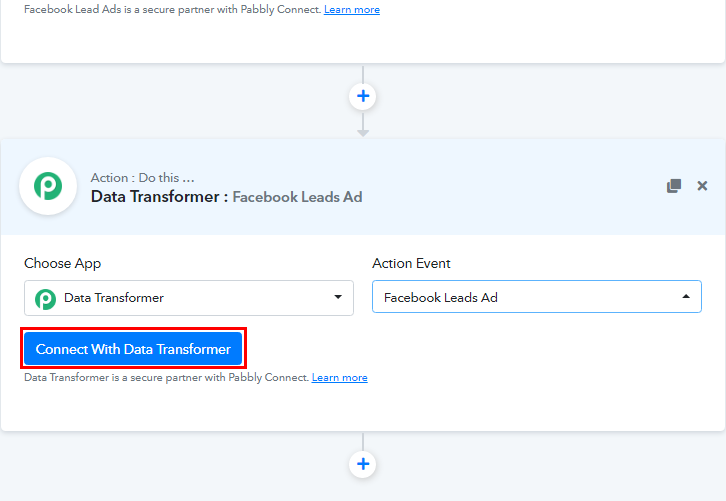
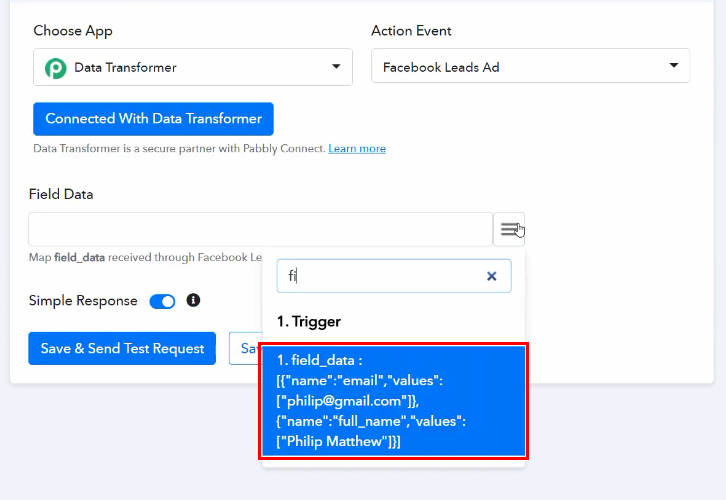
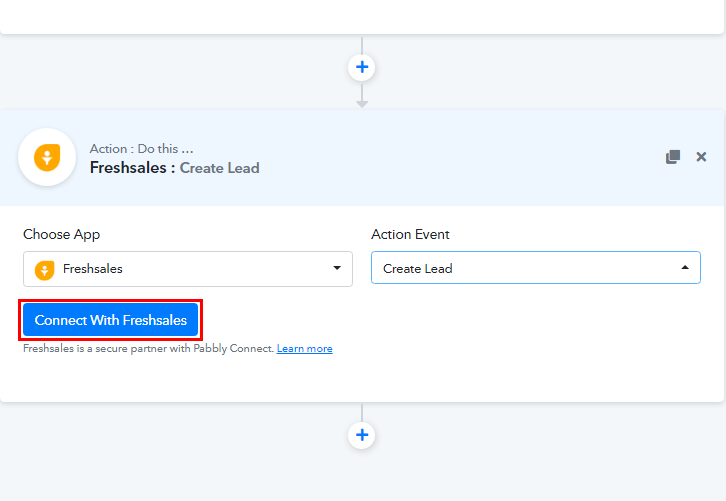
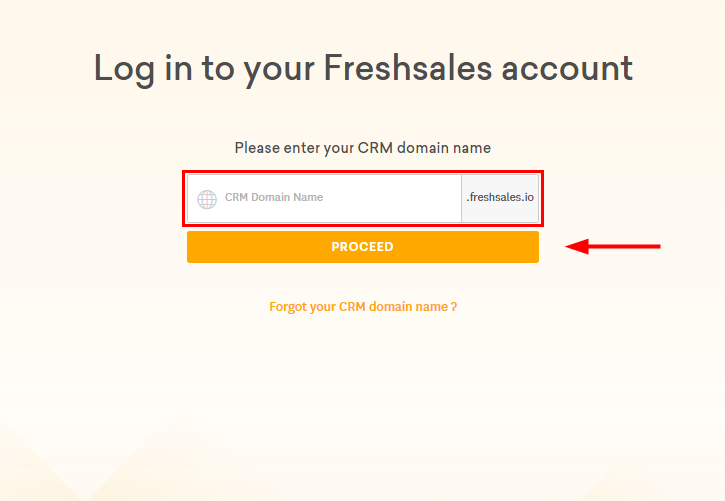
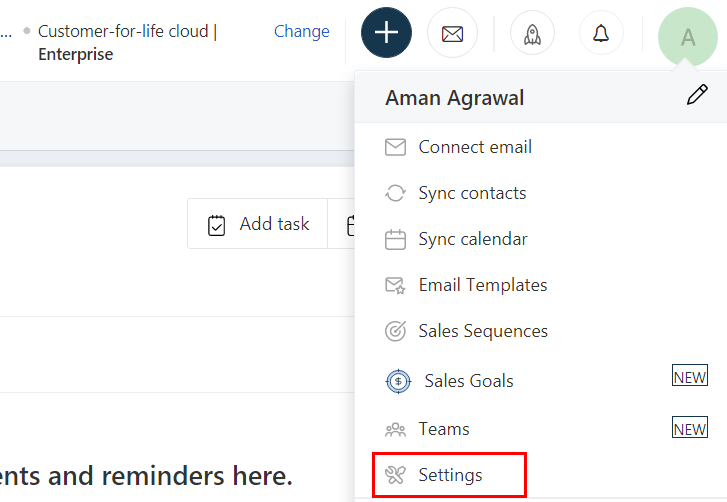
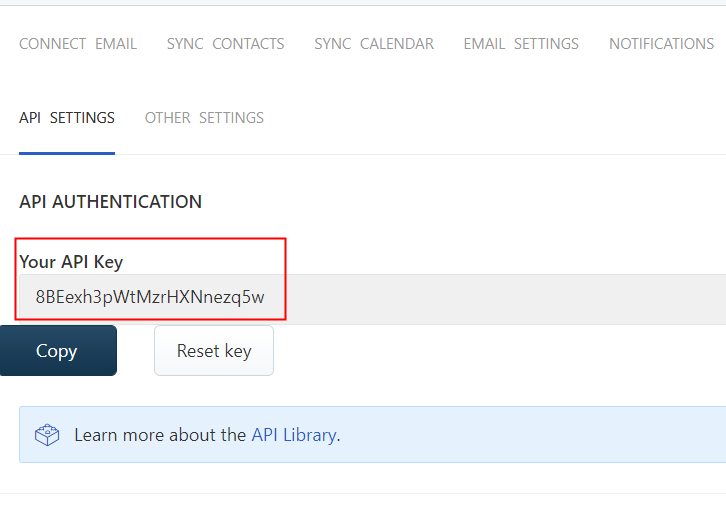
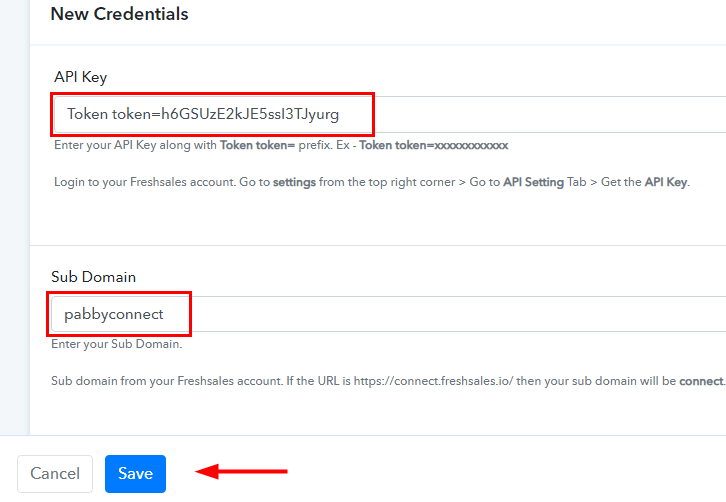
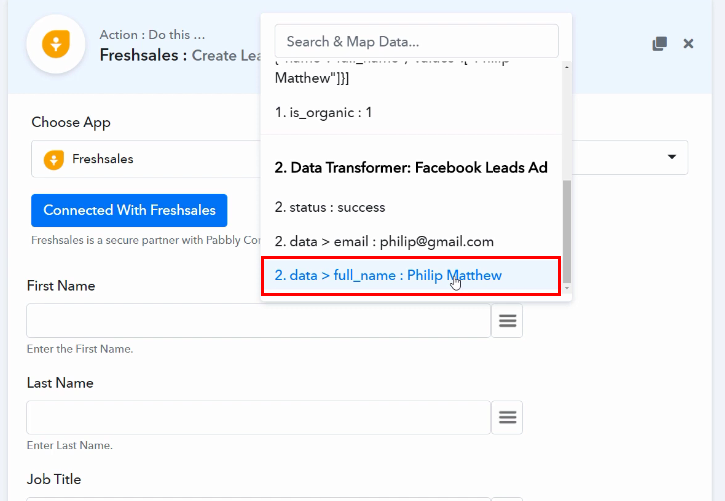
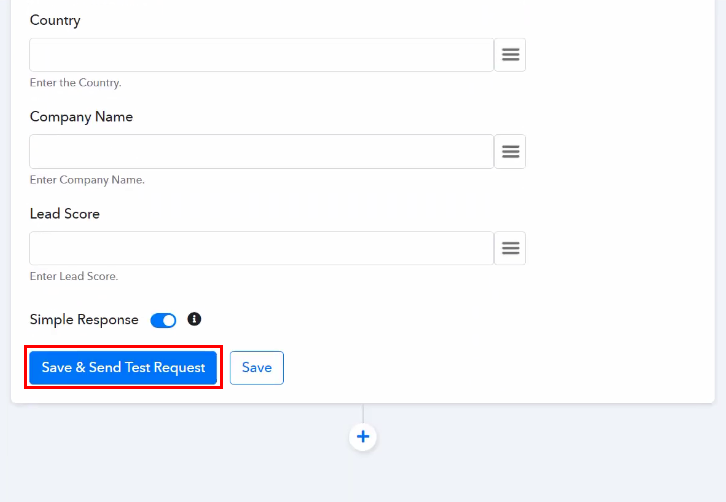
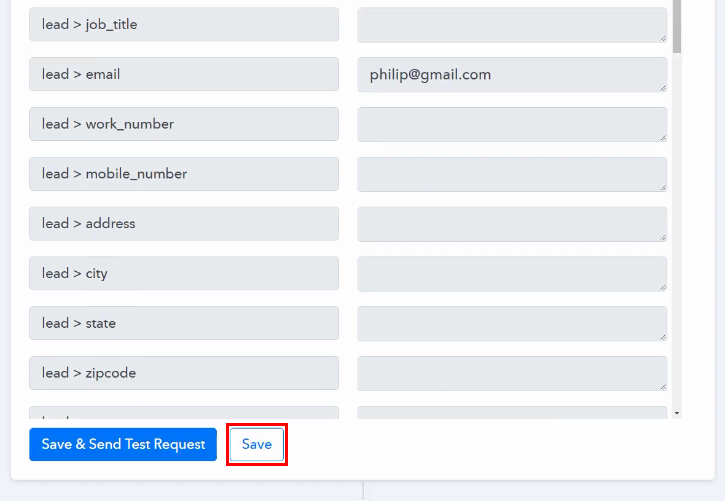
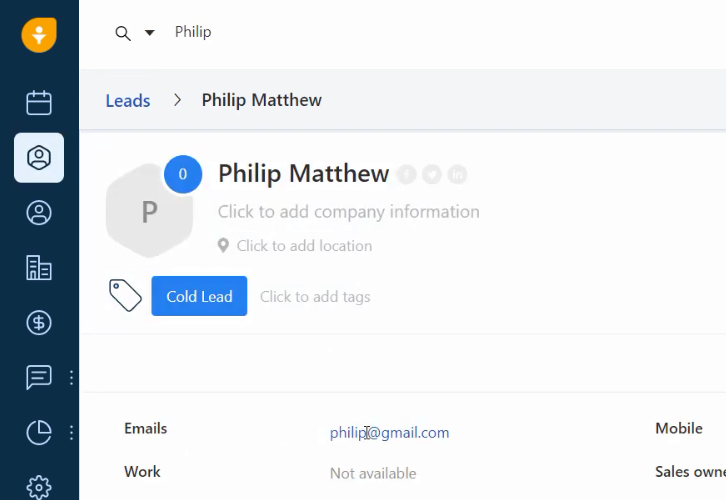
Once you have completed the signup process, click on the Connect section in the dashboard to access Pabbly Connect. Start with creating a workflow for your project by clicking on the ‘Create Workflow’ button. Now, you need to name the workflow just like in the above-shown image. I named the workflow ‘Facebook Lead Ads to Freshsales’, you can obviously name the workflow as per your requirements. At last hit the ‘Create’ button. As soon as you are done with naming a workflow, you will have to select the application you want to integrate. Using Pabbly Connect, you can easily integrate multiple applications, create your free account now. For this integration, we will choose ‘Facebook Lead Ads’ as the trigger application and ‘New Lead’ as a method. After choosing the application, click on the ‘Connect with Facebook Lead Ads’ button for the next step. To connect Facebook with Pabbly Connect, log in to your Facebook account and authenticate it. Next, a window will pop up, here click on the ‘Connect With Facebook Lead Ads’ button and authorize your Facebook account. Then, click on the ‘Save’ button. After the authorization is complete, you will see that Pabbly Connect automatically fetches all the pages and forms available on that account, select according to your requirements. To check whether the integration process is working or not, we have to create a new lead from Facebook. Open up the same Facebook page which you have selected before, i.e. ‘Neepan Tech’’. After that, go to the Publishing Tool from the left sidebar and click on it. From the left sidebar, under the ‘Lead Ads Forms’ section, click on the ‘Form Library’ option. And then you will see all the lead forms, click on ‘Preview’ of your form, i.e. ‘FB Leads Form’. A window will open up, enter the email ID and full name of the new lead, then click on the ‘Save’ button. At last click on ‘Submit’. Once you are done with the creation of a new lead, head back to the Pabbly Connect window and click on the ‘Save and Sent Request’ button to get the API response. But make sure to switch off the ‘Simple Response’ section (to get the data in the correct format). Hence, you will see the API response, click on the ‘Save’ button. The fields and values that we got from the API response are not appropriate as per our requirements, so we have to add the ‘Data Transformer’ as an action step. Click on the plus (+) button. From the choose app drop-down select ‘Data Transformer’ and select method as ‘Facebook Lead Ads’. After selecting the application, click on the ‘Connect With Data Transformer’ button. Now, it’s time to map the field data. Simply click on the map button and select the ‘field_data’ which you received through the Facebook Lead Ads trigger. Next, click on the ‘Save and Sent Test Request’ button to get the API response. Further, as you can see the response is in a correct format. Further, simply click on the ‘Save’ button. Promptly, we have collected all the information in the correct format. Therefore, it’s time to create a Freshsales lead from the Facebook response by setting up an action. Click on the plus icon to select ‘Freshsales’ from choose app and add an action event as ‘Create Lead’. Further, click on the ‘Connect With Freshsales’ button. A window will open up. To connect Freshsales to Pabbly Connect, you have to enter the API Key. For which you are required to log in to your Freshsales account. Firstly, log in to your Freshsales account by filling up your credentials. From the Freshsales dashboard, click on your account icon and then click on the ‘Settings’ option. In the Personal Settings page, click on the ‘API Settings’ menu and you will see the ‘API Key’, copy it. Paste the above copied API Key into the Pabbly Connect window but make sure to add the ‘Token token=’ prefix before the API Key. Also, enter the sub-domain which you can get from Freshsales URL. And at last click on the ‘Save’ button. Map the fields in the Freshsales action window such as name, email, subscription status, etc. After you map all the required fields, click on the ‘Save and Sent Test Request’ button. Besides, you can check the response of your API in the action window. Ultimately, press the ‘Save’ button to save the action API’s response. Promptly, go to your Freshsales lead page and you will see that a new lead is created, which means that our integration is successfully set up. Now, whenever we get a new lead on Facebook lead ads, it will automatically get auto-populated in Freshsales. Well, this is all about ‘How to create Freshsales lead from new Facebook lead ads’. Consequently, after completing the step by step procedure, you will end up automating the Freshsales lead creation through new Facebook lead ads. Most importantly, the procedure is very easy to implement and you don’t need any coding knowledge to follow the steps. All right, what’s stopping you now! By signing up for a free account, go and catch a deal. For your queries or suggestions, do comment below.Step 2: Access Pabbly Connect

Step 3: Workflow for Facebook and Freshsales Integrations
(a) Start with a New Workflow

(b) Name the Workflow
Step 4: Setting Trigger for Facebook and Freshsales Integration
(a) Select Application you want to Integrate
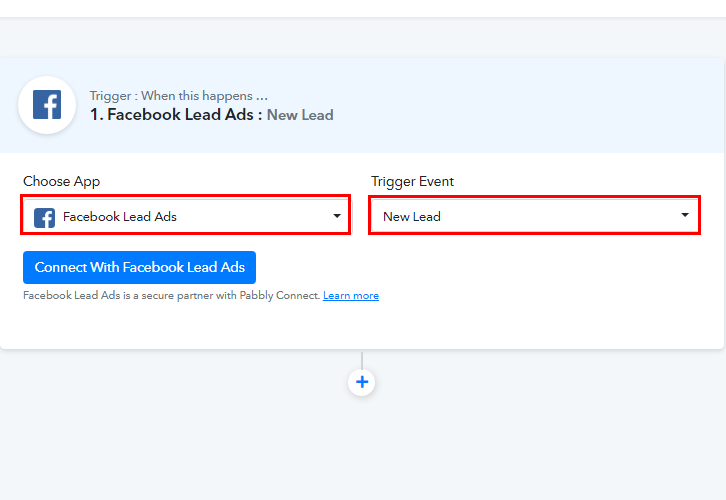
(b) Connect with Facebook Lead Ads
Step 5: Connecting Facebook to Pabbly Connect
(a) Authorize Application
(b) Map the fields
Step 6: Create a New Lead
(a) Open Facebook Page

(b) Go to Publishing Tool
(c) Select Form Library
(d) Add Details
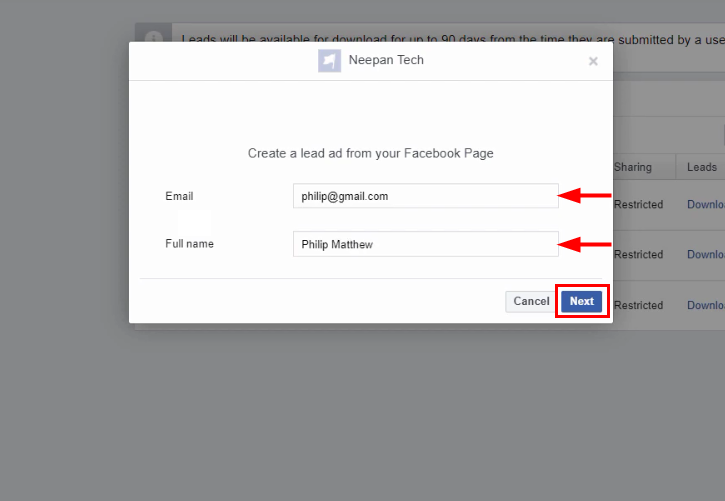
(e) Save and Sent Test Request
(f) Check & Save Response
Step 7: Setting Data Transformer
(a) Select Application
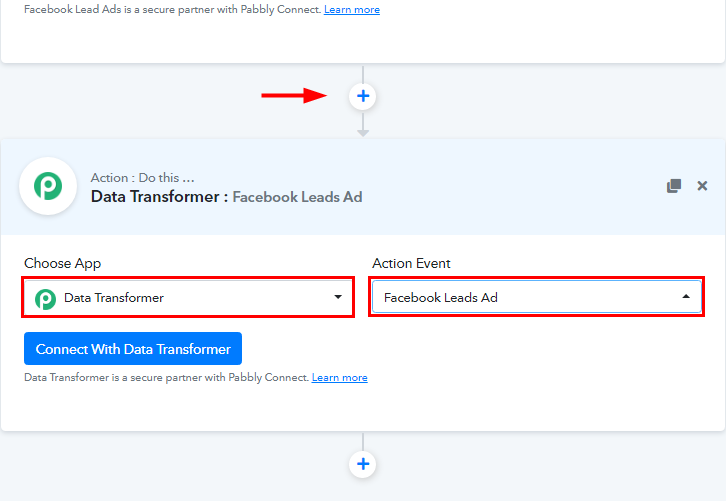
(b) Connect with Data Transformer
(c) Map the Field Data
(d) Save and Sent Test Request
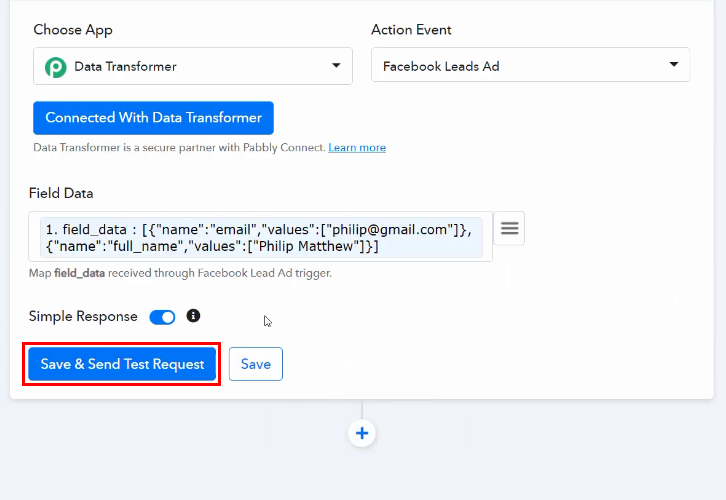
(e) Check & Save Response

Step 8: Setting Action for Facebook to Freshsales
(a) Select Application you want to Integrate
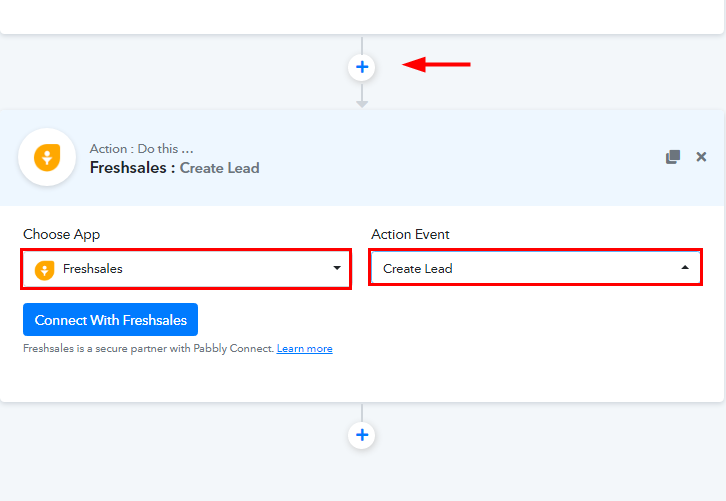
(b) Connect with Freshsales
Step 9: Connect Freshsales with Pabbly Connect
(a) Log in to Freshsales
(b) Go to Settings
(c) Copy the API Key
(d) Paste the API Key
(e) Map the Fields
(f) Save and Sent Test Request
(g) Check & Save Response
Step 10: Check Response in Freshsales Dashboard
Conclusion:
You May Also Like To Read –


