Automatically Add B2B Leads to Google Contacts

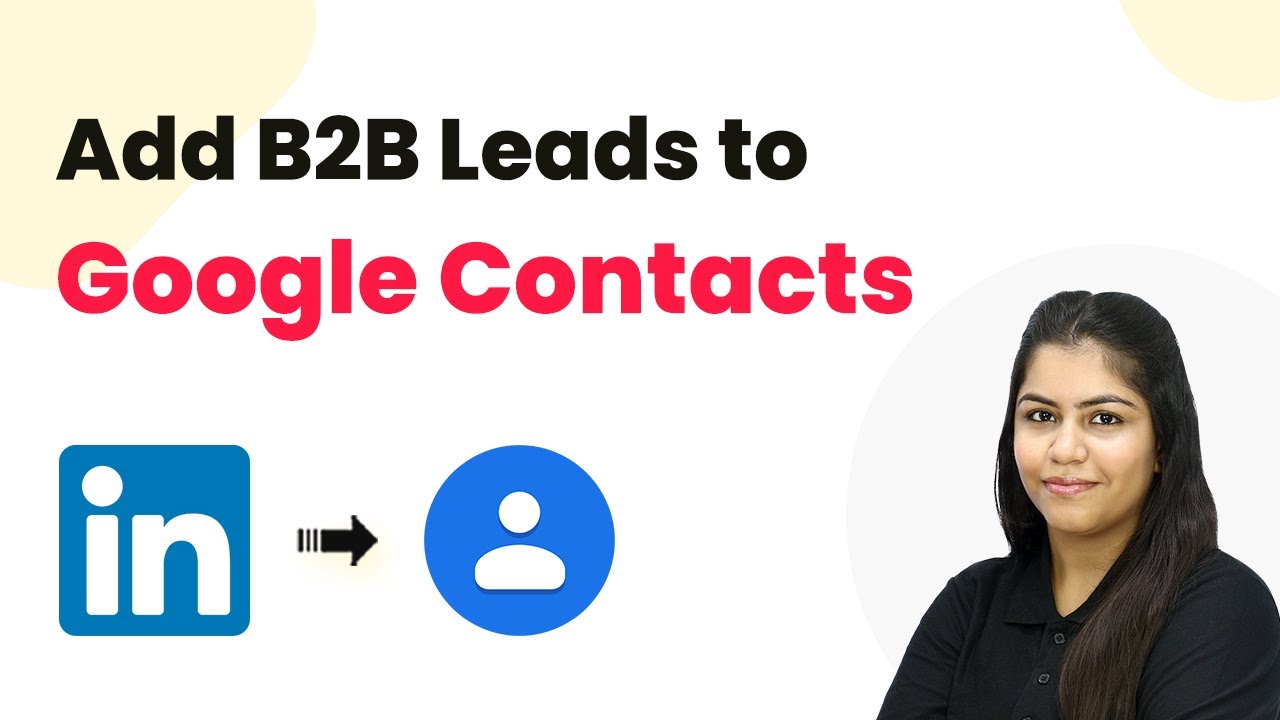
Learn how to automatically add B2B leads to Google Contacts using Pabbly Connect in this detailed tutorial. Follow the exact steps to streamline your workflow.

Watch Step By Step Video Tutorial Below


1. Getting Started with Pabbly Connect

To automatically add B2B leads to your Google Contacts, you will need to start with Pabbly Connect. First, navigate to the Pabbly Connect website by searching for ‘Pabbly.com/connect’ in your browser. If you are a new user, you can sign up for free in the top right corner of the page.

Once signed up, you will receive 100 free tasks each month, allowing you to explore the features of Pabbly Connect. This means you can add up to 100 leads to your Google Contacts for free. If you find the platform useful, consider purchasing a subscription for additional features.


2. Setting Up the Trigger in Pabbly Connect

In this step, you will set up the trigger that will initiate the process of adding leads to Google Contacts using Pabbly Connect. Click on the ‘Add Trigger’ button and search for ‘LinkedIn’ as the trigger application. Select ‘Lead Notifications’ as the event and click on ‘Connect’.

  • If you have an existing connection, select it; otherwise, create a new one by clicking ‘Add a New Connection’.
  • Log in to your LinkedIn account if prompted, and select the sponsored account you want to connect.
  • After connecting, click ‘Save and Send Test Request’ to capture the webhook response.

Once the test request is sent, you will need to create a test lead in LinkedIn to capture the response in Pabbly Connect. This will allow you to verify that the integration works seamlessly.


3. Creating a Test Lead in LinkedIn

To create a test lead, go to your LinkedIn account and fill out the lead form associated with your ad campaign. Enter the required details such as email address and phone number. Note that if your campaign is in draft mode, you may not see all fields like first name or company name.

After filling out the form, click ‘Submit’. You should see a confirmation that the information has been sent to Pabbly Connect. This action will allow Pabbly Connect to capture the lead details through the webhook response.


4. Adding Action to Create Contact in Google Contacts

Now that you have captured the lead details, it’s time to set up an action in Pabbly Connect to create a contact in Google Contacts. Click on ‘Add New Action’ and search for ‘Google Contacts’. Select ‘Create Contact’ as the event and click ‘Connect’.

  • If you have an existing connection with Google Contacts, select it; otherwise, create a new connection.
  • Sign in with your Google account and grant the necessary permissions to Pabbly Connect.
  • Map the fields from your LinkedIn lead to the respective fields in Google Contacts.

Mapping allows you to insert dynamic data from the lead into the contact fields. Once you’ve mapped the necessary details, click ‘Save and Send Test Request’ to create a new contact.


5. Verifying the New Contact in Google Contacts

After setting up the action, you will receive a positive response indicating that a new contact has been created successfully in Google Contacts via Pabbly Connect. To verify, open your Google Contacts and refresh the page.

You should see the new contact added, complete with the details you provided earlier. This automation ensures that every new lead from LinkedIn is automatically added to your Google Contacts, streamlining your workflow.


Conclusion

In this tutorial, we explored how to automatically add B2B leads to Google Contacts using Pabbly Connect. By following the precise steps outlined, you can efficiently manage your leads and enhance your productivity. Try implementing this automation for your own business to save time and improve lead management.

Ensure you check out Pabbly Connect to create business automation workflows and reduce manual tasks. Pabbly Connect currently offer integration with 2,000+ applications.

Send Magicbricks Leads Instantly to Gmail (Real-Time Email Alerts)

Learn how to send Magicbricks leads instantly to Gmail using Pabbly Connect for real-time email alerts. Follow our step-by-step guide for easy integration. Develop expertise in application integration and learn how to design streamlined automation workflows using proven, simplified approaches.

Watch Step By Step Video Tutorial Below


1. Accessing Pabbly Connect for Integration

To send Magicbricks leads instantly to Gmail, you first need to access Pabbly Connect. Start by navigating to the Pabbly website by typing pabby.com in your browser. Once there, you can sign in if you are an existing user or sign up for free if you are new.

After signing in, you will find the Pabbly apps page. Click on the Pabbly Connect icon to access the dashboard. Here, you can create a new workflow specifically for sending email alerts for Magicbricks leads. This integration will allow you to automate the process of sending emails through Gmail whenever a new lead is captured.


2. Creating a Workflow in Pabbly Connect

After accessing Pabbly Connect, the next step is to create a new workflow. Click on the ‘Create Workflow’ button and select ‘Create from scratch’. Choose the new beta workflow builder for a modern setup.

  • Name your workflow as ‘Send Magicbricks Leads Instantly to Gmail’.
  • Select a folder to organize your workflows.
  • Click on ‘Create’ to finalize your workflow setup.

Once your workflow is created, you will be prompted to set a trigger application. This is where you will choose Magicbricks as your trigger application to initiate the workflow whenever a new lead is received.


3. Setting Up the Trigger with Magicbricks

In this step, select Magicbricks as your trigger application in Pabbly Connect. You will then set the trigger event to ‘New Leads’. This means the workflow will be activated every time a new lead is captured from Magicbricks.

To connect Magicbricks with Pabbly Connect, a webhook URL will be generated. This URL acts as a bridge between Magicbricks and Pabbly Connect. Since Magicbricks does not allow direct user input for this URL, you must provide it to your Magicbricks account manager for setup.


4. Capturing Lead Responses

After setting up the webhook, the next step is to capture the lead response. Click on the ‘Capture Webhook Response’ button in Pabbly Connect. The system will now wait for new lead data to be received.

Once a lead is captured, you will see details such as the lead’s name, phone number, and email address. This confirms that the connection setup is working correctly, and you are ready to proceed to the next step of sending emails via Gmail.


5. Sending Email Alerts through Gmail

To send email alerts, add a new action step in your Pabbly Connect workflow. Search for and select Gmail as your action application. Choose the action event as ‘Send Email’ and connect your Gmail account to Pabbly Connect.

Fill in the email details, including the sender’s name and email address. Importantly, use the mapping feature to dynamically insert the recipient’s email from the lead response. This ensures that each email sent is personalized and relevant to the lead.

  • Set the email subject to reflect the inquiry.
  • Draft a personalized email body using mapped lead information.
  • Click on ‘Save and Send Request’ to execute the workflow.

Check your Gmail inbox to confirm that the email was sent successfully, reflecting the lead’s details as intended. This confirms that your integration is functioning perfectly, allowing for real-time email alerts for Magicbricks leads.


Conclusion

By following these steps, you can effectively use Pabbly Connect to send Magicbricks leads instantly to Gmail. This integration streamlines your lead management process and ensures timely email alerts for your inquiries. Automate your workflow today for enhanced efficiency!

Ensure you check out Pabbly Connect to create business automation workflows and reduce manual tasks. Pabbly Connect currently offer integration with 2,000+ applications.

Send Personalized SMS to New Leads Using Twilio

Learn how to send personalized SMS to new leads using Twilio and Pabbly Connect in this detailed tutorial. Follow step-by-step instructions for seamless integration. Transform complex automation concepts into accessible, actionable steps that eliminate unnecessary manual work while maximizing existing application capabilities.

Watch Step By Step Video Tutorial Below


1. Accessing Pabbly Connect for SMS Automation

To send personalized SMS to new leads using Twilio, you first need to access Pabbly Connect. If you are a new user, open your browser and visit pabbl.com/connect. Here, you will find the option to sign up for free, which allows you to explore the features of Pabbly Connect without any cost.

Once registered, you can start creating workflows. The free plan provides you with hundreds of tasks each month, enabling you to send up to 100 SMS for free. This is a great way to test out Pabbly Connect before committing to a subscription plan.


2. Creating a Workflow in Pabbly Connect

After logging into Pabbly Connect, navigate to the workflow builder where you can set up your automation. Begin by clicking on the ‘Add Trigger’ button. For the trigger application, search for Google Ads, as this is where you’ll collect lead details.

  • Select ‘New Lead Form Entry’ as the event.
  • Click on ‘Connect’ to establish the connection.
  • Copy the provided webhook URL.

Next, go to your Google Ads campaign and add the lead form. Ensure that the lead form captures essential details such as name, email, and phone number. Paste the webhook URL from Pabbly Connect into the lead delivery section to connect your lead form with the workflow.


3. Testing the Webhook Response in Pabbly Connect

After setting up the lead form, you need to test the webhook response. Click on ‘Send Test Data’ in Google Ads, which will send a test lead to Pabbly Connect. This allows you to verify that the integration is working correctly.

  • You can either wait for a real lead or use the test lead details.
  • Click on ‘Capture Webhook Response’ to confirm the data is received.

Using the test lead details is recommended as it saves time and ensures that your automation will function correctly with actual leads.


4. Sending SMS with Twilio via Pabbly Connect

Now that you have captured the lead details, it’s time to set up the action step to send an SMS via Twilio. Click on ‘Add New Action’ and search for Twilio. Select ‘Send SMS Message’ as the event and click on ‘Connect’ to link Twilio with Pabbly Connect.

If you already have a connection, select ‘Use Existing Connection’. If not, click on ‘Add New Connection’ and enter your Twilio Account SID and Authorization Token. You can find these in your Twilio dashboard.

For the SMS body, create a message that includes the lead’s name by mapping it from the previous step. For example: ‘Hello {{Name}}, welcome to Natural Glow Skincare! Ready to switch to toxin-free products?’ Ensure to set the sender number as your Twilio phone number and the recipient number as the lead’s phone number.


5. Finalizing the Automation Process

Once you have set up the SMS details, click on ‘Save and Send Test Request’ in Pabbly Connect. You should receive a positive response indicating that the SMS has been successfully sent. This confirms that your automation is working as intended.

Now, whenever a new lead is captured through Google Ads, Pabbly Connect will automatically send a personalized SMS without any manual intervention. This automation will save you time and streamline your lead communication process.

To summarize, using Pabbly Connect to integrate Google Ads and Twilio allows for efficient lead management and personalized communication. Try this automation for your own business today!


Conclusion

In this tutorial, you learned how to send personalized SMS to new leads using Twilio and Pabbly Connect. By following these steps, you can automate your lead communication effectively. This process enhances engagement and saves valuable time, allowing you to focus on other important tasks.

Ensure you check out Pabbly Connect to create business automation workflows and reduce manual tasks. Pabbly Connect currently offer integration with 2,000+ applications.

Google Ads to Google Sheets Automation for High-Growth Businesses

Learn how to automate Google Ads leads to Google Sheets using Pabbly Connect. Step-by-step tutorial for high-growth businesses. Master proven automation processes with practical implementation examples and strategic recommendations you can apply immediately in your workflow.

Watch Step By Step Video Tutorial Below


1. Accessing Pabbly Connect for Automation

To begin automating Google Ads leads to Google Sheets, you first need to access Pabbly Connect. Start by visiting the Pabbly website by typing ‘pabyt.com’ in your browser. Once on the homepage, you will see options for signing in or signing up.

If you are a new user, click on ‘Sign up for free’ to get started with 100 free tasks monthly. Existing users can click ‘Sign in’ to access their account. After signing in, navigate to the Pabbly apps page and select Pabbly Connect to reach the dashboard where you can manage your workflows.


2. Creating a New Workflow in Pabbly Connect

In the Pabbly Connect dashboard, you can create a new workflow by clicking on ‘Create Workflow’. You will be prompted to choose a workflow builder. Opt for the ‘New Beta’ for a modern, flexible experience.

  • Select a name for your workflow, such as ‘Google Ads to Google Sheets Automation for High Growth Businesses’.
  • Choose a folder to save your workflow, like ‘All Automations’.
  • Click on ‘Create’ to finalize the setup.

Once created, you will see a prompt to add a trigger application. This is an essential step as it defines the event that starts your automation. Here, you will set Google Ads as your trigger application.


3. Setting Up Google Ads as Trigger in Pabbly Connect

In the trigger section of your workflow, select Google Ads and choose ‘New Lead Form Entry’ as the trigger event. Click ‘Connect’ to establish a connection between Pabbly Connect and Google Ads.

A webhook URL will be generated, acting as a bridge for data transfer. Copy this URL and navigate to your Google Ads account. Here, set up your lead form and paste the webhook URL in the lead delivery option. Make sure to send test data to check if the connection is working properly.

When you send test data, Pabbly Connect will capture the response. You should see the details such as the city, phone number, email, and full name of the lead. This confirms that your Google Ads is successfully integrated with Pabbly Connect.


4. Adding Google Sheets as Action in Pabbly Connect

Next, you will add Google Sheets as the action application in your workflow. Click on ‘Add New Action Step’ and select Google Sheets. Choose ‘Add New Row’ as the action event and click ‘Connect’. using Pabbly Connect

  • If you have an existing connection, select ‘Save’. If not, click on ‘Add New Connection’.
  • Sign in with your Google account and grant necessary permissions.
  • Select the spreadsheet where you want to add the lead details.

Once connected, you will map the fields from the Google Ads response to the corresponding columns in your Google Sheets. This mapping ensures that each new lead’s details are automatically added to the correct fields.


5. Finalizing the Automation Workflow

After mapping all the necessary fields, click on ‘Save and Send Test Request’ in Pabbly Connect. This action will send the lead details to your specified Google Sheets.

Check your Google Sheets to confirm that the details have been added correctly. You should see the first name, last name, email address, phone number, and city populated in the spreadsheet. This step verifies that your automation is functioning as intended.

In summary, you have successfully created an automation workflow using Pabbly Connect to transfer leads from Google Ads to Google Sheets. This integration not only saves time but also streamlines your lead management process.


Conclusion

In this tutorial, we demonstrated how to automate the process of transferring Google Ads leads to Google Sheets using Pabbly Connect. This integration helps high-growth businesses save time and manage leads efficiently. Start using Pabbly Connect today to enhance your business automation.

Ensure you check out Pabbly Connect to create business automation workflows and reduce manual tasks. Pabbly Connect currently offer integration with 2,000+ applications.

How to Add Lead Details to Brevo Automatically

Learn how to automate adding lead details to Brevo using Pabbly Connect. Follow our step-by-step tutorial to streamline your lead management process. Develop expertise in application integration and learn how to design streamlined automation workflows using proven, simplified approaches.

Watch Step By Step Video Tutorial Below


1. Accessing Pabbly Connect for Lead Automation

To automate adding lead details to Brevo, start by accessing Pabbly Connect. If you are a new user, navigate to pabbl.com/connect in your browser. Click on the ‘Sign up for free’ option in the top right corner to create your account.

Once signed up, you will receive 100 free tasks each month to explore the features of Pabbly Connect. This allows you to add up to 100 lead details to your Brevo account without any cost. After trying Pabbly Connect, you can choose to purchase a subscription plan if you find it beneficial.


2. Setting Up Your Workflow in Pabbly Connect

Now, you’ll need to set up your workflow in Pabbly Connect. Open the workflow builder, which is essential for automation. Here, you will establish triggers and actions that control the flow of data.

Click on the ‘Add Trigger’ button. For the trigger application, search for ‘Google Ads’ and select it. Choose the event as ‘New Lead Form Entry’ and proceed by clicking ‘Connect’. This will generate a webhook URL that you need to copy.

  • Go to your Google Ads campaign and add a lead form.
  • Paste the copied webhook URL in the lead delivery section.
  • Enter the key and click on ‘Send Test Data’.

Once the test data is sent, Pabbly Connect will capture the response, including phone number, email address, first name, and last name. You can either wait for a real lead or use the test data to proceed with the automation setup.


3. Connecting Brevo with Pabbly Connect

Next, you will connect Brevo with Pabbly Connect. Click on ‘Add New Action Step’ and search for ‘Brevo’. Select Brevo and choose the event ‘Create or Update Contact’. Click on ‘Connect’ to establish the integration.

If you have an existing connection, select it. Otherwise, create a new connection by entering your Brevo domain and API key. To get the API key, log into your Brevo account, navigate to the SMTP and API page, and generate a new API key. Name it accordingly, such as ‘New Lead from Ads’.

  • Copy the generated API key and paste it into Pabbly Connect.
  • Map the email address from the previous step by entering it in the designated field.
  • Select the appropriate list for new leads.

After filling in the required fields, click on ‘Save and Send Test Request’. If successful, you will see a confirmation that the lead details have been added to your Brevo account.


4. Verifying Lead Addition in Brevo

After successfully adding lead details, it is important to verify that the data has been correctly captured in Brevo. Navigate to your Brevo account and check the contact list for new leads.

You should see the details of the lead you just added, including the name and email address. This confirms that Pabbly Connect has successfully automated the process of adding leads from Google Ads to Brevo.

With this setup, every time you receive a new lead from Google Ads, a corresponding contact will be created or updated in your Brevo account automatically, streamlining your lead management process.


Conclusion

In this tutorial, we demonstrated how to automate the addition of lead details to Brevo using Pabbly Connect. By following the steps outlined, you can streamline your lead management process effectively. Start using Pabbly Connect today to enhance your business automation.

Ensure you check out Pabbly Connect to create business automation workflows and reduce manual tasks. Pabbly Connect currently offer integration with 2,000+ applications.

Fashion Store Lead Management System (Step-by-Step)

Learn how to manage leads for your fashion store using Pabbly Connect to integrate Google, Google Sheets, and Instagram seamlessly. Transform complex automation concepts into accessible, actionable steps that eliminate unnecessary manual work while maximizing existing application capabilities.

Watch Step By Step Video Tutorial Below


1. Accessing Pabbly Connect for Lead Management

To begin managing your fashion store leads, the first step is to access Pabbly Connect. Start by navigating to pabby.com/connect in your web browser. This will take you to the Pabbly Connect homepage where you’ll find options to sign in or sign up for a free account.

If you’re new to Pabbly Connect, click on ‘Sign Up Free’ to get started with 100 free tasks every month. Existing users can simply sign in. After signing in, you will see all Pabbly applications. Click on ‘Access Now’ under Pabbly Connect to reach the dashboard and begin your workflow setup.


2. Creating a Lead Management Workflow in Pabbly Connect

Once you’re in Pabbly Connect, the next step is to create a workflow for managing your leads. Click the ‘Create Workflow’ button, and choose ‘Create from Scratch’. You will then be prompted to select between the beta version and the classic version; choose the beta version for a modern experience.

  • Select ‘Create Workflow’.
  • Choose ‘Create from Scratch’.
  • Select the beta version for enhanced features.

After this, name your workflow (e.g., ‘Fashion Store Lead Management System’) and select a folder for organization. Click on ‘Create’ to finalize your workflow setup. This sets the stage for your automation process, which involves defining triggers and actions.


3. Setting Up the Trigger in Pabbly Connect

In this section, you will set up the trigger for your lead management system. Since you receive new leads via Google Ads, select Google Ads as your trigger application and choose the event ‘New Lead Form Entry’. Click on ‘Connect’ to establish a connection.

A webhook URL will be generated, which you will use to link Google Ads with Pabbly Connect. Copy this URL and navigate to your Google Ads account. In your test campaign, locate the lead form you created and scroll down to the ‘Lead Delivery’ section.

  • Paste the webhook URL into the lead delivery settings.
  • Assign a key name, such as ‘test’.
  • Send test data to verify the connection.

Once the test data is sent, return to Pabbly Connect to confirm that you received a response with lead details, indicating that your trigger is successfully set up.


4. Adding Action Step to Google Sheets in Pabbly Connect

Now that your trigger is set, the next step is to add an action in Pabbly Connect. Choose Google Sheets as your action application and select ‘Add a New Row’ as the event. Click on ‘Connect’ to build a new connection with your Google account.

Once connected, select the spreadsheet where you want to store your leads (e.g., ‘Leads’) and the specific sheet (e.g., ‘Sheet1’). You will then map the fields from the trigger (first name, last name, email, phone number) to the corresponding columns in your Google Sheets.

Select the correct spreadsheet and sheet. Map the fields from the trigger response. Click ‘Save and Send Test Request’ to finalize.

After saving, you will receive a successful response indicating that a new row has been added to your Google Sheets, confirming that your action step is functioning correctly.


5. Conclusion: Efficient Lead Management with Pabbly Connect

In conclusion, using Pabbly Connect for your fashion store lead management system streamlines the process of capturing leads from Google Ads and storing them in Google Sheets. By following the steps outlined, you can ensure that every new lead is automatically recorded, making management much more efficient.

Ensure you check out Pabbly Connect to create business automation workflows and reduce manual tasks. Pabbly Connect currently offer integration with 2,000+ applications.

Check out Pabbly Connect – Automate your business workflows effortlessly! Sign Up Free – Start your journey with ease! 10,000+ Video Tutorials – Learn step by step! Join Pabbly Facebook Group – Connect with 21,000+ like minded people!

This integration not only saves time but also reduces the chances of manual errors. With Pabbly Connect, you can focus on growing your business while automating essential tasks seamlessly.


Build a WhatsApp Lead Capture Bot That Finds Hot Customers Automatically

Learn how to create a WhatsApp Lead Capture Bot using Pabbly Chatflow and Pabbly Chatflow to automatically identify hot customers. Discover how to design chat experiences that feel personal and responsive while handling customer inquiries automatically around the clock.

Watch Step By Step Video Tutorial Below


1. Setting Up Pabbly Chatflow for WhatsApp Bot

To create a WhatsApp Lead Capture Bot, start by accessing Pabbly Chatflow. Visit Pabbly.com/chatflow to sign in or create a free account. New users can sign up and receive 100 free credits monthly, allowing exploration of the application.

Once logged in, you’ll see your WhatsApp number displayed. If you haven’t added it yet, click the button to add your WhatsApp number using either the WhatsApp connect method or manual token connect method. This step is crucial as it enables Pabbly Chatflow to interact with your WhatsApp account.


2. Creating Your WhatsApp Lead Capture Bot in Pabbly Chatflow

Inside your Pabbly Chatflow dashboard, navigate to the flows section and click on the ‘Add Flow’ button to start creating your bot. Name your flow as ‘Hot Lead Capture Bot’ for clarity. This naming helps in identifying the purpose of your bot easily.

Next, select the trigger event for your bot. Choose ‘Keyword or Reject Match’ from the dropdown menu. Here, you will enter keywords like ‘hello’ and ‘hey’. By doing this, your bot will be triggered whenever users send these keywords. After adding these keywords, you can proceed to frame a welcome message.

  • Select ‘Keyword or Reject Match’ as the trigger event.
  • Add keywords like ‘hello’ and ‘hey’.
  • Frame a welcome message for users.

After framing the welcome message, you can set up additional questions to engage users further. This interaction is essential for qualifying leads effectively.


3. Engaging Users with Questions in Pabbly Chatflow

After sending the welcome message, use the ‘Ask Question’ feature in Pabbly Chatflow to engage users. You can ask questions like ‘What are you looking for today?’ and provide multiple options for users to choose from. This step will help gather valuable information from potential leads.

For each question, ensure you connect the responses to the respective contact custom fields. This allows you to save the answers given by users efficiently. After asking the initial question, duplicate the ‘Ask Question’ action to add more questions about budget, company name, and email.

  • Use the ‘Ask Question’ feature to engage users.
  • Connect responses to contact custom fields.
  • Duplicate questions for budget, company name, and email.

These interactions are crucial in determining whether a lead is hot or cold, based on their responses.


4. Integrating Pabbly Connect for Data Management

To manage the data collected from users, you need to integrate Pabbly Connect. After asking the necessary questions, drag the API request action into your flow. You will need to paste the webhook URL from your Pabbly Connect account here.

To obtain the webhook URL, go back to your Pabbly Connect dashboard and create a new workflow. Select ‘Webhook’ as the trigger application and choose ‘Catch Webhook’ as the event. Copy the generated webhook URL and paste it into your Pabbly Chatflow API request.

Drag the API request into your flow after user questions. Create a new workflow in Pabbly Connect for the webhook. Paste the webhook URL into your API request in Pabbly Chatflow.

By doing this, you ensure that all lead information is captured and sent to your Pabbly Connect account for further processing.


5. Finalizing the Workflow and Testing the Bot

Once your Pabbly Chatflow flow is set up and integrated with Pabbly Connect, you can finalize the workflow. Add a filter action to ensure that only leads with a budget above a specified amount are processed further. This step is crucial for identifying hot leads.

To test your bot, send the trigger keywords like ‘hey’ in your WhatsApp chat. The bot should respond with the welcome message and proceed to ask the questions you set up. After completing the interaction, check your Pabbly Connect account to see if the lead details have been captured correctly.

Add a filter action to process only hot leads. Test the bot by sending trigger keywords in WhatsApp. Verify lead details in your Pabbly Connect account.

This testing phase ensures that your WhatsApp Lead Capture Bot is functioning as intended and effectively categorizing leads.


Conclusion

By following these steps, you can successfully build a WhatsApp Lead Capture Bot using Pabbly Chatflow and Pabbly Connect. This bot will help you automatically identify hot customers and streamline your lead management process. With the right setup, your business can benefit from efficient lead categorization and timely follow-ups.

Ensure you check out Pabbly Connect to create business automation workflows and reduce manual tasks. Pabbly Connect currently offer integration with 2,000+ applications.

How to Add Lead Details to GoHighLevel Automatically

Learn how to use Pabbly Connect to automatically add lead details to GoHighLevel. Follow our step-by-step tutorial for seamless integration. Master proven automation processes with practical implementation examples and strategic recommendations you can apply immediately in your workflow.

Watch Step By Step Video Tutorial Below


1. Setting Up Pabbly Connect for Integration

To automatically add lead details to GoHighLevel, first, you need to access Pabbly Connect. If you’re a new user, open a new tab and visit pabbl.com/connect. Here, you can sign up for free and explore the platform with 100 tasks monthly.

Existing users can directly access their workflow builder in Pabbly Connect. This platform is essential for creating automated workflows, allowing you to set triggers and actions seamlessly.


2. Creating a Trigger with Google Ads in Pabbly Connect

Once you’re in Pabbly Connect, click on the ‘Add Trigger’ button to begin setting up your workflow. For the trigger application, search for Google Ads and select it. Choose the event as ‘New Lead Form Entry’ and click on connect.

  • Select Google Ads as the trigger application.
  • Choose ‘New Lead Form Entry’ as the event.
  • Copy the webhook URL provided by Pabbly Connect.

Next, navigate to your Google Ads campaign and add the lead form. Paste the copied webhook URL into the lead delivery option to establish a connection between Google Ads and Pabbly Connect. This step is crucial for automating the lead data transfer.


3. Capturing Lead Details in Pabbly Connect

After setting up the lead form in Google Ads, you can send test data to Pabbly Connect. Click on ‘Send Test Data’ in Google Ads, and you will see a confirmation that test data has been sent. Now, return to your workflow in Pabbly Connect.

Here, you can view the captured lead details such as phone number, email address, first name, and last name. There are two options: you can either wait for real-time leads or use the test lead details for setting up your automation.


4. Setting Up Action to Add Lead to GoHighLevel

For the action application, search for ‘Lead Connector V2’ in Pabbly Connect. Choose the event ‘Create or Update a Contact’ and click on connect. If you haven’t created a connection with GoHighLevel yet, select ‘Add a New Connection’.

Log into your GoHighLevel account when prompted. After logging in, choose the sub-account and start mapping the fields from the previous step to ensure the data flows correctly. Mapping allows the data to be dynamic and automatically updates with new responses.

  • Map the phone number, email address, and other details from the test lead.
  • Ensure you only map the fields that you have details for.
  • Click on ‘Save and Send Test Request’ after mapping is complete.

Once you receive a positive response indicating a new contact has been created, you can check your GoHighLevel account to confirm that the new lead details have been added successfully.


5. Automating Future Lead Additions with Pabbly Connect

With the integration set up, every time a new lead is generated from Google Ads, Pabbly Connect will automatically create or update a contact in your GoHighLevel account. This eliminates the need for manual data entry and ensures that all lead details are captured promptly.

By utilizing Pabbly Connect, you can focus on other important aspects of your business while the automation handles lead management. This process not only saves time but also increases efficiency in handling leads from various sources.


Conclusion

In conclusion, using Pabbly Connect to automatically add lead details to GoHighLevel streamlines your workflow significantly. This integration allows for efficient lead management, ensuring that all details are captured without manual intervention, thus enhancing your business productivity.

Ensure you check out Pabbly Connect to create business automation workflows and reduce manual tasks. Pabbly Connect currently offer integration with 2,000+ applications.

Payment Automation Workflow for Businesses

Learn how to automate payment workflows for your business using Pabbly Connect, integrating Google Sheets and Razor Pay effectively. This comprehensive guide reveals exactly how to connect your applications and automate repetitive tasks — accessible for professionals of all technical backgrounds.

Watch Step By Step Video Tutorial Below


1. Accessing Pabbly Connect for Payment Automation

To start automating your payment processes, you need to access Pabbly Connect. Simply visit pabby.com/connect in your browser. This platform serves as the backbone for integrating your payment gateway with Google Sheets.

If you’re a new user, click on ‘Sign Up Free’ to get started with 300 tasks every month. Existing users can simply sign in. Once logged in, navigate to the Pabbly apps window and click on ‘Access Now’ to enter the Pabbly Connect dashboard.


2. Creating a New Workflow in Pabbly Connect

Now that you’re in Pabbly Connect, the next step is to create a new workflow. Click on the ‘Create Workflow’ button. You will be presented with two options: create from scratch or using AI. For this tutorial, select ‘Create from Scratch’.

  • Choose the beta version for a modern approach.
  • Name your workflow, for example, ‘Add Razor Pay Payments to Google Sheets’.
  • Select the folder for your workflow, such as ‘Automation’.

After naming your workflow and selecting the appropriate folder, click on the ‘Create’ button. Your new workflow is now set up and ready for configuration in Pabbly Connect.


3. Setting Up the Trigger for Razor Pay Payments

In Pabbly Connect, every automation starts with a trigger. For this workflow, select Razor Pay as your trigger application and the event as ‘Payment Captured’. Click on ‘Connect’ to generate a webhook URL.

Copy the webhook URL and head to your Razor Pay account. Navigate to the ‘Developers’ section and select ‘Webhooks’. Here, add a new webhook by pasting the copied URL. Set the event to ‘Payment Captured’ and leave the secret field blank, then click ‘Create Webhook’.


4. Testing the Trigger with a Test Payment

After setting up the webhook, Pabbly Connect will wait for a response. To test it, make a test payment on your Razor Pay payment page. Enter the details like name, email, phone number, and select UPI as the payment method.

  • Use a test UPI ID to complete the payment.
  • Ensure that the payment is successful.

Once the payment is successful, return to Pabbly Connect. You should see that the payment details have been received, confirming that your trigger is working correctly.


5. Adding Payment Details to Google Sheets

Now that your trigger is set up, the next step is to add the payment details to Google Sheets. In Pabbly Connect, add an action step and select Google Sheets as the application and ‘Add New Row’ as the event.

Click on ‘Connect’ and select ‘Add a New Connection’. Sign in with your Google account and give Pabbly Connect the necessary permissions. Next, choose your spreadsheet and specific sheet where you want the payment details to be saved.

Map the fields such as name, email, phone number, product name, and order ID from the trigger response. Click ‘Save and Send Test Request’ to ensure the data is added correctly.

Upon successful testing, you will see the new payment details appear in Google Sheets, confirming that your automation is complete using Pabbly Connect.


Conclusion

In this tutorial, we demonstrated how to automate payment workflows using Pabbly Connect. By integrating Razor Pay and Google Sheets, you can efficiently manage payment details in real-time. This automation saves time and reduces manual errors, ensuring your business operates smoothly.

Ensure you check out Pabbly Connect to create business automation workflows and reduce manual tasks. Pabbly Connect currently offer integration with 2,000+ applications.

How to Add Property Inquiries to Sheets Automatically

Learn how to seamlessly integrate property inquiries into Google Sheets using Pabbly Connect. This step-by-step guide covers everything you need to know! This comprehensive guide reveals exactly how to connect your applications and automate repetitive tasks — accessible for professionals of all technical backgrounds.

Watch Step By Step Video Tutorial Below


1. Accessing Pabbly Connect for Automation

To start with the integration of property inquiries into Google Sheets, you need to access Pabbly Connect. If you’re a new user, simply open your browser and type in ‘Pabbly.com/connect’ to reach the landing page.

Once there, click on the ‘Sign Up for Free’ option in the top right corner. This allows you to explore Pabbly Connect with 100 free tasks every month, meaning you can automatically add up to 100 inquiries into your sheets without any cost.


2. Setting Up Your Workflow in Pabbly Connect

After signing in, you will be directed to the workflow builder in Pabbly Connect. This interface is crucial as it contains the trigger and action elements that will automate your process.

To begin, click on the ‘Add Trigger’ button and search for ’99 Acres’, which is the platform used to collect property inquiries. Select ’99 Acres’ and choose the event ‘New Leads’. This step is essential for capturing your property inquiries.

  • Click on ‘Connect’ to receive your webhook URL.
  • Copy this URL and provide it to your account manager at 99 Acres to configure the integration.

Once the webhook URL is set up in your 99 Acres account, you will start receiving inquiry details like first name, last name, phone number, and email directly in Pabbly Connect.


3. Adding Property Inquiries to Google Sheets

With the trigger set, it’s time to add these inquiries into Google Sheets. In Pabbly Connect, click on ‘Add New Action Step’ and search for ‘Google Sheets’. Select this application to proceed.

Choose the event ‘Add New Row’ and click on ‘Connect’. If you have an existing connection, select it; otherwise, create a new connection by signing in with your Google account. Allow all necessary permissions for Pabbly Connect to access your Google Sheets.

  • Select the spreadsheet and the specific sheet where you want to add the inquiries.
  • Map the fields from the previous step to the corresponding columns in your Google Sheet.

After mapping the data, click on ‘Save and Send Test Request’. This action will verify if the details have been successfully added to your Google Sheets.


4. Verifying the Data Integration

Once you have set up the action step, it’s important to verify that the data integration is functioning smoothly. Open your Google Sheets to check if the inquiries are being recorded as expected.

Whenever a new property inquiry is received through 99 Acres, Pabbly Connect will automatically add the details into your specified Google Sheet in real-time. This automation saves you time and ensures that you never miss an inquiry.

To confirm the automation is working, you can conduct a test by submitting a new inquiry through 99 Acres and observing if it appears in your Google Sheets. This step is essential to ensure everything is functioning correctly.


5. Final Steps and Tips for Using Pabbly Connect

To wrap up your setup, make sure to regularly monitor your Google Sheets for any discrepancies in the data. With Pabbly Connect, you can also create additional workflows for other applications to further enhance your automation.

If you encounter any issues or have questions, don’t hesitate to reach out to the Pabbly support team. They are available to assist you with any concerns regarding your automations.

Take advantage of the free trial to explore all features of Pabbly Connect. Consider using discount codes available for subscribers to get the best value.

By utilizing Pabbly Connect, you can streamline your property inquiry process, making it easier to manage leads and improve your real estate operations.


Conclusion

In this tutorial, we explored how to use Pabbly Connect to automatically add property inquiries to Google Sheets. This integration simplifies data management for real estate agencies, ensuring that all inquiries are captured efficiently.

Ensure you check out Pabbly Connect to create business automation workflows and reduce manual tasks. Pabbly Connect currently offer integration with 2,000+ applications.