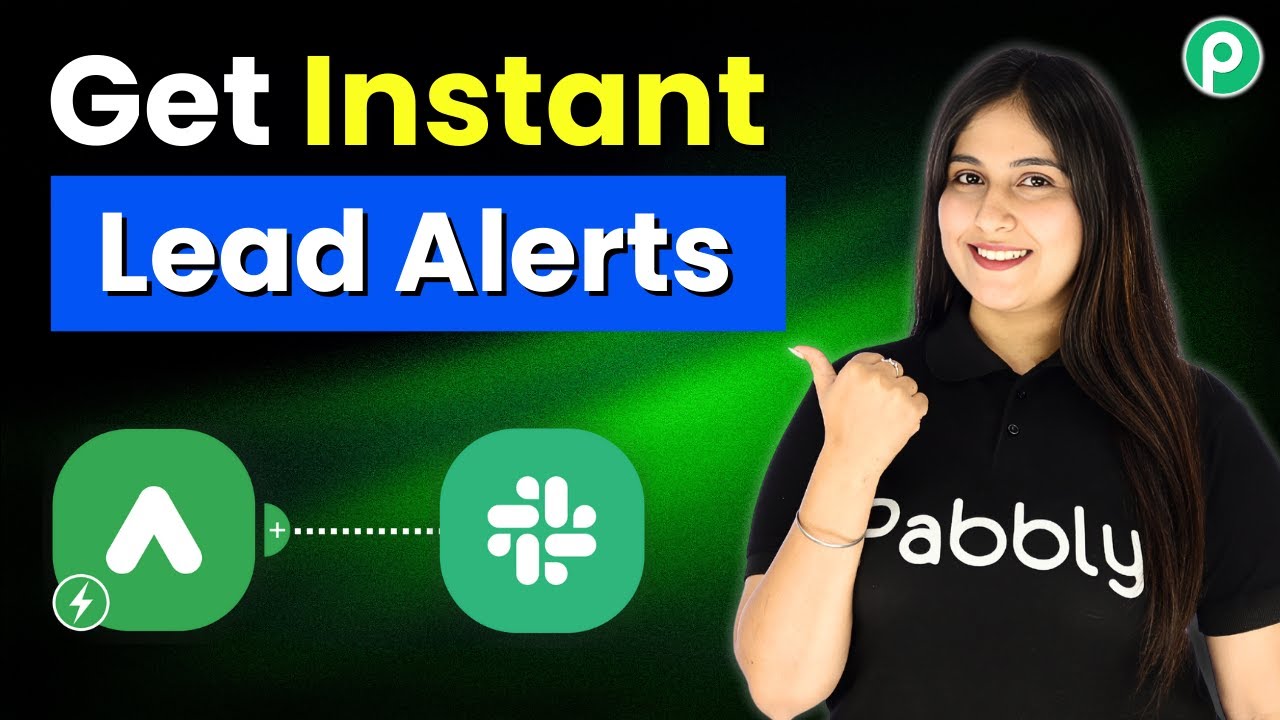
How to Build an AI Assistant for Your Restaurant Business Using Pabbly Chatflow

Learn how to create an AI assistant for your restaurant business using Pabbly Chatflow. This step-by-step guide covers all essential integrations and features. Build conversational workflows that guide visitors toward conversion with dynamic, branching dialogs that respond intelligently to user input.

Watch Step By Step Video Tutorial Below


1. Accessing Pabbly Chatflow for Your Restaurant Business

To build an AI assistant for your restaurant business, first, access Pabbly Chatflow. Visit the Pabbly website and log in or sign up for a new account. This platform is essential for creating your AI assistant.

Once logged in, navigate to the dashboard where you can manage all your WhatsApp numbers and create chatbots. The intuitive interface of Pabbly Chatflow allows you to set up your assistant efficiently.


2. Adding Your WhatsApp Number in Pabbly Chatflow

Next, you need to add your WhatsApp number to Pabbly Chatflow. Click on the ‘Add WhatsApp Number’ button located at the top right corner of your dashboard. This step is crucial for enabling communication with your customers.

  • Select WhatsApp Connect for easy setup.
  • Verify your Meta Business Manager account.
  • Link your WhatsApp Business account.

After completing these steps, your WhatsApp number will be successfully integrated into Pabbly Chatflow. This integration is key to providing automated responses to customer inquiries.


3. Creating Your AI Assistant with Pabbly Chatflow

To create your AI assistant, click on the ‘AI Assistant’ option in the Pabbly Chatflow dashboard. This feature allows you to customize your assistant to meet the specific needs of your restaurant business.

Set up the AI instructions, choosing the type of assistant you want. You can select from options like AI Agent or Customer Support. For a restaurant, selecting AI Agent is beneficial as it can handle various customer queries effectively.

  • Customize the assistant’s name to reflect your restaurant branding.
  • Set the AI model and configuration settings.
  • Upload your knowledge base for accurate responses.

Once these configurations are set, you can proceed to train your assistant with the knowledge base, ensuring it can provide relevant answers to customer inquiries.


4. Testing Your AI Assistant in Real-Time

After setting up your AI assistant, it’s time to test its functionality. Use the WhatsApp web interface to send messages to your assistant. For instance, type a query like ‘I need help’ to see how it responds.

Your assistant should reply promptly, demonstrating its ability to handle inquiries. This real-time interaction showcases the effectiveness of Pabbly Chatflow in managing customer communications.

For example, if you ask about vegetarian options, your assistant should provide a list of available dishes. This interaction helps you refine your assistant’s responses based on customer feedback.


5. Finalizing and Activating Your AI Assistant

Once testing is complete, finalize your settings in Pabbly Chatflow. Make sure to activate your AI assistant so it can start assisting customers immediately. Click on the ‘Save AI Assistant’ button to confirm your setup.

After saving, you will receive a confirmation message indicating that your assistant is ready to go live. This step is crucial for ensuring that your restaurant business can leverage AI to enhance customer service.

With your AI assistant activated, you can now handle customer queries efficiently, allowing your restaurant to focus on delivering excellent service.


Conclusion

Building an AI assistant for your restaurant business using Pabbly Chatflow streamlines customer interactions and improves service efficiency. Follow these steps to create your own assistant and enhance customer experience.

Ensure you check out Pabbly Connect to create business automation workflows and reduce manual tasks. Pabbly Connect currently offer integration with 2,000+ applications.

How to Log Customer Payments from Stripe to Google Sheets Using Pabbly Connect

Learn how to log customer payments from Stripe to Google Sheets using Pabbly Connect. Follow our step-by-step guide to automate your payment tracking. Learn to create powerful connections between your critical applications without requiring specialized programming knowledge or extensive technical background.

Watch Step By Step Video Tutorial Below


1. Accessing Pabbly Connect for Integration

To log customer payments from Stripe to Google Sheets, you first need to access Pabbly Connect. Begin by navigating to the Pabbly Connect landing page by entering ‘Pabbly.com/connect’ in your browser. This platform is essential for creating automated workflows without any coding knowledge.

Once on the Pabbly Connect page, you will be presented with options to either sign in or sign up. If you are a new user, select the ‘Sign up for free’ option to explore the features. For existing users, click on ‘Sign in’ to access your account. After signing in, you will see the dashboard where you can start creating your workflow.


2. Creating a Workflow in Pabbly Connect

To create a workflow that logs customer payments from Stripe to Google Sheets, click on the ‘Create Workflow’ button. You will be prompted to choose a workflow builder. Opt for the new workflow builder for a more modern experience. using Pabbly Connect

  • Select a name for your workflow, such as ‘Log Customer Payments from Stripe to Google Sheets’.
  • Choose a folder to save your workflow, or create a new one if necessary.

After naming your workflow, click ‘Create’. This action opens the workflow window where you will set up the trigger and action. The trigger will be the event that initiates the workflow, while the action is what happens as a result of that trigger.


3. Setting Up the Trigger for Stripe Payments

In the workflow window, select the trigger application by clicking ‘Add Trigger’. Search for and select ‘Stripe’ as your trigger application. For the trigger event, choose ‘New Charge’ and click ‘Connect’. This will generate a webhook URL necessary for connecting Stripe to Pabbly Connect.

Copy the provided webhook URL and navigate to your Stripe account. Go to the ‘Developers’ section on the left sidebar, then select ‘Webhooks’. Click on ‘Add Endpoint’ and paste the copied URL into the endpoint URL field. Set the event to ‘Charge Succeeded’ and click ‘Add Endpoint’. This setup allows Pabbly Connect to capture payment details from Stripe.


4. Testing the Webhook Connection

To ensure that the webhook connection is functioning correctly, you need to perform a test transaction. Go back to your product page and simulate a payment by entering the required details. Once you click on ‘Pay’, Stripe will process the payment.

After the payment is completed, return to Pabbly Connect. The workflow should indicate that it is waiting for a webhook response. Refresh the page, and you should see the details of the payment captured successfully. This confirms that the trigger is working as intended, and Pabbly Connect is receiving data from Stripe.


5. Adding Google Sheets as an Action

The next step is to add Google Sheets as the action application in your workflow. Click on ‘Add Action’ and select ‘Google Sheets’. For the action event, choose ‘Add New Row’ and click ‘Connect’. You will need to authenticate your Google account to allow Pabbly Connect to access your sheets.

  • Select the spreadsheet where you want to log the payment details, such as ‘Payment Tracking’.
  • Map the necessary fields from the Stripe response to the corresponding columns in Google Sheets.

Once mapping is complete, click ‘Save and Send Test Request’. If successful, the payment details will be added to your Google Sheets. This integration ensures that every new payment from Stripe is automatically logged in your designated spreadsheet, streamlining your payment tracking process.


Conclusion

By following this tutorial, you can efficiently log customer payments from Stripe to Google Sheets using Pabbly Connect. This automation not only saves time but also ensures accurate tracking of all your payment activities. Implement this solution for your business to streamline your payment management process.

Ensure you check out Pabbly Connect to create business automation workflows and reduce manual tasks. Pabbly Connect currently offer integration with 2,000+ applications.

Automate WooCommerce Order Confirmation Emails with Pabbly Connect

Learn how to send automated order confirmation emails after WooCommerce purchases using Pabbly Connect. Step-by-step guide to streamline your email notifications. This comprehensive guide reveals exactly how to connect your applications and automate repetitive tasks — accessible for professionals of all technical backgrounds.

Watch Step By Step Video Tutorial Below


1. Accessing Pabbly Connect for WooCommerce Integration

To automate the process of sending an order confirmation email after a WooCommerce purchase, you need to access Pabbly Connect. Open your browser and go to the Pabbly Connect dashboard by entering the URL pabby.com/connect.

If you are a new user, click on ‘Sign Up for Free’; existing users should click ‘Sign In’. After signing in, you can create a new folder for your workflow by clicking the plus button and naming it appropriately.


2. Creating a Workflow in Pabbly Connect

Once you are in the Pabbly Connect dashboard, click on ‘Create Workflow’ to set up your automation. Choose the classic option for the workflow type. Name your workflow something like ‘Send an Order Confirmation Email After WooCommerce Purchase’ and click ‘Create’. using Pabbly Connect

  • Select WooCommerce as the trigger application.
  • Set the trigger event to ‘New Order Created’.
  • Copy the provided webhook URL.

With the workflow created, you are now ready to connect it to your WooCommerce store to capture new orders.


3. Setting Up Webhook in WooCommerce

To link WooCommerce with Pabbly Connect, log into your WordPress admin panel. Navigate to the WooCommerce settings by clicking on the ‘Settings’ tab in the left column. Then, access the ‘Advanced’ settings.

In the Advanced settings, click on the ‘Webhooks’ option and then ‘Add Webhook’. Name it ‘Send Email’ and set its status to active. Select ‘Order Created’ as the trigger event and paste the webhook URL you copied from Pabbly Connect. Finally, click on ‘Save Webhook’.


4. Testing the Integration with a Dummy Purchase

After saving the webhook, it’s time to test the integration. Make a dummy purchase on your WooCommerce store by adding a product to your cart and proceeding to checkout. Fill in the required details as a dummy user and place the order.

Once the order is placed, check your Pabbly Connect dashboard. You should see a response captured with all the order details, confirming that the webhook is working correctly. This indicates that Pabbly Connect has successfully integrated with WooCommerce to receive new orders.


5. Sending the Order Confirmation Email via Gmail

Now that you have confirmed the integration, the next step is to set up Gmail as the action application in Pabbly Connect. Select Gmail and choose ‘Send Gmail’ as the action event. Click on ‘Connect’ to create a new connection.

Once connected, map the necessary data fields. For instance, enter the email address of the customer, set the sender name, and provide a subject like ‘Your Order Has Been Confirmed’. In the email content, include a personalized message thanking the user for their purchase and confirming the order.

After filling in the required fields, click on ‘Save and Send Test Request’. If successful, you will receive a confirmation email in your inbox. This means that Pabbly Connect has successfully automated the order confirmation email process after a WooCommerce purchase.


Conclusion

By using Pabbly Connect, you can easily automate the process of sending order confirmation emails after WooCommerce purchases. This not only saves time but also enhances customer experience by providing immediate confirmation of orders. Follow the steps outlined above to streamline your e-commerce operations effectively.

Ensure you check out Pabbly Connect to create business automation workflows and reduce manual tasks. Pabbly Connect currently offer integration with 2,000+ applications.

How to Automatically Add Instagram Leads to Salesforce CRM Using Pabbly Connect

Learn how to integrate Instagram leads with Salesforce CRM automatically using Pabbly Connect. Follow this detailed step-by-step tutorial for seamless automation. Follow this definitive guide to creating powerful automated workflows with straightforward, efficiency-focused solutions that save valuable time.

Watch Step By Step Video Tutorial Below


1. Access Pabbly Connect for Automation

To start automating the process of adding Instagram leads to Salesforce CRM, first, you need to access Pabbly Connect. Visit the Pabbly Connect website at www.Pabbly.com/connect. If you are a new user, you can sign up for free and get 100 free tasks every month.

Once on the Pabbly Connect landing page, you will see options to sign in or sign up. If you are an existing user, click on the sign-in button to access your account. After logging in, navigate to the Pabbly Connect dashboard to begin creating your automation workflow.


2. Create a New Workflow in Pabbly Connect

After accessing your dashboard in Pabbly Connect, the next step is to create a new workflow. Click on the ‘Create Workflow’ button located at the top right corner. This will open the workflow builder interface, where you can start setting up your automation.

In the workflow setup, you will be prompted to name your workflow. Enter a name such as ‘Add Instagram Leads to Salesforce CRM Automatically’. Select the appropriate folder for your workflow and then click the ‘Create’ button to proceed. This will create a new workflow ready for configuring the trigger and action steps.


3. Set Up the Trigger Step with Instagram Lead Ads

The next step in Pabbly Connect is to set up the trigger for your workflow. For this integration, select ‘Instagram Lead Ads’ as your trigger application. Choose the trigger event as ‘New Lead Instant’. This event captures new leads generated from your Instagram lead ads.

To connect Instagram Lead Ads to Pabbly Connect, click the ‘Connect’ button. A window will appear prompting you to add a new connection. Click on ‘Add New Connection’ and then select the ‘Connect with Instagram Lead Ads’ button. Authorize Pabbly Connect to access your Instagram account by clicking the ‘Continue’ button.

  • Select the Facebook page associated with your Instagram account.
  • Choose the lead generation form you created for collecting leads.

After selecting the Facebook page and lead form, click on the ‘Save and Send Test Request’ button to verify the connection. Generate a test lead using the Meta Lead Ads testing tool to check if the integration is working correctly.


4. Add Action Step to Create a Lead in Salesforce

Once the trigger step is successfully set up, the next step is to add an action to create a lead in Salesforce using Pabbly Connect. Click on the Instagram logo and select the ‘Add Action Step’ option. Choose ‘Salesforce’ as your action application and select the action event as ‘Create Record’.

Click the ‘Connect’ button to connect Salesforce with Pabbly Connect. A window will appear for you to add a new connection. Click on ‘Add New Connection’ and then select the ‘Connect with Salesforce’ button. Authorize the connection by clicking on the ‘Allow’ button, ensuring your data remains secure.

  • Select the Salesforce object as ‘Lead’.
  • Map the fields from the Instagram lead data to the corresponding Salesforce lead fields.

After mapping the fields, click on the ‘Save and Send Test Request’ button to create the lead in Salesforce. Refresh your Salesforce leads page to see the newly created lead.


5. Summary of the Automation Process with Pabbly Connect

In summary, using Pabbly Connect allows you to automate the addition of Instagram leads to Salesforce CRM effortlessly. By setting up a trigger for Instagram Lead Ads and creating an action step to record leads in Salesforce, you streamline your lead management process without manual effort.

This integration ensures that every potential customer inquiry is captured in real-time, helping you maintain an efficient sales pipeline. With Pabbly Connect, you can create similar automations between various applications to enhance your business processes.


Conclusion

In conclusion, automating the process of adding Instagram leads to Salesforce CRM using Pabbly Connect is a powerful way to enhance your business efficiency. By following the steps outlined in this tutorial, you can ensure that all leads are captured automatically, allowing for better management and follow-up. Start using Pabbly Connect today to streamline your lead integration process.

Ensure you check out Pabbly Connect to create business automation workflows and reduce manual tasks. Pabbly Connect currently offer integration with 2,000+ applications.

How to Sync Customer Orders from Shopify to Google Sheets Automatically Using Pabbly Connect

Learn how to sync customer orders from Shopify to Google Sheets automatically using Pabbly Connect with this step-by-step tutorial. Discover how to seamlessly connect your essential tools through accessible instructions that make powerful automation available to professionals at every skill level.

Watch Step By Step Video Tutorial Below


1. Accessing Pabbly Connect for Shopify and Google Sheets Integration

To sync customer orders from Shopify to Google Sheets automatically, you need to access Pabbly Connect. Start by visiting the Pabbly website at pabby.com and sign into your account. If you are new to Pabbly, you can sign up for a free account to get started.

Once logged in, navigate to the Pabbly Connect dashboard. Here you can create and manage your workflows. Click on the ‘Create Workflow’ button to begin setting up the integration between Shopify and Google Sheets.


2. Creating a Workflow in Pabbly Connect

After accessing the Pabbly Connect dashboard, you need to create a new workflow. Name your workflow as ‘Sync Customer Orders from Shopify to Google Sheets Automatically’ and select the appropriate folder for organization. This step is crucial as it helps keep your integrations structured. using Pabbly Connect

  • Click on ‘Create Workflow’.
  • Enter the workflow name.
  • Select a folder where you want to save the workflow.

Once the workflow is created, you will be prompted to add a trigger application. In this case, you will choose Shopify as your trigger application to start the workflow whenever a new order is received.


3. Setting Up the Shopify Trigger in Pabbly Connect

To set up your Shopify trigger, click on the plus sign to add the trigger application. Search for Shopify and select it. For the trigger event, choose ‘New Order’. This event will initiate the workflow each time a new order is placed in your Shopify store.

After selecting the trigger, you need to connect Shopify with Pabbly Connect. A webhook URL will be provided, which acts as a bridge between Shopify and Pabbly Connect. Copy this URL and head to your Shopify account.

  • Go to Shopify settings and select ‘Notifications’.
  • Click on ‘Create Webhook’ and select ‘Order Creation’ as the event.
  • Paste the copied webhook URL and save the webhook.

Once the webhook is saved successfully, return to Pabbly Connect, where you will see a message indicating it is waiting for a webhook response. This confirms that the connection has been established.


4. Testing the Connection Between Shopify and Pabbly Connect

To test the connection, place a test order in your Shopify store. This step is essential to ensure that the integration is functioning correctly. As soon as the order is placed, Pabbly Connect should receive the order details through the webhook.

After placing the order, check your Pabbly Connect workflow. You should see the order details reflected in the workflow response. This confirms that the data is being transmitted correctly from Shopify to Pabbly Connect.

Place a test order in Shopify. Verify that the order details appear in Pabbly Connect. Ensure the connection is successful before proceeding.

Once confirmed, you can move on to the next step of adding the order details to Google Sheets.


5. Adding Google Sheets as an Action Step in Pabbly Connect

Now that the trigger is set up, it’s time to add Google Sheets as the action application. Click on the ‘Add New Action Step’ button and search for Google Sheets. For the action event, select ‘Add New Row’. This action will automatically add the order details to your specified Google Sheets spreadsheet.

To connect Google Sheets with Pabbly Connect, you will need to authorize your Google account. Once connected, select the spreadsheet where you want to add the order details. Make sure to map the fields correctly to ensure that the right data goes into the right columns.

Select the spreadsheet from the dropdown menu. Map the necessary fields from Shopify to Google Sheets. Click on ‘Save and Send Test Request’ to finalize.

After saving the action step, check your Google Sheets to see if the order details have been added successfully. This completes the automation process, allowing you to sync customer orders from Shopify to Google Sheets automatically using Pabbly Connect.


Conclusion

In this tutorial, we explored how to sync customer orders from Shopify to Google Sheets automatically using Pabbly Connect. By following the steps outlined, you can automate the process of order management, saving time and ensuring accuracy in your data handling. With Pabbly Connect, integrating various applications becomes seamless and efficient.

Ensure you check out Pabbly Connect to create business automation workflows and reduce manual tasks. Pabbly Connect currently offer integration with 2,000+ applications.

How to Broadcast WhatsApp Messages for Your Car Dealership Using Pabbly Chatflow

Learn how to effectively broadcast WhatsApp messages for your car dealership using Pabbly Chatflow. Step-by-step guide included. Discover practical methods for designing chat sequences that capture leads, answer questions, and guide users to the next step in your funnel.

Watch Step By Step Video Tutorial Below


1. Accessing Pabbly Chatflow for WhatsApp Broadcasting

To effectively broadcast WhatsApp messages for your car dealership, you first need to access Pabbly Chatflow. This platform allows you to create and manage broadcasts seamlessly. Start by entering the URL www.Pabbly.com/chatflow in your browser’s address bar.

Upon reaching the landing page, you will have options to either sign in or sign up for a free account. If you are a new user, click on the ‘Sign Up Free’ button. Existing users can simply click on ‘Sign In’ to access their accounts. Once signed in, you will be directed to the Pabbly apps page where you can select Pabbly Chatflow to proceed.


2. Creating a Message Template in Pabbly Chatflow

The next step involves creating a message template that will be used for your WhatsApp broadcast. In Pabbly Chatflow, navigate to the templates section on the sidebar. Here, you can either choose a pre-existing template or create a new one.

  • Click on ‘Add Template’ to create a new template.
  • Fill in the required fields including template name, language, and type.
  • Select the appropriate category for your template, such as marketing.

Once you have created your template, ensure it meets the requirements set by WhatsApp. Your template can include text, images, or buttons for further engagement. This template will serve as the foundation for your broadcast messages.


3. Setting Up Your Broadcast in Pabbly Chatflow

After creating your template, the next step is to set up your broadcast. In Pabbly Chatflow, go to the broadcast section and click on the ‘Add Broadcast’ button. This will take you to the broadcast creation page.

Here, you will need to select the broadcast type, which should be set to ‘Broadcast Campaign’. Then, enter a name for your broadcast, such as ‘Car Dealership Promotions’. You will also need to select the contacts list to whom you want to send the broadcast. If you haven’t created a contacts list yet, you can do so in the contacts section.


4. Scheduling the Broadcast in Pabbly Chatflow

Once your broadcast is set up, you can schedule it for a specific date and time. In Pabbly Chatflow, you will see an option to choose whether you want to send the broadcast immediately or schedule it for later. If you opt for scheduling, select the date and time that aligns with your promotional strategy.

This feature is particularly useful for car dealerships wanting to send timely updates about offers or events. After entering the schedule details, click on ‘Add Broadcast’ to finalize the setup. This ensures that your message will reach customers at the right moment, enhancing engagement.


5. Testing Your Broadcast in Pabbly Chatflow

Before launching your broadcast, it’s essential to test it to ensure everything works as intended. In Pabbly Chatflow, you will find an option to send a test message. Enter the username or mobile number you wish to test and click on ‘Send Test Message’.

After sending the test message, check your WhatsApp to confirm receipt. This step is crucial to verify that your broadcast message appears correctly and engages your audience as planned. Once satisfied with the test, you can proceed with the scheduled broadcast.


Conclusion

In conclusion, using Pabbly Chatflow to broadcast WhatsApp messages for your car dealership is an efficient way to keep customers informed about deals and promotions. By following the steps outlined in this tutorial, you can enhance customer engagement and boost sales effectively.

Ensure you check out Pabbly Connect to create business automation workflows and reduce manual tasks. Pabbly Connect currently offer integration with 2,000+ applications.

How to Broadcast WhatsApp Messages for Your Catering Services Using Pabbly Chatflow

Learn how to efficiently broadcast WhatsApp messages for your catering services using Pabbly Chatflow in this detailed step-by-step tutorial. Build conversational workflows that guide visitors toward conversion with dynamic, branching dialogs that respond intelligently to user input.

Watch Step By Step Video Tutorial Below


1. Create a Message Template in Pabbly Chatflow

To broadcast WhatsApp messages for your catering services, the first step is to create a message template using Pabbly Chatflow. This template will serve as the foundation for your broadcast messages. Start by logging into your Pabbly Chatflow account and accessing the dashboard.

Once on the dashboard, navigate to the ‘Templates’ section on the left sidebar. Here, you will find the option to create a new template. Click on the ‘Add Template’ button. You will need to select a template category, typically ‘Marketing’, and provide a name for your template, ensuring it is written in lowercase with underscores for spaces.


2. Create a Broadcast in Pabbly Chatflow

After creating your message template, the next step is to set up a broadcast using Pabbly Chatflow. Go back to the dashboard and select the ‘Broadcast’ option from the sidebar. Click on the ‘Add’ button to create a new broadcast.

  • Choose the broadcast type as ‘Broadcast Campaign’.
  • Enter a name for your broadcast, such as ‘Broadcast Message for Your Catering Service’.
  • Select your contact list from the ‘Select Contacts’ option.

Once you have configured these settings, select the message type. For this broadcast, choose ‘Pre-approved Template Message’ and select the template you created earlier. Fill in the required fields in the template, such as name, price, and date, and click the ‘Done’ button to save your changes.


3. Schedule or Send the Broadcast Message

The final step in broadcasting WhatsApp messages for your catering services is to schedule or send the message immediately using Pabbly Chatflow. On the broadcast setup page, you will see an option to schedule the message. You can choose to send the message instantly or schedule it for later.

  • If you choose to schedule, select the date and time for sending.
  • For instant sending, click the ‘Send Test Message’ button.

After sending the test message, you will receive a confirmation that the broadcast was sent successfully. This allows you to verify that your message is reaching your intended audience effectively. With these steps, you can now efficiently communicate with your customers via WhatsApp using Pabbly Chatflow.


Conclusion

In conclusion, broadcasting WhatsApp messages for your catering services is made easy with Pabbly Chatflow. By creating a message template, setting up a broadcast, and scheduling or sending messages, you can effectively engage your customers. This streamlined process enhances your ability to promote your catering services efficiently.

Ensure you check out Pabbly Connect to create business automation workflows and reduce manual tasks. Pabbly Connect currently offer integration with 2,000+ applications.

How to Build an AI Assistant for Your Publishing Business Using Pabbly Chatflow

Learn how to create an AI assistant for your publishing business with Pabbly Chatflow in just three easy steps. Streamline communication and enhance customer support.

Watch Step By Step Video Tutorial Below


1. Accessing Pabbly Chatflow for Your Publishing Business

To create an AI assistant for your publishing business, you first need to access Pabbly Chatflow. Open your web browser and navigate to pav.com/chatflow. This will direct you to the Pabbly Chatflow dashboard.

Once you are on the page, you will see options to sign up or log in. If you’re a new user, click on the ‘Sign up for free’ button. For existing users, simply log in to your account. After logging in, click on the ‘Access Now’ button under Pabbly Chatflow to enter the dashboard.


2. Connecting WhatsApp to Pabbly Chatflow

After accessing Pabbly Chatflow, the next step is to connect your WhatsApp number. On the dashboard, locate the WhatsApp connect option. You can either connect via WhatsApp connect or manual token connect. For detailed instructions, refer to the specific videos available on the Pabbly YouTube channel.

  • Go to the top right corner of the dashboard.
  • Select your WhatsApp connection method.
  • Follow the prompts to complete the connection.

Once your WhatsApp is connected, you can manage messages and engage with clients effectively through Pabbly Chatflow. This integration allows for seamless communication between you and your clients.


3. Creating Your AI Assistant in Pabbly Chatflow

Now that your WhatsApp is connected, it’s time to create your AI assistant using Pabbly Chatflow. Navigate to the AI assistant option on the left sidebar of the dashboard and click on it. To start, click on the ‘Add AI Assistant’ button located at the top right corner of the page.

You’ll be prompted to name your assistant. Enter a suitable name such as ‘AI Assistant for Your Publishing Business’ and confirm by clicking the ‘Add AI Assistant’ button. This will take you to the configuration page where you can set up various features for your assistant.


4. Configuring the AI Assistant Settings

In this section, you will configure your AI assistant settings within Pabbly Chatflow. Start by selecting the instruction type. Choose ‘AI Agent’ from the dropdown menu. This will automatically fetch predefined instructions that you can customize if needed.

  • Set the temperature of responses (0 for focused, 1 for creative).
  • Select Open AI as the AI to use.
  • Choose the model (GPT-4 mini) from the dropdown.

Next, you will need to enter your Open AI API key. Click on the Open AI API key page, create a new secret key, and copy this key back into your AI assistant settings. This will enable your assistant to function effectively.


5. Finalizing Your AI Assistant and Testing

After configuring your AI assistant in Pabbly Chatflow, it’s time to finalize and test it. Toggle the activation button to enable your assistant. You can also customize the header and footer messages to suit your publishing business needs.

To test your AI assistant, go back to your WhatsApp and send a message like ‘I need help’. Your assistant should respond with a greeting and ask what assistance you need. You can then ask specific questions regarding your publishing process, and the assistant should provide detailed responses.

This setup will enhance your customer interaction, allowing you to focus more on publishing while the AI assistant handles inquiries effectively.


Conclusion

Building an AI assistant for your publishing business using Pabbly Chatflow is a straightforward process. By following the steps outlined above, you can streamline communication and improve customer service, allowing you to focus on what you do best—publishing great stories.

Ensure you check out Pabbly Connect to create business automation workflows and reduce manual tasks. Pabbly Connect currently offer integration with 2,000+ applications.

How to Send Product Updates Using AI to New Facebook Leads with Pabbly Connect

Learn how to automate sending product updates to new Facebook leads using AI with Pabbly Connect in this step-by-step tutorial. Eliminate manual repetitive tasks from your workflow. Discover proven automation methods with intuitive steps designed for efficiency-minded professionals.

Watch Step By Step Video Tutorial Below


1. Accessing Pabbly Connect for Facebook Lead Integration

To send product updates using AI to new Facebook leads, you first need to access Pabbly Connect. Simply visit the Pabbly Connect website by typing pabby.com/connect in your browser. This platform enables seamless automation between various applications, including Facebook Lead Ads, OpenAI, and Gmail.

After visiting the Pabbly Connect website, sign in to your account. If you’re a new user, you can sign up for free and get 100 tasks monthly. Once logged in, navigate to the dashboard where you can manage your workflows and integrations.


2. Creating a New Workflow in Pabbly Connect

After accessing your dashboard, you need to create a new workflow for sending product updates. Click on the ‘Create Workflow’ button and select the classic workflow builder. Enter a name for your workflow, such as ‘Send Product Updates Using AI to New Facebook Leads,’ and choose the appropriate folder to save it in. using Pabbly Connect

With the workflow created, you will see two boxes labeled ‘Trigger’ and ‘Action.’ The trigger is the event that starts the automation. Here, you will set Facebook Lead Ads as your trigger application. This integration will ensure that every time a new lead is generated, the process for sending product updates is initiated.

  • Select ‘Facebook Lead Ads’ as the trigger application.
  • Choose ‘New Lead Instant’ as the trigger event.
  • Connect your Facebook account to Pabbly Connect.

Once you have set up the trigger, you are ready to move on to the next step, which involves configuring the action to generate product updates using OpenAI.


3. Configuring OpenAI for Product Updates

Now that you have your trigger set up with Facebook Lead Ads, the next step is to configure OpenAI to generate product updates. In the action application section, select OpenAI. Here, you will choose the action event as ‘Chat GPT Structured AI Output’ to generate the email content. using Pabbly Connect

To connect OpenAI, you will need to enter your API token. If you do not have an existing connection, click on ‘Add New Connection’ and follow the prompts to generate a new API key. Once connected, you can specify the AI model (e.g., GPT-4 Mini) and enter a prompt that instructs the AI on the type of email to generate.

  • Choose the AI model you want to use.
  • Enter a prompt detailing the email content you want generated.
  • Set the response format to JSON for structured output.

After configuring OpenAI, you will be able to generate a personalized email that includes product updates tailored to the new lead.


4. Sending the Email via Gmail

With the product update generated by OpenAI, the final step is to send this email using Gmail. In the action application section, select Gmail and choose the action event as ‘Send Email V1.’ This will allow you to send the generated email to the new lead. using Pabbly Connect

Connect your Gmail account to Pabbly Connect by clicking on ‘Add New Connection’ and granting the necessary permissions. Once connected, you can map the recipient’s email address from the response received from Facebook Lead Ads, ensuring that the email is sent to the correct lead.

Map the recipient email address to ensure dynamic updates. Enter the email subject and content as per the OpenAI response. Select the email content type (plain or HTML).

Once all details are entered, click on ‘Save and Send Test Request’ to send the email. You should receive a confirmation that the email has been sent successfully.


5. Conclusion: Automating Product Updates with Pabbly Connect

In this tutorial, we demonstrated how to automate the process of sending product updates to new Facebook leads using Pabbly Connect. By integrating Facebook Lead Ads, OpenAI, and Gmail, you can streamline your communication with potential customers.

Ensure you check out Pabbly Connect to create business automation workflows and reduce manual tasks. Pabbly Connect currently offer integration with 2,000+ applications.

Check out Pabbly Connect – Automate your business workflows effortlessly! Sign Up Free – Start your journey with ease! 10,000+ Video Tutorials – Learn step by step! Join Pabbly Facebook Group – Connect with 21,000+ like minded people!

This automation not only saves time but also ensures that every new lead receives a personalized and engaging email. With Pabbly Connect, you can easily create similar workflows to enhance your business processes and improve customer engagement.

Start using Pabbly Connect today to automate your workflows and experience the benefits of seamless integration across your applications.

How to Automatically Add New Leads from Instagram Ads to Zoho CRM Using Pabbly Connect

Learn how to automate the process of adding new leads from Instagram Ads to Zoho CRM using Pabbly Connect. Follow our detailed step-by-step tutorial. Explore efficient methods for automating routine tasks with clear, concise instructions suited for both newcomers and experienced professionals.

Watch Step By Step Video Tutorial Below


1. Accessing Pabbly Connect for Integrations

To start automating the process of adding new leads from Instagram Ads to Zoho CRM, you first need to access Pabbly Connect. Open a web browser and navigate to the Pabbly Connect landing page by entering ‘Pabbly.com/connect’.

Once on the landing page, you will see options to sign in or sign up. If you are a new user, click on the ‘Sign up for free’ button to create an account, which offers you 100 free tasks each month. Existing users can simply click ‘Sign in’ to access their accounts.


2. Creating a New Workflow in Pabbly Connect

After signing into your account, you will be directed to the dashboard of Pabbly Connect. To create a new workflow, click on the ‘Create Workflow’ button. You will then be prompted to choose between the new workflow builder and the classic one. Select the new builder for a more modern experience.

  • Click on ‘Create Workflow’.
  • Name your workflow as ‘Automatically Add New Leads from Instagram Ads to Zoho CRM’.
  • Choose a folder to save your workflow.

After naming your workflow, click on the ‘Create’ button. This opens the workflow window, where you will set up the trigger and action for your automation. The trigger indicates when an event occurs, while the action specifies what should happen as a result.


3. Setting Up the Trigger for Instagram Lead Ads

To set up your trigger, select ‘Instagram Lead Ads’ as your trigger application in Pabbly Connect. For the trigger event, choose ‘New Lead Instant’. Click on ‘Connect’ to establish a connection.

Next, click on ‘Add a New Connection’ and connect with Instagram Lead Ads. You will be prompted to select the Facebook account associated with your Instagram Ads. Choose the correct account and click ‘Continue’. After successfully connecting, select your Facebook page and the lead generation form you want to use.

  • Select your Facebook page.
  • Choose the lead generation form.
  • Click ‘Save and Send Test Request’ to capture the lead data.

Once you click ‘Save and Send Test Request’, you will need to perform a test submission to capture the webhook response. This is crucial for verifying that the integration is working correctly.


4. Adding Action to Create a Contact in Zoho CRM

After successfully capturing the lead data, the next step is to add an action step in Pabbly Connect. Click on the ‘Add Action Step’ button and select ‘Zoho CRM’ as your action application. For the action event, choose ‘Create a Contact’ and click ‘Connect’.

To connect to Zoho CRM, select ‘Add a New Connection’ and enter your domain. This domain can be found in your Zoho CRM account settings. After entering the domain, click ‘Save’. You will need to grant permissions to allow Pabbly Connect access to your Zoho CRM account.

Select ‘Advertisement’ as the lead source. Map the lead details from the trigger step to the fields in Zoho CRM. Click ‘Save and Send Test Request’ to finalize the action.

After mapping the required fields, you will receive a confirmation that a new contact has been successfully created in your Zoho CRM account.


5. Testing and Verifying the Integration

To ensure everything is set up correctly, it’s important to test the integration. Go back to the lead ads testing tool and delete any previous leads to avoid duplication. Then, fill out the lead form again to create a new test lead.

After submitting the test lead, refresh your Zoho CRM contacts page to check if the new lead has been added successfully. With Pabbly Connect, the new contact should appear within seconds, confirming that your automation is functioning as intended.

Now that your workflow is complete, you can sit back and relax while Pabbly Connect automatically adds new leads from Instagram Ads to Zoho CRM without any manual intervention.


Conclusion

In this tutorial, we demonstrated how to use Pabbly Connect to automate the process of adding new leads from Instagram Ads to Zoho CRM. By following these steps, you can streamline your lead management process and improve efficiency in your sales team.

Ensure you check out Pabbly Connect to create business automation workflows and reduce manual tasks. Pabbly Connect currently offer integration with 2,000+ applications.