How to Sync Leads from Google Ads to Google Sheets Using Pabbly Connect

Learn how to sync leads from Google Ads to Google Sheets effortlessly using Pabbly Connect with this step-by-step tutorial. Follow this definitive guide to creating powerful automated workflows with straightforward, efficiency-focused solutions that save valuable time.

Watch Step By Step Video Tutorial Below


1. Accessing Pabbly Connect for Google Ads Integration

To sync leads from Google Ads to Google Sheets, start by accessing Pabbly Connect. Visit the Pabbly Connect landing page by typing ‘pabyt.com/connect’ in your browser’s address bar.

Once on the Pabbly Connect website, sign in to your account. If you are a new user, you can sign up for free to receive 100 tasks monthly. Existing users should click the ‘Sign In’ button located in the top right corner.


2. Creating a New Workflow in Pabbly Connect

After signing in, navigate to the Pabbly Connect dashboard, where you can manage your workflows. To create a new workflow, click the ‘Create Workflow’ button. In the pop-up, select the new beta workflow builder for a modern experience.

  • Name your workflow as ‘Sync Leads from Google Ads to Google Sheets.’
  • Select a folder for organization, such as ‘Google Sheets Automations.’

Click ‘Create’ to finalize your workflow setup. This action sets the stage for integrating Google Ads with Google Sheets through Pabbly Connect.


3. Setting Up the Trigger for Google Ads

In the newly created workflow, you will need to set up a trigger to initiate the automation process. Select Google Ads as your trigger application and choose ‘New Lead Form Entry’ as the trigger event.

Now, connect Pabbly Connect with Google Ads by providing a webhook URL. This URL acts as a bridge between Google Ads and Pabbly Connect. Open your Google Ads account, navigate to your test lead form, and locate the lead delivery option to enter the webhook URL.


4. Configuring Google Sheets as the Action Application

After setting up your trigger, it’s time to configure Google Sheets as the action application. Click on ‘Add New Action Step’ and search for Google Sheets. Select ‘Add New Row’ as the action event and connect it to your Google Sheets account.

  • Choose the spreadsheet you created named ‘Google Ads Leads.’
  • Map the fields from the Google Ads response to the corresponding columns in your Google Sheet.

By using mapping, you ensure that every new lead captured is dynamically added to your Google Sheet without manual entry, showcasing the power of Pabbly Connect.


5. Testing and Finalizing the Integration

To complete the integration, send test data from Google Ads to verify that the setup works correctly. After sending the test data, check your Google Sheet to confirm that the lead details have been added successfully.

This testing phase is crucial as it ensures that Pabbly Connect is effectively syncing leads from Google Ads to Google Sheets. Once confirmed, your automation is fully operational, allowing for seamless lead management.


Conclusion

In this tutorial, we explored how to sync leads from Google Ads to Google Sheets using Pabbly Connect. By automating this process, you can save time and streamline your lead management effectively. Start using Pabbly Connect today to enhance your business workflows.

Ensure you check out Pabbly Connect to create business automation workflows and reduce manual tasks. Pabbly Connect currently offer integration with 2,000+ applications.

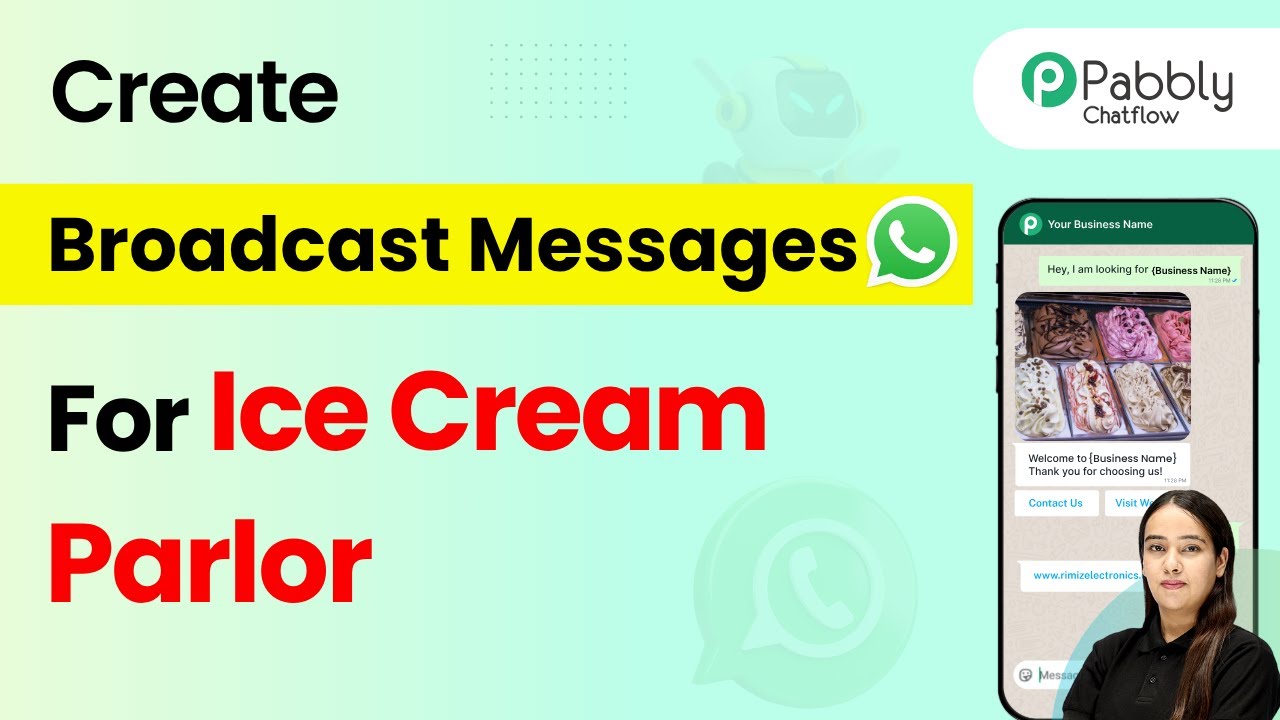
How to Broadcast WhatsApp Messages for Your Ice Cream Parlor Using Pabbly Chatflow

Learn how to effectively broadcast WhatsApp messages for your ice cream parlor using Pabbly Chatflow. Step-by-step guide to automate customer communication. Build conversational workflows that guide visitors toward conversion with dynamic, branching dialogs that respond intelligently to user input.

Watch Step By Step Video Tutorial Below


1. Accessing Pabbly Chatflow for WhatsApp Integration

To start broadcasting WhatsApp messages for your ice cream parlor, you first need to access Pabbly Chatflow. This platform allows you to automate communication with your customers efficiently.

Begin by visiting the Pabbly Chatflow website. If you are a new user, click on the ‘Sign Up for Free’ button. Existing users can simply sign in. Once logged in, you will be directed to the dashboard where you can manage your WhatsApp messages and broadcasts.


2. Setting Up Your WhatsApp Connection in Pabbly Chatflow

Once you are in Pabbly Chatflow, the next step is to set up your WhatsApp connection. This is crucial for sending messages to your customers. Click on the ‘Add WhatsApp Number’ button located at the top right corner of the dashboard.

  • Choose between WhatsApp Connect and Manual Token Connect.
  • For WhatsApp Connect, you need to verify your Meta Business Manager account.
  • For Manual Token Connect, enter your Meta access token and WhatsApp Business Account ID.

After selecting your connection type and entering the necessary details, click on the ‘Connect’ button. This will link your WhatsApp account with Pabbly Chatflow, allowing you to send messages seamlessly.


3. Creating Your Broadcast Message in Pabbly Chatflow

With your WhatsApp connection established, you can now create a broadcast message. In Pabbly Chatflow, click on the ‘Broadcast’ option from the dashboard. Then, select the ‘Add Broadcast’ button to start setting up your message.

Here, you will need to fill in several fields:

  • Broadcast Type: Choose between Broadcast Campaign and API Campaign.
  • Broadcast Name: Name your broadcast, such as ‘Ice Cream Specials’.
  • Contact List: Select the predefined list of contacts you want to send the message to.

After filling in these details, you can select the message type, either a pre-approved template or a regular message, to ensure your broadcast is compliant with WhatsApp’s policies.


4. Scheduling Your Broadcast in Pabbly Chatflow

After creating your broadcast message, the next step is scheduling it. In Pabbly Chatflow, you can choose to send your broadcast instantly or schedule it for a later date and time.

To schedule your message, simply select the date and time you want the broadcast to be sent. For instance, you might want to send your ice cream special offers at 6:15 PM on a specific date. After setting the time, click on the ‘Schedule’ button to confirm your broadcast.


5. Testing Your Broadcast in Pabbly Chatflow

Testing your broadcast is a crucial step to ensure everything is working correctly. In Pabbly Chatflow, you can send a test message to verify that your broadcast setup is functioning as expected.

To do this, enter a test phone number in the designated field and click on the ‘Send Test Message’ button. Once sent, check your WhatsApp to see if the message appears as intended. This will confirm that your broadcast settings are correct and ready for your customers.

Conclusion

This guide summarizes the key points and helps you understand the essential features and benefits of using this tool.

Ensure you check out Pabbly Connect to create business automation workflows and reduce manual tasks. Pabbly Connect currently offer integration with 2,000+ applications.


Using Pabbly Chatflow for broadcasting WhatsApp messages can greatly enhance your communication with customers at your ice cream parlor. Follow these steps to automate your messaging and keep your customers updated with the latest offers and news.

Automatically Add New Product Posts to Pinterest from Shopify Using Pabbly Connect

Learn how to automatically add new product posts to Pinterest from Shopify using Pabbly Connect with our detailed step-by-step tutorial. Discover how to seamlessly connect your essential tools through accessible instructions that make powerful automation available to professionals at every skill level.

Watch Step By Step Video Tutorial Below


1. Accessing Pabbly Connect for Integration

To start automating the process of adding new product posts to Pinterest from Shopify, first, access Pabbly Connect. You can do this by visiting Pabbly.com/connect in your web browser. This platform is designed to facilitate seamless integrations without requiring any coding skills.

Once on the Pabbly Connect page, you will need to sign into your account. If you’re a new user, simply click on the ‘Sign Up for Free’ option to create an account. After logging in, you will be directed to the Pabbly Connect dashboard where you can create and manage your workflows.


2. Creating a New Workflow in Pabbly Connect

After accessing your Pabbly Connect dashboard, the next step is to create a new workflow for integrating Shopify and Pinterest. Click on the ‘Create Workflow’ button. You will be prompted to choose between the new beta workflow builder and the classic one. For this tutorial, select the classic version. using Pabbly Connect

  • Click on ‘Create Workflow’ and name it ‘Automatically Add New Product Post to Pinterest from Shopify’.
  • Select the folder where you want to save this workflow.
  • Click on ‘Create’ to finalize the new workflow.

Upon creation, you will see two boxes labeled ‘Trigger’ and ‘Action’. The trigger indicates when the automation starts, while the action defines what happens as a result. In this case, the trigger will be when a new product is created in Shopify, and the action will be to create a pin in Pinterest.


3. Setting Up Shopify as the Trigger Application

In this step, you will set Shopify as the trigger application in your Pabbly Connect workflow. Click on the trigger box and select Shopify from the list of applications. Then, choose the event ‘New Product Created’. This means that every time a new product is added to your Shopify store, it will trigger the workflow. using Pabbly Connect

Next, you need to connect Pabbly Connect with your Shopify account. A webhook URL will be provided by Pabbly Connect, which acts as a bridge between the two applications. Go to your Shopify account, navigate to Settings, and then to Notifications. Click on Webhooks and create a new webhook.

  • Select the event as ‘Product Creation’.
  • Set the format to JSON and paste the webhook URL from Pabbly Connect.
  • Choose the latest API version and click ‘Save’.

Once saved, return to Pabbly Connect, and you will see that it is waiting for a webhook response. This indicates that the connection is set up correctly and ready to receive data from Shopify.


4. Creating a Pin in Pinterest as the Action Application

With the trigger set up, the next step is to configure the action application, which in this case is Pinterest. Click on the action box and select Pinterest. Then, choose the action event as ‘Create a Pin’. Click on ‘Connect’. If you already have a connection, you can save it; otherwise, select ‘Add New Connection’. using Pabbly Connect

Upon connecting, you will need to authorize Pabbly Connect to access your Pinterest account. After granting access, you will need to specify the board where the pin will be created. For this, select the appropriate board from your Pinterest account.

Use the mapping feature to dynamically input data from the Shopify response. Map the image URL, title, and description from the Shopify product details. Avoid entering static data to ensure the pin updates with new products.

After filling in the required fields, click ‘Save and Send Test Request’. If successful, you will see the new pin created in your Pinterest account.


5. Testing and Executing the Workflow

Now that you have set up the trigger and action applications, it’s time to test the workflow. Go back to your Shopify account and create a new product. Fill in the product details such as title, description, and upload an image. Once done, click ‘Save’. This action will trigger the workflow in Pabbly Connect.

After saving the product, return to Pabbly Connect and check the webhook response. You should see the details of the newly created product. If the response is received correctly, it indicates that the connection between Shopify and Pabbly Connect is working effectively.

Confirm that the pin has been created in your Pinterest account with the correct details. Ensure that the title, description, and image are accurately represented in the pin. This finalizes the integration process.

With the successful execution of the workflow, you have now automated the process of adding new product posts to Pinterest from Shopify using Pabbly Connect. This automation will save you time and streamline your social media marketing efforts.


Conclusion

In this tutorial, we demonstrated how to automatically add new product posts to Pinterest from Shopify using Pabbly Connect. By following the steps outlined, you can streamline your e-commerce operations and enhance your marketing efforts through automation.

Ensure you check out Pabbly Connect to create business automation workflows and reduce manual tasks. Pabbly Connect currently offer integration with 2,000+ applications.

Sync Leads from LinkedIn Lead Ads to Airtable Automatically Using Pabbly Connect

Learn how to automatically sync leads from LinkedIn Lead Ads to Airtable using Pabbly Connect. This step-by-step tutorial covers all necessary actions for seamless integration.

Watch Step By Step Video Tutorial Below


1. Accessing Pabbly Connect for Integration

To sync leads from LinkedIn Lead Ads to Airtable automatically, you need to access Pabbly Connect. Begin by navigating to the Pabbly website and signing in or creating a free account. This platform is essential for automating your workflow between LinkedIn and Airtable.

Once logged in, you will be presented with various applications offered by Pabbly. Locate Pabbly Connect to create your automated workflow. This integration allows you to connect LinkedIn Lead Ads directly to Airtable, ensuring that new leads are captured without manual intervention.


2. Creating a New Workflow in Pabbly Connect

Next, you need to create a new workflow in Pabbly Connect. Click on the ‘Create Workflow’ button located at the top right corner of the dashboard. This step is crucial as it sets the foundation for automating the lead syncing process.

  • Choose a descriptive name for your workflow, such as ‘Sync Leads from LinkedIn Lead Ads to Airtable Automatically’.
  • Select the folder where you want to save this workflow.

After naming your workflow and selecting the appropriate folder, you will proceed to set up the trigger event. This is where you will define how Pabbly Connect will react when a new lead is generated from LinkedIn Lead Ads.


3. Setting Up the Trigger for LinkedIn Lead Ads

In this section, you will set the trigger to activate when a new lead is received from LinkedIn Lead Ads. Click on the ‘Add Trigger’ button and select LinkedIn as your application. Choose the event as ‘Lead Notification’ to ensure that the workflow starts when a new lead is submitted.

After selecting the trigger, you will need to connect your LinkedIn account to Pabbly Connect. Ensure you are logged into your LinkedIn account, then authorize Pabbly Connect to access your LinkedIn Lead Ads. This connection is vital for the automation process to function correctly.

  • Confirm the connection by selecting the sponsored account associated with your LinkedIn Lead Ads.
  • Test the connection to verify that it is properly set up.

Once the connection is successful, you are ready to proceed to the next step of mapping the data from LinkedIn to Airtable using Pabbly Connect.


4. Adding Action Step to Create a Record in Airtable

Now that the trigger is set up, the next step is to add an action to create a record in Airtable. Click on the ‘Add Action’ button and select Airtable as your application. Choose the event ‘Create a Record’ to ensure that the lead details are added automatically to your Airtable account.

To connect your Airtable account with Pabbly Connect, you will need to authorize the connection. Make sure you allow access to the necessary resources within your Airtable account. This is crucial for ensuring that the lead details are captured accurately.

Select the base and table where the lead information should be stored. Map the fields from LinkedIn Lead Ads to the corresponding fields in Airtable.

After successfully mapping the fields, click on ‘Save and Send Test Request’ to confirm that the integration works as expected. This step will ensure that any new lead captured will automatically create a record in Airtable through Pabbly Connect.


5. Testing the Integration and Finalizing Setup

With the action step configured, it’s time to test the entire integration process. Generate a test lead in your LinkedIn Lead Ads to see if it syncs correctly to Airtable. This is a critical step to ensure that everything is functioning properly.

Monitor the response in Pabbly Connect to verify that the lead details are accurately transferred to Airtable. If successful, you will see the new record appear in your Airtable base. This confirmation indicates that the automation is working seamlessly.

Check for any discrepancies in the data transferred. If everything looks good, finalize the setup by clicking on ‘Turn On’ for your workflow.

Congratulations! You have successfully set up an automated process using Pabbly Connect to sync leads from LinkedIn Lead Ads to Airtable. This automation will save you time and effort by eliminating manual data entry.


Conclusion

In this tutorial, we explored how to use Pabbly Connect to automate the syncing of leads from LinkedIn Lead Ads to Airtable. By following these steps, you can streamline your lead management process and enhance efficiency in your business operations.

Ensure you check out Pabbly Connect to create business automation workflows and reduce manual tasks. Pabbly Connect currently offer integration with 2,000+ applications.

Utilizing Pabbly Connect not only simplifies the workflow but also ensures that all lead data is captured accurately and promptly. This integration is essential for any business looking to optimize its marketing efforts.

Setting Up Slack Notifications for New IndiaMART Wholesale Inquiries Using Pabbly Connect

Learn how to set up Slack notifications for new IndiaMART wholesale inquiries with Pabbly Connect. Follow this step-by-step tutorial for seamless integration. Explore efficient methods for automating routine tasks with clear, concise instructions suited for both newcomers and experienced professionals.

Watch Step By Step Video Tutorial Below


1. Setting Up Pabbly Connect for Slack Notifications

To set up Slack notifications for new IndiaMART wholesale inquiries, you need to use Pabbly Connect. Start by accessing the Pabbly Connect website by searching for ‘Pabbly.com/connect’ in your browser. Once there, you will find options to sign in or sign up for free. If you are a new user, you can click on ‘Sign up for free’ to get started.

After signing in, you will be directed to the Pabbly Connect dashboard. Here, click on the button that says ‘Create Workflow’. You will be prompted to select a workflow builder. Choose either the new or classic option; the classic option is recommended for those who prefer a stable interface. Once selected, enter a name for your workflow, select a folder for saving, and click ‘Create’. This initiates the workflow setup process.


2. Selecting IndiaMART as Trigger Application

Now that you have set up your workflow in Pabbly Connect, the next step is to select IndiaMART as your trigger application. In the workflow window, locate the trigger section and search for ‘IndiaMART’. Select it and choose ‘New Leads’ as the trigger event. This action will enable Pabbly Connect to monitor for new inquiries from your IndiaMART account.

  • Search for ‘IndiaMART’ in the trigger application section.
  • Select ‘New Leads’ as the trigger event.
  • Copy the provided webhook URL for further use.

Once you have selected the trigger settings, Pabbly Connect will generate a webhook URL. Copy this URL as you will need to paste it into your IndiaMART account to establish the connection. This step is crucial for ensuring that inquiries from IndiaMART are forwarded to Slack via Pabbly Connect.


3. Configuring IndiaMART to Use the Webhook

The next step involves configuring your IndiaMART account to utilize the webhook URL provided by Pabbly Connect. Log into your IndiaMART account and navigate to the ‘Lead Manager’ section in the left sidebar. From there, go to the ‘Import/Export Leads’ menu and select ‘Push API’. Here, you will need to choose ‘Other’ as the source and enter ‘Pabbly Connect’ as the CRM platform name.

  • Select ‘Other’ in the source option.
  • Enter ‘Pabbly Connect’ as the CRM platform name.
  • Paste the copied webhook URL into the designated field.

After pasting the URL, click on ‘Save Details’ to finalize the configuration. You may be prompted to enter a reason for shifting leads to another application; complete this step and generate an OTP for verification. Once you submit the OTP, your webhook listener URL will be successfully added, establishing a connection between IndiaMART and Pabbly Connect.


4. Testing the Webhook Connection

With the webhook configured, it’s time to test the connection to ensure that Pabbly Connect can receive data from IndiaMART. Return to your IndiaMART account and look for the ‘Test Your Webhook Listener URL’ option. Click on this to initiate a test submission, which will send a test lead to Pabbly Connect.

Once the test is executed, return to your Pabbly Connect workflow. You should see that the test submission has been captured, displaying details like the subject, state, and pin code. This confirms that the connection is successful and data is being transmitted correctly from IndiaMART to Pabbly Connect.


5. Setting Up Slack Notifications for New Leads

Now that the webhook is successfully tested, the final step is to set up Slack notifications for new leads using Pabbly Connect. In your workflow, search for ‘Slack’ in the action application section and select it. Choose ‘Send Channel Message’ as the action event. You will need to connect your Slack account to Pabbly Connect by adding a new connection.

When prompted, select the token type for your connection. You can choose either user or bot type. After granting the necessary permissions, select the channel where you want the notifications to be sent, such as ‘New Leads’. You can then customize the message that will be sent to Slack, including dynamic data from the previous step.

Finally, click on ‘Save and Send Test Request’. If everything is set up correctly, you will receive a notification in your Slack channel confirming that a new lead has been received from IndiaMART. This integration allows your team to respond quickly and efficiently to inquiries, streamlining your sales process.


Conclusion

By following this tutorial, you can effectively set up Slack notifications for new IndiaMART wholesale inquiries using Pabbly Connect. This integration ensures your sales team is alerted promptly, allowing for faster response times and enhanced customer engagement. Try this automation for your business today and see the benefits of seamless integration.

Ensure you check out Pabbly Connect to create business automation workflows and reduce manual tasks. Pabbly Connect currently offer integration with 2,000+ applications.

Build an AI Assistant for Your Educational Business Using Pabbly Chatflow

Learn how to create an AI assistant for your educational business using Pabbly Chatflow. Step-by-step guide to automate responses and improve efficiency. Build conversational workflows that guide visitors toward conversion with dynamic, branching dialogs that respond intelligently to user input.

Watch Step By Step Video Tutorial Below


1. Accessing Pabbly Chatflow for Your AI Assistant

To build an AI assistant for your educational business, you first need to access Pabbly Chatflow. Open a new browser tab and enter the URL Pabbly.com/chatflow. If you are an existing user, click on the sign-in button. For new users, click on ‘sign up for free’.

Once signed in, you will be directed to the Pabbly Chatflow dashboard. Here, you can see various features available. Click on ‘Access Now’ to enter the main dashboard where you can manage your AI assistant effectively.


2. Creating Your AI Assistant in Pabbly Chatflow

After accessing Pabbly Chatflow, the next step is to create your AI assistant. Click on the ‘AI Assistant’ feature on the left sidebar. To add a new assistant, click on the button that allows you to create one.

  • Provide a name for your AI assistant, such as ‘Educational Business AI Assistant’.
  • Select the instruction type as ‘AI Agent’.
  • Configure the AI temperature setting for creativity.

Make sure to select the AI model you wish to use. In this case, choose ‘OpenAI’ and select ‘Chat GPT 4.0 Mini’ as the model. This configuration ensures that your assistant can provide intelligent responses based on user queries.


3. Integrating WhatsApp with Pabbly Chatflow

To enhance your AI assistant’s capabilities, integrating WhatsApp is essential. In the settings of Pabbly Chatflow, you can add your WhatsApp number. Click on ‘Add WhatsApp Number’ to start the integration process.

  • Choose between ‘WhatsApp Connect Beta’ or ‘Manual Token Connect’.
  • For manual connection, generate a Meta access token from Facebook Meta for developers.
  • Paste the generated token in the required field in Pabbly Chatflow.

This integration allows your AI assistant to communicate with users via WhatsApp, making it easier to respond to inquiries and manage interactions efficiently.


4. Customizing Your AI Assistant in Pabbly Chatflow

Customization is key to making your AI assistant effective. Within Pabbly Chatflow, you can set up various features such as header messages, footers, and fallback messages. Enable the toggle for header messages and customize them according to your educational business needs.

Set a default fallback message for when the AI cannot understand a query. Upload a knowledge source in .txt format, ensuring it does not exceed 90 MB. Customize the assistant’s interface, including colors and themes.

Once you have configured these settings, your AI assistant will be ready to handle inquiries related to your educational business efficiently.


5. Finalizing and Activating Your AI Assistant

The final step is to save and activate your AI assistant in Pabbly Chatflow. After completing all customizations, click on the ‘Save AI Assistant’ button. This action ensures that your assistant is now fully functional and ready to assist users.

Make sure to test your AI assistant by sending a message like ‘Hello’. The assistant should respond promptly, indicating it is operational. This testing phase is crucial for ensuring your AI assistant meets your educational business needs effectively.


Conclusion

In conclusion, building an AI assistant for your educational business using Pabbly Chatflow is a straightforward process. By following these steps, you can automate responses and enhance user engagement effectively. Start utilizing Pabbly Chatflow today to streamline your operations.

Ensure you check out Pabbly Connect to create business automation workflows and reduce manual tasks. Pabbly Connect currently offer integration with 2,000+ applications.

Broadcast WhatsApp Messages for Your Matrimony Business Using Pabbly Chatflow

Learn how to broadcast WhatsApp messages for your matrimony business using Pabbly Chatflow. Follow this detailed tutorial for step-by-step guidance. Build conversational workflows that guide visitors toward conversion with dynamic, branching dialogs that respond intelligently to user input.

Watch Step By Step Video Tutorial Below


1. Accessing Pabbly Chatflow for WhatsApp Broadcasting

To start broadcasting WhatsApp messages for your matrimony business, first, access Pabbly Chatflow. Open a new browser tab and enter the URL pabby.com/chatflow. This will take you to the main landing page of Pabbly Chatflow.

If you are an existing user, click on ‘Sign In’. For new users, click on ‘Sign Up for Free’. Once signed in, click on ‘Access Now’ to reach the Pabbly Chatflow dashboard, where you can manage your broadcasts effectively.


Once in the Pabbly Chatflow dashboard, you will see various features on the left side. These include:

  • Dashboard: Overview of chatbot performance and stats.
  • Inbox: Manage and reply to incoming customer conversations.
  • Contacts: Store details of users who interacted with your chatbot.
  • Broadcast: Send bulk messages or announcements to multiple users.

These features help streamline your communication process, making it easier to manage your matrimony business effectively.


3. Adding Your WhatsApp Number to Pabbly Chatflow

To use WhatsApp for broadcasting messages, you need to add your WhatsApp number in Pabbly Chatflow. Click on ‘Add WhatsApp Number’ in the settings menu. You will have two options: WhatsApp Connect Beta and Manual Token Connect.

Select ‘Manual Token Connect’ and generate a Meta access token from Facebook Meta for developers. Once you have the token, input it in the provided field in Pabbly Chatflow. This step is crucial for ensuring your broadcasts reach your contacts.


4. Creating a Broadcast in Pabbly Chatflow

To create a broadcast, go to the ‘Broadcast’ feature in Pabbly Chatflow and click on ‘Add Broadcast’. Select the broadcast type as ‘Broadcast Campaign’ and name it, for example, ‘Matrimony Business’. Next, choose your contact list.

If you need to create a new contact list, access the ‘Contacts’ feature, click on the plus icon, and fill in the required details. After creating your contact list, return to the broadcast setup and select it. Choose the message type as ‘Template Message’ and select your approved WhatsApp template.


5. Scheduling and Sending Your Broadcast

Once you have selected your template, you can send a test message to see how it appears. Input your phone number and click ‘Send Test Message’. After confirming the message looks good, you can schedule your broadcast.

In Pabbly Chatflow, you can choose to send the broadcast immediately or schedule it for a later date and time. If scheduling, provide the specific date and time for the broadcast. Once everything is set, click on ‘Add Broadcast’ to finalize your setup. You will see a confirmation that your broadcast was created successfully.


Conclusion

Using Pabbly Chatflow, you can efficiently broadcast WhatsApp messages for your matrimony business. This process automates communication, saving you time and ensuring your clients receive timely updates. Start using Pabbly Chatflow today to enhance your business communications.

Ensure you check out Pabbly Connect to create business automation workflows and reduce manual tasks. Pabbly Connect currently offer integration with 2,000+ applications.

Log New Payment Details from Instamojo to Airtable Using Pabbly Connect

Learn how to log new payment details from Instamojo to Airtable using Pabbly Connect in this detailed step-by-step tutorial. Revolutionize your productivity approach with just a few strategic clicks. Uncover professional methods for connecting applications and creating workflows that reclaim hours of your week.

Watch Step By Step Video Tutorial Below


1. Access Pabbly Connect for Integration

To log new payment details from Instamojo to Airtable, you first need to access Pabbly Connect. Simply open your web browser and visit the Pabbly Connect landing page at pav.com/connect. This intuitive platform allows you to create seamless integrations without any coding skills.

Once on the landing page, you can either sign in if you are an existing user or sign up for free to explore its features. The free plan offers you 100 tasks every month, allowing you to test the functionalities of Pabbly Connect and create your automation workflows.


2. Create a New Workflow in Pabbly Connect

After signing in to your Pabbly Connect account, click on the ‘Create Workflow’ button. You will be prompted to choose between the new workflow builder and the classic one. Opt for the new workflow builder for a modern and flexible interface.

  • Click on ‘Create Workflow’
  • Select your folder and enter a workflow name
  • Click on ‘Create’

This will take you to the workflow window where you can set up your trigger and action. The trigger will be Instamojo, and the action will be Airtable, allowing you to log payment details automatically.


3. Set Up the Trigger with Instamojo

In the workflow window, select Instamojo as your trigger application. Search for Instamojo and choose the option labeled Instamojo v2. For the app event, select ‘New Sale’ and click on the ‘Connect’ button.

Pabbly Connect will provide you with a webhook URL. Copy this URL, as it will be used to connect Instamojo with Pabbly Connect. Now, go to your Instamojo account and navigate to the page settings of the product you want to track.

  • Edit the product page in Instamojo
  • Go to Page Settings and then Webhooks
  • Add the webhook URL and select successful payments for information to be sent

After saving the settings, your webhook will be active, and Pabbly Connect will be ready to capture payment details from Instamojo.


4. Test the Webhook to Capture Payment Details

To ensure that the webhook is functioning correctly, you need to perform a test payment. Copy the product page URL and complete a purchase by entering your details. This step is crucial as it triggers the webhook and allows Pabbly Connect to log the payment information.

After completing the payment, go back to your workflow in Pabbly Connect to see if the details have been captured. You should see the customer’s name, email address, and phone number displayed in the workflow.

Complete the payment process in Instamojo Check for the captured response in Pabbly Connect Verify customer details are displayed correctly

Once this is confirmed, you can proceed to set up the action step for Airtable.


5. Configure Action to Log Details in Airtable

For the action step, select Airtable as your application in Pabbly Connect. Choose the event ‘Create Record’ and click on ‘Connect’ to link your Airtable account.

Grant the necessary permissions for Pabbly Connect to access your Airtable base. Select the base you want to use for logging payment details, and map the fields from the Instamojo trigger to the Airtable fields.

Select the appropriate Airtable base Map the customer name, email, phone number, and payment ID Click ‘Save and Send Test Request’

After testing the setup, check your Airtable account to verify that the payment details have been logged successfully. Now, every time a new payment is received on Instamojo, the details will be automatically recorded in Airtable without any manual intervention.


Conclusion

Using Pabbly Connect, you can effortlessly log new payment details from Instamojo to Airtable. This integration automates the process, ensuring that your sales team has immediate access to payment information for follow-ups and fulfillment. Try this powerful automation for your business today!

Ensure you check out Pabbly Connect to create business automation workflows and reduce manual tasks. Pabbly Connect currently offer integration with 2,000+ applications.

Integrate Razorpay Orders into Google Sheets Using Pabbly Connect

Learn how to seamlessly integrate Razorpay orders into Google Sheets using Pabbly Connect with this detailed step-by-step tutorial. Develop expertise in application integration and learn how to design streamlined automation workflows using proven, simplified approaches.

Watch Step By Step Video Tutorial Below


1. Setting Up Pabbly Connect for Razorpay and Google Sheets Integration

To integrate Razorpay orders into Google Sheets, we will use Pabbly Connect. Start by navigating to the Pabbly Connect landing page by searching for ‘Pabbly.com/connect’ in your browser. This platform allows users to automate workflows without any coding knowledge.

Once on the Pabbly Connect page, you can either sign up for a free account or log in if you’re an existing user. After logging in, click on the ‘Create Workflow’ button to begin setting up your integration.


2. Creating Your Workflow in Pabbly Connect

After clicking ‘Create Workflow’, you will be prompted to choose a workflow builder. Select the new workflow builder for a more modern interface. Name your workflow ‘Add Razorpay Orders in Google Sheets for E-Commerce Stores’ and click ‘Create’. using Pabbly Connect

  • Select Razorpay as the trigger application.
  • Choose ‘New Payment Captured’ as the trigger event.
  • Click ‘Connect’ to generate a webhook URL.

Copy the generated URL and head over to your Razorpay account. Navigate to the ‘Developers’ section on the left sidebar, click on ‘Webhooks’, and then select ‘Add New Webhook’. Paste the copied URL into the Webhook URL field and set the active event to ‘Payment Captured’.


3. Testing Your Connection Between Razorpay and Pabbly Connect

After setting up the webhook, it’s essential to test the connection. To do this, go back to Razorpay and create a test payment. Select a product from your e-commerce store, enter the required details, and complete the payment process.

Once the payment is successful, return to your Pabbly Connect workflow. You should see that Pabbly Connect has captured the payment details including the first name, last name, email address, and product name. This confirms that the webhook is functioning correctly.

  • Ensure all relevant details are captured correctly.
  • Check for any errors in the webhook response.

With the successful capture of payment details, you can now proceed to add these details into Google Sheets using Pabbly Connect.


4. Adding Razorpay Payment Details to Google Sheets

Next, we will integrate Google Sheets into our workflow. Click on ‘Add Action Step’ and select Google Sheets as the action application. Choose ‘Add New Row’ as the action event and click ‘Connect’. using Pabbly Connect

Sign in to your Google account to establish the connection. Once connected, select the spreadsheet where you want to store the payment details. In this case, choose your spreadsheet named ‘Razorpay Payments’.

Map the order ID, name, email, phone number, and payment method fields from Razorpay to Google Sheets. Ensure that the mapping is done correctly for dynamic data entry.

After mapping all required fields, click on ‘Save and Send Test Request’. This will add the captured payment details to your Google Sheets. Verify that the information appears correctly in your spreadsheet.


5. Finalizing Your Automation with Pabbly Connect

Now that you have successfully set up the integration, every time a new payment is captured in Razorpay, the details will automatically be added to your Google Sheets. This automation streamlines your order management process significantly.

Test your workflow by making another test payment to ensure everything works as intended. Check your Google Sheets to confirm the new payment details are recorded accurately.

With Pabbly Connect, you can easily manage your e-commerce orders without manual entry, saving time and reducing errors. This automation is particularly useful for tracking sales and managing customer information efficiently.


Conclusion

In conclusion, integrating Razorpay orders into Google Sheets using Pabbly Connect is a straightforward process that enhances your e-commerce operations. This automation ensures that all payment details are captured and organized efficiently, allowing for better tracking and reporting.

Ensure you check out Pabbly Connect to create business automation workflows and reduce manual tasks. Pabbly Connect currently offer integration with 2,000+ applications.

By following the steps outlined in this tutorial, you can set up similar automations for your own e-commerce store and enjoy the benefits of streamlined order management.

How to Build an AI Assistant for Your Mutual Fund Services Business Using Pabbly Chatflow

Learn how to create an AI Assistant for your Mutual Fund Services using Pabbly Chatflow. Step-by-step guide for effective integration with YouTube, Square, and Facebook.

Watch Step By Step Video Tutorial Below


1. Accessing Pabbly Chatflow for AI Assistant Creation

To build an AI Assistant for your Mutual Fund Services, start by accessing Pabbly Chatflow. Open a new browser tab and enter the URL pabby.com/chatflow. This will take you to the main landing page of Pabbly Chatflow.

If you are an existing user, click on the ‘Sign In’ button. New users should click on ‘Sign Up for Free’. Once logged in, you will be directed to the dashboard where you can access various features of Pabbly Chatflow.


After signing in, you will find several features on the left side of the screen. These include:

  • Dashboard: Overview of chatbot performance and stats.
  • Inbox: Manage and reply to customer conversations.
  • Contacts: Store details of users who have interacted with your chatbot.
  • AI Assistant: Integrate AI for smart responses.

These features are essential for effectively managing your AI Assistant created with Pabbly Chatflow. The dashboard provides insights, while the inbox allows for direct customer engagement.


3. Creating Your AI Assistant in Pabbly Chatflow

To create your AI Assistant, click on the ‘AI Assistant’ feature and then select ‘Add AI Assistant’. You will need to name your assistant, for example, ‘Mutual Fund AI Assistant’. After naming, click on ‘Add AI Assistant’ to proceed. using Pabbly Connect

Next, select the instruction type. Choose ‘AI Agent’ from the options provided. This will set the primary functions and constraints of your AI Assistant. You can then configure settings, including the creativity level, by adjusting the temperature setting to 0.9 for enhanced responses.


4. Configuring AI Assistant Settings in Pabbly Chatflow

Once you have set the instruction type, configure the AI tool by selecting OpenAI and the model as GPT 4.0 Mini. You will need to update the API token from the OpenAI API keys page. Create a new secret key named ‘Mutual Fund Service AI Assistant’ and copy the generated key into Pabbly Chatflow. using Pabbly Connect

In the assistant settings, you can customize the header and footer messages. Additionally, upload a knowledge source file (max 90 MB in .txt format) that the AI Assistant will use to respond to queries. This is crucial for ensuring accurate responses to user inquiries.


5. Customizing Your AI Assistant’s Appearance

To enhance user interaction, customize the appearance of your AI Assistant. You can choose the theme (light or dark), modify the assistant shape, and change background colors. Set the header display name and subheading, which will appear to users when they interact with the assistant.

Once you have completed all customizations, enable the toggle to activate your AI Assistant. Finally, click on ‘Save AI Assistant’ to finalize the setup. This process ensures that your AI Assistant is fully functional and ready to assist users with their mutual fund queries using Pabbly Chatflow.


Conclusion

In conclusion, using Pabbly Chatflow to create an AI Assistant for your Mutual Fund Services business streamlines customer interactions and automates responses. This guide provides a comprehensive overview of the steps involved, ensuring that your assistant is effective and user-friendly.

Ensure you check out Pabbly Connect to create business automation workflows and reduce manual tasks. Pabbly Connect currently offer integration with 2,000+ applications.