How to Send Personalized Thank You Messages After Payment via Razorpay Using Pabbly Connect

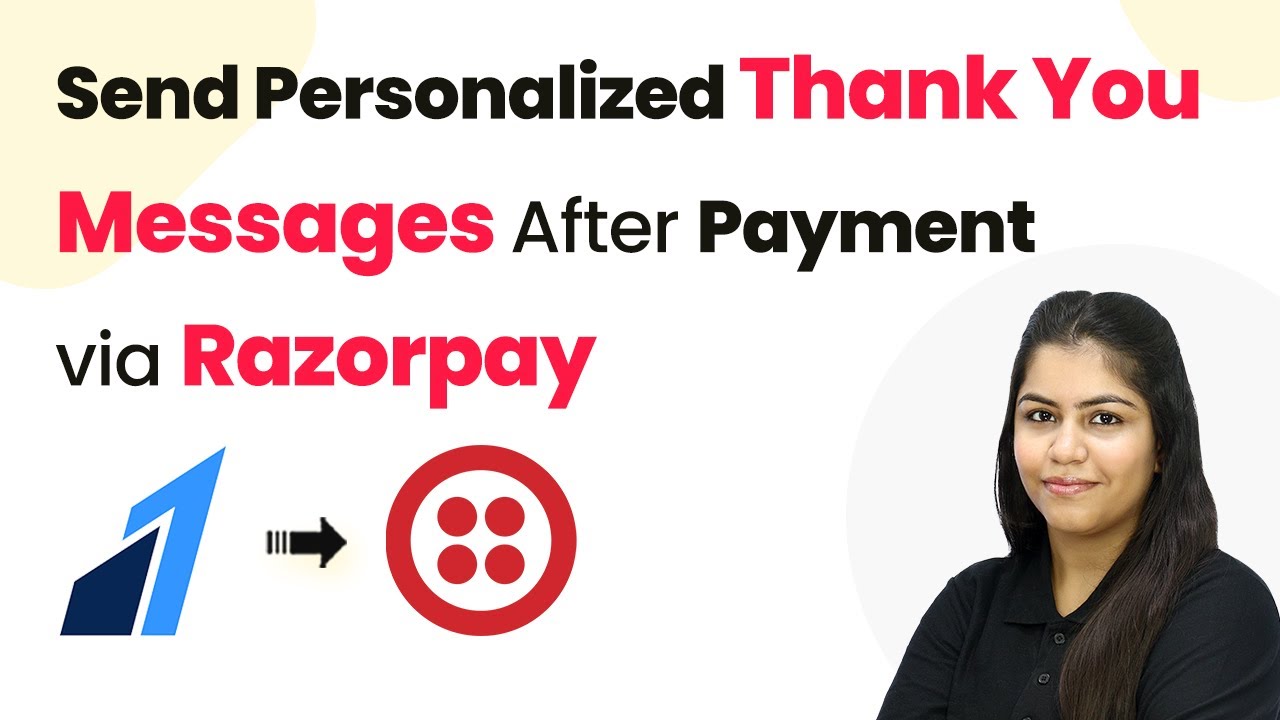
Learn how to integrate Razorpay with Pabbly Connect to send personalized thank you messages automatically after payment. Step-by-step tutorial included. Discover hidden automation capabilities within your existing tools. This guide shows you how to connect your essential applications and permanently eliminate redundant manual processes.

Watch Step By Step Video Tutorial Below


1. Accessing Pabbly Connect for Integration

To send personalized thank you messages after payment via Razorpay, you need to access Pabbly Connect. Start by opening your web browser and searching for Pabbly Connect at Pabbly.com/connect. Once on the landing page, you will see options to sign in or sign up for free. If you are a new user, click on ‘Sign Up for Free’ to start your trial.

For existing users, simply click on ‘Sign In’. After signing in, you will be directed to the Pabbly apps dashboard. Here, you will select Pabbly Connect to create your integration workflow. Click on the ‘Access Now’ button to proceed to your Pabbly Connect account dashboard.


2. Creating a New Workflow in Pabbly Connect

In your Pabbly Connect dashboard, click on the ‘Create Workflow’ button. You will be presented with two options: the new workflow builder and the classic one. Choose the new workflow builder for a more modern experience. After selecting, enter a name for your workflow.

  • Enter a name for your workflow.
  • Select the folder where you want to save your workflow.
  • Click on the ‘Create’ button to finalize.

After clicking ‘Create’, you will see the workflow window, which is crucial for setting up your automation using Pabbly Connect. This window consists of triggers and actions that define how your workflow operates.


3. Setting Up the Trigger for Razorpay Payments

To automate your thank you messages, you need to set up a trigger that activates when a payment is received via Razorpay. Click on ‘Add Trigger’ and select Razorpay as your trigger application. For the trigger event, choose ‘Payment Captured’ and click on ‘Connect’. using Pabbly Connect

After connecting, you will receive a webhook URL. Copy this URL and head to your Razorpay account. In Razorpay, navigate to the ‘Developers’ section on the left sidebar and select ‘Webhooks’. Click on ‘Add New Webhook’ and paste the copied URL. Set the active event to ‘Payment Captured’ and create the webhook.


4. Filtering Payments for Specific Courses

To ensure that thank you messages are sent only for specific products, you can add a filter condition in your workflow. Click on ‘Add New Action Step’ and select ‘Filter’ as your action application. For the event, choose ‘Filter Values’ and connect it.

  • Set the label to the course name.
  • Choose the filter type as ‘Equals to’.
  • Enter the specific course name value.

After setting up the filter, click on ‘Save and Send Test Request’. This ensures that your workflow only proceeds when the specified course is purchased, making your thank you messages more targeted and personalized via Pabbly Connect.


5. Sending Personalized Thank You Messages via Twilio

Now it’s time to send the thank you messages using Twilio. Add a new action step and select Twilio as your action application. For the event, choose ‘Send SMS Message’ and connect your Twilio account. You will need your Twilio Account SID, Authorization Token, and Twilio Phone Number to connect.

Once connected, enter the SMS body you want to send. To personalize the message, use the mapping feature of Pabbly Connect to insert the customer’s name dynamically. This way, every customer receives a unique thank you message after their payment is processed.


Conclusion

By following these steps using Pabbly Connect, you can easily automate the process of sending personalized thank you messages after payments via Razorpay. This integration enhances customer experience and ensures timely communication. Start using Pabbly Connect today to streamline your business operations.

Ensure you check out Pabbly Connect to create business automation workflows and reduce manual tasks. Pabbly Connect currently offer integration with 2,000+ applications.

How to Send Automated SMS After Event Registration from Google Sheets Using Pabbly Connect

Learn how to automate SMS notifications after event registration using Google Sheets and Pabbly Connect in this detailed tutorial. Follow this definitive guide to creating powerful automated workflows with straightforward, efficiency-focused solutions that save valuable time.

Watch Step By Step Video Tutorial Below


1. Accessing Pabbly Connect for Automation

To begin automating SMS notifications after event registrations using Google Sheets, you first need to access Pabbly Connect. Start by visiting the Pabbly website and signing in to your account. If you are a new user, you can sign up for a free account to explore the features.

Once logged in, navigate to the Pabbly Connect dashboard. This platform is essential for creating automated workflows that connect Google Sheets with SMS sending applications. You will be able to set up triggers and actions that facilitate the automation process.


2. Creating Your Workflow in Pabbly Connect

Now that you have accessed Pabbly Connect, the next step is to create a new workflow. Click on the ‘Create Workflow’ button located in the top right corner of the dashboard. This will initiate the process of setting up your automation.

  • Provide a name for your workflow, such as ‘Send Automated SMS After Event Registration from Google Sheets’.
  • Select a folder to save your workflow, or create a new folder if necessary.
  • Choose the trigger application, which in this case will be Google Sheets.

After selecting Google Sheets as your trigger application, you will need to define the event that will trigger the SMS notification. This typically involves selecting ‘New or Updated Spreadsheet Row’ as the event type.


3. Connecting Google Sheets to Pabbly Connect

To link your Google Sheets to Pabbly Connect, you must configure the connection settings. This involves copying the webhook URL provided by Pabbly Connect and adding it to your Google Sheets.

Open your Google Sheets, navigate to the Extensions menu, and select the Pabbly Connect Webhooks add-on. From there, you can initiate the setup process by pasting the webhook URL into the designated field. Make sure to set the trigger column, which will be the final data column in your sheet.

  • Ensure that your Google Sheets is ready with the necessary fields such as Name, Email, City, and Phone Number.
  • Refresh your Google Sheets after installing the Pabbly Connect add-on to see the new options.
  • Test the connection by adding a new row in your Google Sheets.

Once you have successfully connected Google Sheets to Pabbly Connect, you can proceed to the next step of sending automated SMS messages.


4. Sending SMS Notifications through Pabbly Connect

With your Google Sheets connected, the next step is to set up the action to send SMS notifications. For this, choose your SMS sending application, such as Twilio, as the action app in Pabbly Connect.

Configure the action settings by selecting the event as ‘Send SMS’. You will need to provide the sender number and recipient number, which will be mapped from the data received from Google Sheets. Additionally, you can customize the SMS body to include dynamic fields from the registration data.

Enter the SMS body, including placeholders for dynamic data such as the recipient’s name and event details. Map the recipient’s phone number from Google Sheets to ensure the SMS goes to the correct number. Save the action settings to finalize the SMS sending setup.

After configuring the SMS settings, you can test the workflow to ensure everything is functioning correctly. This will allow you to verify that the SMS notifications are sent automatically when new registrations are added to Google Sheets.


5. Testing Your Automation Setup

To ensure that your automation is working as intended, you need to perform a test. Go back to your Google Sheets and add a new registration entry with all required details. This will trigger the workflow you set up in Pabbly Connect.

Once you have added the new entry, check your SMS application to see if the notification has been sent. You should receive an SMS that confirms the registration with the event details. This step is crucial to ensure that your automation is functioning properly.

After testing, you can make any necessary adjustments to the SMS content or the mapping of data fields. This allows you to customize the notifications further based on your requirements. With Pabbly Connect, you can easily manage and modify your workflows as needed.


Conclusion

In this tutorial, we explored how to send automated SMS notifications after event registrations using Google Sheets and Pabbly Connect. By following the steps outlined, you can streamline your event registration process and ensure timely communication with your attendees. Automating these notifications not only saves time but also enhances the overall experience for your participants.

Ensure you check out Pabbly Connect to create business automation workflows and reduce manual tasks. Pabbly Connect currently offer integration with 2,000+ applications.

How to Trigger Google Chat Message for Razorpay Refunds Using Pabbly Connect

Learn how to trigger Google Chat messages for Razorpay refunds using Pabbly Connect in this detailed step-by-step tutorial. Automate your notifications effortlessly! Discover hidden automation capabilities within your existing tools. This guide shows you how to connect your essential applications and permanently eliminate redundant manual processes.

Watch Step By Step Video Tutorial Below


1. Introduction to Pabbly Connect for Razorpay Refunds

In this section, we will explore how to use Pabbly Connect to automate Google Chat notifications for Razorpay refunds. This integration is essential for keeping your team informed about refund activities in real time.

By leveraging Pabbly Connect, you can effortlessly connect Razorpay and Google Chat without any coding skills. This automation will ensure that every refund processed through Razorpay triggers an immediate notification on Google Chat, enhancing communication within your team.


2. Accessing Pabbly Connect for Workflow Creation

To begin, access Pabbly Connect by navigating to the Pabbly website. You can do this by entering ‘Pabbly.com/connect’ in your browser. Once there, you will have options to either sign in or sign up for free.

  • If you are a new user, click on ‘Sign Up for Free’ to create an account.
  • Existing users should select the ‘Sign In’ button to access their dashboard.

After signing in, click on the ‘Access Now’ button for Pabbly Connect. This will take you to the dashboard where you can start creating your workflow.


3. Creating a Workflow in Pabbly Connect

Once you’re on the Pabbly Connect dashboard, initiate the workflow creation by clicking on the ‘Create Workflow’ button. You will be prompted to choose between the new and classic workflow builders. Select the new workflow builder for a modern interface.

Next, give your workflow a name, such as ‘Trigger Google Chat Message for Razorpay Refunds’. Choose the appropriate folder to save your workflow. If needed, you can create a new folder for better organization.

After naming your workflow, click on the ‘Create’ button to open the workflow window. This window is crucial as it allows you to set up the trigger and action for your automation. The trigger will be Razorpay, and the action will be Google Chat.


4. Setting Up the Trigger for Razorpay Refunds

To set up the trigger, click on the ‘Add Trigger’ button in Pabbly Connect. Search for Razorpay and select it as the trigger application. For the trigger event, choose ‘Refund Processed’ to ensure that the workflow activates whenever a refund is initiated.

Once selected, click on ‘Connect’. You will be provided with a webhook URL. Copy this URL as it will be used to connect Razorpay to Pabbly Connect.

  • Log into your Razorpay account and navigate to the ‘Developers’ section.
  • Select ‘Webhooks’ and click on ‘Add New Webhook’.
  • Paste the copied webhook URL and set the event to ‘Refund Processed’.
  • Click on ‘Create Webhook’ to save your settings.

With this, you have successfully set up the trigger for Razorpay refunds in Pabbly Connect.


5. Testing the Automation and Notifying Google Chat

To test the automation, issue a refund from your Razorpay account. Navigate to the transaction section, select a transaction, and click on ‘Issue Refund’. Confirm the refund to trigger the webhook.

Once the refund is processed, return to Pabbly Connect to check if the webhook response has been captured. You should see the customer details, refund ID, and payment ID in the captured data.

Now, set up the action to notify Google Chat. Add a new action step and select Google Chat. Choose ‘Create Message’ as the event and connect it to your Google Chat webhook URL. Map the necessary fields such as customer name, amount, payment ID, and refund ID into the message.


Conclusion

In conclusion, using Pabbly Connect allows you to automate Google Chat notifications for Razorpay refunds efficiently. By following the steps outlined in this tutorial, you can streamline your refund processes and enhance team communication. Start using Pabbly Connect today to experience seamless integrations!

Ensure you check out Pabbly Connect to create business automation workflows and reduce manual tasks. Pabbly Connect currently offer integration with 2,000+ applications.

How to Auto-Send Webinar Joining Link on WhatsApp After Form Fill Using Pabbly Connect

Learn how to auto-send a webinar joining link via WhatsApp after a form fill using Pabbly Connect. Step-by-step guide to automate your process. Learn to create powerful connections between your critical applications without requiring specialized programming knowledge or extensive technical background.

Watch Step By Step Video Tutorial Below


1. Access Pabbly Connect for Integration

To auto-send a webinar joining link on WhatsApp after a form fill, you need to access Pabbly Connect. Start by searching for ‘Pabbly Connect’ in your browser, which will direct you to the homepage of Pabbly.

Once there, you have two options: sign in if you are an existing user or click on ‘Sign Up Free’ to create a new account. New users can explore the platform with 100 free tasks each month to get familiar with the features.


2. Create a New Workflow in Pabbly Connect

After signing in to Pabbly Connect, navigate to the dashboard and click on the ‘Create Workflow’ button located at the top right corner. This is where you will build your automation process.

  • Select a name for your workflow, such as ‘Send Webinar Joining Link on WhatsApp After Form Fill’.
  • Choose the folder where you want to save this workflow.
  • Click on the ‘Select’ button to proceed with the newly created workflow.

Now you have set up a new workflow in Pabbly Connect. This will be the foundation for connecting your Google Form with WhatsApp.


3. Setting Up Trigger for Google Forms

In this step, you will set up the trigger for your workflow. Select ‘Google Forms’ as your trigger application and choose the event as ‘New Response Received’. This means that every time a new form is submitted, it will trigger the automation. using Pabbly Connect

After selecting the trigger, you will receive a Webhook URL. Copy this URL as you will need to paste it into your Google Form. Go to your Google Form, click on the settings, and look for the option to link to a Google Sheet. Create a new sheet to capture responses, ensuring that the data is organized for the next steps.


4. Connecting WhatsApp to Pabbly Connect

Next, you will integrate WhatsApp using the WhatsApp Cloud API. In Pabbly Connect, select WhatsApp as your action application, and choose the event as ‘Send Template Message’. Here, you will need to provide your WhatsApp Business Account ID and other details.

  • Generate an access token from your WhatsApp Cloud API account.
  • Map the phone number field from your Google Form response to the WhatsApp message.
  • Select the message template that you created for the webinar link.

By completing this step, you have successfully connected WhatsApp to Pabbly Connect, allowing automated messages to be sent to registrants.


5. Testing the Integration

Finally, it is crucial to test your integration. Submit a test response through your Google Form to ensure that the entire automation works flawlessly. Check your WhatsApp to see if the joining link message is received.

If everything is set up correctly, you will receive an automated message with the webinar joining link. This confirms that Pabbly Connect has successfully facilitated the integration between Google Forms and WhatsApp.


Conclusion

In conclusion, using Pabbly Connect, you can easily automate the process of sending a webinar joining link via WhatsApp after a form fill. This integration enhances communication efficiency and improves user experience. Follow these steps to streamline your webinar registrations.

Ensure you check out Pabbly Connect to create business automation workflows and reduce manual tasks. Pabbly Connect currently offer integration with 2,000+ applications.

How to Track Customer Satisfaction from Typeform to Zoho CRM Using Pabbly Connect

Learn how to seamlessly track customer satisfaction by integrating Typeform with Zoho CRM using Pabbly Connect. Step-by-step guide included. Develop expertise in application integration and learn how to design streamlined automation workflows using proven, simplified approaches.

Watch Step By Step Video Tutorial Below


1. Accessing Pabbly Connect for Integration

To track customer satisfaction from Typeform to Zoho CRM, you must first access Pabbly Connect. This powerful automation tool allows you to connect various applications seamlessly without any coding.

Begin by opening a new browser tab and navigating to Pabbly.com/connect. Here, you can either sign up for a new account or log in if you are an existing user. Once logged in, you will be directed to the Pabbly Connect dashboard, where you can create new workflows.


2. Creating a Workflow in Pabbly Connect

After accessing Pabbly Connect, the next step is to create a new workflow. Click on the ‘Create Workflow’ button and name it ‘Track Customer Satisfaction from Typeform to Zoho CRM’. Select your desired folder for better organization.

  • Click on the ‘Create’ button.
  • Define a trigger for your workflow.
  • Choose Typeform as the application to start the automation.

Once you have created the workflow, you will need to set a trigger event. This event will initiate the workflow each time a customer submits their feedback form in Typeform.


3. Setting Up the Trigger with Typeform

In this step, you will configure the trigger in Pabbly Connect. Click on ‘Add Trigger’ and select Typeform as your application. Choose the event ‘New Entry’ to capture responses from your customer satisfaction form.

Click on the ‘Connect’ button. You will have the option to add a new connection or select an existing one. If adding a new connection, click on ‘Connect with Typeform’ and authorize the connection. Once connected, refresh the fields to ensure you can capture the latest data.


4. Setting Up the Action with Zoho CRM

After successfully setting up the trigger, the next step involves selecting Zoho CRM as the action application in Pabbly Connect. Click on the ‘Plus’ icon to add an action and select Zoho CRM.

  • Choose the event ‘Create Contact’ to add new customer data.
  • Connect your Zoho CRM account by entering your domain.
  • Map the data fields from Typeform to Zoho CRM, such as first name, last name, and email.

Mapping the fields correctly is crucial as it ensures that the data flows smoothly from Typeform to Zoho CRM. After mapping the necessary fields, click on ‘Save and Send Test Request’ to verify that the integration is functioning correctly.


5. Finalizing the Integration and Testing

Once you have tested the integration successfully, click on the ‘Save’ button to finalize your workflow in Pabbly Connect. This will ensure that all future submissions from your Typeform will automatically create new contacts in Zoho CRM.

To test the entire workflow, fill out the Typeform customer satisfaction form again. After submission, check your Zoho CRM to confirm that the new contact has been created with all relevant details captured accurately. This automation eliminates manual data entry and keeps your customer feedback organized.


Conclusion

By following these steps, you can effectively track customer satisfaction by integrating Typeform with Zoho CRM using Pabbly Connect. This integration streamlines your workflow, ensuring that customer feedback is captured and organized efficiently.

Ensure you check out Pabbly Connect to create business automation workflows and reduce manual tasks. Pabbly Connect currently offer integration with 2,000+ applications.

How to Log Stripe Payments Automatically in Google Sheets Using Pabbly Connect

Learn how to log Stripe payments automatically in Google Sheets for effective financial tracking using Pabbly Connect. Follow our detailed tutorial. Master proven automation processes with practical implementation examples and strategic recommendations you can apply immediately in your workflow.

Watch Step By Step Video Tutorial Below


1. Access Pabbly Connect for Stripe and Google Sheets Integration

To start logging Stripe payments automatically in Google Sheets, you need to access Pabbly Connect. This platform facilitates the integration between Stripe and Google Sheets seamlessly.

Open a new browser tab and enter the URL Pabbly.com/connect to reach the main landing page. Here, you can sign in if you are an existing user or sign up for free if you are new. Once logged in, you will be directed to your Pabbly Connect dashboard.


2. Creating a Workflow in Pabbly Connect

After accessing your dashboard, the next step is to create a new workflow in Pabbly Connect. Click on the plus icon to create a new folder and name it appropriately, such as ‘Log Stripe Payments Automatically in Google Sheets for Financial Tracking’.

To create the workflow, click on ‘Create Workflow’. You will have two options: the new beta version and the classic version. Choose the new beta version for a modern experience. Name your workflow and select the folder you just created.

  • Click on the plus icon to create a new folder.
  • Name your folder for easy identification.
  • Select the new beta version for workflow creation.

Once created, you will be redirected to your workflow setup where you will set up the trigger for Stripe payments.


3. Setting Up the Trigger for Stripe Payments

In this section, you will set up the trigger in Pabbly Connect. Select Stripe as your trigger application. This means that whenever a payment is completed in Stripe, the workflow will automatically log the details into Google Sheets.

Next, connect your Stripe account by using the provided webhook URL from Pabbly Connect. Sign into your Stripe account, navigate to the developers page, and then to webhooks. Here, you will add a new endpoint using the webhook URL you received.

  • Navigate to the Stripe developers page and select webhooks.
  • Add a new endpoint and paste the webhook URL.
  • Select the event type ‘Checkout Session Completed’.

After adding the endpoint, ensure that it is enabled. This allows Pabbly Connect to receive payment information from Stripe whenever a payment is processed.


4. Setting Up the Action to Log Data in Google Sheets

After configuring the trigger, it is time to set up the action in Pabbly Connect. Select Google Sheets as your action application. This action will log the payment details from Stripe into your Google Sheets automatically.

Choose the event as ‘New Row’ and connect your Google Sheets account. If you are adding a new connection, simply sign in and allow access. After connecting, select the specific Google Sheet where you want the Stripe data to be logged.

Select Google Sheets as the action application. Choose ‘New Row’ as the event. Map the payment details from Stripe to the appropriate fields in Google Sheets.

Finally, map the fields such as name, email, payment method, status, and amount. After mapping the fields, click on ‘Save and Send Test Request’ to ensure that the integration works successfully.


5. Testing the Integration between Stripe and Google Sheets

To ensure that your integration is successful, you need to test it. Complete a payment in Stripe using the payment link you created. Once the payment is processed, Pabbly Connect will capture the webhook response containing the payment details.

Check your Google Sheets to see if the payment details have been logged correctly. You should see all the information such as name, email, payment method, status, and amount in the designated columns.

Complete a payment in Stripe to trigger the workflow. Verify that the details appear in Google Sheets. Ensure all fields are correctly mapped and updated.

Once confirmed, save your workflow in Pabbly Connect to finalize the automation. Now, every time a payment is completed in Stripe, the details will automatically be logged in your Google Sheets for easy financial tracking.


Conclusion

Integrating Stripe with Google Sheets using Pabbly Connect allows for efficient logging of payment details automatically. This setup enhances financial tracking by eliminating manual entry, ensuring accuracy and saving time. Follow the steps outlined to create your own automated workflow today!

Ensure you check out Pabbly Connect to create business automation workflows and reduce manual tasks. Pabbly Connect currently offer integration with 2,000+ applications.

How to Send Course Welcome Video via WhatsApp After Payment Using Pabbly Connect

Learn how to automate sending a course welcome video via WhatsApp after payment using Pabbly Connect with Razer Pay integration. Follow our detailed tutorial for step-by-step guidance.

Watch Step By Step Video Tutorial Below


1. Accessing Pabbly Connect for Integration

To start sending a course welcome video via WhatsApp after payment, you first need to access Pabbly Connect. This platform will facilitate the integration between Razer Pay and WhatsApp.

Visit the Pabbly Connect website and sign in or sign up for a free account. Once logged in, navigate to the dashboard to create a new workflow. This is where you will set up the automation for sending the welcome video.


2. Creating a Workflow in Pabbly Connect

After accessing Pabbly Connect, click on the ‘Create Workflow’ button to set up your automation. Name your workflow something descriptive, like ‘Send Course Welcome Video via WhatsApp After Payment.’ This will help you identify the workflow later.

Next, choose the classic method for workflow creation. In this workflow, you will establish a trigger and an action. The trigger will be the payment captured from Razer Pay, while the action will be sending a message via WhatsApp.

  • Click on the ‘Create’ button to finalize your workflow.
  • Select Razer Pay as the trigger application.
  • Choose ‘Payment Captured’ as the trigger event.

Once you have set up the trigger, Pabbly Connect will provide you with a unique webhook URL. This URL will be used to connect your Razer Pay account with Pabbly Connect.


3. Configuring Razer Pay with Pabbly Connect

To connect Razer Pay to Pabbly Connect, log into your Razer Pay account and navigate to the ‘Accounts and Settings’ section. Here, you will find an option to add a new webhook.

Paste the webhook URL provided by Pabbly Connect into the webhook URL field. For the action event, select ‘Payment Captured.’ Click on the ‘Create Webhook’ button to establish the connection. This will ensure that every successful payment triggers the automation.

  • Go to the ‘Webhooks’ section in Razer Pay.
  • Click on ‘Add New Webhook’ and paste the URL.
  • Select ‘Payment Captured’ as your action event.

Once the webhook is saved, return to Pabbly Connect to test the connection by making a sample payment.


4. Setting Up WhatsApp Cloud API in Pabbly Connect

Now that Razer Pay is connected, the next step is to set up the WhatsApp Cloud API in Pabbly Connect. For this, choose WhatsApp Cloud API as your action application.

In the action event, select ‘Send Template Message New.’ You will need to enter your WhatsApp business account details, including the token and phone number ID. This information can be found in your WhatsApp Cloud API setup.

Enter your WhatsApp token, phone number ID, and business account ID. Select the template you created for the welcome message. Add the video link from your WordPress account for the message.

After entering all necessary details, click on the ‘Save and Send Test Request’ button to check if the integration works correctly. If successful, you will receive the welcome message along with the video on WhatsApp.


5. Conclusion: Automating Your Course Welcome Messages

In conclusion, using Pabbly Connect to automate sending a course welcome video via WhatsApp after payment is an efficient way to enhance customer experience. By integrating Razer Pay with WhatsApp Cloud API, you can streamline your communication process.

Ensure you check out Pabbly Connect to create business automation workflows and reduce manual tasks. Pabbly Connect currently offer integration with 2,000+ applications.

Check out Pabbly Connect – Automate your business workflows effortlessly! Sign Up Free – Start your journey with ease! 10,000+ Video Tutorials – Learn step by step! Join Pabbly Facebook Group – Connect with 21,000+ like minded people!

Follow the steps outlined in this tutorial to set up your automation seamlessly. With Pabbly Connect, you can focus more on your business while ensuring your clients receive timely welcome messages after their payments.


How to Send WhatsApp Booking Confirmation from Typeform Entry Using Pabbly Connect

Learn to send WhatsApp booking confirmations from Typeform entries using Pabbly Connect. Follow our detailed tutorial for seamless automation. This comprehensive guide reveals exactly how to connect your applications and automate repetitive tasks — accessible for professionals of all technical backgrounds.

Watch Step By Step Video Tutorial Below


1. Setting Up Pabbly Connect for WhatsApp Booking Confirmation

To send WhatsApp booking confirmations from Typeform entries, we will use Pabbly Connect. Start by visiting the Pabbly Connect website and signing in or signing up for a free account. This automation tool allows you to connect various applications without any coding knowledge.

Once logged in, you will see the dashboard. Click on the ‘Create Workflow’ button to begin setting up your automation. You will be prompted to choose between the new and classic workflow builders. Select the new one for a modern interface, then name your workflow as ‘Send WhatsApp Booking Confirmations from Typeform Entry’.


2. Triggering the Workflow with Typeform Entry

The next step is to set the trigger for our workflow. Click on ‘Add Trigger’ and select Pabbly Connect as the application. Choose ‘Typeform’ as the trigger application, then select ‘New Entry’ as the trigger event.

  • Connect your Typeform account by clicking on ‘Connect with Typeform’.
  • Grant necessary permissions for Pabbly Connect to access your Typeform data.
  • Select the specific Typeform you want to use for this automation.

After setting up the trigger, test the connection by submitting a sample entry in your Typeform. This will allow Pabbly Connect to capture the response and ensure everything is working correctly.


3. Connecting to WhatsApp Cloud API for Sending Messages

Now that we have our trigger set up, it’s time to connect to the WhatsApp Cloud API. Click on ‘Add Action’ and select ‘WhatsApp Cloud API’ as the action application. For the action event, choose ‘Send Template Message’. This is where Pabbly Connect plays a crucial role in sending automated messages.

To establish the connection, you will need to enter your WhatsApp Cloud API details, including the access token, phone number ID, and WhatsApp business account ID. You can find these details by following the instructions provided in the Pabbly Connect documentation.

  • Copy the access token from your WhatsApp Cloud API settings.
  • Paste the phone number ID and WhatsApp business account ID as required.
  • Save the connection to proceed.

Once the connection is saved, you can proceed to configure the message template that will be sent to users after they submit their booking.


4. Configuring the Message Template in Pabbly Connect

In this step, we will set up the message template that will be sent to users via WhatsApp. In the WhatsApp Cloud API settings, you will need to select the template you created earlier. Ensure that your template includes placeholders for dynamic data, such as the user’s name and appointment date. using Pabbly Connect

For the message body, map the variables from the Typeform entry to the template. This allows the message to personalize the confirmation sent to each user. Here’s how to do it:

Select the appropriate template from your WhatsApp Cloud API account. Map the user’s name and appointment date to the respective variables in the template. Save the configuration to finalize the setup.

After saving, test the action to ensure that the WhatsApp message is sent correctly. This will confirm that your workflow is fully operational.


5. Conclusion: Automate Your Booking Confirmations with Pabbly Connect

By following this tutorial, you have successfully set up an automation that sends WhatsApp booking confirmations whenever a new entry is made in Typeform. Pabbly Connect serves as the central platform that facilitates this integration seamlessly, ensuring your customers receive instant notifications.

Ensure you check out Pabbly Connect to create business automation workflows and reduce manual tasks. Pabbly Connect currently offer integration with 2,000+ applications.

Check out Pabbly Connect – Automate your business workflows effortlessly! Sign Up Free – Start your journey with ease! 10,000+ Video Tutorials – Learn step by step! Join Pabbly Facebook Group – Connect with 21,000+ like minded people!

Automation like this not only enhances customer experience but also saves time and effort in managing bookings. Now you can focus more on your business while Pabbly Connect handles the communication effortlessly.

Try this automation for your own business and enjoy the benefits of real-time notifications!

How to Integrate JustDial Enquiries with ActiveCampaign Using Pabbly Connect

Learn how to seamlessly add JustDial enquiries to ActiveCampaign for email automation using Pabbly Connect in this step-by-step tutorial. Eliminate manual repetitive tasks from your workflow. Discover proven automation methods with intuitive steps designed for efficiency-minded professionals.

Watch Step By Step Video Tutorial Below


1. Accessing Pabbly Connect for Integration

To start the integration process, access Pabbly Connect by visiting the official website. Simply search for ‘Pabbly.com/connect’ in your browser to reach the landing page. Once there, you will see options to sign in or sign up for free, depending on whether you are an existing user or a new user.

For existing users, click on the ‘Sign In’ button. This will direct you to your Pabbly Connect dashboard, where you can begin creating your workflows. Remember, Pabbly Connect is the automation tool that will connect JustDial and ActiveCampaign seamlessly.


2. Creating a New Workflow in Pabbly Connect

Once you are logged into your Pabbly Connect account, click on the ‘Create Workflow’ button to initiate a new integration. You will be prompted to select a workflow builder. Choose the new workflow builder for a modern interface, which is ideal for creating efficient automation.

Next, enter a name for your workflow and select a folder to save it in. You can create new folders if needed. After naming your workflow, click the ‘Create’ button. This will take you to the workflow window where you will set up the trigger and action for your integration.

  • Click on the ‘Add Trigger’ button.
  • Select JustDial as your trigger application.
  • Choose ‘New Leads’ as the trigger event.

With these steps completed, you are now ready to set up the connection between JustDial and Pabbly Connect.


3. Setting Up JustDial to Send Data to Pabbly Connect

After selecting JustDial as your trigger application, click on the ‘Connect’ button. You will receive a webhook URL from Pabbly Connect. This URL is crucial as it allows JustDial to send lead details to your Pabbly Connect workflow.

To complete the integration, copy the webhook URL and contact your JustDial account manager. Since JustDial does not allow users to add webhook URLs directly, you need to provide this URL to them. Once they add it to your account, Pabbly Connect will automatically receive lead details whenever a new lead is generated on JustDial.


4. Adding ActiveCampaign as an Action in Pabbly Connect

Now that you have successfully set up JustDial to send data to Pabbly Connect, it’s time to add ActiveCampaign as the action application. Click on the ‘Add Action Step’ button and select ActiveCampaign from the list of applications.

For the action event, choose ‘Create or Update a Contact’ and click ‘Connect’. You will need to provide your ActiveCampaign API URL and key. To find these, go to your ActiveCampaign account settings, navigate to the Developer section, and copy the required information.

  • Paste the API URL in Pabbly Connect without the ‘https://’ prefix.
  • Enter your API key from ActiveCampaign.
  • Click on ‘Save’ to establish the connection.

After saving, you can now map the lead details from JustDial to the fields in ActiveCampaign.


5. Mapping Fields and Finalizing the Integration

With the connection established, you will see fields for email, first name, last name, etc. You can map these fields to automatically insert data from JustDial into ActiveCampaign. Mapping allows the data to be dynamic, meaning it will change with each new lead. using Pabbly Connect

Fill in the required fields by selecting the corresponding mapped data from the JustDial response. For instance, map the first name, last name, email, and phone number. You can also assign a tag, such as ‘New Leads’, for better organization in ActiveCampaign.

Once you have completed the mapping, click on ‘Save and Send Test Request’. This will create or update a contact in your ActiveCampaign account using the details received from JustDial. You should see a confirmation message indicating that the contact has been successfully created.


Conclusion

In this tutorial, we demonstrated how to integrate JustDial enquiries with ActiveCampaign using Pabbly Connect. By following these steps, you can automate the process of adding leads to your email campaigns, enhancing your lead nurturing efforts. Embrace automation with Pabbly Connect to streamline your business processes today!

Ensure you check out Pabbly Connect to create business automation workflows and reduce manual tasks. Pabbly Connect currently offer integration with 2,000+ applications.

How to Automatically Add Leads from WhatsApp Chatbot to Zoho CRM Using Pabbly Connect

Learn how to automate the process of adding leads from WhatsApp Chatbot to Zoho CRM using Pabbly Connect in this detailed step-by-step tutorial. This comprehensive guide reveals exactly how to connect your applications and automate repetitive tasks — accessible for professionals of all technical backgrounds.

Watch Step By Step Video Tutorial Below


1. Creating a WhatsApp Chatbot Using Pabbly Chatflow

To start the integration process, you need to create a WhatsApp chatbot using Pabbly Connect. This chatbot will help collect lead information from potential customers. First, visit the Pabbly Chatflow website and sign in to your account.

Once logged in, navigate to the flow section and click on the ‘Add Flow’ button. Name your flow appropriately, such as ‘WhatsApp Lead Collector.’ Set up the trigger for when a new message is received. This is crucial as it will initiate the workflow every time a user interacts with the bot.


2. Configuring Questions to Collect Lead Information

Next, you will configure the questions that your WhatsApp bot will ask potential leads. This is done in Pabbly Chatflow, where you can set up a series of questions to gather essential information.

  • Ask for the user’s full name.
  • Request their WhatsApp number.
  • Inquire about their email address.
  • Ask for their preferred location or city.
  • Determine their budget range.
  • Ask what type of property they are looking for.

These questions will help you gather comprehensive lead data. Once the questions are set, ensure that each answer is mapped correctly to the corresponding fields in Pabbly Connect.


3. Integrating Pabbly Connect with Zoho CRM

After configuring the WhatsApp bot, the next step is to integrate Pabbly Connect with Zoho CRM. This integration will allow you to automatically add the gathered lead information into your Zoho CRM account.

To set up this integration, go to the Pabbly Connect dashboard and create a new workflow. Select the trigger application as Pabbly Chatflow and choose the event ‘New Message Received.’ Pabbly Connect will provide a webhook URL that you will need to add to your WhatsApp bot configuration.

In the action step, select Zoho CRM as your action application and choose ‘Create Contact’ as the action event. Here, you will map the fields from your WhatsApp bot to the corresponding fields in Zoho CRM, ensuring that all lead information is accurately captured.


4. Testing the Integration

Once you have set up the integration between Pabbly Connect and Zoho CRM, it’s essential to test the workflow to ensure everything is functioning correctly. Send a test message to your WhatsApp bot and interact with it as a potential lead.

After providing the required information, check your Zoho CRM account to see if the new contact has been created successfully. You should see all the details filled in correctly, including the lead source marked as WhatsApp. This confirms that your integration is working as intended.


5. Conclusion

In this tutorial, you learned how to automate the process of adding leads from your WhatsApp chatbot to Zoho CRM using Pabbly Connect. By following these steps, you can save time and manage your leads more efficiently. Automating this process ensures no lead is missed and that your CRM is always up to date.

Ensure you check out Pabbly Connect to create business automation workflows and reduce manual tasks. Pabbly Connect currently offer integration with 2,000+ applications.

With Pabbly Connect, you can streamline various workflows and enhance your business operations effectively. Start integrating your applications today for seamless automation!