Automate Lead Transfer from Contact Form 7 to GoHighLevel

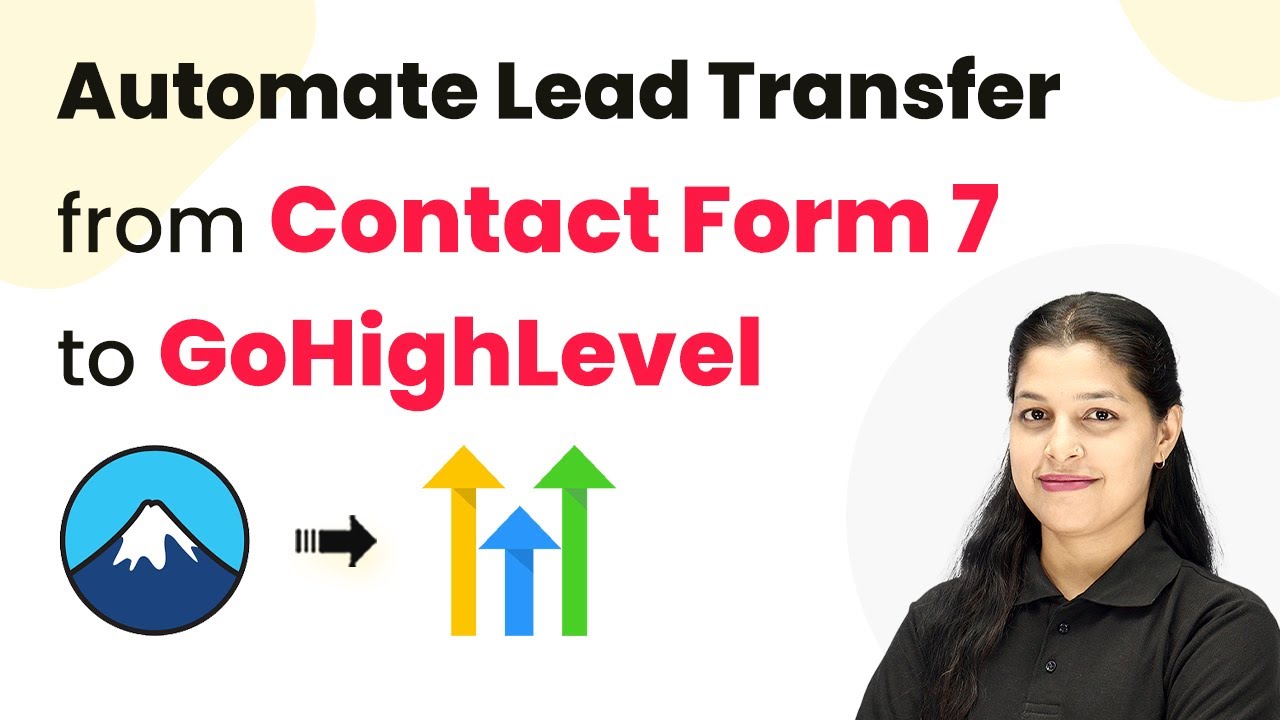
Learn how to automate lead transfer from Contact Form 7 to GoHighLevel using Pabbly Connect with this step-by-step tutorial. No coding needed! Master proven automation processes with practical implementation examples and strategic recommendations you can apply immediately in your workflow.

Watch Step By Step Video Tutorial Below


1. Access Pabbly Connect for Automation

To automate lead transfer from Contact Form 7 to GoHighLevel, start by accessing Pabbly Connect. Open a new tab and enter the URL Pabbly.com/connect. This will take you to the Pabbly Connect homepage.

If you are new to Pabbly Connect, click on ‘Sign up free’ to create an account. Existing users can simply sign in. Once logged in, you will see the Pabbly apps page where you can access Pabbly Connect to create your automation.


2. Create a Workflow in Pabbly Connect

After accessing Pabbly Connect, you will need to create a new workflow. Click on the ‘Create Workflow’ button. You will be prompted to choose between creating from scratch or using AI. Select ‘Create from scratch’ for this automation.

  • Choose the beta workflow builder for a modern approach.
  • Name your workflow as ‘Automate Lead Transfer from Contact Form 7 to GoHighLevel’.
  • Select the folder where you want to save this workflow.

Click on the ‘Create’ button to finalize your workflow setup in Pabbly Connect. You will now be able to add a trigger to start the automation.


3. Set Up Trigger for Contact Form 7

The trigger is the first application that initiates your workflow. In this case, you will select Contact Form 7 as the trigger app in Pabbly Connect. Click on the ‘Add Trigger’ button and search for ‘Contact Form 7’.

Once selected, set the app event to ‘New Form Submission’ and click on the ‘Connect’ button. You will receive a webhook URL which acts as a bridge between Pabbly Connect and Contact Form 7. Copy this URL and proceed to your WordPress account.


4. Configure Contact Form 7 to Use Webhook

In your WordPress account, navigate to the Contact Form 7 settings. Click on the form you want to use, and then select the ‘Webhooks’ option. Paste the webhook URL you copied from Pabbly Connect into the designated field.

  • Enable the ‘Send to Webhook’ option.
  • Save the changes to your Contact Form 7 settings.

After saving, create a new page in WordPress to publish your form. Add the generated shortcode for your form and publish the page. This will allow users to submit leads through your Contact Form 7.


5. Add Action Step to Create Contact in GoHighLevel

Now that your trigger is set up in Pabbly Connect, it’s time to add an action step. Click on the ‘Add New Action Step’ button and search for ‘Lead Connector’, which is the app for GoHighLevel.

Select the action event as ‘Create Contact’ and click on the ‘Connect’ button. If this is your first time connecting, you will need to create a new connection by allowing access to your GoHighLevel account. Once connected, you can map the fields from Contact Form 7 to GoHighLevel, such as first name, last name, email, and phone number.

After mapping the fields, click on ‘Save and Send Test Request’. If successful, you will see the new contact created in your GoHighLevel account, confirming that your automation is working seamlessly.


Conclusion

By following these steps, you can efficiently automate lead transfer from Contact Form 7 to GoHighLevel using Pabbly Connect. This integration allows you to eliminate manual data entry and streamline your workflow. Start using Pabbly Connect today to enhance your business automation!

Ensure you check out Pabbly Connect to create business automation workflows and reduce manual tasks. Pabbly Connect currently offer integration with 2,000+ applications.

How to Create Instagram Developer App and Connect with Pabbly Connect

Learn how to create an Instagram Developer App and connect it seamlessly with Pabbly Connect for effective automation management. Discover hidden automation capabilities within your existing tools. This guide shows you how to connect your essential applications and permanently eliminate redundant manual processes.

Watch Step By Step Video Tutorial Below


1. Accessing Pabbly Connect for Instagram Integration

To create an Instagram Developer App and connect it with Pabbly Connect, start by accessing the Pabbly Connect platform. Open a new tab in your browser and navigate to pabbl.com/connect. Once there, you’ll find the option to sign up for free in the top right corner.

By signing up, you can explore Pabbly Connect with 100 free tasks every month. This allows you to create and test various automations, including those for Instagram. After signing up, you can proceed to the workflow builder, which is essential for setting up your integrations.


2. Creating an Instagram Developer App

The next step involves creating your Instagram Developer App. In the Pabbly Connect workflow builder, click on the add trigger button and search for ‘Instagram for Developer’. Select this option to begin the integration process. using Pabbly Connect

  • Click on the ‘New Comment’ event to automate Instagram comments.
  • Connect to your Instagram account by adding a new connection.
  • Follow the on-screen prompts to obtain your token and account identifier.

After selecting the event, you’ll be prompted to create a new connection. Click on the relevant button to proceed with obtaining your access token and account ID, which are crucial for the integration.


3. Accessing the Meta Developer Portal

To obtain the necessary credentials, you must access the Meta Developer Portal. Go to developers.facebook.com, and navigate to the ‘My Apps’ section. Here, you can create a new app by clicking on the ‘Create App’ button.

When prompted, name your app (e.g., ‘Testing’) and proceed to select the business messaging use case. This is essential for managing Instagram content through Pabbly Connect. After setting up your app, follow the instructions to complete the app creation process.


4. Configuring App Roles and Permissions

Once your app is created, you need to configure app roles and permissions. In the app dashboard, navigate to the ‘Use Cases’ section and click on ‘Customize’. Here, you will see options to add required permissions.

  • Add the Instagram account you wish to use for automation.
  • Select the ‘Add People’ button to search for your Instagram account.
  • Grant the necessary permissions for your app to function correctly.

After adding your Instagram account, ensure that you accept any permission requests that appear. This step is crucial for the successful integration of Instagram with Pabbly Connect.


5. Generating Access Tokens and Finalizing Setup

Now it’s time to generate your access token. In the app settings, locate the option to generate a new token. Click on this to initiate the process. Ensure that your Instagram account is logged in to avoid any issues during token generation.

Once the token is generated, copy it and paste it into your Pabbly Connect workflow. Additionally, you will need to configure the webhook settings by entering the callback URL and verification token provided in the Pabbly Connect documentation.

After saving your settings, you can publish your app, which will finalize the connection between Instagram and Pabbly Connect. With your app published, you can now automate tasks such as managing comments and sending notifications based on new comments.


Conclusion

In summary, this tutorial has guided you through creating an Instagram Developer App and connecting it with Pabbly Connect. By following these steps, you can efficiently automate your Instagram activities and manage content effectively. Explore the capabilities of Pabbly Connect for your automation needs today!

Ensure you check out Pabbly Connect to create business automation workflows and reduce manual tasks. Pabbly Connect currently offer integration with 2,000+ applications.

Build an AI Chatbot in Pabbly Chatflow (Step-by-Step Tutorial)

Learn how to build an AI chatbot using Pabbly Chatflow in this detailed step-by-step tutorial. Integrate WhatsApp and automate responses effortlessly. Discover how to design chat experiences that feel personal and responsive while handling customer inquiries automatically around the clock.

Watch Step By Step Video Tutorial Below


1. Accessing Pabbly Chatflow for Your AI Chatbot

To start building your AI chatbot, access Pabbly Chatflow by visiting Pabbly.com/chartflow. This platform is essential for automating WhatsApp messages and responses for your business.

If you are new to Pabbly, click on the ‘Sign Up Free’ option to receive 100 free credits each month. Existing users should click on ‘Sign In’ to access their dashboard. Once logged in, navigate to the Pabbly Chatflow section to begin your project.


2. Creating Your AI Assistant in Pabbly Chatflow

After accessing Pabbly Chatflow, select the AI Assistant option to start creating your automated assistant. Click the ‘+ Add Assistant’ button to begin the setup process.

  • Enter the name for your AI assistant.
  • Choose the instruction type as ‘AI Agent’.
  • Set the temperature for creativity in replies.

Once you have configured these settings, proceed by selecting the model provider as OpenAI and the model as GPT-4 Mini. This setup is crucial for your AI assistant’s functionality.


3. Configuring Your API Key in Pabbly Chatflow

In this step, you will need to enter your OpenAI API key to enable your AI assistant to function. Go to the OpenAI platform and create a new secret key by clicking on the ‘+ Create New Secret Key’ button.

Once you have generated the API key, copy it and paste it into the corresponding field in Pabbly Chatflow. After pasting, click on the ‘Connect’ button to save your API key successfully. This step is vital as it allows your AI assistant to access AI capabilities.


4. Designing Your AI Assistant Interface in Pabbly Chatflow

Designing your AI assistant’s interface is a critical step in using Pabbly Chatflow. You can customize the header and footer messages, as well as set the initial message to greet users.

  • Set a header message for welcoming users.
  • Add a footer message for closing conversations.
  • Define the initial message to initiate interaction.

After you have configured these settings, click on the ‘Save AI Assistant’ button to finalize your design. This step ensures that your assistant is ready for user interactions.


5. Finalizing Your AI Assistant Settings in Pabbly Chatflow

To complete the setup of your AI assistant in Pabbly Chatflow, navigate to the inbox settings. Enable the ‘AI Auto Reply’ toggle and select your contact list.

Finally, save your settings to activate your AI assistant. This setup allows your assistant to respond to users automatically, ensuring efficient communication without manual intervention.

By following these steps, you have successfully built an AI chatbot using Pabbly Chatflow. This tool enables you to automate responses on WhatsApp, enhancing user experience and operational efficiency.


Conclusion

In this tutorial, we demonstrated how to build an AI chatbot using Pabbly Chatflow, focusing on automation and user interaction. This powerful tool streamlines your communication processes and enhances user engagement.

Ensure you check out Pabbly Connect to create business automation workflows and reduce manual tasks. Pabbly Connect currently offer integration with 2,000+ applications.

This Automation Sends LinkedIn Leads Straight to CRM

Learn how to automate LinkedIn leads to your CRM using Pabbly Connect. This step-by-step tutorial guides you through the entire process. Explore efficient methods for automating routine tasks with clear, concise instructions suited for both newcomers and experienced professionals.

Watch Step By Step Video Tutorial Below


1. Accessing Pabbly Connect for Lead Automation

To automate LinkedIn leads to your CRM, the first step is to access Pabbly Connect. This platform enables seamless integration between LinkedIn and your CRM application.

Open a new tab and navigate to Pabbly.com/connect. If you’re new to Pabbly Connect, you can sign up for free to receive 100 tasks per month. This allows you to explore the features of Pabbly Connect without any initial investment.


2. Creating Your Workflow in Pabbly Connect

After signing into your account, create a new workflow in Pabbly Connect. This workflow will consist of two main components: a trigger and an action.

  • Select LinkedIn as your trigger application.
  • Choose the event as ‘Lead Notification’.
  • Click the ‘Connect’ button to establish a connection with LinkedIn.

By following these steps, you will set up the trigger that captures new leads generated through LinkedIn ads directly into Pabbly Connect.


3. Configuring the LinkedIn Trigger in Pabbly Connect

Once your workflow is created, configure the LinkedIn trigger in Pabbly Connect. Enter your LinkedIn account credentials to connect.

After logging in, you will need to refresh the fields to see your LinkedIn account. Select your account and click on the ‘Save and Send Test Request’ button. This step ensures that Pabbly Connect is properly receiving data from LinkedIn.


4. Adding Pipe Drive as an Action in Pabbly Connect

Now that your LinkedIn trigger is set, it’s time to add Pipe Drive as the action application in your workflow. Select Pipe Drive and choose the event ‘Create a Person’.

  • Connect your Pipe Drive account by entering the API key found in your Pipe Drive settings.
  • Map the fields from LinkedIn to Pipe Drive, including first name, last name, email, and phone number.

This mapping allows Pabbly Connect to automatically transfer lead details from LinkedIn to Pipe Drive, ensuring no data is lost.


5. Testing Your Automation with Pabbly Connect

To finalize your setup, test the automation. Generate a new lead through your LinkedIn ad and check if it appears in your Pipe Drive CRM.

Upon generating a lead, Pabbly Connect should capture the lead details and display them. Check your Pipe Drive contacts to confirm that the new lead has been added successfully.

This testing phase ensures that your automation is functioning correctly and that every new lead from LinkedIn is recorded in your CRM without manual entry.


Conclusion

In this tutorial, we demonstrated how to automate LinkedIn leads to your CRM using Pabbly Connect. By following the outlined steps, you can ensure that every lead generated is seamlessly integrated into your Pipe Drive CRM, enhancing your lead management process.

Ensure you check out Pabbly Connect to create business automation workflows and reduce manual tasks. Pabbly Connect currently offer integration with 2,000+ applications.

Create Salesforce Leads from New WhatsApp Messages

Learn how to automate Salesforce lead creation from WhatsApp messages using Pabbly Connect. Step-by-step tutorial for seamless integration. Learn to create powerful connections between your critical applications without requiring specialized programming knowledge or extensive technical background.

Watch Step By Step Video Tutorial Below


1. Accessing Pabbly Connect for Automation

To start automating Salesforce lead creation from WhatsApp messages, first, access Pabbly Connect by visiting Pabbly.com/connect. This platform allows you to integrate various applications seamlessly without any coding.

If you are new to Pabbly Connect, click on the ‘Sign Up Free’ option to create an account. Existing users can simply sign in. After logging in, navigate to the Pabbly Connect dashboard by clicking the ‘Access Now’ button. Here, you can manage your workflows efficiently.


2. Creating a Workflow in Pabbly Connect

Once you are in the dashboard of Pabbly Connect, click on the ‘+ Create Workflow’ button. You will be prompted to name your workflow; enter ‘Create Salesforce Leads from New WhatsApp Messages’ and select a folder if desired.

  • Click on the ‘Create’ button to finalize your workflow setup.
  • Select ‘Pabbly Chatflow’ as your trigger application.
  • Choose ‘New Message Received’ as the event to trigger the workflow.

After selecting the trigger, click on the ‘Connect’ button. This action will generate a webhook URL that you will use to connect your WhatsApp messages to Pabbly Connect. Copy this URL for the next steps.


3. Setting Up the WhatsApp Chatbot

Now, go to your Pabbly Chatflow and set up an API request node to connect it with Pabbly Connect. In your chatbot flow, add the API request node between your message prompts and configure it to send data to the webhook URL you copied earlier.

Make sure to set the request type to POST and select parameters for the user data you want to send, such as full name, contact number, and email address. This ensures that whenever a new message is received, the data will be sent to Pabbly Connect.


4. Mapping Data to Salesforce

After configuring your chatbot, return to Pabbly Connect and set up the next application, which is Salesforce. Choose ‘Create Contact’ as the action event. Click on ‘Connect’ and authorize Pabbly Connect to access your Salesforce account.

  • Map the first name, last name, email, and contact number fields from the previous application (Pabbly Chatflow).
  • Ensure that you select the correct response format for the data being sent.

Once the mapping is complete, click on ‘Save and Send Test Request’ to verify that the contact is created in Salesforce. Refresh your Salesforce account to see the new contact reflecting the details you specified in the chatbot.


5. Finalizing Your Automation Workflow

After successfully mapping the data, ensure that the toggle for your workflow in Pabbly Connect is enabled. This step is crucial; otherwise, your automation will not function as intended.

Finally, test the entire process by sending a test message through your WhatsApp chatbot. If everything is set up correctly, a new lead should appear in your Salesforce account without any manual input. This automation saves time and streamlines your lead capture process.


Conclusion

In this tutorial, we explored how to automate the creation of Salesforce leads from new WhatsApp messages using Pabbly Connect. This integration simplifies lead management and enhances your business efficiency. Start using this powerful automation today!

Ensure you check out Pabbly Connect to create business automation workflows and reduce manual tasks. Pabbly Connect currently offer integration with 2,000+ applications.

Auto-Send Calendly Appointment Alerts Using WhatsApp

Learn how to automate WhatsApp appointment alerts from Calendly using Pabbly Connect. Follow our step-by-step guide to streamline your appointment reminders. Follow this definitive guide to creating powerful automated workflows with straightforward, efficiency-focused solutions that save valuable time.

Watch Step By Step Video Tutorial Below


1. Accessing Pabbly Connect for Appointment Alerts

To begin automating WhatsApp appointment alerts, first access Pabbly Connect by visiting the official website. If you’re a new user, you can sign up for a free account, which provides 100 free tasks every month. If you already have an account, click on the sign-in button to access your dashboard.

Once logged in, navigate to the dashboard of Pabbly Connect. Here, you can create a new workflow by selecting the ‘Create Workflow’ button. Choose to create from scratch and select the workflow builder that suits your preference, either the new beta version or the classic version.


2. Setting Up the Trigger with Calendly

In this step, you will set up the trigger application, which is Calendly. Click on the ‘Add Trigger’ button and search for Calendly. Select it as your trigger application. For the event, choose ‘New Invitee Created’ to ensure your workflow activates whenever a new appointment is booked in Calendly.

  • Select ‘New Invitee Created’ as the event.
  • Click ‘Connect’ to establish a connection with Calendly.
  • Choose ‘Add New Connection’ if this is your first setup.

After connecting, you will need to select your organization and user details. Once done, click on ‘Save and Send Test Request’ to verify the connection. This allows Pabbly Connect to receive data from Calendly whenever a new appointment is scheduled.


3. Sending WhatsApp Alerts via Pabbly Connect

After setting up the trigger, the next step is to send WhatsApp alerts. Add a new action step by clicking on the ‘+’ button, then search for the WhatsApp Cloud API. Choose ‘Send Text Message’ as your action event to send a reminder to your clients.

  • Select ‘Send Text Message’ as the action event.
  • Connect to WhatsApp by adding your access token and phone number ID.
  • Map the recipient’s phone number from the previous step.

This setup ensures that every time a new appointment is created in Calendly, Pabbly Connect will trigger a WhatsApp message to the client, reminding them of their upcoming appointment.


4. Formatting Date and Time for Alerts

To ensure the date and time are readable, you will need to format these details before sending them in the WhatsApp message. Add a new step using the Date and Time Formatter application in Pabbly Connect. Choose the appropriate formatting options to convert the date into a user-friendly format.

Map the date received from Calendly into the Date and Time Formatter. Specify the original format and the desired output format. This process will help in crafting a clear message that includes the appointment details in a readable format for the client.


5. Delaying Alerts Before Sending

Finally, to customize the timing of your alerts, add a delay step in Pabbly Connect. Use the Delay by Pabbly feature to set the alert to be sent 24 hours before the scheduled appointment. This ensures clients receive their reminders at the right time.

In this step, select ‘Delay Until’ and input the calculated date and time that is 24 hours prior to the appointment. This will involve mapping the date from the previous Date and Time Formatter step and adjusting it accordingly.

With this delay set, your workflow is now complete. Whenever a new appointment is scheduled, Pabbly Connect will automatically send a WhatsApp reminder to the client, ensuring they are informed well in advance.


Conclusion

Using Pabbly Connect, you can seamlessly automate WhatsApp appointment alerts from Calendly, ensuring that your clients never miss their appointments. By following these steps, you can enhance communication and improve client satisfaction.

Ensure you check out Pabbly Connect to create business automation workflows and reduce manual tasks. Pabbly Connect currently offer integration with 2,000+ applications.

Launch Your Own AI Assistant to Engage and Support Customers

Learn how to create your own AI assistant using Pabbly Chatflow. This detailed tutorial guides you through the integration process with WhatsApp and more. Discover how to design chat experiences that feel personal and responsive while handling customer inquiries automatically around the clock.

Watch Step By Step Video Tutorial Below


1. Accessing Pabbly Chatflow to Create Your AI Assistant

To create your AI assistant, first access Pabbly Chatflow by visiting Pabbly.com/chatflow. You can sign up for a free account to start building your assistant. Once logged in, you will land on the Pabbly Chatflow dashboard, where you can begin the setup process.

After logging in, locate the option to add your WhatsApp number. You can choose between connecting via WhatsApp Connect or using a manual token. This step is crucial as it enables the integration of your AI assistant with WhatsApp, allowing you to engage with customers effectively.


2. Building Your AI Assistant in Pabbly Chatflow

Once you are in Pabbly Chatflow, navigate to the AI Assistant section in the sidebar. Click on the ‘Add AI Assistant’ button to start creating your assistant. Enter a name for your assistant, such as ‘Legal Consultation AI Assistant,’ to identify its purpose.

  • Click on the AI Assistant tab in the sidebar.
  • Select the ‘Add AI Assistant’ button.
  • Provide a name for your assistant.

After naming your assistant, you will be directed to the configuration page. Here, you can set the instruction type for your AI assistant. Choose ‘AI agent’ as the instruction type to optimize its performance. This configuration allows your assistant to respond accurately to customer inquiries.


3. Uploading Knowledge Base for Your AI Assistant

In this section, you will upload the knowledge base that your AI assistant will utilize to respond to customer queries. Navigate to the Knowledge Source tab within Pabbly Chatflow and select the option to upload a file. Ensure your knowledge base is in either TXT or PDF format.

  • Go to the Knowledge Source tab.
  • Click on the ‘Choose or drag a file here’ button.
  • Upload your knowledge base file.

After uploading, your AI assistant will have access to the necessary information to assist customers effectively. This step ensures that the assistant can answer queries accurately based on the information provided in the knowledge base.


4. Configuring Your AI Assistant Settings

Next, you need to configure the settings of your AI assistant in Pabbly Chatflow. This includes setting up the header and footer messages that will be displayed during customer interactions. Enable the toggle for displaying the powered by Pabbly label if you want to showcase the platform.

You can also set up stop keywords that will halt the assistant’s responses if needed. Adjust the retry attempts to define how many times the assistant should attempt to respond if it fails initially. This configuration is essential for ensuring smooth communication with customers.


5. Enabling Your AI Assistant for Customer Engagement

Finally, to activate your AI assistant for customer interactions, navigate to the settings and select the inbox settings option. Here, enable AI auto replies for all contacts or a specific contact list. This allows your assistant to engage with customers automatically. using Pabbly Connect

To enable it for a particular chat, go to the inbox, select the chat, and choose the AI assistant you created. Click save, and your AI assistant will be ready to assist customers in real-time.


Conclusion

By following these steps in Pabbly Chatflow, you can successfully launch your own AI assistant to engage and support customers. This automation tool streamlines customer interactions and enhances business efficiency.

Ensure you check out Pabbly Connect to create business automation workflows and reduce manual tasks. Pabbly Connect currently offer integration with 2,000+ applications.

Send WhatsApp Business Messages for New Google Sheets Rows

Learn how to automate sending WhatsApp Business messages for new rows in Google Sheets using Pabbly Connect. Follow our detailed step-by-step tutorial. Master proven automation processes with practical implementation examples and strategic recommendations you can apply immediately in your workflow.

Watch Step By Step Video Tutorial Below


1. Accessing Pabbly Connect for Automation

To automate sending WhatsApp Business messages for new rows in Google Sheets, start by accessing Pabbly Connect. Go to the Pabbly website and select ‘Connect’ to begin your automation journey.

If you are new to Pabbly, click on the ‘Sign Up Free’ option to create your account. Existing users can simply sign in. Once logged in, navigate to the Pabbly Connect dashboard by clicking on the ‘Access Now’ button. Here, you can manage all your automation workflows.


2. Creating a New Workflow in Pabbly Connect

In this section, we will create a new workflow in Pabbly Connect. Click on the ‘Create Workflow’ button and select the option to create from scratch. Name your workflow ‘Send WhatsApp Business Messages for New Google Sheets Rows’ and choose the appropriate folder.

  • Click on the ‘Plus’ icon to add a new trigger.
  • Select ‘Google Sheets’ as the trigger application.
  • Choose the event ‘New or Updated Spreadsheet Row’.

After selecting the trigger, click on the ‘Connect’ button. You will receive a webhook URL, which you need to copy for the next step. This URL is crucial as it links your Google Sheets to Pabbly Connect.


3. Setting Up Google Sheets with Pabbly Connect

Next, open your Google Sheets and navigate to the ‘Extensions’ menu. Click on ‘Pabbly Connect Webhooks’ and select ‘Initial Setup’. Here, paste the webhook URL you copied earlier.

  • Set the trigger column to the final data column, which is typically column F.
  • Click ‘Send Test’ to verify the connection.

Once the test is successful, click on the ‘Submit’ button to finalize your setup. Ensure that the ‘Send On Event’ toggle is active, or else Pabbly Connect won’t receive any responses from Google Sheets.


4. Sending WhatsApp Messages Using Pabbly Connect

Now that the Google Sheets setup is complete, it’s time to configure the action step in Pabbly Connect. Click on the plus icon to add an action application and select ‘Pabbly Chatflow’.

Choose the event ‘Send Template Message’. Connect your Pabbly Chatflow account by entering the API token.

Once connected, map the recipient mobile number from the previous Google Sheets step. This is crucial for personalizing the message sent to the user. Select the appointment confirmation message template you previously created in Pabbly Chatflow and fill in the necessary fields using the data mapped from Google Sheets.


5. Finalizing and Testing the Automation

After setting up the message template, review all fields to ensure they are correctly mapped. Click on the ‘Save and Send Test Request’ button to send a test message. You should receive a confirmation message on your WhatsApp.

Remember, the recipient mobile number must include the country code without the plus sign. Once you confirm that the message is sent successfully, your automation is ready to go live. Make sure to enable the workflow toggle in Pabbly Connect to activate your automation.

Conclusion

This guide summarizes the key points and helps you understand the essential features and benefits of using this tool.

Ensure you check out Pabbly Connect to create business automation workflows and reduce manual tasks. Pabbly Connect currently offer integration with 2,000+ applications.


By following these steps, you can automate WhatsApp Business messages for new entries in Google Sheets using Pabbly Connect. This powerful integration streamlines communication and enhances customer engagement in your business.

Create CRM Contacts Automatically from Jotform Entries

Learn how to automate the creation of CRM contacts from Jotform entries using Pabbly Connect. Follow our step-by-step tutorial to streamline your workflow. Discover how to seamlessly connect your essential tools through accessible instructions that make powerful automation available to professionals at every skill level.

Watch Step By Step Video Tutorial Below


1. Accessing Pabbly Connect for Jotform and HubSpot Integration

To automate the creation of CRM contacts from Jotform entries, you need to access Pabbly Connect. Start by opening a new tab and entering the URL Pabbly.com/connect. This will take you to the Pabbly homepage where you can either sign in or sign up for free.

If you are a new user, click on ‘Sign Up Free’ to create your account. Existing users can simply sign in. Once you log in, navigate to the Pabbly Connect app from your dashboard to start creating your automation.


2. Creating a New Workflow in Pabbly Connect

After accessing Pabbly Connect, you will see options to create a new workflow. Click on the ‘Create Workflow’ button. You will be prompted to choose between creating from scratch or using AI. For this integration, select ‘Create from Scratch’ to build your workflow manually.

  • Choose the workflow builder – select the beta version for a modern experience.
  • Name your workflow, e.g., ‘Add Jotform Leads to HubSpot CRM.’
  • Select a folder for better organization, such as ‘Automation.’

Click the ‘Create’ button to proceed to the workflow page where you can set up your trigger and action.


3. Setting Up the Trigger for Jotform Entries

In the workflow page, the first step is to set up the trigger app. For this integration, select Pabbly Connect as your trigger app and choose ‘Jotform’ as the application that will initiate the workflow.

Click on the ‘Add Trigger’ button and select ‘New Response’ as the event. You will receive a webhook URL that acts as a bridge between Pabbly Connect and Jotform. Copy this URL and move to your Jotform account to configure the webhook.


4. Configuring Jotform to Use the Webhook URL

In your Jotform dashboard, navigate to the form you want to use for this integration. Click on ‘Edit Form’ and then go to the ‘Settings’ tab. From there, select ‘Integrations’ and search for the ‘Webhook’ option.

  • Paste the copied webhook URL into the provided field.
  • Complete the integration setup by clicking ‘Complete Integration.’

This will enable Jotform to send new entries to Pabbly Connect automatically. You can then return to Pabbly Connect to test the webhook response.


5. Adding HubSpot as the Action App in Pabbly Connect

Now that your Jotform webhook is set up, it’s time to add HubSpot as the action app. In Pabbly Connect, click on the action step and search for ‘HubSpot CRM.’ Select it and choose ‘Create a Contact’ as the event.

Click on the ‘Connect’ button to establish a connection. If you have an existing connection, you can select it; otherwise, click on ‘Add New Connection’ and authenticate your HubSpot account. Once connected, you will need to map the fields from your Jotform response to HubSpot fields.

Map the fields such as first name, last name, email, and phone number from the Jotform entry to the corresponding fields in HubSpot. After mapping, click on ‘Save and Send Test Request’ to ensure the integration works correctly. Once you receive a positive response, check your HubSpot CRM to confirm that the contact has been created successfully.


Conclusion

By following this tutorial, you can automate the process of creating CRM contacts from Jotform entries using Pabbly Connect. This integration not only saves time but also streamlines your workflow, allowing you to focus on more important tasks. Start using Pabbly Connect today to enhance your business automation.

Ensure you check out Pabbly Connect to create business automation workflows and reduce manual tasks. Pabbly Connect currently offer integration with 2,000+ applications.

Automate Any Business with an AI Assistant on WhatsApp

Learn how to automate your business with an AI assistant on WhatsApp using Pabbly Chatflow. Step-by-step tutorial for seamless integration. Create intelligent chat experiences that delight users while collecting valuable information and moving prospects through your sales process.

Watch Step By Step Video Tutorial Below


1. Accessing Pabbly Chatflow for Your AI Assistant

To automate your business with an AI assistant on WhatsApp, you first need to access Pabbly Chatflow. Open a new tab and navigate to Pabbly.com/chatflow. If you are new to Pabbly, click on the ‘Sign Up Free’ option to create an account and receive 100 free credits every month.

If you are an existing user, simply click on ‘Sign In’. After logging in, locate the Pabbly Chatflow application and click on the ‘Access Now’ button. This action will take you to the Pabbly Chatflow dashboard, where you can manage all your WhatsApp numbers in one place.


2. Creating Your AI Assistant in Pabbly Chatflow

Once you are in the Pabbly Chatflow dashboard, the next step is to create your AI assistant. Click on the ‘AI Assistant’ button to access the AI assistant page. Here, you can train your AI assistant with a knowledge base to answer common questions. using Pabbly Connect

  • Click on the ‘+ AI Assistant’ button.
  • Enter a name for your assistant, such as ‘Automate Any Business with an AI Assistant on WhatsApp’.
  • Select the instruction type as ‘AI Agent’.

After entering the assistant name, you will be directed to the settings page. Here, you can customize instructions, set the temperature for creativity, and select the model provider as Open AI.


3. Configuring AI Settings in Pabbly Chatflow

In this section, you’ll configure essential settings for your AI assistant using Pabbly Chatflow. After selecting the model, you will need to enter your OpenAI API key. Click on the ‘Open AI API Keys Page’ button to generate your key.

  • Click on ‘Create New Secret Key’.
  • Copy the generated key and paste it into the appropriate field in Pabbly Chatflow.

Next, set the header and footer messages that will be sent to users at the start and end of conversations. These messages provide a welcoming tone and essential contact information. You can also define stop keywords that will pause the conversation when triggered.


4. Uploading Knowledge Source for Your AI Assistant

To enhance the capabilities of your AI assistant, you need to upload a knowledge source file in Pabbly Chatflow. This file serves as the information bank for your assistant, allowing it to provide accurate and business-specific answers.

Ensure your knowledge source file is in PDF or TXT format and less than 90 MB. After preparing your file, drag and drop it into the designated area in the Pabbly Chatflow interface. This action will upload the knowledge source successfully, enabling your assistant to answer queries effectively.


5. Finalizing Your AI Assistant Setup

After configuring all settings and uploading the knowledge source, it’s time to finalize your AI assistant setup in Pabbly Chatflow. Enter a heading and subheading for your assistant, such as ‘AI Assistant for Any Business’. Customize the initial message to greet users, like ‘Hi there, how can I help you today?’.

Once you are satisfied with the settings, enable the toggle to activate your AI assistant. Click on the ‘Save Assistant’ button to save your configurations. Finally, navigate to the inbox settings and enable the AI auto-reply feature to ensure your assistant responds to inquiries automatically.


Conclusion

Using Pabbly Chatflow, you can easily automate your business with an AI assistant on WhatsApp. This step-by-step tutorial guides you through the process of creating an AI assistant tailored to your specific needs. With Pabbly Chatflow, you can enhance customer interactions and streamline communication effortlessly.

Ensure you check out Pabbly Connect to create business automation workflows and reduce manual tasks. Pabbly Connect currently offer integration with 2,000+ applications.