Automate Fitness Class Bookings and Membership Renewal via WhatsApp with Pabbly Chatflow

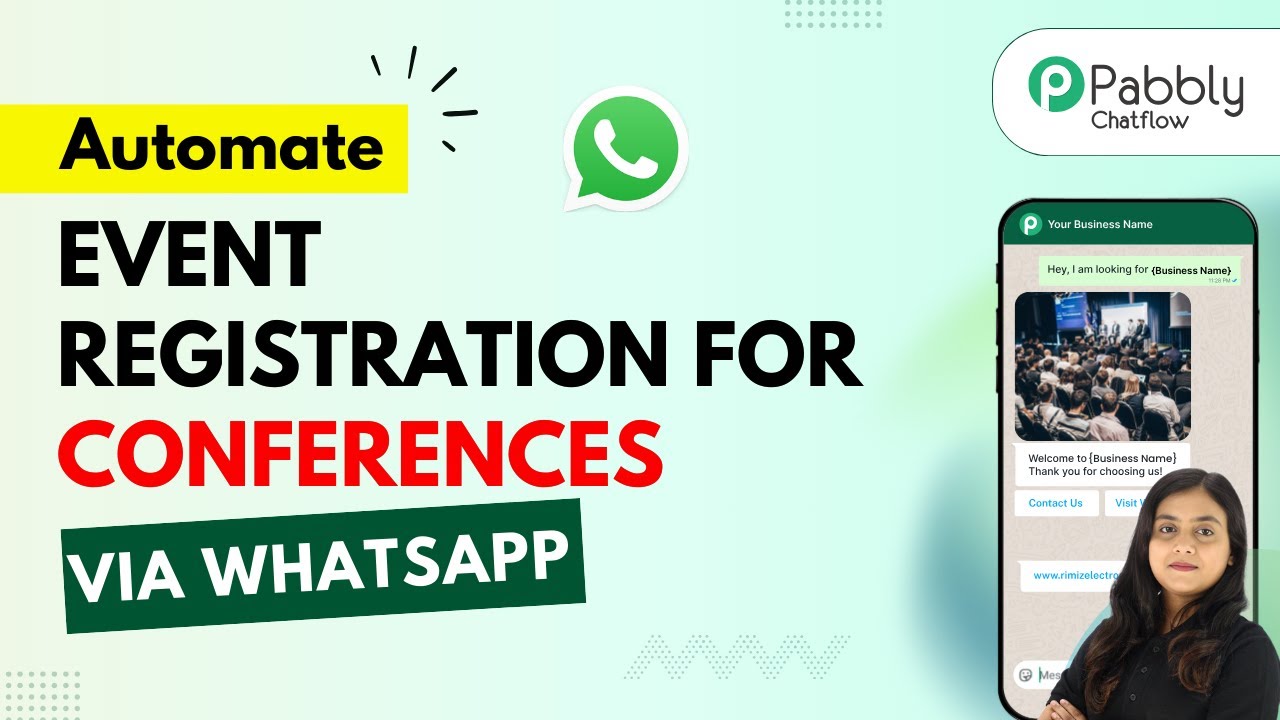
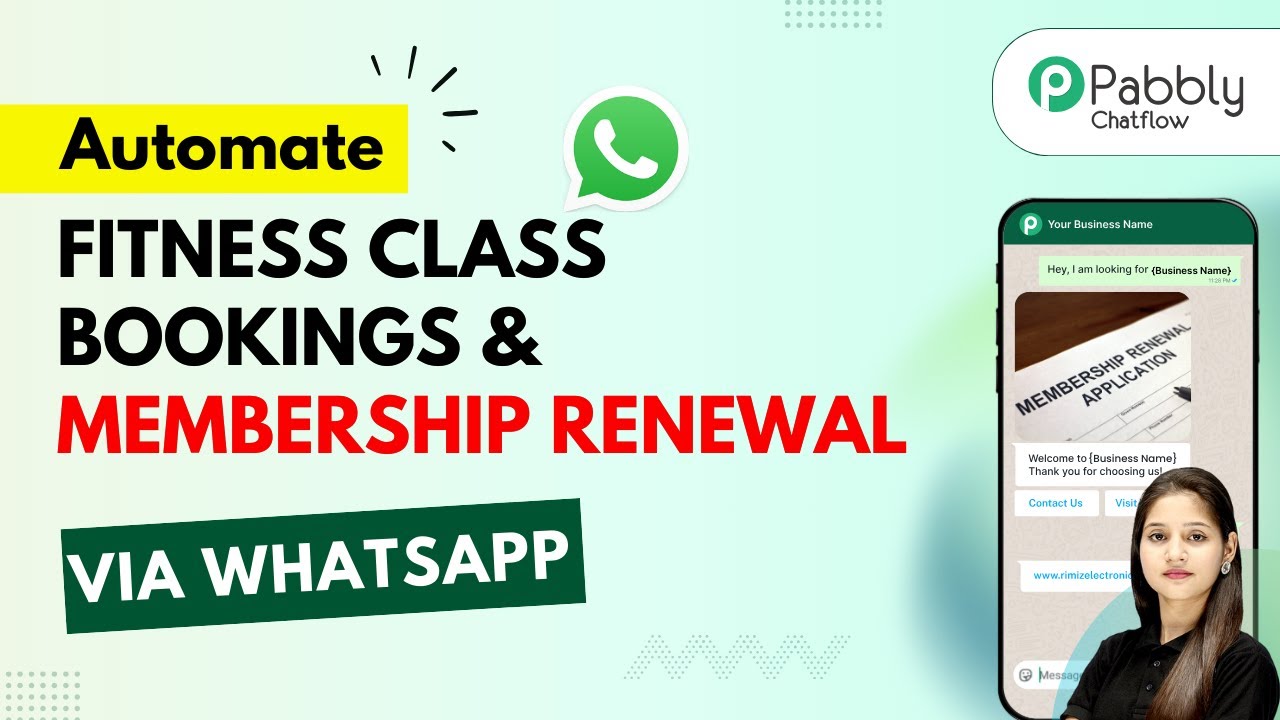
Learn how to automate fitness class bookings and membership renewal via WhatsApp using Pabbly Chatflow. Step-by-step guide for seamless integration. Discover practical methods for designing chat sequences that capture leads, answer questions, and guide users to the next step in your funnel.

Watch Step By Step Video Tutorial Below


1. Accessing Pabbly Chatflow for Automation

To automate fitness class bookings and membership renewal via WhatsApp, first, access Pabbly Chatflow by visiting the official website. This platform is designed to streamline your WhatsApp communications and automate responses efficiently.

Once on the Pabbly Chatflow homepage, you will see options for signing in or signing up. If you are a new user, click on the ‘Sign Up’ button to create your account and receive 100 free credits. Existing users can log in using the ‘Sign In’ option. After logging in, navigate to the Pabbly Chatflow dashboard to begin setting up your automation.


2. Setting Up Your WhatsApp Chatbot in Pabbly Chatflow

In the Pabbly Chatflow dashboard, click on the ‘Access Now’ button for the Chatflow app. This will take you to the flow builder where you can create a WhatsApp chatbot. Click on the ‘Plus Add Flow’ button to start a new flow for automating fitness class bookings. using Pabbly Connect

  • Provide a name for your bot, such as ‘Automate Fitness Class Bookings and Membership Renewal’.
  • Select the trigger event for your flow, using the ‘Keyword/Regex’ option to respond to specific user inquiries.
  • Add a list button to prompt users to choose a class type, such as Yoga, Zumba, or HIIT.

These steps will set the foundation for your WhatsApp chatbot, allowing it to respond to users automatically when they send messages related to fitness class bookings.


3. Creating the Flow for Class Bookings

After setting up the initial flow, you will need to configure how your bot interacts with users. Start by adding a message that prompts users to select a class. Use the list button feature to provide options like Yoga, Zumba, and HIIT. using Pabbly Connect

Once a user selects a class, the bot should ask for the date and time they wish to attend. Add an ‘Ask a Question’ button to capture this information, ensuring that the contact custom fields are set up to store the date and time.

  • Prompt for the user’s full name after confirming the class details.
  • Ensure the bot provides a confirmation message that includes the selected class, date, and time.

This structured interaction allows users to easily book classes through WhatsApp, making the process efficient and user-friendly.


4. Handling Membership Renewals with Pabbly Chatflow

In addition to class bookings, your WhatsApp chatbot should handle membership renewals. After collecting the user’s details, the bot should present options for either renewing their membership or making a new booking. using Pabbly Connect

Utilize the quick button feature to allow users to select their choice. Based on their selection, the bot should respond with a customized message confirming their action and providing a payment link. This ensures that users can complete their transactions smoothly.

Connect the membership renewal option to a payment processing link. Ensure the bot sends a dynamic message that includes the class name and payment details.

By integrating membership renewals into your chatbot, you can enhance user satisfaction and streamline your operations.


5. Finalizing Your Pabbly Chatflow Automation

Once you have configured all interactions within your flow, it’s crucial to save your settings. Click the ‘Save’ button to ensure that all changes are applied and your bot is ready to interact with users.

Your final flow should allow users to seamlessly book fitness classes and renew memberships via WhatsApp, with the bot providing necessary information and payment links dynamically. This automation will save you time and enhance customer engagement.

Remember, the entire process can be done without any coding skills, thanks to the user-friendly interface of Pabbly Chatflow.


Conclusion

In conclusion, automating fitness class bookings and membership renewals via WhatsApp is made easy with Pabbly Chatflow. This platform allows for seamless integration and efficient communication, enhancing user experience and operational efficiency.

Ensure you check out Pabbly Connect to create business automation workflows and reduce manual tasks. Pabbly Connect currently offer integration with 2,000+ applications.

Automate Job Applications and Resume Screening via WhatsApp with Pabbly Chatflow

Learn how to automate job applications and resume screening via WhatsApp using Pabbly Chatflow. Step-by-step tutorial on creating a WhatsApp chatbot. Build conversational workflows that guide visitors toward conversion with dynamic, branching dialogs that respond intelligently to user input.

Watch Step By Step Video Tutorial Below


1. Getting Started with Pabbly Chatflow

To automate job applications and resume screening via WhatsApp, the first step is to access Pabbly Chatflow. This platform allows you to create a WhatsApp chatbot that can respond to job applicants automatically. Start by navigating to Pabbly Chatflow and signing up or logging in if you already have an account.

Once logged in, you will see the dashboard where you can manage your WhatsApp numbers. Click on the ‘Add WhatsApp Number’ option to integrate your WhatsApp account with Pabbly Chatflow. You can use either the WhatsApp connect option for scanning a QR code or the manual token connect using your Meta access token.


2. Creating a WhatsApp Chatbot with Pabbly Chatflow

After setting up your WhatsApp number, it’s time to create your chatbot using Pabbly Chatflow. Click on the ‘Flow’ option in the left sidebar and then click on the ‘+ Add Flow’ button. Name your flow, for example, ‘Automate Job Applications and Resume Screening via WhatsApp’. This name will help you easily identify your chatbot later.

  • Click on the ‘Add Flow’ button.
  • Name your flow appropriately.
  • Select the trigger event for your chatbot.

For this automation, select the trigger event as ‘Keyword’ to allow the bot to respond to specific messages from users. You can set keywords like ‘job application’, ‘apply now’, and ‘career opportunity’. After entering the keywords, click enter to save them.


3. Designing the Chatbot Flow in Pabbly Chatflow

Now that you have set up the keywords, it’s time to design the flow of your WhatsApp chatbot. In Pabbly Chatflow, you can use various options like messages and actions. Start by dragging a ‘List’ option into your flow to display job positions.

  • Drag the ‘List’ option into your flow.
  • Enter the message body asking users to select a job position.
  • Add job types like Software Developer, Marketing Manager, and Sales Executive.

Ensure that you connect your trigger event to the list option. This way, when users send a message containing any of the keywords, the bot will automatically respond with the job options. Follow this by adding custom fields to capture user responses for each job type.


4. Capturing User Information with Pabbly Chatflow

Next, you will want to capture essential user information such as their full name and contact number. In Pabbly Chatflow, you can use the ‘Ask a Question’ button to prompt users for their details. Drag this button into your flow and write a message asking, ‘What’s your full name for the application?’ and select the appropriate custom field to store their response.

After capturing the name, you can add another ‘Ask a Question’ button to request their contact number. This ensures that you have all the necessary information for follow-ups. After these steps, connect each part of your flow to maintain a seamless user experience.


5. Finalizing the Chatbot Flow in Pabbly Chatflow

Finally, after capturing the user’s name and contact number, you will want to request their resume. Use the ‘Ask Media’ button to prompt users to upload their resume. Set the message as ‘Please upload your resume to complete the application process’ and select the document type in the settings.

Once all information is captured, you can set a tag for the application, such as ‘Job Application Received’. This helps in categorizing applicants for future reference. Finally, connect all parts of your flow and save your work in Pabbly Chatflow to activate your WhatsApp chatbot.


Conclusion

By following these steps, you can successfully automate job applications and resume screening via WhatsApp using Pabbly Chatflow. This integration streamlines your hiring process, allowing you to respond to applicants efficiently without manual effort. Start creating your WhatsApp chatbot today and enhance your recruitment process!

Ensure you check out Pabbly Connect to create business automation workflows and reduce manual tasks. Pabbly Connect currently offer integration with 2,000+ applications.

Automate Course Enrollment for E-learning Institutes on WhatsApp Using Pabbly Chatflow

Learn how to automate course enrollment for e-learning institutes on WhatsApp using Pabbly Chatflow and Pabbly Chatflow. Step-by-step tutorial included. Implement professional chat automation that answers common questions, qualifies leads, and books appointments without human intervention.

Watch Step By Step Video Tutorial Below


1. Accessing Pabbly Chatflow for Course Enrollment Automation

To automate course enrollment for e-learning institutes on WhatsApp, the first step is to access Pabbly Chatflow. Start by visiting the Pabbly Chatflow website at www.Pabbly.com/chatflow. You will need to sign in to your account or create a new one if you are a first-time user.

Once you are logged in, you will see the dashboard displaying your credits and available features. To proceed, ensure that your WhatsApp number is connected by clicking on the ‘Add WhatsApp Number’ button. This integration is crucial for enabling automated responses through the WhatsApp chatbot.


2. Creating a WhatsApp Chatbot with Pabbly Chatflow

Next, you will create a WhatsApp chatbot using Pabbly Chatflow. Navigate to the ‘Flows’ section on the left sidebar and click on the ‘Add Flow’ button. This will take you to the flow builder where you can set up your chatbot’s responses.

  • Click on the trigger event and select ‘Keyword Regex Match’ to start the flow.
  • Enter keywords like ‘registration’ and ‘enroll’ to activate the chatbot when users send messages containing these terms.
  • Set up the regex to capture various expressions related to course enrollment.

After configuring the trigger, you can set the initial message that users will receive. For instance, the bot can greet users with a message like, ‘Hi, welcome to Learn Smart Academy. Please choose the course you want to enroll in.’ This interaction sets the stage for further questions regarding the user’s enrollment.


3. Collecting User Information through Pabbly Chatflow

Once the user selects a course, Pabbly Chatflow will prompt them for essential information. The bot will ask for the user’s full name, email address, and phone number. This is done through the ‘Ask Question’ feature in the flow builder.

  • For each question, create a contact custom field to store responses.
  • Ensure the format for each field matches the type of data being collected (e.g., text for names, email for addresses).
  • Save the flow regularly to avoid losing any progress.

As users provide their information, Pabbly Chatflow captures these details, creating a personalized experience. After collecting the information, the chatbot will send a confirmation message, thanking the user for enrolling and providing course details.


4. Integrating Pabbly Connect with Google Sheets

To manage user data efficiently, you can integrate Pabbly Chatflow with Google Sheets using Pabbly Connect. This integration allows you to store all collected user information in a structured format. Start by creating a workflow in Pabbly Connect and select ‘Webhook by Pabbly’ as the trigger.

Copy the webhook URL provided by Pabbly Connect and paste it into the API request in your Chatflow. Map the fields from the Chatflow responses (name, email, phone) to the corresponding columns in your Google Sheet. Test the connection to ensure that data is being sent correctly.

This integration not only streamlines data collection but also ensures that all user enrollment details are easily accessible in Google Sheets for future reference.


5. Testing and Launching the WhatsApp Chatbot

After completing the setup, it’s essential to test your WhatsApp chatbot created with Pabbly Chatflow. Send a message like ‘I want to register for your course’ to your WhatsApp number. The bot should respond with the course options and proceed to collect user information as designed.

Ensure that all functionalities work as expected and that the data is correctly recorded in Google Sheets via Pabbly Connect. After confirming everything is operational, you can officially launch your chatbot for users to access and enroll in courses seamlessly.


Conclusion

In this tutorial, we explored how to automate course enrollment for e-learning institutes on WhatsApp using Pabbly Chatflow and Pabbly Connect. By following these steps, you can create a functional chatbot that enhances user experience and streamlines the enrollment process.

Ensure you check out Pabbly Connect to create business automation workflows and reduce manual tasks. Pabbly Connect currently offer integration with 2,000+ applications.

How to Store New JustDial Inquiries in Airtable Using Pabbly Connect

Learn how to integrate JustDial with Airtable using Pabbly Connect for better management and reporting of inquiries. Follow this definitive guide to creating powerful automated workflows with straightforward, efficiency-focused solutions that save valuable time.

Watch Step By Step Video Tutorial Below


1. Accessing Pabbly Connect for Integration

To store new JustDial inquiries in Airtable, the first step is to access Pabbly Connect. Open your browser and navigate to the Pabbly Connect landing page by typing Pabbly.com/connect. This platform is essential for creating automated workflows between JustDial and Airtable.

Once on the Pabbly Connect page, you will see two options: ‘Sign In’ and ‘Sign Up for Free’. If you are a new user, you can sign up and receive 100 free tasks every month. For existing users, click on ‘Sign In’ to access your account and proceed with the integration.


2. Creating a Workflow in Pabbly Connect

After signing in, you will be directed to the Pabbly Connect dashboard. Here, you will need to create a new workflow to connect JustDial and Airtable. Click on the ‘Create Workflow’ button and choose the new workflow builder for a modern interface.

  • Name your workflow ‘Store New JustDial Inquiries in Airtable’.
  • Select an appropriate folder to save your workflow.

Click on the ‘Create’ button to access the workflow window where you will set up the trigger and action for your automation. This is where Pabbly Connect becomes crucial, as it allows you to automate the data transfer between JustDial and Airtable.


3. Setting Up Trigger with JustDial

In the workflow window, the next step is to define the trigger for your automation. Click on the ‘Add Trigger’ button and search for JustDial. Select it as your trigger application and choose the ‘New Lead’ event.

To connect JustDial with Pabbly Connect, you will need to copy the webhook URL provided. This URL must be configured in your JustDial account. Contact your JustDial account manager to add this URL, as it cannot be done through the user interface.


4. Configuring Airtable as Action Step

Once the trigger is set, the next step is to add Airtable as the action application. Click on ‘Add New Action Step’ and select Airtable. For the action event, choose ‘Create Record’ and click on ‘Connect’.

  • If you have an existing connection, select it; otherwise, create a new connection.
  • Grant Pabbly Connect the necessary permissions to access your Airtable base.

After granting permissions, select the base and table where you want to store the inquiry details. This integration with Pabbly Connect ensures that every new lead from JustDial is automatically added to your Airtable database.


5. Mapping Fields and Testing the Integration

The final step involves mapping the fields from the JustDial response to your Airtable columns. You will see fields for phone number, name, email, and company name. Instead of typing these details manually, use the mapping feature in Pabbly Connect to dynamically insert data from the JustDial trigger.

After mapping all the necessary fields, click on ‘Save and Send Test Request’. If successful, you will receive a confirmation that the details have been added to your Airtable. Now, whenever a new lead comes in from JustDial, it will be automatically stored in Airtable without any additional manual effort.


Conclusion

In this tutorial, we explored how to use Pabbly Connect to automate the storage of new JustDial inquiries in Airtable. This integration simplifies management and reporting, allowing you to focus on growing your business without missing any leads. Start using Pabbly Connect today to enhance your workflow!

Ensure you check out Pabbly Connect to create business automation workflows and reduce manual tasks. Pabbly Connect currently offer integration with 2,000+ applications.

How to Send Custom SMS After Payment via Instamojo Using Pabbly Connect

Learn how to send custom SMS after payment via Instamojo using Pabbly Connect. This detailed tutorial walks you through the integration process step-by-step. Develop expertise in application integration and learn how to design streamlined automation workflows using proven, simplified approaches.

Watch Step By Step Video Tutorial Below


1. Accessing Pabbly Connect for Integration

To send custom SMS after payment via Instamojo, the first step is accessing Pabbly Connect. Start by visiting the Pabbly website and signing into your account. If you are a new user, you can sign up for free and receive 100 tasks monthly.

Once logged in, navigate to the Pabbly apps page and select Pabbly Connect. This is where you will create your automation workflow that connects Instamojo with Twilio to send SMS notifications after payments.


2. Creating a Workflow in Pabbly Connect

In this section, you will create a new workflow in Pabbly Connect. Click on the ‘Create Workflow’ button and choose the classic workflow builder. Name your workflow as ‘Send Custom SMS After Payment via Instamojo’ and select a folder for organization.

  • Click on ‘Create’ to finalize your workflow.
  • You will see two boxes: one for the trigger and one for the action.

Set the trigger application to Instamojo and the action application to Twilio. This setup will ensure that whenever a payment is received through Instamojo, a custom SMS will be sent automatically via Twilio.


3. Setting Up Instamojo in Pabbly Connect

Next, you need to configure your trigger by selecting Instamojo as the application and ‘Successful Payment’ as the trigger event in Pabbly Connect. A webhook URL will be generated, which acts as a bridge between Instamojo and Pabbly Connect.

Log into your Instamojo account and navigate to the smart pages section. Select the page you want to edit, and in the page settings, find the webhook section. Here, paste the webhook URL you copied from Pabbly Connect and set the trigger to successful payment.


4. Testing the Connection Between Instamojo and Pabbly Connect

After configuring the webhook, it’s time to test the connection. Go back to your workflow in Pabbly Connect, which should now display ‘Waiting for Webhook Response’. To test, make a payment on your Instamojo page.

Once the payment is successful, return to Pabbly Connect to check if the response has been captured. This response will include details like the payment status, amount, and customer information, confirming that the integration is working correctly.


5. Sending Custom SMS Using Twilio

Now, you will set up Twilio as the action application in your Pabbly Connect workflow. Select Twilio and choose the event ‘Send SMS Message’. If this is your first time connecting Twilio, you will need to enter your Twilio account SID, token, and phone number.

  • Enter the message body for the SMS, including dynamic fields from the Instamojo response.
  • Ensure to map the customer name, payment amount, and product name dynamically using the data received from Instamojo.

After filling in the required details, click on ‘Save and Send Test Request’. You should receive a confirmation SMS on your phone, indicating that the custom SMS has been successfully sent.


Conclusion

In this tutorial, we explored how to send custom SMS after payment via Instamojo using Pabbly Connect. By automating this process, you can enhance customer communication effortlessly. With Pabbly Connect, integrating various applications becomes seamless, allowing you to focus on growing your business.

Ensure you check out Pabbly Connect to create business automation workflows and reduce manual tasks. Pabbly Connect currently offer integration with 2,000+ applications.

How to Capture New Leads from Facebook Lead Ads in Google Sheets Automatically using Pabbly Connect

Learn how to automatically capture new leads from Facebook Lead Ads into Google Sheets using Pabbly Connect. Follow our step-by-step tutorial for seamless integration. Develop expertise in application integration and learn how to design streamlined automation workflows using proven, simplified approaches.

Watch Step By Step Video Tutorial Below


1. Accessing Pabbly Connect for Automation

To begin capturing new leads from Facebook Lead Ads into Google Sheets automatically, you first need to access Pabbly Connect. This platform enables seamless integration between various applications, including Facebook and Google Sheets.

Open your web browser and navigate to Pabbly.com. If you are a new user, click on ‘Sign Up Free’ to create an account. Existing users can simply log in. Once logged in, you will be directed to the Pabbly Connect dashboard, where you can create your automation workflows.


2. Creating a New Workflow in Pabbly Connect

Once you are on the Pabbly Connect dashboard, the next step is to create a new workflow. Click on the ‘Create Workflow’ button located at the top right corner. This will allow you to set up the automation process for capturing leads.

  • Select a name for your workflow, such as ‘Capture New Leads from Facebook Lead Ads in Google Sheets’.
  • Choose a folder to save your workflow, like ‘Google Sheet’.

After naming your workflow and selecting a folder, click on the ‘Create’ button. This will initiate the workflow setup process in Pabbly Connect, allowing you to define triggers and actions needed to automate lead capture.


3. Setting Up the Trigger for Facebook Lead Ads

In this step, you will set up the trigger to capture new leads from Facebook Lead Ads. Click on the ‘Add Trigger’ button and select ‘Facebook Lead Ads’ as your trigger application. Choose the event as ‘New Lead’ to ensure that the workflow activates whenever a new lead is generated.

Next, you will need to connect your Facebook account. If you have already connected your Facebook account to Pabbly Connect, you can select the existing connection. Otherwise, click on ‘Add New Connection’ to log in and grant access. Once connected, select the specific Facebook page and lead form you want to capture leads from.


4. Adding Action Step to Send Data to Google Sheets

After setting up the trigger, the next step is to add an action that sends the captured lead data to Google Sheets. Click on the ‘Add Action Step’ button and select ‘Google Sheets’ as the action application. Choose the action event as ‘Add a New Row’ to insert lead details into your spreadsheet.

  • Connect your Google Sheets account to Pabbly Connect.
  • Select the specific spreadsheet and worksheet where you want to store the lead data.

Map the fields from the Facebook lead data to the corresponding columns in your Google Sheets. This ensures that each new lead’s details, such as name, email, phone number, and city, are accurately recorded in the right columns.


5. Testing the Automation Process

With the workflow configured, it’s essential to test the automation to ensure it works correctly. Go back to the Facebook Lead Ads testing tool and generate a test lead by filling in the required details. Once submitted, Pabbly Connect will capture this lead and add it to your specified Google Sheets automatically.

Check your Google Sheets to confirm that the new lead details have been successfully added as a new row. If everything looks good, your automation is now set up and ready to capture new leads from Facebook Lead Ads into Google Sheets automatically!


Conclusion

In this tutorial, we explored how to use Pabbly Connect to automate the process of capturing new leads from Facebook Lead Ads directly into Google Sheets. By following the outlined steps, you can streamline your lead management process effectively.

Ensure you check out Pabbly Connect to create business automation workflows and reduce manual tasks. Pabbly Connect currently offer integration with 2,000+ applications.

With Pabbly Connect, integrating various applications like Facebook and Google Sheets becomes effortless, allowing you to focus more on your business growth.

Integrating Kit Sequence with GoHighLevel Using Pabbly Connect

Learn how to integrate Kit Sequence with GoHighLevel using Pabbly Connect for seamless lead management. Follow this step-by-step tutorial for effective automation. Discover hidden automation capabilities within your existing tools. This guide shows you how to connect your essential applications and permanently eliminate redundant manual processes.

Watch Step By Step Video Tutorial Below


1. Accessing Pabbly Connect to Start Integration

To integrate Kit Sequence with GoHighLevel, the first step is to access Pabbly Connect. Begin by navigating to the Pabbly Connect website and signing in to your account. If you do not have an account, you can sign up for free, which includes 100 free tasks each month for new users.

Once signed in, you will arrive at the Pabbly Connect dashboard. Here, you can create a new workflow by clicking on the ‘Create Workflow’ button. This action initiates the process of integrating Kit Sequence and GoHighLevel through Pabbly Connect, allowing for seamless data transfer between the two applications.


2. Creating the Workflow in Pabbly Connect

After accessing Pabbly Connect, it’s time to create the integration workflow. Click on the ‘Create Workflow’ button and select the classic version of the workflow builder. Name your workflow something meaningful, such as ‘Add Leads to GoHighLevel CRM from Kit.’ This name helps identify the workflow’s purpose.

  • Choose Kit as the trigger application.
  • Set the trigger event to ‘New Subscriber’ to initiate the workflow.
  • Select GoHighLevel (Lead Connector) as the action application.
  • Set the action event to ‘Create Contact’ for adding new leads.

By following these steps, you ensure that the workflow is correctly set up to respond to new subscribers in Kit by creating corresponding contacts in GoHighLevel through Pabbly Connect.


3. Connecting Kit Sequence and GoHighLevel in Pabbly Connect

Next, you need to establish a connection between Kit and Pabbly Connect. Click on the ‘Connect’ button next to the Kit application and choose ‘Add New Connection.’ Enter your API key and API secret from your Kit account to authorize the connection.

To find your API credentials, log into your Kit account, navigate to the account settings, and locate the developer option. Copy the API key and secret, and paste them into Pabbly Connect. After saving the connection, click on the ‘Save and Send Test Request’ button to ensure everything is working properly.


4. Testing the Integration with a New Subscriber

Now that you have set up the connection, it’s time to test the integration. Go to your Kit account and add a new subscriber by clicking on the ‘Add Subscriber’ button. Fill in the subscriber’s name and email, then click on the ‘Finish’ button to complete the process.

After adding the subscriber, return to Pabbly Connect and check if the test request captured the new subscriber’s details. If successful, the subscriber’s information should appear in the response section, confirming that the trigger step is functioning correctly.


5. Finalizing the Automation in Pabbly Connect

With the test successfully completed, you can now finalize the action step to create a contact in GoHighLevel. Click on the ‘Connect’ button for the Lead Connector and select ‘Add New Connection.’ This will allow you to link your GoHighLevel account to Pabbly Connect.

Fill in the required fields using the mapping feature to dynamically link the subscriber’s first name and email to the contact fields in GoHighLevel. Once all fields are mapped, click on the ‘Save and Send Test Request’ button to create the contact. After refreshing your GoHighLevel account, you should see the new contact created with the same details as the subscriber added in Kit.


Conclusion

By following these steps, you can effectively integrate Kit Sequence with GoHighLevel using Pabbly Connect. This automation allows for efficient lead management by ensuring that every new subscriber added in Kit is automatically created as a contact in GoHighLevel. This seamless integration enhances your workflow and improves customer follow-up processes.

Ensure you check out Pabbly Connect to create business automation workflows and reduce manual tasks. Pabbly Connect currently offer integration with 2,000+ applications.

Integrate Salesforce with LinkedIn Lead Ads Using Pabbly Connect

Learn how to create new contacts in Salesforce from LinkedIn Lead Ads using Pabbly Connect. Follow our step-by-step guide for seamless integration. Eliminate manual repetitive tasks from your workflow. Discover proven automation methods with intuitive steps designed for efficiency-minded professionals.

Watch Step By Step Video Tutorial Below


1. Introduction to Pabbly Connect for Integration

In this section, we will explore how to use Pabbly Connect to create new contacts in Salesforce from LinkedIn Lead Ads. Pabbly Connect is an automation platform that bridges the gap between different applications, allowing seamless data transfer.

To get started, head over to the Pabbly Connect landing page by typing Pabbly.com/connect in your browser. Once there, you can choose to sign in or sign up for a free account, which provides 100 free tasks every month. This is a great way to explore the capabilities of Pabbly Connect without any initial investment.


2. Creating a Workflow in Pabbly Connect

After signing in to Pabbly Connect, click on the ‘Create Workflow’ button. You will be prompted to select between the new workflow builder and the classic one. For this tutorial, we will use the new workflow builder, which is faster and more flexible.

  • Click on ‘Create Workflow’.
  • Choose the new workflow builder option.
  • Name your workflow: ‘Create New Contacts in Salesforce from LinkedIn Lead Ads’.

Once you have named your workflow, select the folder where you want to save it and click on the ‘Create’ button. This will open the workflow window where you will set up triggers and actions for the integration.


3. Setting Up the Trigger in Pabbly Connect

The next step involves setting up the trigger that will initiate the workflow. Click on the ‘Add Trigger’ button and search for LinkedIn in the application options. Select LinkedIn as your trigger application.

For the trigger event, choose ‘Lead Notification’. After selecting this, you will need to connect your LinkedIn account to Pabbly Connect. Click on ‘Add a New Connection’ and follow the prompts to authorize the connection.

  • Select the sponsored account from the dropdown.
  • Click ‘Save and Send Test Request’ to capture the webhook response.
  • Perform a test submission on your LinkedIn ad to generate a lead.

Once the test submission is complete, Pabbly Connect will capture the lead details, confirming that your trigger is correctly set up.


4. Configuring the Action in Pabbly Connect

After successfully setting up the trigger, it’s time to configure the action that will take place in Salesforce. Click on the ‘Add New Action Step’ button and select Salesforce as your action application.

For the action event, choose ‘Create Contact’ and connect your Salesforce account to Pabbly Connect. You will need to authorize the connection by granting necessary permissions. Once connected, you can proceed to map the fields from the LinkedIn lead to the Salesforce contact.

Map the first name, last name, email, and phone number fields. Leave any non-required fields blank. Click ‘Save and Send Test Request’ to create the contact in Salesforce.

After the test request is sent, you should see a success message indicating that the contact has been created in Salesforce. This confirms that your integration is functioning correctly.


5. Verifying Integration Success

To ensure everything is working as intended, open your Salesforce account and refresh the contacts list. You should see the new contact created from the LinkedIn lead submission.

This seamless integration using Pabbly Connect allows your sales team to follow up on leads quickly and efficiently. By automating this process, you save time and reduce manual data entry errors.

Now, every time a new lead is generated from LinkedIn Lead Ads, a corresponding contact will automatically be created in Salesforce, streamlining your lead management process.


Conclusion

In conclusion, using Pabbly Connect to integrate Salesforce with LinkedIn Lead Ads simplifies the process of creating new contacts from leads. This automation enhances efficiency and ensures timely follow-ups for your sales team.

Ensure you check out Pabbly Connect to create business automation workflows and reduce manual tasks. Pabbly Connect currently offer integration with 2,000+ applications.

How to Send WhatsApp Alerts When New Email Is Received via Parser Using Pabbly Connect

Learn how to automate WhatsApp alerts for new emails received via parser using Pabbly Connect. Follow our step-by-step tutorial to streamline your notifications. Implement the precise methodologies leading organizations use to automate repetitive tasks, illustrated with practical examples designed for immediate application.

Watch Step By Step Video Tutorial Below


1. Accessing Pabbly Connect for Email and WhatsApp Integration

To send WhatsApp alerts when a new email is received, you must first access Pabbly Connect. Begin by visiting the Pabbly Connect website and signing in or signing up for a free account.

Once logged in, navigate to the dashboard where you can create a new workflow. Pabbly Connect allows you to automate various tasks, including sending alerts to WhatsApp upon receiving emails. This initial setup is crucial for the integration to function correctly.


2. Creating a Workflow in Pabbly Connect

After accessing Pabbly Connect, click on the ‘Create Workflow’ button. You will be prompted to name your workflow, such as ‘Send WhatsApp Alerts for New Emails.’ This name helps you identify the workflow later.

  • Choose the workflow folder for better organization.
  • Select either the new beta version or the classic version of the workflow builder.

After naming your workflow and selecting the folder, click on the ‘Create’ button. This action will set up the framework for your integration process.


3. Setting Up the Trigger for New Emails

To configure the trigger, select the ‘Email Parser by Pabbly’ as your trigger application. The trigger event will be set to ‘New Email Received.’ This setup ensures that your workflow activates whenever a new email arrives in your Gmail account.

Next, you will need to connect your Gmail account to Pabbly Connect. Click on the ‘Connect’ button to obtain the email parser address. Copy this address and add it as a forwarding address in your Gmail settings. This step is essential for capturing incoming emails.


4. Creating a Filter for Specific Emails

To optimize the emails forwarded to Pabbly Connect, create a filter in your Gmail account. This filter will allow only emails containing the word ‘inquiry’ to be forwarded. Click on ‘Create a Filter’ in Gmail settings and input the keyword.

  • Select options like ‘Mark as Read’ to manage your inbox effectively.
  • Save the filter to apply it to incoming emails.

After setting the filter, return to Pabbly Connect and capture the email parser response to ensure it’s working correctly. Send a test email to verify that the setup functions as expected.


5. Integrating WhatsApp to Send Alerts

Now that you have set up the email trigger, it’s time to configure the WhatsApp integration. Select ‘WhatsApp Cloud API’ as your action application in Pabbly Connect. Choose the action event as ‘Send Template Message’ to send alerts to your WhatsApp account.

You will need to connect your WhatsApp account to Pabbly Connect. Click on the ‘Connect’ button and enter your access token, phone number ID, and WhatsApp business account ID. These details can be obtained from your Meta for Developers account.


Conclusion

By following this tutorial, you can successfully set up Pabbly Connect to send WhatsApp alerts whenever a new email is received via parser. This automation streamlines your communication and ensures you never miss important inquiries.

Ensure you check out Pabbly Connect to create business automation workflows and reduce manual tasks. Pabbly Connect currently offer integration with 2,000+ applications.

Automate Event Registrations for Conferences via WhatsApp with Pabbly Chatflow

Learn how to automate event registrations for conferences using Pabbly Chatflow and WhatsApp. Step-by-step tutorial with specific integrations and processes. Explore how leading businesses automate customer interactions with carefully designed chat sequences that feel natural and helpful.

Watch Step By Step Video Tutorial Below


1. Access Pabbly Chatflow to Create Your WhatsApp Chatbot

To automate event registrations via WhatsApp, the first step is to access Pabbly Chatflow. Simply go to the Pabbly Chatflow website and either sign in or sign up for a free account. This platform allows you to create chatbots without any coding skills.

Once logged in, navigate to the Pabbly Chatflow dashboard. You will see various options to manage your WhatsApp conversations effectively. This is where you will set up your chatbot for event registrations.


2. Setting Up Your WhatsApp Number in Pabbly Chatflow

After accessing Pabbly Chatflow, the next step is to set up your WhatsApp number. Click on the ‘Add WhatsApp Number’ button located in the top right corner of your dashboard. You will have two methods to connect your number: WhatsApp Connect or Manual Token Connect.

  • Select WhatsApp Connect for automatic integration.
  • Use Manual Token Connect if you prefer a manual setup.

Once connected, you can categorize your WhatsApp numbers in folders according to your event needs. This organization helps streamline your event registration process.


3. Creating Your Event Registration Chatbot with Pabbly Chatflow

To create a WhatsApp chatbot for event registrations, navigate to the ‘Flow’ section in Pabbly Chatflow. Click on the ‘Add Flow’ button to start a new project. Name your flow something descriptive, like ‘Automate Event Registrations for Conferences via WhatsApp.’ This helps identify your flow easily.

Next, set up your trigger event. Choose ‘Keyword Regex Match’ as the trigger type. This allows your bot to respond to specific keywords from users, such as ‘register’ or ‘event’. Enter these keywords in the designated field and save your settings.


4. Designing the Chatbot Flow for Event Registrations

Now that the trigger is set, you need to design your chatbot flow. Drag and drop the ‘List’ message type into your flow to present users with event options. Add a header and body text to introduce the bot and provide context about the events available for registration. using Pabbly Connect

  • Include event titles like ‘Marketing Conference’ and descriptions.
  • Make sure to connect the List to your trigger.

After users select an event, you will need to collect their names and email addresses. Use the ‘Ask Question’ feature to prompt users for this information and save their responses in custom fields. This data will be crucial for follow-up communications.


5. Finalizing Your Chatbot Setup and Testing

Once your chatbot flow is complete, it’s time to finalize and test it. Click the ‘Save’ button to ensure all your settings are stored in Pabbly Chatflow. After saving, run a test by sending a message to your WhatsApp bot.

Check if the bot responds correctly with the event options and collects user information as intended. This step is essential to ensure everything works smoothly before going live with your event registration process.


Conclusion

By following this tutorial, you can successfully automate event registrations for conferences via WhatsApp using Pabbly Chatflow. This integration streamlines the registration process, making it efficient and user-friendly. With Pabbly Chatflow, you can create powerful chatbots without any coding skills.

Ensure you check out Pabbly Connect to create business automation workflows and reduce manual tasks. Pabbly Connect currently offer integration with 2,000+ applications.