Sync Shopify Customers and Orders to Salesflare Automatically

Watch Step By Step Video Tutorial Below


1. Accessing Pabbly Connect for Integration

To start integrating Shopify with Salesflare, you’ll need to access Pabbly Connect. Begin by navigating to the Pabbly website at paby.com and signing in to your account. If you’re a new user, you can sign up for free and receive 100 tasks monthly to test the platform.

Once logged in, you will see the dashboard displaying all Pabbly applications. Click on Pabbly Connect to access your workflows. If you need to create a new workflow, simply click on the “Create from Scratch” button and name your workflow accordingly. This sets the stage for automating your order management process.


2. Creating a Workflow in Pabbly Connect

After accessing Pabbly Connect, it’s time to create a workflow that will automate the connection between Shopify and Salesflare. Click on the “Create from Scratch” button and name your workflow, such as “Sync Shopify Customers and Orders to Salesflare Automatically.” Select a folder for organization and click “Create” to proceed.

  • Click “Create from Scratch”.
  • Name your workflow.
  • Select a folder and click “Create”.

With your workflow created, you will now need to set a trigger application. This is where you will select Shopify V2 and the trigger event as “New Order.” Click on “Connect” to establish a connection between Pabbly Connect and Shopify.


3. Setting Up the Webhook in Shopify

To connect Shopify with Pabbly Connect, you need to set up a webhook. In your Shopify admin, navigate to “Settings” and then to “Notifications”. From there, select “Webhooks” and click on “Create Webhook”. Choose the event as “Order Creation” and set the format to JSON.

  • Select “Order Creation” as the event.
  • Set the format to JSON.
  • Paste the webhook URL from Pabbly Connect.

Once you save the webhook, return to Pabbly Connect where it will be waiting for the webhook response. To test the setup, create a new order in Shopify and check if the details are captured in your workflow.


4. Capturing Order Details in Pabbly Connect

After placing a test order in Shopify, return to Pabbly Connect to capture the order details. You should see the response with all relevant order information, such as payment details, customer name, and address. This confirms that the webhook is functioning correctly.

To verify, check the response details in your Pabbly workflow. You should see fields like total payment, customer name, and address. This indicates that your connection between Shopify and Pabbly Connect is successfully set up.


5. Adding Salesflare as the Action Application

The final step involves adding Salesflare as the action application in your Pabbly Connect workflow. Select Salesflare and choose the action event as “Create a Contact.” Connect your Salesflare account by entering your API key, which you can find in the Salesflare settings.

After connecting, map the order details from Shopify to the corresponding fields in Salesflare. This ensures that every new order creates a contact automatically. Once you save and test this action, you should see the new contact created in Salesflare.


Conclusion

Using Pabbly Connect, you can effectively automate the integration between Shopify and Salesflare. This tutorial guided you through accessing Pabbly Connect, creating workflows, setting up webhooks, capturing order details, and adding Salesflare as an action application. With this automation, you can streamline your order management process effortlessly.
Automatically Create Notion Database Entries for Google Ads Leads

Watch Step By Step Video Tutorial Below


1. Accessing Pabbly Connect for Integration

To start integrating Google Ads with Notion, you need to access Pabbly Connect. Begin by navigating to the Pabbly Connect homepage in your browser.

Here, you’ll see two options: “Sign In” for existing users and “Sign Up for Free” for new users. If you’re new, click on the “Sign Up for Free” button to create your account and explore 100 free tasks monthly.


2. Creating a Workflow in Pabbly Connect

After signing in, you will be directed to the Pabbly Connect dashboard. To create a new workflow, click on the “Create Workflow” button. This is where the magic happens.

  • Select “Create from Scratch” to build your workflow step by step.
  • Choose “Google Ads” as the trigger application.
  • Set the trigger event as “New Lead Form Entry”.

Once you have set up your trigger, you will need to approve the connection with your Google Ads account. This allows Pabbly Connect to access your leads seamlessly.


3. Setting Up the Action to Notion

After defining your trigger, the next step is to set up the action that will send data to Notion. Click on the “Add Action” button and select Notion as your action application.

  • Choose “Create Database Item” as the action event.
  • Connect your Notion account by allowing access to Pabbly Connect.
  • Map the fields from Google Ads to Notion, such as name, email, and phone number.

This mapping ensures that every new lead captured in Google Ads is automatically added to your Notion database as a new item.


4. Testing the Integration

Once you have set up the action, it’s time to test the integration. Click on the “Send Test Data” button to send a test lead from Google Ads to Notion.

After sending the test data, check your Notion database to verify that the new entry has been successfully created. This step confirms that your Pabbly Connect workflow is functioning as intended.


5. Finalizing Your Automation

After successful testing, finalize your automation by clicking on the “Save” button in Pabbly Connect. Your workflow is now live!

From now on, every time a new lead is generated through Google Ads, it will automatically populate your Notion database, saving you time and ensuring you never miss a lead.


Conclusion

By using Pabbly Connect, you can effortlessly integrate Google Ads with Notion, automating the process of lead management. This integration saves time and enhances productivity, allowing you to focus on growing your business.

Collect Job Applications & Schedule Interviews on WhatsApp

Watch Step By Step Video Tutorial Below


1. Introduction to Pabbly Connect for WhatsApp Integration

Pabbly Connect is a powerful tool that automates processes by integrating various applications. In this tutorial, we will explore how to use Pabbly Connect to create a WhatsApp bot that schedules interviews and collects candidate data seamlessly.

This integration is particularly useful for HR teams looking to streamline their recruitment process. By utilizing Pabbly Connect, you can automate the collection of essential candidate information and schedule interviews without manual intervention.


2. Setting Up Pabbly Connect for Your WhatsApp Bot

To start, access Pabbly Connect through its website and create an account if you haven’t already. Once logged in, you can begin setting up your WhatsApp bot.

Follow these steps to create the bot:

  • Log into your Pabbly Connect account.
  • Navigate to the “Workflows” section.
  • Click on “Create New Workflow”.
  • Name your workflow, for example, “WhatsApp Interview Scheduler”.

After creating the workflow, you can set the trigger event that will initiate the bot. Choose a keyword that will start the interaction with candidates who message your WhatsApp number.


3. Configuring the WhatsApp Bot Responses with Pabbly Connect

Once the workflow is set up, the next step is to configure the responses that your WhatsApp bot will send. This is where Pabbly Connect shines by allowing you to customize the interaction.

Here’s how to set up the bot responses:

  • Define the welcome message, e.g., “Hello candidate, thank you for your interest in joining Digital Dynamics.”
  • Add a button for users to start the application process.
  • Create fields for collecting candidate information such as name, phone number, email, and position applied for.
  • Set the format for each response to ensure data is collected correctly.

By using Pabbly Connect, you can ensure that all candidate responses are stored in custom fields, making data management easy and efficient.


4. Scheduling Interviews Automatically with Pabbly Connect

After collecting all necessary information, the next step is to schedule interviews. This is a critical feature of the WhatsApp bot created using Pabbly Connect.

To automate the scheduling process, follow these steps:

  • Ask candidates for their preferred interview date and time.
  • Set parameters for scheduling, such as available days and time slots.
  • Confirm the scheduled date and time with the candidate.

Using Pabbly Connect, you can automate the entire scheduling process, ensuring that candidates receive timely notifications about their interviews.


5. Reviewing Candidate Data Collected via Pabbly Connect

Once the interviews are scheduled, it’s essential to review the candidate data collected through your WhatsApp bot. Pabbly Connect provides an easy way to access this information.

To review the data:

  • Go to the “Inbox” section in Pabbly Connect.
  • Find the conversation with the candidate.
  • Review all collected data, including name, email, and scheduled interview details.

This feature allows HR teams to keep track of candidates efficiently, making the recruitment process smoother and more organized with Pabbly Connect.


Conclusion

In this tutorial, we explored how to use Pabbly Connect to automate interview scheduling and data collection via WhatsApp. By implementing these steps, HR teams can streamline their recruitment process, making it more efficient and effective.

WhatsApp AI Agent for Real Estate Businesses | Automate Property Enquiries 24/7

Watch Step By Step Video Tutorial Below


1. Setting Up Pabbly Connect for WhatsApp Integration

To create a WhatsApp chatbot for your real estate business, you first need to access Pabbly Connect. This integration platform allows you to connect various applications seamlessly. Start by visiting the Pabbly Connect website and signing in or creating an account.

Once logged in, navigate to the dashboard where you can find options to create new workflows. Pabbly Connect will enable you to connect your WhatsApp account to the chatbot you will create. This integration is crucial for automating your WhatsApp conversations effectively.


2. Creating Your WhatsApp Chatbot with Pabbly Connect

After setting up Pabbly Connect, the next step is to create your WhatsApp chatbot. Go to the Pabbly Chatflow section and select the option to create a new AI assistant. This assistant will handle queries related to your real estate business.

  • Click on ‘Add New Assistant’
  • Name your assistant, for example, “AI Agent for Real Estate”.
  • Configure the AI settings, including the temperature and API key.

With these steps completed, your AI assistant will be ready to respond to customer inquiries. This is how Pabbly Connect facilitates the creation of a responsive chatbot for your real estate business.


3. Configuring the AI Assistant in Pabbly Connect

Configuring your AI assistant is essential for optimal performance. In this step, you will set up the AI’s response mechanisms using Pabbly Connect. Adjust the settings such as the default messages and fallback responses to ensure the assistant can handle various queries effectively.

Make sure to toggle on the options for header and footer messages, and set a stop keyword to escalate queries to human support when necessary. This allows for a smooth user experience and ensures that customers receive timely assistance.

  • Set the stop keyword for user queries that require escalation.
  • Upload a knowledge base file that contains FAQs and service details.
  • Customize the assistant’s interface with branding elements.

These configurations are crucial for making your WhatsApp chatbot effective and user-friendly through Pabbly Connect.


4. Testing Your WhatsApp Chatbot via Pabbly Connect

Once your AI assistant is configured, it’s time to test the WhatsApp chatbot. Use Pabbly Connect to simulate user queries and observe how the assistant responds. This step is vital to ensure that the assistant provides accurate and helpful responses to potential clients.

Send various inquiries to your WhatsApp number and check the responses. Ensure the AI assistant provides detailed information about properties, document requirements, and connects users with property consultants when needed.

Testing is essential to refine the AI assistant’s capabilities and ensure it aligns with your business needs. By utilizing Pabbly Connect, you can easily monitor and adjust the assistant’s performance based on user interactions.


5. Assigning the AI Assistant to Contacts Using Pabbly Connect

After successful testing, you can assign your AI assistant to specific contacts or groups through Pabbly Connect. This feature allows you to automate responses for multiple clients efficiently. Navigate to the inbox settings within Pabbly Connect to manage these assignments.

  • Select the AI assistant you created.
  • Choose the contacts or groups to which you want to assign the assistant.
  • Save the settings to activate the assistant for those contacts.

This automation will enhance your customer service by ensuring that all inquiries are handled promptly and accurately. By leveraging Pabbly Connect, you can streamline your real estate operations and improve client satisfaction.


Conclusion

Creating a WhatsApp chatbot for your real estate business using Pabbly Connect is a straightforward process. By following these detailed steps, you can automate conversations and enhance customer engagement effectively.

How Agencies Automate Client Onboarding on WhatsApp

Watch Step By Step Video Tutorial Below


1. Access Pabbly Connect for WhatsApp Automation

To start automating your client onboarding process on WhatsApp, first access Pabbly Connect. Open a new tab and go to the Pabbly website. If you are a new user, you can sign up for free and receive 100 free credits each month to explore the software.

Once you sign in, navigate to the Pabbly Chartflow dashboard. Here, you will find various features that allow you to create a WhatsApp chatbot easily. The first step is to click on the “Flows” feature, which takes you to the flow builder page.


2. Setting Up Your WhatsApp Chatbot with Pabbly Connect

In the flow builder, begin by creating a new chatbot flow. Click on the “Add Flow” button and name your flow. In this section, you will set up the trigger events that will initiate your chatbot.

  • Select the trigger event as “Keyword”.
  • Add keywords such as “onboarding”, “hi”, and “hello”.
  • Link these keywords to your welcome message.

Whenever a client sends any of these keywords, the chatbot will trigger and respond with a personalized welcome message. This sets the foundation for a seamless onboarding experience.


3. Customizing Your Chatflow with Pabbly Connect

Now that you have set up the initial trigger, it’s time to customize your chatbot’s responses. Use the “Ask Question” button to prompt users for their full name, company name, and service type they are interested in.

  • Ask for the user’s full name and store it in a contact custom field.
  • Request the company name and service type in the same manner.
  • Ensure to link all the responses to the appropriate nodes.

This customization allows the chatbot to gather essential information from clients, paving the way for a tailored onboarding experience.


4. Finalizing Your Chatbot Flow with Pabbly Connect

With all the questions set up, the next step is to finalize your chatbot flow. You can add a final message that acknowledges the client’s input, thanking them for sharing their details.

In this message, include placeholders for the user’s name, company, service type, and contact number. This ensures that the message is personalized based on the information provided by the client. Once everything is set, click on the “Save” button to update your flow.


Conclusion

In this tutorial, we explored how to automate client onboarding on WhatsApp using Pabbly Connect. By following these steps, you can create a personalized chatbot that enhances your client interaction and onboarding process.

How Do I Bring Back Customers Who Stopped Buying?

Watch Step By Step Video Tutorial Below


1. Accessing Pabbly Connect for Integration

To begin the integration process, access Pabbly Connect by visiting pabby.com/connect in your browser. This platform is essential for creating automated workflows that connect your applications seamlessly.

If you are a new user, click on the ‘Sign up for free’ button to create an account. Existing users can directly log in. Upon signing up, you will receive 100 free tasks each month to explore the features of Pabbly Connect.


2. Creating a Workflow in Pabbly Connect

Once logged in, navigate to the dashboard of Pabbly Connect and click on the ‘Create Workflow’ option. This is where you will set up the integration between Google Sheets and Pabbly Chatflow.

  • Select ‘Quick Workflow Builder’ for an easy setup.
  • Enter your requirement, such as connecting Google Sheets with Pabbly Chatflow.
  • Choose the trigger as ‘New or Updated Spreadsheet Row.’

After setting up the trigger, approve the workflow. This allows Pabbly Connect to automatically send WhatsApp messages based on new data entries in Google Sheets.


3. Setting Up Google Sheets with Pabbly Connect

Next, you need to establish a connection between Google Sheets and Pabbly Connect. To do this, copy the webhook URL provided by Pabbly Connect and paste it into your Google Sheets add-on.

  • Go to ‘Extensions’ and select ‘Add-ons’ to install the Pabbly Connect Webhooks add-on.
  • In the initial setup, paste the webhook URL and define the trigger column.
  • Send a test response to confirm the connection.

Once the connection is confirmed, every new row added to Google Sheets will trigger a WhatsApp message via Pabbly Connect.


4. Sending WhatsApp Messages Using Pabbly Chatflow

Now that the connection is established, you can set up the WhatsApp messaging feature using Pabbly Chatflow. This application allows you to send personalized messages efficiently.

To connect Pabbly Chatflow with Pabbly Connect, provide your API token from the Chatflow account settings. This integration ensures that messages are sent without the risk of getting banned.

  • Map the customer’s mobile number from the previous response.
  • Select the WhatsApp template you want to use for messaging.
  • Customize header types and parameters as needed.

After setting up the message details, click ‘Save and Send Test Request’ to verify that the message is delivered correctly to the customer’s WhatsApp.


5. Finalizing the Integration for Bulk Messaging

With everything set up, you can now finalize your integration. Use Pabbly Connect to send messages to all customers listed in your Google Sheets.

To send messages to all customers at once, simply click on ‘Send All Data’ in the Pabbly Connect Webhooks add-on. This action ensures that each customer receives their personalized message without any manual effort.

  • Ensure that the ‘Send on Event’ option is enabled for ongoing automation.
  • Monitor the responses to confirm successful message delivery.
  • Adjust templates as needed for future campaigns.

This setup allows you to efficiently manage customer outreach via WhatsApp, leveraging the power of Pabbly Connect and Pabbly Chatflow.


Conclusion

In this tutorial, we explored how to integrate WhatsApp with Google Sheets using Pabbly Connect and Pabbly Chatflow. This method allows you to automate messaging to inactive customers effectively, ensuring better engagement and retention.

Get Instant Notifications for Every Facebook Lead

Watch Step By Step Video Tutorial Below


1. Accessing Pabbly Connect for Integration

To begin, access Pabbly Connect by typing ‘pabbly.com/connect’ in your browser. This platform enables seamless integration between various applications, including Facebook and Zoho CRM.

If you’re a new user, click on the ‘Sign Up for Free’ button to create an account, which allows you to execute 100 free tasks monthly. Existing users should click on ‘Sign In’ to access their dashboard.


2. Creating a Workflow in Pabbly Connect

Once logged into Pabbly Connect, click on ‘Create Workflow’ on the right-hand side. This opens a new workflow creation page where you can define your automation.

Type a name for your workflow, such as “Facebook Leads to Zoho CRM”. Pabbly Connect will suggest necessary steps based on your inputs. This feature simplifies the setup process, allowing you to connect Facebook leads directly to Zoho CRM.

  • Click on ‘Create Message’ to send notifications.
  • Select the appropriate actions for each application.
  • Approve and create the workflow to finalize the setup.

After setting up, you need to build the necessary connections for the workflow to function correctly.


3. Connecting Facebook Leads to Pabbly Connect

To capture leads from Facebook, click on the ‘Connect’ button in Pabbly Connect. Then, select ‘Add New Connection’ to connect to Facebook Leads.

Once prompted, log in to your Facebook account and grant the required permissions. After successful authentication, choose the Facebook page associated with your leads, such as “Prime Properties”.

  • Select the lead generation form you want to connect.
  • Click ‘Save and Send Test Request’ to ensure the connection is established.
  • Verify that the lead details are captured correctly in Pabbly Connect.

This setup allows Pabbly Connect to automatically capture new leads from Facebook as they come in.


4. Sending Notifications to Google Chat

Next, you will connect Google Chat to Pabbly Connect for instant notifications. To do this, you need to generate a webhook URL from your Google Chat account.

Navigate to your Google Chat space and click on the settings icon. Select ‘Apps and Integrations’, then ‘Add Webhook’. After naming your webhook, click ‘Save’ to generate the URL. Copy this URL for the next step.

  • Paste the webhook URL into Pabbly Connect.
  • Draft your notification message, including dynamic fields like customer name and email.
  • Map the fields to ensure the correct data is sent.

After saving and sending a test request, check your Google Chat to confirm the notification has been received successfully.


5. Adding Leads to Zoho CRM

Finally, connect your Zoho CRM account to Pabbly Connect to add captured leads. Click on ‘Add New Connection’ and select Zoho CRM.

Authenticate your Zoho account by providing your domain and authorizing the connection. After connecting, select the module for leads and map the fields from your Facebook lead data to the corresponding fields in Zoho CRM.

  • Ensure all required fields in Zoho CRM are filled correctly.
  • Test the integration to confirm that leads are added successfully.
  • Check your Zoho CRM dashboard for new leads.

This integration allows you to manage leads efficiently, ensuring that all data is captured and stored in Zoho CRM automatically.


Conclusion

By using Pabbly Connect, you can automate the process of capturing Facebook leads and adding them to Zoho CRM. This integration not only streamlines your workflow but also ensures timely notifications via Google Chat, enhancing your team’s efficiency.

How to Get More Orders Without Spending on Ads

Watch Step By Step Video Tutorial Below


1. Accessing Pabbly Connect for WhatsApp Messaging

To start using Pabbly Connect for WhatsApp messaging, you first need to access the platform. Simply go to the Pabbly website and sign up for an account. Once registered, you can log in and navigate to the dashboard where you will find various options.

After logging in, look for the feature dedicated to WhatsApp messaging. This is where you can set up your communications. Ensure you have the necessary permissions and credentials to send messages through WhatsApp.


2. Creating a WhatsApp Broadcast with Pabbly Connect

Once you are in Pabbly Connect, the next step is to create a WhatsApp broadcast. Click on the “Add Broadcast” button to initiate the process. You will then need to select the broadcast type; choose “Broadcast Campaign” for this setup.

  • Select the broadcast name, e.g., “Today’s Offer”.
  • Choose the contact list to which you want to send the broadcast.

After setting up your broadcast name, you will need to select a predefined contact list. This list should contain the customers you wish to reach out to. You can create or upload a new contact list directly through Pabbly Connect.


3. Uploading Contacts to Pabbly Connect

To effectively use Pabbly Connect, you must upload your contacts. Navigate to the “Contacts” feature and click on the “Add Contacts” button. You can add contacts manually or in bulk using a CSV file.

  • Prepare a CSV file with customer names and phone numbers.
  • Upload the CSV file to Pabbly Connect.

Ensure that your CSV file does not exceed the 50 MB limit and can contain up to 200,000 contacts. This bulk upload feature significantly reduces manual effort and allows you to reach a large audience quickly.


4. Setting Up Message Types in Pabbly Connect

In Pabbly Connect, you have the option to select between two message types: pre-approved template messages and regular messages. Regular messages can only be sent if the customer has messaged you within the last 24 hours.

Pre-approved template messages are meta-approved and can be sent to initiate conversations or send updates. For this tutorial, we will use pre-approved templates. You can select your desired template from the options available in Pabbly Connect.


5. Scheduling Your WhatsApp Broadcast with Pabbly Connect

After setting up your message, the final step is to schedule your broadcast. You can choose to send the broadcast immediately or schedule it for later. If you want to schedule it, select the date and time in the Pabbly Connect interface.

Once you have selected your preferred time, click on the “Add Broadcast” button to finalize your setup. This allows you to reach your customers effectively without relying solely on ads.


Conclusion

Using Pabbly Connect for WhatsApp messaging enables businesses to reach their customers effectively, enhancing communication without ad spend. This tutorial provides a straightforward approach to setting up broadcasts for maximum engagement.

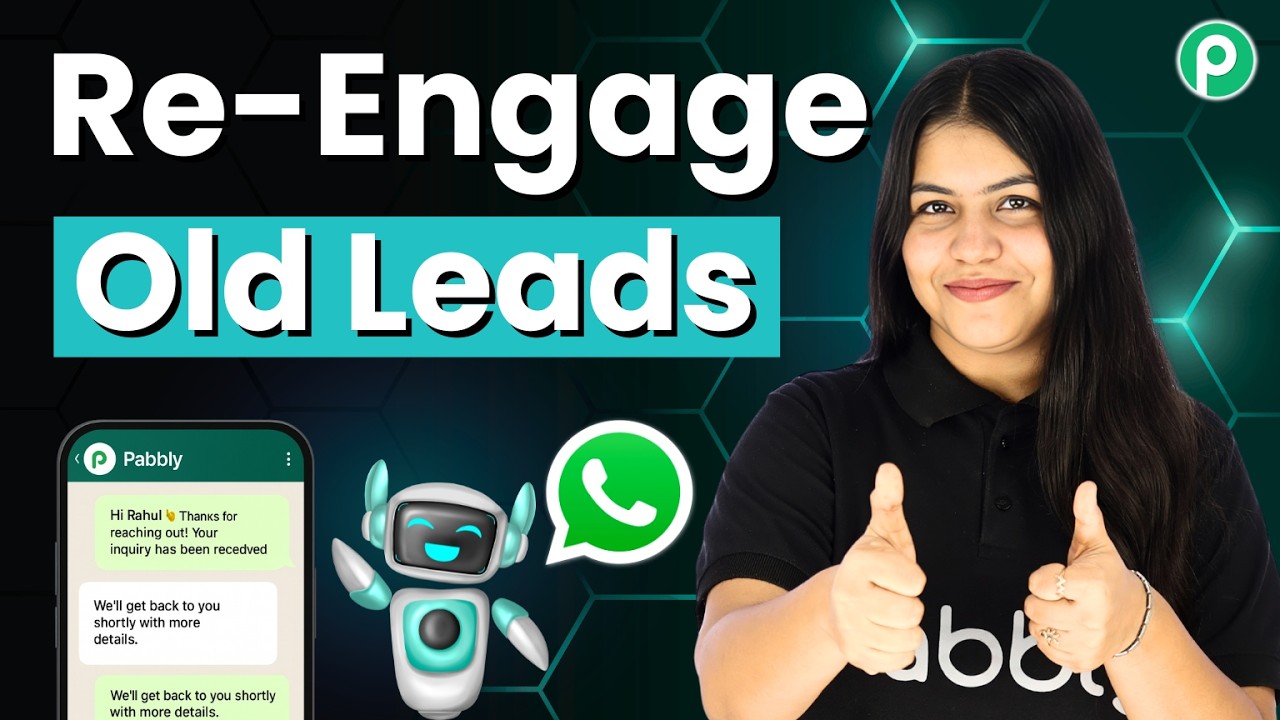
Re-Engage Old Leads with Bulk WhatsApp Messages

Watch Step By Step Video Tutorial Below


1. Accessing Pabbly Chatflow for Bulk WhatsApp Messages

To begin using Pabbly Chatflow for sending bulk WhatsApp messages, start by accessing your dashboard. If you are a new user, visit pabbl.com/chartflow in your browser to reach the landing page.

On the top right corner, click on the “Sign up for free” option. This allows you to get a free trial of Pabbly Chatflow. After familiarizing yourself with the platform, consider purchasing a subscription plan to unlock more features.


2. Adding Your WhatsApp Number in Pabbly Chatflow

Before sending messages, ensure you have added your WhatsApp number in Pabbly Chatflow. This is essential for the integration to work correctly. If you haven’t done this yet, follow the tutorial linked in the description box.

  • Navigate to the settings in Pabbly Chatflow.
  • Select the option to add your WhatsApp number.
  • Save the changes to confirm your number is added.

Once your WhatsApp number is added, you can proceed to use the broadcast feature of Pabbly Chatflow for sending bulk messages to your leads.


3. Creating a Broadcast in Pabbly Chatflow

To send bulk WhatsApp messages, access the broadcast section in Pabbly Chatflow. Click on the “Add Broadcast” button to create a new broadcast campaign. Name your broadcast according to your preference; for instance, you can label it as “Old Leads”.

Next, select the contact list you want to send messages to. If you haven’t created a contact list yet, navigate to the contact section and create one. After selecting the appropriate list, you can refine your audience by excluding new leads or specific contacts.


4. Composing Messages for the Broadcast

In this step, you will compose the message for your broadcast using Pabbly Chatflow. Choose between a pre-approved template message or a regular message. If opting for a template, ensure it is approved by Meta before use.

  • Type your message in the provided text area.
  • To bold text, add stars at both ends of the text.
  • Include personalized elements like the lead’s name using the placeholder format.

After composing your message, you will need to test it. Enter a username and mobile number to send a test message, ensuring everything looks correct before the actual broadcast.


5. Scheduling Your Broadcast in Pabbly Chatflow

Once your message is ready, you can schedule your broadcast in Pabbly Chatflow. You have two options: send immediately or schedule for later. If you choose to send instantly, simply click on the “Send Instantly” button.

To schedule for later, select the “Schedule for Later” option and choose your desired date and time from the calendar. Confirm by clicking on the “Add” button. After scheduling, you will receive a confirmation message indicating the broadcast details.

Once sent, you can view the stats of the broadcast, including how many messages were sent, delivered, read, pending, ignored, and failed. This data helps you analyze the effectiveness of your outreach campaign.


Conclusion

Using Pabbly Chatflow, you can efficiently send bulk WhatsApp messages to re-engage your old leads. This process allows for personalized communication, enhancing your chances of converting leads into customers. Start utilizing Pabbly Chatflow today to maximize your customer engagement efforts.

This WhatsApp Strategy Works Better Than Facebook Ads

Watch Step By Step Video Tutorial Below


1. Accessing Pabbly Connect for WhatsApp Integration

To start integrating WhatsApp with your business, you first need to access Pabbly Connect. This platform serves as the central hub for connecting various applications, including WhatsApp, for streamlined communication.

Begin by visiting the official Pabbly website and signing up for an account. Once registered, you will receive 100 free credits every month, which allows you to explore the features of Pabbly Connect. After logging in, navigate to the Pabbly Connect dashboard where you can set up your integrations.


2. Creating a Broadcast Campaign in Pabbly Connect

Once you are in Pabbly Connect, the next step is to create a broadcast campaign to communicate with your customers via WhatsApp. This process begins with accessing the Pabbly Chartflow feature from the dashboard.

Click on the broadcast feature on the left sidebar. This will take you to a page where you can manage your WhatsApp messages. Here are the steps to create a broadcast campaign:

  • Click on the “+ Add Broadcast” button.
  • Select the broadcast type as “Broadcast Campaign”.
  • Name your broadcast campaign.

After naming your campaign, select the contact list you wish to use. This list will contain the customers you want to reach via WhatsApp. Ensure that you have already uploaded your contacts to Pabbly Connect for this step to work smoothly.


3. Adding Contacts to Pabbly Connect for Broadcast

To effectively use Pabbly Connect, you need to add contacts to your broadcast list. You can do this by clicking on the contacts feature and then the “+ Add Contact” button. This allows for both manual entry and bulk uploads.

For bulk uploads, prepare a CSV file containing your customer data, which can be created using Excel or Google Sheets. Ensure that your CSV file includes necessary details like first name, last name, and phone number. Here’s how to upload your contacts:

  • Click on “Add New File” and upload your CSV file.
  • Confirm the upload by clicking on the “Insert” button.

Once your contacts are uploaded, you can manage them effectively through Pabbly Connect, ensuring that your broadcast campaign reaches the right audience.


4. Scheduling Broadcasts with Pabbly Connect

After setting up your broadcast campaign in Pabbly Connect, the next step is to schedule it for sending. This feature allows you to choose the exact time and date when your message will be sent out to your contacts.

To schedule a broadcast, follow these steps:

  • Select the option to schedule the broadcast.
  • Set the desired date and time for the broadcast.
  • Click on the “+ Add Broadcast” button to finalize your schedule.

This feature in Pabbly Connect ensures that your messages are sent at optimal times, maximizing engagement with your customers.


5. Testing and Launching Your Broadcast with Pabbly Connect

Before launching your broadcast campaign, it’s essential to test it to ensure everything works as expected. Within Pabbly Connect, you can send a test message to verify the setup.

To test your broadcast:

  • Enter a test user’s name and phone number.
  • Click the “Send Test Message” button.

If the test is successful, you will receive the message on WhatsApp, confirming that your setup is correct. Once verified, you can confidently launch your broadcast campaign to reach your customers effectively through Pabbly Connect.


Conclusion

Integrating WhatsApp with Pabbly Connect allows businesses to effectively communicate with their customers. By following the steps outlined in this tutorial, you can easily create and manage broadcast campaigns to enhance customer engagement.

Utilizing the features of Pabbly Connect ensures that your messages reach your audience at the right time, making your communication strategy more effective.