How to Set Up a Facebook Messenger AI Chatbot Using Pabbly Connect

Learn how to set up a Facebook Messenger AI Chatbot in just 10 minutes using Pabbly Connect. Follow this step-by-step guide for integration. Learn to create powerful connections between your critical applications without requiring specialized programming knowledge or extensive technical background.

Watch Step By Step Video Tutorial Below


1. Setting Up Pabbly Connect for Facebook Messenger AI Chatbot

To start creating your Facebook Messenger AI Chatbot, you need to access Pabbly Connect. Begin by visiting the Pabbly Connect website and signing up or logging in to your account. This platform allows you to automate workflows between various applications seamlessly.

Once logged in, navigate to the Pabbly Connect dashboard. Here, you can initiate the process of setting up your chatbot. Follow these steps to create a new workflow:

  • Click on the ‘Create Workflow’ button in the top right corner.
  • Choose the ‘New Beta Method’ for a more modern setup.
  • Name your workflow (e.g., ‘Facebook Messenger AI Chatbot’).

After naming your workflow, you can proceed to set up the trigger for your chatbot using Pabbly Connect. This will be essential for capturing incoming messages from Facebook Messenger.


2. Connecting Facebook Messenger to Pabbly Connect

In this section, you will connect your Facebook Messenger account to Pabbly Connect. This step is crucial as it allows Pabbly to capture messages sent to your Facebook page. Start by selecting ‘Facebook Messenger’ as your trigger application.

Choose the trigger event as ‘New Message Sent to Page’. Next, click on the ‘Connect’ button to establish a connection. You will be prompted to log in to your Facebook account. Make sure to grant the necessary permissions for Pabbly Connect to access your Facebook Messenger. Follow these steps:

  • Select your Facebook page from the dropdown menu.
  • Click on ‘Save and Send Test Request’ to verify the connection.

Once the connection is verified, you can test it by sending a message to your Facebook page. This will ensure that Pabbly Connect is properly capturing the messages for the next steps.


3. Setting Up OpenAI Integration in Pabbly Connect

After successfully connecting Facebook Messenger to Pabbly Connect, the next step is to integrate OpenAI to generate automated responses. Add an action step by selecting ‘OpenAI’ as your action application.

Choose the action event as ‘Chat GPT’. When prompted, create a new connection to OpenAI by entering your API key. You can find this key in your OpenAI account under the API settings. This key is essential for linking OpenAI with Pabbly Connect. Follow these steps:

Click on ‘Create New Secret Key’ in your OpenAI account. Copy the generated key and paste it into Pabbly Connect.

Once the connection is established, define the AI model you want to use and set up the prompt that will guide OpenAI in generating responses. This is where you specify the details about your business and the type of queries you expect.


4. Replying to Messages with Facebook Messenger and Pabbly Connect

With OpenAI integrated, you can now configure Pabbly Connect to reply to messages automatically. Add another action step, selecting ‘Facebook Messenger’ again, and choose the action event ‘Send Message’.

In this step, you will map the data from the previous steps to send the generated response back to the user. This includes mapping the sender ID and the message content. Follow these steps to complete this setup:

Map the recipient’s ID to send the response to the correct user. Map the generated message from OpenAI to send as a reply.

After mapping the necessary fields, click on ‘Save and Send Test Request’. If everything is set up correctly, you will see the response appear in your Facebook Messenger, confirming that Pabbly Connect has successfully sent the reply.


5. Setting Up Fallback Messages for Irrelevant Queries

To enhance your chatbot’s functionality, you can set up fallback messages for queries that are not relevant to your business. This is an important feature that ensures users receive a response even if their questions don’t match your services.

In your OpenAI prompt, include a fallback message that will be triggered when the user asks unrelated questions. For example, you can instruct the AI to respond with a polite message directing users back to relevant queries. This can be set up as follows:

Define a fallback message in your OpenAI prompt for irrelevant queries. Ensure the AI understands to only respond with the fallback message when necessary.

Once this is configured, your Facebook Messenger AI Chatbot will be equipped to handle a variety of inquiries, making it a robust tool for customer engagement through Pabbly Connect.


Conclusion

In this tutorial, we explored how to set up a Facebook Messenger AI Chatbot using Pabbly Connect. By following these steps, you can automate responses to customer inquiries, enhancing your business’s efficiency and customer engagement. With Pabbly Connect, you can easily integrate Facebook Messenger and OpenAI, creating a powerful chatbot in just minutes.

Ensure you check out Pabbly Connect to create business automation workflows and reduce manual tasks. Pabbly Connect currently offer integration with 2,000+ applications.

How to Create New Customer Records in HubSpot from Google Form Submissions Using Pabbly Connect

Learn how to automate customer record creation in HubSpot from Google Form submissions using Pabbly Connect. Step-by-step tutorial for seamless integration. Explore efficient methods for automating routine tasks with clear, concise instructions suited for both newcomers and experienced professionals.

Watch Step By Step Video Tutorial Below


1. Accessing Pabbly Connect for Integration

To create new customer records in HubSpot from Google Form submissions, we will use Pabbly Connect. Start by visiting the Pabbly website at pabby.com. You can either sign in if you are an existing user or sign up for free to get started.

Once signed in, navigate to the Pabbly Connect dashboard where you can create new workflows. Click on the ‘Create Workflow’ button and select the workflow builder. Choose the new beta option for a modern interface and name your workflow appropriately.


2. Setting Up Google Forms as the Trigger Application

In this step, we will set Google Forms as the trigger application in Pabbly Connect. Select Google Forms and choose ‘New Response Received’ as the trigger event. This action allows the workflow to activate whenever a new form submission occurs.

  • Select Google Forms as your trigger application.
  • Choose ‘New Response Received’ as the trigger event.
  • Connect to your Google Forms account by providing the required permissions.

After setting up the trigger, a webhook URL will be generated. This URL is crucial as it acts as a bridge between Google Forms and Pabbly Connect. Copy this webhook URL and proceed to your Google Form settings to integrate it.


3. Linking Google Sheets for Data Capture

Next, we will link Google Sheets to capture the form responses. Open your Google Form and navigate to the ‘Responses’ tab. Click on ‘View in Sheets’ to create a Google Sheet that will store the submissions. using Pabbly Connect

Ensure that the last name field is marked as required. This is important for data integrity. After setting up your Google Sheet, test the integration by submitting a dummy response through the form. Once submitted, verify that the response appears in the linked Google Sheet.


4. Configuring the Pabbly Connect Webhook

Return to Pabbly Connect and configure the webhook to send data from Google Sheets to your workflow. Go to the ‘Extensions’ menu in Google Sheets, select ‘Add-ons’, and search for Pabbly Connect Webhooks.

  • Paste the copied webhook URL into the designated field in Pabbly Connect Webhooks.
  • Set the trigger column to the last column (e.g., column G) in your Google Sheet.
  • Click on ‘Send Test’ to ensure the connection is successful.

After configuring the webhook, make sure to enable the ‘Send on Event’ option in your Pabbly Connect Webhooks settings. This ensures that future form submissions are sent to your Pabbly Connect workflow.


5. Adding HubSpot as the Action Application

Finally, we will set HubSpot as the action application in Pabbly Connect. Choose HubSpot and select ‘Create Contact’ as the action event. This step enables the workflow to create a new contact in HubSpot whenever a new form submission is received.

Connect your HubSpot account by following the prompts to grant necessary permissions. Once connected, map the fields from the Google Form responses to the corresponding fields in HubSpot. This mapping is crucial for ensuring that the correct data is transferred.

After completing the mapping, click on ‘Save and Send Test Request’ to send the data to HubSpot. Check your HubSpot CRM to confirm that the new contact has been created successfully with the details from your Google Form submission.


Conclusion

In this tutorial, we demonstrated how to create new customer records in HubSpot from Google Form submissions using Pabbly Connect. By following these steps, you can automate the process and save valuable time. The integration between Google Forms and HubSpot via Pabbly Connect ensures that your customer data is always up-to-date and easily accessible.

Ensure you check out Pabbly Connect to create business automation workflows and reduce manual tasks. Pabbly Connect currently offer integration with 2,000+ applications.

How to Store Facebook Lead Ads Responses in Zoho CRM Automatically Using Pabbly Connect

Learn how to automatically store Facebook Lead Ads responses in Zoho CRM using Pabbly Connect with this step-by-step tutorial. Transform complex automation concepts into accessible, actionable steps that eliminate unnecessary manual work while maximizing existing application capabilities.

Watch Step By Step Video Tutorial Below


1. Accessing Pabbly Connect for Integration

To begin storing Facebook Lead Ads responses in Zoho CRM automatically, you first need to access Pabbly Connect. Open a new tab and visit the Pabbly Connect landing page by entering ‘Pabbly.com/connect’ in your browser.

Once on the landing page, you will see options to sign in or sign up. If you are new, click on ‘Sign up for free’ to create an account. Existing users can simply click ‘Sign in’ to access their dashboard. After signing in, locate and click on the ‘Access Now’ button for Pabbly Connect.


2. Creating a Workflow in Pabbly Connect

After accessing Pabbly Connect, you need to create a new workflow to connect Facebook Lead Ads with Zoho CRM. Click on the ‘Create Workflow’ button. You will be prompted to choose between a new workflow builder and the classic one. It is recommended to select the ‘New’ workflow builder for a more modern interface.

  • Enter a name for your workflow, such as ‘Store Facebook Lead Ads Responses in Zoho CRM Automatically’.
  • Select a folder to save your workflow, or create a new folder if needed.
  • Click ‘Create’ to open the workflow window.

The workflow window will display the trigger and action sections. Triggers are events that start the workflow, while actions are the results that follow. Now, click on the ‘Add Trigger’ button to begin the integration process.


3. Setting Up Facebook Lead Ads as Trigger

In this step, you will select Facebook Lead Ads as the trigger application. Search for and select ‘Facebook Lead Ads’, then choose the trigger event as ‘New Lead Instant’. This option allows you to capture lead details instantly as they come in.

Click the ‘Connect’ button to establish a connection between Facebook Lead Ads and Pabbly Connect. You will be prompted to either select an existing connection or create a new one. If you haven’t set up a connection before, choose ‘Add a New Connection’. You will then be asked to connect with your Facebook account.

  • Select your Facebook account and click ‘Continue’.
  • Choose the Facebook page and lead generation form you want to use.
  • Click ‘Save and Send Test Request’ to initiate the test.

After completing these steps, Pabbly Connect will wait for a webhook response, which you will generate by submitting a test lead through Facebook’s lead ads testing tool.


4. Testing the Webhook Response

To capture the webhook response, you need to conduct a test submission. Open a new tab and search for the Meta for Developers page. Navigate to the resources section and select developer tools, then look for the Lead Ads Debug Tool.

In the Lead Ads Debug Tool, select the same Facebook page and lead generation form you configured in Pabbly Connect. Fill in the required details such as first name, last name, email, and phone number, then submit the form. After submitting, return to your Pabbly Connect workflow, where it should capture the test submission as a webhook response.

Confirm that the captured details match what you submitted. This indicates that the trigger step is successfully set up.

Once the details are captured, you can proceed to the action step of the workflow.


5. Setting Up Zoho CRM as Action

Now you will set Zoho CRM as the action application in your workflow. Click on ‘Add New Action Step’ and search for ‘Zoho CRM’. Select it and then choose the action event as ‘Create Contact’. Click ‘Connect’ to establish a connection between Zoho CRM and Pabbly Connect.

You will be prompted to enter your Zoho domain, which you can find by checking the URL of your Zoho CRM account. Copy the domain and paste it into the required field in Pabbly Connect. After accepting the permissions requested by Pabbly Connect, you will need to map the fields from the lead data captured earlier.

Map the first name, last name, email, and phone number from the webhook response. Leave unnecessary fields blank. Click ‘Save and Send Test Request’ to finalize the setup.

Upon successful completion, you should receive a confirmation that a new contact has been created in Zoho CRM with the details you provided. Refresh your Zoho CRM contact list to see the newly created contact.


Conclusion

In this tutorial, we demonstrated how to store Facebook Lead Ads responses in Zoho CRM automatically using Pabbly Connect. By following these steps, you can streamline your lead management process and ensure that every new lead is captured efficiently. Start leveraging Pabbly Connect today to enhance your business automation.

Ensure you check out Pabbly Connect to create business automation workflows and reduce manual tasks. Pabbly Connect currently offer integration with 2,000+ applications.

How to Add Google Lead Ads Leads to ActiveCampaign Automatically Using Pabbly Connect

Learn how to automate adding Google Lead Ads leads to ActiveCampaign using Pabbly Connect with this step-by-step tutorial. Discover how to seamlessly connect your essential tools through accessible instructions that make powerful automation available to professionals at every skill level.

Watch Step By Step Video Tutorial Below


1. Accessing Pabbly Connect for Automation

To start automating the process of adding Google Lead Ads leads to ActiveCampaign, you need to access Pabbly Connect. First, visit the Pabbly website by typing ‘Pabbly.com’ into your browser. If you are a new user, you can sign up for free and receive 100 tasks every month.

Once on the Pabbly website, click on ‘Sign In’ if you already have an account. After signing in, you will be directed to the Pabbly applications page. Here, click on Pabbly Connect to access the dashboard where you can create your workflow.


2. Creating a New Workflow in Pabbly Connect

In the Pabbly Connect dashboard, you can create a new workflow to automate the integration between Google Ads and ActiveCampaign. Click on the ‘Create Workflow’ button, then choose the ‘New Beta’ option for a modern workflow builder. using Pabbly Connect

  • Name your workflow something descriptive, like ‘Add Google Lead Ads to ActiveCampaign Automatically.’
  • Select a folder to organize your workflow, such as ‘All Automations.’
  • Click ‘Create’ to finalize your new workflow.

After creating the workflow, you will see a prompt to add a trigger application. In this case, select Google Ads as your trigger application. This means that every time a new lead is generated in Google Ads, it will trigger the workflow to add that lead to ActiveCampaign.


3. Connecting Google Ads to Pabbly Connect

To connect Google Ads to Pabbly Connect, you need to specify the trigger event. Choose ‘New Lead Form’ as the trigger event and click ‘Connect.’ A webhook URL will be provided to you, which acts as a bridge between Google Ads and Pabbly Connect.

Now, go to your Google Ads account and locate the test campaign you created. In the lead form settings, find the lead delivery option where you can input the webhook URL. Paste the webhook URL from Pabbly Connect into the designated field and add a random key. This will allow Google Ads to send lead data to your Pabbly Connect workflow.


4. Setting Up ActiveCampaign as the Action Application

After successfully connecting Google Ads, the next step is to set up ActiveCampaign as the action application in your workflow. In Pabbly Connect, select ActiveCampaign as your action application and choose ‘Create a Contact’ as the action event. using Pabbly Connect

  • If you have an existing connection, click ‘Save.’ If not, click ‘Add New Connection.’
  • Enter the ActiveCampaign URL and API key found in your ActiveCampaign account settings under Developer.
  • Ensure to remove the ‘https://’ from the URL before saving.

Once the connection is established, you will set up the mapping for the contact details. This means using the data received from Google Ads to populate the new contact fields in ActiveCampaign. This step is crucial for ensuring that each new lead is accurately captured in your ActiveCampaign account.


5. Testing the Integration and Finalizing the Workflow

After mapping the fields, click on ‘Save and Send Test Request’ to test the integration. If everything is set up correctly, you should receive a positive response indicating that the contact was successfully created in ActiveCampaign.

To verify, go back to your ActiveCampaign account and check the contacts section. You should see the new contact with the details you mapped from Google Ads. This confirms that your Pabbly Connect workflow is functioning as intended, automatically adding leads from Google Ads to ActiveCampaign.


Conclusion

In this tutorial, we demonstrated how to automate the integration of Google Lead Ads with ActiveCampaign using Pabbly Connect. By following these steps, you can streamline your lead management process and save valuable time.

Ensure you check out Pabbly Connect to create business automation workflows and reduce manual tasks. Pabbly Connect currently offer integration with 2,000+ applications.

How to Log Leads from Google Ads to Pipedrive CRM Automatically Using Pabbly Connect

Learn how to automate lead logging from Google Ads to Pipedrive CRM using Pabbly Connect. Step-by-step guide with detailed instructions. Develop expertise in application integration and learn how to design streamlined automation workflows using proven, simplified approaches.

Watch Step By Step Video Tutorial Below


1. Accessing Pabbly Connect for Automation

To log leads from Google Ads to Pipedrive CRM automatically, you need to access Pabbly Connect. Start by visiting Pabbly.com/connect. This platform serves as the central hub for your integration needs.

Once on the Pabbly Connect homepage, you have options to sign in or sign up. If you’re new, click on the ‘Sign Up Free’ button to get started with 300 free tasks each month. Existing users can simply sign in to access their dashboard.


2. Creating a Workflow in Pabbly Connect

After signing in, the next step involves creating a workflow in Pabbly Connect. Click on the ‘Create Workflow’ button located at the top right corner of your dashboard. You’ll be prompted to choose between the new beta version or the classic version of the workflow builder.

  • Select the ‘New Beta’ option for a modern experience.
  • Name your workflow as ‘Log Leads from Google Ads to Pipedrive CRM Automatically’.
  • Choose a folder for your workflow, such as ‘Automations’.

Once you’ve set this up, click the ‘Create’ button to finalize your workflow. This sets the stage for automating lead logging from Google Ads to Pipedrive CRM using Pabbly Connect.


3. Setting Up the Trigger with Google Ads

The next step is to configure the trigger in Pabbly Connect. Click on the ‘Add Trigger’ button and select Google Ads as your trigger application. Choose the event type as ‘New Lead Form Entry’. This will ensure that every time a new lead is generated in Google Ads, it triggers the automation.

After selecting the event, you will receive a webhook URL. This URL is essential for connecting Google Ads to Pabbly Connect. Copy this webhook URL and navigate to your Google Ads account to set up the lead form.

  • Create a new lead form in Google Ads.
  • Paste the webhook URL in the lead delivery settings under the Webhook integration section.
  • Send test data to verify the connection.

Once the test data is sent successfully, you’ll see a confirmation in Pabbly Connect. This indicates that your trigger setup is complete and ready to log leads automatically.


4. Creating a Contact in Pipedrive CRM

With the trigger set, the next step in Pabbly Connect is to create a new contact in Pipedrive CRM. Click on ‘Add Action’ and select Pipedrive as your action application. Choose ‘Create Person’ as the action event.

You’ll need to connect your Pipedrive account by entering your API token, which you can find in your Pipedrive account settings. After entering the token, map the fields from the Google Ads lead form to the Pipedrive contact fields.

Map the first name and last name from the lead details. Include the email address and phone number as well. Set the label (optional) to categorize the lead.

After mapping the required fields, click ‘Save and Send Test Request’ to create the contact in Pipedrive CRM. If successful, you will receive a confirmation response in Pabbly Connect.


5. Creating a Deal in Pipedrive CRM

Finally, the last step is to create a deal for the newly created contact in Pipedrive CRM using Pabbly Connect. Again, click on ‘Add Action’, select Pipedrive, and choose ‘Create Deal’ as the action event.

Since you’ve already connected your Pipedrive account, simply proceed to map the necessary fields for the deal. For example, use the lead’s first name in the deal title and set the status to open.

Map the person ID from the previous step. Set the probability percentage for the deal. Select the currency and other optional fields.

Once you’ve entered all the required details, click ‘Save and Send Request’. This will create a new deal in your Pipedrive account linked to the lead generated from Google Ads.


Conclusion

In this tutorial, we walked through the exact steps to log leads from Google Ads to Pipedrive CRM automatically using Pabbly Connect. From setting up the trigger to creating contacts and deals, Pabbly Connect streamlines the entire process, making it efficient and hassle-free. By automating these tasks, you can focus on nurturing leads and closing deals effectively.

Ensure you check out Pabbly Connect to create business automation workflows and reduce manual tasks. Pabbly Connect currently offer integration with 2,000+ applications.

How to Capture LinkedIn Lead Ads and Store Them in HubSpot CRM Automatically Using Pabbly Connect

Learn how to capture LinkedIn Lead Ads and store them in HubSpot CRM automatically using Pabbly Connect. Step-by-step guide included. Develop expertise in application integration and learn how to design streamlined automation workflows using proven, simplified approaches.

Watch Step By Step Video Tutorial Below


1. Accessing Pabbly Connect to Automate LinkedIn to HubSpot Integration

To capture LinkedIn Lead Ads and store them in HubSpot CRM automatically, you first need to access Pabbly Connect. Open your browser and visit pabby.com/connect to reach the Pabbly Connect homepage.

Once on the homepage, you will see options to either sign in or sign up. If you are a new user, click on ‘Sign up free’ to get started. Existing users should click on ‘Sign in’ to access their dashboards. After logging in, you will see various applications, including Pabbly Connect and Pabbly Subscription Billing.


2. Creating a Workflow in Pabbly Connect

After accessing Pabbly Connect, the next step is to create a workflow. Click the ‘Create Workflow’ button located at the top right corner of the dashboard. You will be prompted to select the workflow builder; choose the ‘Beta’ version for a modern experience.

  • Click on ‘Create’ after naming your workflow, for example, ‘Capture LinkedIn Lead Ads and Store Them in HubSpot CRM Automatically’.
  • Select a folder to save your workflow, such as ‘Automations’.

Once your workflow is created, you will need to set up a trigger and an action. In this case, the trigger will be a new lead from LinkedIn, and the action will be creating a new contact in HubSpot CRM using Pabbly Connect.


3. Setting Up the Trigger for LinkedIn Lead Ads

To set up the trigger, click on the ‘Add Trigger’ button in your workflow. Select LinkedIn as your trigger application and choose ‘Lead Notifications’ as the event. Click on ‘Connect’ to establish a connection.

If your LinkedIn account is not already connected, you will need to add a new connection. Click on ‘Connect with LinkedIn’ and follow the prompts to log in. Once connected, select your sponsored account from the dropdown menu and click ‘Save and Send Test Request’. This action will allow Pabbly Connect to wait for a webhook response from LinkedIn.


4. Generating a Test Lead for LinkedIn Ads

To test the integration, you need to generate a test lead through your LinkedIn lead ad. Navigate back to your LinkedIn Campaign Manager and select the campaign where your test lead form is located. Click on the ‘Apply Now’ button to open the test lead form.

  • Enter an email address for the test lead.
  • Provide a random phone number and submit the form.

After submission, check back in Pabbly Connect to see if you received a successful response with the lead details. This confirms that the trigger is set up correctly and ready to send data to HubSpot CRM.


5. Adding HubSpot CRM Action to Create Contacts

After successfully setting up your trigger, it’s time to add an action step. Select HubSpot CRM as your action application and choose ‘Create a Contact’ as the event. Click ‘Connect’ to establish the connection with HubSpot CRM.

If you have not connected HubSpot CRM to Pabbly Connect yet, you will need to log in and authorize the connection. Once connected, you will be prompted to fill in the necessary fields for creating a contact. Some fields are not required, so you can leave them blank.

Map the lead’s company name, email address, first name, and last name from the previous step. Select ‘Active’ for the status and ‘New’ for the lead status.

Finally, click on ‘Save and Send Test Request’ to create the contact in HubSpot CRM. Refresh your HubSpot account to verify that the new contact has been created successfully.


Conclusion

In this tutorial, we have successfully demonstrated how to capture LinkedIn Lead Ads and store them in HubSpot CRM automatically using Pabbly Connect. By following these steps, you can streamline your lead management process and ensure that every lead is captured efficiently.

Ensure you check out Pabbly Connect to create business automation workflows and reduce manual tasks. Pabbly Connect currently offer integration with 2,000+ applications.

Utilizing Pabbly Subscription Billing alongside Pabbly Connect can further enhance your automation capabilities. Start automating your workflows today!

Integrating Google Ads Leads with Salesforce CRM Using Pabbly Connect

Learn how to seamlessly integrate Google Ads leads into Salesforce CRM using Pabbly Connect. Step-by-step tutorial with detailed instructions and UI elements. Discover hidden automation capabilities within your existing tools. This guide shows you how to connect your essential applications and permanently eliminate redundant manual processes.

Watch Step By Step Video Tutorial Below


1. Accessing Pabbly Connect for Google Ads and Salesforce Integration

To integrate Google Ads leads into Salesforce CRM, you first need to access Pabbly Connect. Start by opening a new tab in your browser and typing Pabbly.com/connect to reach the Pabbly Connect landing page.

Once on the landing page, you have two options: sign in or sign up for free. If you are a new user, click on sign up for free to receive 100 free tasks every month. Existing users should click sign in to access their account.


2. Creating a Workflow in Pabbly Connect

After signing in, you will see the Pabbly Connect dashboard. To create a new workflow, click on the create workflow button. You will be prompted to select a workflow builder; choose the new workflow builder for a modern interface.

  • Select a name for your workflow, such as Add New Google Ads Leads to Salesforce CRM.
  • Choose a folder to save your workflow.
  • Click on the create button to finalize.

Once created, the workflow window will open. This is where the automation process begins, utilizing triggers and actions to connect Google Ads and Salesforce through Pabbly Connect.


3. Setting Up the Trigger for Google Ads

To initiate the workflow, click on the add trigger button and select Google Ads as your trigger application. Choose New Lead Form Entry as the trigger event and click on connect.

A webhook URL will be generated; copy this URL. Now, navigate to your Google Ads account. In your lead form settings, locate the lead delivery option and paste the copied webhook URL. Enter a key of your choice and click on send test data.

  • Ensure your Google Ads campaign is either in draft mode or live to capture test data.
  • Check that Pabbly Connect captures the test data successfully.

After sending the test data, return to Pabbly Connect to verify that the response has been captured, including details like company name, email, and phone number.


4. Adding the Action Step to Create a Lead in Salesforce

Next, you need to add an action step to create a lead in Salesforce. Click on add new action step and select Salesforce as the action application. Choose Create Lead as the action event and click on connect.

You will be prompted to either select an existing connection or add a new one. If this is your first connection, click on add a new connection. You will be asked to allow permissions for Pabbly Connect to access your Salesforce account.

Log in to your Salesforce account if prompted. Grant permissions to Pabbly Connect to manage your leads.

Once connected, you will be able to map the lead details from Google Ads to Salesforce using Pabbly Connect, ensuring all information is transferred accurately.


5. Mapping Lead Details and Finalizing the Integration

In the mapping section, you will need to input lead details such as first name, last name, company name, phone number, and email. Instead of typing these manually, use the mapping feature provided by Pabbly Connect to insert data dynamically from the previous step.

For the lead source, set it to web only, and for the status, choose open – not contacted. Click on save and send test request to finalize the lead creation process.

Upon successful creation, you will receive a confirmation message from Pabbly Connect. You can then check your Salesforce account to verify that the new lead has been created with all the correct details, ensuring that your integration between Google Ads and Salesforce is working flawlessly.


Conclusion

In this tutorial, we explored how to integrate Google Ads leads into Salesforce CRM using Pabbly Connect. This process allows for seamless lead management and ensures that every new lead is captured efficiently. By following these steps, you can automate your lead generation process and focus on growing your business.

Ensure you check out Pabbly Connect to create business automation workflows and reduce manual tasks. Pabbly Connect currently offer integration with 2,000+ applications.

Automate Appointment Booking & Reminders for Clinics on WhatsApp Using Pabbly Chatflow

Learn how to automate appointment booking and reminders for clinics using Pabbly Chatflow and Pabbly Chatflow for WhatsApp integration. Learn step-by-step how to create, test, and optimize chatbots that enhance customer experience while reducing support workload.

Watch Step By Step Video Tutorial Below


1. Accessing Pabbly Chatflow for Automation

To start automating appointment booking and reminders for clinics on WhatsApp, you first need to access Pabbly Chatflow. Begin by visiting the Pabbly website and navigating to the Chatflow section. Here, you can either sign in if you’re an existing user or sign up for a new account, which grants you 100 free credits each month to create chatbots.

Once logged in, you will land on the dashboard. From here, the first step is to add your WhatsApp number. You can do this by selecting the ‘Add WhatsApp Number’ option, where you can choose between WhatsApp connect or manual token connect. This setup is crucial as it allows Pabbly Chatflow to send and receive messages on WhatsApp.


2. Creating Your WhatsApp Chatbot with Pabbly Chatflow

After setting up your WhatsApp number, the next step is to create your WhatsApp chatbot using Pabbly Chatflow. Click on the ‘Flows’ button in the left sidebar and then select ‘Add Flow’. Give your chatbot a meaningful name, such as ‘WhatsApp Chatbot for Goodwill Clinic’. This naming is essential for easy identification later on.

  • Set a trigger event for your chatbot, using keywords like ‘hello’ and ‘book appointment’.
  • Add a list to respond to users, including options for booking, rescheduling, or canceling appointments.
  • Connect the trigger to the list to ensure users receive the options when they send a message.

By setting these elements, you allow Pabbly Chatflow to respond dynamically to user inquiries, enhancing the overall user experience.


3. Configuring Appointment Options in Pabbly Chatflow

Once your chatbot is created, it’s time to configure the appointment options. This involves setting up specific responses for each user interaction. For instance, when a user clicks on ‘Book New Appointment’, you can prompt them for their name, date, and time of the appointment.

To do this, use the ‘Ask Question’ feature in Pabbly Chatflow to create sequential questions. Each question should be connected to a custom field to store the user’s responses, such as:

  • Ask for the user’s name and store it in a custom field.
  • Request the date and time for the appointment, also storing these in custom fields.

This structured approach allows Pabbly Chatflow to gather all necessary information efficiently, ensuring a smooth booking process for users.


4. Integrating Pabbly Chatflow with Pabbly Connect

After gathering user information, the next step is to integrate Pabbly Chatflow with Pabbly Connect to automate reminders. This is achieved through an API request that sends the collected data to Pabbly Connect. In your chatbot flow, add an API request action after capturing the user’s details.

To set up the API request, you need to enter the webhook URL from Pabbly Connect and specify the fields to send, including name, date, and time. This integration allows you to create reminders automatically in Google Calendar. For example:

Set the action event in Pabbly Connect to create an event in Google Calendar. Map the collected data to the appropriate fields in Google Calendar.

This seamless integration ensures that every appointment booked through your chatbot is automatically reflected in your calendar, keeping you organized and informed.


5. Testing and Launching Your Chatbot

With your chatbot and integrations set up, it’s time to test the functionality. Send a message to your WhatsApp number to interact with the chatbot. For instance, type ‘hello’ to see if the list of options appears as intended. Follow through the booking process by selecting an appointment and providing your details.

Check your Google Calendar to confirm that the appointment has been added correctly. If everything works as planned, your chatbot is ready to go live! Remember to monitor the interactions to ensure users are receiving the right information and assistance.

Utilizing Pabbly Chatflow for this automation not only streamlines your appointment booking process but also enhances customer satisfaction by providing instant responses and confirmations.


Conclusion

In conclusion, automating appointment booking and reminders for clinics using Pabbly Chatflow significantly improves operational efficiency. By following the outlined steps, you can create a responsive WhatsApp chatbot that integrates seamlessly with Pabbly Connect and Google Calendar, ensuring a smooth experience for both staff and patients.

Ensure you check out Pabbly Connect to create business automation workflows and reduce manual tasks. Pabbly Connect currently offer integration with 2,000+ applications.

How to Automatically Post New Products to Pinterest from BigCommerce Using Pabbly Connect

Learn how to automatically post new products to Pinterest from BigCommerce using Pabbly Connect. Step-by-step tutorial for seamless integration. Eliminate manual repetitive tasks from your workflow. Discover proven automation methods with intuitive steps designed for efficiency-minded professionals.

Watch Step By Step Video Tutorial Below


1. Accessing Pabbly Connect for Integration

To begin the process of automatically posting new products to Pinterest from BigCommerce, you first need to access Pabbly Connect. This integration platform simplifies the automation process without any coding skills required.

Start by visiting the Pabbly Connect website by typing pabyt.com in your browser. Once there, sign in to your account. If you’re a new user, you can sign up for free to get started with 100 free tasks monthly. After logging in, navigate to the Pabbly Connect dashboard, where you can create workflows to automate your tasks.


2. Creating a New Workflow in Pabbly Connect

After accessing the dashboard of Pabbly Connect, the next step is to create a new workflow. Click on the ‘Create Workflow’ button and select the classic workflow builder for a familiar interface.

  • Name your workflow as ‘Automatically Post New Products to Pinterest from BigCommerce’.
  • Select a folder for your workflow, such as ‘All Automations’.
  • Click on ‘Create’ to finalize your workflow setup.

Once your workflow is created, you will see two boxes: one for the trigger and one for the action. The trigger will be set to BigCommerce, and the action will be set to Pinterest, allowing for seamless integration using Pabbly Connect.


3. Setting Up Trigger and Action for BigCommerce and Pinterest

In this section, you’ll configure the trigger and action for your workflow using Pabbly Connect. Start with the trigger application, selecting BigCommerce as your trigger app.

Choose ‘New Product’ as the trigger event. If you don’t have an existing connection, click on ‘Add New Connection’. You will need to provide your BigCommerce API details, including the Client ID, Access Token, and Store Hash Key. These details can be obtained from your BigCommerce account settings under API accounts.

  • Copy the Client ID and Access Token from your BigCommerce API settings.
  • Paste these details into the corresponding fields in Pabbly Connect.
  • Click ‘Save’ to establish the connection.

After saving the connection, click on ‘Save and Send Test Request’ to capture a response. This response will confirm that your trigger is correctly set up and ready to capture new product details.


4. Creating a Pin in Pinterest Using Pabbly Connect

With the trigger successfully set up, it’s time to create a Pinterest pin automatically when a new product is added in BigCommerce. In this step, use Pabbly Connect to add an action step to your workflow.

Search for Pinterest as your action application and select ‘Create Pin’ as the action event. If you have an existing connection, choose to save it; otherwise, create a new connection by logging into your Pinterest account through Pabbly Connect.

Select the board where you want to post the pin. Map the image URL and product details from the previous steps. Click ‘Save and Send Test Request’ to finalize the action.

After executing this action, check your Pinterest board to confirm that the new pin for the product has been created successfully. This step showcases the power of Pabbly Connect in automating your e-commerce tasks efficiently.


5. Conclusion: Automate Your Product Posting with Pabbly Connect

In this tutorial, we explored how to use Pabbly Connect to automatically post new products from BigCommerce to Pinterest. By following the steps outlined, you can streamline your e-commerce operations effectively.

Ensure you check out Pabbly Connect to create business automation workflows and reduce manual tasks. Pabbly Connect currently offer integration with 2,000+ applications.

Utilizing Pabbly Connect not only saves time but also ensures that your product updates are reflected in real-time across platforms. Start automating your workflows today to enhance productivity and efficiency in your online business.

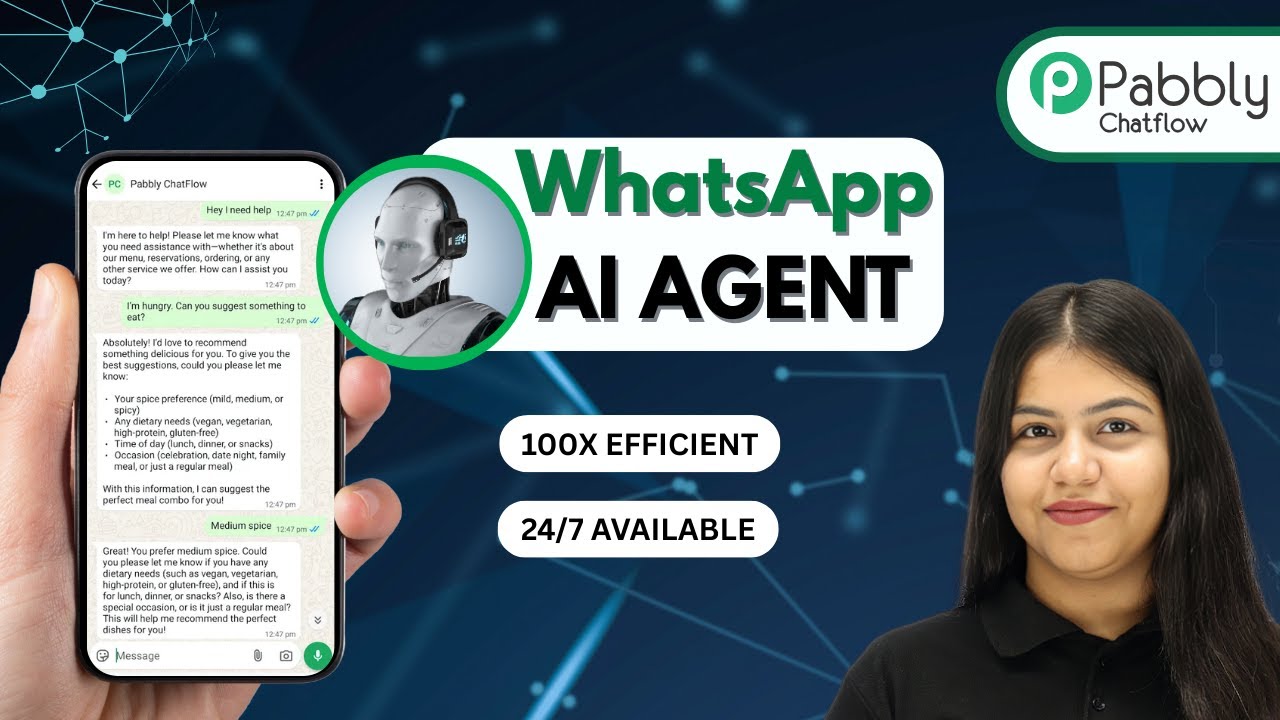
Build a WhatsApp AI Agent in Just 10 Minutes Using Pabbly Chatflow

Learn how to create a WhatsApp AI agent in just 10 minutes with Pabbly Chatflow. Follow this detailed tutorial for seamless integration and setup. Discover how to design chat experiences that feel personal and responsive while handling customer inquiries automatically around the clock.

Watch Step By Step Video Tutorial Below


1. Accessing Pabbly Chatflow to Create Your WhatsApp AI Agent

To create a WhatsApp AI agent, the first step is to access Pabbly Chatflow. Visit the official Pabbly website and navigate to the Chatflow section. If you are a new user, you can sign up for a free trial, which allows you to explore all features.

Once you are on the Pabbly Chatflow landing page, you can either sign in or create an account. After logging in, you will be directed to the dashboard where you can start setting up your WhatsApp AI agent. Make sure to have your WhatsApp number added to Pabbly Chatflow for seamless integration.


2. Creating Your AI Agent in Pabbly Chatflow

Creating an AI agent in Pabbly Chatflow is straightforward. Click on the ‘AI Assistant’ feature from the left sidebar. This will allow you to create a new AI assistant specifically for WhatsApp.

  • Click on ‘Add AI Assistant’ and name your agent, for example, ‘AI Agent for WhatsApp’.
  • Choose a pre-built example or create a custom prompt for your assistant.
  • Set the temperature to control the creativity of the AI responses.

After setting these parameters, you can proceed to select the AI model, such as GPT-4 Mini, and enter your OpenAI API key. This key is crucial as it connects your AI agent to the OpenAI service, allowing it to generate responses.


3. Configuring Your AI Assistant Settings

In this section, you will configure various settings for your AI assistant within Pabbly Chatflow. You can customize header and footer messages, set up keywords for user queries, and specify retry attempts.

  • Add a header message to greet users when they initiate a chat.
  • Set keywords that will trigger human intervention if the AI cannot respond.
  • Define fallback messages to guide users when the AI fails to respond.

These configurations enhance the user experience by ensuring that the AI agent can handle various scenarios effectively. After adjusting these settings, you can upload your knowledge source, which is crucial for the AI to provide accurate responses.


4. Uploading Your Knowledge Source to Pabbly Chatflow

Uploading a knowledge source is a critical step in setting up your AI agent in Pabbly Chatflow. This source contains all the information the AI will use to respond to user inquiries. You can upload documents in TXT or PDF format.

To create your knowledge source, you can prepare a document with all relevant information about your business, such as menu items, services, and FAQs. After preparing your document, simply upload it in the designated area within Pabbly Chatflow. This allows your AI agent to access and utilize this information when responding to users.


5. Testing Your WhatsApp AI Agent Created with Pabbly Chatflow

Once your AI agent is configured and your knowledge source is uploaded, it’s time to test the functionality. You can initiate a conversation through WhatsApp by sending a simple greeting like ‘Hey, I need help’.

Your AI agent, powered by Pabbly Chatflow, will respond based on the settings and knowledge source you provided. You can test various queries, such as asking for menu recommendations or booking details, to see how well the AI performs. This testing phase is essential to ensure your AI agent operates smoothly before going live.


Conclusion

In this tutorial, you learned how to build a WhatsApp AI agent using Pabbly Chatflow in just 10 minutes. By following the steps outlined above, you can create an effective AI assistant that enhances customer interaction and supports your business needs.

Ensure you check out Pabbly Connect to create business automation workflows and reduce manual tasks. Pabbly Connect currently offer integration with 2,000+ applications.