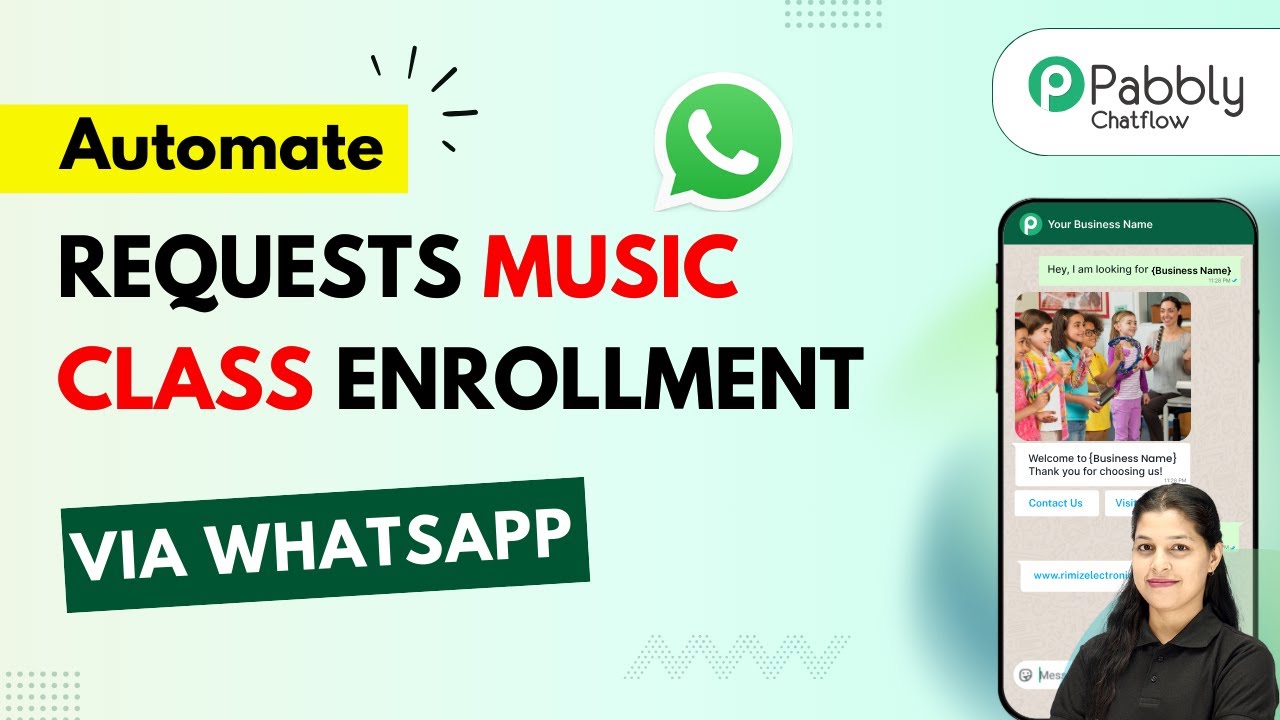
Automate Music Class Enrollment via WhatsApp with Pabbly Chatflow

Learn how to automate music class enrollment via WhatsApp using Pabbly Chatflow in this detailed step-by-step tutorial. Explore how leading businesses automate customer interactions with carefully designed chat sequences that feel natural and helpful.

Watch Step By Step Video Tutorial Below


1. Accessing Pabbly Chatflow for WhatsApp Integration

To automate music class enrollment via WhatsApp, you first need to access Pabbly Chatflow. Start by visiting the Pabbly Chatflow website by typing ‘Pabbly.com/chatflow’ in your browser. Once there, you will see options for signing in or signing up.

If you are a new user, click on ‘Sign Up Free’ to create an account. Existing users should click on ‘Sign In’. After signing up, you will receive 100 free credits per month to practice building your chatbot. This is a great way to familiarize yourself with the platform’s features.


2. Creating Your WhatsApp Chatbot with Pabbly Chatflow

After accessing Pabbly Chatflow, navigate to the dashboard where you will find the option to add your WhatsApp number. Click on ‘Add WhatsApp Number’ to connect your WhatsApp account. You can choose between WhatsApp Connect or Manual Token Connect based on your preference.

  • Select ‘WhatsApp Connect’ for easier integration.
  • If using Manual Token Connect, follow the prompts to enter your token.

Once your WhatsApp number is successfully connected, proceed to the sidebar and click on ‘Flows’ to create your chatbot flow. This flow will automate the enrollment process for your music class.


3. Designing the Chatbot Flow in Pabbly Chatflow

In the flow builder of Pabbly Chatflow, click on ‘Add Flow’ to start designing your chatbot. Name your flow ‘Automate Music Class Enrollment via WhatsApp’. Next, set up a trigger that initiates the chatbot when a specific keyword is sent by the user.

For this, select the ‘Keyword Matches’ trigger and enter a keyword like ‘enroll’. This keyword will activate the chatbot whenever a user sends a message containing it. After setting the trigger, create a welcome message that greets the user and provides options to enroll or view courses.


4. Adding Interaction Options for Users

In your Pabbly Chatflow flow, after the welcome message, add buttons for user interaction. Create two buttons: ‘Enroll Now’ and ‘View Courses’. When a user clicks ‘Enroll Now’, the chatbot should ask them which instrument they want to learn.

  • The first button should lead to a question asking for the instrument.
  • The second button should show a list of available courses.

Ensure that each question collects necessary information, such as instrument choice, preferred batch, and full name. After collecting this information, send a confirmation message to the user, confirming their enrollment.


5. Testing Your Chatbot Integration with WhatsApp

Once your flow is set up in Pabbly Chatflow, it’s time to test it. Send a message from your connected WhatsApp number to see if the chatbot responds correctly. For example, type ‘I want to enroll in music class’ and check if you receive the welcome message.

Follow the prompts by selecting ‘Enroll Now’ and entering the required details. If everything is set up correctly, you should receive confirmation of your enrollment, and the chatbot will provide course options when requested.


Conclusion

By utilizing Pabbly Chatflow, you can effectively automate the enrollment process for your music classes via WhatsApp. This integration not only saves time but also enhances the user experience by providing instant responses and information.

Ensure you check out Pabbly Connect to create business automation workflows and reduce manual tasks. Pabbly Connect currently offer integration with 2,000+ applications.

Start using Pabbly Chatflow today to streamline your music class enrollment process and improve communication with your students.

Integrate Facebook Lead Ads with GoHighLevel CRM Using Pabbly Connect

Learn how to seamlessly integrate Facebook Lead Ads with GoHighLevel CRM using Pabbly Connect in this detailed tutorial. Follow the step-by-step guide for effective automation.

Watch Step By Step Video Tutorial Below


1. Accessing Pabbly Connect for Integration

To integrate Facebook Lead Ads with GoHighLevel CRM, the first step is to access Pabbly Connect. This platform is essential for creating automated workflows without any coding knowledge. If you are a new user, you can sign up for free to get started.

After signing up, log into your Pabbly Connect account and navigate to the workflow builder. This area is where you will set up the integration between Facebook Lead Ads and GoHighLevel CRM. You will be able to create a seamless connection that allows lead data to flow automatically.


2. Creating the Workflow in Pabbly Connect

Once you are in Pabbly Connect, the next step is to create a new workflow. Click on the ‘Add Workflow’ button, and name your workflow to reflect its purpose, such as ‘Facebook Lead Ads to GoHighLevel CRM’. This helps keep your automations organized.

  • Click on the ‘Add Trigger’ button.
  • Search for and select ‘Facebook Lead Ads’ as the trigger application.
  • Choose ‘New Lead’ as the action event.

After selecting the trigger, you will connect your Facebook account to Pabbly Connect. Make sure you are logged into Facebook to allow the integration. This is crucial for capturing lead data from your Facebook ads.


3. Setting Up Facebook Connection

In this step, you will finalize the connection between Facebook Lead Ads and Pabbly Connect. Click on ‘Connect with Facebook Lead Ads’ and follow the prompts to log in. This will allow Pabbly Connect to access your Facebook Lead Ads data.

Once connected, select the Facebook page and the specific lead form that you want to use for this automation. Ensure you enable the ‘Simple Response’ option to get the lead data in a manageable format. Click ‘Save and Send Test Request’ to confirm the connection.


4. Capturing Lead Data from Facebook

After setting up the Facebook connection, Pabbly Connect will wait for a webhook response. To generate this response, use the Facebook Lead Ads testing tool. Fill out the lead form with test data to simulate a new lead submission.

Once you submit the test lead, Pabbly Connect will capture the lead data. You should see the captured details in your workflow. This confirms that the integration is working correctly and that Pabbly Connect is receiving data from Facebook Lead Ads.


5. Adding GoHighLevel CRM to the Workflow

The final step involves connecting Pabbly Connect with GoHighLevel CRM. Click on ‘Add Action Step’ and select ‘Lead Connector V2’ as the action application. Choose ‘Create Contact’ as the event to map the lead data into your CRM.

Log into your GoHighLevel account to authorize the connection. Once authorized, you will map the lead data fields from Facebook to the appropriate fields in GoHighLevel. This ensures that each new lead is added accurately with their details.


Conclusion

Integrating Facebook Lead Ads with GoHighLevel CRM using Pabbly Connect allows for efficient lead management. By following the steps outlined above, you can automate the process of capturing leads and adding them to your CRM seamlessly. With this automation, you can focus more on your business growth while Pabbly Connect handles the data flow.

Ensure you check out Pabbly Connect to create business automation workflows and reduce manual tasks. Pabbly Connect currently offer integration with 2,000+ applications.

How to Add 99acres Leads to Your CRM Using Pabbly Connect

Learn how to automate adding 99acres leads to your CRM using Pabbly Connect. Step-by-step guide with detailed instructions and features of Pabbly Connect. Transform complex automation concepts into accessible, actionable steps that eliminate unnecessary manual work while maximizing existing application capabilities.

Watch Step By Step Video Tutorial Below


1. Accessing Pabbly Connect for Integration

To start automating your lead management, you will need to access Pabbly Connect. If you are an existing user, simply open your workflow builder. For new users, visit the Pabbly Connect landing page and sign up for free to explore the platform.

Once logged in, navigate to the dashboard of Pabbly Connect and open your workflow builder. This is where you will set up the integration process for adding 99acres leads to your CRM.


2. Setting Up the Trigger with 99acres

The first step in your automation journey is to set up the trigger. In Pabbly Connect, click on ‘Add Trigger’ and search for 99acres as your trigger application. Select it and choose the trigger event as ‘New Leads’. After this, click on ‘Connect’.

  • Search for 99acres in the trigger application.
  • Select ‘New Leads’ as the trigger event.
  • Click ‘Connect’ to generate a webhook URL.

Copy the generated webhook URL and contact your account manager at 99acres to have this URL added to your account. This step is crucial, as 99acres does not allow users to add the webhook URL directly through their interface.


3. Capturing Lead Details from 99acres

Once the webhook URL is successfully added to your 99acres account, Pabbly Connect will start capturing lead details automatically. You will see the lead details appear as a webhook response, including important information such as name, phone number, email, and company name.

After capturing the webhook response, you can proceed to create a new contact in your CRM using these details. For this tutorial, we will use Salesforce as the CRM, but Pabbly Connect supports many CRM applications including HubSpot and Zoho CRM.


4. Adding Action Step to Create a Contact in CRM

Now it’s time to add an action step in Pabbly Connect. Click on ‘Add New Action Step’ and search for Salesforce as the action application. Choose ‘Create Contact’ as the action event and click ‘Connect’.

  • Select Salesforce as the action application.
  • Choose ‘Create Contact’ as the action event.
  • Connect to your Salesforce account by allowing necessary permissions.

To establish a connection, ensure you are logged into your Salesforce account. When prompted, allow Pabbly Connect the necessary permissions to access your Salesforce data. Once connected, you will be able to map the lead details captured from 99acres to the appropriate fields in Salesforce.


5. Mapping Lead Details and Testing the Workflow

The final step involves mapping the captured lead details to the fields in Salesforce. In Pabbly Connect, you will see fields corresponding to the contact details. Instead of typing the details manually, you will use the mapping feature to dynamically insert data from the previous step.

After mapping the lead details, click on ‘Save and Send Test Request’ to test the integration. You should receive a positive response indicating that the contact has been successfully created in Salesforce. Refresh your Salesforce contact list to verify that the new lead appears with the correct details.


Conclusion

By following these steps, you can effectively automate the process of adding 99acres leads to your CRM using Pabbly Connect. This integration saves time and ensures that your lead data is accurately captured and managed. Start using Pabbly Connect today to streamline your lead management process.

Ensure you check out Pabbly Connect to create business automation workflows and reduce manual tasks. Pabbly Connect currently offer integration with 2,000+ applications.

How to Automatically Add Facebook Leads to Apollo.io Using Pabbly Connect

Learn how to integrate Facebook Leads with Apollo.io automatically using Pabbly Connect. Follow our step-by-step tutorial for seamless automation. Discover hidden automation capabilities within your existing tools. This guide shows you how to connect your essential applications and permanently eliminate redundant manual processes.

Watch Step By Step Video Tutorial Below


1. Accessing Pabbly Connect for Integration

To add Facebook leads to Apollo.io automatically, you first need to access Pabbly Connect. Start by visiting the official Pabbly website and signing in or signing up for a free account. This integration will streamline your lead management process.

Once logged in, navigate to the Pabbly Connect dashboard. Here, you will find various options to create workflows that connect your applications. The user-friendly interface makes it easy to set up the necessary automation for your Facebook leads.


2. Creating a Workflow in Pabbly Connect

Creating a workflow in Pabbly Connect is the next crucial step. Click on the ‘Create Workflow’ button located at the top right corner of your dashboard. You will be prompted to name your workflow; for this integration, you can name it ‘Facebook Leads to Apollo.io’.

  • Select the folder where you want to save your workflow.
  • Choose the trigger application as Facebook Leads.
  • Set the event to ‘New Lead’.

After naming your workflow and selecting the appropriate trigger, click on ‘Save’. This step is essential to ensure that your workflow is set up correctly for future automation tasks.


3. Connecting Facebook Leads to Pabbly Connect

Now, it’s time to connect your Facebook Leads account to Pabbly Connect. Click on the ‘Connect with Facebook Leads’ button. If you’re not already logged into your Facebook account, you will be prompted to enter your credentials.

Once connected, select the Facebook page and the lead form you want to use. This selection is critical as it determines which leads will be captured and sent to Apollo.io. After making your selections, click on ‘Continue’ to proceed.


4. Setting Up Apollo.io in Pabbly Connect

The next step involves setting up Apollo.io as the action application in Pabbly Connect. Click on the ‘Add Action Step’ button and select Apollo.io. Choose the event as ‘Create Contact’. This allows you to create a new contact in Apollo.io every time a new lead is generated.

To connect Apollo.io, you will need to enter your API key, which can be found in your Apollo.io account settings. After entering the key, click on ‘Save’. This action establishes a secure connection between Pabbly Connect and Apollo.io.

  • Map the fields from Facebook Leads to Apollo.io, including first name, last name, email, and phone number.
  • Ensure that all required fields are filled correctly to avoid errors.

After mapping the fields, click on ‘Save and Send Test Request’ to verify that the integration works correctly. You should see a successful response indicating that the contact has been created in Apollo.io.


5. Testing the Integration

Testing your integration is essential to ensure everything is functioning as expected. Go back to your Facebook lead form and generate a test lead. After submitting the lead, check your Apollo.io account to see if the new contact appears.

If the contact is successfully created in Apollo.io, your integration is working perfectly. This automated process allows you to manage your leads more efficiently without manual input. With Pabbly Connect, you can focus on growing your business rather than managing leads manually.


Conclusion

In this tutorial, we demonstrated how to use Pabbly Connect to automatically add Facebook leads to Apollo.io. By following the steps outlined, you can streamline your lead management process and enhance your business efficiency.

Ensure you check out Pabbly Connect to create business automation workflows and reduce manual tasks. Pabbly Connect currently offer integration with 2,000+ applications.

How to Create Salesforce Leads from MagicBricks Inquiries Using Pabbly Connect

Learn how to create Salesforce leads from MagicBricks inquiries using Pabbly Connect. Follow this step-by-step tutorial for seamless integration. Build sophisticated automated workflows in less time than you think. This guide translates complex integrations into straightforward steps for immediate implementation.

Watch Step By Step Video Tutorial Below


1. Accessing Pabbly Connect for Integration

To create Salesforce leads from MagicBricks inquiries, the first step is to access Pabbly Connect. Open a new tab and type Pabbly.com/connect in your browser to reach the landing page.

On the landing page, you have two options: sign in or sign up for free. If you are a new user, click on ‘sign up for free’ to get 100 tasks free every month. Existing users should click on ‘sign in’ to access their accounts. Once logged in, navigate to the applications and select Pabbly Connect.


2. Creating a Workflow in Pabbly Connect

Once you are in Pabbly Connect, click on the ‘create workflow’ button. You will then be prompted to select between the new or classic workflow builder. Choose the new workflow builder for a modern interface.

  • Enter the workflow name: ‘Create Salesforce leads from MagicBricks inquiries’.
  • Select the folder as ‘Automations’.
  • Click on the ‘create’ button.

After clicking create, you will enter the workflow window where you can set up triggers and actions. This is crucial for the automation process using Pabbly Connect.


3. Setting Up the Trigger with MagicBricks

In the workflow window, click on the ‘add trigger’ button. Search for MagicBricks and select it as the trigger application. Choose the event ‘New Leads’ and click on ‘Connect’.

You will receive a webhook URL. This URL needs to be provided to your MagicBricks account manager because MagicBricks does not allow users to input webhooks directly. Once they add this URL, leads will automatically be sent to Pabbly Connect as web responses.


4. Capturing Lead Details and Creating Salesforce Lead

After setting up the webhook, you will capture the lead details like first name, last name, phone number, email address, and city. This information will be used to create a lead in Salesforce.

Next, click on ‘add new action step’ and search for Salesforce. Select it and choose the event ‘Create Lead’. Click on ‘Connect’. If you have an existing connection, select it. Otherwise, create a new connection by logging into your Salesforce account through Pabbly Connect.

  • Map the lead details from MagicBricks to Salesforce fields.
  • Click on ‘Save and Send Test Request’ to create the lead.

Once the test request is successful, you will see that a new lead has been created in Salesforce, confirming the seamless integration facilitated by Pabbly Connect.


5. Conclusion: Automate Your Lead Generation with Pabbly Connect

By following these steps, you can effectively create Salesforce leads from MagicBricks inquiries using Pabbly Connect. This automation allows your sales team to follow up quickly and efficiently on new leads.

Ensure you check out Pabbly Connect to create business automation workflows and reduce manual tasks. Pabbly Connect currently offer integration with 2,000+ applications.

Check out Pabbly Connect – Automate your business workflows effortlessly! Sign Up Free – Start your journey with ease! 10,000+ Video Tutorials – Learn step by step! Join Pabbly Facebook Group – Connect with 21,000+ like minded people!

Try this automation for your own business and experience the efficiency of Pabbly Connect. If you have any questions, feel free to reach out for support or join the community for assistance.


In this tutorial, we explored how to create Salesforce leads from MagicBricks inquiries using Pabbly Connect. By automating this process, you can enhance your lead management and improve your business operations.

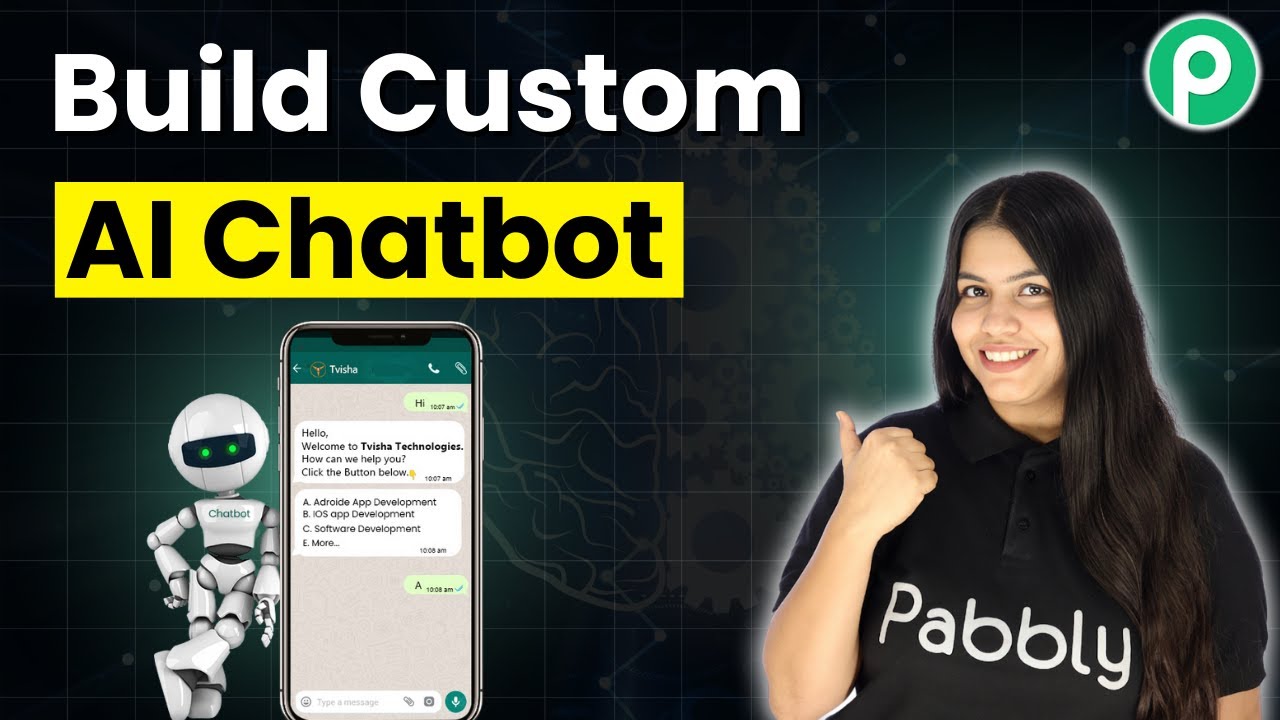
Build a Custom AI Chatbot with Pabbly Chatflow: Step-by-Step Guide

Learn how to create a custom AI chatbot trained on your data using Pabbly Chatflow. Follow our detailed guide for seamless integration with WhatsApp and Google.

Watch Step By Step Video Tutorial Below


1. Accessing Pabbly Chatflow for Your Custom AI Chatbot

To build a custom AI chatbot trained on your data, start by accessing Pabbly Chatflow. Open a new tab and navigate to Pabbly.com/chatflow. Once on the landing page, you’ll see options to sign in or sign up for free.

If you’re a new user, select the ‘sign up for free’ option, which grants you 100 credits each month to explore Pabbly Chatflow. Existing users should simply sign in to proceed. After logging in, access the dashboard and locate the Pabbly Chatflow app.


2. Creating Your AI Chatbot in Pabbly Chatflow

Once in Pabbly Chatflow, the next step is to create your AI chatbot. Click on the ‘Add a Assistant’ button on the left side of the dashboard. You will need to name your assistant; for instance, you can name it ‘AI Chatbot’ and click the ‘Add AI Assistant’ button.

After naming your assistant, a new window will appear where you can select the instruction type. Choose ‘Custom Prompt’ for tailored instructions or select from pre-built options like ‘AI Agent’. If you opt for a custom prompt, enter your specific instructions in the provided field.

  • Select the temperature to define creativity in responses (0 for focused, 1 for creative).
  • Choose the AI to use, such as OpenAI, and select the model (e.g., GPT-3.5).
  • Obtain your OpenAI API key from the OpenAI API key page and paste it into the designated field.

After configuring these settings, click ‘Connect’ to save your OpenAI API key successfully.


3. Customizing Your AI Assistant in Pabbly Chatflow

In this step, you can customize your AI assistant’s settings in Pabbly Chatflow. This includes adding header and footer messages, setting stop keywords, and defining fallback messages. To do this, toggle the header and footer options and input your desired messages.

Additionally, you can specify stop keywords, which will prevent the AI from responding once entered by the user. This is crucial for managing user interactions effectively. Also, set the number of retry attempts for the AI responses and provide a fallback message for when the AI fails to respond correctly.

  • Enter stop keywords that users can type to stop the AI assistant.
  • Specify the number of retry attempts (1-10) for AI responses.
  • Add a support email in the fallback message for user emergencies.

Once these settings are configured, your AI assistant will be equipped to handle various inquiries effectively.


4. Uploading Knowledge Source for Your AI Chatbot

To ensure your Pabbly Chatflow AI assistant provides accurate responses, you need to upload a knowledge source. This involves creating a Google document with information unique to your business, such as FAQs and service details. Once you’ve compiled this information, download it in .txt format for compatibility.

After downloading, return to Pabbly Chatflow and select the option to choose a file. Upload your .txt file, which will serve as the knowledge base for your AI chatbot. This step is crucial, as the assistant will rely on this data to respond to user queries accurately.

Make sure to double-check the content of your uploaded file to ensure it contains all necessary information that users may inquire about. This will enhance the chatbot’s effectiveness in providing relevant answers.


5. Activating and Testing Your AI Chatbot

After successfully configuring and uploading your knowledge source, it’s time to activate your AI chatbot in Pabbly Chatflow. Switch on the toggle button to activate the assistant and click on the ‘Save AI Assistant’ button. This finalizes the setup of your custom AI chatbot.

To test your chatbot, you can initiate a conversation via WhatsApp. Send a simple message like ‘Hey’ to see how the AI assistant responds. For example, if you ask about travel packages, the AI should provide relevant information based on the knowledge source you’ve uploaded.

Send a message through WhatsApp to initiate a chat with your AI assistant. Ask specific questions related to your business to test the accuracy of responses. Monitor the responses to ensure they align with the knowledge you provided.

With these steps completed, your custom AI chatbot is now ready to assist users effectively, leveraging the data you’ve trained it on.


Conclusion

In conclusion, using Pabbly Chatflow allows you to create a powerful custom AI chatbot tailored to your business needs. By following these detailed steps, you can integrate WhatsApp and other platforms seamlessly, enhancing user engagement and support.

Ensure you check out Pabbly Connect to create business automation workflows and reduce manual tasks. Pabbly Connect currently offer integration with 2,000+ applications.

How to Save Hours Writing Course Content with AI Using Pabbly Connect

Discover how to streamline your course content creation using Pabbly Connect with Google Sheets and other Google applications in this step-by-step guide. Build sophisticated automated workflows in less time than you think. This guide translates complex integrations into straightforward steps for immediate implementation.

Watch Step By Step Video Tutorial Below


1. Accessing Pabbly Connect for Course Content Automation

To begin saving hours writing course content, the first step is to access Pabbly Connect. Simply search for www.Pabbly.com/connect in your browser. This will take you to the Pabbly Connect homepage where you can sign in or create a free account.

If you are a new user, click on the ‘Sign Up Free’ button to get started. Once signed in, you will see various applications available under Pabbly. Click on the option to access Pabbly Connect to start creating your workflow for course content automation.


2. Creating a Workflow in Pabbly Connect

After accessing Pabbly Connect, you need to create a new workflow to connect Google Sheets with OpenAI for generating course content. Click on the ‘Create Workflow’ button located at the top right corner of the dashboard.

  • Select a name for your workflow, such as ‘Save Hours Writing Course Content with AI’.
  • Choose the folder where you want to save this workflow.
  • Click on the ‘Create’ button to finalize the workflow setup.

With your workflow created, you can now set up triggers and actions to automate the content creation process.


3. Setting Up Triggers in Pabbly Connect

The next step involves setting up triggers in your workflow. In this case, the trigger will be when new details are added to Google Sheets. Select Google Sheets as your trigger application and choose the event as ‘New or Updated Spreadsheet Row’. using Pabbly Connect

Upon selecting the trigger, Pabbly Connect will provide you with a webhook URL. Copy this URL, and you will need to use it in your Google Sheets to connect the two applications. This allows Pabbly Connect to receive data whenever a new row is added or updated in your spreadsheet.


4. Connecting Google Sheets to Pabbly Connect

To connect Google Sheets with Pabbly Connect, you need to install the Pabbly Connect add-on in your Google Sheets. Click on the ‘Extensions’ menu, then select ‘Add-ons’ and click on ‘Get Add-ons’. Search for Pabbly Connect and install it.

Once installed, refresh your Google Sheets. After refreshing, go back to the ‘Extensions’ menu, select Pabbly Connect, and choose ‘Initial Setup’. Here, you will paste the webhook URL you copied earlier and select the trigger column that will send data to Pabbly Connect.


5. Generating Course Content with OpenAI

After setting up the connection, the next step in Pabbly Connect is to set up an action to generate course content using OpenAI. Choose OpenAI as your action application and select the event as ‘Start GPT’.

In the action setup, you will need to enter your OpenAI API key and configure the model parameters as per your requirements. Map the necessary fields from your Google Sheets data to the prompt that will instruct OpenAI on what content to generate.

Finally, save your settings and test the workflow. Once everything is set up correctly, you will see that the course content is generated automatically whenever you add new rows in Google Sheets.


Conclusion

In this blog post, we explored how to save hours writing course content using Pabbly Connect integrated with Google Sheets and OpenAI. By automating the process, you can efficiently generate high-quality content without manual effort. Start implementing these steps today to enhance your course creation process.

Ensure you check out Pabbly Connect to create business automation workflows and reduce manual tasks. Pabbly Connect currently offer integration with 2,000+ applications.

Automate WhatsApp Thank-You Messages for Google Forms Leads with Pabbly Connect

Learn how to automatically send WhatsApp thank-you messages for Google Forms leads using Pabbly Connect. Step-by-step tutorial for seamless integration. Transform complex automation concepts into accessible, actionable steps that eliminate unnecessary manual work while maximizing existing application capabilities.

Watch Step By Step Video Tutorial Below


1. Accessing Pabbly Connect for Automation

To start sending WhatsApp thank-you messages automatically for Google Forms leads, you first need to access Pabbly Connect. Simply go to the Pabbly website and sign in to your account. If you are a new user, you can sign up for a free account which offers 100 tasks monthly.

Once logged in, navigate to the Pabbly Connect dashboard. This is where you can manage your workflows. Click on ‘Create Workflow’ to begin setting up the automation process between Google Forms and WhatsApp.


2. Creating a Workflow in Pabbly Connect

In this step, we will create a new workflow to automate the sending of WhatsApp messages. After clicking ‘Create Workflow’, select the new beta workflow builder and name it ‘Send WhatsApp Thank You Messages Automatically for Google Forms Leads’.

  • Click on the ‘Create’ button to set up the workflow.
  • Choose Google Forms as the trigger application.
  • Select ‘New Response Received’ as the trigger event.

After setting the trigger, you will receive a webhook URL from Pabbly Connect. This URL will act as a bridge between Google Forms and Pabbly Connect, enabling the automation to work seamlessly.


3. Connecting Google Forms to Pabbly Connect

To connect Google Forms to Pabbly Connect, you need to set up a spreadsheet that will record the responses. Go to your Google Form, click on the ‘Responses’ tab, and select the option to link it to a new spreadsheet.

Once the spreadsheet is created, make sure the last column is set as the trigger column. This column will send data to Pabbly Connect whenever a new response is submitted.

  • Open the Google Sheets linked to your form.
  • Go to Extensions > Add-ons > Get add-ons, and search for Pabbly Connect Webhooks.
  • Install the add-on and refresh the spreadsheet.

After refreshing, navigate to the add-on and enter the webhook URL from Pabbly Connect. Set the trigger column to the final data column, ensuring that all data will be sent to the workflow.


4. Setting Up the Action Application in Pabbly Connect

With the Google Forms connected, the next step is to set the action application. In this case, we will be using AI Sensei to send WhatsApp messages. In the action application settings, select AI Sensei and choose ‘Send Template Message’ as the action event. using Pabbly Connect

To establish this connection, you will need to enter your API key from your AI Sensei account. Once connected, you can set up the message template that will be sent via WhatsApp.

Navigate to your AI Sensei account to find the API key. Create a message template that includes custom variables for personalization. Map the fields from Google Forms to the corresponding fields in your message template.

This setup allows you to send personalized messages to users who fill out your Google Forms, enhancing customer engagement.


5. Testing Your Pabbly Connect Workflow

After setting up both the trigger and action, it’s time to test your workflow. Submit a test entry through your Google Form to ensure that the entire process is functioning correctly. Check your WhatsApp for the thank-you message.

If everything is set up correctly, you should receive a personalized WhatsApp message shortly after submitting the form. This confirms that your Pabbly Connect workflow is working as intended.

In case you face any issues, revisit each step and ensure that all connections and settings are correct. Testing is crucial to verify that the automation works flawlessly.


Conclusion

In this tutorial, we explored how to automate the sending of WhatsApp thank-you messages for Google Forms leads using Pabbly Connect. By following the steps outlined, you can enhance your customer communication and streamline your workflow efficiently.

Ensure you check out Pabbly Connect to create business automation workflows and reduce manual tasks. Pabbly Connect currently offer integration with 2,000+ applications.

Turn WhatsApp Into a Smart Marketing & Support Tool with Pabbly Chatflow

Learn how to use Pabbly Chatflow to transform WhatsApp into an automated marketing and support tool. Step-by-step tutorial included. Discover practical methods for designing chat sequences that capture leads, answer questions, and guide users to the next step in your funnel.

Watch Step By Step Video Tutorial Below


1. Accessing Pabbly Chatflow for WhatsApp Integration

To effectively turn WhatsApp into a smart marketing and support tool, you need to start with Pabbly Chatflow. Begin by visiting the Pabbly website and selecting the Chatflow option. If you’re a new user, you can sign up for free to get started with 100 free credits. Existing users can simply sign in to their accounts.

Once logged in, navigate to the dashboard where you will find various options available for building your WhatsApp assistant. Click on the ‘Access Now’ button to enter the Pabbly Chatflow interface and start integrating your WhatsApp account.


2. Connecting Your WhatsApp Number in Pabbly Chatflow

Next, it’s essential to connect your WhatsApp number within Pabbly Chatflow. This integration allows your assistant to respond to queries directly on WhatsApp. Click on the ‘Add WhatsApp Number’ button to initiate the connection process.

  • Choose the WhatsApp Connect method for a seamless setup.
  • Follow the on-screen instructions to complete the connection.

After successfully connecting your WhatsApp number, you can begin to explore the various features of Pabbly Chatflow that will enhance your marketing and customer support efforts.


3. Creating Your AI Assistant with Pabbly Chatflow

Now that your WhatsApp is connected, it’s time to create your AI assistant using Pabbly Chatflow. Click on the ‘Add AI Assistant’ button to start the creation process. You will be prompted to name your assistant, which will be used to identify it in your dashboard.

Upon naming your assistant, you will be directed to the AI assistant configuration window. Here, you can set specific instructions that will guide your assistant’s responses. This includes defining the tone and style of replies, which can be adjusted using the temperature settings.

  • Set the temperature to adjust the creativity of responses.
  • Choose the AI model that best fits your needs.

After configuring your AI assistant, make sure to save your settings to ensure that all changes are applied correctly. This setup is crucial for your assistant to effectively handle inquiries on WhatsApp.


4. Uploading Your Knowledge Source for AI Responses

To empower your AI assistant with the necessary information, you need to upload a knowledge source. This will enable your assistant to provide accurate responses to customer inquiries. In Pabbly Chatflow, go to the knowledge source section and upload your document, preferably in a text format.

Your knowledge source should include FAQs, product availability, and any other relevant business information. Once uploaded, your assistant will utilize this data to answer queries effectively. Ensure that the knowledge source is comprehensive to cover various customer questions.


5. Assigning Your AI Assistant to WhatsApp Chats

Finally, you need to assign your newly created AI assistant to your WhatsApp chats. In Pabbly Chatflow, navigate to the settings and select the inbox settings option. Here, you can enable the AI auto-reply feature and choose the specific contact list to which your assistant will respond.

After selecting the relevant contact list, choose the AI assistant you created earlier and save the settings. This action will ensure that your assistant is now actively responding to WhatsApp queries, providing instant support and marketing assistance.

Conclusion

This guide summarizes the key points and helps you understand the essential features and benefits of using this tool.

Ensure you check out Pabbly Connect to create business automation workflows and reduce manual tasks. Pabbly Connect currently offer integration with 2,000+ applications.


By following these steps, you can effectively turn WhatsApp into a smart marketing and support tool using Pabbly Chatflow. The integration process is straightforward, allowing you to enhance customer interactions and streamline your business operations.

In conclusion, utilizing Pabbly Chatflow to automate responses on WhatsApp can significantly improve your marketing and customer support efforts. By setting up an AI assistant, you can ensure that your customers receive timely and accurate information, enhancing their overall experience with your brand.

Automate Your Housing.com Leads with Pabbly Connect: A Step-by-Step Guide

Learn how to automate email follow-ups for Housing.com leads using Pabbly Connect in this comprehensive tutorial. Turn leads into clients with ease! Explore efficient methods for automating routine tasks with clear, concise instructions suited for both newcomers and experienced professionals.

Watch Step By Step Video Tutorial Below


1. Accessing Pabbly Connect for Automated Email Follow-Up

To automate email follow-ups for your Housing.com leads, the first step is to access Pabbly Connect. Begin by visiting the Pabbly website and navigating to the Pabbly Connect section. If you are a new user, click on the ‘Sign Up Free’ option to create an account, which allows you to explore 100 free tasks every month.

For existing users, simply sign in. Once logged in, you will see various Pabbly applications. Click on ‘Access Now’ under Pabbly Connect, which will direct you to the dashboard where you can create your automation workflows.


2. Creating a Workflow in Pabbly Connect

In this section, you will create a workflow to connect Housing.com with Gmail for automated email follow-ups. Click on the ‘Create Workflow’ button located at the top right corner of the Pabbly Connect dashboard. You will be prompted to choose between two workflow builders: the Beta version and the Classic version. For this tutorial, select the Beta version for its modern interface. using Pabbly Connect

  • Click on the ‘Create’ button.
  • Name your workflow, for example, ‘Housing.com Leads to Clients’.
  • Select a folder to save your workflow, such as ‘Automations’.

After naming your workflow and selecting the folder, you will be taken to the workflow setup page. Here, you will set up triggers and actions to automate the email follow-up process.


3. Setting Up the Trigger for New Leads

The next step is to set up the trigger for your workflow. Click on the ‘Add Trigger’ button and select the application as Housing.com. Choose the event as ‘New Leads’. This will ensure that every time you receive a new lead through Housing.com, the automation process will be initiated.

Once you select the trigger, you will see a prompt to connect your Housing.com account with Pabbly Connect. You will need to provide a webhook URL to capture the lead data. Copy the provided webhook URL and send it to your Housing.com account manager to enable the integration. After activation, your Housing.com leads will start flowing into Pabbly Connect.


4. Adding Action to Send Emails via Gmail

Now that the trigger is set, it’s time to add an action step. Click on ‘Add Action’ and select Gmail as your application. For the event, choose ‘Send Email’. This action will allow you to send a personalized follow-up email to each new lead received from Housing.com.

When prompted, sign in to your Gmail account through Pabbly Connect. After authentication, you will need to fill in the required fields such as the sender name, sender email address, and recipient email address. For the recipient email, map the email address from the lead data captured in the trigger step.

  • Set the email subject as ‘Thank You for Showing Your Interest’.
  • Compose the email content in HTML format for a professional look.

Once you have filled in all the necessary fields, click on the ‘Save and Send Test Request’ button to test the email functionality. If successful, your lead will receive the email instantly.


5. Conclusion: Automating Your Follow-Up Process

In this tutorial, we successfully demonstrated how to turn Housing.com leads into clients using Pabbly Connect for automated email follow-ups. By following these steps, you can ensure that every new lead receives a timely and personalized email, enhancing your chances of conversion.

Ensure you check out Pabbly Connect to create business automation workflows and reduce manual tasks. Pabbly Connect currently offer integration with 2,000+ applications.

With the integration of Housing.com, Gmail, and the automation capabilities of Pabbly Connect, managing leads has never been easier. Start automating your follow-ups today and turn your leads into valuable clients!