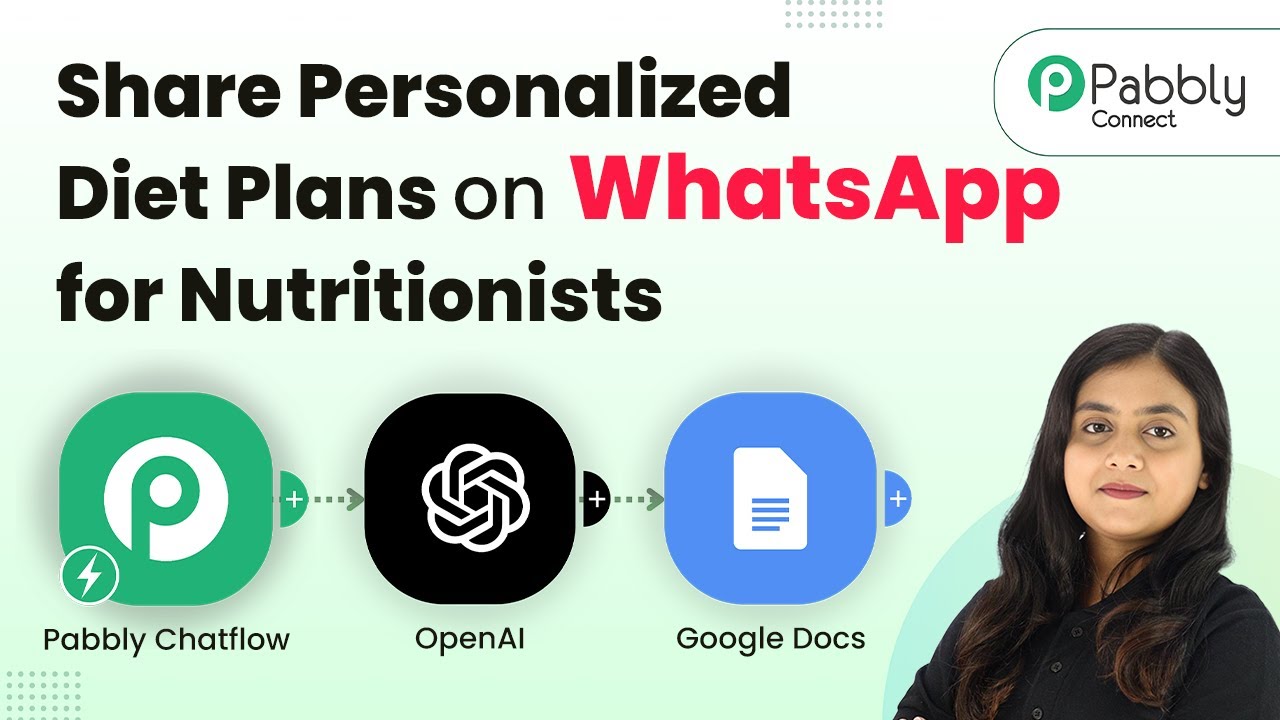
How to Share Personalized Diet Plans on WhatsApp with Pabbly Chatflow

Learn how to share personalized diet plans on WhatsApp for nutritionists using Pabbly Chatflow and Pabbly Chatflow. Step-by-step tutorial included! Implement professional chat automation that answers common questions, qualifies leads, and books appointments without human intervention.

Watch Step By Step Video Tutorial Below


1. Accessing Pabbly Chatflow to Create Your Bot

To begin sharing personalized diet plans on WhatsApp, first, access Pabbly Chatflow. This platform enables seamless integration with various applications and allows you to create your own WhatsApp bot.

Navigate to the Pabbly Chatflow website and log in or sign up for a free account. Once logged in, you’ll see the dashboard where you can start creating your bot. Click on the ‘Add Flow’ button to initiate the process of designing your personalized diet plan bot.


2. Creating Your WhatsApp Bot in Pabbly Chatflow

After accessing Pabbly Chatflow, you need to create a new flow for your WhatsApp bot. Name your flow something like ‘Share Personalized Diet Plans on WhatsApp for Nutritionists’. This naming helps in identifying the bot later.

Next, set up a trigger for your bot to respond to user messages. You can select the ‘Keyword’ trigger type. Enter keywords like ‘hello’ and ‘diet plan’ to initiate the bot’s response when users send these messages.

  • Add keywords such as ‘hey’, ‘diet plan’, and ‘hello’.
  • Set the trigger to respond with a welcome message.

This setup ensures that whenever a user sends one of these keywords, the bot will respond appropriately, guiding them to request a personalized diet plan.


3. Collecting User Information for Diet Plans

Once your bot is set up to trigger responses, the next step involves collecting user details. In Pabbly Chatflow, drag and drop the ‘Ask Question’ feature to gather information such as age, gender, height, and weight.

For each question, create a custom field in Pabbly Chatflow to store the responses. This allows you to personalize the diet plan based on the user’s specific information. For example, ask for their age using a question like ‘Please share your age’ and link it to a custom field named ‘age’.

  • Ask for the user’s weight and height.
  • Collect their full name and email address for further communication.

This structured approach ensures you gather all necessary information to create a tailored diet plan for each user.


4. Integrating with Pabbly Connect for Diet Plan Generation

After collecting user information, the next crucial step is integrating with Pabbly Connect. This integration allows you to send the collected data to an AI that generates personalized diet plans based on the user’s information.

In your Pabbly Chatflow, use the ‘API Request’ action to send user data to Pabbly Connect. You’ll need to create a webhook URL in Pabbly Connect and paste it into your API request setup in Pabbly Chatflow.

Set the API request to POST and include user details like age, weight, and dietary goals. Test the API request to ensure data is sent correctly.

This integration is vital as it allows the AI to process the information and generate a personalized diet plan for the user.


5. Sending the Personalized Diet Plan to Users

Once the diet plan is generated using AI, it’s time to deliver it to the user. In Pabbly Chatflow, add a final action to send an email through Gmail with the generated diet plan attached.

Configure the Gmail action by mapping the recipient’s email address, subject line, and content. Include a link to download the diet plan PDF in the email body to ensure the user can easily access their personalized plan.

Map the user’s email address to send the diet plan directly to them. Include a subject that clearly states the content, like ‘Your Personalized Diet Plan is Ready’.

With this final step, users will receive their personalized diet plans via email, completing the workflow efficiently through Pabbly Chatflow and Pabbly Connect.


Conclusion

In this tutorial, we explored how to share personalized diet plans on WhatsApp using Pabbly Chatflow and Pabbly Connect. By following these steps, nutritionists can automate their diet plan sharing process effectively.

Ensure you check out Pabbly Connect to create business automation workflows and reduce manual tasks. Pabbly Connect currently offer integration with 2,000+ applications.

Automate Boutique Clothing Orders via WhatsApp with Pabbly Chatflow

Learn how to automate boutique clothing orders via WhatsApp using Pabbly Chatflow. Follow this detailed tutorial for step-by-step integration. Discover how to design chat experiences that feel personal and responsive while handling customer inquiries automatically around the clock.

Watch Step By Step Video Tutorial Below


1. Getting Started with Pabbly Chatflow

To automate boutique clothing orders via WhatsApp, you need to access Pabbly Chatflow. Begin by visiting the Pabbly Chatflow website. Here, you will find options to sign up for a free account or log in if you already have one.

Once logged in, you will be directed to the dashboard where you can manage your WhatsApp chatbot. By creating an account, you gain access to 100 free credits each month, allowing you to experiment with your chatbot without any cost.


2. Creating a WhatsApp Chatbot Using Pabbly Chatflow

After accessing the dashboard of Pabbly Chatflow, you will need to add your WhatsApp number. Click on the ‘Add WhatsApp Number’ button. You can choose between WhatsApp Connect or Manual Token Connect to integrate your number.

  • Select ‘WhatsApp Connect’ if you want an easy integration.
  • Choose ‘Manual Token Connect’ if you prefer a more technical approach.

Once your number is connected, navigate to the ‘Flows’ section to create a new flow. Click on the ‘Add Flow’ button and name your flow, such as ‘Automate Boutique Clothing Orders via WhatsApp’. You will then set up the trigger for your chatbot.


3. Setting Up the Chatbot Flow in Pabbly Chatflow

To initiate your chatbot, you will need to select a trigger event. In this case, choose ‘Keyword Match’ to allow the chatbot to respond when users send specific keywords like ‘order’ or ‘dresses’. Enter these keywords in the designated field and proceed to set up the welcome message. using Pabbly Connect

Drag and drop the ‘Text’ button to create a welcome message that greets users when they initiate a conversation. This message should encourage users to explore your clothing collection. You can also add buttons that link to the product list.

  • Create a button labeled ‘View Collection’ to display available products.
  • Ensure the button leads to the product list for seamless navigation.

After setting up the welcome message and buttons, test the flow to ensure it works as intended. This setup allows customers to communicate easily with your boutique.


4. Adding Products to Your Chatbot via Pabbly Chatflow

Once the welcome message is set, you can add a product list to your chatbot. Use the ‘List’ node to create a section for your products. Here, you can add items like dresses, tops, and sarees. For each item, provide a title and a brief description.

Additionally, for each product, you can set up a custom field to save customer selections. This allows you to keep track of what customers are interested in. After adding the products, ensure you connect each product to a corresponding action that allows users to select them.

Finally, provide images and a ‘Buy Now’ button for each item. This enhances the user experience by making it visually appealing and easy to navigate. By integrating these features, Pabbly Chatflow helps streamline the purchasing process for your customers.


5. Finalizing the Chatbot Experience with Pabbly Chatflow

As you finalize your chatbot, add questions to gather customer information such as full name, delivery address, and size preferences. Use the ‘Ask Question’ node to prompt users for this information after they select a product.

Once you have collected the necessary information, create a payment confirmation message that instructs users on how to complete their purchase. By integrating payment options through Pabbly Chatflow, you can enhance the customer experience significantly.

After setting everything up, save your flow and test it thoroughly. Ensure that the chatbot responds correctly to user inputs and that all buttons function as intended. This final step is crucial to ensure a smooth operation of your WhatsApp chatbot.


Conclusion

In this tutorial, we explored how to automate boutique clothing orders via WhatsApp using Pabbly Chatflow. By following the step-by-step instructions, you can create an efficient WhatsApp chatbot that enhances customer interaction and streamlines the order process. Start using Pabbly Chatflow today to elevate your boutique’s customer service!

Ensure you check out Pabbly Connect to create business automation workflows and reduce manual tasks. Pabbly Connect currently offer integration with 2,000+ applications.

Automate Bookstore Orders via WhatsApp Using Pabbly Chatflow

Learn how to automate bookstore orders via WhatsApp using Pabbly Chatflow. This detailed tutorial shows you how to build powerful chat automation that engages visitors and converts prospects—without any coding required.

Watch Step By Step Video Tutorial Below


1. Accessing Pabbly Chatflow for Automation

To automate bookstore orders via WhatsApp, you first need to access Pabbly Chatflow. Simply type the URL Pabbly.com/chatflow into your browser. This will take you to the Pabbly Chatflow landing page.

On this page, you will see options for signing in or signing up. If you are new, click on ‘Sign Up Free’ to create an account. Once registered, you will receive 100 free credits each month to practice building your chatbot.


2. Creating Your WhatsApp Chatbot in Pabbly Chatflow

After signing in, navigate to the dashboard of Pabbly Chatflow. Here, you need to add your WhatsApp number. Click on the ‘Add WhatsApp Number’ button and choose either WhatsApp Connect or Manual Token Connect, depending on your preference.

  • Select WhatsApp Connect for easy integration.
  • Use Manual Token Connect if you have a token ready.

Once your number is connected, click on ‘Flows’ in the sidebar to begin creating your chatbot flow. Click on ‘Add Flow’ to start a new automation and name it ‘Automate Bookstore Orders via WhatsApp’.


3. Setting Up the Chatbot Flow in Pabbly Chatflow

In the flow builder of Pabbly Chatflow, you will define the trigger for your chatbot. For this setup, choose the trigger event as ‘Keyword Rejects Match’. Add keywords like ‘book’ and ‘order’ to initiate the chatbot when users send messages containing these words.

  • Add a welcome message to greet users.
  • Create a button labeled ‘View Books’ for users to see book options.

Drag and drop a text node to create your welcome message. After the welcome, users will click the ‘View Books’ button, which will lead them to a list of available books.


4. Collecting User Information via Pabbly Chatflow

Once users select a book category, you will need to collect their full name and delivery address using Pabbly Chatflow. After the user selects a book, ask for their full name with a question node. Set the contact custom field to capture this information.

Prompt users for their delivery address after capturing their name. Use the contact custom fields to store this data effectively.

After gathering the necessary information, send a personalized message to the user asking them to confirm their order and make a payment. This message should include a ‘Pay Now’ button for easy payment processing.


5. Integrating Google Sheets with Pabbly Chatflow

To save user responses, integrate Google Sheets with Pabbly Chatflow using Pabbly Connect. After the payment confirmation, you will need to create a webhook URL in Pabbly Connect. This URL will be used to send data from your chatbot to Google Sheets.

In Pabbly Connect, create a new workflow and select Pabbly Chatflow as the trigger app. Choose the event ‘New Message Received’ to initiate the workflow. Copy the generated webhook URL and paste it into the API request node in your chatbot flow.

Map the required fields such as book name, customer name, and delivery address. Test the API request to ensure data is sent correctly to Google Sheets.

Finally, save your flow in Pabbly Chatflow and test the entire process to ensure everything works seamlessly. Your automated bookstore order system via WhatsApp is now ready!


Conclusion

This tutorial has guided you through automating bookstore orders via WhatsApp using Pabbly Chatflow. By integrating Google Sheets and setting up a chatbot, you can streamline your order process and enhance customer experience. Start using Pabbly Chatflow today!

Ensure you check out Pabbly Connect to create business automation workflows and reduce manual tasks. Pabbly Connect currently offer integration with 2,000+ applications.

Automate Home Tutoring Bookings via WhatsApp with Pabbly Chatflow

Learn how to automate home tutoring bookings via WhatsApp using Pabbly Chatflow. Follow our step-by-step guide for seamless integration and efficient management. Build conversational workflows that guide visitors toward conversion with dynamic, branching dialogs that respond intelligently to user input.

Watch Step By Step Video Tutorial Below


1. Creating a WhatsApp Chatbot Using Pabbly Chatflow

To automate home tutoring bookings via WhatsApp, the first step is to create a WhatsApp chatbot using Pabbly Chatflow. This platform allows you to build a chatbot that interacts with users and collects necessary information.

Start by accessing Pabbly Chatflow through the URL Pabbly.com/chatflow. Sign up for a free account to get 100 credits every month. Once logged in, navigate to the dashboard and click on ‘Add WhatsApp Number’ to integrate your WhatsApp account.


2. Setting Up the Chatflow for Home Tutoring Bookings

After creating your WhatsApp chatbot, it’s essential to set up the flow in Pabbly Chatflow. Click on ‘Flows’ in the sidebar and then select ‘Add Flow’ to create a new flow. Name it ‘Automate Home Tutoring Bookings for WhatsApp’ and set the trigger event to ‘Keyword Rejects Match’. This will initiate the chatbot when users send specific keywords.

  • Enter keywords like ‘tutor’ and ‘home’ to trigger the chatbot.
  • Add a list message to prompt users for their subject preferences.

Once the keywords are set, you can create a list message for subjects like Math, English, and Coding. Customize the header and body of the list to provide clear options for the users.


3. Collecting User Information via Pabbly Chatflow

After users select their subject, the next step is to collect their information using Pabbly Chatflow. You will ask questions regarding their full name, preferred mode of tutoring, and timing. Use the ‘Ask Question’ action to prompt users for this information.

  • Ask for the full name and map it to the corresponding contact custom field.
  • Inquire about the preferred mode (online/offline) and timing.

Once the information is gathered, you can store it in a Google Sheet using the integration capabilities of Pabbly Chatflow.


4. Integrating Google Sheets with Pabbly Connect

To save the user responses into a Google Sheet, you will use Pabbly Connect in conjunction with Pabbly Chatflow. Start by creating a workflow in Pabbly Connect and select Pabbly Chatflow as the trigger app. Set the event to ‘New Message Received’.

After connecting, copy the provided webhook URL and paste it into the API request section of Pabbly Chatflow. This will allow you to send the collected data to Google Sheets.

Map the fields appropriately in Pabbly Connect to ensure that the data from the chatbot flows into the correct columns in your Google Sheet.


5. Finalizing the Chatbot Flow and Confirmation Message

After setting up the integration with Google Sheets, finalize your chatbot flow in Pabbly Chatflow. Add a confirmation message that thanks the user for their booking and informs them that their details have been recorded. This enhances user experience and provides assurance.

Click on the ‘Save’ button to update your flow. You can test the chatbot by sending a message through WhatsApp and observing how the automated responses are delivered.

With this setup, your WhatsApp chatbot for home tutoring bookings is fully operational, allowing you to manage bookings efficiently.


Conclusion

In conclusion, using Pabbly Chatflow to automate home tutoring bookings via WhatsApp streamlines the enrollment process and enhances user interaction. This step-by-step guide demonstrates how to create a functional chatbot that collects user data and stores it in Google Sheets.

Ensure you check out Pabbly Connect to create business automation workflows and reduce manual tasks. Pabbly Connect currently offer integration with 2,000+ applications.

Automate Home Tutoring Bookings via WhatsApp with Pabbly Chatflow

Learn how to automate home tutoring bookings via WhatsApp using Pabbly Chatflow. Follow our step-by-step guide for seamless integration and efficient management. Build conversational workflows that guide visitors toward conversion with dynamic, branching dialogs that respond intelligently to user input.

Watch Step By Step Video Tutorial Below


1. Creating a WhatsApp Chatbot Using Pabbly Chatflow

To automate home tutoring bookings via WhatsApp, the first step is to create a WhatsApp chatbot using Pabbly Chatflow. This platform allows you to build a chatbot that interacts with users and collects necessary information.

Start by accessing Pabbly Chatflow through the URL Pabbly.com/chatflow. Sign up for a free account to get 100 credits every month. Once logged in, navigate to the dashboard and click on ‘Add WhatsApp Number’ to integrate your WhatsApp account.


2. Setting Up the Chatflow for Home Tutoring Bookings

After creating your WhatsApp chatbot, it’s essential to set up the flow in Pabbly Chatflow. Click on ‘Flows’ in the sidebar and then select ‘Add Flow’ to create a new flow. Name it ‘Automate Home Tutoring Bookings for WhatsApp’ and set the trigger event to ‘Keyword Rejects Match’. This will initiate the chatbot when users send specific keywords.

  • Enter keywords like ‘tutor’ and ‘home’ to trigger the chatbot.
  • Add a list message to prompt users for their subject preferences.

Once the keywords are set, you can create a list message for subjects like Math, English, and Coding. Customize the header and body of the list to provide clear options for the users.


3. Collecting User Information via Pabbly Chatflow

After users select their subject, the next step is to collect their information using Pabbly Chatflow. You will ask questions regarding their full name, preferred mode of tutoring, and timing. Use the ‘Ask Question’ action to prompt users for this information.

  • Ask for the full name and map it to the corresponding contact custom field.
  • Inquire about the preferred mode (online/offline) and timing.

Once the information is gathered, you can store it in a Google Sheet using the integration capabilities of Pabbly Chatflow.


4. Integrating Google Sheets with Pabbly Connect

To save the user responses into a Google Sheet, you will use Pabbly Connect in conjunction with Pabbly Chatflow. Start by creating a workflow in Pabbly Connect and select Pabbly Chatflow as the trigger app. Set the event to ‘New Message Received’.

After connecting, copy the provided webhook URL and paste it into the API request section of Pabbly Chatflow. This will allow you to send the collected data to Google Sheets.

Map the fields appropriately in Pabbly Connect to ensure that the data from the chatbot flows into the correct columns in your Google Sheet.


5. Finalizing the Chatbot Flow and Confirmation Message

After setting up the integration with Google Sheets, finalize your chatbot flow in Pabbly Chatflow. Add a confirmation message that thanks the user for their booking and informs them that their details have been recorded. This enhances user experience and provides assurance.

Click on the ‘Save’ button to update your flow. You can test the chatbot by sending a message through WhatsApp and observing how the automated responses are delivered.

With this setup, your WhatsApp chatbot for home tutoring bookings is fully operational, allowing you to manage bookings efficiently.


Conclusion

In conclusion, using Pabbly Chatflow to automate home tutoring bookings via WhatsApp streamlines the enrollment process and enhances user interaction. This step-by-step guide demonstrates how to create a functional chatbot that collects user data and stores it in Google Sheets.

Ensure you check out Pabbly Connect to create business automation workflows and reduce manual tasks. Pabbly Connect currently offer integration with 2,000+ applications.

Automate Home Tutoring Bookings via WhatsApp with Pabbly Chatflow

Learn how to automate home tutoring bookings via WhatsApp using Pabbly Chatflow. Follow our step-by-step guide for seamless integration and efficient management. Build conversational workflows that guide visitors toward conversion with dynamic, branching dialogs that respond intelligently to user input.

Watch Step By Step Video Tutorial Below


1. Creating a WhatsApp Chatbot Using Pabbly Chatflow

To automate home tutoring bookings via WhatsApp, the first step is to create a WhatsApp chatbot using Pabbly Chatflow. This platform allows you to build a chatbot that interacts with users and collects necessary information.

Start by accessing Pabbly Chatflow through the URL Pabbly.com/chatflow. Sign up for a free account to get 100 credits every month. Once logged in, navigate to the dashboard and click on ‘Add WhatsApp Number’ to integrate your WhatsApp account.


2. Setting Up the Chatflow for Home Tutoring Bookings

After creating your WhatsApp chatbot, it’s essential to set up the flow in Pabbly Chatflow. Click on ‘Flows’ in the sidebar and then select ‘Add Flow’ to create a new flow. Name it ‘Automate Home Tutoring Bookings for WhatsApp’ and set the trigger event to ‘Keyword Rejects Match’. This will initiate the chatbot when users send specific keywords.

  • Enter keywords like ‘tutor’ and ‘home’ to trigger the chatbot.
  • Add a list message to prompt users for their subject preferences.

Once the keywords are set, you can create a list message for subjects like Math, English, and Coding. Customize the header and body of the list to provide clear options for the users.


3. Collecting User Information via Pabbly Chatflow

After users select their subject, the next step is to collect their information using Pabbly Chatflow. You will ask questions regarding their full name, preferred mode of tutoring, and timing. Use the ‘Ask Question’ action to prompt users for this information.

  • Ask for the full name and map it to the corresponding contact custom field.
  • Inquire about the preferred mode (online/offline) and timing.

Once the information is gathered, you can store it in a Google Sheet using the integration capabilities of Pabbly Chatflow.


4. Integrating Google Sheets with Pabbly Connect

To save the user responses into a Google Sheet, you will use Pabbly Connect in conjunction with Pabbly Chatflow. Start by creating a workflow in Pabbly Connect and select Pabbly Chatflow as the trigger app. Set the event to ‘New Message Received’.

After connecting, copy the provided webhook URL and paste it into the API request section of Pabbly Chatflow. This will allow you to send the collected data to Google Sheets.

Map the fields appropriately in Pabbly Connect to ensure that the data from the chatbot flows into the correct columns in your Google Sheet.


5. Finalizing the Chatbot Flow and Confirmation Message

After setting up the integration with Google Sheets, finalize your chatbot flow in Pabbly Chatflow. Add a confirmation message that thanks the user for their booking and informs them that their details have been recorded. This enhances user experience and provides assurance.

Click on the ‘Save’ button to update your flow. You can test the chatbot by sending a message through WhatsApp and observing how the automated responses are delivered.

With this setup, your WhatsApp chatbot for home tutoring bookings is fully operational, allowing you to manage bookings efficiently.


Conclusion

In conclusion, using Pabbly Chatflow to automate home tutoring bookings via WhatsApp streamlines the enrollment process and enhances user interaction. This step-by-step guide demonstrates how to create a functional chatbot that collects user data and stores it in Google Sheets.

Ensure you check out Pabbly Connect to create business automation workflows and reduce manual tasks. Pabbly Connect currently offer integration with 2,000+ applications.

Automate Home Tutoring Bookings via WhatsApp with Pabbly Chatflow

Learn how to automate home tutoring bookings via WhatsApp using Pabbly Chatflow. Follow our step-by-step guide for seamless integration and efficient management. Build conversational workflows that guide visitors toward conversion with dynamic, branching dialogs that respond intelligently to user input.

Watch Step By Step Video Tutorial Below


1. Creating a WhatsApp Chatbot Using Pabbly Chatflow

To automate home tutoring bookings via WhatsApp, the first step is to create a WhatsApp chatbot using Pabbly Chatflow. This platform allows you to build a chatbot that interacts with users and collects necessary information.

Start by accessing Pabbly Chatflow through the URL Pabbly.com/chatflow. Sign up for a free account to get 100 credits every month. Once logged in, navigate to the dashboard and click on ‘Add WhatsApp Number’ to integrate your WhatsApp account.


2. Setting Up the Chatflow for Home Tutoring Bookings

After creating your WhatsApp chatbot, it’s essential to set up the flow in Pabbly Chatflow. Click on ‘Flows’ in the sidebar and then select ‘Add Flow’ to create a new flow. Name it ‘Automate Home Tutoring Bookings for WhatsApp’ and set the trigger event to ‘Keyword Rejects Match’. This will initiate the chatbot when users send specific keywords.

  • Enter keywords like ‘tutor’ and ‘home’ to trigger the chatbot.
  • Add a list message to prompt users for their subject preferences.

Once the keywords are set, you can create a list message for subjects like Math, English, and Coding. Customize the header and body of the list to provide clear options for the users.


3. Collecting User Information via Pabbly Chatflow

After users select their subject, the next step is to collect their information using Pabbly Chatflow. You will ask questions regarding their full name, preferred mode of tutoring, and timing. Use the ‘Ask Question’ action to prompt users for this information.

  • Ask for the full name and map it to the corresponding contact custom field.
  • Inquire about the preferred mode (online/offline) and timing.

Once the information is gathered, you can store it in a Google Sheet using the integration capabilities of Pabbly Chatflow.


4. Integrating Google Sheets with Pabbly Connect

To save the user responses into a Google Sheet, you will use Pabbly Connect in conjunction with Pabbly Chatflow. Start by creating a workflow in Pabbly Connect and select Pabbly Chatflow as the trigger app. Set the event to ‘New Message Received’.

After connecting, copy the provided webhook URL and paste it into the API request section of Pabbly Chatflow. This will allow you to send the collected data to Google Sheets.

Map the fields appropriately in Pabbly Connect to ensure that the data from the chatbot flows into the correct columns in your Google Sheet.


5. Finalizing the Chatbot Flow and Confirmation Message

After setting up the integration with Google Sheets, finalize your chatbot flow in Pabbly Chatflow. Add a confirmation message that thanks the user for their booking and informs them that their details have been recorded. This enhances user experience and provides assurance.

Click on the ‘Save’ button to update your flow. You can test the chatbot by sending a message through WhatsApp and observing how the automated responses are delivered.

With this setup, your WhatsApp chatbot for home tutoring bookings is fully operational, allowing you to manage bookings efficiently.


Conclusion

In conclusion, using Pabbly Chatflow to automate home tutoring bookings via WhatsApp streamlines the enrollment process and enhances user interaction. This step-by-step guide demonstrates how to create a functional chatbot that collects user data and stores it in Google Sheets.

Ensure you check out Pabbly Connect to create business automation workflows and reduce manual tasks. Pabbly Connect currently offer integration with 2,000+ applications.

Automate Home Tutoring Bookings via WhatsApp with Pabbly Chatflow

Learn how to automate home tutoring bookings via WhatsApp using Pabbly Chatflow. Follow our step-by-step guide for seamless integration and efficient management. Build conversational workflows that guide visitors toward conversion with dynamic, branching dialogs that respond intelligently to user input.

Watch Step By Step Video Tutorial Below


1. Creating a WhatsApp Chatbot Using Pabbly Chatflow

To automate home tutoring bookings via WhatsApp, the first step is to create a WhatsApp chatbot using Pabbly Chatflow. This platform allows you to build a chatbot that interacts with users and collects necessary information.

Start by accessing Pabbly Chatflow through the URL Pabbly.com/chatflow. Sign up for a free account to get 100 credits every month. Once logged in, navigate to the dashboard and click on ‘Add WhatsApp Number’ to integrate your WhatsApp account.


2. Setting Up the Chatflow for Home Tutoring Bookings

After creating your WhatsApp chatbot, it’s essential to set up the flow in Pabbly Chatflow. Click on ‘Flows’ in the sidebar and then select ‘Add Flow’ to create a new flow. Name it ‘Automate Home Tutoring Bookings for WhatsApp’ and set the trigger event to ‘Keyword Rejects Match’. This will initiate the chatbot when users send specific keywords.

  • Enter keywords like ‘tutor’ and ‘home’ to trigger the chatbot.
  • Add a list message to prompt users for their subject preferences.

Once the keywords are set, you can create a list message for subjects like Math, English, and Coding. Customize the header and body of the list to provide clear options for the users.


3. Collecting User Information via Pabbly Chatflow

After users select their subject, the next step is to collect their information using Pabbly Chatflow. You will ask questions regarding their full name, preferred mode of tutoring, and timing. Use the ‘Ask Question’ action to prompt users for this information.

  • Ask for the full name and map it to the corresponding contact custom field.
  • Inquire about the preferred mode (online/offline) and timing.

Once the information is gathered, you can store it in a Google Sheet using the integration capabilities of Pabbly Chatflow.


4. Integrating Google Sheets with Pabbly Connect

To save the user responses into a Google Sheet, you will use Pabbly Connect in conjunction with Pabbly Chatflow. Start by creating a workflow in Pabbly Connect and select Pabbly Chatflow as the trigger app. Set the event to ‘New Message Received’.

After connecting, copy the provided webhook URL and paste it into the API request section of Pabbly Chatflow. This will allow you to send the collected data to Google Sheets.

Map the fields appropriately in Pabbly Connect to ensure that the data from the chatbot flows into the correct columns in your Google Sheet.


5. Finalizing the Chatbot Flow and Confirmation Message

After setting up the integration with Google Sheets, finalize your chatbot flow in Pabbly Chatflow. Add a confirmation message that thanks the user for their booking and informs them that their details have been recorded. This enhances user experience and provides assurance.

Click on the ‘Save’ button to update your flow. You can test the chatbot by sending a message through WhatsApp and observing how the automated responses are delivered.

With this setup, your WhatsApp chatbot for home tutoring bookings is fully operational, allowing you to manage bookings efficiently.


Conclusion

In conclusion, using Pabbly Chatflow to automate home tutoring bookings via WhatsApp streamlines the enrollment process and enhances user interaction. This step-by-step guide demonstrates how to create a functional chatbot that collects user data and stores it in Google Sheets.

Ensure you check out Pabbly Connect to create business automation workflows and reduce manual tasks. Pabbly Connect currently offer integration with 2,000+ applications.

Automate Home Tutoring Bookings via WhatsApp with Pabbly Chatflow

Learn how to automate home tutoring bookings via WhatsApp using Pabbly Chatflow. Follow our step-by-step guide for seamless integration and efficient management. Build conversational workflows that guide visitors toward conversion with dynamic, branching dialogs that respond intelligently to user input.

Watch Step By Step Video Tutorial Below


1. Creating a WhatsApp Chatbot Using Pabbly Chatflow

To automate home tutoring bookings via WhatsApp, the first step is to create a WhatsApp chatbot using Pabbly Chatflow. This platform allows you to build a chatbot that interacts with users and collects necessary information.

Start by accessing Pabbly Chatflow through the URL Pabbly.com/chatflow. Sign up for a free account to get 100 credits every month. Once logged in, navigate to the dashboard and click on ‘Add WhatsApp Number’ to integrate your WhatsApp account.


2. Setting Up the Chatflow for Home Tutoring Bookings

After creating your WhatsApp chatbot, it’s essential to set up the flow in Pabbly Chatflow. Click on ‘Flows’ in the sidebar and then select ‘Add Flow’ to create a new flow. Name it ‘Automate Home Tutoring Bookings for WhatsApp’ and set the trigger event to ‘Keyword Rejects Match’. This will initiate the chatbot when users send specific keywords.

  • Enter keywords like ‘tutor’ and ‘home’ to trigger the chatbot.
  • Add a list message to prompt users for their subject preferences.

Once the keywords are set, you can create a list message for subjects like Math, English, and Coding. Customize the header and body of the list to provide clear options for the users.


3. Collecting User Information via Pabbly Chatflow

After users select their subject, the next step is to collect their information using Pabbly Chatflow. You will ask questions regarding their full name, preferred mode of tutoring, and timing. Use the ‘Ask Question’ action to prompt users for this information.

  • Ask for the full name and map it to the corresponding contact custom field.
  • Inquire about the preferred mode (online/offline) and timing.

Once the information is gathered, you can store it in a Google Sheet using the integration capabilities of Pabbly Chatflow.


4. Integrating Google Sheets with Pabbly Connect

To save the user responses into a Google Sheet, you will use Pabbly Connect in conjunction with Pabbly Chatflow. Start by creating a workflow in Pabbly Connect and select Pabbly Chatflow as the trigger app. Set the event to ‘New Message Received’.

After connecting, copy the provided webhook URL and paste it into the API request section of Pabbly Chatflow. This will allow you to send the collected data to Google Sheets.

Map the fields appropriately in Pabbly Connect to ensure that the data from the chatbot flows into the correct columns in your Google Sheet.


5. Finalizing the Chatbot Flow and Confirmation Message

After setting up the integration with Google Sheets, finalize your chatbot flow in Pabbly Chatflow. Add a confirmation message that thanks the user for their booking and informs them that their details have been recorded. This enhances user experience and provides assurance.

Click on the ‘Save’ button to update your flow. You can test the chatbot by sending a message through WhatsApp and observing how the automated responses are delivered.

With this setup, your WhatsApp chatbot for home tutoring bookings is fully operational, allowing you to manage bookings efficiently.


Conclusion

In conclusion, using Pabbly Chatflow to automate home tutoring bookings via WhatsApp streamlines the enrollment process and enhances user interaction. This step-by-step guide demonstrates how to create a functional chatbot that collects user data and stores it in Google Sheets.

Ensure you check out Pabbly Connect to create business automation workflows and reduce manual tasks. Pabbly Connect currently offer integration with 2,000+ applications.

Automate Music Class Enrollment via WhatsApp with Pabbly Chatflow

Learn how to automate music class enrollment via WhatsApp using Pabbly Chatflow in this detailed step-by-step tutorial. Explore how leading businesses automate customer interactions with carefully designed chat sequences that feel natural and helpful.

Watch Step By Step Video Tutorial Below


1. Accessing Pabbly Chatflow for WhatsApp Integration

To automate music class enrollment via WhatsApp, you first need to access Pabbly Chatflow. Start by visiting the Pabbly Chatflow website by typing ‘Pabbly.com/chatflow’ in your browser. Once there, you will see options for signing in or signing up.

If you are a new user, click on ‘Sign Up Free’ to create an account. Existing users should click on ‘Sign In’. After signing up, you will receive 100 free credits per month to practice building your chatbot. This is a great way to familiarize yourself with the platform’s features.


2. Creating Your WhatsApp Chatbot with Pabbly Chatflow

After accessing Pabbly Chatflow, navigate to the dashboard where you will find the option to add your WhatsApp number. Click on ‘Add WhatsApp Number’ to connect your WhatsApp account. You can choose between WhatsApp Connect or Manual Token Connect based on your preference.

  • Select ‘WhatsApp Connect’ for easier integration.
  • If using Manual Token Connect, follow the prompts to enter your token.

Once your WhatsApp number is successfully connected, proceed to the sidebar and click on ‘Flows’ to create your chatbot flow. This flow will automate the enrollment process for your music class.


3. Designing the Chatbot Flow in Pabbly Chatflow

In the flow builder of Pabbly Chatflow, click on ‘Add Flow’ to start designing your chatbot. Name your flow ‘Automate Music Class Enrollment via WhatsApp’. Next, set up a trigger that initiates the chatbot when a specific keyword is sent by the user.

For this, select the ‘Keyword Matches’ trigger and enter a keyword like ‘enroll’. This keyword will activate the chatbot whenever a user sends a message containing it. After setting the trigger, create a welcome message that greets the user and provides options to enroll or view courses.


4. Adding Interaction Options for Users

In your Pabbly Chatflow flow, after the welcome message, add buttons for user interaction. Create two buttons: ‘Enroll Now’ and ‘View Courses’. When a user clicks ‘Enroll Now’, the chatbot should ask them which instrument they want to learn.

  • The first button should lead to a question asking for the instrument.
  • The second button should show a list of available courses.

Ensure that each question collects necessary information, such as instrument choice, preferred batch, and full name. After collecting this information, send a confirmation message to the user, confirming their enrollment.


5. Testing Your Chatbot Integration with WhatsApp

Once your flow is set up in Pabbly Chatflow, it’s time to test it. Send a message from your connected WhatsApp number to see if the chatbot responds correctly. For example, type ‘I want to enroll in music class’ and check if you receive the welcome message.

Follow the prompts by selecting ‘Enroll Now’ and entering the required details. If everything is set up correctly, you should receive confirmation of your enrollment, and the chatbot will provide course options when requested.


Conclusion

By utilizing Pabbly Chatflow, you can effectively automate the enrollment process for your music classes via WhatsApp. This integration not only saves time but also enhances the user experience by providing instant responses and information.

Ensure you check out Pabbly Connect to create business automation workflows and reduce manual tasks. Pabbly Connect currently offer integration with 2,000+ applications.

Start using Pabbly Chatflow today to streamline your music class enrollment process and improve communication with your students.