Add Multiple Contacts to HubSpot at Once

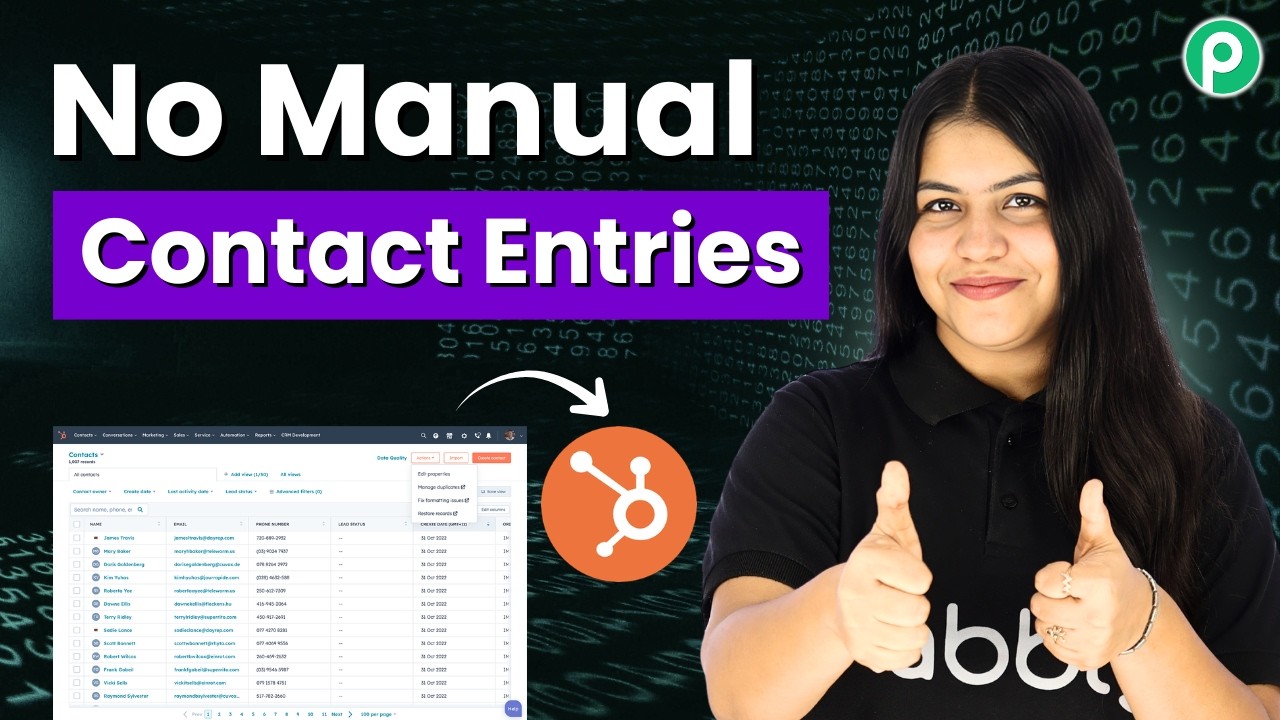
Learn how to add multiple contacts to HubSpot at once using Pabbly Connect. This step-by-step tutorial covers integration with Google Sheets and more. Explore efficient methods for automating routine tasks with clear, concise instructions suited for both newcomers and experienced professionals.

Watch Step By Step Video Tutorial Below


1. Setting Up Pabbly Connect for Integration

To begin adding multiple contacts to HubSpot, first access Pabbly Connect. If you are a new user, visit pabbl.com/connect in your browser and sign up for free. This allows you to explore the capabilities of Pabbly Connect with 100 free tasks every month, enabling you to create up to 100 contacts.

Once signed up, navigate to the workflow builder within Pabbly Connect. This is where you will set up the automation. You will need to create a trigger and an action to facilitate the integration between Google Sheets and HubSpot CRM.


2. Creating the Trigger in Pabbly Connect

In the workflow builder of Pabbly Connect, click on the ‘Add Trigger’ button. Search for ‘Google Sheets’ as your trigger application. Select the event ‘New or Updated Spreadsheet Row’ and click on ‘Connect’. You will receive a webhook URL that you will need for the next steps.

  • Click on ‘Add-ons’ in Google Sheets and search for ‘Pabbly Connect Webhooks’.
  • Install the extension and refresh your spreadsheet to see the new option in the extensions tab.
  • Go to ‘Pabbly Connect Webhooks’ > ‘Initial Setup’ and paste the webhook URL.

After pasting the URL, specify the trigger column, which is the final data column in your spreadsheet. Click ‘Submit’ to successfully configure the setup. This establishes a connection between Google Sheets and Pabbly Connect.


3. Testing the Trigger in Pabbly Connect

To test the trigger, click on the ‘Send Test’ button in Pabbly Connect. This action sends test data to verify that the setup works correctly. Once the test data is sent successfully, you will see the captured response in your workflow.

Next, you will move on to create a HubSpot contact. Click on ‘Add New Action Step’ and search for ‘HubSpot CRM’. Select ‘Create a Contact’ as the action event and click ‘Connect’. If prompted, log into your HubSpot account to establish the connection with Pabbly Connect.


4. Mapping Data to HubSpot Using Pabbly Connect

After connecting, you will need to map the data from the Google Sheets to the HubSpot fields. For example, map the email address and phone number fields dynamically using the mapping feature in Pabbly Connect. This ensures that as new data comes in, it is automatically inserted into the correct fields in HubSpot.

  • Use a slash (/) to search for the details you wish to map.
  • Select the appropriate fields from the test data captured earlier.
  • Click ‘Save and Send Test Request’ after mapping the fields.

Once the test request is successful, you will see a confirmation message indicating that the contact has been added to HubSpot. Refresh your HubSpot contact list to verify that the new contact appears correctly.


5. Sending Multiple Contacts to HubSpot at Once

To add multiple contacts in one go, go back to your Google Sheets and click on ‘Pabbly Connect Webhooks’ and select ‘Send All Data’. This action will send all the data from the spreadsheet to Pabbly Connect, which will then create multiple contacts in HubSpot automatically.

Make sure to enable the ‘Send on Event’ option in the settings of the Pabbly Connect Webhooks for future entries. This ensures that any new data added to your spreadsheet is automatically processed and added to HubSpot without manual intervention.

With Pabbly Connect, you can automate the entire process of adding multiple contacts to HubSpot, making your workflow efficient and error-free. This powerful integration allows you to focus on other important tasks while the automation takes care of contact management.


Conclusion

In this tutorial, we demonstrated how to use Pabbly Connect to add multiple contacts to HubSpot at once. By integrating Google Sheets with HubSpot via Pabbly Connect, you can streamline your contact management process and save valuable time. Try this automation today to enhance your productivity!

Ensure you check out Pabbly Connect to create business automation workflows and reduce manual tasks. Pabbly Connect currently offer integration with 2,000+ applications.

Automatically Share WordPress Posts on Instagram

Learn how to automate sharing WordPress posts on Instagram using Pabbly Connect. This step-by-step guide covers all necessary actions and integrations. Explore systematic approaches to creating efficient automation solutions that convert technical concepts into practical, implementable instructions.

Watch Step By Step Video Tutorial Below


1. Accessing Pabbly Connect for Automation

To automate the sharing of WordPress posts on Instagram, start by accessing Pabbly Connect. Open a new tab and enter the URL Pabbly.com/connect. This will take you to the Pabbly Connect homepage where you can sign up for free or log in if you already have an account.

If you are a new user, select the ‘Sign Up Free’ option to create your account. Upon signing up, you will receive 100 free tasks every month to practice using Pabbly Connect. If you are an existing user, simply click on ‘Sign In’ to access your dashboard.


2. Creating a Workflow in Pabbly Connect

Once logged into Pabbly Connect, you will be directed to your dashboard. Here, you can create a new workflow by clicking on the ‘Create Workflow’ button. Choose the option to create from scratch, as we will build our automation step by step.

  • Select the newly launched workflow builder for a modern experience.
  • Name your workflow ‘Automatically Share WordPress Posts on Instagram’.
  • Choose the appropriate folder for better organization.

After naming your workflow, click on ‘Create’. You will now be on the workflow page where you can set up the trigger for your automation.


3. Setting Up the Trigger for WordPress

In Pabbly Connect, a trigger is the event that starts your workflow. For this integration, you will need to select WordPress as your trigger application. Click on ‘Add Trigger’ and search for WordPress, then select it.

Choose the event ‘New Post Published’ to trigger the workflow whenever a new post is created. Click on ‘Connect’ to generate a webhook URL, which acts as a bridge between WordPress and Pabbly Connect. Copy this URL as you will need it in the next steps.


4. Configuring WordPress to Send Data

Now, navigate to your WordPress account and go to the Plugins section. Install the WP Webhooks plugin if you haven’t already. Once installed, go to the settings of the WP Webhooks plugin and select the option to send data.

  • Select the trigger as ‘Post Created’.
  • Add the webhook URL you copied from Pabbly Connect.
  • Save the settings to ensure the connection is established.

After saving the settings, return to Pabbly Connect and test the webhook by creating a new post in WordPress. This will allow Pabbly Connect to receive the data and confirm the connection.


5. Finalizing the Integration with Instagram

With the trigger set, now you can add the action step to post on Instagram. Click on ‘Add New Action Step’ and search for Instagram for Business. Select this option and choose ‘Create and Publish Photo’ as the action event. using Pabbly Connect

Connect your Instagram account by following the prompts. You will need to log into your Facebook account linked with your Instagram account to establish this connection. After connecting, map the fields for the photo URL and caption using the data received from WordPress.

Once everything is mapped correctly, click ‘Save’ and send a test request to verify that the post is successfully published on Instagram. Upon confirmation, you can check your Instagram account to see the new post reflecting the content from your WordPress site.


Conclusion

By utilizing Pabbly Connect, you can effortlessly automate the process of sharing WordPress posts on Instagram. This integration not only saves time but also ensures consistent engagement on your social media platforms. Start using Pabbly Connect today to streamline your workflow and enhance your online presence.

Ensure you check out Pabbly Connect to create business automation workflows and reduce manual tasks. Pabbly Connect currently offer integration with 2,000+ applications.

How to Auto-Publish Instagram Posts Across Multiple Social Media Platforms

Learn how to auto-publish Instagram posts across multiple social media platforms using Pabbly Connect. Step-by-step tutorial for seamless integration. Navigate the automation landscape confidently with clear, structured guidance suitable for professionals regardless of prior technical experience.

Watch Step By Step Video Tutorial Below


1. Accessing Pabbly Connect for Social Media Integration

To auto-publish Instagram posts across multiple social media platforms, the first step is to access Pabbly Connect. You can do this by searching for Pabbly.com in your browser and navigating to the Pabbly Connect homepage.

Once on the homepage, you will see two options: ‘Sign In’ and ‘Sign Up Free’. If you are a new user, click on ‘Sign Up Free’ to create an account and get 100 free tasks every month to explore the software. Existing users should click on ‘Sign In’ to access their accounts.


2. Creating a Workflow in Pabbly Connect

After signing in, you will be directed to the Pabbly Connect dashboard. Here, you can create a new workflow by clicking on the ‘Create Workflow’ button. For this tutorial, name your workflow something like ‘Publish Instagram Posts Across Multiple Social Media Platforms’. using Pabbly Connect

  • Click on the dropdown menu to select a folder for your workflow.
  • Choose the ‘Automations’ folder or create one based on your requirements.

Once you have named your workflow and selected the appropriate folder, click on the ‘Create’ button. You will now be taken to the workflow builder where you can set up triggers and actions.


3. Setting Up the Instagram Trigger

In this section, you will set up the trigger for your automation using Pabbly Connect. Select ‘Instagram for Business’ as your trigger application. Choose the event ‘New Media Posted’ to capture any new posts made on your Instagram account.

Next, click on the ‘Connect’ button. If your Instagram account is already connected, select the existing connection. Otherwise, follow the prompts to connect your Instagram account to Pabbly Connect. After granting access, select the Instagram account you wish to use and click ‘Save and Send Test Request’ to ensure the connection is successful.


4. Adding Action Steps to Publish on Other Platforms

Once the Instagram trigger is set, it’s time to add action steps to publish the post on other platforms. Start with Facebook by selecting ‘Facebook Pages’ as your action application. Choose the event ‘Create Page Photo Post’ to share the Instagram post on your Facebook page.

  • Connect your Facebook account to Pabbly Connect.
  • Select the Facebook page you want to post on.

Map the media URL and caption received from the Instagram trigger to the corresponding fields in the Facebook action step. After completing this, test the action to ensure it posts correctly on Facebook.


5. Publishing to LinkedIn and Pinterest

After successfully posting to Facebook, you can extend the automation to LinkedIn and Pinterest using Pabbly Connect. For LinkedIn, select ‘LinkedIn’ as your action application and choose ‘Share a Text Update with Image’ as the event.

Connect your LinkedIn account and map the image URL and caption from the Instagram trigger to the LinkedIn action step. Similarly, for Pinterest, select ‘Pinterest’ as your action application and choose ‘Create Pin’. Map the necessary fields just like you did for Facebook and LinkedIn. Once all steps are configured, test each action to confirm that posts are shared successfully on all platforms.


Conclusion

By following these steps, you can easily auto-publish Instagram posts across multiple social media platforms using Pabbly Connect. This automation saves time and ensures your content reaches a wider audience effortlessly. Start using Pabbly Connect today to enhance your social media strategy!

Ensure you check out Pabbly Connect to create business automation workflows and reduce manual tasks. Pabbly Connect currently offer integration with 2,000+ applications.

Manage Real Estate Leads in Backend Automatically

Learn how to manage real estate leads automatically using Pabbly Connect, integrating Google Sheets, Zoho CRM, and more for efficient lead management. Implement the precise methodologies leading organizations use to automate repetitive tasks, illustrated with practical examples designed for immediate application.

Watch Step By Step Video Tutorial Below


1. Accessing Pabbly Connect for Real Estate Lead Management

To manage real estate leads automatically, you need to access Pabbly Connect. Start by visiting pabbl.com/connect in your browser. If you’re a new user, click on ‘Sign Up for Free’ in the top right corner. This allows you to explore Pabbly Connect with 100 free tasks every month, which is perfect for adding lead details into Google Sheets and your CRM.

After signing up, you can utilize the powerful workflow builder in Pabbly Connect. This tool is essential for setting up triggers and actions, which will automate your lead management process. With this setup, your sales team can efficiently manage and contact leads without manual entry.


2. Setting Up the Trigger in Pabbly Connect

In Pabbly Connect, the first step is to set up a trigger that activates when a new lead is received. Click on the ‘Add Trigger’ button and select ’99 acres’ as the application. Choose the event ‘New Leads’ and connect your account to receive a webhook URL.

  • Select ’99 acres’ as your trigger application.
  • Choose ‘New Leads’ as the event.
  • Copy the webhook URL provided.

To complete the setup, you must contact your account manager at 99 acres to integrate the webhook URL into your account. Once this is done, Pabbly Connect will be ready to capture lead details automatically.


3. Adding Lead Details to Google Sheets

After the trigger is set, the next step is to add the lead details into Google Sheets using Pabbly Connect. Click on ‘Add New Action Step’, search for ‘Google Sheets’, and select it. Choose the event ‘Add New Row’ and connect your Google account.

  • Select your spreadsheet titled ‘New Lead Details’.
  • Map the lead details such as first name, last name, email, phone number, and area.
  • Click on ‘Save and Send Test Request’ to confirm the addition.

This mapping process ensures that every new lead is automatically added to your Google Sheets, making it easier for your team to track and manage leads efficiently through Pabbly Connect.


4. Creating Contacts in Zoho CRM

Next, you will create a contact in Zoho CRM using Pabbly Connect. Click on ‘Add New Action Step’, search for ‘Zoho CRM’, and select it. Choose the event ‘Create Contact’ and connect your Zoho account by entering your domain.

After connecting, you will need to map the same lead details (first name, last name, email) as you did for Google Sheets. This ensures that every lead captured is also reflected in your CRM. Click on ‘Save and Send Test Request’ to create the contact.

Once the contact is created, refresh your Zoho CRM contact list to see the new entry. This integration through Pabbly Connect streamlines your lead management process, ensuring that your sales team has immediate access to new leads.


5. Conclusion: Automate Your Real Estate Lead Management

Using Pabbly Connect to manage real estate leads automatically simplifies your workflow. By integrating Google Sheets and Zoho CRM, you can ensure that every new lead is efficiently tracked and managed.

Ensure you check out Pabbly Connect to create business automation workflows and reduce manual tasks. Pabbly Connect currently offer integration with 2,000+ applications.

This automation not only saves time but also reduces the need for additional manpower. With Pabbly Connect, managing leads is seamless, whether you receive one lead or a hundred. Start using Pabbly Connect today to enhance your real estate business operations!

Put Your Business on Autopilot with a Custom WhatsApp AI Assistant

Learn how to automate your business communication with a Custom WhatsApp AI Assistant using Pabbly Chatflow. Step-by-step tutorial to streamline customer interactions. Create intelligent chat experiences that delight users while collecting valuable information and moving prospects through your sales process.

Watch Step By Step Video Tutorial Below


1. Accessing Pabbly Chatflow to Set Up Your WhatsApp AI Assistant

To begin automating your business communication, you will first need to access Pabbly Chatflow. This platform is essential for creating a Custom WhatsApp AI Assistant that can handle customer inquiries efficiently. Open your web browser and type in the URL Pabbly.com/chatflow to reach the Pabbly Chatflow homepage.

Once you arrive at the homepage, you will see options to either sign in or create a free account. If you are new to Pabbly, click on the ‘Sign Up Free’ option. This will allow you to create an account and receive 100 free credits monthly to practice. Existing users can simply log in to their accounts. After logging in, you will be directed to the dashboard where you can access all Pabbly applications, including Pabbly Chatflow.


2. Adding Your WhatsApp Number in Pabbly Chatflow

After accessing Pabbly Chatflow, the next step is to add your WhatsApp number. This is crucial for enabling the AI Assistant to interact with your customers on WhatsApp. On the dashboard, look for the ‘Add WhatsApp Number’ button. Click on it to proceed.

  • Select ‘WhatsApp Connect’ for a seamless integration.
  • Alternatively, you can choose ‘Manual Token Connect’ if preferred.

Once you have selected your preferred method, follow the on-screen instructions to finalize the connection. This step is essential as it allows Pabbly Chatflow to manage your WhatsApp communications effectively, ensuring that your AI Assistant can respond to customer messages in real-time.


3. Creating Your Custom WhatsApp AI Assistant in Pabbly Chatflow

Now that your WhatsApp number is connected, you can create your Custom WhatsApp AI Assistant using Pabbly Chatflow. Navigate to the AI Assistant section on the sidebar and click on the ‘Add AI Assistant’ button. You will be prompted to enter a name for your assistant, such as ‘Business on Autopilot with a Custom WhatsApp AI Assistant’.

After naming your assistant, you will enter the AI Instructions tab. Here, select the instruction type as ‘AI Agent’. This setting allows your assistant to handle customer queries effectively. Next, adjust the temperature setting, which controls the creativity of the responses. A temperature of 0.5 is recommended for friendly and engaging responses. Once configured, click on the ‘Save AI Assistant’ button to save your settings.


4. Configuring the Knowledge Base for Your AI Assistant

To ensure your Custom WhatsApp AI Assistant can provide accurate responses, you need to configure its knowledge base. In Pabbly Chatflow, navigate to the Knowledge Source tab. Here, you can upload a knowledge base file in .txt or .pdf format. This file should contain all the relevant information your AI Assistant will need to answer customer queries.

  • Make sure your knowledge base is comprehensive and up-to-date.
  • Upload the file by clicking the upload button and selecting your prepared knowledge base document.

Once uploaded, your AI Assistant will be able to access this information and provide instant support to customers. This configuration is crucial for the assistant to function effectively and streamline your business operations.


5. Enabling Your AI Assistant on WhatsApp

Finally, to enable your AI Assistant for customer interactions, go to the Inbox Settings in Pabbly Chatflow. Here, you can select whether to enable the AI Assistant for all contacts or specific ones. This flexibility allows you to tailor the assistant’s capabilities based on your business needs.

After making your selection, click on the ‘Save’ button to activate your AI Assistant. Your assistant is now ready to respond to customer inquiries on WhatsApp, providing instant support and ensuring no queries are missed.


Conclusion

Using Pabbly Chatflow, you can easily automate your business communication with a Custom WhatsApp AI Assistant. This step-by-step guide has shown you how to set up the assistant, configure its knowledge base, and enable it for customer interactions. Start using Pabbly Chatflow today to streamline your operations and enhance customer satisfaction.

Ensure you check out Pabbly Connect to create business automation workflows and reduce manual tasks. Pabbly Connect currently offer integration with 2,000+ applications.

How to Automate Freshdesk Ticket Routing Based on Priority (Step-by-Step)

Learn how to automate Freshdesk ticket routing based on priority using Pabbly Connect. Step-by-step guide for seamless integration with Slack and WhatsApp. Implement the precise methodologies leading organizations use to automate repetitive tasks, illustrated with practical examples designed for immediate application.

Watch Step By Step Video Tutorial Below


1. Accessing Pabbly Connect for Automation

To automate Freshdesk ticket routing based on priority, start by accessing Pabbly Connect. Visit the Pabbly website by typing pabby.com in your browser. Sign into your existing account or create a new one to begin your automation journey.

Once logged in, navigate to the Pabbly Connect dashboard. From here, you can create a new workflow by selecting the ‘Create Workflow’ button. This will allow you to set up a new automation that integrates Freshdesk with other applications like Slack and WhatsApp.


2. Creating a New Workflow in Pabbly Connect

After accessing your dashboard, click on the ‘Create Workflow’ option. You will be prompted to name your workflow. For this tutorial, name it ‘Automate Freshdesk Ticket Routing Based on Priority’. Choose the folder where you want to save this workflow.

  • Select the trigger application as Freshdesk.
  • Choose the trigger event ‘New Ticket’.
  • Click on ‘Connect’ to establish a connection.

This step connects your Freshdesk account to Pabbly Connect, allowing it to receive notifications whenever a new ticket is created. Follow the prompts to complete the connection.


3. Setting Up Freshdesk for Ticket Routing

To set up Freshdesk for ticket routing, navigate to your Freshdesk admin panel. Here, you will configure a webhook that connects Freshdesk with Pabbly Connect. Go to the ‘Admin’ section and select ‘Workflows’ followed by ‘Automation’.

Create a new automation rule by clicking on ‘New Rule’. Name this rule appropriately, such as ‘Pabbly Connect Integration’. Set the conditions based on ticket creation times and select the trigger as ‘Webhook’ with the request type set to POST.

  • Paste the webhook URL provided by Pabbly Connect into the designated field.
  • Configure the JSON encoding settings as needed.
  • Add required ticket details like Ticket ID, Subject, Description, etc.

After setting up these configurations, save the rule. This allows Freshdesk to send ticket data to Pabbly Connect, which will trigger your automation workflow.


4. Routing Tickets Based on Priority

With the webhook in place, the next step is to route the tickets based on their priority. In your Pabbly Connect workflow, add a new action step by selecting the ‘Router’ action. This allows you to create conditions for different ticket priorities.

Create three routes: one for low priority, one for medium/high priority, and one for urgent tickets. For each route, set the filter conditions based on the priority level received from Freshdesk.

For low priority tickets, configure an email action to notify users. For medium and high priority tickets, set up a Slack message action. For urgent tickets, connect to WhatsApp Cloud API to send a message.

This routing setup ensures that each ticket is handled appropriately based on its priority, leveraging Pabbly Connect to manage the workflow efficiently.


5. Testing the Automation Workflow

After configuring the routing, it’s essential to test the automation to ensure it functions as intended. Create a sample ticket in Freshdesk with varying priority levels. Monitor the responses in Pabbly Connect to verify that the correct actions are triggered based on the ticket priority.

Check your email for notifications from low priority tickets, your Slack channel for medium/high priority messages, and your WhatsApp for urgent ticket alerts. This testing phase confirms that the integration and automation are working seamlessly.

Once the testing is successful, your workflow is ready to go live, ensuring efficient ticket routing based on priority using Pabbly Connect.


Conclusion

In conclusion, using Pabbly Connect to automate Freshdesk ticket routing based on priority enhances team efficiency. By integrating Freshdesk with Slack and WhatsApp, you ensure timely responses to customer queries based on urgency.

Ensure you check out Pabbly Connect to create business automation workflows and reduce manual tasks. Pabbly Connect currently offer integration with 2,000+ applications.

How to Send Bulk Holi Wishes on WhatsApp for Free

Learn how to send bulk Holi wishes on WhatsApp for free using Pabbly Connect. Step-by-step tutorial on setting up the integration with Google Sheets. Learn to create powerful connections between your critical applications without requiring specialized programming knowledge or extensive technical background.

Watch Step By Step Video Tutorial Below


1. Accessing Pabbly Connect for Sending Bulk Holi Wishes

To send bulk Holi wishes on WhatsApp for free, the first step is to access Pabbly Connect. You can do this by visiting Pabbly’s official website and signing up for a new account or logging into your existing account.

Upon entering the Pabbly Connect dashboard, you will have access to various automation tools. For this tutorial, we will focus on creating an automation workflow that connects Google Sheets with WhatsApp, allowing you to send personalized Holi messages to your customers.


2. Creating a Workflow in Pabbly Connect

Creating a workflow is essential for automating the process of sending messages. In Pabbly Connect, click on the ‘Create Workflow’ button to start. You will be prompted to name your workflow; choose something relevant like ‘Send Bulk Holi Wishes on WhatsApp’.

  • Select the folder for your workflow.
  • Choose either the Beta or Classic version of Pabbly Connect.
  • Click on ‘Create’ to finalize your workflow setup.

After creating the workflow, you will set up triggers and actions. The trigger will be when new customer details are added to your Google Sheets, which will automatically initiate the sending of messages through WhatsApp.


3. Setting Up the Trigger with Google Sheets

In this step, you will configure the trigger to capture new entries in your Google Sheets. In Pabbly Connect, select Google Sheets as the trigger application and choose the event as ‘New Updated Spreadsheet Row’.

Next, you will need to connect your Google Sheets account with Pabbly Connect. Follow the prompts to authorize Pabbly Connect to access your Google account. Once connected, select the specific sheet you want to monitor for new customer entries.


4. Connecting WhatsApp for Sending Messages

Now that your trigger is set up, the next step is to connect WhatsApp using the WhatsApp Cloud API. In Pabbly Connect, select WhatsApp Cloud API as the action application and choose the event as ‘Send Template Message’.

You will need to enter several details for this action, including your WhatsApp Business Account ID and the template ID for your Holi message. Make sure to map the customer’s phone number from the Google Sheets data to ensure the message is sent to the correct recipient.

  • Enter the WhatsApp Business Account ID.
  • Map the phone number field from Google Sheets.
  • Select the message template you created for Holi wishes.

After filling in these details, save your changes and test the connection to ensure everything is working correctly.


5. Finalizing the Automation to Send Bulk Messages

Once you have tested the connection and confirmed that your workflow is working correctly, you can finalize the automation. In Pabbly Connect, click on the ‘Send All Data’ option to send the messages to all customers listed in your Google Sheets.

This feature allows you to send personalized Holi wishes to multiple recipients at once without the risk of being blocked by WhatsApp. Ensure that you have all your customer data correctly filled out in the Google Sheets for smooth execution.

Now that your automation is set up, you can celebrate Holi by sending out your wishes effortlessly through WhatsApp. Enjoy the festivities while Pabbly Connect takes care of your messaging needs!


Conclusion

In this tutorial, we explored how to use Pabbly Connect to send bulk Holi wishes on WhatsApp for free. By integrating Google Sheets with WhatsApp, you can easily automate your messaging process and reach out to your customers effectively.

Ensure you check out Pabbly Connect to create business automation workflows and reduce manual tasks. Pabbly Connect currently offer integration with 2,000+ applications.

Automatically Add Google Ads Leads to Mailchimp (No Code Tutorial)

Learn how to automatically add Google Ads leads to Mailchimp using Pabbly Connect in this detailed no-code tutorial. Follow step-by-step instructions for seamless integration. Discover how to seamlessly connect your essential tools through accessible instructions that make powerful automation available to professionals at every skill level.

Watch Step By Step Video Tutorial Below


1. Access Pabbly Connect for Google Ads and Mailchimp Integration

To begin the process of integrating Google Ads with Mailchimp, you need to access Pabbly Connect. Start by visiting the Pabbly website at pabby.com. If you are an existing user, click on the ‘Sign In’ button located at the top right corner. For new users, select the ‘Sign Up for Free’ option to create an account and receive 100 free tasks monthly.

Once logged in, navigate to the Pabbly Connect dashboard. Click on the ‘Access Now’ button for Pabbly Connect. This action will take you to the app dashboard where you can manage your workflows. To create a new workflow, click on the ‘Create Workflow’ button, and select the new beta workflow builder. Name your workflow as ‘Automatically Add Google Ads Leads to Mailchimp’ and click on ‘Create’ to proceed.


2. Setting Up Google Ads as the Trigger in Pabbly Connect

In this step, we will set Google Ads as the trigger application in Pabbly Connect. The trigger is the event that initiates the workflow. Select Google Ads as your trigger application. The specific trigger event you need to choose is ‘New Lead Form Entry.’ This will allow the workflow to activate whenever a new lead is generated from Google Ads.

  • Search for Google Ads in the trigger application field.
  • Select ‘New Lead Form Entry’ as the trigger event.
  • Click on the ‘Connect’ button to establish a connection.

After connecting, Pabbly Connect will provide you with a webhook URL. This URL acts as a bridge to connect Google Ads with Pabbly Connect. Copy this webhook URL and proceed to your Google Ads account to set up lead delivery.


Now that you have your webhook URL from Pabbly Connect, it’s time to configure Google Ads to send lead data to this URL. Open your Google Ads account and navigate to the campaign where you have created a lead form. Ensure that your lead form includes all necessary fields such as first name, last name, email, phone number, and company name.

In the lead delivery options, paste the copied webhook URL into the designated box. Make sure to enter the key as well. Click on the ‘Send Test Data’ button to verify that the connection is working correctly. If the test data is successfully sent, you will see a confirmation indicating that the connection setup is functioning as intended.


4. Connecting Mailchimp as the Action Application

Next, we will set up Mailchimp as the action application in Pabbly Connect. This step allows you to automatically add new leads from Google Ads to your Mailchimp account. Click on the ‘Add New Action Step’ and search for Mailchimp in the action application field. Select ‘Add New Member with Custom Fields’ as the action event.

  • Connect to your Mailchimp account by entering your API key and data center.
  • Select the audience list you want to add leads to.
  • Map the fields from Google Ads to Mailchimp, ensuring email addresses and names are correctly assigned.

Once all details are mapped, click on the ‘Save and Send Test Request’ button. If successful, you will receive a confirmation response indicating that the subscriber has been created in Mailchimp.


5. Finalizing the Google Ads and Mailchimp Integration

With both Google Ads and Mailchimp connected through Pabbly Connect, you have successfully set up the automation workflow. Every time a new lead is generated in Google Ads, it will automatically be added to your Mailchimp audience list without any manual effort. This automation saves time and ensures that your leads are captured efficiently.

To summarize, you have configured Google Ads as the trigger application, set up lead delivery, connected Mailchimp as the action application, and mapped the necessary fields. This seamless integration allows for effective lead management and enhances your marketing efforts.


Conclusion

In this tutorial, we demonstrated how to automatically add Google Ads leads to Mailchimp using Pabbly Connect. By following the steps outlined, you can streamline your lead management process and ensure that all potential customers are captured effectively. Start utilizing Pabbly Connect today to enhance your marketing automation.

Ensure you check out Pabbly Connect to create business automation workflows and reduce manual tasks. Pabbly Connect currently offer integration with 2,000+ applications.

Build AI Helpdesk Assistant Without Coding

Learn how to create an AI Helpdesk Assistant using Pabbly Chatflow. Follow this detailed tutorial for seamless integration and automation without coding. Learn step-by-step how to create, test, and optimize chatbots that enhance customer experience while reducing support workload.

Watch Step By Step Video Tutorial Below


1. Setting Up Pabbly Chatflow for Your AI Helpdesk Assistant

To build your AI Helpdesk Assistant using Pabbly Chatflow, you first need to access the platform. Start by visiting the Pabbly Chatflow website and signing up for a free account. New users receive 100 free credits each month, allowing you to create chatbots without any cost.

Once you are logged in, navigate to the dashboard. Here, you will find options to add your WhatsApp number, which is essential for your assistant. Click on the ‘Add WhatsApp Number’ button to proceed with your integration.


2. Creating Your AI Assistant in Pabbly Chatflow

After setting up your WhatsApp number, the next step is to create your AI assistant. In your Pabbly Chatflow account, select the ‘AI Assistant’ option from the left sidebar. Press the ‘Add Assistant’ button to begin the creation process.

  • Name your assistant (e.g., AI Helpdesk Assistant).
  • Configure AI instructions, knowledge sources, and interface settings.
  • Style your assistant according to your brand preferences.

Once you have completed these steps, click the ‘Save’ button to finalize your AI assistant setup. This assistant will now be ready to interact with your customers.


3. Uploading Your Knowledge Base in Pabbly Chatflow

A crucial part of your AI assistant is its knowledge base. In Pabbly Chatflow, navigate to the ‘Knowledge Source’ section. Here, you need to upload a file containing essential information about your business, such as FAQs and service details.

Ensure your file is in .txt or PDF format and does not exceed 90 MB. Once uploaded, your assistant will utilize this information to answer customer queries effectively. This step is vital for ensuring your assistant provides accurate responses.


4. Designing Your AI Assistant’s Interface

Next, you will design the interface of your AI assistant within Pabbly Chatflow. Customize the heading and subheading to reflect your brand. You can also add an initial message that customers will see when they interact with the assistant.

  • Select a theme (light or dark).
  • Change the shape of the assistant’s avatar.
  • Add a privacy policy link if required.

After making these adjustments, click the ‘Save’ button to apply your changes. This design will enhance user experience and brand recognition.


5. Testing Your AI Helpdesk Assistant

Finally, it’s time to test your AI Helpdesk Assistant created through Pabbly Chatflow. Open your WhatsApp and send the trigger keyword you set earlier. Your assistant should respond instantly, demonstrating its functionality.

Verify that the assistant correctly answers queries based on the knowledge base you uploaded. If everything works as expected, your AI Helpdesk Assistant is now fully operational and ready to assist customers.


Conclusion

In this tutorial, we explored how to build an AI Helpdesk Assistant using Pabbly Chatflow. By following these steps, you can automate customer support and enhance user experience without any coding knowledge. Start leveraging automation today!

Ensure you check out Pabbly Connect to create business automation workflows and reduce manual tasks. Pabbly Connect currently offer integration with 2,000+ applications.

Put Your WhatsApp on Autopilot Today

Learn how to automate your WhatsApp using Pabbly Connect to streamline customer interactions and enhance your business efficiency. Discover hidden automation capabilities within your existing tools. This guide shows you how to connect your essential applications and permanently eliminate redundant manual processes.

Watch Step By Step Video Tutorial Below


1. Accessing Pabbly Connect for WhatsApp Automation

To put your WhatsApp on autopilot, you first need to access Pabbly Connect. Begin by searching for Pabbly.com/f in your browser. This will direct you to the home page of Pabbly Connect.

Once on the homepage, you will see two options: Sign In and Sign Up for free. If you are a new user, click on ‘Sign Up for Free’ to create an account. Existing users can simply sign in to their account.


2. Creating Your WhatsApp AI Agent with Pabbly Connect

After signing in, navigate to the Pabbly Connect dashboard where you can start creating your WhatsApp AI agent. Click on the ‘Add’ button to begin the process of setting up your AI assistant. using Pabbly Connect

  • Select a name for your assistant.
  • Choose the instruction type from the dropdown.
  • Configure the AI settings, including API key integration.

Once you have set the name and selected the instruction type, you will be directed to a flow window. Here, you can customize your AI agent’s responses and configure various settings to enhance its functionality.


3. Configuring AI Settings in Pabbly Connect

Next, configure the AI settings for your WhatsApp agent. In the configuration section, you will find options to set the temperature, which determines how creative or focused the responses will be. using Pabbly Connect

For example, setting the temperature to 0.4 will yield more focused responses. You will also need to select the AI model, such as GPT-3, from the dropdown menu. This is crucial for ensuring accurate responses to customer queries.

  • Enter your OpenAI API key to connect the AI model.
  • Adjust the header and footer messages to personalize your agent.
  • Specify keywords that will stop the assistant from replying.

After configuring these settings, you can save your changes and proceed to the next steps in setting up your WhatsApp automation.


4. Activating Your WhatsApp Agent with Pabbly Connect

To activate your WhatsApp agent, navigate to the inbox settings in Pabbly Connect. Here, you will find the option to enable AI outbound replies. Select the contact list and assign the assistant you created to these contacts. using Pabbly Connect

Click on the ‘Save’ button to confirm your settings. Your assistant will now be assigned to all contacts in the selected list, allowing it to respond to customer inquiries automatically.


5. Conclusion: Automate Your WhatsApp Today

Using Pabbly Connect to automate your WhatsApp interactions is a straightforward process. By following the steps outlined above, you can create an AI agent that efficiently handles customer queries, enhancing your business operations.

Ensure you check out Pabbly Connect to create business automation workflows and reduce manual tasks. Pabbly Connect currently offer integration with 2,000+ applications.

Start utilizing Pabbly Connect today to streamline your WhatsApp communications and improve customer satisfaction. With this automation, you can focus on growing your business while ensuring timely responses to your clients.