How to Auto-Categorize Leads in HubSpot from Facebook Lead Ads

Learn how to automate lead categorization in HubSpot from Facebook Lead Ads using Pabbly Connect. Follow this step-by-step tutorial for seamless integration. Explore systematic approaches to creating efficient automation solutions that convert technical concepts into practical, implementable instructions.

Watch Step By Step Video Tutorial Below


1. Introduction to Pabbly Connect for Lead Automation

Pabbly Connect is the central platform that automates the lead categorization process in HubSpot from Facebook Lead Ads. This integration saves time and eliminates manual data entry. using Pabbly Connect

By using Pabbly Connect, you can seamlessly transfer lead data from Facebook to HubSpot without any coding. This automation allows businesses to focus on nurturing leads rather than managing them manually.


2. Setting Up Pabbly Connect for Facebook Lead Ads

To get started, visit Pabbly Connect and sign in to your account. If you are a new user, you can sign up for free and get 100 free tasks every month.

  • Go to the Pabbly Connect dashboard.
  • Click on ‘Create Workflow’ to set up a new automation.
  • Select the ‘New Beta Builder’ for a modern workflow experience.

Once you have set up your workflow, name it according to your task, such as ‘Lead in HubSpot from Facebook Lead Ads.’ This naming helps in identifying the workflow later.


3. Configuring Facebook Lead Ads in Pabbly Connect

In this step, you will configure the trigger for your workflow. Select Facebook Lead Ads as your app and choose the event as ‘New Lead Instant.’ This will allow Pabbly Connect to capture leads as they come in. using Pabbly Connect

Next, connect your Facebook account by adding a new connection. After successful connection, select the page from which you want to capture leads and the lead generation form.

  • Choose your Facebook page.
  • Select the lead gen form to capture new leads.
  • Enable the simple response toggle to receive immediate feedback.

After configuring these settings, save and send a test request to ensure that the connection works correctly.


4. Mapping Data to HubSpot Using Pabbly Connect

Now that your trigger is set up, it’s time to add an action step to map the captured lead data to HubSpot. Search for HubSpot and select the action event as ‘Create Contact.’ This will allow you to create a new contact whenever a new lead is captured. using Pabbly Connect

Connect your HubSpot account by adding a new connection. After granting access, map the fields from the Facebook lead to the corresponding fields in HubSpot, such as email address, first name, last name, phone number, and city.

Map the email address from the Facebook lead to HubSpot. Link the first name and last name accordingly. Ensure the phone number and city are correctly mapped.

Once all fields are mapped, save and send a test request to confirm that the data is correctly entered into HubSpot.


5. Testing and Activating Your Workflow

After successfully mapping the data, it’s crucial to test the entire workflow to ensure everything functions as intended. Fill out the Facebook lead ad form to generate a new lead.

Once the form is submitted, check HubSpot to see if the lead information appears correctly. You should see the name, email address, phone number, and city captured from the lead ad.

After verifying that the data is correctly transferred, activate your workflow in Pabbly Connect. This will ensure that every new lead from Facebook is automatically categorized in HubSpot without any manual effort.


Conclusion

In conclusion, using Pabbly Connect to auto-categorize leads in HubSpot from Facebook Lead Ads streamlines your lead management process. This automation not only saves time but also minimizes the risk of human error, allowing you to focus on other important business tasks.

Ensure you check out Pabbly Connect to create business automation workflows and reduce manual tasks. Pabbly Connect currently offer integration with 2,000+ applications.

How to Automatically Save LinkedIn Leads to Google Contacts for Digital Marketing Agencies

Learn how to automatically save LinkedIn leads to Google Contacts using Pabbly Connect. Step-by-step tutorial for digital marketing agencies. Explore efficient methods for automating routine tasks with clear, concise instructions suited for both newcomers and experienced professionals.

Watch Step By Step Video Tutorial Below


1. Accessing Pabbly Connect for Integration

To begin automating the process of saving LinkedIn leads to Google Contacts, you first need to access Pabbly Connect. Start by visiting the Pabbly website and signing in to your account. If you are a new user, you can sign up for a free account, which allows you to use 100 tasks monthly to test the platform.

Once logged in, navigate to the Pabbly Connect dashboard. Here, you can create new workflows that will facilitate the integration of LinkedIn and Google Contacts. This is where you will set up the automation that triggers whenever a new lead is generated from LinkedIn.


2. Creating a New Workflow in Pabbly Connect

In the Pabbly Connect dashboard, click on the ‘Create Workflow’ button. You will be prompted to name your workflow. For this integration, name it ‘Automatically Save LinkedIn Leads to Google Contacts for Digital Marketing Agencies’. Select an appropriate folder for organization, such as ‘LinkedIn Automation’.

  • Click on the ‘Create’ button to finalize your workflow setup.
  • Choose LinkedIn as your trigger application, and select ‘Lead Notifications’ as the trigger event.
  • Connect your LinkedIn account to Pabbly Connect by entering your credentials.

After connecting LinkedIn, you will need to select the sponsored account you want to use for this workflow. Once selected, click on ‘Save and Send Test Request’ to confirm that the connection is working properly.


3. Testing the LinkedIn Integration

To test the integration, you need to generate a lead through LinkedIn. Open your LinkedIn campaign and fill out the lead generation form with the necessary details, such as email and phone number. Once the form is submitted, Pabbly Connect will capture this data as part of the workflow.

After submission, return to the Pabbly Connect dashboard to check if the lead details have been successfully captured. You should see the email and phone number you entered in the test submission. This confirms that the LinkedIn trigger is properly set up and functioning.


4. Adding Google Contacts Integration in Pabbly Connect

Next, you will set up the action step that adds the captured lead to Google Contacts. In the Pabbly Connect workflow, click on ‘Add New Action Step’ and select Google Contacts as your action application. Choose ‘Create Contact’ as the action event.

  • Connect your Google account by signing in and granting permission to Pabbly Connect.
  • Map the fields from the LinkedIn lead to the Google Contacts fields, such as first name, last name, email, and phone number.
  • Ensure that mapping is done correctly to keep the data dynamic for future leads.

After mapping the fields, click on ‘Save and Send Request’ to finalize the integration. This will create a new contact in your Google Contacts based on the lead information captured from LinkedIn.


5. Verifying the Google Contacts Integration

Once you have saved the action step, it is time to verify that the integration works as intended. Open your Google Contacts and refresh the page to check if the new lead has been added successfully. You should see the contact created with the details you provided during the LinkedIn lead submission.

This final step confirms that your automation workflow between LinkedIn and Google Contacts via Pabbly Connect is fully operational. Whenever a new lead is generated in LinkedIn, it will automatically be saved in your Google Contacts.


Conclusion

In this tutorial, we have successfully set up an automation workflow using Pabbly Connect to save LinkedIn leads directly to Google Contacts. This process streamlines lead management for digital marketing agencies, ensuring no lead is missed. By following these steps, you can enhance your marketing efforts and improve efficiency.

Ensure you check out Pabbly Connect to create business automation workflows and reduce manual tasks. Pabbly Connect currently offer integration with 2,000+ applications.

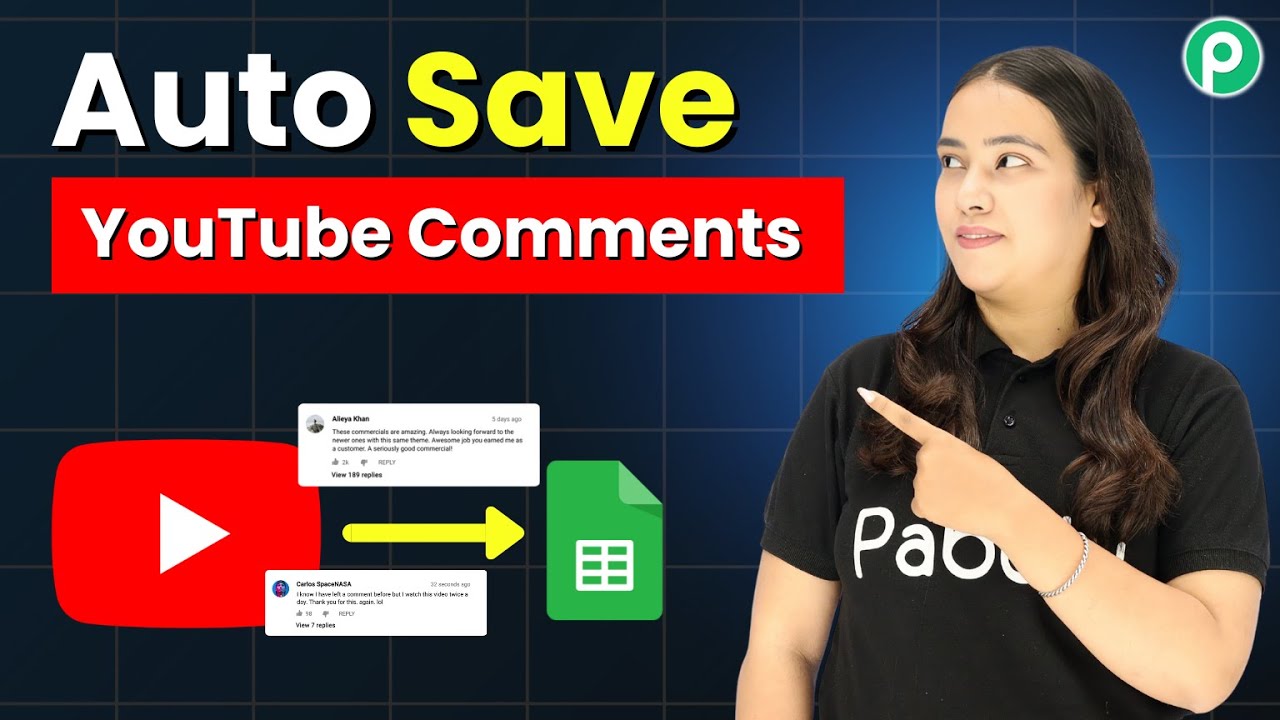
Extract YouTube New Comments & Store in Google Sheets

Learn how to extract YouTube comments and store them in Google Sheets using Pabbly Connect. Step-by-step tutorial with detailed instructions. Explore systematic approaches to creating efficient automation solutions that convert technical concepts into practical, implementable instructions.

Watch Step By Step Video Tutorial Below


1. Access Pabbly Connect for YouTube Comment Extraction

To begin extracting YouTube comments and storing them in Google Sheets, you need to access Pabbly Connect. Start by navigating to the Pabbly website and selecting the Connect option. This platform allows you to efficiently integrate various applications, including YouTube and Google Sheets, without manual coding.

Once on the Pabbly Connect page, you can either sign up for a free account or log in if you’re an existing user. The platform provides a user-friendly interface to create automation workflows. You will find options to create a new workflow, which is essential for setting up your YouTube comment extraction process.


2. Create a Workflow in Pabbly Connect

After logging into Pabbly Connect, the next step is to create a new workflow. Click on the ‘Create Workflow’ button, and you will be prompted to name your workflow. For this task, name it ‘Extract YouTube New Comments and Store in Google Sheets’ to keep it organized.

In this section, you will also choose the folder where your workflow will be stored. After naming your workflow, click on the ‘Create’ button to proceed. This workflow will serve as the backbone for automating the extraction of comments from your YouTube videos.

  • Click on ‘Create Workflow’.
  • Name your workflow appropriately.
  • Select a folder for organization.

Once your workflow is created, you can start adding triggers and actions. This is where the automation process will begin, making your YouTube comments instantly available in Google Sheets.


3. Setting Up the Trigger with YouTube

The next step involves setting up the trigger for your workflow in Pabbly Connect. Click on the option to add a trigger and choose YouTube as your application. The specific event you want to select is ‘New Comment on a Channel.’ This event will initiate the workflow every time a new comment is posted on your selected YouTube channel.

To connect your YouTube account, you will need to add a new connection. This requires signing in with your Google account and granting the necessary permissions. Once connected, you can specify the channel name from which you want to extract comments and set a maximum result limit, such as 100, to control how many comments are fetched at a time.

  • Select ‘New Comment on a Channel’ as the event.
  • Connect your YouTube account.
  • Set the maximum result limit.

After configuring these settings, click on ‘Save and Send Test Request’ to ensure that the trigger is set up correctly. You should receive a response with the latest comment details, enabling you to move forward with the automation process.


4. Fetching Video Details Using Pabbly Connect

After successfully setting up the trigger, the next step in Pabbly Connect is to fetch video details associated with the new comments. To do this, add another action step and select YouTube again, this time choosing the event ‘Get Video ID.’ This action will allow you to retrieve the video ID related to the comment that triggered the workflow.

As before, connect to your existing YouTube connection. You will then map the video ID from the previous step to ensure that the correct video title is fetched along with the comment details. Once set, click on ‘Save and Send Test Request’ to verify that the video title is successfully extracted.

Select ‘Get Video ID’ as the event. Connect using the existing YouTube connection. Map the video ID from the previous step.

This step is crucial as it ensures that you have all necessary details, including the video title, which will be saved in your Google Sheets along with the comments.


5. Saving Comments to Google Sheets

Now that you have both the comment details and the video title, the final step in Pabbly Connect is to save this information into Google Sheets. To do this, add another action step and search for Google Sheets, selecting the event ‘Add New Row.’ This action will allow you to insert a new row in your specified Google Sheets document.

Connect to your Google Sheets account by adding a new connection and signing in. Select the spreadsheet where you want the comments to be stored. You will then need to map the details such as the commenter’s name, comment date, comment text, and video title into the corresponding columns of your Google Sheet. After mapping all required fields, click on ‘Save and Send Test Request’ to finalize the process.

Once completed, you will see that the new comment has been successfully added to your Google Sheet, including all relevant details. This automation saves you from manual work and allows you to focus on engaging with your audience.


Conclusion

In this tutorial, we explored how to extract YouTube comments and store them in Google Sheets using Pabbly Connect. By following the steps outlined, you can automate the process without any coding, ensuring you never miss important comments again. This integration enhances your productivity and streamlines your workflow.

Ensure you check out Pabbly Connect to create business automation workflows and reduce manual tasks. Pabbly Connect currently offer integration with 2,000+ applications.

How to Add TikTok Leads to HubSpot Automatically

Learn how to integrate TikTok leads into HubSpot automatically using Pabbly Connect with this step-by-step tutorial. Learn to create powerful connections between your critical applications without requiring specialized programming knowledge or extensive technical background.

Watch Step By Step Video Tutorial Below


1. Accessing Pabbly Connect for Integration

To begin the process of adding TikTok leads to HubSpot automatically, you first need to access Pabbly Connect. This powerful automation tool allows seamless integration between different applications. If you’re a new user, simply visit Pabbly.com/connect to sign up for a free account.

Once you’re on the Pabbly Connect landing page, click on the ‘Sign Up for Free’ button located in the top right corner. You’ll receive 100 free tasks every month, which is perfect for testing out your TikTok and HubSpot integrations. After registering, you can explore Pabbly Connect’s features and create your first automation workflow.


2. Creating Your Workflow in Pabbly Connect

After logging into Pabbly Connect, navigate to the workflow builder. This is where you will set up the automation to add TikTok leads to HubSpot. Click on the ‘Add New Workflow’ button to get started, and give your workflow a meaningful name.

  • Click on ‘Add Trigger’ to select your trigger application.
  • Search for ‘TikTok Lead Generation’ and select it.
  • Choose ‘New Lead’ as the event.

Once you have set up the trigger, click on ‘Connect’ to link your TikTok account with Pabbly Connect. If you haven’t connected TikTok yet, you’ll be prompted to log into your TikTok for Business account and grant the necessary permissions.


3. Configuring the TikTok Connection

After successfully connecting TikTok to Pabbly Connect, you need to select the appropriate advertiser ID and form ID for your leads. This step is crucial as it determines which leads will be sent to HubSpot.

Ensure that you set the response format to ‘Advanced’ and click on ‘Save and Send Test Request’. At this point, Pabbly Connect will wait for a webhook response from TikTok. You can either wait for a real lead or create a test lead to proceed.

  • To create a test lead, add a new action step and select ‘TikTok Trigger’.
  • Choose ‘Create Test Lead’ as the event.

Once you create the test lead, you will capture the lead details, such as name, email, and phone number, which will be used in the subsequent steps of your integration.


4. Adding HubSpot Connection in Pabbly Connect

Next, you will add HubSpot as the action application in your workflow. Search for ‘HubSpot CRM’ and select it as the action app. Choose ‘Create Contact’ as the action event and click ‘Connect’ to link your HubSpot account with Pabbly Connect.

If you have previously connected HubSpot, simply select the existing connection. If not, you will need to log into your HubSpot account and authorize Pabbly Connect to access your HubSpot data.

Map the lead details from TikTok into the corresponding fields in HubSpot. Ensure to include the email address and any other relevant information.

After mapping the details, click on ‘Save and Send Test Request’. This will create a new contact in HubSpot using the information from your TikTok lead.


5. Verifying the Integration in HubSpot

Finally, it’s time to verify that the integration is working correctly. Go to your HubSpot CRM and check if the new contact has been created successfully. The details should match what you entered during the test session in Pabbly Connect.

With the integration set up, every time you receive a new lead from TikTok, a new contact will automatically be created in HubSpot CRM. This seamless process eliminates the need for manual data entry, saving you time and effort.

Now you can enjoy the benefits of having your TikTok leads automatically added to HubSpot, enhancing your lead management process. For any questions or assistance, feel free to reach out to the Pabbly support team.


Conclusion

Using Pabbly Connect to automatically add TikTok leads to HubSpot is a powerful way to streamline your lead management. This integration allows you to save time and ensure that your leads are always up-to-date in your CRM.

Ensure you check out Pabbly Connect to create business automation workflows and reduce manual tasks. Pabbly Connect currently offer integration with 2,000+ applications.

By following the detailed steps outlined above, you can set up this automation quickly and efficiently. Start using Pabbly Connect today to enhance your business processes!

Create WhatsApp Auto-Reply for Business Enquiries

Learn how to set up WhatsApp auto-replies for business inquiries using Pabbly Chatflow with this detailed step-by-step tutorial. Build conversational workflows that guide visitors toward conversion with dynamic, branching dialogs that respond intelligently to user input.

Watch Step By Step Video Tutorial Below


1. Accessing Pabbly Chatflow for WhatsApp Integration

To create a WhatsApp auto-reply for business inquiries, start by accessing Pabbly Chatflow. You can do this by visiting Pabbly.com/tf in your browser. This will take you to the homepage of Pabbly Chatflow where you can either sign in or sign up for a free trial.

If you are a new user, click on ‘Sign Up Free’ to create an account. Existing users can simply log in. Once logged in, you will see the dashboard where you can manage your WhatsApp integrations.


2. Creating Your WhatsApp Agent in Pabbly Chatflow

After accessing your dashboard, the next step is to create a WhatsApp agent. In Pabbly Chatflow, click on the ‘Add’ button to start setting up your agent. You will need to provide a name for your agent and then click ‘Add’ to proceed to the flow window.

  • Click on the ‘Add’ button to create a new agent.
  • Enter a name for your WhatsApp agent.
  • Proceed to the flow window by clicking ‘Add’.

In the flow window, select the instruction type from the dropdown menu. For this setup, choose ‘AI Agent’. This allows your WhatsApp agent to respond to customer inquiries automatically.


3. Configuring Your AI Assistant in Pabbly Chatflow

Now that your agent is created, you need to configure the AI assistant settings. In Pabbly Chatflow, set the creativity level for responses. A setting of 0.4 is recommended for focused answers. You will also need to select the AI model to use; for instance, you can choose ‘GPT 5 Mini’.

Next, you will be prompted to enter your OpenAI API key. To obtain this, visit your OpenAI account and create a new secret key. Copy this key and paste it into the designated field in Pabbly Chatflow to enable your assistant to function properly.


4. Setting Up Auto-Replies for Customer Inquiries

With your AI assistant configured, the next step is to set up auto-replies. In Pabbly Chatflow, you can add various templates for responses. For example, you can include a welcome message, FAQs, and specific inquiries like product availability.

  • Add a welcome message for new inquiries.
  • Include answers to frequently asked questions.
  • Set up specific replies for product inquiries.

Make sure to save your settings after adding all necessary auto-replies. This ensures that your WhatsApp agent can respond to customer queries accurately and promptly.


5. Activating Your WhatsApp Agent in Pabbly Chatflow

Finally, to activate your WhatsApp agent, you need to enable it in Pabbly Chatflow. Click the activation button and then save your assistant settings. This will allow your agent to start responding to customer inquiries on WhatsApp.

You can also embed your WhatsApp agent on your website by clicking the embed button to get the script code. This allows customers to interact with your agent directly from your site, enhancing customer engagement.


Conclusion

In this tutorial, we explored how to create a WhatsApp auto-reply system for business inquiries using Pabbly Chatflow. By following these steps, you can effectively manage customer queries and improve your business communication.

Ensure you check out Pabbly Connect to create business automation workflows and reduce manual tasks. Pabbly Connect currently offer integration with 2,000+ applications.

Send New Leads to Notion Automatically

Discover how to automatically send new leads to Notion using Pabbly Connect in this step-by-step tutorial. Optimize your workflow today! Follow this definitive guide to creating powerful automated workflows with straightforward, efficiency-focused solutions that save valuable time.

Watch Step By Step Video Tutorial Below


1. Accessing Pabbly Connect for Automation

To automatically send new leads to Notion, you need to access Pabbly Connect. If you are an existing user, simply log in to your Pabbly Connect account. New users should visit Pabbly.com/connect to sign up for free. Once signed up, you will get hundreds of tasks free each month to explore the capabilities of Pabbly Connect.

After logging in, you will be directed to the workflow builder, which is the main interface for setting up your automation. Here, you will create a new workflow that will connect LinkedIn with Notion using Pabbly Connect to manage your leads effectively.


2. Setting Up the LinkedIn Trigger in Pabbly Connect

To begin the automation, you need to set up a trigger in Pabbly Connect. Click on the ‘Add Trigger’ button and search for LinkedIn. Select LinkedIn and choose the event as ‘Lead Notifications’. Click on ‘Connect’ to establish a connection.

  • If you have an existing connection, select it; otherwise, create a new connection by entering your LinkedIn credentials.
  • After connecting, refresh the fields if necessary to ensure all options are loaded.
  • Click ‘Save and Send Test Request’ to capture the webhook response.

Once you submit a test lead form on LinkedIn, Pabbly Connect will capture the lead details, allowing you to proceed to the next step of the automation.


3. Adding Action Step to Notion via Pabbly Connect

After successfully capturing the lead details, the next step is to add an action in Pabbly Connect. Click on ‘Add New Action Step’ and search for Notion. Select Notion and choose the action event as ‘Create Database Item’. Then, click on ‘Connect’ to link your Notion account.

If you have previously connected Notion, select the existing connection; otherwise, create a new one by logging into your Notion account. Ensure you grant Pabbly Connect access to the appropriate pages in your Notion account.

  • Select the database where you want to save the lead details.
  • If the fields do not appear, click ‘Refresh Fields’ to load them.
  • Map the lead details from the previous step to the corresponding fields in Notion.

Once you have mapped all necessary fields, click on ‘Save and Send Test Request’ to add the lead details to your Notion database. This confirms that your integration is working correctly.


4. Verifying the Lead Details in Notion

To ensure that your automation is functioning as intended, check your Notion database. After executing the test request, you should see the newly added lead details reflected in your selected database.

It is essential to verify that all mapped details, such as first name, last name, email, and phone number, are correctly entered. This step confirms that Pabbly Connect is effectively sending the lead information from LinkedIn to Notion.

If any details are missing, revisit the mapping step in Pabbly Connect. Make adjustments as necessary to ensure all relevant information is captured.

Once verified, your automation is ready to run, and all future leads from LinkedIn will automatically be sent to your Notion database without manual intervention.


5. Conclusion: Automate Your Lead Management with Pabbly Connect

In conclusion, using Pabbly Connect to send new leads from LinkedIn to Notion is a straightforward process that enhances your lead management efficiency. By following the steps outlined in this tutorial, you can automate the data entry process and ensure that your lead information is always up-to-date.

Ensure you check out Pabbly Connect to create business automation workflows and reduce manual tasks. Pabbly Connect currently offer integration with 2,000+ applications.

With Pabbly Connect, you can not only streamline your workflow but also focus on converting leads into customers. Start your free trial of Pabbly Connect today and experience the benefits of automation in your business!


SMS Automation Made Easy for Beginners

Learn how to automate SMS sending with Pabbly Connect. Follow this detailed tutorial to integrate Lindin with SMS Automation for your business. Navigate the automation landscape confidently with clear, structured guidance suitable for professionals regardless of prior technical experience.

Watch Step By Step Video Tutorial Below


1. Accessing Pabbly Connect for SMS Automation

To start automating SMS sending, you first need to access Pabbly Connect. Simply search for Pabbly.com/connect in your browser to reach the home page. Here, you will see options to sign in or sign up for free.

If you are new to Pabbly, click on the ‘Sign Up Free’ button. This allows you to explore the software with 100 free tasks every month. Existing users can sign in directly to access their dashboard.


2. Creating a New Workflow in Pabbly Connect

Once logged into Pabbly Connect, you can create a new workflow. Click on the ‘Create Workflow’ button to initiate the process. A dialog box will appear asking for the workflow name and folder selection.

  • Enter a name for your workflow, such as ‘SMS Automation Made Easy for Beginners’.
  • Select the folder where you want to save this workflow.

After naming your workflow, click on the ‘Create’ button. This sets up the framework for your SMS automation process.


3. Setting Up the Trigger in Pabbly Connect

The next step involves setting up a trigger in Pabbly Connect. Since you’ll be receiving leads through Lindin ads, select Lindin as your trigger application. Choose the event as ‘Lead Notifications’ to proceed.

Click on ‘Connect’ to build a new connection. If your Lindin account is already connected, you can select the existing connection. Otherwise, you will need to enter your account credentials to authorize the connection.


4. Configuring the Action to Send SMS via Twilio

After setting up the trigger, you will configure the action to send SMS using Twilio in Pabbly Connect. Select Twilio as your action application and choose the event ‘Send SMS Message’.

  • Connect to Twilio by entering your Account SID and Auth Token.
  • Map the sender number to your Twilio phone number and the recipient number to the lead’s phone number.
  • Compose your SMS body, including personalized elements like the lead’s first name.

Once all details are entered, click on the ‘Save and Send Test Request’ button to ensure everything is functioning correctly.


5. Testing Your SMS Automation Workflow

To confirm that your SMS automation is working, you need to perform a test submission. This involves generating a test lead in your Lindin ads account. After submitting the test lead, check Pabbly Connect for a successful response indicating that the lead details were received.

If successful, you should receive the SMS on your designated phone number confirming the setup. This shows that the entire process from lead generation to SMS sending via Pabbly Connect is functioning as intended.


Conclusion

In this tutorial, we explored how to automate SMS sending using Pabbly Connect by integrating Lindin with Twilio. Following these steps will help you streamline your communication with leads and enhance your engagement strategies.

Ensure you check out Pabbly Connect to create business automation workflows and reduce manual tasks. Pabbly Connect currently offer integration with 2,000+ applications.

Add TikTok Leads to Zoho CRM Automatically

Learn how to automate adding TikTok leads to Zoho CRM using Pabbly Connect. Follow this step-by-step guide for seamless integration. Master proven automation processes with practical implementation examples and strategic recommendations you can apply immediately in your workflow.

Watch Step By Step Video Tutorial Below


1. Accessing Pabbly Connect for Automation

To automate adding TikTok leads to Zoho CRM, you need to start by accessing Pabbly Connect. Open a new tab and search for pabbl.com/connect in your browser. This will take you to the Pabbly Connect landing page.

In the top right corner, click on the option to sign up for free. By signing up, you will receive 100 tasks free every month, allowing you to explore Pabbly Connect’s capabilities. If you enjoy using it, you can consider purchasing a subscription later.


2. Creating a Workflow in Pabbly Connect

Once you are in Pabbly Connect, the next step is to create a new workflow. Click on the ‘Add Trigger’ button to begin setting up your automation. For the trigger application, search for ‘TikTok Lead Generation’ and select it.

  • Select the event as ‘New Lead’.
  • Click on ‘Connect’ to establish a connection with TikTok.

If you have already connected TikTok to Pabbly Connect, select the existing connection. If not, click on ‘Add a New Connection’ and follow the prompts to log into your TikTok account and grant necessary permissions.


3. Setting Up TikTok Leads in Pabbly Connect

After establishing the connection with TikTok, you need to select the advertiser ID and the form ID for the leads you want to capture. This is crucial for ensuring that the correct lead information is sent to Zoho CRM. using Pabbly Connect

Next, click on ‘Save and Send Test Request’. Make sure to select the response format as ‘Advanced’ to properly capture the lead data. Pabbly Connect will now wait for a webhook response, which means you can either wait for a real lead or generate a test lead to capture the response.

  • If you choose to generate a test lead, follow the instructions provided in Pabbly Connect.
  • Once the test lead is captured, you will see the details such as email, phone number, and name.

With the lead data captured, you can now proceed to add this information to Zoho CRM.


4. Adding Captured Leads to Zoho CRM Using Pabbly Connect

To add the captured lead information to Zoho CRM, click on ‘Add New Action Step’ in your Pabbly Connect workflow. Search for ‘Zoho CRM’ as the action application and select it. using Pabbly Connect

Choose ‘Create Contact’ as the event and click on ‘Connect’. If you have an existing connection with Zoho CRM, select it. Otherwise, create a new connection by entering your Zoho CRM domain, which is found in the URL after ‘https://crm.’.

Enter the lead source and map the lead details from the previous step. Mapping allows you to automatically insert data from the TikTok lead into Zoho CRM.

After mapping the required fields, click on ‘Save and Send Test Request’ to finalize the process. You will receive a success message indicating that a new contact has been created in Zoho CRM.


5. Verifying the New Contacts in Zoho CRM

Now that you have successfully created a new contact in Zoho CRM using Pabbly Connect, it’s time to verify that the lead details have been added correctly. Open your Zoho CRM account and refresh the contact list.

You should see the newly created contact with the details you entered. This confirms that whenever a new lead is generated from TikTok, a corresponding contact will be automatically created in Zoho CRM, streamlining your lead management process.

This seamless integration not only saves time but also enhances your productivity by eliminating manual data entry. With Pabbly Connect, you can automate various workflows and ensure that your business processes run smoothly.


Conclusion

In this tutorial, we explored how to automate the process of adding TikTok leads to Zoho CRM using Pabbly Connect. By following the steps outlined, you can enhance your lead management efficiency and focus on growing your business. Pabbly Connect offers a powerful solution for integrating various applications effortlessly.

Ensure you check out Pabbly Connect to create business automation workflows and reduce manual tasks. Pabbly Connect currently offer integration with 2,000+ applications.

How to Automatically Track Online Payments in Real Time

Learn how to automatically track online payments in real time using Pabbly Connect. This step-by-step tutorial covers integration with Google Sheets and Razer Pay. This comprehensive guide reveals exactly how to connect your applications and automate repetitive tasks — accessible for professionals of all technical backgrounds.

Watch Step By Step Video Tutorial Below


1. Accessing Pabbly Connect for Payment Tracking

To start tracking online payments in real time, you need to access Pabbly Connect. First, visit Pabbly.com/connect in your browser. Here, you will find options to either sign in or sign up for a free account. New users can explore the platform with 300 tasks every month.

Once logged in, navigate to the Pabbly apps window and click on ‘Access Now’ under Pabbly Connect. This action will take you to the Pabbly Connect dashboard, where you can create your first automation workflow.


2. Creating a Workflow in Pabbly Connect

After accessing Pabbly Connect, click on the ‘Create Workflow’ button to begin. You will be prompted to select between the beta and classic workflow builders. Choose the beta version for a modern experience.

  • Name your workflow: Automatically Track Online Payments in Real Time
  • Select a folder for organization, e.g., Automations
  • Click ‘Create’ to finalize your workflow setup

With your workflow created, you will set up a trigger and action. The trigger will be set to Razer Pay and the event as ‘Payment Captured’. This is crucial for tracking incoming payments effectively.


3. Setting Up the Trigger with Razer Pay

In this section, you will configure the trigger for your workflow using Pabbly Connect. Select Razer Pay as your trigger application and choose ‘Payment Captured’ as the event. Click on ‘Connect’ to proceed.

You will receive a webhook URL that you need to copy. This URL will link Razer Pay to Pabbly Connect. Log into your Razer Pay account, navigate to the ‘Developers’ section, and select ‘Webhooks’. Here, add a new webhook using the copied URL and set the event to ‘Payment Captured’.


4. Testing the Integration with a Test Payment

To ensure that your workflow is functioning correctly, make a test payment through Razer Pay. Fill in the necessary details like name, email, and UPI ID to complete the payment. After processing, check Pabbly Connect to see if the payment details have been captured.

If successful, you should see the payment information displayed in Pabbly Connect, including order ID and customer details. This confirms that the trigger is working as intended.


5. Adding Payment Data to Google Sheets

The final step is to add your captured payment data to Google Sheets using Pabbly Connect. Add another action step and select Google Sheets as your application. Choose ‘Add a New Row’ as the event and connect to your Google account.

  • Select the spreadsheet where you want to store the data.
  • Map the customer details to the respective fields in Google Sheets.
  • Click ‘Save and Send Test Request’ to confirm the data addition.

Once completed, check your Google Sheets to verify that the new payment details have been added correctly. This integration showcases how Pabbly Connect streamlines the process of tracking online payments in real time.


Conclusion

Using Pabbly Connect, you can efficiently track online payments in real time by integrating Razer Pay with Google Sheets. This step-by-step tutorial has guided you through creating a workflow, setting up triggers, testing the integration, and adding data to Google Sheets. Automate your payment tracking process today!

Ensure you check out Pabbly Connect to create business automation workflows and reduce manual tasks. Pabbly Connect currently offer integration with 2,000+ applications.

Create 100s of Zoho CRM Contacts in One Click ✅

Learn how to create multiple Zoho CRM contacts in one click using Pabbly Connect. Follow this step-by-step tutorial for seamless integration. Navigate the automation landscape confidently with clear, structured guidance suitable for professionals regardless of prior technical experience.

Watch Step By Step Video Tutorial Below


1. Accessing Pabbly Connect for Zoho CRM Integration

To create multiple Zoho CRM contacts in one click, you first need to access Pabbly Connect. If you are a new user, visit Pabbly.com/connect and sign up for free. This allows you to create up to 100 contacts for free each month.

Once logged in, navigate to the dashboard. Click on the ‘Create Workflow’ button. You will be prompted to enter a workflow name and choose a folder for your workflow. After naming your workflow, click ‘Create’ to open the workflow builder, which is essential for setting up your automation.


2. Setting Up the Trigger in Pabbly Connect

The first step in creating your automation is to set up a trigger in Pabbly Connect. Click on the ‘Add Trigger’ button and select Google Sheets as your trigger application. Choose the event as ‘New or Updated Spreadsheet Row’ and click on ‘Connect’.

  • Copy the webhook URL provided by Pabbly Connect.
  • Open your Google Sheets and go to Extensions > Add-ons > Get Add-ons.
  • Search for ‘Pabbly Connect Webhooks’ and install the extension.

After installation, refresh your Google Sheets to see the Pabbly Connect Webhooks option. Click on it and select ‘Initial Setup’. Paste the webhook URL and set the trigger column to your final data column. Click ‘Submit’ to configure the setup successfully.


3. Creating a New Contact in Zoho CRM

With the trigger set up, the next step is to create a new contact in Zoho CRM using Pabbly Connect. Click on ‘Add New Action Step’ and search for Zoho CRM. Select the action event as ‘Create Contact’ and click ‘Connect’.

If you have already connected your Zoho CRM account, select the existing connection. If not, create a new connection by entering your Zoho domain, which can be found in your Zoho CRM URL. After saving, grant the necessary permissions to allow Pabbly Connect to access your Zoho account.

Next, you will need to map the lead details. Mapping allows you to dynamically insert data from your Google Sheets into Zoho CRM. Enter the required fields such as first name, last name, and email address. You can leave optional fields blank. After mapping the data, click on ‘Save and Send Test Request’ to create the contact.


4. Sending Multiple Contacts to Zoho CRM

To create multiple contacts in one click, ensure that your Google Sheets is populated with the necessary lead details. Go back to Pabbly Connect and click on the ‘Send All Data’ option in the Pabbly Connect Webhooks menu. This action will send all the data from your Google Sheets to your workflow.

  • Make sure all your lead details are filled out correctly in the spreadsheet.
  • Click ‘Send All Data’ to initiate the process.
  • Wait for a few seconds for the contacts to be created in Zoho CRM.

After sending the data, refresh your Zoho CRM contact list. You will see that multiple contacts have been created successfully. This automation allows you to create hundreds of contacts in one click, showcasing the power of Pabbly Connect.


5. Conclusion: Automate Your Zoho CRM Contacts with Pabbly Connect

In this tutorial, we explored how to use Pabbly Connect to create multiple contacts in Zoho CRM efficiently. By following the steps outlined, you can automate the process of adding new leads from Google Sheets into your CRM.

Ensure you check out Pabbly Connect to create business automation workflows and reduce manual tasks. Pabbly Connect currently offer integration with 2,000+ applications.

Check out Pabbly Connect – Automate your business workflows effortlessly! Sign Up Free – Start your journey with ease! 10,000+ Video Tutorials – Learn step by step! Join Pabbly Facebook Group – Connect with 21,000+ like minded people!
With Pabbly Connect, you can streamline your workflow and save valuable time, making it an essential tool for managing your contacts. Start using Pabbly Connect today to enhance your business automation.