How to Broadcast WhatsApp Messages for Your Pathology Lab Using Pabbly Chatflow

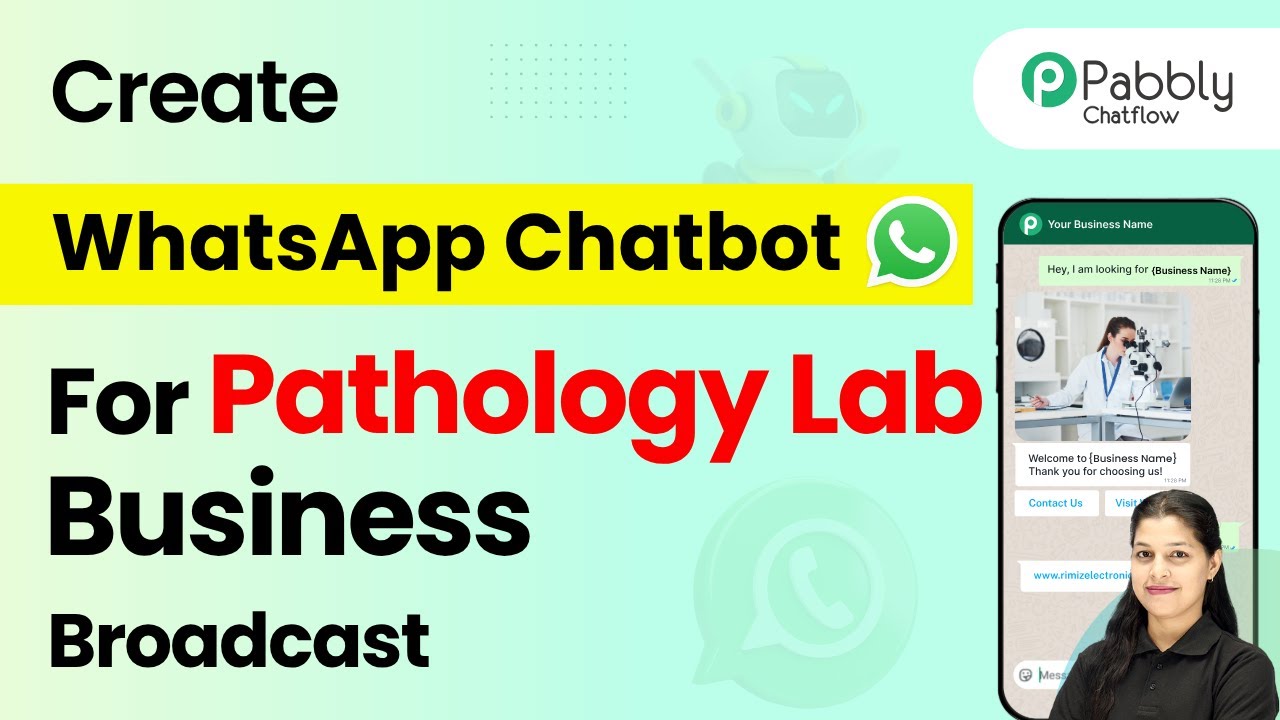
Learn how to effectively broadcast WhatsApp messages for your pathology lab using Pabbly Chatflow. Step-by-step guide for creating templates and scheduling broadcasts. Master conversational marketing with practical techniques for creating chatbots that engage visitors at exactly the right moment in their journey.

Watch Step By Step Video Tutorial Below


1. Accessing Pabbly Chatflow for Broadcasting WhatsApp Messages

To broadcast WhatsApp messages for your pathology lab, you need to access Pabbly Chatflow. Begin by entering the URL www.Pabbly.com/chatflow into your web browser. This will take you to the Pabbly Chatflow landing page where you can either sign in or sign up for a free account.

If you are a new user, click on the ‘Sign Up Free’ button. For existing users, simply click ‘Sign In’. Once logged in, you will be directed to the Pabbly Chatflow dashboard, where you can manage your broadcasts and templates.


2. Creating a Message Template in Pabbly Chatflow

Creating a message template is the first step in using Pabbly Chatflow for broadcasting WhatsApp messages. Navigate to the sidebar and select ‘Templates’. Then click on the ‘Add Template’ button to create a new template.

  • Choose a category for your template, such as Marketing.
  • Enter a template name using lowercase alphanumeric characters and underscores.
  • Select the template type, such as text or image.

After filling in these details, click ‘Submit’ to save your template. This template will be used for your WhatsApp broadcasts, ensuring your messages are consistent and professional.


3. Setting Up a Broadcast in Pabbly Chatflow

Once your template is created, the next step is to set up a broadcast. In Pabbly Chatflow, select the ‘Broadcast’ option from the sidebar. Click on ‘Add Broadcast’ to start the setup process.

Here, you will need to provide a broadcast name, such as ‘Pathology Offer’. You will also select a contact list that you have previously created or create a new one. This list will define who receives your messages.


4. Scheduling Your WhatsApp Message Broadcast

After setting up your broadcast, you can schedule when your message will be sent. In the broadcast setup page of Pabbly Chatflow, you will find an option to select a date and time for your broadcast.

  • Choose to send your message instantly or schedule it for later.
  • Select the preferred date and time for your broadcast.

Once you have scheduled your message, you can test it by sending a test message to your WhatsApp number. This ensures everything is working correctly before the actual broadcast.


5. Sending the Broadcast via Pabbly Chatflow

Finally, you are ready to send your broadcast using Pabbly Chatflow. After confirming that your test message was received successfully, you can proceed to send your scheduled broadcast. Click on the ‘Send Broadcast’ button to initiate the process.

Your message will now be sent to all contacts in your selected list at the scheduled time, allowing you to effectively communicate promotions, updates, and reminders to your patients.


Conclusion

In conclusion, using Pabbly Chatflow to broadcast WhatsApp messages for your pathology lab is an efficient way to keep your customers informed. By following these steps, you can create templates, set up broadcasts, and schedule messages with ease. Enhance your customer engagement today with Pabbly Chatflow!

Ensure you check out Pabbly Connect to create business automation workflows and reduce manual tasks. Pabbly Connect currently offer integration with 2,000+ applications.

How to Create a WhatsApp Chatbot for Your Horticultural Consultant Business Using Pabbly Chatflow

Learn how to create a WhatsApp chatbot for your horticultural consultant business using Pabbly Chatflow. Step-by-step guide to automate your inquiries. Build conversational workflows that guide visitors toward conversion with dynamic, branching dialogs that respond intelligently to user input.

Watch Step By Step Video Tutorial Below


1. Accessing Pabbly Chatflow for Your WhatsApp Chatbot

To create a WhatsApp chatbot for your horticultural consultant business, you need to start with Pabbly Chatflow. First, open a new tab and navigate to the Pabbly website. Here, you will find options to sign up for a free account or log in if you are an existing user.

Once logged in, you will be directed to the Pabbly dashboard, where you can manage all your applications. Click on the Access Now button under Pabbly Chatflow to begin the setup process for your WhatsApp chatbot.


2. Adding Your WhatsApp Number in Pabbly Chatflow

To add your WhatsApp number, navigate to the top right corner of the dashboard where you will see the Add WhatsApp Number button. Click on it to proceed. In this section, you have two options: WhatsApp Connect or Manual Token Connect.

  • For WhatsApp Connect, verify your Meta Business Manager account.
  • For Manual Token Connect, enter your Meta Access Token and WhatsApp Business Account ID manually.

After adding your number, you can manage all your WhatsApp conversations seamlessly through Pabbly Chatflow, enhancing your customer engagement.


3. Creating a Chatbot Flow Using Pabbly Chatflow

Next, you will create a new flow for your WhatsApp chatbot. Click on the Add Flow button located at the top right corner of the flow builder page. Give your flow a meaningful name, such as WhatsApp Chatbot for Your Horticultural Consultant Business. using Pabbly Connect

In the flow builder, you will see several features including Start, Keywords, Rejects, and Choose Template. For this chatbot, select the Choose Template option to personalize the interaction. You can also set up keywords that will trigger specific responses from your bot.


4. Designing Chatbot Responses in Pabbly Chatflow

Once your flow is set up, it’s time to design the responses your chatbot will provide. Begin by dragging and dropping the Add Content button to your flow. Here, you can enter a welcome message such as, ‘Welcome to Green Thumb Bot, your plant care partner!’. This sets the tone for user interaction.

  • Add action buttons like Send Plant Photos, Book Consultation, and Ask Plant Questions.
  • For each button, create specific follow-up messages to guide users through their inquiries.

By utilizing Pabbly Chatflow, you can ensure that your customers receive immediate responses, enhancing their experience while reducing your workload.


5. Activating Your Chatbot Flow in Pabbly Chatflow

After designing your chatbot responses, the final step is to activate your flow. Make sure to click on the Activate Flow button and save your changes. This will make your WhatsApp chatbot live and ready to interact with users.

Once activated, your chatbot will be able to respond to inquiries in real-time, providing a seamless experience for your customers. With Pabbly Chatflow, you can manage multiple bots and enhance your business operations effortlessly.


Conclusion

Creating a WhatsApp chatbot for your horticultural consultant business using Pabbly Chatflow streamlines customer inquiries and improves engagement. Follow these steps to set up your chatbot and enjoy the benefits of automation.

Ensure you check out Pabbly Connect to create business automation workflows and reduce manual tasks. Pabbly Connect currently offer integration with 2,000+ applications.

How to Send Thank You Emails After Purchase via WooCommerce Using Pabbly Connect

Learn how to automate thank you emails after purchases in WooCommerce using Pabbly Connect and SendGrid. Step-by-step guide to streamline your e-commerce communications. Build sophisticated automated workflows in less time than you think. This guide translates complex integrations into straightforward steps for immediate implementation.

Watch Step By Step Video Tutorial Below


1. Accessing Pabbly Connect for WooCommerce Integration

To start sending thank you emails after purchases via WooCommerce, you need to access Pabbly Connect. This automation tool allows you to create seamless integrations without any coding skills. Simply visit the Pabbly Connect website by typing ‘Pabbly.com/connect’ in your browser.

Once on the Pabbly Connect landing page, sign in to your account. If you are a new user, you can sign up for free and receive 100 tasks monthly. After logging in, navigate to the dashboard where you can create a new workflow that connects WooCommerce with SendGrid.


2. Creating a Workflow in Pabbly Connect

In your Pabbly Connect dashboard, click on the ‘Create Workflow’ button to begin the integration process between WooCommerce and SendGrid. Name your workflow, for example, ‘Send Thank You Emails After Purchase via WooCommerce Using SendGrid,’ and select a folder to save it. using Pabbly Connect

  • Click on the ‘Create’ button to set up the workflow.
  • A trigger and action box will appear; set the trigger as WooCommerce.
  • Select ‘New Order Created’ as the trigger event.

Once you have set the trigger, Pabbly Connect will wait for new orders in WooCommerce to initiate the workflow. This setup ensures that every time a new order is placed, the workflow will be activated to send a thank you email through SendGrid.


3. Connecting WooCommerce to Pabbly Connect

To connect WooCommerce to Pabbly Connect, you will need to set up a webhook. This webhook acts as a bridge between WooCommerce and Pabbly Connect, allowing data to flow seamlessly. Go to your WordPress dashboard, find WooCommerce settings, and navigate to the ‘Advanced’ tab.

Under the Advanced settings, locate the ‘Webhooks’ option. Click on ‘Add Webhook’ and fill in the necessary details:

  • Name: Testing 123
  • Status: Active
  • Topic: Order Created
  • Delivery URL: Paste the webhook URL from Pabbly Connect.

After saving the webhook, you will receive a confirmation that it has been updated successfully. This connection allows Pabbly Connect to capture order details automatically whenever a new purchase is made in WooCommerce.


4. Sending Thank You Emails via SendGrid

Once the connection between WooCommerce and Pabbly Connect is established, the next step is to configure SendGrid to send thank you emails. In the action application, select SendGrid and choose the action event as ‘Send Email.’ Click on connect and, if prompted, create a new connection using your SendGrid API key.

To find your API key, log into your SendGrid account, navigate to settings, and select API keys. Create a new API key with full access, copy it, and paste it into Pabbly Connect to establish the connection. Once connected, you will be able to map the email fields from WooCommerce directly into the SendGrid email template.

Set the recipient email using data from the WooCommerce order. Customize the subject line and body of the email. Use mapping to personalize the email with customer names and product details.

By completing these steps, every time a new order is placed in WooCommerce, a personalized thank you email will be sent automatically using SendGrid through Pabbly Connect.


5. Testing the Integration

The final step is to test your integration to ensure everything is working smoothly. Place a test order in your WooCommerce store to trigger the webhook. Once the order is confirmed, check your email to see if the thank you email has been received.

If the email arrives with the correct details, your integration is successful! You can also monitor the workflow in Pabbly Connect to see the captured data from WooCommerce and ensure that the email was sent through SendGrid.

In case of any issues, return to your Pabbly Connect dashboard and review the workflow setup. Make adjustments as necessary to ensure that your automation runs flawlessly every time a purchase is made.


Conclusion

In this tutorial, we explored how to send thank you emails after purchases via WooCommerce using Pabbly Connect and SendGrid. By automating this process, you enhance customer experience and save valuable time.

Ensure you check out Pabbly Connect to create business automation workflows and reduce manual tasks. Pabbly Connect currently offer integration with 2,000+ applications.

Using Pabbly Connect, you can easily integrate various applications to streamline your business operations and improve communication with your customers.

How to Build an AI Assistant for Your Industrial Plants & Machinery Business Using Pabbly Chatflow

Learn how to create an AI assistant for your industrial plants and machinery business using Pabbly Chatflow. Step-by-step guide with detailed instructions. Implement professional chat automation that answers common questions, qualifies leads, and books appointments without human intervention.

Watch Step By Step Video Tutorial Below


1. Setting Up Pabbly Chatflow for Your AI Assistant

To create an AI assistant for your industrial plants and machinery business, you need to access Pabbly Chatflow. Start by opening your web browser and navigating to www.Pabbly.com/chatflow. If you already have an account, simply sign in. If not, you will need to sign up for a new account.

Once logged in, you will see the dashboard displaying various Pabbly applications. Click on the ‘Access Now’ button for Pabbly Chatflow. This interface will allow you to create your business account and set up your AI assistant effectively.


2. Adding Your WhatsApp Number in Pabbly Chatflow

After accessing Pabbly Chatflow, you need to add your WhatsApp number to facilitate communication through the AI assistant. Click on the ‘Add WhatsApp Number’ option. You will have two methods: WhatsApp Connect Preferred and Manual Token Connect. using Pabbly Connect

  • Choose the Manual Token Connect option.
  • Fill in the required details such as Meta Access Token, Phone Number ID, and WhatsApp Business Account ID.
  • Select the folder and click on Next.

Upon clicking Next, you will receive confirmation that your WhatsApp number has been successfully added. This step is crucial as it enables your AI assistant to interact with users directly via WhatsApp.


3. Creating Your AI Assistant with Pabbly Chatflow

Now that you have your WhatsApp number set up, it’s time to create your AI assistant. Navigate to the ‘AI Assistant’ section in Pabbly Chatflow and click on ‘Add AI Assistant.’ Enter a name for your assistant, such as ‘AI Assistant for Your Industrial Plants and Machinery Business,’ and click on ‘Add AI Assistant’ to proceed. using Pabbly Connect

Next, you will be prompted to configure your AI assistant settings. Choose the instruction type as ‘AI Agent’ and set the AI configuration parameters. Here, you can select the temperature, which controls the randomness of the responses. The default temperature is set to 0.5, but you can adjust it based on your preferences.

  • Select OpenAI as the AI tool.
  • Choose the model, for example, GPT 4.1.
  • Generate your API token by creating a new secret key.

Copy and paste the generated API token into the designated section and click on ‘Connect.’ You will see a confirmation message indicating that the OpenAI key has been saved successfully.


4. Customizing Your AI Assistant in Pabbly Chatflow

With your AI assistant set up, the next step is to customize its interface and responses. In the settings, you can modify the header message, footer message, stop keyword, retry attempts, and fallback message based on your business needs. Make sure to toggle the relevant options to suit your preferences. using Pabbly Connect

Additionally, you can upload a knowledge source in .txt format, which acts as a reference for your AI assistant to answer user queries effectively. This knowledge source should summarize your business details to enhance the assistant’s accuracy.

Enter the header display name, such as ‘Industrial Plants and Machinery Business.’ Customize the footer text and links as needed. Choose the theme mode (light or dark) and adjust the colors for the assistant’s interface.

After making these adjustments, click on ‘Save AI Assistant’ to finalize your setup.


5. Testing Your AI Assistant with Pabbly Chatflow

Once your AI assistant is fully configured, it’s essential to test its functionality. Go back to your WhatsApp dashboard and type a query, such as ‘What equipment do you supply?’ This will help you verify that the AI assistant responds accurately based on the setup you’ve completed in Pabbly Chatflow.

By following these steps, you can ensure that your AI assistant is operational and ready to handle inquiries related to your industrial plants and machinery business. This integration not only automates responses but also enhances customer engagement.

In conclusion, using Pabbly Chatflow allows you to create a sophisticated AI assistant tailored for your specific business needs. You can expand this functionality further by adding more templates or features as necessary.

Conclusion

This guide summarizes the key points and helps you understand the essential features and benefits of using this tool.

Ensure you check out Pabbly Connect to create business automation workflows and reduce manual tasks. Pabbly Connect currently offer integration with 2,000+ applications.


In summary, this tutorial has guided you through the process of building an AI assistant for your industrial plants and machinery business using Pabbly Chatflow. By following the steps outlined, you can automate customer interactions and improve your service efficiency.

Automate Customer Feedback Requests After Stripe Payment with Pabbly Connect

Learn how to automate customer feedback requests after Stripe payments using Pabbly Connect, integrating Google Forms and Gmail seamlessly. This comprehensive guide reveals exactly how to connect your applications and automate repetitive tasks — accessible for professionals of all technical backgrounds.

Watch Step By Step Video Tutorial Below


1. Accessing Pabbly Connect for Automation

To automate customer feedback requests after Stripe payments, you first need to access Pabbly Connect. Visit Pabbly’s website and navigate to the Pabbly Connect section. This platform allows you to integrate various applications seamlessly.

Once on the homepage, you can either sign in if you are an existing user or sign up for a free account. Pabbly Connect provides an intuitive interface to set up your automation workflows.


2. Creating a Workflow in Pabbly Connect

After logging into Pabbly Connect, the next step is to create a new workflow. Click on the ‘Create Workflow’ button located on the dashboard. You will be prompted to name your workflow.

  • Name your workflow something descriptive, like ‘Automate Customer Feedback Requests After Stripe Payment’.
  • Select a folder for organizing your workflows, such as ‘Automations’.

Once you have named your workflow and selected a folder, you will see the workflow setup page. Here, you can define your trigger and action events for the automation.


3. Setting the Trigger for Stripe Payments

In this step, you will set the trigger for your workflow in Pabbly Connect. Choose ‘Stripe’ as your trigger application. This will allow Pabbly Connect to listen for new payments made through your Stripe account.

Next, select the trigger event as ‘New Charge’. This means that every time a new payment is received, the workflow will be activated. You will then need to copy the webhook URL provided by Pabbly Connect and add it to your Stripe account under the Webhooks settings.


4. Configuring Gmail to Send Feedback Requests

After setting up the trigger with Stripe, the next step involves configuring Gmail to send the feedback request email. In Pabbly Connect, select ‘Gmail’ as your action application.

  • Choose the action event as ‘Send Email’.
  • Connect your Gmail account with Pabbly Connect by following the authorization prompts.

Once connected, fill in the recipient’s email address dynamically by mapping it from the Stripe trigger response. You can personalize the email content by including the customer’s name and a link to a Google Form for feedback.


5. Testing Your Automation Workflow

The final step is to test your entire automation setup in Pabbly Connect. Make a test payment through your Stripe account to see if the feedback request email is sent successfully.

Check the recipient’s Gmail inbox to ensure that the email appears with the correct subject and body content, including the Google Form link. If everything is correct, your automation is now live and ready to collect customer feedback automatically after each payment.


Conclusion

In conclusion, automating customer feedback requests after Stripe payments using Pabbly Connect streamlines your feedback collection process. By following the steps outlined, you can ensure valuable insights from your customers without any manual effort.

Ensure you check out Pabbly Connect to create business automation workflows and reduce manual tasks. Pabbly Connect currently offer integration with 2,000+ applications.

How to Sync New Leads from Facebook Ads to Google Sheets Automatically with Pabbly Connect

Learn how to sync new leads from Facebook Ads to Google Sheets automatically using Pabbly Connect. Step-by-step guide with detailed instructions. Master proven automation processes with practical implementation examples and strategic recommendations you can apply immediately in your workflow.

Watch Step By Step Video Tutorial Below


1. Accessing Pabbly Connect for Integration

To sync new leads from Facebook Ads to Google Sheets automatically, you need to access Pabbly Connect. Start by visiting the Pabbly Connect website at pave.com/connect. This platform is essential for automating the integration process.

Once on the Pabbly Connect homepage, you can sign up for free or log in if you already have an account. After signing in, you will see the dashboard where you can create your workflow to connect Facebook Ads with Google Sheets.


2. Creating a Workflow in Pabbly Connect

In this section, you will create a workflow that connects your Facebook Ads with Google Sheets using Pabbly Connect. Click on the ‘Create Workflow’ button located at the top right corner of the dashboard.

  • Enter a name for your workflow, such as ‘Sync New Leads from Facebook Ads to Google Sheets Automatically’.
  • Select a folder where you want to save this workflow.

After naming your workflow, click on the ‘Create’ button to proceed. You will now see options for setting up triggers and actions within your automation.


3. Setting Up the Trigger for Facebook Ads

The next step involves setting up the trigger that will initiate the workflow in Pabbly Connect. Select ‘Facebook Lead Ads’ as your trigger application and choose the ‘New Lead’ event. This means that whenever a new lead is submitted, the workflow will start.

To connect your Facebook Lead Ads account, click on ‘Connect’ and then select ‘Add New Connection’. Authorize the connection by selecting your Facebook account. Once connected, choose your Facebook page and the specific lead generation form you want to use.


4. Testing the Lead Submission

After setting up the trigger, you need to test it to ensure everything is functioning correctly. Use the Facebook Lead Ads testing tool to submit a test lead. Fill out the form with dummy details such as first name, last name, email, and phone number.

  • Type of property: Rental Property
  • First Name: Test
  • Last Name: User
  • Email: [email protected]

Once you submit the test lead, return to Pabbly Connect to check if the lead details were captured successfully. You should see the response with all the lead information ready for the next step.


5. Adding Leads to Google Sheets Automatically

Now that the trigger is set up and tested, it’s time to add the lead details to Google Sheets. In Pabbly Connect, select ‘Google Sheets’ as your action application and choose ‘Add a New Row’ as the action event.

Connect your Google Sheets account by clicking on ‘Connect’ and selecting ‘Add New Connection’. Authorize the connection to allow Pabbly Connect to access your Google Sheets data. After connecting, choose the spreadsheet where you want to store the leads and map the fields from your trigger step to the corresponding columns in your Google Sheet.


Conclusion

In this tutorial, we explored how to sync new leads from Facebook Ads to Google Sheets automatically using Pabbly Connect. We detailed each step, from accessing Pabbly Connect to creating workflows, setting up triggers, testing lead submissions, and finally adding leads to Google Sheets. This integration simplifies lead management and enhances your business operations.

Ensure you check out Pabbly Connect to create business automation workflows and reduce manual tasks. Pabbly Connect currently offer integration with 2,000+ applications.

How to Automatically Add Leads from Google Ads to Salesforce Using Pabbly Connect

Learn how to automate the process of adding leads from Google Ads to Salesforce using Pabbly Connect with this step-by-step tutorial. Discover how to seamlessly connect your essential tools through accessible instructions that make powerful automation available to professionals at every skill level.

Watch Step By Step Video Tutorial Below


1. Accessing Pabbly Connect for Integration

To start integrating Google Ads and Salesforce, we first need to access Pabbly Connect. This powerful automation tool allows you to connect various applications without any coding skills. Simply go to the Pabbly website by typing ‘Pabbly.com’ in your browser.

Once on the website, sign in to your Pabbly account. If you are a new user, you can sign up for free, which gives you access to 100 tasks monthly. After logging in, navigate to the Pabbly Connect dashboard to create your first workflow.


2. Creating a New Workflow in Pabbly Connect

In Pabbly Connect, click on the ‘Create Workflow’ button to start building your automation. Name your workflow ‘Add Leads from Google Ads to Salesforce Automatically’ and select a folder for organization. This naming helps in identifying workflows easily.

  • Click on the ‘Create’ button to proceed.
  • You will see two boxes: Trigger and Action.
  • Select Google Ads as the trigger application.

This setup indicates that whenever a new lead is generated in Google Ads, it will automatically trigger an action in Salesforce to create a new lead. This seamless integration is made possible through Pabbly Connect.


3. Setting Up Google Ads as the Trigger

Now, let’s configure Google Ads as the trigger application in Pabbly Connect. Choose ‘New Lead Form Entry’ as the trigger event. This ensures that the workflow is activated whenever a new lead is captured in Google Ads.

Next, Pabbly Connect will provide you with a webhook URL. This URL is crucial as it acts as a bridge between Google Ads and Pabbly Connect. Copy this URL and head to your Google Ads account to set it up.

  • Open your Google Ads account and locate the lead delivery option.
  • Paste the copied webhook URL into the designated field.
  • Save your settings to establish the connection.

With this setup, every time a new lead is generated in Google Ads, the information will flow directly into Pabbly Connect, allowing for seamless integration with Salesforce.


4. Configuring Salesforce as the Action Application

After setting up Google Ads, the next step is to configure Salesforce as the action application in Pabbly Connect. Select ‘Create Lead’ as the action event. This action will automatically create a new lead in your Salesforce account whenever a new lead is captured from Google Ads.

To connect Salesforce, you will need to authorize Pabbly Connect to access your Salesforce account. Click on ‘Connect’, and if prompted, grant the necessary permissions. Once connected, you can begin mapping the fields from Google Ads to Salesforce.

Map the fields such as first name, last name, email, and phone number from the Google Ads response. Ensure that you do not manually enter these details; use the mapping feature to keep the data dynamic. Select the lead source and status as needed.

Once all fields are mapped correctly, click ‘Save and Send Test Request’. This will send a test lead to Salesforce, confirming that your integration is functioning as intended through Pabbly Connect.


5. Testing the Integration and Confirmation

After completing the setup, it’s crucial to test the integration between Google Ads and Salesforce via Pabbly Connect. Send a test lead from Google Ads and check the response in Pabbly Connect’s dashboard.

If everything is set up correctly, you should see a successful response indicating that the lead was created in Salesforce. You can verify this by logging into your Salesforce account and checking the leads section.

Check for the newly created lead in Salesforce. Ensure all details match the test lead data sent from Google Ads. If successful, your automation is complete!

This integration demonstrates how Pabbly Connect can streamline your lead management process by automating the transfer of data from Google Ads to Salesforce, ensuring no leads are missed and saving you valuable time.


Conclusion

In this tutorial, we explored how to use Pabbly Connect to automate the process of adding leads from Google Ads to Salesforce. By following the steps outlined, you can ensure that your lead management is efficient and effective, enhancing your business operations.

Ensure you check out Pabbly Connect to create business automation workflows and reduce manual tasks. Pabbly Connect currently offer integration with 2,000+ applications.

Utilizing Pabbly Connect not only simplifies the integration process but also allows for real-time updates, ensuring your sales team has the most current information at their fingertips.

Integrate 99acres Leads to CRM with Pabbly Connect and Notify Sales Team on Discord

Learn how to use Pabbly Connect to seamlessly integrate 99acres leads into Zoho CRM and instantly notify your sales team on Discord with this detailed tutorial.

Watch Step By Step Video Tutorial Below


1. Access Pabbly Connect to Start Automation

To begin integrating 99acres leads into your CRM, first access Pabbly Connect by navigating to the Pabbly Connect website. You can do this by entering ‘Pabbly.com/connect’ in your browser. This platform is essential for creating automated workflows without any programming knowledge.

Once on the Pabbly Connect landing page, you will see options to either sign in or sign up for free. New users can sign up and receive 100 free tasks monthly. Existing users should click on the ‘Sign In’ button to access their dashboard, where they can create and manage workflows.


2. Create a New Workflow in Pabbly Connect

After signing in, the next step is to create a new workflow in Pabbly Connect. Click on the ‘Create Workflow’ button, which will prompt you to name your workflow. For this integration, name it ‘Add 99acres Leads to CRM and Instantly Notify Sales Team on Discord’ and select an appropriate folder for saving.

The workflow window will open, displaying options for triggers and actions. Triggers initiate the workflow, while actions are the responses. For this integration, select 99acres as the trigger application and choose ‘New Leads’ as the trigger event.

  • Access Pabbly Connect and sign in.
  • Click on ‘Create Workflow’ and name it.
  • Select 99acres as the trigger application.

After selecting the trigger, Pabbly Connect will provide a webhook URL. This URL must be copied and configured in your 99acres account to receive lead details automatically. Contact your 99acres account manager to set up this webhook integration.


3. Map Lead Details to Zoho CRM Using Pabbly Connect

Once the webhook is set up, the next step in Pabbly Connect is to map the lead details into Zoho CRM. Select Zoho CRM as the action application and choose ‘Create Lead’ as the action event. This will allow you to add the lead details captured from 99acres.

To connect to Zoho CRM, click ‘Add New Connection’ and enter your Zoho domain. After connecting, you will need to map the lead details such as first name, last name, email, and city from the previous step. This mapping ensures that the data is dynamically inserted into your CRM.

  • Select Zoho CRM as the action application.
  • Choose ‘Create Lead’ as the action event.
  • Map the lead details from 99acres.

After mapping the lead details, click on ‘Save and Send Test Request’ to ensure that the lead is successfully created in Zoho CRM. Refresh your Zoho CRM dashboard to confirm that the new lead details appear correctly.


4. Notify Sales Team on Discord via Pabbly Connect

The final step in this integration process is to notify your sales team on Discord whenever a new lead is added. In Pabbly Connect, add another action step and select Discord as the action application. Choose ‘Send Channel Message Markdown’ as the action event to send a formatted message to your team.

To set this up, you will need to create a webhook in Discord. Navigate to your server settings, select integrations, and create a new webhook. Copy the webhook URL and paste it back into Pabbly Connect. Then, compose your message by mapping the lead details you want to share with your team.

Select Discord as the action application. Choose ‘Send Channel Message Markdown’ as the action event. Map the lead details into the message.

After setting up the message, click ‘Save and Send Test Request’ to verify that the message is sent to your Discord channel. Your sales team will now receive instant notifications whenever a new lead is captured from 99acres.


5. Conclusion: Streamline Your Lead Management with Pabbly Connect

By following this tutorial, you have successfully integrated 99acres leads into Zoho CRM and set up notifications for your sales team on Discord using Pabbly Connect. This automation ensures that no lead is missed, allowing your team to respond promptly and effectively.

Ensure you check out Pabbly Connect to create business automation workflows and reduce manual tasks. Pabbly Connect currently offer integration with 2,000+ applications.

Check out Pabbly Connect – Automate your business workflows effortlessly! Sign Up Free – Start your journey with ease! 10,000+ Video Tutorials – Learn step by step! Join Pabbly Facebook Group – Connect with 21,000+ like minded people!

Utilizing Pabbly Connect for this integration not only saves time but also enhances your lead management process, making it easier to convert leads into clients. Start automating your workflows today and experience the benefits of seamless integration.

How to Create Lead in Salesforce from MagicBricks Inquiry Using Pabbly Connect

Learn how to create leads in Salesforce from MagicBricks inquiries using Pabbly Connect. Follow this step-by-step tutorial for seamless integration. Learn to create powerful connections between your critical applications without requiring specialized programming knowledge or extensive technical background.

Watch Step By Step Video Tutorial Below


1. Accessing Pabbly Connect for Integration

To create leads in Salesforce from MagicBricks inquiries, the first step is to access Pabbly Connect. Start by navigating to the Pabbly Connect website. There, you will find options to sign in or sign up for a free account.

If you are an existing user, simply sign in to your account. For new users, signing up is free and offers 100 free tasks every month. Once logged in, you will see the dashboard where you can start creating your automation workflows.


2. Creating a New Workflow in Pabbly Connect

After accessing your Pabbly Connect dashboard, the next step is to create a new workflow. Click on the button to create a workflow and name it ‘Create Lead in Salesforce from MagicBricks Inquiry’. This name will help you identify the workflow later.

  • Click on the create button to proceed.
  • You will see two windows: one for the trigger and another for the action.

In this setup, the trigger window is where you will specify what event will start the automation. The action window is where you define what happens once the trigger event occurs.


3. Setting Up the Trigger for MagicBricks Inquiry

To begin the integration, set up the trigger in Pabbly Connect. Select ‘MagicBricks’ as the trigger application. The trigger event you want to capture is ‘New Inquiry’. This means that every time a new inquiry is generated in MagicBricks, it will trigger the workflow.

Once you select the trigger, Pabbly Connect will provide you with a webhook URL. This URL needs to be shared with the management team handling your MagicBricks account. They will use this URL to connect MagicBricks to Pabbly Connect.


4. Setting Up the Action in Salesforce

Now that you have configured the trigger, you will set up the action step in Pabbly Connect. Select ‘Salesforce’ as the action application and choose the action event ‘Create Record’. This action will create a new lead in Salesforce whenever a new inquiry is received.

  • Click on the connect button to link your Salesforce account.
  • Authorize Pabbly Connect to access your Salesforce account.

After authorization, you will need to select the object type as ‘Lead’. After this, map the lead data fields from the MagicBricks inquiry to the corresponding fields in Salesforce. This mapping ensures that the inquiries are accurately transferred as leads.


5. Finalizing the Integration and Testing

After mapping the necessary fields, you can finalize the integration in Pabbly Connect. Click on ‘Save and Send Test Request’ to check if the integration works correctly. If successful, you will receive a confirmation response.

To verify, log into your Salesforce account and check the leads section. You should see a new lead created with the details from the MagicBricks inquiry. This confirms that the integration is working flawlessly, allowing you to manage your leads efficiently without manual entry.


Conclusion

In this tutorial, we demonstrated how to create leads in Salesforce from MagicBricks inquiries using Pabbly Connect. This integration automates the process, saving time and ensuring accuracy in lead management. By following the steps outlined, you can streamline your workflow and enhance your sales process.

Ensure you check out Pabbly Connect to create business automation workflows and reduce manual tasks. Pabbly Connect currently offer integration with 2,000+ applications.

How to Automatically Track Facebook Leads in Google Sheets for E-Commerce Store Using Pabbly Connect

Learn how to automate tracking Facebook leads in Google Sheets for your e-commerce store using Pabbly Connect. Follow our step-by-step tutorial for seamless integration. Develop expertise in application integration and learn how to design streamlined automation workflows using proven, simplified approaches.

Watch Step By Step Video Tutorial Below


1. Setting Up Pabbly Connect for Automation

To automatically track Facebook leads in Google Sheets for your e-commerce store, you first need to access Pabbly Connect. This powerful automation platform allows you to seamlessly integrate various applications without any coding or programming skills.

Start by visiting the Pabbly Connect website and either sign in or create a new account. If you are a new user, you can sign up for free and receive 100 tasks per month. Once logged in, you will see the Pabbly Connect dashboard where you can create your automation workflow.


2. Creating a Workflow in Pabbly Connect

After accessing your Pabbly Connect dashboard, create a new workflow for tracking Facebook leads. Click on the ‘Create Workflow’ button and name your workflow, such as ‘Track Facebook Leads in Google Sheets for E-Commerce Store’. using Pabbly Connect

  • Select a workflow name that reflects its purpose.
  • Choose a folder to organize your workflows.
  • Click the ‘Create’ button to finalize your workflow setup.

Once your workflow is created, you will see two windows: the trigger window and the action window. The trigger window is where you will specify the event that starts the automation, while the action window is where you define what happens as a result.


3. Configuring Facebook Lead Ads as Trigger in Pabbly Connect

In the trigger window, select ‘Facebook Lead Ads’ as your trigger application. This allows Pabbly Connect to respond to new leads generated from your Facebook ads. using Pabbly Connect

Choose the trigger event as ‘New Lead Instant’ and click the ‘Connect’ button. A prompt will appear asking you to add a new connection. Follow the instructions to connect your Facebook account to Pabbly Connect.

  • Select the specific Facebook page you are using for your ads.
  • Choose the lead generation form you have set up.
  • Click ‘Save and Send Test Request’ to test the connection.

Once the connection is established, you can generate a test lead using the Meta Lead Ads testing tool to ensure everything is working correctly. This step is crucial for verifying that Pabbly Connect is capturing the lead data accurately.


4. Setting Up Google Sheets as Action in Pabbly Connect

Next, you need to configure the action step in your workflow. Select ‘Google Sheets’ as your action application, which will allow you to record the lead information captured from Facebook. using Pabbly Connect

For the action event, select ‘Add New Row’ and click the ‘Connect’ button. Similar to the previous step, you will add a new connection to your Google account. Choose the appropriate spreadsheet and sheet where you want the lead information to be stored.

Select the spreadsheet named ‘Leads Details’. Choose ‘Sheet1’ as the destination for your lead data. Map the fields for full name, email, and phone number from the previous step.

After mapping the fields, click on the ‘Save and Send Test Request’ button. This action will create a new row in your Google Sheets with the lead’s information, confirming that your automation is functioning as intended.


5. Testing and Verifying Your Integration

Now that you have set up both the trigger and action, it’s time to test the entire workflow. Generate a new test lead through the Facebook Lead Ads testing tool, just as you did earlier.

After submitting the test lead, check your Google Sheets to verify that the lead’s information has been recorded. If everything is configured correctly, you should see the new lead details populated in your specified sheet.

Ensure the lead’s full name, email, and phone number appear correctly. If the data is missing, double-check your mappings in Pabbly Connect.

This testing phase is crucial as it confirms that your integration between Facebook Lead Ads and Google Sheets via Pabbly Connect is working seamlessly, allowing you to track leads automatically.


Conclusion

By following this tutorial, you can successfully use Pabbly Connect to automatically track Facebook leads in Google Sheets for your e-commerce store. This automation saves time and ensures efficient lead management.

Ensure you check out Pabbly Connect to create business automation workflows and reduce manual tasks. Pabbly Connect currently offer integration with 2,000+ applications.

With Pabbly Connect, you can enhance your business operations, allowing you to focus on what matters most—growing your e-commerce store.