Automate Post-Purchase Product Recommendations via Email Using OpenAI and Pabbly Connect

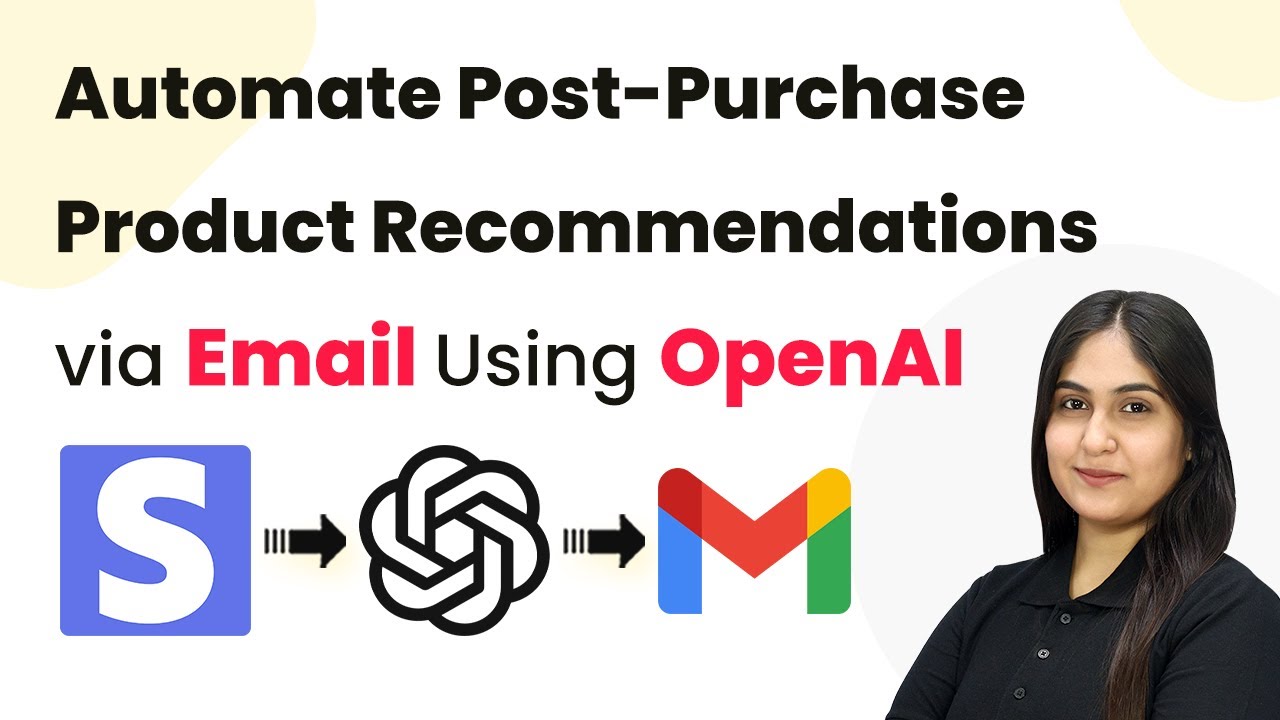
Learn how to automate post-purchase product recommendations via email using OpenAI and Pabbly Connect with this step-by-step guide. Learn to create powerful connections between your critical applications without requiring specialized programming knowledge or extensive technical background.

Watch Step By Step Video Tutorial Below


1. Accessing Pabbly Connect to Start Automation

To automate post-purchase product recommendations via email, you first need to access Pabbly Connect. Start by visiting the Pabbly Connect website and signing in with your account.

Once logged in, you will be taken to the dashboard where you can create a new workflow. Click on the ‘Create Workflow’ button to begin setting up your automation.


2. Creating a Workflow in Pabbly Connect

In this step, you will create a workflow for automating product recommendations. After clicking on ‘Create Workflow’, you need to name your workflow something descriptive, such as ‘Automate Post Purchase Product Recommendations by Email Using OpenAI’. using Pabbly Connect

  • Name your workflow appropriately.
  • Select the folder to save your workflow.
  • Click on the ‘Create’ button to finalize.

After creating the workflow, you will see two essential components: Trigger and Action. The Trigger will be set as Stripe to capture new payments.


3. Setting Up the Trigger with Stripe

To set up the trigger, select Stripe as your trigger application in Pabbly Connect. Choose the trigger event as ‘New Charge’ to capture any new payments made through your Stripe account.

Next, you will receive a Webhook URL from Pabbly Connect. Copy this URL and go to your Stripe account to set up a new webhook. Paste the URL into the webhook settings and select the events you want to listen to, primarily focusing on ‘Charge Succeeded’.


4. Connecting OpenAI to Generate Recommendations

After setting up the trigger, the next step is to connect OpenAI to generate personalized product recommendations. In Pabbly Connect, select OpenAI as your action application and choose the action event as ‘ChatGPT’.

  • Input your OpenAI API key to establish the connection.
  • Set your prompt to include customer details and product categories.
  • Map the customer name and product information from the Stripe trigger.

Once you have configured the OpenAI action, you will be able to generate a personalized email content based on the purchase details.


5. Sending the Email via Gmail

Finally, to send the generated recommendations via email, you will set up Gmail as the final action in your workflow in Pabbly Connect. Choose the action event as ‘Send Email’.

Fill in the recipient email address, which should be mapped from the Stripe trigger, and customize the email subject and body using the generated content from OpenAI. Make sure to test the email sending to ensure it works correctly.


Conclusion

Using Pabbly Connect, you can easily automate post-purchase product recommendations via email by integrating Stripe, OpenAI, and Gmail. This not only enhances customer engagement but also encourages repeat purchases effectively.

Ensure you check out Pabbly Connect to create business automation workflows and reduce manual tasks. Pabbly Connect currently offer integration with 2,000+ applications.

How to Send WhatsApp Messages to IndiaMART Repeat Inquiries Using Pabbly Connect

Learn how to automate sending WhatsApp messages for IndiaMART repeat inquiries using Pabbly Connect. Step-by-step tutorial for seamless integration. Follow this definitive guide to creating powerful automated workflows with straightforward, efficiency-focused solutions that save valuable time.

Watch Step By Step Video Tutorial Below


1. Accessing Pabbly Connect for Integration

To send WhatsApp messages for IndiaMART repeat inquiries, you first need to access Pabbly Connect. Begin by visiting the Pabbly website and signing in to your account. If you are a new user, you can sign up for free and receive 100 tasks monthly.

After logging in, navigate to the dashboard where you can create a new workflow. Click on the ‘Create Workflow’ button, and give your workflow a name, such as ‘Send WhatsApp Messages to IndiaMART Repeat Inquiries’. This is where you will set up the automation process.


2. Setting Up the Trigger for New Inquiries

The next step involves setting up the trigger in Pabbly Connect. Choose IndiaMART as your trigger application. This means that whenever you receive a new inquiry from IndiaMART, it will activate your workflow.

  • Select the trigger event as ‘New Inquiry’.
  • Connect your IndiaMART account by entering the required API key.
  • Test the trigger to ensure it captures inquiries correctly.

Once the trigger is set, you can proceed to the next step. Make sure to test the connection to confirm that inquiries are being received properly. This ensures that your automation will function smoothly.


3. Searching Google Sheets for Existing Inquiries

In this part of the workflow, Pabbly Connect will check if the inquiry already exists in your Google Sheets. Select Google Sheets as the action application. This step is crucial to avoid sending duplicate messages.

Choose the action event as ‘Lookup Spreadsheet Row’. Connect your Google Sheets account and select the spreadsheet that contains your inquiries. Specify the lookup column, typically the email address, to determine if the inquiry is a repeat.

  • Select the spreadsheet that contains the inquiry data.
  • Map the email field from the inquiry to the lookup column.
  • Test this action to confirm it retrieves the correct data.

After testing, you will know whether the inquiry is new or a repeat. This information is essential for the next step where you decide the appropriate action.


4. Sending WhatsApp Messages Based on Inquiry Status

Now, it’s time to send the WhatsApp messages using Pabbly Connect. Depending on whether the inquiry is new or a repeat, you will send different messages. Select WhatsApp Cloud API as your action application.

Choose the action event as ‘Send Text Message’. Connect your WhatsApp account and set up the message template. You can customize messages based on the inquiry type. For example, for new inquiries, you might say, ‘Thank you for your inquiry!’ and for repeat inquiries, ‘Great to hear from you again!’.

Enter the recipient’s phone number without the country code. Customize the message content based on inquiry status. Test the WhatsApp message to confirm it is sent successfully.

By testing the WhatsApp integration, you ensure that your messages are delivered correctly. This step finalizes your workflow, allowing you to automatically respond to inquiries as they come in.


5. Conclusion: Automate Your Communication with Pabbly Connect

In conclusion, using Pabbly Connect to send WhatsApp messages for IndiaMART repeat inquiries streamlines your communication process. By setting up triggers and actions, you can ensure that every inquiry is addressed promptly.

Ensure you check out Pabbly Connect to create business automation workflows and reduce manual tasks. Pabbly Connect currently offer integration with 2,000+ applications.

This automation not only saves time but also enhances customer satisfaction by ensuring timely responses. With Pabbly Connect, you can manage your inquiries efficiently and focus on growing your business.


How to Automatically Add Leads from LinkedIn Ads to HubSpot CRM Using Pabbly Connect

Learn how to automatically add leads from LinkedIn Ads to HubSpot CRM using Pabbly Connect with this detailed step-by-step tutorial. Discover how to seamlessly connect your essential tools through accessible instructions that make powerful automation available to professionals at every skill level.

Watch Step By Step Video Tutorial Below


1. Accessing Pabbly Connect for Integration

To automatically add leads from LinkedIn Ads to HubSpot CRM, you need to access Pabbly Connect. Begin by navigating to the Pabbly website and signing in to your account. If you do not have an account, you can sign up for free to get started with 100 tasks monthly.

Once logged in, you will be directed to the Pabbly Connect dashboard, where you can create a new workflow. This dashboard is user-friendly and allows you to manage all your workflows efficiently. Click on the ‘Create Workflow’ button to start setting up your integration.


2. Creating a New Workflow in Pabbly Connect

In this step, you will create a new workflow specifically for adding leads from LinkedIn Ads to HubSpot CRM using Pabbly Connect. After clicking on ‘Create Workflow’, you will need to name your workflow. For example, you can name it ‘Automatically Add Leads from LinkedIn Ads to HubSpot CRM’.

Next, select the folder where you want to save this workflow. Once you have set the name and folder, click on ‘Create’. You will now see two boxes: one for the trigger and one for the action. The trigger is the event that initiates the workflow, while the action is what happens as a result.

  • Choose ‘LinkedIn Ads’ as the trigger application.
  • Select ‘New Lead Notification’ as the trigger event.
  • Connect your LinkedIn Ads account to Pabbly Connect.

After selecting the trigger, you will need to test the connection to ensure it works properly. This is a crucial step to confirm that your LinkedIn Ads account is successfully linked with Pabbly Connect.


3. Setting Up HubSpot CRM as the Action

Once your trigger is configured, the next step is to set HubSpot CRM as the action application in Pabbly Connect. This is where the leads captured from LinkedIn Ads will be sent. Select HubSpot CRM from the action application dropdown.

Then, choose the action event as ‘Create Contact’. This action will create a new contact in your HubSpot CRM every time a lead is generated from LinkedIn Ads. You will need to connect your HubSpot account to Pabbly Connect for this step as well.

  • Authorize Pabbly Connect to access your HubSpot CRM account.
  • Map the fields from LinkedIn Ads to HubSpot CRM, such as Email, First Name, Last Name, and Phone Number.
  • Test the action to ensure contacts are created successfully in HubSpot.

After mapping the fields and testing the action, you will have successfully set up the integration between LinkedIn Ads and HubSpot CRM using Pabbly Connect.


4. Testing the Integration for Successful Lead Capture

After setting up the workflow, it is essential to test the integration to ensure that leads from LinkedIn Ads are being captured and added to HubSpot CRM correctly. To do this, generate a test lead through a LinkedIn Ads form.

Once you submit the test lead, check the Pabbly Connect dashboard to see if the lead has been captured. You should see a response indicating that the lead was received. This confirms that the trigger is working correctly.

Verify that the lead details appear in the Pabbly Connect workflow. Check your HubSpot CRM to confirm that the lead has been added as a new contact. Ensure all mapped fields are correctly populated in HubSpot.

Once you have verified that the integration works as intended, you can confidently use this automated process to manage your leads from LinkedIn Ads to HubSpot CRM through Pabbly Connect.


5. Conclusion

In conclusion, using Pabbly Connect to automatically add leads from LinkedIn Ads to HubSpot CRM streamlines your lead management process. By following the steps outlined in this tutorial, you can set up an efficient workflow that saves time and reduces manual effort.

Ensure you check out Pabbly Connect to create business automation workflows and reduce manual tasks. Pabbly Connect currently offer integration with 2,000+ applications.

This integration ensures that every lead generated from your LinkedIn Ads is captured and added to your HubSpot CRM seamlessly, allowing you to focus on converting those leads into customers. Start using Pabbly Connect today to enhance your marketing automation efforts!

How to Send Thank You Emails Automatically After Stripe Payment Using Pabbly Connect

Learn how to automate thank you emails after Stripe payments using Pabbly Connect. Step-by-step guide for seamless integration with Gmail. Transform complex automation concepts into accessible, actionable steps that eliminate unnecessary manual work while maximizing existing application capabilities.

Watch Step By Step Video Tutorial Below


1. Accessing Pabbly Connect for Automation

To send thank you emails automatically after a Stripe payment, you first need to access Pabbly Connect. This platform enables seamless integration between different applications, such as Stripe and Gmail, to facilitate your automation needs.

Visit the Pabbly Connect website by typing Pabbly.com/connect in your browser. You will see options to either sign in or sign up for free. If you are a new user, click on the ‘Sign Up Free’ button; existing users can simply click on ‘Sign In’ to access their accounts.


2. Creating Your Workflow in Pabbly Connect

Once you are logged into Pabbly Connect, you can create a new workflow. Click on the ‘Create Workflow’ button to start. You will be prompted to choose between the new workflow builder and the classic one. Select the new workflow builder for a modern experience.

  • Click on the ‘Select’ button after choosing the new workflow builder.
  • Provide a name for your workflow, such as ‘Send Thank You Email After Payment Over Stripe’.
  • Choose a folder for your workflow or keep it in the default folder.

After creating your workflow, you will be directed to the workflow page where you can set up triggers and actions. This is where Pabbly Connect shines by allowing you to integrate Stripe as your trigger app.


3. Setting Up Stripe as the Trigger App

Now, select Stripe as your trigger app in Pabbly Connect. This means that the workflow will initiate whenever a new payment is received through Stripe. Choose the event type as ‘New Charge’ to ensure that the workflow triggers upon successful payments.

Click the ‘Connect’ button to get your webhook URL, which you will need to paste into your Stripe account. This URL allows Pabbly Connect to receive data about new charges directly from Stripe.

  • Log in to your Stripe account and navigate to the ‘Developers’ section.
  • Select ‘Webhooks’ and then click on ‘Add Endpoint’.
  • Paste the webhook URL from Pabbly Connect and select the event ‘Charge.succeeded’.

After setting this up, you will have successfully connected Stripe to Pabbly Connect, and you can proceed to test the integration.


4. Testing the Integration with a Stripe Payment

To test the integration, you need to make a payment through Stripe. Copy the payment link generated in your Stripe account and open it in a new tab. Fill in the required details and click the ‘Pay’ button to complete the transaction.

Once the payment is successful, go back to Pabbly Connect to check if the webhook response has been received. You should see a confirmation that the charge was successful, along with the details of the payment.

Check the response in Pabbly Connect to verify that it captures the payment details. Ensure that all relevant payment information is displayed correctly.

With the successful test, you can now set up the action to send thank you emails through Gmail.


5. Sending Thank You Emails via Gmail

For the final step, set Gmail as your action app in Pabbly Connect. This will allow you to send automated thank you emails to customers after they make a payment. Select the action event as ‘Send Email’.

Connect your Gmail account by clicking on the ‘Connect’ button and authorize Pabbly Connect to access your Gmail. Once connected, you will need to map the fields for the email, such as the recipient’s address, subject, and content.

Enter the recipient’s email address, which can be dynamically mapped from the Stripe response. Provide a subject line, such as ‘Payment Received: Thank You’. Compose the email body, thanking the customer for their payment and including relevant details.

After filling in these fields, click on ‘Save and Send Test Request’ to send a test email. Check your Gmail inbox to confirm that the thank you email has been received successfully.


Conclusion

In this tutorial, we explored how to send thank you emails automatically after a Stripe payment using Pabbly Connect. By following the steps outlined, you can enhance customer engagement and streamline your communication processes effectively.

Ensure you check out Pabbly Connect to create business automation workflows and reduce manual tasks. Pabbly Connect currently offer integration with 2,000+ applications.

How to Save IndiaMART Leads in Brevo List Using Pabbly Connect

Learn how to save IndiaMART leads in Brevo List for campaigns using Pabbly Connect. Follow our step-by-step guide to automate your workflow efficiently. Implement the precise methodologies leading organizations use to automate repetitive tasks, illustrated with practical examples designed for immediate application.

Watch Step By Step Video Tutorial Below


1. Accessing Pabbly Connect for IndiaMART and Brevo Integration

To start saving IndiaMART leads in Brevo List, the first step is accessing Pabbly Connect. This automation tool allows seamless integration between various applications without the need for programming skills.

Open your web browser and navigate to the Pabbly Connect landing page by searching for Pabbly Connect. Once there, you can sign up for free if you’re a new user, or simply click on the ‘Sign In’ button if you already have an account. After logging in, you will be directed to the Pabbly Connect dashboard.


2. Creating a New Workflow in Pabbly Connect

After accessing the dashboard, the next step is to create a new workflow. Click on the ‘Create Workflow’ button. You will be prompted to choose between the new and classic workflow builders. For this integration, select the new workflow builder for a modern interface. using Pabbly Connect

  • Choose a name for your workflow.
  • Select a folder for saving your workflow.
  • Click on the ‘Create’ button to proceed.

This action opens the workflow window, where you’ll set up the trigger and action for your integration. In this case, the trigger will be IndiaMART, and the action will be Brevo. This setup is essential for automating lead management effectively.


3. Setting Up the Trigger with IndiaMART

To capture new leads from IndiaMART, you need to set up the trigger in Pabbly Connect. Click on the ‘Add Trigger’ button and select IndiaMART as the trigger application. Then, choose ‘New Leads’ as the trigger event.

After selecting the trigger event, Pabbly Connect will generate a webhook URL. Copy this URL and head over to your IndiaMART account. Navigate to the Lead Manager, and select ‘Import Export Leads’ followed by ‘Push API’. Here, you will need to choose ‘Other’ as the source and enter ‘Pabbly Connect’ as the CRM platform name.

  • Paste the copied webhook URL in the webhook listener URL field.
  • Click on ‘Save Details’ to finalize the setup.

Once the webhook URL is saved, you will need to generate an OTP to complete the connection. Enter the OTP and click on ‘Submit’ to confirm your setup.


4. Setting Up the Action with Brevo

With the trigger successfully set up, the next step is to configure the action in Pabbly Connect using Brevo. Click on ‘Add Action’ and select Brevo as the action application. Choose ‘Create or Update Contact’ as the action event.

To connect your Brevo account, you will need to provide the API key. Access your Brevo account, navigate to the SMTP and API section, and generate a new API key. Copy this key and return to Pabbly Connect to paste it into the required field.

Map the email address from the trigger step. Fill in other required fields such as name and phone number.

After entering all necessary details, click on ‘Save and Send Test Request’. If successful, a new contact will be created in your Brevo account, confirming that the integration works as intended.


5. Conclusion: Automating Your Lead Management

By following these steps, you can automate the process of saving IndiaMART leads in Brevo using Pabbly Connect. This integration allows for efficient lead management without manual intervention, enhancing your marketing efforts.

Ensure you check out Pabbly Connect to create business automation workflows and reduce manual tasks. Pabbly Connect currently offer integration with 2,000+ applications.

Now that you have set up this automation, you can focus on converting leads into customers while Pabbly Connect handles the backend processes. This powerful tool not only connects IndiaMART and Brevo but also offers a range of other integrations to streamline your business operations.


In this tutorial, we highlighted how to effectively use Pabbly Connect to save IndiaMART leads in Brevo List for campaigns. Start automating your workflows today for increased efficiency and productivity!

Automatically Post New Products to Facebook from WooCommerce Using Pabbly Connect

Learn how to automatically post new products to Facebook from WooCommerce using Pabbly Connect. Follow our step-by-step tutorial for seamless integration. Implement the precise methodologies leading organizations use to automate repetitive tasks, illustrated with practical examples designed for immediate application.

Watch Step By Step Video Tutorial Below


1. Accessing Pabbly Connect for WooCommerce and Facebook Integration

To automatically post new products to Facebook from WooCommerce, you first need to access Pabbly Connect. This powerful automation tool allows you to create workflows without any coding skills. You can visit Pabbly Connect by typing Pabbly.com/connect in your browser.

Once on the Pabbly Connect landing page, you can sign in or sign up for a free account. Signing up gives you access to 100 free tasks monthly. After logging in, you will reach the dashboard where you can create new workflows and manage existing ones.


2. Creating a Workflow in Pabbly Connect

In this section, you will create a workflow to link WooCommerce and Facebook using Pabbly Connect. Click on the ‘Create Workflow’ button. You will be prompted to choose between the classic or modern workflow builder; select the classic option for familiarity.

  • Name your workflow: ‘Automatically Post New Products to Facebook from WooCommerce’.
  • Select a folder for your workflow.
  • Click on ‘Create’ to finalize the workflow setup.

Once created, you will see two boxes labeled ‘Trigger’ and ‘Action’. The trigger indicates when the automation starts, while the action defines what happens next. For this integration, you will set WooCommerce as the trigger application and Facebook as the action application.


3. Setting Up the Trigger for WooCommerce

To set up the trigger in Pabbly Connect, select WooCommerce as the trigger application. The event you want to trigger the workflow is ‘New Product Created’. This means every time a new product is added to your WooCommerce store, the workflow will activate.

Next, you will need to connect WooCommerce to Pabbly Connect. A webhook URL is provided, which acts as a bridge between WooCommerce and Pabbly Connect. Copy this URL, and then navigate to your WordPress dashboard.

  • Go to WooCommerce settings and click on ‘Advanced’.
  • Select ‘Webhooks’ and click on ‘Add Webhook’.
  • Fill out the webhook details, including naming it and setting the status to active.

Paste the copied webhook URL into the delivery URL field and save the webhook. This connects your WooCommerce store to Pabbly Connect, allowing it to receive product creation events.


4. Configuring the Action to Post on Facebook

After setting up the trigger, it’s time to configure the action in Pabbly Connect. Select Facebook Pages as the action application and choose ‘Create Page Post’ as the action event. If you don’t have an existing connection to Facebook, click on ‘Add New Connection’ to authenticate your Facebook account.

Once connected, you will need to specify the page where you want to post the new product updates. You can select your desired Facebook page from the dropdown list. Then, you will fill in the message and link URL fields, but instead of manually entering details, you will use the mapping feature to pull data from the WooCommerce trigger.

Map the image URL from the WooCommerce response. Create a message like ‘We have launched a new product: [Product Name]’. Include the product link for easy access.

This dynamic mapping ensures that every time a new product is added, the correct information is posted on your Facebook page.


5. Finalizing the Automation Workflow

To finalize your automation in Pabbly Connect, you will perform a test submission. This involves adding a new product in WooCommerce, which will trigger the workflow. Once you publish the product, you should see a response in Pabbly Connect indicating that the product details have been captured successfully.

After confirming the response, check your Facebook page to verify that the post has been created as expected. You should see the product name, description, and image included in the post. This confirms that your automation workflow is functioning correctly.

With this setup, you can now automatically post new products to Facebook from WooCommerce with ease. This integration saves time and ensures that your audience is always updated with your latest offerings.


Conclusion

In this tutorial, we demonstrated how to automatically post new products to Facebook from WooCommerce using Pabbly Connect. By following the step-by-step process, you can streamline your product announcements and enhance your online presence effortlessly.

Ensure you check out Pabbly Connect to create business automation workflows and reduce manual tasks. Pabbly Connect currently offer integration with 2,000+ applications.

How to Send Welcome WhatsApp Message When Lead is Captured via IndiaMART Using Pabbly Connect

Learn how to automate sending a welcome WhatsApp message when a lead is captured through IndiaMART using Pabbly Connect. Follow this detailed tutorial for step-by-step guidance.

Watch Step By Step Video Tutorial Below


1. Accessing Pabbly Connect for Integration

To send a welcome WhatsApp message when a lead is captured via IndiaMART, you first need to access Pabbly Connect. This automation platform allows you to integrate various applications seamlessly.

Visit Pabbly’s website and sign up for a free account. Once you log in, you will see the dashboard where you can create workflows to automate tasks.


2. Creating a Workflow in Pabbly Connect

In this section, you will learn how to create a workflow that sends a welcome WhatsApp message. Start by clicking on the ‘Create Workflow’ button on the top right corner of the dashboard.

  • Select the workflow builder as ‘New Beta’ for a modern experience.
  • Name your workflow as ‘Send Welcome WhatsApp Message When Lead is Captured via IndiaMART’.
  • Choose a folder to save your workflow, such as ‘Automations’.

After creating the workflow, you will see options to set a trigger and action. This is where Pabbly Connect shines by allowing you to connect your IndiaMART account with WhatsApp.


3. Setting Up the Trigger for New Leads

Now, you need to set up a trigger that activates when a new lead is captured from IndiaMART. Click on the ‘Set Trigger’ button and select ‘India’ as the trigger application.

Next, choose the event as ‘New Leads’. After selecting the event, click on ‘Connect’. You will receive a webhook URL from Pabbly Connect that you will use to connect your IndiaMART account.

  • Copy the webhook URL provided by Pabbly Connect.
  • Log in to your IndiaMART account and navigate to the lead manager.
  • Select ‘Import/Export Leads’ and choose ‘Push API’ as the source.

Enter ‘Pabbly Connect’ as the platform name and paste the webhook URL to establish the connection. This step ensures that every new lead captured will trigger the automation.


4. Sending the Welcome WhatsApp Message

After successfully setting up the trigger, it’s time to send the welcome WhatsApp message. Click on ‘Add Action Step’ and select ‘Interact’ as the action application.

Choose the event as ‘Send WhatsApp Template Message’. Click on ‘Connect’ to create a new connection with your Interact account. You will need to enter the secret key found in your Interact account settings.

Map the phone number field from the trigger step to ensure the message is sent to the right lead. Enter the template code for the welcome message you created in your Interact account. Fill in any variable values required by your message template.

Once all details are entered, click on ‘Save’ to finalize the action step. This integration through Pabbly Connect ensures that every lead receives a personalized welcome message automatically.


5. Testing Your Integration

To ensure everything is working correctly, you need to test the integration. Generate a test lead in your IndiaMART account and check if the welcome WhatsApp message is sent.

After generating a test lead, go back to Pabbly Connect and see if the webhook response indicates success. If you see a successful response, it means your integration is set up correctly.

Check your WhatsApp to see if the welcome message has been received. If the message is not received, revisit the steps to ensure everything is set up correctly.

Once confirmed, you can start using this automation for all new leads captured via IndiaMART, enhancing your customer engagement right from the start.


Conclusion

In this tutorial, we explored how to send a welcome WhatsApp message when a lead is captured via IndiaMART using Pabbly Connect. By following the steps outlined, you can automate your communication and improve your customer relationship management effectively.

Ensure you check out Pabbly Connect to create business automation workflows and reduce manual tasks. Pabbly Connect currently offer integration with 2,000+ applications.

Utilizing Pabbly Connect for this integration not only saves time but also helps in building trust with your prospects from the very first interaction.

How to Log Sales from Stripe into Google Sheets Using Pabbly Connect

Learn how to log sales from Stripe into Google Sheets for financial reporting using Pabbly Connect. Step-by-step guide for seamless integration. Eliminate manual repetitive tasks from your workflow. Discover proven automation methods with intuitive steps designed for efficiency-minded professionals.

Watch Step By Step Video Tutorial Below


1. Accessing Pabbly Connect for Integration

To log sales from Stripe into Google Sheets, you first need to access Pabbly Connect. This powerful automation platform allows seamless integration between various applications, including Stripe and Google Sheets.

To get started, open a web browser and type the URL www.Pabbly.com/connect. Once on the landing page, you will see options to ‘Sign In’ or ‘Sign Up Free’. If you are a new user, click on ‘Sign Up Free’ to create an account. Existing users can simply sign in.


2. Creating a Workflow in Pabbly Connect

After signing in, you will be directed to the Pabbly Connect dashboard. Here, click on the ‘Create Workflow’ button to start building your integration. Choose the ‘New Workflow Builder’ option for a modern experience. using Pabbly Connect

  • Click on ‘Create Workflow’.
  • Select a name for your workflow (e.g., ‘Log Sales to Google Sheets’).
  • Choose a folder for your workflow or create a new one.

Once you have named the workflow, click on the ‘Create’ button to proceed. This will take you to the workflow setup page.


3. Setting Up the Trigger with Stripe

In this section, you will set up the trigger to initiate your workflow. Select ‘Stripe’ as your trigger app. Next, choose the event that will start the workflow, which is ‘New Charge’ in this case.

Click on the ‘Connect’ button to establish the connection. You will receive a webhook URL from Pabbly Connect that you need to paste into your Stripe account. To do this, log into your Stripe account, navigate to the ‘Developers’ section, and select ‘Webhooks’.

  • Click on ‘Add Endpoint’.
  • Paste the webhook URL from Pabbly Connect.
  • Select the event ‘Charge.succeeded’ to trigger the workflow.

After adding the endpoint, you will see confirmation that the webhook has been successfully added. This setup allows Pabbly Connect to receive data from Stripe whenever a payment is made.


4. Configuring the Action in Google Sheets

Now that the trigger is set up, it’s time to configure the action app. Choose ‘Google Sheets’ as your action app and select the event ‘Add New Row’. This tells Pabbly Connect to create a new row in your Google Sheet for each new payment received. using Pabbly Connect

Click on the ‘Connect’ button to link your Google Sheets account. If you have an existing connection, select it; otherwise, create a new connection by signing into your Google account.

Select the spreadsheet where you want to log the sales (e.g., ‘New Payments’). Choose the specific sheet (e.g., ‘Sheet1’). Map the fields from Stripe to Google Sheets (e.g., Name, Email, Amount).

After mapping the fields, click on ‘Save and Send Test Request’ to ensure everything is working correctly. You should see the transaction details appear in your Google Sheet, confirming that the integration is successful.


5. Testing the Integration

To verify that the integration works as intended, you will need to perform a test transaction in Stripe. Navigate to the Stripe dashboard and create a new payment using the test mode.

Once the payment is successful, return to Pabbly Connect to check if the webhook received the response. You should see the transaction details populated in the designated Google Sheet.

Check the Google Sheet for the new entry. Ensure all mapped fields are correctly populated.

If everything is set up correctly, you have successfully automated the process of logging sales from Stripe into Google Sheets using Pabbly Connect!


Conclusion

This tutorial provided a detailed guide on how to log sales from Stripe into Google Sheets for financial reporting using Pabbly Connect. By following these steps, you can automate your sales logging process effectively.

Ensure you check out Pabbly Connect to create business automation workflows and reduce manual tasks. Pabbly Connect currently offer integration with 2,000+ applications.

Utilizing Pabbly Connect simplifies the integration between applications, allowing for efficient tracking of financial data.

How to Send Thank You Emails After Order via Instamojo Using SendGrid with Pabbly Connect

Learn how to automate sending thank you emails after orders via Instamojo using SendGrid with Pabbly Connect in this step-by-step tutorial. Transform complex automation concepts into accessible, actionable steps that eliminate unnecessary manual work while maximizing existing application capabilities.

Watch Step By Step Video Tutorial Below


1. Access Pabbly Connect for Integration

To send thank you emails after an order via Instamojo using SendGrid, first, access Pabbly Connect. Open your browser and search for Pabbly.com to reach the homepage of Pabbly Connect.

Once on the homepage, you can either sign up for free or log in if you are an existing user. New users can explore the platform with 100 free tasks every month. After logging in, you will see the dashboard where you can manage your integrations.


2. Create a New Workflow in Pabbly Connect

To automate sending thank you emails, you need to create a new workflow in Pabbly Connect. Click on the ‘Create Workflow’ button located at the top right corner of the dashboard. In the pop-up, give your workflow a name like ‘Send Thank You Emails After Order via Instamojo Using SendGrid’.

  • Select a folder to save your workflow, such as ‘Automations’.
  • Choose between the New Beta or Classic workflow builder.

After naming your workflow, proceed to set up the trigger by selecting ‘Insta Mojo’ as the application. This setup allows you to initiate the automation whenever a new payment is received through your Instamojo account.


3. Set Up Trigger for New Payments in Instamojo

In this step, you will configure the trigger in Pabbly Connect to listen for new payments. Click on the ‘Add Trigger’ button and select ‘Insta Mojo’ as the application. Choose the event labeled ‘New Sale’ which activates when a new payment status is received.

Once selected, click on the ‘Connect’ button to establish the connection. You will receive a webhook URL that needs to be copied and added to your Instamojo account. Log into your Instamojo account, navigate to the payment page settings, and enable the webhook feature by pasting the URL.


4. Configure SendGrid to Send Thank You Emails

After setting up the trigger, the next step in Pabbly Connect is to configure the action that sends the thank you emails via SendGrid. Click on ‘Add Action’ and select ‘SendGrid’ as the application. Choose the action event ‘Send Email’.

  • Input your SendGrid API key to connect your SendGrid account.
  • Map the customer email, subject, and content of the email using the data received from the trigger.

For the email content, you can personalize the message by including the customer’s name and thanking them for their purchase. After mapping all necessary fields, save the action to finalize the configuration.


5. Test the Integration and Confirm Functionality

The final step is to test your integration in Pabbly Connect. To do this, make a test purchase through your Instamojo account. This will trigger the workflow you set up, allowing you to verify that the thank you email is sent successfully.

Once the test is complete, check the email inbox of the customer to confirm receipt of the thank you email. If everything works as intended, your automation is successfully set up to send thank you emails after orders via Instamojo using SendGrid.


Conclusion

In conclusion, using Pabbly Connect to send thank you emails after orders via Instamojo is a straightforward process. By following the steps outlined in this tutorial, you can enhance customer experience and build trust through automated communication. Start automating your workflows today!

Ensure you check out Pabbly Connect to create business automation workflows and reduce manual tasks. Pabbly Connect currently offer integration with 2,000+ applications.

Automatically Post Blog Updates to Facebook from WordPress Using Pabbly Connect

Learn how to automatically post blog updates from WordPress to Facebook using Pabbly Connect. Step-by-step tutorial with detailed instructions. Learn to create powerful connections between your critical applications without requiring specialized programming knowledge or extensive technical background.

Watch Step By Step Video Tutorial Below


1. Accessing Pabbly Connect for Automation

To automatically post blog updates from WordPress to Facebook, the first step is to access Pabbly Connect. Start by opening your browser and navigating to the Pabbly Connect landing page by entering ‘Pabbly.com/connect’. This software allows you to connect various applications without any programming knowledge.

Once on the landing page, you will see options to sign in or sign up for free. If you’re a new user, click on ‘Sign up for free’ to get started with 100 free tasks each month. Existing users should click ‘Sign in’ to access their accounts. After signing in, select ‘Access Now’ under Pabbly Connect to open your dashboard.


2. Creating Your Workflow in Pabbly Connect

After accessing your Pabbly Connect dashboard, the next step is to create a workflow that connects WordPress and Facebook. Click on the ‘Create Workflow’ button, which will prompt you to select a workflow builder. Choose the ‘New’ workflow builder for a modern interface. using Pabbly Connect

  • Click on ‘Create Workflow’ to start.
  • Enter a name for your workflow.
  • Select a folder to save your workflow.

After naming your workflow and selecting a folder, click ‘Create’. This opens the workflow window where you will set up the trigger and action for your automation. In this case, the trigger will be WordPress, and the action will be Facebook.


3. Setting Up WordPress as the Trigger

In the workflow window, you need to set up WordPress as the trigger application. Click on ‘Add Trigger’ and search for ‘WordPress’. Select it, and for the event, choose ‘New Post Published’. Click ‘Connect’ to link your WordPress account with Pabbly Connect.

After clicking connect, a webhook URL will be generated. Copy this URL, then go to your WordPress account. Navigate to the plugins section, and install the WP Webhooks plugin if you haven’t already. Once installed, activate the plugin, and go to the WP Webhooks settings.

  • Select ‘Send Data’ in WP Webhooks settings.
  • Choose ‘Post Created’ as the event.
  • Paste the copied webhook URL in the appropriate field.

After entering the webhook URL, you need to save the settings. This completes the connection between WordPress and Pabbly Connect.


4. Testing the Connection Between WordPress and Facebook

With the trigger set up, it’s time to test the connection. Go back to your WordPress account, navigate to the Posts section, and click ‘Add New Post’. Enter a title and content for your test post, then click ‘Publish’. This action should trigger the connection. using Pabbly Connect

Return to your Pabbly Connect workflow. You should see the details of the newly published post captured in the workflow. If the details appear correctly, you can proceed to set up the action to post on Facebook.

Click ‘Add Action Step’ in Pabbly Connect. Search for ‘Facebook Pages’ and select it. Choose ‘Create Page Post’ as the event.

Now, connect your Facebook account to Pabbly Connect by clicking ‘Connect with Facebook’. Select the appropriate Facebook account and grant the necessary permissions.


5. Finalizing the Automation to Post on Facebook

After connecting your Facebook account, select the page where you want to post updates. Enter a message to notify your audience about the new blog post. For dynamic content, use the mapping feature to insert the post title and URL from the previous step.

Once you’ve entered the message and linked the post URL, click ‘Save and Send Test Request’. This will send a test post to your Facebook page. Check your Facebook account to confirm that the post appears correctly with the message and link.

Now, every time you publish a new post on WordPress, Pabbly Connect will automatically create a post on your Facebook page, enhancing your engagement without manual effort. Test the workflow again by publishing another post to see the automation in action.


Conclusion

In this tutorial, we demonstrated how to automatically post blog updates from WordPress to Facebook using Pabbly Connect. This integration allows for seamless sharing of new content, helping to boost audience engagement effortlessly. Utilize this automation to streamline your social media presence.

Ensure you check out Pabbly Connect to create business automation workflows and reduce manual tasks. Pabbly Connect currently offer integration with 2,000+ applications.