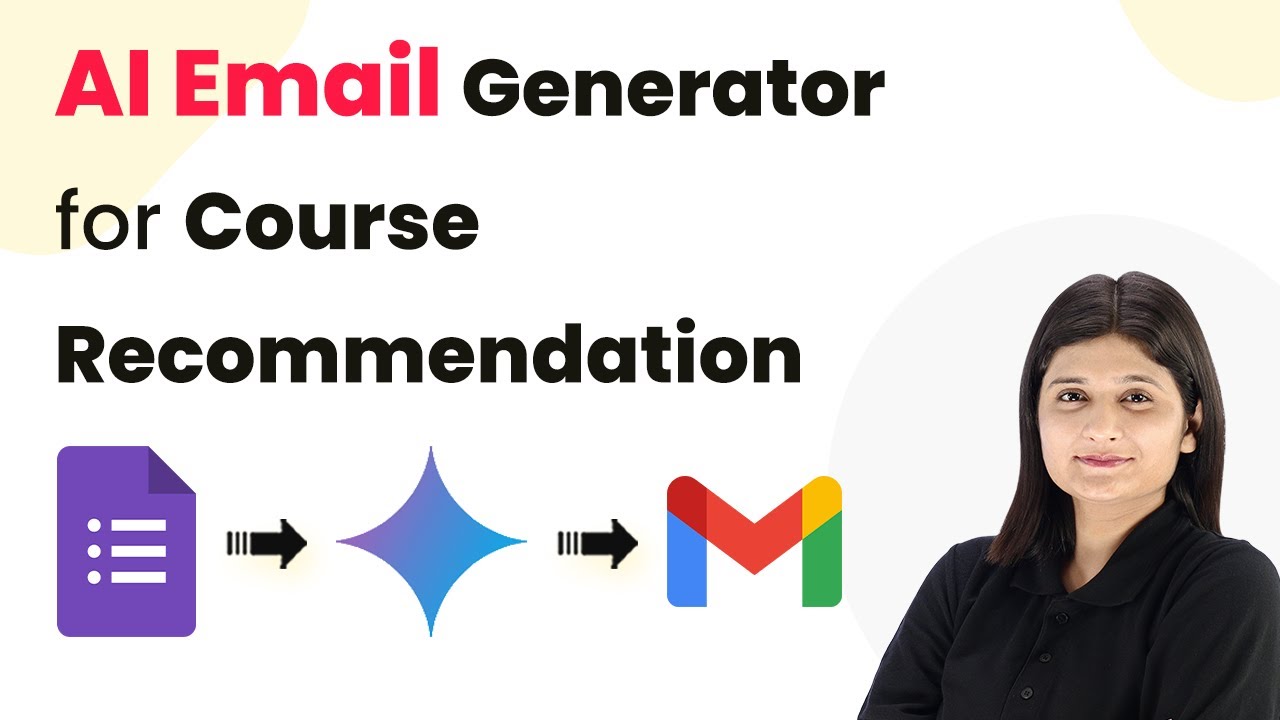
AI Email Generator for Course Recommendation

Learn how to automate course recommendations using Pabbly Connect, Google Forms, Gmail, and Google Gemini. Follow this detailed tutorial for seamless integration. Master proven automation processes with practical implementation examples and strategic recommendations you can apply immediately in your workflow.

Watch Step By Step Video Tutorial Below


1. Accessing Pabbly Connect for Course Recommendations

To start automating course recommendations, you first need to access Pabbly Connect. Open your browser and navigate to Pabbly’s website by typing ‘Pabbly.com’. Once there, sign in to your account using the ‘Sign In’ option located at the top right corner of the page.

If you are a new user, you can sign up for free and enjoy 100 tasks each month. This allows you to test Pabbly Connect and see how it fits your business needs. After signing in, locate the Pabbly Connect application on your dashboard and click on it to access the workflow management interface.


2. Creating a New Workflow in Pabbly Connect

Once you are in Pabbly Connect, you can create a new workflow for your course recommendation emails. Click on the ‘Create Workflow’ button to start. You will be prompted to choose between the new beta workflow builder or the classic version; select the new beta for enhanced features.

  • Name your workflow as ‘AI Email Generator for Course Recommendation’.
  • Select a folder to organize your workflow, such as ‘AI Agent’.
  • Click on ‘Create’ to finalize your workflow setup.

After creating your workflow, you will see a box asking you to enter your trigger application. This is crucial as it sets off the automation process whenever a new form response is submitted.


3. Setting Google Forms as the Trigger in Pabbly Connect

In this section, you will configure Google Forms as the trigger application in Pabbly Connect. Click on ‘Add Trigger’ and search for ‘Google Forms’. Choose the ‘New Response Received’ action event to initiate the workflow when a new form submission occurs.

Next, you need to connect Google Forms with Pabbly Connect. A webhook URL will be provided, which acts as a bridge between the two applications. Open your Google Forms, navigate to the ‘Responses’ tab, and create a spreadsheet for the responses. Ensure that the last field in your form is toggled on for responses.

  • Click on ‘View in Sheets’ to access the response spreadsheet.
  • Go to ‘Extensions’, then ‘Add-ons’, and install the ‘Pabbly Connect Webhooks’.
  • Refresh your Google Sheets to see the Pabbly Connect options.

Once the add-on is installed, click on ‘Initial Setup’ in the Pabbly Connect menu within Google Sheets. Paste the webhook URL and set your trigger column, which will be the final data entry column for your form responses.


4. Generating Personalized Emails with Google Gemini

After setting up the trigger, the next step is to generate personalized emails using Google Gemini through Pabbly Connect. Click on ‘Add New Action Step’ and search for ‘Google Gemini’. Select ‘Generate Content’ as the action event.

To connect Google Gemini, you will need an API token. Click on the provided hyperlink to access the API page, create a new API key, and paste it into Pabbly Connect to establish the connection. Once connected, you can configure the content generation prompt based on the data received from Google Forms.

Enter a detailed prompt that includes the student’s details and available courses. Map the necessary fields such as student name, email, and interest area to ensure dynamic content generation. Click on ‘Save and Send Test Request’ to generate the email content.

Once the email content is generated, you can preview it to ensure it meets your expectations before moving on to the next step.


5. Sending the Generated Email via Gmail

The final step is to send the generated email using Gmail through Pabbly Connect. Click on ‘Add New Action Step’ and search for ‘Gmail’. Choose ‘Send Mail’ as the action event and connect your Gmail account.

After connecting, you will need to fill in the required fields such as sender name, recipient email, email subject, and the content generated from Google Gemini. Ensure that you map the recipient’s email address from the Google Forms response to personalize the email.

Enter a static sender name, like ‘Ed Tech’. Map the generated content from Google Gemini as the email body. Click ‘Save and Send Test Request’ to send the email.

Check your Gmail inbox to confirm that the email has been sent successfully, and you will see a personalized course recommendation email for the student.


Conclusion

In this tutorial, we demonstrated how to automate course recommendations using Pabbly Connect by integrating Google Forms, Google Gemini, and Gmail. By following these steps, you can create a seamless workflow that generates personalized emails based on student responses.

Ensure you check out Pabbly Connect to create business automation workflows and reduce manual tasks. Pabbly Connect currently offer integration with 2,000+ applications.

Utilizing Pabbly Connect allows for efficient automation, ensuring that students receive timely and relevant course recommendations. Start using this powerful tool today to enhance your edtech business operations.
Free AI Agent to Post Daily on Social Media

Learn how to automate daily social media posts using Pabbly Connect and Free AI Agent with this step-by-step tutorial. Develop expertise in application integration and learn how to design streamlined automation workflows using proven, simplified approaches.

Watch Step By Step Video Tutorial Below


1. Setting Up Pabbly Connect for Automation

To automate daily social media posts using Pabbly Connect, you first need to access the platform. If you are a new user, open your browser and navigate to pabbl.com/connect. In the top right corner, click on the ‘Sign Up for Free’ option to create your account. Pabbly Connect offers 100 free tasks per month, allowing you to explore its features without any cost.

Once you have signed up, log in to your account and access the workflow builder. This is where all the magic happens. The workflow builder allows you to set triggers and actions, which are essential for automating your social media posts. You can create a workflow that will automatically post on your social media accounts every day at a specific time.


2. Creating Your Daily Posting Workflow with Pabbly Connect

To create your workflow in Pabbly Connect, click on the ‘Add Trigger’ button. For the trigger application, select ‘Schedule by Pabbly’. This will allow you to set the frequency of your posts. For the event, choose ‘Schedule Workflow’ and click on ‘Connect’ to proceed.

  • Choose how often you want to run your workflow (e.g., every day).
  • Set the specific time for posting (e.g., 1:00 p.m.).
  • Click ‘Save’ to finalize the trigger settings.

After saving the trigger, your workflow is set to run at your specified time. Now, you will need to generate the content that will be posted. This includes both the caption and the image for your social media post.


3. Generating Post Content with OpenAI in Pabbly Connect

Next, you will generate the post caption using OpenAI integrated with Pabbly Connect. Click on ‘Add New Action Step’, search for OpenAI, and select it. For the event, choose ‘Chat GPT’ and click on ‘Connect’. If you have not created a connection before, you will need to enter your OpenAI API key to proceed.

Once connected, you can input your desired prompt to generate the caption. Make sure to use a prompt that is relevant to your social media theme. After entering the prompt, click ‘Save and Send Test Request’. This will generate the caption that will be used in your post.

  • Choose an appropriate prompt for generating captions.
  • Review the generated caption in the response message.
  • Ensure the caption aligns with your social media strategy.

After you have the caption, you can now move on to generating the image using the same OpenAI integration.


4. Generating Images for Your Social Media Posts

To generate an image for your post, you will again use OpenAI within Pabbly Connect. Click on ‘Add New Action Step’ and search for OpenAI. This time, select ‘Generate Image GPT’. Make sure to choose the correct event to ensure high-quality images.

After connecting to OpenAI, enter the prompt that will guide the image generation. It’s crucial to map the caption generated in the previous step to ensure the image aligns with the content. To map the caption, simply use the mapping function by inserting a slash and selecting the caption from the previous step.

Select the model for image generation (e.g., GPT Image 1). Set the output format to PNG for better quality. Click ‘Save and Send Test Request’ to generate the image.

Once the image is generated, you can review it and ensure it meets your expectations before posting it on social media.


5. Posting to Social Media Using Pabbly Connect

The final step in your automation process is to post the generated content on your social media account. Click on ‘Add New Action Step’ and search for Facebook. Select ‘Create Page Photo Post’ and click on ‘Connect’. If you have not connected your Facebook account before, you will need to log in and authorize the connection.

Once connected, select the Facebook page where you want to post the content. Map the image URL and caption generated in the previous steps to ensure that the correct content is posted. Click on ‘Save and Send Test Request’ to finalize the process.

Choose the Facebook page for posting. Map the image URL and caption accurately. Confirm the post by checking your Facebook page.

After completing these steps, you will see your new post appear on your Facebook page, demonstrating the power of automation through Pabbly Connect. You can now relax as your posts will be generated and published automatically every day at your chosen time.


Conclusion

In this tutorial, we explored how to automate daily social media posts using Pabbly Connect and Free AI Agent. By following the steps outlined, you can create an efficient workflow that generates and posts content automatically. Enjoy the benefits of automation and enhance your social media presence effortlessly!

Ensure you check out Pabbly Connect to create business automation workflows and reduce manual tasks. Pabbly Connect currently offer integration with 2,000+ applications.

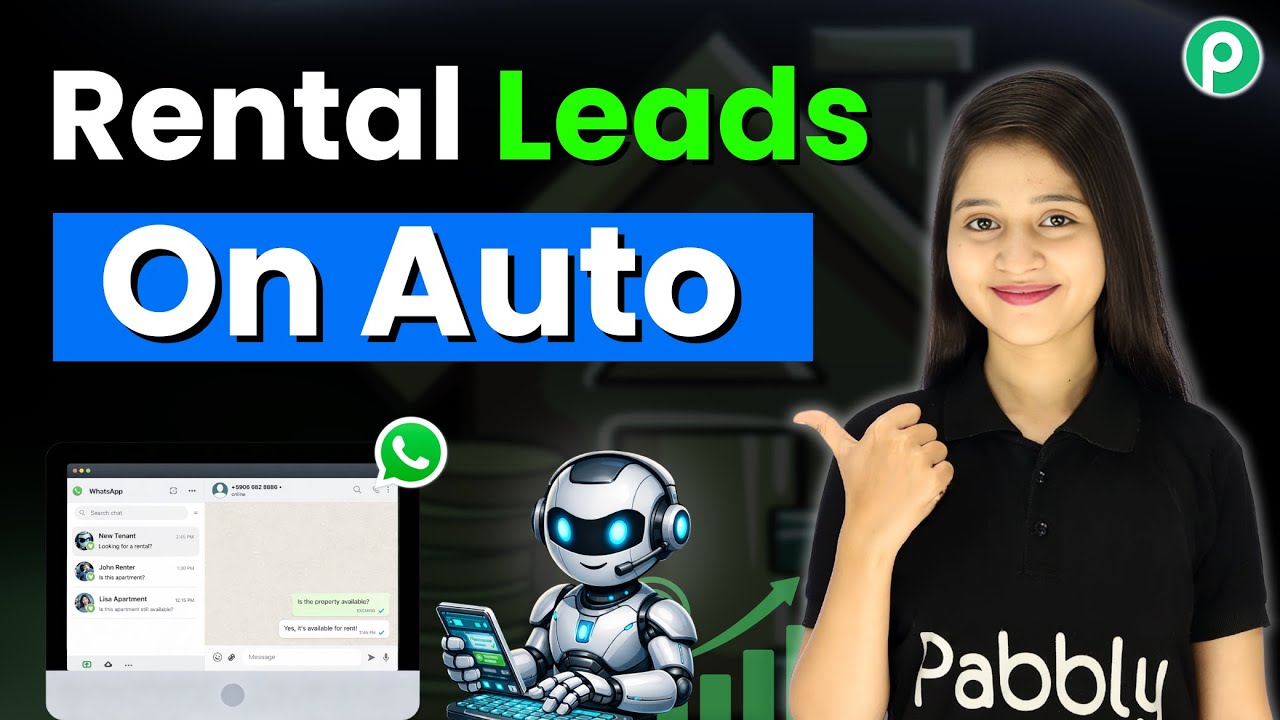
Get Rental Leads on WhatsApp Automatically | Pabbly Chatflow Tutorial

Learn how to automate WhatsApp rental leads with Pabbly Chatflow. This tutorial walks you through the setup process step-by-step. Explore how leading businesses automate customer interactions with carefully designed chat sequences that feel natural and helpful.

Watch Step By Step Video Tutorial Below


1. Accessing Pabbly Chatflow for WhatsApp Integration

To get started, access Pabbly Chatflow by visiting the official website. Once there, click on the ‘Sign Up Free’ button if you are a new user. This allows you to explore the platform with 100 free credits monthly. Existing users should click on ‘Sign In’ to access their accounts.

After logging in, navigate to the Pabbly Chatflow dashboard. Here, you can manage your WhatsApp numbers and explore various features. Make sure you have your WhatsApp number linked to your Pabbly Chatflow account for seamless integration.


2. Creating Your WhatsApp Chatbot Flow in Pabbly Chatflow

To create a WhatsApp chatbot, click on the ‘Add Flow’ button in your Pabbly Chatflow dashboard. Name your flow something descriptive, like ‘Get Rental Leads on WhatsApp Automatically.’ This helps you easily identify the flow later.

  • Select a trigger event, choosing ‘Keywords’ to initiate the flow.
  • Enter keywords such as ‘hi’ and ‘hello’ to trigger the bot.
  • Add a welcome message that greets users and offers options like ‘Find Rental’ or ‘Talk to Agent.’

Link your trigger to the welcome message to ensure users receive an immediate response. This setup is crucial for engaging potential leads effectively.


3. Configuring User Options for Rental Leads

Once users choose ‘Find Rental,’ your Pabbly Chatflow bot should prompt them to specify the type of property they are looking for. Create a list button that includes options such as ‘Apartment,’ ‘Flat,’ and ‘Independent House.’ This allows users to select their preferences easily.

  • Set up a custom field for property type to capture user selections.
  • Link this list to the previous step to ensure a smooth flow of conversation.
  • Confirm that all nodes are connected correctly to avoid any disconnections.

This structured approach ensures that the users have a seamless experience while engaging with the chatbot, making it more likely for them to provide their rental preferences.


4. Collecting User Information for Rental Inquiries

After users select the property type, your Pabbly Chatflow bot should ask for essential information like their full name, area, budget, and contact number. This step is crucial for generating leads effectively.

Use the ‘Ask Question’ feature to collect this information. For each question, set the appropriate contact custom fields to ensure the data is captured accurately. For example, ask for the user’s full name and set the format to text.

Ensure that you link each question to the corresponding custom field to keep the data organized. This method helps in personalizing the response later when the user receives a confirmation message about their inquiry.


5. Finalizing Your WhatsApp Chatbot Flow in Pabbly Chatflow

Once all user data is collected, it’s time to send a customized confirmation message. In Pabbly Chatflow, create a text button that thanks users for their inquiry and summarizes the information they provided.

In this message, include dynamic fields using the dollar symbol to display the user’s responses for a personalized touch. This could include their name, property type, budget, and contact number. Finally, ensure that the flow is saved and activated.

With your flow finalized, users will receive instant replies through WhatsApp, enhancing their experience and increasing the likelihood of securing rental leads automatically.


Conclusion

By utilizing Pabbly Chatflow, you can create a fully automated WhatsApp chatbot that effectively captures rental leads. This tutorial guides you through each step, ensuring a seamless integration process. Start automating your rental inquiries today!

Ensure you check out Pabbly Connect to create business automation workflows and reduce manual tasks. Pabbly Connect currently offer integration with 2,000+ applications.

How to Create an AI Bot for Blog Posting

Learn how to automate your blog posting using Pabbly Connect with Google AI and other applications in this detailed tutorial. Build sophisticated automated workflows in less time than you think. This guide translates complex integrations into straightforward steps for immediate implementation.

Watch Step By Step Video Tutorial Below


1. Getting Started with Pabbly Connect for Blog Posting

To create an AI bot for blog posting, the first step is to access Pabbly Connect. If you are a new user, simply open your browser and search for pabbl.com/connect. This will lead you to the Pabbly Connect landing page where you can sign up for free.

Once signed up, you will receive 100 free tasks each month. This means you can draft up to 100 blogs for free. After trying Pabbly Connect, you can choose to purchase a subscription plan if you find it useful.


2. Setting Up Your Workflow in Pabbly Connect

In the workflow builder of Pabbly Connect, you will set up triggers and actions. Triggers initiate the workflow, while actions are the tasks performed. To start, click on the ‘Add Trigger’ button.

  • Select ‘Scheduled by Pabbly’ as your trigger application.
  • Choose ‘Schedule Workflow’ as the event.
  • Set the frequency to daily and choose your preferred time.

Once set, click ‘Save’ to schedule the workflow that will run daily at your chosen time, automating the blog post generation process.


3. Generating Blog Title with Google AI through Pabbly Connect

Next, you will generate the blog title using Google AI. In Pabbly Connect, add a new action step to generate the content. Search for ‘Gemini’ and select it.

For the event, choose ‘Generate Content’ and click ‘Connect’. If you haven’t created a connection yet, you will need to provide an API key from your Google AI studio. To obtain this key, navigate to your Google AI studio, click on ‘Get API Key’, create a new key, and copy it into Pabbly Connect.


4. Creating Blog Content Dynamically Using Pabbly Connect

After successfully generating the blog title, it’s time to create the blog content. You will clone the previous step to reuse the connection with Gemini. Rename the cloned step to reflect that it will generate blog content.

In this step, you will modify the prompt to include the dynamically generated blog title. Use the mapping feature in Pabbly Connect to insert the blog title from the previous step, ensuring that the content generated is always relevant and current.

  • Open the cloned step and change the prompt to include the blog title.
  • Map the title dynamically to ensure it updates with each workflow run.
  • Click ‘Save and Send Test Request’ to generate the blog content.

Upon completion, you will have the blog content ready for posting on Google Blogger.


5. Posting the Blog on Google Blogger Using Pabbly Connect

Finally, to post the generated blog content, add another action step in Pabbly Connect and search for ‘Google Blogger’. Select it and choose ‘Create a Post’ as the event.

Connect your Google account by signing in and granting necessary permissions. Select the blog ID where you want to post the content. Map the blog title and content from the previous steps to this action.

Choose the status of the post (draft or live). Click ‘Save and Send Test Request’ to draft the blog post.

Once you refresh your Google Blogger dashboard, you will see your new draft ready for review and publication.


Conclusion

In this tutorial, we explored how to automate blog posting using Pabbly Connect with Google AI. By setting up a workflow, you can generate blog titles and content effortlessly, saving time and enhancing productivity.

Ensure you check out Pabbly Connect to create business automation workflows and reduce manual tasks. Pabbly Connect currently offer integration with 2,000+ applications.

WhatsApp Chatbot for CA Firms to Collect Client Documents Automatically

Learn how to set up a WhatsApp Chatbot for CA firms using Pabbly Chatflow to automate document collection seamlessly. This detailed guide shows you how to build powerful chat automation that engages visitors and converts prospects—without any coding required.

Watch Step By Step Video Tutorial Below


1. Accessing Pabbly Chatflow for WhatsApp Chatbot Setup

To create a WhatsApp chatbot for CA firms, start by accessing Pabbly Chatflow. Open a new tab and type the URL Pabbly.com/chatflow. This will take you to the Pabbly Chatflow homepage.

If you are a new user, click on the ‘Sign Up Free’ option to create an account. Existing users can simply sign in. Once logged in, you will see the dashboard where you can access various Pabbly products.


2. Creating a Chatbot Flow in Pabbly Chatflow

After accessing Pabbly Chatflow, click on the ‘Flows’ option in the sidebar to start creating your chatbot flow. This feature allows you to design how your WhatsApp chatbot will interact with users. Click on the ‘Add Flow’ button to initiate a new flow.

  • Provide a name for your flow, such as ‘WhatsApp Chatbot for CA Firms to Collect Client Documents’.
  • Set a trigger for the chatbot, which can be a keyword or a message from the user.
  • Choose a keyword that will initiate the chatbot, like ‘hello’.

With these steps, you have set up the basic structure of your chatbot flow in Pabbly Chatflow.


3. Designing User Interaction with Pabbly Chatflow

Next, you will design how the chatbot interacts with users. Drag and drop message blocks from the left sidebar to create responses. Start by sending a welcome message to users when they initiate contact.

In this step, you can also add buttons for users to select services. For example, create buttons for ‘Income Tax Return’ and ‘GST Services’. When a user selects an option, the chatbot will respond accordingly and guide them through the document submission process.

  • Add a button for each service offered.
  • Set up a list of document types needed for each service.
  • Ensure each button leads to the correct document request.

This setup in Pabbly Chatflow ensures that users have a clear path for submitting documents, enhancing their experience.


4. Collecting Client Documents Automatically

Once the user selects a service, the chatbot will prompt them to upload necessary documents. For instance, if the user selects the ‘Income Tax Return’ service, the chatbot should ask for documents like PAN card, Aadhaar card, and income proof.

Utilize the ‘Ask Media’ block in Pabbly Chatflow to request these documents. Specify the type of media (image or document) and set validation messages for incorrect submissions. This allows for seamless document collection without manual intervention.

Request the PAN card first, followed by Aadhaar and income proof. Set validation messages to guide users on acceptable formats. Confirm receipt of documents through a thank you message.

This automation via Pabbly Chatflow significantly reduces the time CA firms spend on document collection.


5. Finalizing Your WhatsApp Chatbot in Pabbly Chatflow

After setting up the document collection process, review and save your chatbot flow in Pabbly Chatflow. Ensure all paths and responses are functioning correctly. You can also share your flow with team members to enhance collaboration.

To save the flow, select the ‘Save’ button. Once saved, you can access the flow anytime to make adjustments or improvements based on user feedback. This flexibility is crucial for ongoing optimization of your document collection process.

Finally, encourage your team to utilize this automated system to streamline operations and improve client interactions. By leveraging Pabbly Chatflow, CA firms can focus more on client service rather than administrative tasks.


Conclusion

This tutorial outlined how to create a WhatsApp chatbot using Pabbly Chatflow for CA firms to automate document collection. By following these steps, firms can enhance efficiency and improve client experiences in document submission.

Ensure you check out Pabbly Connect to create business automation workflows and reduce manual tasks. Pabbly Connect currently offer integration with 2,000+ applications.

Start utilizing Pabbly Chatflow today to automate your client document collection process and focus on growing your business.

How to Generate Social Media Captions Using AI (Step-by-Step)

Discover how to automate social media caption generation using Pabbly Connect, Google Sheets, and AI tools in this detailed step-by-step tutorial. Discover how to seamlessly connect your essential tools through accessible instructions that make powerful automation available to professionals at every skill level.

Watch Step By Step Video Tutorial Below


1. Accessing Pabbly Connect for Automation

To start generating social media captions using AI, first, access Pabbly Connect by visiting pav.com/connect. This platform allows you to automate workflows seamlessly.

Once on the homepage, you will see options to sign in or sign up. If you are a new user, click on ‘sign up free’ to get 100 free tasks each month. Existing users can simply sign in to their accounts.


2. Setting Up Your Workflow in Pabbly Connect

After signing in, navigate to the Pabbly apps window and select Pabbly Connect. Click on the ‘Create’ button to start a new workflow. Here, you can choose between the new beta version and the classic version; select the beta version for a modern experience.

  • Click on ‘Select’ to enter the workflow builder.
  • Name your workflow as ‘Generate Social Media Captions Using AI.’
  • Choose a folder for organization, such as ‘Automations.’

After naming your workflow, click on the ‘Create’ button to finalize the setup. You now have a blank canvas to build your automation.


3. Setting Up the Trigger with Google Sheets

In this step, we will set up the trigger that initiates the automation process. Select Google Sheets as the trigger application and choose ‘New or Updated Spreadsheet Row’ as the trigger event.

Click on ‘Connect’ to receive a webhook URL. This URL will link your Google Sheets to Pabbly Connect. Copy the URL and head over to your Google Sheets where you have your data.

  • Install the Pabbly Connect Webhooks add-on from the Google Workspace Marketplace.
  • Set up the webhook URL and indicate the trigger column in Google Sheets.
  • Test the connection by sending test data to ensure everything is working correctly.

Once the setup is complete, you will see that the data from Google Sheets is successfully captured in Pabbly Connect.


4. Generating Captions Using AI

Now that we have set up the trigger, it’s time to generate the social media captions. Choose your AI tool (such as Gemini) as the action application and select ‘Generate Content’ as the action event.

Connect your AI tool to Pabbly Connect by entering the API key. This key can be obtained from your AI tool’s settings. After connecting, you will need to map the input fields to pull in data from Google Sheets.

Map the post idea, platform, tone, length, and CTA from your Google Sheets data. Select the AI model and method for generating the content. Send a test request to ensure the AI generates the caption correctly.

Once the test is successful, you will see the generated caption ready for use in your Google Sheets.


5. Updating Google Sheets with Generated Captions

The final step is to update your Google Sheets with the generated captions. Select Google Sheets as the action application and choose ‘Update a Cell Value’ as the action event.

Connect to Google Sheets again through Pabbly Connect and specify the spreadsheet and sheet name. You will also need to define the range where the caption should be updated.

Map the column for the caption generated and the row index for dynamic updates. Send a test request to confirm the caption updates successfully.

After completing this step, you will see the new caption reflected in your Google Sheets under the designated column.


Conclusion

In this tutorial, we explored how to automate the generation of social media captions using Pabbly Connect, Google Sheets, and an AI tool. By setting up triggers and actions, you can streamline your social media management effectively.

Ensure you check out Pabbly Connect to create business automation workflows and reduce manual tasks. Pabbly Connect currently offer integration with 2,000+ applications.

This process not only saves time but also ensures that your captions are generated quickly and accurately, allowing you to focus on other important aspects of your business.

This WhatsApp Automation Saves Every Lead Automatically (INSANE!)

Learn how to automate WhatsApp messages and store leads in Google Sheets using Pabbly Connect with this step-by-step tutorial. Transform complex automation concepts into accessible, actionable steps that eliminate unnecessary manual work while maximizing existing application capabilities.

Watch Step By Step Video Tutorial Below


1. Accessing Pabbly Connect for Automation

To start automating your WhatsApp messages and storing leads in Google Sheets, the first step is to access Pabbly Connect. Open a new tab and visit Pabbly.com/connect. Here, you can either sign up for a free account or log in if you are an existing user.

Once logged in, navigate to the Pabbly Connect dashboard. Click on the ‘Access Now’ button to enter the automation workspace. You’ll find options to create a new workflow. Select the ‘Create Workflow’ button to begin setting up your automation.


2. Setting Up Trigger in Pabbly Connect

The next step is to set up the trigger for your workflow. In this case, you want to select Facebook Lead Ads as your trigger application. Click on the dropdown menu and choose ‘Facebook Lead Ads’. using Pabbly Connect

  • Select ‘New Lead Instant’ as the event.
  • Click on ‘Connect’ to establish a connection.
  • Choose ‘Add New Connection’ to create a new link with your Facebook account.

After connecting your Facebook account, select the page and form associated with your leads. Once this is established, you can test the connection to ensure it’s working correctly.


3. Sending WhatsApp Messages Using Pabbly Connect

Now that your trigger is set, it’s time to configure the action step to send WhatsApp messages. Select Pabbly Chatflow as the action application. Choose the event as ‘Send Text Message’.

  • Click ‘Connect’ and choose ‘Add New Connection’.
  • Enter the API token from your Pabbly Chatflow account.
  • Map the recipient’s WhatsApp number from the previous step.

After mapping, insert the message content you want to send. Utilize dynamic fields from the Facebook lead data to personalize your message. This setup ensures that each lead receives a tailored response.


4. Storing Leads in Google Sheets Using Pabbly Connect

To store the leads captured from Facebook in Google Sheets, you will again use Pabbly Connect. Select Google Sheets as your action application and choose ‘Add New Row’ as the event.

Click ‘Connect’ and select ‘Add New Connection’. Authorize your Google account to allow access. Map the fields from the Facebook lead data to the corresponding columns in your Google Sheet.

Once all fields are mapped correctly, click ‘Save & Send Test Request’. This will add a new row in your Google Sheet with the lead details, confirming that the integration is successful.


5. Finalizing Your Automation in Pabbly Connect

After successfully setting up your workflow, make sure to enable the toggle to activate your automation. This is crucial; without enabling it, your workflow will not function.

Additionally, review your workflow to ensure all connections are properly configured. You can also test the entire process by submitting a new lead from Facebook to see if the WhatsApp message is sent and the details are stored in Google Sheets.

With Pabbly Connect, you can automate not just WhatsApp messages but a wide range of applications, enhancing your business efficiency. Feel free to explore more integrations to maximize your workflow automation.


Conclusion

In this tutorial, we demonstrated how to automate WhatsApp messages and store leads in Google Sheets using Pabbly Connect. By following these steps, you can streamline your lead management process effectively.

Ensure you check out Pabbly Connect to create business automation workflows and reduce manual tasks. Pabbly Connect currently offer integration with 2,000+ applications.

Hands-Free Follow-Ups: Instagram to WhatsApp Template Automation

Learn how to automate WhatsApp messages from Instagram leads using Pabbly Connect in this step-by-step tutorial. Enhance your follow-up process effortlessly! Discover how to seamlessly connect your essential tools through accessible instructions that make powerful automation available to professionals at every skill level.

Watch Step By Step Video Tutorial Below


1. Accessing Pabbly Connect for Automation

To start automating WhatsApp messages from Instagram leads, first, access Pabbly Connect. Open a new tab and type in the URL Pabbly.com/connect. Here, you will find options to sign in or sign up for free. Signing up gives you access to 100 free tasks every month, perfect for testing your automations.

Once logged in, you will land on the Pabbly apps page. Select Pabbly Connect to begin creating your automation workflow. You can organize your workflows into folders for better management. This initial setup is crucial for streamlining your automation process.


2. Creating Your Workflow in Pabbly Connect

After accessing Pabbly Connect, click on the ‘Create Workflow’ button. You have two options: create from scratch or use AI. Choose to create from scratch for full control over your automation. Then, select the beta workflow builder for a modern experience.

  • Select a name for your workflow, such as ‘Send WhatsApp Template Message to Instagram Leads’.
  • Choose a folder for better organization, like ‘Automation’.
  • Click the ‘Create’ button to finalize your workflow setup.

This step sets the foundation for your automation, allowing you to initiate actions based on Instagram leads seamlessly.


3. Setting Up the Trigger in Pabbly Connect

In your newly created workflow, the next step is to set up the trigger. This trigger will initiate the workflow when a new lead is captured via Instagram lead ads. Select the Instagram Lead Ads as your trigger app and choose the event ‘New Lead Instant’. using Pabbly Connect

Click the ‘Connect’ button to establish a connection. You will need to log into your Facebook account, which is linked to your Instagram account. Once connected, select the appropriate Facebook page and form that corresponds to your Instagram lead ads. This ensures that the right data flows into your workflow.


4. Sending WhatsApp Template Message via Pabbly Connect

Once the trigger is set, the next step involves sending a WhatsApp template message using the WhatsApp Cloud API. Add a new action step in your workflow and search for the WhatsApp Cloud API app. Select the action event ‘Send Template Message’. using Pabbly Connect

  • Enter your WhatsApp API token, phone number ID, and business account ID to establish the connection.
  • Map the receiver’s phone number dynamically from the previous step to personalize the message.
  • Select the template ID for your message, ensuring it matches the one created in your WhatsApp manager.

This process allows your leads to receive a personalized WhatsApp message immediately after they submit their information through Instagram, enhancing customer engagement.


5. Testing and Activating Your Automation

After setting up the WhatsApp message, it’s crucial to test the automation. Submit a test lead through your Instagram form and monitor the response in Pabbly Connect. Ensure that the WhatsApp message is received correctly, containing all the mapped details.

Once confirmed, activate your workflow in Pabbly Connect. This will enable the automation to run in real-time, sending WhatsApp messages to every new lead captured from Instagram. This hands-free follow-up system will save you time and improve customer communication.


Conclusion

In this tutorial, we demonstrated how to automate WhatsApp messages from Instagram leads using Pabbly Connect. By following these steps, you can streamline your follow-up process and enhance customer interaction effortlessly. Start utilizing Pabbly Connect today to elevate your business operations!

Ensure you check out Pabbly Connect to create business automation workflows and reduce manual tasks. Pabbly Connect currently offer integration with 2,000+ applications.

I Stopped Running Ads… This Email System Worked Better

Learn how to integrate YouTube, Gmail, and more using Pabbly Connect for successful email marketing campaigns without running ads. Transform complex automation concepts into accessible, actionable steps that eliminate unnecessary manual work while maximizing existing application capabilities.

Watch Step By Step Video Tutorial Below


1. Accessing Pabbly Connect for Email Marketing

To start using Pabbly Connect for your email marketing, first, visit the Pabbly website. You can easily access the Pabbly Email Marketing tool through Pabbly Connect. Simply go to Pabbly.com/email-marketing and log in or sign up for a free account.

Once logged in, you will see various Pabbly applications. Click on the Pabbly Email Marketing option and select the new beta version to access the latest features. This version includes enhanced functionalities that are beneficial for creating email campaigns.


2. Creating Email Campaigns with Pabbly Connect

After accessing Pabbly Connect, you can create an email campaign by navigating to the campaign section. Click on the ‘Create Email’ button to start setting up your campaign. Select the campaign type as regular and enter your campaign name, like ‘Flash Sale Email.’ This is where you’ll define how your email will look and what it will communicate.

  • Choose a compelling subject line, e.g., ‘Flash Sale Live: Up to 75% Off!’
  • Add a preheader for additional context, such as ‘Limited time flash sale on bestselling natural skincare.’
  • Preview the email details on the left side of the screen as you enter them.

Once you have set these details, click on the continue button to move to the next step of selecting an email template. You can choose to create a new template using the drag-and-drop builder available in Pabbly Connect.


3. Designing Your Email in Pabbly Connect

When designing your email, you can utilize the drag-and-drop builder in Pabbly Connect. Start by adding a header, title, and image to your email layout. You can easily upload images from your computer to personalize your email further. This visual appeal is crucial for attracting your audience.

After setting up the basic structure, customize the content by adding text blocks and buttons. For instance, you can create a call-to-action button labeled ‘Buy Now’ that links to your website. Ensure that all images and text align with your brand and campaign message.

  • Use engaging text to describe your offer, like ‘Enjoy 50 to 75% off on selected bestselling skincare!’
  • Add social media links to connect with your audience on different platforms.

After finalizing your design, make sure to review the email layout and save your template for future use.


4. Sending Your Campaign Using Pabbly Connect

Once your email design is complete, it’s time to send your campaign. Go back to the campaign settings in Pabbly Connect, and finalize the details, including the recipient list. You can select an existing subscriber list or add individual email addresses to whom you want to send the email.

To send the email, you have the option to either send it immediately or schedule it for a later time. If you choose to schedule, select the date and time for sending the email. This flexibility allows you to optimize your campaign timing for maximum engagement.

Confirm all details before hitting the send button. You can preview the email to ensure it looks right across devices.

Once sent, you can track the status of your campaign within Pabbly Connect and view reports to analyze the performance of your email marketing efforts.


5. Analyzing Results of Your Email Campaign

After your campaign is sent, Pabbly Connect allows you to analyze the results. You can view detailed reports on open rates, click-through rates, and overall engagement. This data is essential for understanding how your audience responds to your campaigns.

Utilizing the insights gained from these reports, you can refine future email marketing strategies. This helps in improving your campaigns and ensuring better performance over time. The ability to track results is one of the significant advantages of using Pabbly Connect.

Review metrics like delivery rates and bounces to optimize future campaigns. Make adjustments based on subscriber feedback and engagement levels.

With this data, you can continuously improve your email marketing efforts without the need for expensive ads.


Conclusion

In conclusion, using Pabbly Connect for email marketing allows you to create effective campaigns without relying on ads. By following the steps outlined, you can leverage Pabbly’s features to engage your audience and drive sales effectively.

Ensure you check out Pabbly Connect to create business automation workflows and reduce manual tasks. Pabbly Connect currently offer integration with 2,000+ applications.

Automatically Save Instamojo Order Details

Learn how to automatically save Instamojo order details to Google Sheets using Pabbly Connect. Step-by-step tutorial with detailed instructions. This comprehensive guide reveals exactly how to connect your applications and automate repetitive tasks — accessible for professionals of all technical backgrounds.

Watch Step By Step Video Tutorial Below


1. Accessing Pabbly Connect for Automation

To automatically save Instamojo order details, start by accessing Pabbly Connect. Open a browser and navigate to the Pabbly Connect landing page by searching for ‘Pabbly.com/connect’. If you are new, click on the ‘Sign up for free’ option in the top right corner.

Once signed up, you can utilize 100 free tasks per month to explore Pabbly Connect. This allows you to automatically add up to 100 Instamojo order details into Google Sheets, streamlining your order management process.


2. Setting Up the Trigger with Instamojo

The first step in the automation process is to set up the trigger in Pabbly Connect. Click on the ‘Add Trigger’ button and search for ‘Instamojo’. Select ‘Instamojo V2’ and choose ‘New Sale’ as the event. After that, click on the ‘Connect’ button to generate a webhook URL.

  • Search for Instamojo and select Instamojo V2.
  • Choose ‘New Sale’ as the event.
  • Click on ‘Connect’ to receive your webhook URL.

Copy this webhook URL and go to your Instamojo dashboard. Edit the page for which you want to set up the automation, navigate to page settings, and find the webhook section. Toggle the switch to enable webhooks and paste the copied URL, ensuring that it is set to trigger on successful payments.


3. Testing the Webhook Response

After setting up the webhook in Instamojo, you need to test it to ensure that Pabbly Connect receives the data correctly. To do this, share the page URL and make a test purchase to trigger the webhook. Fill out the necessary details like name, email, and payment information to complete the transaction.

Once the payment is successful, return to Pabbly Connect and check if it captures the webhook response. This response should include all relevant order details, confirming that your setup is working correctly.


4. Adding Order Details to Google Sheets

Now that the webhook is successfully capturing order details, the next step is to add these details to Google Sheets using Pabbly Connect. Click on ‘Add New Action Step’ and select ‘Google Sheets’ as the application. Choose ‘Add New Row’ as the event and click on ‘Connect’ to establish the connection.

  • Select ‘Google Sheets’ and choose ‘Add New Row’ as the action.
  • Connect your Google account to allow Pabbly Connect access.
  • Choose the spreadsheet and sheet where you want to save the order details.

Map the data fields from the Instamojo order to the corresponding columns in your Google Sheet. This dynamic mapping will ensure that every new order automatically populates the sheet with the correct information.


5. Finalizing the Automation Process

After mapping all the required fields, click on ‘Save’ and send a test request to confirm that the order details are correctly added to your Google Sheets. Once confirmed, your automation is complete. From now on, every successful order through Instamojo will automatically save the details in your Google Sheets without any manual intervention.

This powerful automation using Pabbly Connect not only saves time but also minimizes errors associated with manual data entry. Now you can focus on other important aspects of your business while Pabbly Connect handles the order details for you.


Conclusion

In summary, using Pabbly Connect allows you to seamlessly integrate Instamojo with Google Sheets, automating the process of saving order details. This tutorial provides a step-by-step guide to set up the automation effectively, ensuring efficiency and accuracy in your order management.

Ensure you check out Pabbly Connect to create business automation workflows and reduce manual tasks. Pabbly Connect currently offer integration with 2,000+ applications.