Automate Client Follow-Up for Marketing Agencies via WhatsApp with Pabbly Chatflow

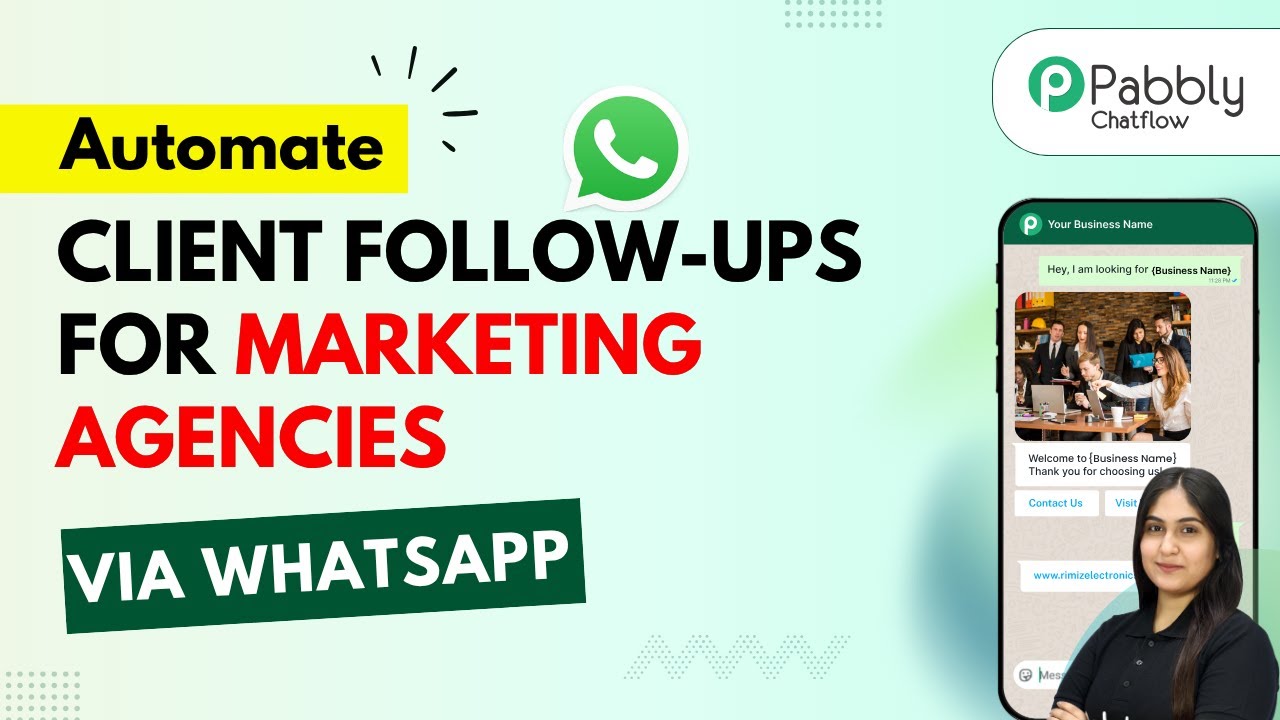
Learn how to automate client follow-up for marketing agencies using Pabbly Chatflow and WhatsApp. Step-by-step guide with detailed instructions. Explore how leading businesses automate customer interactions with carefully designed chat sequences that feel natural and helpful.

Watch Step By Step Video Tutorial Below


1. Accessing Pabbly Chatflow for WhatsApp Integration

To automate client follow-ups using WhatsApp, first access Pabbly Chatflow. Visit the official Pabbly website and navigate to the Chatflow section. Here, you can create an account or log in if you already have one.

Once logged in, you will see the dashboard of Pabbly Chatflow. This is where you can manage all your automation workflows. Begin by clicking on the ‘Create New Flow’ button to start setting up your WhatsApp chatbot.


2. Creating a WhatsApp Chatbot with Pabbly Chatflow

Now, to create a WhatsApp chatbot, click on the ‘Add Flow’ button in Pabbly Chatflow. Name your flow something relevant, like ‘Automate Client Follow-Up for Marketing Agencies via WhatsApp’. This helps you identify the flow easily in future.

  • Select the trigger event for your flow.
  • Choose ‘Keyword or Regex Match’ as the trigger type.
  • Define the keywords that will trigger this flow, such as ‘marketing proposals’.

After setting the trigger, you can add actions that the chatbot will perform when the trigger is activated. This is where you customize your chatbot’s responses and actions based on user input.


3. Setting Up Responses in Pabbly Chatflow

In this step, you will configure how your WhatsApp chatbot responds to users. Using Pabbly Chatflow, you can create a list of services that your marketing agency offers. This will be shown to users when they trigger the flow.

  • Add a list message node to your flow.
  • Enter a header, body, and footer for the list message.
  • Include services like SEO, PPC campaigns, and social media management.

Once you have set up the list message, ensure that the responses are clear and engaging. This helps in retaining user interest and guiding them through the follow-up process effectively.


4. Testing Your WhatsApp Chatbot with Pabbly Chatflow

After completing the setup of your WhatsApp chatbot in Pabbly Chatflow, it is essential to test its functionality. Send a message to your WhatsApp number that matches the keywords you set up as triggers.

Observe how the chatbot responds to your input. This is crucial to ensure that all responses are correctly set up and that the flow works as intended. Make adjustments as necessary based on your testing results.


5. Conclusion: Benefits of Using Pabbly Chatflow for Automation

In conclusion, automating client follow-ups for marketing agencies via WhatsApp using Pabbly Chatflow is an effective way to enhance communication. This platform allows for seamless integration of WhatsApp chatbots that can handle client inquiries efficiently.

Ensure you check out Pabbly Connect to create business automation workflows and reduce manual tasks. Pabbly Connect currently offer integration with 2,000+ applications.

Check out Pabbly Connect – Automate your business workflows effortlessly! Sign Up Free – Start your journey with ease! 10,000+ Video Tutorials – Learn step by step! Join Pabbly Facebook Group – Connect with 21,000+ like minded people!

By following the steps outlined in this tutorial, you can set up a responsive chatbot that improves client engagement and saves time for your agency. Start using Pabbly Chatflow today to automate your client follow-ups and streamline your marketing processes.


Automate Client Inquiries for Travel Agencies via WhatsApp with Pabbly Chatflow

Learn how to automate client inquiries for travel agencies using Pabbly Chatflow. This tutorial covers creating a WhatsApp chatbot step by step. Explore how leading businesses automate customer interactions with carefully designed chat sequences that feel natural and helpful.

Watch Step By Step Video Tutorial Below


1. Accessing Pabbly Chatflow for Your Travel Agency

To automate client inquiries for travel agencies via WhatsApp, you need to access Pabbly Chatflow. Start by visiting the official website at www.Pabbly.com/chatflow. Once there, you can either sign in or create a new account if you are a first-time user.

After signing in, you will be directed to the Pabbly Chatflow dashboard. This dashboard provides access to all features necessary for creating your WhatsApp chatbot. Ensure you have your WhatsApp number ready, as you will need to connect it to Pabbly Chatflow for the automation to function effectively.


2. Creating Your WhatsApp Chatbot in Pabbly Chatflow

Once you are logged into Pabbly Chatflow, navigate to the ‘Flows’ section. Here, you can create a new flow by clicking on the ‘Add Flow’ button. This is where you will design your WhatsApp chatbot specifically for handling inquiries from travel agency clients.

  • Click on ‘Add Flow’ to start a new project.
  • Name your flow something relevant, like ‘Automate Client Inquiries for Travel Agencies via WhatsApp’.
  • Select a trigger event that will initiate the chatbot conversation.

For this automation, you can use the ‘User Starts Conversation’ trigger or a regex keyword match. This setup allows the chatbot to automatically respond when a user sends a specific message, streamlining the inquiry process for your travel agency.


3. Designing Responses for Your Chatbot Using Pabbly Chatflow

After setting up the trigger, it’s time to design the responses of your WhatsApp chatbot using Pabbly Chatflow. You can create various messages that the bot will send based on the user’s inquiry. For instance, if a user asks about travel packages, the bot can respond with options.

To add a response, select the ‘Text Plus’ option where you can customize your message. You might write something like, ‘Welcome to Globe Trotters! Ready for your next adventure? Please choose one of our exciting travel packages: Europe Tour, Asia Package, or USA Road Trip.’ This interaction keeps clients engaged and provides them with clear options.


4. Collecting Client Information via Pabbly Chatflow

To enhance your travel agency’s chatbot, it is crucial to collect client information effectively. With Pabbly Chatflow, you can create questions that the chatbot will ask. For example, after a client selects a travel package, the bot can ask for their full name and travel dates.

  • Use the ‘Question’ feature to create fields for full name and travel date.
  • Ensure you set up contact custom fields to store the information provided by clients.
  • Use the collected data to personalize follow-up messages, enhancing client experience.

This method not only automates responses but also personalizes interactions, making clients feel valued and improving their overall experience with your travel agency.


5. Finalizing the Chatbot Setup in Pabbly Chatflow

Once all responses and questions are set up, it’s essential to finalize your WhatsApp chatbot in Pabbly Chatflow. Ensure that your flow is activated so that it can respond to inquiries as intended. Save your flow to prevent losing any configurations.

After saving, test your chatbot by sending a message from your WhatsApp account to see if the automated responses work correctly. This testing phase is crucial to ensure that all functionalities are working as expected before fully deploying the chatbot for client inquiries.


Conclusion

In this tutorial, we explored how to automate client inquiries for travel agencies via WhatsApp using Pabbly Chatflow. By setting up a WhatsApp chatbot, agencies can streamline their communication, enhance client interactions, and save valuable time. Implementing this system can significantly improve operational efficiency and client satisfaction.

Ensure you check out Pabbly Connect to create business automation workflows and reduce manual tasks. Pabbly Connect currently offer integration with 2,000+ applications.

How to Send Automated Messages When a Lead is Received via 99acres using Pabbly Connect

Learn how to automate WhatsApp messages for leads from 99acres using Pabbly Connect. Step-by-step tutorial for seamless integration. Revolutionize your productivity approach with just a few strategic clicks. Uncover professional methods for connecting applications and creating workflows that reclaim hours of your week.

Watch Step By Step Video Tutorial Below


1. Accessing Pabbly Connect for Integration

To send automated WhatsApp messages when a lead is received via 99acres, start by accessing Pabbly Connect. Open a new tab in your browser and enter ‘Pabbly.com/connect’ to reach the landing page.

Once on the landing page, you can either sign up for free or sign in if you are an existing user. Click on the ‘Sign In’ button to access your account. After logging in, navigate to the Pabbly Connect dashboard to begin creating your workflow.


2. Creating a Workflow in Pabbly Connect

In the Pabbly Connect dashboard, click on the ‘Create Workflow’ button. You will be prompted to choose between the new or classic workflow builder. For this tutorial, select the new workflow builder for a modern interface. using Pabbly Connect

  • Enter a name for your workflow, such as ‘Send Automated WhatsApp Message When a Lead is Received via 99acres’.
  • Select a folder to save your workflow or create a new folder if needed.
  • Click ‘Create’ to open the workflow window where you will set up triggers and actions.

After creating the workflow, you will see the trigger and action setup area. This is where you configure how Pabbly Connect will respond when a new lead is received from 99acres.


3. Setting Up the Trigger for 99acres in Pabbly Connect

To set up the trigger in Pabbly Connect, click on the ‘Add Trigger’ button. Search for and select ’99acres’ as the trigger application. Choose ‘New Leads’ as the trigger event and click ‘Connect’. using Pabbly Connect

Pabbly Connect will provide you with a webhook URL. This URL needs to be configured in your 99acres account to receive lead details. Since 99acres does not allow users to add webhooks directly, contact your account manager to add this URL to your account.


4. Configuring the Action Step to Send WhatsApp Messages

Once the trigger is set up, click on ‘Add New Action Step’. Search for ‘WhatsApp Cloud API’ as the action application. Select ‘Send Template Message’ as the action event and click ‘Connect’. using Pabbly Connect

  • If you have already set up a connection, select it. Otherwise, click ‘Add a New Connection’.
  • You will need to enter your WhatsApp Business Account ID, Phone Number ID, and Access Token.
  • Follow the help text provided to find these details in your WhatsApp Cloud API setup.

After connecting, proceed to map the receiver’s phone number dynamically from the lead details received. This ensures that each message is personalized for the new lead.


5. Testing Your Workflow in Pabbly Connect

To test your workflow, click on ‘Save and Send Test Request’. Ensure you enter the actual phone number for testing. Pabbly Connect will send an automated WhatsApp message to the specified number. using Pabbly Connect

Once the test request is sent, check your WhatsApp to see if the message has been received. The message should include details such as the lead’s name and area of interest, demonstrating the effectiveness of the automation.

Now, every time a new lead is received from 99acres, Pabbly Connect will automatically send a personalized WhatsApp message, streamlining your communication process.


Conclusion

In this tutorial, we explored how to send automated WhatsApp messages when a lead is received via 99acres using Pabbly Connect. By following the exact steps outlined, you can enhance your lead nurturing process efficiently.

Ensure you check out Pabbly Connect to create business automation workflows and reduce manual tasks. Pabbly Connect currently offer integration with 2,000+ applications.

How to Create an AI Assistant for Real Estate Lead Qualification Using Pabbly Chatflow

Learn how to set up an AI assistant for real estate lead qualification using Pabbly Chatflow, integrating YouTube, Urban Nest Realy, and more. Create intelligent chat experiences that delight users while collecting valuable information and moving prospects through your sales process.

Watch Step By Step Video Tutorial Below


1. Introduction to Pabbly Chatflow for Real Estate AI Assistant

Creating an AI assistant for real estate lead qualification can significantly streamline your business communications. Pabbly Chatflow is the ideal platform for this purpose, enabling seamless integration with WhatsApp and other applications.

In this tutorial, we will guide you through the process of setting up your AI assistant using Pabbly Chatflow. This assistant will help manage inquiries from potential leads effectively and efficiently.


2. Accessing Pabbly Chatflow and Setting Up Your Account

To start, navigate to the Pabbly Chatflow website at www.Pabbly.com/chatflow. If you’re a new user, you can sign up for a free account, which provides you with 100 free credits monthly.

  • Sign up for a free account if you’re new to Pabbly.
  • If you already have an account, simply log in to access your dashboard.

Once logged in, find the option to access Pabbly Chatflow from the dashboard. This will take you to the main interface where you can begin creating your AI assistant.


3. Creating Your AI Assistant in Pabbly Chatflow

After accessing Pabbly Chatflow, click on the ‘AI Assistant’ panel. Here, you can add a new AI assistant by selecting the ‘Add AI Assistant’ button.

When prompted, name your assistant (for example, ‘Urban Nest Realy Assistant’) and select the type of AI agent. This will enable your assistant to respond to inquiries automatically.

  • Set the AI type to ‘AI Agent’ to handle inquiries.
  • Configure the AI’s temperature for creative responses (e.g., 0.7 for more creativity).

Finally, select OpenAI as the AI engine and input your API key to connect your assistant to the OpenAI services. This integration is crucial for enabling intelligent responses.


4. Configuring Knowledge Sources for Your AI Assistant

Once your AI assistant is created, the next step is to establish a knowledge base. This knowledge base will inform the AI on how to respond to various inquiries. using Pabbly Connect

Upload a text file containing all relevant information about your real estate listings, services, and company details. This file should include:

Property types available. Pricing plans and services offered. Business overview and contact details.

After uploading the knowledge base, ensure that your AI assistant is equipped with all the necessary information to provide accurate replies to leads.


5. Testing Your AI Assistant and Finalizing Setup

With your AI assistant configured, it’s time to test its functionality. Send a message through WhatsApp to see how quickly and accurately the assistant responds.

Make sure to enable the AI auto-reply settings within Pabbly Chatflow. This will allow your assistant to respond automatically to inquiries from all contacts.

For further optimization, you can customize the assistant’s interface to match your branding, including colors and logos. Once everything is set, save your settings and finalize the setup.


Conclusion

Using Pabbly Chatflow, you can create an efficient AI assistant for real estate lead qualification that automates responses and saves time. This setup enhances customer interaction and streamlines your business processes.

Ensure you check out Pabbly Connect to create business automation workflows and reduce manual tasks. Pabbly Connect currently offer integration with 2,000+ applications.

How to Create Client Record in Airtable for New 99acres Inquiries Using Pabbly Connect

Learn how to automate the creation of client records in Airtable for new 99acres inquiries using Pabbly Connect. Step-by-step tutorial included! Build sophisticated automated workflows in less time than you think. This guide translates complex integrations into straightforward steps for immediate implementation.

Watch Step By Step Video Tutorial Below


1. Access Pabbly Connect for Automation

To create client records in Airtable for new inquiries from 99acres, you first need to access Pabbly Connect. Go to your browser and search for Pabbly.com, which will take you to the home page of Pabbly Connect.

On this page, you have two options: Sign In if you are an existing user or Sign Up for free to explore the features of Pabbly Connect. By signing up, you can get 100 free tasks every month to help you get started with automation.


2. Creating a Workflow in Pabbly Connect

Once you are signed in, navigate to the dashboard of Pabbly Connect. Here, click on the ‘Create Workflow’ button located in the top right corner. This action will open a new workflow setup window.

  • Give your workflow a name, such as ‘Create Client Record in Airtable for New 99acres Inquiries’.
  • Select a folder to save your workflow; in this case, choose ‘Automations’.
  • Click on the ‘Create’ button to finalize your workflow setup.

After creating the workflow, you will see a new screen where you can set up the trigger and action for your automation process using Pabbly Connect.


3. Setting Up Trigger for New Leads

The next step is to set up the trigger for your workflow. Select ’99acres’ as your trigger application, which will capture new leads. Then, choose the trigger event as ‘New Leads’.

Upon selecting the trigger event, Pabbly Connect will generate a webhook URL. You need to copy this URL and configure it in your 99acres account to ensure that new leads are sent to Pabbly Connect.


4. Configuring Action to Create Client Record in Airtable

Now that your trigger is set up, it’s time to configure the action that will create a client record in Airtable. Select ‘Airtable’ as your action application and choose the action event as ‘Create a Record’.

  • Connect your Airtable account to Pabbly Connect by following the prompts for authorization.
  • Select the base name and table name where you want to create the record.
  • Map the fields from the trigger data to the corresponding fields in Airtable.

After mapping the fields, click on the ‘Save and Send Test Request’ button to ensure that the record is created successfully in Airtable.


5. Testing the Integration

Once you have set up the action, it’s crucial to test the integration. Go back to your 99acres account and send a test lead to see if it triggers the workflow in Pabbly Connect.

Check your Airtable account to confirm that the new client record has been created with the correct details. If everything is set up correctly, you will see the new record reflecting the lead information.


Conclusion

This tutorial has guided you through the process of creating client records in Airtable for new inquiries from 99acres using Pabbly Connect. By following these steps, you can automate the client record creation process efficiently and effectively.

Ensure you check out Pabbly Connect to create business automation workflows and reduce manual tasks. Pabbly Connect currently offer integration with 2,000+ applications.

How to Automate Customer Service with AI Assistant for Travel Agencies Using Pabbly Chatflow

Learn how to automate customer service for travel agencies using Pabbly Chatflow and integrate various applications for efficient customer support. Create intelligent chat experiences that delight users while collecting valuable information and moving prospects through your sales process.

Watch Step By Step Video Tutorial Below


1. Accessing Pabbly Chatflow for Your Travel Agency

To automate customer service with an AI assistant, the first step is to access Pabbly Chatflow. Navigate to the Pabbly Chatflow landing page by typing ‘Pabbly.com/chatflow’ in your browser. This platform is essential for integrating various applications to enhance customer service.

Once on the landing page, you will see options to either sign in or sign up for free. If you are a new user, click on the ‘Sign up for free’ button to get started with 100 free credits each month. Existing users should click ‘Sign in’ to access their accounts and proceed to utilize Pabbly Chatflow for creating their AI assistant.


2. Creating Your AI Assistant in Pabbly Chatflow

After signing in, you will be directed to the dashboard of Pabbly Chatflow. To create an AI assistant, you need to add a WhatsApp number. Click on the ‘Add WhatsApp Number’ button and choose between WhatsApp Connect and Manual Token Connect. This integration is crucial for automating responses via WhatsApp.

  • Select ‘Add WhatsApp Number’.
  • Choose WhatsApp Connect or Manual Token Connect.
  • Follow the prompts to successfully add your number.

Once your WhatsApp number is added, navigate to the AI assistant feature on the left side of the Pabbly Chatflow interface. Click on the ‘Add AI Assistant’ button, name your assistant, and select the appropriate instructions for a customer support agent. This setup is vital for ensuring your assistant can effectively respond to user queries.


3. Configuring Your AI Assistant Settings

In this section, you will configure the settings for your AI assistant within Pabbly Chatflow. After naming your assistant, you will have options to set a custom prompt and adjust the AI’s creativity level using the temperature setting. A lower temperature results in more focused responses, while a higher temperature allows for creative answers.

Next, you need to select the AI model, such as GPT-4 Mini, and input your OpenAI API key. This key is essential for the AI to function correctly. You can obtain it by following the instructions provided in the Pabbly Chatflow interface.

  • Set temperature for response creativity.
  • Select the AI model.
  • Paste your OpenAI API key.

Finally, make sure to save your changes. This configuration ensures that your AI assistant is tailored to meet the specific needs of your travel agency, allowing for efficient customer service automation.


4. Integrating a Knowledge Base for Effective Responses

To enhance the capabilities of your AI assistant, you will need to upload a knowledge base in Pabbly Chatflow. This knowledge base should contain information relevant to your travel agency, such as tour packages, pricing, and policies. It can be created in a Google Doc and uploaded in either PDF or TXT format.

Once your knowledge base is ready, navigate to the appropriate section in Pabbly Chatflow to upload it. This step is crucial as it enables the AI to provide accurate and relevant answers to customer inquiries regarding services like the Bali Bliss tour or Rajasthan Royal Retreat.

Create a knowledge base in Google Docs. Upload the document in PDF or TXT format. Ensure the document contains relevant travel information.

With the knowledge base uploaded, your AI assistant will be equipped to handle various customer queries efficiently, providing immediate responses based on the information provided.


5. Testing and Activating Your AI Assistant

After setting up your AI assistant in Pabbly Chatflow, it is essential to test its functionality. You can do this by sending a test message through WhatsApp, such as ‘Hey, I need help’. The AI should respond promptly, confirming that it is operational.

Once you confirm that the AI assistant is working correctly, you can activate it. This involves saving your assistant settings and ensuring it is assigned to the appropriate chat or contact list. You can also embed the assistant on your website for broader accessibility.

Send a test message to check AI responses. Activate the assistant in the settings. Embed the assistant on your website.

By following these steps, you ensure that your AI assistant is ready to automate customer service for your travel agency, providing quick and accurate responses to user queries.


Conclusion

In conclusion, automating customer service for travel agencies using Pabbly Chatflow allows for efficient handling of user inquiries. By following the steps outlined, you can create a responsive AI assistant that enhances customer experiences and streamlines communication.

Ensure you check out Pabbly Connect to create business automation workflows and reduce manual tasks. Pabbly Connect currently offer integration with 2,000+ applications.

How to Log Leads in Vtiger CRM from Kit Subscribers Using Pabbly Connect

Learn how to log leads in Vtiger CRM from Kit Subscribers using Pabbly Connect. Follow this detailed guide for seamless integration. Explore systematic approaches to creating efficient automation solutions that convert technical concepts into practical, implementable instructions.

Watch Step By Step Video Tutorial Below


1. Introduction to Pabbly Connect for Kit and Vtiger CRM Integration

In this section, we will explore how to use Pabbly Connect to log leads in Vtiger CRM from Kit subscribers. This integration automates the process of adding new subscribers from Kit directly into your Vtiger CRM. By utilizing Pabbly Connect, you can streamline your workflow without any coding knowledge.

To begin, you will need to access Pabbly Connect and set up your workflow. This includes creating a trigger that activates whenever a new subscriber is added in Kit. The integration allows for seamless data transfer, ensuring that your CRM is always up-to-date with the latest subscriber information.


2. Setting Up Your Pabbly Connect Account

First, navigate to the Pabbly Connect website by entering Pabbly.com/connect in your browser. If you are a new user, click on ‘Sign Up for Free’ to create an account. Existing users should click on ‘Sign In’ to access their dashboard. Once logged in, you will be directed to the Pabbly Connect dashboard where you can start creating your workflow.

  • Click on the ‘Create Workflow’ button.
  • Choose between the new or classic workflow builder.
  • Name your workflow, e.g., ‘Log Leads in Vtiger CRM from Kit Subscribers’.

After setting up the initial details, click on the ‘Create’ button to open the workflow window. This window is crucial as it allows you to configure the trigger and action needed for your integration.


3. Configuring the Trigger for New Subscribers in Kit

In this step, we will set up the trigger in Pabbly Connect. Click on the ‘Add Trigger’ button and select Kit as the trigger application. For the trigger event, choose ‘New Form Subscriber’. This will initiate the workflow every time a new subscriber is added in Kit.

To connect Kit with Pabbly Connect, you will need to provide your API key and API secret. These can be found in your Kit account under the settings menu. After copying the necessary credentials, paste them into the respective fields in Pabbly Connect and click ‘Save’.

  • Open your Kit account and go to ‘Settings’.
  • Navigate to ‘Developers’ to find your API key and secret.
  • Copy and paste these into Pabbly Connect.

Once connected, you will need to select the form you want to monitor for new subscribers. Click ‘Save and Send Test Request’ to capture a test response, which will help confirm that the connection is working properly.


4. Adding New Contacts to Vtiger CRM Using Pabbly Connect

Now that your trigger is set up, the next step is to add new contacts to Vtiger CRM. Click on ‘Add New Action Step’ and select Vtiger CRM as the action application. For the event, choose ‘Create Contact’. This step will allow you to create a new contact in your Vtiger CRM whenever a new subscriber is added in Kit.

To connect Vtiger CRM with Pabbly Connect, you will need your Vtiger username, access key, and domain. These can be found in your Vtiger account under ‘My Preferences’. Copy these details and paste them into the respective fields in Pabbly Connect. Once completed, click ‘Save’.

Access your Vtiger account and go to ‘My Preferences’. Copy your username and access key. Enter the domain URL (without the https:// part).

After saving the connection, you will need to map the details from the trigger step to the action step. This ensures that the contact information such as first name, last name, email, and phone number is correctly transferred to Vtiger CRM.


5. Testing and Finalizing Your Pabbly Connect Workflow

With the action step configured, it is time to test your workflow. Click on ‘Save and Send Test Request’ to check if the contact is successfully created in Vtiger CRM. After running the test, navigate to your Vtiger CRM contacts to verify that the new contact has been added with the correct details.

Once you confirm that everything is working as expected, you can finalize your workflow. From this point onward, every time a new subscriber is added in Kit, their details will automatically be logged in Vtiger CRM without any manual intervention.

This efficient automation is made possible by Pabbly Connect, allowing you to focus on other important aspects of your business while ensuring your CRM is updated in real-time.


Conclusion

In conclusion, using Pabbly Connect to log leads in Vtiger CRM from Kit subscribers is a powerful way to automate your workflow. By following the steps outlined in this tutorial, you can seamlessly connect these applications and ensure that your lead management process is efficient and effective. Try out this integration today and enhance your business operations!

Ensure you check out Pabbly Connect to create business automation workflows and reduce manual tasks. Pabbly Connect currently offer integration with 2,000+ applications.

How to Create an AI Assistant for Personal Finance Management Using Pabbly Chatflow

Learn how to create an AI assistant for personal finance management using Pabbly Chatflow. Follow step-by-step instructions for seamless integration with YouTube and more. Master conversational marketing with practical techniques for creating chatbots that engage visitors at exactly the right moment in their journey.

Watch Step By Step Video Tutorial Below


1. Accessing Pabbly Chatflow for Your AI Assistant

To create an AI assistant for personal finance management, the first step is accessing Pabbly Chatflow. Open your browser and navigate to www.Pabbly.com/chatflow. Here, you will find options to sign in or sign up for a new account.

Once on the Pabbly Chatflow homepage, click on the ‘Sign In’ button if you already have an account. For new users, select ‘Sign Up for Free’. After logging in, you will be directed to the Pabbly Chatflow dashboard, where you can manage your AI assistants.


2. Creating Your AI Assistant in Pabbly Chatflow

After accessing the dashboard, the next step is to create your AI assistant using Pabbly Chatflow. Click on the ‘AI Assistant’ option in the left sidebar. To initiate the creation process, find and click on the ‘Add AI Assistant’ button.

  • Name your assistant, for example, ‘My Personal Finance’.
  • Select ‘AI Agent’ as the type of assistant.
  • Configure the AI settings, including temperature and model selection.

After configuring these settings, click the ‘Add AI Assistant’ button to save your changes. This will set the foundation for your AI assistant to handle queries related to personal finance management.


3. Configuring AI Settings and Knowledge Source

In this section, you will configure the AI settings for your assistant using Pabbly Chatflow. This includes specifying the AI instructions, knowledge source, and interface settings. Start by selecting the AI instructions that guide how your assistant will respond to queries.

Next, upload a knowledge base file that contains detailed information about personal finance management. This knowledge base should include topics like budgeting, expense tracking, and financial goals.

  • Ensure the knowledge base is in .txt format.
  • Include comprehensive details to enhance response accuracy.
  • Set up a fallback message for unrecognized queries.

After setting up the knowledge source, proceed to configure the assistant’s interface, including the display name and initial greeting message.


4. Finalizing Your AI Assistant in Pabbly Chatflow

Once the settings are configured, it’s time to finalize your AI assistant using Pabbly Chatflow. Review all settings, ensuring the assistant is active by toggling on the activation button. Click the ‘Save’ button to store your configurations.

After saving, you can generate a QR code for users to easily access your assistant on WhatsApp. This feature allows your clients to engage with your AI assistant seamlessly, enhancing their experience with your personal finance services.


5. Testing Your AI Assistant’s Functionality

To ensure everything is working correctly, test your AI assistant created with Pabbly Chatflow. Send a message via WhatsApp and check if the assistant responds accurately based on the queries. For example, ask for budget planning or expense tracking.

Monitor the responses to ensure the assistant provides detailed and relevant information. If necessary, return to the settings to adjust the knowledge base or response parameters for better accuracy.


Conclusion

Creating an AI assistant for personal finance management using Pabbly Chatflow is a straightforward process. By following these detailed steps, you can automate responses to client queries effectively, enhancing your service delivery and customer satisfaction.

Ensure you check out Pabbly Connect to create business automation workflows and reduce manual tasks. Pabbly Connect currently offer integration with 2,000+ applications.

How to Create New Deals in Pipedrive from Jotform Submissions Using Pabbly Connect

Learn how to integrate Jotform and Pipedrive to create new deals automatically using Pabbly Connect. Step-by-step tutorial included. Develop expertise in application integration and learn how to design streamlined automation workflows using proven, simplified approaches.

Watch Step By Step Video Tutorial Below


1. Accessing Pabbly Connect for Integration

To create new deals in Pipedrive from Jotform submissions, you will first need to access Pabbly Connect. This platform serves as the integration solution that connects various applications seamlessly. Open your browser and navigate to Pabbly.com/connect to reach the Pabbly Connect homepage.

Once on the homepage, you will see options to sign in or sign up. If you are a new user, click on ‘Sign up Free’ to get started with your free account. Existing users should click on ‘Sign In’ to access their dashboards. After signing in, you will be directed to the Pabbly Apps window where you can select Pabbly Connect to begin building your workflow.


2. Creating a New Workflow in Pabbly Connect

The next step involves creating a new workflow in Pabbly Connect. Click on the ‘Create Workflow’ button located at the top right corner of your dashboard. You will be prompted to choose between the new beta version or the classic version. For this tutorial, select the beta version for a modern experience.

  • Choose a name for your workflow, such as ‘Create New Deals in Pipedrive from Jotform Submissions’.
  • Select a folder to save your workflow. You can create a new folder if needed.
  • Click on the ‘Create’ button to finalize your workflow setup.

After creating the workflow, you will see the workflow window. Here, you will set up your trigger and actions. Remember, in automation, the trigger indicates when something happens, while the action is what occurs as a result. In this case, the trigger will be a new submission from Jotform.


3. Setting Up the Trigger: Jotform Submission

To begin the automation process, you need to set up a trigger in Pabbly Connect. Click on the ‘Add a Trigger’ button and select Jotform as your application. For the event, choose ‘New Response’ to capture submissions from your form.

After selecting the event, you will receive a webhook URL. This URL is crucial as it connects your Jotform to Pabbly Connect. Copy the webhook URL and head over to your Jotform account. Locate the form you want to integrate, click on ‘Edit Form’, and navigate to ‘Settings’. Under settings, find ‘Integrations’ and search for ‘Webhook’.

  • Select Webhook and click ‘Edit Integration’.
  • Remove any existing webhook and paste the new URL.
  • Complete the integration and publish your form.

After setting up the webhook, return to Pabbly Connect to test the connection. Your workflow will now be ready to receive data from Jotform submissions.


4. Creating a New Person in Pipedrive

Once you have successfully set up the trigger, the next step is to create a new person in Pipedrive using Pabbly Connect. Click on ‘Add Action Step’ in your workflow and select Pipedrive as your action application. Choose ‘Create Person’ as the event, which allows you to add a new contact based on the Jotform submission data.

You will need to connect your Pipedrive account to Pabbly Connect. If you have already connected it, you can select the existing connection. Otherwise, you will need to enter your API token from Pipedrive, which is found in your profile settings under ‘API’. Copy this token and paste it into Pabbly Connect.

Map the fields from the Jotform submission to the Pipedrive contact fields. For example, map the first name, last name, email, and phone number. Click ‘Save and Send Request’ to create the new person.

Upon successful creation, you should see the new person listed in your Pipedrive contacts. This step confirms that your integration is functioning correctly, facilitated entirely through Pabbly Connect.


5. Creating a New Deal in Pipedrive

The final step in this integration process is to create a new deal in Pipedrive for the person you just created. In Pabbly Connect, add another action step and select Pipedrive again. This time, choose ‘Create Deal’ as the event.

Connect to your existing Pipedrive account if prompted. You will need to fill in the details for the deal, such as the title. You can map the lead’s name to create a title like ‘Follow up with {First Name} {Last Name}’. Ensure to set the deal status and any other required fields as necessary.

Set the status to ‘Open’ and select the appropriate pipeline and stage. Map the person ID from the previous step to associate the deal with the correct contact. Click ‘Save and Send Request’ to create the deal.

After this step, you should see the new deal created in your Pipedrive account, completing the automation process initiated by Pabbly Connect. This integration allows you to streamline your workflow efficiently.


Conclusion

In this tutorial, we explored how to create new deals in Pipedrive from Jotform submissions using Pabbly Connect. By following these steps, you can automate your workflow, ensuring that every form submission results in a new contact and deal being created in Pipedrive. This not only saves time but also enhances your productivity significantly.

Ensure you check out Pabbly Connect to create business automation workflows and reduce manual tasks. Pabbly Connect currently offer integration with 2,000+ applications.

How to Sync New Payment Information from Instamojo to Airtable Using Pabbly Connect

Learn how to sync new payment information from Instamojo to Airtable using Pabbly Connect with this step-by-step tutorial. Automate your workflow effortlessly! Transform complex automation concepts into accessible, actionable steps that eliminate unnecessary manual work while maximizing existing application capabilities.

Watch Step By Step Video Tutorial Below


1. Accessing Pabbly Connect for Integration

To sync new payment information from Instamojo to Airtable, first, you need to access Pabbly Connect. Open your web browser and type in the URL Pabbly.com/connect. This will take you to the Pabbly Connect landing page.

On the landing page, you will see options to either sign in or sign up. If you are a new user, click on Sign Up for Free to create an account. Existing users can click on Sign In to access their dashboard. Once signed in, navigate to the Pabbly Connect dashboard to begin creating your workflow.


2. Creating a New Workflow in Pabbly Connect

After signing in, click on the Pabbly Connect application to start building your workflow. Click on the button labeled Create Workflow. You will then be prompted to select either the new or classic workflow builder. For this tutorial, we will use the classic workflow builder.

  • Select Classic for a stable setup.
  • Enter a workflow name: Sync New Payment Information from Instamojo to Airtable.
  • Choose a folder to save your workflow.

Once you have set these parameters, click on the Create button. This will take you to the workflow window where you can configure triggers and actions.


3. Setting Up the Trigger with Instamojo

In the workflow window, the first step is to set up the trigger. Select Pabbly Connect and then search for Instamojo. Choose Instamojo V2 as your trigger application. For the trigger event, select New Sale.

Pabbly Connect will generate a webhook URL that you need to copy. This URL will connect Instamojo to Pabbly Connect. Now, navigate to your Instamojo account, go to Smart Pages, and edit the page where you want to set up the webhook.

  • Enable webhooks in your page settings.
  • Paste the copied webhook URL.
  • Save and update the settings.

After saving, return to Pabbly Connect, where it will indicate that it’s waiting for a webhook response. This means the integration is ready to capture data from Instamojo.


4. Testing the Webhook Response

To capture the webhook response, you need to perform a test submission. Go back to your Instamojo account and simulate a sale by purchasing a product. Fill in the necessary details such as name, email, and phone number, and proceed to payment. using Pabbly Connect

Once the payment is confirmed, return to your Pabbly Connect workflow. You should see that the webhook has successfully captured the response, displaying details like the customer’s name, email, and payment ID. This confirms that Pabbly Connect is properly receiving data from Instamojo.

Check for captured details in the Pabbly Connect interface. Ensure all relevant information is displayed correctly.

With the test submission successful, you are now ready to set up the action that will send this data to Airtable.


5. Setting Up the Action to Send Data to Airtable

Now that your trigger is set up and tested, it’s time to configure the action. In the Pabbly Connect workflow, search for Pabbly Connect and select Airtable as your action application. For the action event, choose Create Record.

You will need to connect your Airtable account to Pabbly Connect. Click on Add a New Connection and follow the prompts to grant necessary permissions. Select the specific base and table where you want to store the payment information.

Map the fields from the Instamojo response to the Airtable fields. Ensure all required fields are filled correctly. Click on Save and Send Test Request to finalize the setup.

After the test request is successful, check your Airtable database to confirm that the new payment details have been added correctly. This completes the integration process!


Conclusion

In this tutorial, we demonstrated how to sync new payment information from Instamojo to Airtable using Pabbly Connect. By following the steps outlined, you can automate your workflow and ensure that payment details are organized efficiently. This integration allows for seamless management of sales data, enhancing your business operations.

Ensure you check out Pabbly Connect to create business automation workflows and reduce manual tasks. Pabbly Connect currently offer integration with 2,000+ applications.