Analyze Any YouTube Video & Get Instant Summaries with Gemini

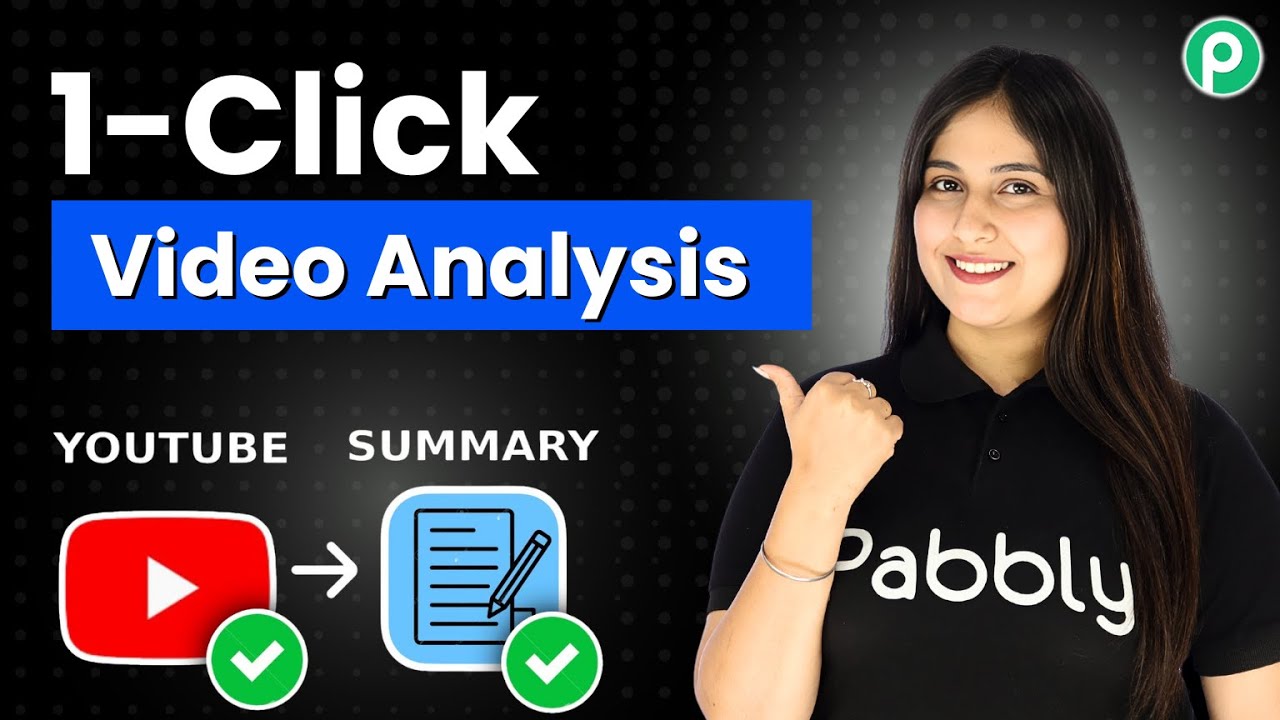
Learn how to analyze any YouTube video and get instant summaries using Pabbly Connect. Follow this step-by-step guide for seamless integration. Master proven automation processes with practical implementation examples and strategic recommendations you can apply immediately in your workflow.

Watch Step By Step Video Tutorial Below


1. Accessing Pabbly Connect for YouTube Integration

To analyze any YouTube video and get instant summaries, you first need to access Pabbly Connect. Start by navigating to Pabbly.com/n in your browser. This will take you to the Pabbly Connect homepage where you can either sign in or sign up for free.

If you are a new user, click on the ‘Sign Up Free’ button to create an account and receive 100 free tasks each month. Existing users can simply sign in. Once logged in, you will find all the applications available within Pabbly Connect.


2. Creating a Workflow in Pabbly Connect

After accessing Pabbly Connect, you need to create a workflow to set up the automation. Click on the ‘Create Workflow’ button. You will be prompted to select either the new Beta version or the Classic version. For this tutorial, choose the Beta version for its modern features.

  • Select a name for your workflow, such as ‘Analyze Any YouTube Video and Get Instant Summaries with Gemini’.
  • Choose a folder to save your workflow, or create a new one if necessary.

After naming your workflow, click on the ‘Create’ button. This will set the stage for integrating YouTube with Pabbly Connect.


3. Setting Up the Trigger for YouTube Videos

The next step involves setting up the trigger for your automation. In Pabbly Connect, select ‘Google Sheets’ as your trigger application and choose the event as ‘New or Updated Spreadsheet Row’. This means that whenever a new video title and link are added to your Google Sheet, it will trigger the automation.

  • You will receive a Webhook URL after connecting your Google Sheets account.
  • Copy this URL and paste it into your Google Sheets account to link them.

Once the URL is added, test the connection by adding a new row in your Google Sheet with a YouTube video title and link. This will initiate the trigger and send the data to Pabbly Connect.


4. Configuring the Action Step with Google Gemini

Now that the trigger is set, it’s time to configure the action step. In Pabbly Connect, select ‘Google Gemini’ as your action application. Choose the event as ‘Analyze YouTube Videos to Generate Summaries’. This action will take the data from your Google Sheet and use it to generate a summary of the YouTube video.

You will need to enter the API key for Google Gemini, which can be obtained from your Google AI Studio account. Map the YouTube video title and link from the previous step to the relevant fields in the action step.

After configuring the action, click on the ‘Save’ button to finalize the setup. This will ensure that whenever a new video is added to your Google Sheet, Pabbly Connect will automatically generate a summary using Google Gemini.


5. Updating the Summary Back to Google Sheets

The final step is to update the generated summary back into your Google Sheet. In Pabbly Connect, add another action step and select ‘Google Sheets’ again. This time, choose the event as ‘Update Row’. This action will take the summary generated by Google Gemini and place it in the specified column of your Google Sheet.

Map the summary field to the corresponding column in your Google Sheet. Make sure to specify the row index correctly to ensure the summary updates in the right place.

Once everything is set up, click on the ‘Save’ button again. This completes the automation process, allowing you to analyze any YouTube video and get instant summaries seamlessly.


Conclusion

In this tutorial, we demonstrated how to use Pabbly Connect to analyze any YouTube video and generate instant summaries. By integrating Google Sheets with Google Gemini, you can automate the process efficiently and effectively. This setup not only saves time but also enhances your content creation workflow.

Ensure you check out Pabbly Connect to create business automation workflows and reduce manual tasks. Pabbly Connect currently offer integration with 2,000+ applications.

Send Automatic SMS to New Leads | Step-by-Step Tutorial

Learn how to send automated SMS to new leads using Pabbly Connect in this detailed tutorial. Follow our step-by-step guide to set up your automation seamlessly.

Watch Step By Step Video Tutorial Below


1. Accessing Pabbly Connect to Set Up Your Automation

To get started with sending automatic SMS to new leads, you need to access Pabbly Connect. First, open your browser and visit Pabbly.com/connect. If you’re a new user, click on ‘Sign up for free’ to create an account.

Once logged in, you can explore the features of Pabbly Connect. You will receive 100 free tasks each month, allowing you to send up to 100 SMS messages to your leads without any cost. This is a great way to test the automation capabilities of Pabbly Connect.


2. Setting Up the Trigger in Pabbly Connect

After logging into Pabbly Connect, navigate to the workflow builder. This is where you will define the trigger that initiates your SMS sending process. Click on the ‘Add Trigger’ button and search for Google Ads.

  • Select ‘New Lead Form Entry’ as the event.
  • Connect Google Ads to Pabbly Connect by clicking on ‘Connect’.
  • Copy the webhook URL provided by Pabbly Connect.

Next, go to your Google Ads campaign and ensure that you have a lead form set up. Paste the copied webhook URL in the lead delivery section. Once done, click on ‘Send Test Data’ to confirm that Pabbly Connect has captured the lead information correctly.


3. Capturing Lead Information for SMS

Now that you have set up the trigger, Pabbly Connect will capture the details of the new lead. You will see fields like first name, last name, email, phone number, and company name populated in your workflow.

If you want to test with real leads, ensure your Google Ads campaign is live. However, for demonstration purposes, you can use the test lead data that Pabbly Connect has captured. This will allow you to proceed with setting up the SMS automation.


4. Sending SMS Using Pabbly Connect and Twilio

To send an SMS, click on ‘Add New Action Step’ and search for Twilio. Choose ‘Send SMS Message’ as the action event and click ‘Connect’. If you have previously connected Twilio to Pabbly Connect, select the existing connection. If not, create a new connection using your Twilio Account SID and Authorization Token.

  • Enter your Twilio Account SID and Authorization Token.
  • Map the lead’s phone number to the recipient field.
  • Craft your SMS message, including a welcome note and any promotional codes.

Once you have filled in all the necessary details, click on ‘Save and Send Test Request’. This action will send a test SMS to the mapped phone number, allowing you to verify that everything is working correctly.


5. Verifying SMS Delivery and Finalizing Automation

After sending the test request, you should receive a confirmation that the SMS was sent successfully. If you are using a trial account, the message will indicate it is sent from your Twilio trial account. However, if you have a paid account, the message will appear without the trial notification.

With this setup, every time a new lead is captured through Google Ads, Pabbly Connect will automatically send an SMS to that lead. You don’t need to manually trigger the SMS; it happens automatically in the background, streamlining your lead engagement process.


Conclusion

In this tutorial, we demonstrated how to use Pabbly Connect to send automatic SMS to new leads captured through Google Ads. By following these steps, you can enhance your lead engagement strategy and ensure timely communication with potential customers.

Ensure you check out Pabbly Connect to create business automation workflows and reduce manual tasks. Pabbly Connect currently offer integration with 2,000+ applications.

Every Business Owner Needs This WhatsApp Chatbot Setup!

Learn how to set up a WhatsApp chatbot using Pabbly Chatflow for your business, automating responses and improving customer engagement. Implement professional chat automation that answers common questions, qualifies leads, and books appointments without human intervention.

Watch Step By Step Video Tutorial Below


1. Accessing Pabbly Chatflow for Your WhatsApp Chatbot

To build an effective WhatsApp chatbot, start by accessing Pabbly Chatflow. Open a new tab and navigate to Pabbly.com/chatflow. This platform is designed to automate WhatsApp messages, making it easier for business owners to engage with customers.

Once on the Pabbly Chatflow page, you will see options to sign in or sign up. If you’re a new user, click on the ‘Sign Up Free’ button to create an account, which provides you with 100 free credits monthly to explore the software. Existing users can simply sign in to access the flow builder.


2. Creating Your WhatsApp Chatbot Flow

After signing into Pabbly Chatflow, navigate to the flow builder page. Here, you can create multiple types of WhatsApp chatbots using a user-friendly drag-and-drop interface. Click on the ‘Flows’ option and then the ‘+ Add Flow’ button to start your chatbot design.

  • Name your flow, for example, ‘Every Business Owner Needs This WhatsApp Chatbot Setup.’
  • Select your trigger event, such as keywords that users might send.
  • Add multiple keywords like ‘hi’, ‘hello’, and ‘help’ to trigger the bot.

Once you’ve set your keywords, connect them to the first message your bot will send. For instance, you can upload an image and write a welcome message that greets users when they initiate a conversation.


3. Designing Responses and Actions in Pabbly Chatflow

In this section, you will design the responses your WhatsApp chatbot will provide. Using Pabbly Chatflow, you can add media buttons and text responses to engage users effectively. After the welcome message, add buttons like ‘Our Services’ and ‘Talk to Support’ to guide your users.

  • Choose the list button to show users the types of services available.
  • Add service types such as home construction, commercial builds, renovation, and remodeling.
  • Ensure to connect these buttons to the appropriate responses in the flow.

By linking these actions, your bot will provide a seamless experience for users, allowing them to select services and receive immediate feedback from your business.


4. Collecting User Information with Pabbly Chatflow

Next, you’ll set up your WhatsApp chatbot to collect essential user information. With Pabbly Chatflow, you can ask users for their approximate budget, project location, and preferred start date. This information is crucial for providing personalized service.

Use the ‘Ask Question’ button to gather user responses. Set up custom fields for each piece of information collected. Ensure to connect these questions back to your main flow for a cohesive experience.

By collecting this data, your chatbot will be able to give tailored responses based on user input, enhancing customer satisfaction and engagement.


5. Finalizing Your WhatsApp Chatbot Setup

Once you have designed the entire flow, it’s time to finalize your WhatsApp chatbot. In Pabbly Chatflow, make sure to save your flow to avoid losing any progress. After saving, you can test the flow by sending keywords to your WhatsApp business account.

The bot should respond with a welcome message, options for services, and collect information as intended. This setup allows your business to operate 24/7 without manual intervention, ensuring customer inquiries are handled efficiently.


Conclusion

Setting up a WhatsApp chatbot using Pabbly Chatflow streamlines customer interactions and automates responses. By following these steps, you can enhance your business operations and improve customer engagement effectively.

Ensure you check out Pabbly Connect to create business automation workflows and reduce manual tasks. Pabbly Connect currently offer integration with 2,000+ applications.

Auto-Create Blog & Social Media Content Using RSS Feeds and Perplexity AI (Step-by-Step)

Learn how to automate blog and social media content creation using RSS feeds and Perplexity AI through Pabbly Connect in this step-by-step tutorial. Build sophisticated automated workflows in less time than you think. This guide translates complex integrations into straightforward steps for immediate implementation.

Watch Step By Step Video Tutorial Below


1. Accessing Pabbly Connect for Automation

To begin automating your blog and social media content creation, the first step is accessing Pabbly Connect. Start by visiting the Pabbly website at pabby.com. If you are a new user, click on ‘Sign up for free’ to create an account. Existing users can simply log in by clicking ‘Sign in’ in the top right corner.

Once logged in, navigate to the Pabbly Connect dashboard. Here, you can manage your workflows and access the various tools offered by Pabbly. To create a new automation workflow, click on the ‘Create Workflow’ button. This allows you to set up the integration that will connect RSS feeds, Perplexity AI, and Google Blogger seamlessly.


2. Creating Your Workflow in Pabbly Connect

In this section, we will create a workflow to automate the posting of content from RSS feeds to Google Blogger using Pabbly Connect. Start by selecting the new beta workflow builder, which is faster and more flexible. Name your workflow, for example, ‘Auto-Create Blog & Social Media Content Using RSS Feeds and Perplexity AI’ and choose a folder for organization.

Next, you will set up the trigger application. This is essential for starting the automation process. Follow these steps to configure the trigger:

  • Select ‘RSS by Pabbly’ as the trigger application.
  • Choose ‘New Item in Feed’ as the trigger event.
  • Enter the RSS feed URL from which you want to fetch new content.

After entering the feed URL, set the polling interval to check for updates, for instance, every 30 minutes. This ensures that your workflow remains up-to-date with the latest content.


3. Fetching Content Using Perplexity AI

With the RSS feed set up, the next step is to fetch and generate content using Perplexity AI via Pabbly Connect. Add an action step by selecting Perplexity AI as the action application. Choose the action event as ‘Create Chat Completion’ to generate content based on the fetched RSS feed.

To connect Perplexity AI, you will need to enter your API key. If you do not have one, you can generate a new API key from your Perplexity account. After connecting, you will set the parameters for content generation:

  • Select the model (e.g., Sonar Pro).
  • Input a prompt that instructs Perplexity AI on how to format the content.
  • Map the data from the RSS feed to ensure dynamic content generation.

Once you have configured these settings, send a test request to see if Perplexity AI generates the desired content. This content will be formatted for your blog or social media posts.


4. Posting Generated Content to Google Blogger

After generating the content with Perplexity AI, the next step is to post it on Google Blogger using Pabbly Connect. Add another action step and select Google Blogger as the action application. Choose the action event as ‘Create Post’ to publish the content directly to your blog.

To connect Google Blogger, click on ‘Sign in with Google’ and grant the necessary permissions. Once connected, you will need to fill in the blog ID and map the title and content generated from the previous steps:

Select your blog ID from the dropdown list. Map the title from the RSS feed response. Map the content generated by Perplexity AI.

Once you have entered all required fields, click on ‘Save and Send Test Request’ to publish the blog post. You can verify this by checking your Google Blogger account to see the new post in draft mode.


5. Conclusion: Automating Content Creation with Pabbly Connect

In this tutorial, we explored how to automate the creation of blog and social media content using RSS feeds and Perplexity AI through Pabbly Connect. By setting up a workflow that integrates these applications, you can effortlessly generate and post fresh content regularly.

Ensure you check out Pabbly Connect to create business automation workflows and reduce manual tasks. Pabbly Connect currently offer integration with 2,000+ applications.

Utilizing Pabbly Connect not only saves time but also enhances your online presence by ensuring that your social media accounts remain active with engaging content. With this automation, you can focus on other important aspects of your business while maintaining a consistent online presence.

How to Auto Reply to YouTube Comments Using Google Gemini

Learn how to automate YouTube comment replies using Pabbly Connect and Google Gemini. Follow this detailed tutorial for seamless integration. Transform complex automation concepts into accessible, actionable steps that eliminate unnecessary manual work while maximizing existing application capabilities.

Watch Step By Step Video Tutorial Below


1. Setting Up Pabbly Connect for YouTube Comment Automation

To automate replies to YouTube comments, the first step is accessing Pabbly Connect. If you’re a new user, go to pabbl.com/connect and click on ‘Sign up for free’ in the top right corner. This gives you access to 100 free tasks each month, allowing you to explore the capabilities of Pabbly Connect.

Existing users can simply log in to their Pabbly Connect account. Once logged in, navigate to the workflow builder, which is essential for setting up the automation. This is where you will create the trigger and action that will facilitate the reply automation.


2. Creating the Trigger for New YouTube Comments

The next step involves creating a trigger that activates when a new comment is posted on your YouTube channel. In the workflow builder of Pabbly Connect, click on the ‘Add Trigger’ button and select ‘YouTube’ as the application.

  • Choose the event as ‘New Comment on Channel’.
  • Connect your YouTube account by selecting ‘Add a New Connection’.
  • Sign in with your Google account that manages the YouTube channel.

After granting permissions, you will need to set the maximum results parameter, which determines how many comments will be fetched. Set this to your desired number, typically 1 for simplicity. Click ‘Save and Send Test Request’ to capture the latest comment for the next steps.


3. Generating Replies Using Google Gemini

With the trigger set, the next step is to generate a reply using Google Gemini. In Pabbly Connect, add a new action step and select ‘Gemini’ as the application. Choose the event as ‘Generate Content’.

  • If prompted, connect your Google Gemini account using the API key obtained from Google AI Studio.
  • Enter a specific prompt that includes the context of your YouTube channel and FAQs.
  • Map the author’s name and comment dynamically to personalize the reply.

After setting up your prompt, click ‘Save and Send Test Request’ to generate a reply. This reply will be used in the next action step to respond to the original comment.


4. Replying to YouTube Comments Automatically

The final action in this automation is to post the generated reply back to YouTube. Add a new action step in Pabbly Connect and select ‘YouTube’ again. This time, choose the event ‘Reply to a Comment’.

Use the existing connection you created earlier. Map the reply text generated by Gemini and the comment ID from the trigger.

Click ‘Save and Send Test Request’ to finalize the process. After refreshing your YouTube channel, you will see the automated reply posted under the original comment.


5. Conclusion: Automate Your YouTube Comment Replies with Pabbly Connect

By following these steps, you can effectively automate replies to comments on your YouTube channel using Pabbly Connect and Google Gemini. This integration allows you to engage with your audience even when you are not available.

Ensure you check out Pabbly Connect to create business automation workflows and reduce manual tasks. Pabbly Connect currently offer integration with 2,000+ applications.

Check out Pabbly Connect – Automate your business workflows effortlessly! Sign Up Free – Start your journey with ease! 10,000+ Video Tutorials – Learn step by step! Join Pabbly Facebook Group – Connect with 21,000+ like minded people!

With the ability to generate personalized responses, you can enhance viewer interaction and satisfaction on your channel. Start using Pabbly Connect today to streamline your YouTube comment management.

Create Automatic Invoices from Google Sheets in Minutes

Learn how to create automatic invoices from Google Sheets using Pabbly Connect in this step-by-step tutorial. Discover hidden automation capabilities within your existing tools. This guide shows you how to connect your essential applications and permanently eliminate redundant manual processes.

Watch Step By Step Video Tutorial Below


1. Accessing Pabbly Connect for Automation

To begin creating automatic invoices from Google Sheets, you first need to access Pabbly Connect. Simply navigate to Pabbly’s official website and sign in or create a free account. This platform serves as the central hub for all your automation needs, allowing seamless integration between Google Sheets and Zoho.

Once logged in, you will see options to create workflows. Click on ‘Create Workflow’ to start setting up your automation. Here are the steps to follow:

  • Go to Pabbly Connect’s dashboard.
  • Select ‘Create Workflow’.
  • Name your workflow (e.g., ‘Automatic Invoices from Google Sheets’).

After setting up the workflow, you can proceed to configure the trigger that will initiate the invoice creation process.


2. Setting Up the Trigger in Pabbly Connect

In this section, you will set up the trigger that will capture new entries in your Google Sheets. Select Google Sheets as your trigger application in Pabbly Connect. The event you need to choose is ‘New or Updated Spreadsheet Row’.

After selecting Google Sheets, you will be prompted to connect your Google account. Follow these steps:

  • Click on ‘Connect’ to link your Google Sheets account.
  • Authorize Pabbly Connect to access your Google Sheets.
  • Select the specific spreadsheet you want to monitor.

Once the connection is established, you can test the trigger to ensure it is capturing data correctly from your Google Sheets.


3. Configuring Zoho for Invoice Creation

After successfully setting up the trigger, the next step is to configure the action that will create an invoice in Zoho Books through Pabbly Connect. Choose Zoho Books as your action application and select the event ‘Create Invoice’.

To connect your Zoho account, follow these steps:

Click ‘Connect’ to link your Zoho Books account. Authorize Pabbly Connect to access your Zoho Books account. Map the required fields from your Google Sheets to the corresponding fields in Zoho Books.

Ensure that all necessary information, such as customer details and invoice items, are accurately mapped to facilitate the invoice creation process.


4. Testing Your Automation Workflow

With both the trigger and action set up, it’s crucial to test your automation in Pabbly Connect. This ensures that everything works as intended. Start by adding a new row in your Google Sheets with the relevant invoice details.

After entering the data, go back to Pabbly Connect and click on the ‘Test’ button to check if the new invoice is created in Zoho Books. You should see a success message indicating that the data has been sent correctly.

If everything is successful, you can now refresh your Zoho Books account to see the newly created invoice. This confirms that the integration between Google Sheets and Zoho Books via Pabbly Connect is functioning correctly.


5. Finalizing Your Automation Setup

After confirming that your automation workflow works seamlessly, it’s time to finalize the setup in Pabbly Connect. You can enable the automation so that it runs automatically whenever a new entry is made in Google Sheets.

Additionally, you can customize your workflow further by adding filters or additional actions if needed. This allows you to refine how invoices are generated based on specific criteria.

To complete the setup, ensure you save your workflow and monitor it for any potential issues. With everything in place, your automatic invoicing process is now fully operational!


Conclusion

In this tutorial, you learned how to create automatic invoices from Google Sheets using Pabbly Connect. By following the steps outlined, you can streamline your invoicing process and save time for your business. Start automating today with Pabbly Connect to enhance your efficiency!

Ensure you check out Pabbly Connect to create business automation workflows and reduce manual tasks. Pabbly Connect currently offer integration with 2,000+ applications.

WhatsApp Automation for Salon Appointments & Service Bookings

Learn how to automate salon appointments and service bookings using WhatsApp and Pabbly Chatflow in this detailed step-by-step tutorial. Explore how leading businesses automate customer interactions with carefully designed chat sequences that feel natural and helpful.

Watch Step By Step Video Tutorial Below


1. Accessing Pabbly Chatflow for WhatsApp Automation

To start automating salon appointments and service bookings, first access Pabbly Chatflow. You can do this by visiting Pabbly’s official website and navigating to the Chatflow section.

Once there, you have two options: sign in if you are an existing user, or click on ‘Sign Up Free’ to create a new account. After signing in, you will be directed to the Chatflow dashboard, where you can begin setting up your WhatsApp automation.


2. Connecting Your WhatsApp Number in Pabbly Chatflow

In this step, you will connect your WhatsApp number to Pabbly Chatflow. This is essential for enabling the AI agent to communicate with your customers effectively.

To connect your WhatsApp number, click on the ‘Add WhatsApp Number’ button. You will see two options: ‘WhatsApp Connect’ and ‘Manual Token Connect.’ Choose ‘WhatsApp Connect’ for a seamless integration process. Follow these steps:

  • Click on ‘Add WhatsApp Number’.
  • Select ‘WhatsApp Connect’.
  • Follow the prompts to complete the connection process.

Once connected, you will see your WhatsApp number listed in the dashboard, confirming that Pabbly Chatflow is ready to facilitate your salon’s communication.


3. Creating an AI Agent with Pabbly Chatflow

Now that your WhatsApp number is connected, the next step is to create an AI agent using Pabbly Chatflow. This agent will respond to customer inquiries automatically, streamlining your appointment bookings.

To create your AI agent, click on the ‘Add Assistant’ button. You will need to provide a name for your assistant and then select the type of instructions it will follow. Here’s how:

  • Click on ‘Add Assistant’.
  • Name your assistant.
  • Select ‘AI Agent’ from the instruction type options.

After naming your assistant, configure its settings like temperature and API key to ensure it operates effectively. This will allow Pabbly Chatflow to manage customer interactions smoothly.


4. Configuring AI Settings in Pabbly Chatflow

With your AI agent created, it’s time to configure its settings in Pabbly Chatflow. This includes setting up the response templates and knowledge sources for your assistant.

In the AI settings section, you can specify the response style, add knowledge sources, and set fallback messages. Here are the steps to follow:

Set the response style, such as formal or casual. Add knowledge sources by uploading documents that contain FAQs and service details. Configure fallback messages for when the AI cannot respond.

Once these settings are configured, your AI assistant will be well-equipped to handle customer inquiries regarding salon services and bookings.


5. Assigning Your AI Assistant to WhatsApp Chats

The final step is to assign your AI assistant to your WhatsApp chats using Pabbly Chatflow. This will allow your assistant to start responding to customer messages automatically.

To do this, navigate to the inbox settings and enable the AI auto-reply feature. You will need to select the contact list for which the assistant will be assigned. Here’s how:

Go to inbox settings. Enable AI auto-reply. Select the contact list and assign the assistant.

After saving these settings, your AI assistant is now live and ready to assist customers with their salon appointments and service bookings through WhatsApp.


Conclusion

In this tutorial, we explored how to automate salon appointments and service bookings using WhatsApp and Pabbly Chatflow. By following these steps, you can create an efficient AI assistant that enhances customer interaction and streamlines your booking process.

Ensure you check out Pabbly Connect to create business automation workflows and reduce manual tasks. Pabbly Connect currently offer integration with 2,000+ applications.

Utilizing Pabbly Chatflow not only saves time but also provides a better customer experience, ensuring that your salon runs smoothly.

AI Blog Writer | Draft Daily Blogs Automatically in Minutes

Learn how to automate daily blog drafting on WordPress with Pabbly Connect and Google Gemini. Follow this step-by-step guide for seamless integration. Build sophisticated automated workflows in less time than you think. This guide translates complex integrations into straightforward steps for immediate implementation.

Watch Step By Step Video Tutorial Below


1. Accessing Pabbly Connect for Blog Automation

To automate daily blog drafting, you need to start with Pabbly Connect. Begin by visiting the Pabbly Connect website and signing up for a free account. This allows you to explore the features of Pabbly Connect without any cost.

Once logged in, navigate to the workflow builder. This interface is crucial as it enables you to set up triggers and actions. Triggers initiate the workflow, while actions are the tasks executed as a result of the trigger. Now, let’s dive into creating your first automation.


2. Setting Up the Schedule Trigger in Pabbly Connect

The first step in your automation is to set up a schedule with Pabbly Connect. Click on the ‘Add Trigger’ button and search for ‘Schedule by Pabbly’. This feature allows you to schedule workflows to run at specific times.

  • Select ‘Schedule Workflow’ as the event.
  • Set the frequency to run daily.
  • Choose the time for the workflow to run, such as 12 PM.

After configuring these settings, click ‘Save’ to finalize the trigger setup. Your workflow is now scheduled to run daily, initiating the blog drafting process.


3. Generating Blog Content with Google Gemini

Next, we will use Google Gemini to generate content for your blog. In Pabbly Connect, click on ‘Add New Action Step’ and search for ‘Google Gemini’. Select the ‘Generate Content’ event to create the blog title and content.

If you have a pre-existing connection, select it; otherwise, create a new connection by entering your API key from Google AI Studio. Follow these steps to retrieve your API key:

  • Go to the ‘Get API Key’ section in Google AI Studio.
  • Click on ‘Create API Key’ and fill in the required details.
  • Copy the generated key and paste it into Pabbly Connect.

Once the connection is established, provide the prompt for title generation. After clicking ‘Save and Send Test Request’, Google Gemini will generate the title for your blog post.


4. Drafting the Blog Post in WordPress

With the title generated, it’s time to draft the blog post in WordPress using Pabbly Connect. Add a new action step, search for ‘WordPress’, and select ‘Create a Post’ as the event. If a connection exists, choose it; otherwise, create a new connection by entering your WordPress credentials and base URL.

Ensure you input the base URL correctly, excluding any suffixes like ‘/wp-admin’. After saving the connection, map the title and content generated by Google Gemini to the respective fields in the WordPress post settings:

Select the post type as ‘Draft’ to allow for review before publishing. Map the title and content fields with the data from Google Gemini.

Finally, click on ‘Save and Send Test Request’ to create the draft post in your WordPress account. You can check your WordPress dashboard to confirm that the draft has been successfully created.


5. Conclusion: Automate Your Blogging with Pabbly Connect

By following these steps, you can automate the process of drafting daily blog posts on WordPress using Pabbly Connect and Google Gemini. This integration allows you to save time and streamline your content creation process.

Ensure you check out Pabbly Connect to create business automation workflows and reduce manual tasks. Pabbly Connect currently offer integration with 2,000+ applications.

Check out Pabbly Connect – Automate your business workflows effortlessly! Sign Up Free – Start your journey with ease! 10,000+ Video Tutorials – Learn step by step! Join Pabbly Facebook Group – Connect with 21,000+ like minded people!

With Pabbly Connect, your blog posts will be generated automatically at your specified time each day, ensuring that you always have fresh content ready for your audience. Start using Pabbly Connect today to enhance your blogging workflow!

Save Facebook Leads Automatically & Send WhatsApp Messages

Learn how to automate saving Facebook leads to Google Sheets and sending WhatsApp messages using Pabbly Connect. Step-by-step guide included! Explore systematic approaches to creating efficient automation solutions that convert technical concepts into practical, implementable instructions.

Watch Step By Step Video Tutorial Below


1. Accessing Pabbly Connect for Automation

To start automating the process of saving Facebook leads automatically and sending WhatsApp messages, access Pabbly Connect by visiting its website. This platform allows you to integrate various applications seamlessly.

Once on the homepage, you have two options: sign in if you already have an account or sign up for free if you’re a new user. Signing up gives you access to 100 free tasks every month, allowing you to practice and explore the features of Pabbly Connect.


2. Creating a Workflow in Pabbly Connect

After logging into Pabbly Connect, the next step is to create a new workflow. Click on the ‘Create Workflow’ button and select the modern workflow builder. You will then need to name your workflow, such as ‘Save Facebook Leads to Google Sheets and Send WhatsApp Messages’.

  • Click on ‘Add Trigger’ to start the integration process.
  • Choose ‘Facebook Lead Ads’ as your trigger app.
  • Select ‘New Lead Instant’ as the app event.

Once you complete these steps, you will be prompted to connect your Facebook account with Pabbly Connect. Ensure that you are logged into your Facebook account to proceed seamlessly.


3. Testing Facebook Lead Submission

With the trigger set up in Pabbly Connect, it’s time to test the integration. Navigate to the Facebook Lead Ads testing tool and select the page and form you want to use. Fill out the form with the required information, such as name, email, phone number, and city, and submit it.

After submitting the form, return to Pabbly Connect to check if the lead data has been captured correctly. You should see a positive response indicating that the new lead has been successfully retrieved from Facebook.


4. Saving Data to Google Sheets

Now that the lead data is captured, the next step is to save this information to Google Sheets using Pabbly Connect. Click on ‘Add New Action Step’ and select ‘Google Sheets’ as your action app.

  • Choose ‘Add New Row’ as the action event.
  • Connect your Google account and select the spreadsheet where you want to save the leads.
  • Map the fields from the Facebook lead to the corresponding columns in Google Sheets.

Once you have mapped the fields, click on ‘Save and Send Test Request’ to verify that the data is correctly saved in your Google Sheets. You should see a confirmation that the data has been added successfully.


5. Sending WhatsApp Messages

Finally, to complete the automation, you will set up the action to send WhatsApp messages. In Pabbly Connect, click on ‘Add New Action Step’ and select ‘WhatsApp Cloud API’ as your action app.

Choose ‘Send Template Message’ as the action event. Connect your WhatsApp Cloud API account by entering the necessary credentials such as the access token and phone number ID. Map the recipient’s phone number and the message template to the corresponding fields.

Once everything is set up, click on ‘Save and Send Test Request’ to send a test WhatsApp message. Check your WhatsApp application to confirm that the message has been received successfully.


Conclusion

This tutorial demonstrated how to automate the process of saving Facebook leads automatically and sending WhatsApp messages using Pabbly Connect. By following the steps outlined, you can streamline your lead management process and enhance customer engagement.

Ensure you check out Pabbly Connect to create business automation workflows and reduce manual tasks. Pabbly Connect currently offer integration with 2,000+ applications.

Auto Call & Follow-Up Facebook Leads Using Bolna AI + Pabbly

Learn how to automate calling and follow-up for Facebook leads using Pabbly Connect and Bolna AI in this detailed tutorial. Master proven automation processes with practical implementation examples and strategic recommendations you can apply immediately in your workflow.

Watch Step By Step Video Tutorial Below


1. Integrate Facebook Leads with Pabbly Connect

To automate the calling and follow-up process for Facebook leads, you first need to set up Pabbly Connect. This platform serves as the central hub for integrating various applications, including Facebook, Google Sheets, and Bolna AI. Start by signing up for a free account at Pabbly Connect.

Once logged in, navigate to the workflow builder within Pabbly Connect. Here, you will create a new workflow that will trigger when a new lead is generated from Facebook Lead Ads. Select Facebook Lead Ads as your trigger application and choose the event as ‘New Lead Instant’.


2. Configure Google Sheets with Pabbly Connect

After setting up the trigger, the next step involves adding the lead details to Google Sheets using Pabbly Connect. This is crucial as it helps in maintaining a record of all leads. Choose Google Sheets as your action application and select the event ‘Add New Row’.

  • Select the spreadsheet where you want to add lead details.
  • Map the lead details from the Facebook form to the corresponding fields in Google Sheets.
  • Click on ‘Save and Send Test Request’ to ensure the data is added correctly.

This integration allows you to keep track of leads efficiently and prepares you for the next step in the automation process using Pabbly Connect.


3. Schedule Calls with Bolna AI Using Pabbly Connect

Now that your leads are captured in Google Sheets, it’s time to schedule calls using Bolna AI through Pabbly Connect. To do this, add a new action step in your workflow and select Bolna AI as the application. Choose the event ‘Make Phone Call’.

For this step, you need to connect your Bolna AI account by entering your API key. Once connected, select the agent you created for the call. Map the recipient’s phone number and schedule the call using the modified date and time from the previous steps in Pabbly Connect.


4. Set Up Follow-Up Calls with Pabbly Connect

The final step is to set up follow-up calls for leads who did not answer the initial call. This can be done by creating another action step in Pabbly Connect and again selecting Bolna AI. Use the same process as before but modify the timing to schedule this call for 72 hours later.

  • Copy the previous date-time formatter step to get the modified date for follow-up.
  • Select the follow-up agent you created.
  • Map the recipient’s phone number and schedule the follow-up call.

This ensures that every lead receives a second chance to engage with your business, demonstrating the efficiency of Pabbly Connect in automating your follow-up process.


5. Conclusion

In this tutorial, we explored how to automate the calling and follow-up process for Facebook leads using Pabbly Connect and Bolna AI. By integrating these applications, you can ensure timely communication with leads, enhancing your business efficiency.

Ensure you check out Pabbly Connect to create business automation workflows and reduce manual tasks. Pabbly Connect currently offer integration with 2,000+ applications.

Utilizing Pabbly Connect allows you to streamline your workflow, ensuring that no lead is left unattended. Implement this automation today to improve your lead management process.