How to Get Unlimited Leads Using WhatsApp (No Website Needed) 😳

Watch Step By Step Video Tutorial Below


1. Introduction to Pabbly Connect for WhatsApp Automation

Pabbly Connect serves as the backbone for automating WhatsApp messages, enabling seamless communication without manual intervention. In this tutorial, we will explore how to leverage Pabbly Connect to create an automated WhatsApp chatbot.

By integrating WhatsApp with Pabbly Connect, you can streamline your lead generation process. This automation allows you to send template messages, gather user information, and respond dynamically based on user inputs.


2. Setting Up Your Pabbly Connect Account

To get started, access Pabbly Connect by visiting the official website. If you’re new, sign up for a free account to explore its features. Existing users can simply log in to their account.

Once logged in, navigate to the Pabbly Connect dashboard. Here’s how to set up your account:

  • Click on the ‘Access Now’ button for Pabbly Chartflow.
  • Add your WhatsApp number to manage communications.
  • Familiarize yourself with the dashboard layout and features.

This setup is crucial for creating your automated WhatsApp chatbot using Pabbly Connect.


3. Creating Your WhatsApp Chatbot Flow

With your account set up, the next step is to create a flow for your WhatsApp chatbot. Click on the ‘+ Add Flow’ button to start designing your automated responses.

When creating a flow, you’ll need to name it appropriately. For example, you might name it “Lead Generation via WhatsApp”. After naming your flow, you can begin defining the trigger events that will initiate your chatbot interactions:

  • Select a trigger event from the options provided.
  • Choose a template for your automated message.
  • Configure the message format to include personalized fields.

This process is facilitated entirely through Pabbly Connect, ensuring that your users receive timely and relevant responses.


4. Sending Template Messages through Pabbly Connect

Once your flow is established, you can send template messages to your users. In the Pabbly Chartflow interface, navigate to the templates section and select the template you want to use, such as a discount alert.

To send a message, follow these steps:

  • Choose the ‘Send Template’ option.
  • Upload any media if necessary by clicking the ‘Add Image’ button.
  • Click the ‘Send’ button to deliver your message.

Using Pabbly Connect, these messages can be sent automatically, enhancing your communication strategy and improving lead engagement.


5. Finalizing and Testing Your Automated WhatsApp Chatbot

After setting up your chatbot flow, it’s essential to test it to ensure everything functions correctly. Interact with your chatbot as a user would, providing inputs like your name and service preferences.

To finalize your setup:

  • Save your flow to avoid losing your configurations.
  • Verify that all responses are correctly personalized based on user input.
  • Adjust any settings as needed based on your testing.

Testing ensures that your automated WhatsApp chatbot, powered by Pabbly Connect, provides a seamless experience for your users and captures leads effectively.


Conclusion

This tutorial has guided you through automating WhatsApp responses using Pabbly Connect. By following these steps, you can enhance your lead generation efforts and improve customer engagement through effective automation.

All-in-One WhatsApp Chatbot for Sales, Support & Bookings

Watch Step By Step Video Tutorial Below


1. Introduction to Pabbly Connect for WhatsApp Chatbot

In this tutorial, we will explore how to create an all-in-one WhatsApp chatbot using Pabbly Connect. This chatbot will assist users with sales, support, and bookings. By leveraging Pabbly Connect, you can automate data entry into Google Sheets without manual efforts.

To start, ensure you have access to Pabbly Connect. This platform will facilitate the integration between your WhatsApp chatbot and Google Sheets, streamlining your business operations.


2. Setting Up the WhatsApp Chatbot with Pabbly Connect

To set up your WhatsApp chatbot, first navigate to the Pabbly Chatflow page. If you’re a new user, visit the Pabbly Chatflow URL and sign up for a free account. This will give you access to 100 free credits every month for practice.

  • Go to Pabbly Chatflow and sign up.
  • Access the flow page for creating your WhatsApp chatbot.
  • Add your WhatsApp number to the account.

Once you are on the flow page, you will see options for triggers and actions. The trigger will initiate your chatbot when a user sends a specific message, like “Hello”. This is where Pabbly Connect plays a crucial role in automating responses and actions based on user inputs.


3. Creating the Chatbot Flow in Pabbly Connect

The flow of your WhatsApp chatbot can be designed using various message and action blocks available in Pabbly Connect. For example, when a user sends a greeting, the chatbot can respond with a welcome message and present options like “View Courses” or “Ask Questions”.

  • Use the text message block for the welcome message.
  • Create buttons for user interaction.
  • Set up actions that respond to button clicks.

After setting up the initial message and buttons, you can create a list of courses offered by your business. This will allow users to select a course and proceed to enroll. The integration between your chatbot and Google Sheets via Pabbly Connect ensures that user data is captured automatically.


4. Saving Data in Google Sheets Using Pabbly Connect

When a user selects a course and clicks “Enroll Now”, the chatbot will prompt them for their name and email. This data will then be sent to Google Sheets using Pabbly Connect to automate data management.

To achieve this, you will need to set up an API request in Pabbly Connect that connects your WhatsApp chatbot to Google Sheets. This process involves creating a custom field to store user information and ensuring that the data is formatted correctly for the Google Sheets API.

  • Create a custom field for user details.
  • Set up the API request to Google Sheets.
  • Test the integration to ensure data is saved correctly.

By using Pabbly Connect, you can ensure that all user data is captured seamlessly, allowing you to focus on your business rather than manual data entry.


5. Integrating AI Assistant with Pabbly Connect

The final step in creating your WhatsApp chatbot is integrating an AI assistant. This assistant will handle user queries and provide information based on a knowledge base you create. Using Pabbly Connect, you can easily set this up to respond to customer inquiries.

To integrate the AI assistant, you will need to select the appropriate action block in Pabbly Connect and link it to the “Ask Questions” button in your chatbot. The AI will utilize the knowledge base to provide accurate answers to user queries.

  • Create a knowledge base with detailed information about your services.
  • Link the AI assistant to the chatbot flow.
  • Test the AI responses to ensure accuracy.

This integration allows your WhatsApp chatbot to function efficiently, providing users with the information they need 24/7, thereby enhancing customer experience and satisfaction.


Conclusion

In this tutorial, we’ve explored how to create an all-in-one WhatsApp chatbot using Pabbly Connect. By following these steps, you can automate user interactions, save data to Google Sheets, and integrate an AI assistant to handle queries. This setup not only saves time but also improves customer engagement, making it a valuable tool for any business.

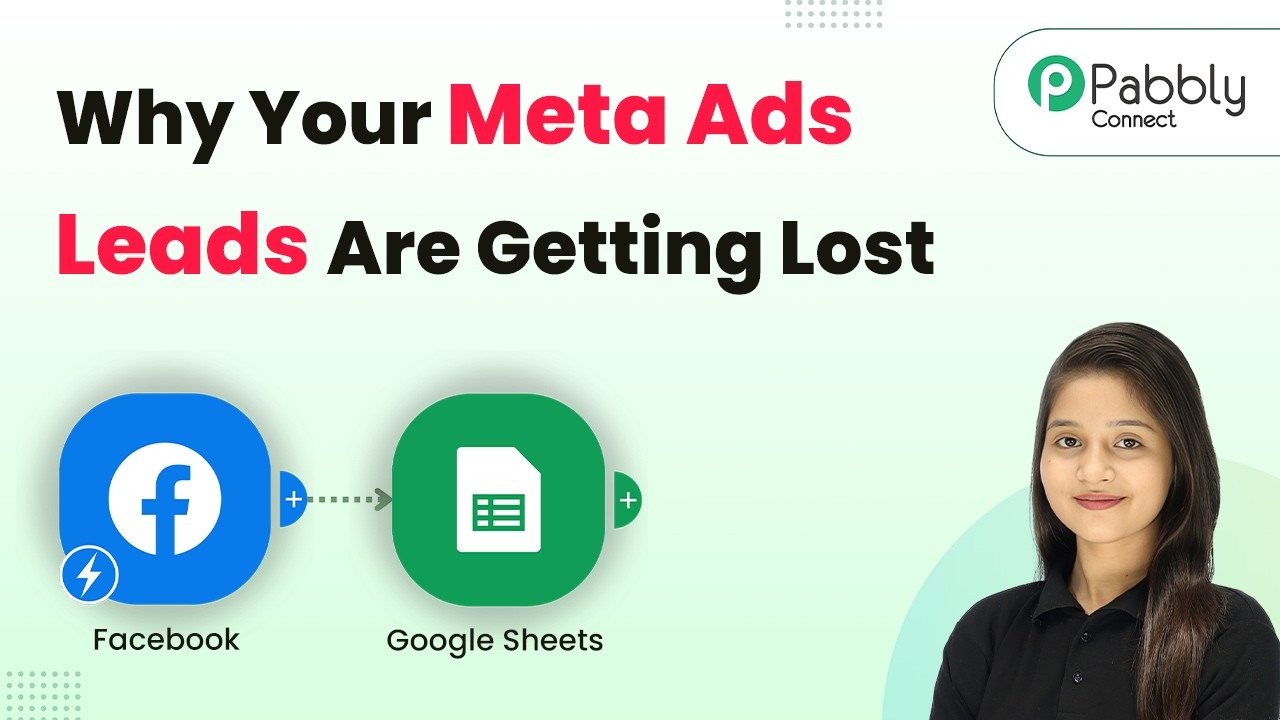
Why Your Meta Ads Leads Are Getting Lost (Auto-Save Setup)

Watch Step By Step Video Tutorial Below


1. Accessing Pabbly Connect for Automation

To get started, you need to access Pabbly Connect. Open a new tab in your browser and search for pabblab.com/connect. This platform is essential for automating your workflows.

Once on the site, you will see options for signing in or signing up. If you’re new, click on the “Sign Up Free” option to get 100 free tasks every month. Existing users should click “Sign In”. After signing in, navigate to the Pabbly Connect dashboard by clicking on the “Access Now” button.


2. Creating a New Workflow in Pabbly Connect

In the Pabbly Connect dashboard, click on “Create Workflow”. You will be prompted to create from scratch or use AI. Select “Create from Scratch” for this tutorial.

  • Choose “New Beta” as your workflow builder.
  • Name your workflow something like “Capture Facebook Leads”.
  • Select the folder as “Publicly Connect” and click “Create”.

Now, you need to set a trigger. Search for “Facebook Lead Ads” and select it as your trigger application. Choose the event “New Lead Instant” to ensure automation runs every time a new lead is generated.


3. Connecting Facebook Lead Ads to Pabbly Connect

After selecting the trigger, click on the “Connect” button. You will have options to add a new connection or select an existing one. For this tutorial, we will create a new connection.

Click on “Add New Connection” and connect with your Facebook account. Once connected, select your Facebook page and lead form. Make sure to choose the lead form you are using to collect details.

  • Choose the response format as “Simple”.
  • Click on “Save and Send Test Request” to test the connection.

Once the test is successful, you’ll see that the connection between your Facebook account and Pabbly Connect is working perfectly.


4. Storing Leads in Google Sheets via Pabbly Connect

Next, you will set up the action to store leads in Google Sheets. Click on the plus icon and search for “Google Sheets”. Select the event as “Add New Row”.

Click on the “Connect” button and create a new connection by signing in with your Google account. After connecting, select the spreadsheet where you want to store the leads.

  • Choose the spreadsheet named “Facebook Leads”.
  • Select “Sheet 1” for the data storage.

In the mapping section, map the fields such as first name, last name, phone number, and email address from the Facebook lead data to the corresponding columns in your Google Sheet. This dynamic mapping will ensure that each lead’s data is captured correctly.


5. Completing and Activating the Automation

After mapping the fields, click on the “Save and Send Test Request” button. You should see a positive response indicating that a new row has been successfully added to your Google Sheet.

To finalize your workflow, ensure to enable the toggle switch at the top right of the screen. This step is crucial; if not enabled, your automation will not work.

  • Test the workflow to confirm everything is functioning correctly.
  • If you encounter any issues, refer to the support options available.

With this setup, your Facebook leads will automatically be captured and stored in Google Sheets, streamlining your lead management process using Pabbly Connect.


Conclusion

In this tutorial, we explored how to automate Facebook Lead Ads with Google Sheets using Pabbly Connect. This integration allows you to capture leads instantly, ensuring no opportunities are lost. Start automating your workflows today!

Automatically Add WhatsApp Leads to CRM (No Code Automation)

Watch Step By Step Video Tutorial Below


1. Accessing Pabbly Connect for Integration

To start integrating WhatsApp with HubSpot CRM, you first need to access Pabbly Connect. Visit the Pabbly website by typing pabbly.com in your browser. Once there, you can sign in or create a new account if you are a first-time user.

After signing in, click on the Pabbly Connect option on your dashboard. This will take you to the Pabbly Connect app where you can create workflows. Here, you can manage all your integrations and automations seamlessly.


2. Creating a New Workflow in Pabbly Connect

Next, you will create a new workflow in Pabbly Connect. Click on the Create Workflow button and select the new beta workflow builder. Name your workflow something like “Automatically Add WhatsApp Leads to CRM” and choose an appropriate folder.

  • Select the folder for your workflow.
  • Click on the Create button to save your workflow.

Once you create the workflow, you will need to set up a trigger. This trigger will activate the automation whenever a new message is received on WhatsApp.


3. Setting Up WhatsApp Cloud API as Trigger

For the trigger, select Pabbly Connect and choose the WhatsApp Cloud API as your trigger application. Set the trigger event to Message Notification and click on Connect.

A webhook URL will be generated, which you need to copy and paste into your WhatsApp Cloud API settings. This URL acts as a bridge between WhatsApp and Pabbly Connect. Make sure to follow the provided headers and save the settings in your WhatsApp API configuration.

  • Remove any existing callback URL.
  • Enter the new webhook URL and verify token.

After saving the configuration, test the connection by sending a message through WhatsApp. This will confirm if the setup is working correctly.


4. Connecting HubSpot CRM as Action Application

Now that your trigger is set, the next step is to connect HubSpot CRM as the action application in Pabbly Connect. Choose HubSpot and select the Create Contact action event. Click on Connect to establish the connection.

Once connected, you will need to map the fields from the WhatsApp message to the HubSpot contact fields. For instance, map the phone number, name, and message. This ensures that every new WhatsApp message creates a corresponding contact in HubSpot CRM.

  • Use dynamic mapping to keep the data updated.
  • Ensure you enter all required fields for HubSpot.

After mapping the fields, click on Save and Send Test Request to verify if the contact is created in HubSpot.


5. Finalizing the Integration Workflow

To finalize the integration, check your HubSpot CRM for the newly created contact. If the test was successful, you should see the lead details populated in HubSpot, indicating that the integration via Pabbly Connect is working correctly.

This setup will now automatically add any new WhatsApp messages as leads in your HubSpot CRM. You can monitor this workflow in Pabbly Connect to ensure everything is functioning as expected.

In summary, by using Pabbly Connect, you have successfully integrated WhatsApp with HubSpot CRM, allowing for seamless lead management.


Conclusion

This tutorial demonstrated how to automate lead management by integrating WhatsApp with HubSpot CRM using Pabbly Connect. By following these steps, you can enhance your CRM capabilities and streamline your workflow.

WordPress User Automation + WhatsApp Alerts (No Code Tutorial)

Watch Step By Step Video Tutorial Below


1. Accessing Pabbly Connect for Integration

To begin integrating WhatsApp with WordPress, you’ll first need to access Pabbly Connect. This platform serves as the central hub for your automation needs. Simply navigate to pabbly.com/connect to reach the workflow page.

If you are a new user, you can sign up for free and explore 100 tasks each month. If you are an existing user, just log in to your account. Once on the workflow page, you can start creating your automation.


2. Setting Up Google Form Trigger in Pabbly Connect

The first step in your automation is to set up a trigger using Google Forms. In Pabbly Connect, select Google Forms as your trigger app. This will be the application that initiates your workflow when a new response is received.

  • Select the trigger event as “New Response Received”.
  • Click the “Connect” button to generate a webhook URL.
  • Copy the webhook URL provided by Pabbly Connect.

After copying the webhook URL, head over to your Google Form. In the responses menu, select “View in Sheets” to access the linked Google Sheet. Under the “Extensions” menu, navigate to “Add-ons” and install the Pabbly Connect Webhook add-on if you haven’t done so already. Then, set up the webhook URL in the add-on settings.


3. Creating a WordPress User Action

Once your Google Form trigger is set, the next step is to create a user in WordPress using Pabbly Connect. Select WordPress as your action app, and choose the event “Create User”.

To set up the connection, you will need to enter your WordPress username, password, and base URL. After entering these details, click “Save” to establish the connection. Now, you can map the fields from the Google Form responses to the WordPress user fields.

  • Map the email address, username, and password fields from the Google Form responses.
  • Set the user role as “Subscriber”.

After mapping the necessary fields, click on “Save and Send Test Request”. Check your WordPress dashboard to confirm that the new user has been successfully created.


4. Sending WhatsApp Message Notification

The final step in the integration process involves sending a WhatsApp message to the new user. In Pabbly Connect, add a new action step and select WhatsApp Cloud API as your action app.

For this, you will need to enter your WhatsApp Business Account ID, Phone Number ID, and Access Token. After entering these details, map the recipient’s mobile number and create a message that includes user details such as their name and login credentials.

  • Format your message with necessary details and mapping.
  • Click “Save and Send Test Request” to send the message.

Check your WhatsApp to confirm that the message has been received successfully, indicating that your automation is working perfectly.


5. Conclusion

By following these steps, you have successfully integrated WhatsApp with WordPress using Pabbly Connect. This automation allows you to streamline user notifications and improve user experience. Now, you can focus on growing your business while Pabbly Connect handles the manual tasks.

Auto Send Daily Work Reports to Managers

Watch Step By Step Video Tutorial Below


1. Accessing Pabbly Connect for Automation

To start automating daily reports, first access Pabbly Connect. This platform allows you to integrate various applications seamlessly.

Navigate to the Pabbly website and sign in or create a free account. Once logged in, you can start building your automation workflows.


2. Creating Your Workflow in Pabbly Connect

After signing into Pabbly Connect, click on the “Create Workflow” button. This action will initiate the workflow creation process.

  • Select “Create from Scratch” for a custom workflow.
  • Choose the new beta version of the workflow builder.
  • Name your workflow and select a folder to save it.

After naming your workflow, click the “Create” button to proceed. This will lead you to the trigger application selection.


3. Setting Up Triggers with Pabbly Connect

In this step, you will set the trigger for your workflow using Pabbly Connect. Select “Schedule by Pabbly” as your trigger application.

Choose the event “Schedule Workflow” and set it to trigger daily at your desired time. For example, you can select 6 a.m. as the trigger time.

  • Specify the frequency as “Every Day”.
  • Select the time for the workflow to run.

Click the “Save” button to finalize your trigger settings. Your workflow is now scheduled to run automatically.


4. Integrating Google Sheets with Pabbly Connect

Next, integrate Google Sheets into your Pabbly Connect workflow. This allows you to pull task updates from your team.

Select Google Sheets as your action application and choose “Get Rows” as the event. This step will pull all relevant data from your specified spreadsheet.

  • Create a new connection to your Google account.
  • Select the spreadsheet and the specific sheet you want to pull data from.
  • Define the range of data you want to retrieve.

After setting up these parameters, click “Save and Send Test Request” to ensure data is being pulled correctly from Google Sheets.


5. Sending Email Reports via Gmail

Finally, you will send the daily report via Gmail using Pabbly Connect. Select Gmail as your action application and choose “Send Email” as the event.

Set up the email parameters, including the sender name, recipient’s email, subject, and content. Map the data retrieved from Google Sheets into the email body for personalization.

  • Fill in the sender name and recipient’s email address.
  • Enter a subject line for your email report.
  • Map the message content from the previous step.

Click “Save and Send Test Request” to send the email. Check your Gmail to confirm that the report has been sent successfully.


Conclusion

In this tutorial, we explored how to automate daily reports using Pabbly Connect. By integrating Google Sheets and Gmail, you can streamline your workflow and ensure timely updates.

Every Booking Gets an Instant Confirmation Email Automatically

Watch Step By Step Video Tutorial Below


1. Accessing Pabbly Connect for Integration

To start integrating Calendly with Gmail, first access Pabbly Connect. Go to the Pabbly Connect website and either sign in or sign up for a free account.

Once logged in, you’ll have access to 100 free tasks each month, allowing you to create automations without any coding skills. This is your first step towards automating booking confirmations.


2. Setting Up the Trigger in Pabbly Connect

In Pabbly Connect, the integration process begins with setting up a trigger. Select Calendly as the trigger application. This means that whenever a new booking is made, it will trigger the automation.

  • Choose “Invite Created” as the event.
  • Click on the connect button to establish a connection.
  • Log into your Calendly account if prompted.

After connecting, select your organization and user, then click on “Save and Send Test Request” to ensure the trigger is working correctly. This sets the stage for the next steps in the integration.


3. Capturing the Response from Calendly

Once the trigger is set, you can test it by scheduling a new meeting in Calendly. As you fill in details like your name and email, Pabbly Connect will capture this information.

For example, if you enter the name “Best Lead” and email “[email protected]”, this data will be recorded in Pabbly Connect. You can verify the captured response in the logs to ensure everything is functioning smoothly.


4. Sending a Confirmation Email via Gmail

After capturing the response, the next step is to send a confirmation email through Gmail using Pabbly Connect. Select Gmail as the action application and choose the “Send Email” event.

  • Connect your Gmail account by clicking on “Sign in with Google”.
  • Map the recipient’s email address from the previous Calendly response.
  • Fill in the subject and body of the email, ensuring to include dynamic data.

Once the email is configured, click on “Send Test Request” to ensure the email gets sent correctly. This confirms that your automation is now complete and functional.


5. Finalizing the Integration Setup

After successfully sending the confirmation email, you can finalize your integration setup in Pabbly Connect. Review the workflow to ensure all steps are functioning as intended.

This integration allows for seamless booking confirmations whenever a new meeting is scheduled in Calendly. Now, every time a booking is made, an email will automatically be sent to the customer, enhancing your business’s efficiency.


Conclusion

In this tutorial, you learned how to integrate Calendly with Gmail using Pabbly Connect. This setup automates your booking confirmations, allowing for a more efficient workflow in your business. With Pabbly Connect, you can streamline processes without any coding skills.

Top 5 Payment Gateway Automations for Businesses

Watch Step By Step Video Tutorial Below


1. Getting Started with Pabbly Connect

To begin automating your business processes, you first need to access Pabbly Connect. Start by opening a new browser tab and navigating to pabbl.com/connect. Once there, click on the ‘Sign Up for Free’ option located in the top right corner of the page.

After signing up, you will receive 100 free tasks per month, allowing you to explore the functionalities of Pabbly Connect. This free trial is an excellent way to test the platform’s capabilities before deciding on a subscription plan.


2. Automating Payment Confirmations with Pabbly Connect

One of the first automations you can set up using Pabbly Connect is automatic payment confirmations. Instead of manually confirming payments, this automation sends an email, SMS, or WhatsApp message to customers as soon as their payment is successful.

To set this up, follow these steps:

  • Connect Razorpay as the trigger application.
  • Set a filter to create automation for specific products if needed.
  • Connect Gmail or your preferred email service for sending confirmation emails.

This automation not only enhances customer trust but also reduces the number of support queries regarding payment confirmations.


3. Automatic Digital Product Delivery via Pabbly Connect

Another fantastic feature of Pabbly Connect is the ability to automate the delivery of digital products. For businesses selling online courses or eBooks, this automation can save significant time and effort.

To automate digital product delivery, follow these steps:

  • Set Razorpay or any other payment gateway as the trigger.
  • Choose Gmail as the action to send login credentials or download links instantly after payment.
  • Ensure the email content includes necessary product access details.

This process allows customers to receive their purchased products immediately without any manual intervention, enhancing their experience.


4. Updating CRM and Google Sheets Automatically with Pabbly Connect

Using Pabbly Connect, you can also automate the addition of new customers to your CRM and Google Sheets. This ensures that all customer information is stored systematically without manual entry.

To set this automation, do the following:

  • Select Razorpay or your payment gateway as the trigger.
  • Choose Google Sheets and your CRM as actions to store customer details.
  • Map fields like email and phone number to ensure accurate data entry.

This automation helps maintain an organized database, making it easier for your team to track orders and customer interactions.


5. Invoice Generation and Team Notifications with Pabbly Connect

Lastly, Pabbly Connect can automate invoice generation and team notifications. This saves time and reduces errors in your accounting processes.

To set this up, follow these steps:

  • Connect your payment gateway as the trigger for invoice generation.
  • Choose Zoho Books or QuickBooks as the action to generate invoices automatically.
  • Set up notifications to send updates to your team via Slack or Discord.

This automation keeps your team informed about payments and ensures that invoices are sent promptly, improving overall efficiency.


Conclusion

By leveraging Pabbly Connect, you can automate essential business processes like payment confirmations, digital product deliveries, CRM updates, invoice generation, and team notifications, ultimately saving time and enhancing customer satisfaction.

Automate Appointment Booking + WhatsApp Reminders

Watch Step By Step Video Tutorial Below


1. Accessing Pabbly Connect for Automation

To automate your appointment booking process, you first need to access Pabbly Connect. Open a new tab and enter the URL pabbly.com/connect. This will take you to the homepage where you can either sign in or sign up for free.

If you’re a new user, click on the ‘Sign Up Free’ button. By signing up, you will receive 100 free tasks each month to explore Pabbly Connect. Existing users can simply sign in to access their workflow page.


2. Creating Your Workflow in Pabbly Connect

Once you’re logged into Pabbly Connect, you can start creating your workflow. The first step is to add a trigger, which is the event that initiates the automation. In this case, the trigger will be a new appointment received through Google Forms.

  • Select Google Forms as your trigger application.
  • Choose the event as ‘New Response Received’.
  • Click the ‘Connect’ button to generate a webhook URL.

Copy the webhook URL provided by Pabbly Connect. This URL acts as a bridge between Google Forms and Pabbly Connect, allowing you to capture form responses automatically.


3. Setting Up Google Forms with Pabbly Connect

Now, head to your Google Form where you receive appointment requests. Navigate to the ‘Responses’ tab and click on ‘View in Sheets’. This creates a Google Sheet that will automatically log responses from your form.

Next, go back to the Google Sheet, click on ‘Extensions’, and search for Pabbly Connect Webhooks to install it. Once installed, select ‘Initial Setup’ under the Pabbly Connect Webhooks option and paste the webhook URL you copied earlier. Enter the last data column, which is usually column G.


4. Integrating Google Calendar with Pabbly Connect

After setting up Google Forms, the next step is to add Google Calendar as an action app in your Pabbly Connect workflow. This allows you to create calendar events based on the submitted appointment data.

  • Select Google Calendar as your action app.
  • Choose the event as ‘Create Event’.
  • Map the appointment details such as title, start date, and end date from the Google Form responses.

Ensure the date and time formats are correct. You can use Pabbly Connect‘s Date and Time Formatter to adjust any mismatches. This will ensure your events are created accurately in Google Calendar.


5. Sending WhatsApp Confirmations with Pabbly Connect

The final step in your automation process is to send confirmation messages via WhatsApp. For this, you will use the WhatsApp Cloud API integrated through Pabbly Connect.

Search for the WhatsApp Cloud API in Pabbly Connect and select the ‘Send Text Message’ event. Connect your WhatsApp account by entering your API token and phone number ID. Map the recipient’s number and the message content, including the appointment details.

Once everything is set up, click ‘Save and Send Test Request’ to check if the WhatsApp message is sent successfully. This will ensure that your clients receive timely confirmation messages about their appointments.


Conclusion

By following these steps, you can successfully automate your appointment booking process using Pabbly Connect. This integration not only saves time but also enhances your client communication through automated WhatsApp confirmations and Google Calendar events.

Build a WhatsApp AI Chatbot for Flower Shop Orders & Delivery

Watch Step By Step Video Tutorial Below


1. Accessing Pabbly Connect for Integration

To start integrating your WhatsApp chatbot, you need to access Pabbly Connect. Begin by navigating to the Pabbly website and signing in to your account. If you don’t have an account, you can sign up for free and receive 100 credits monthly to test the features.

Once logged in, select the Pabbly Chatflow option on the dashboard. This will lead you to the app where you can create your WhatsApp chatbot. Ensure you have your WhatsApp number connected to the Pabbly Chatflow for seamless operation.


2. Creating Your AI Assistant Using Pabbly Connect

After accessing the Pabbly Chatflow, you can start creating your AI assistant. Click on the AI Assistant option on the left sidebar, and then select the option to create a new assistant. Name it something relevant, like “Floral AI Agent”.

  • Choose AI instructions and set it to AI agent.
  • Set the creativity level of AI responses by adjusting the temperature setting.
  • Connect to OpenAI by entering your API key.

After filling in these details, save your AI assistant. This setup allows Pabbly Connect to facilitate communication between your WhatsApp and the AI assistant, ensuring automated responses to customer queries.


3. Configuring AI Settings in Pabbly Connect

Configuring the AI settings is crucial for effective communication. In the AI assistant setup, you will find several options. Toggle on the header and footer messages to give your chatbot a professional touch.

Input fallback messages to provide users with alternative contact details if the AI cannot respond. Set the retry attempts for the AI to ensure it tries multiple times to answer a query before giving up. This step is vital for maintaining customer satisfaction.

  • Use a fallback message for unresponsive queries.
  • Set a stop keyword for users to halt AI responses.
  • Upload a knowledge source file for reference.

These settings ensure that your AI assistant is equipped to handle various customer inquiries effectively through Pabbly Connect.


4. Styling and Customizing Your Assistant with Pabbly Connect

Styling your AI assistant is essential for branding. Use the assistant settings to customize the appearance, including the theme (light or dark) and the shape (circle or square). You can also upload a profile picture and set background colors to match your business identity.

Make sure to add initial messages that your AI assistant will use to greet customers. This personalization helps in making the interaction feel more engaging and tailored to the user’s needs.

Once all settings are configured, save your assistant. This ensures that all the customizations are applied and that your assistant is ready for deployment through Pabbly Connect.


5. Assigning Your AI Assistant in Pabbly Connect

To assign your AI assistant to specific contacts or groups, navigate to the inbox settings in Pabbly Connect. Here, you can enable auto-reply settings for your AI assistant. This feature allows your assistant to respond to all incoming queries automatically, reducing response time.

Select the contacts or groups you want to assign the AI assistant to and save your settings. This step is crucial for ensuring that your assistant is actively engaging with users as soon as they reach out.

By following the above steps, you can effectively utilize Pabbly Connect to automate customer interactions via WhatsApp, enhancing user experience and operational efficiency.


Conclusion

Integrating a WhatsApp chatbot using Pabbly Connect streamlines customer service by automating responses. By following the steps outlined, you can create an effective AI assistant that enhances user engagement and satisfaction.