Auto Send Welcome Video to New Contest Participants

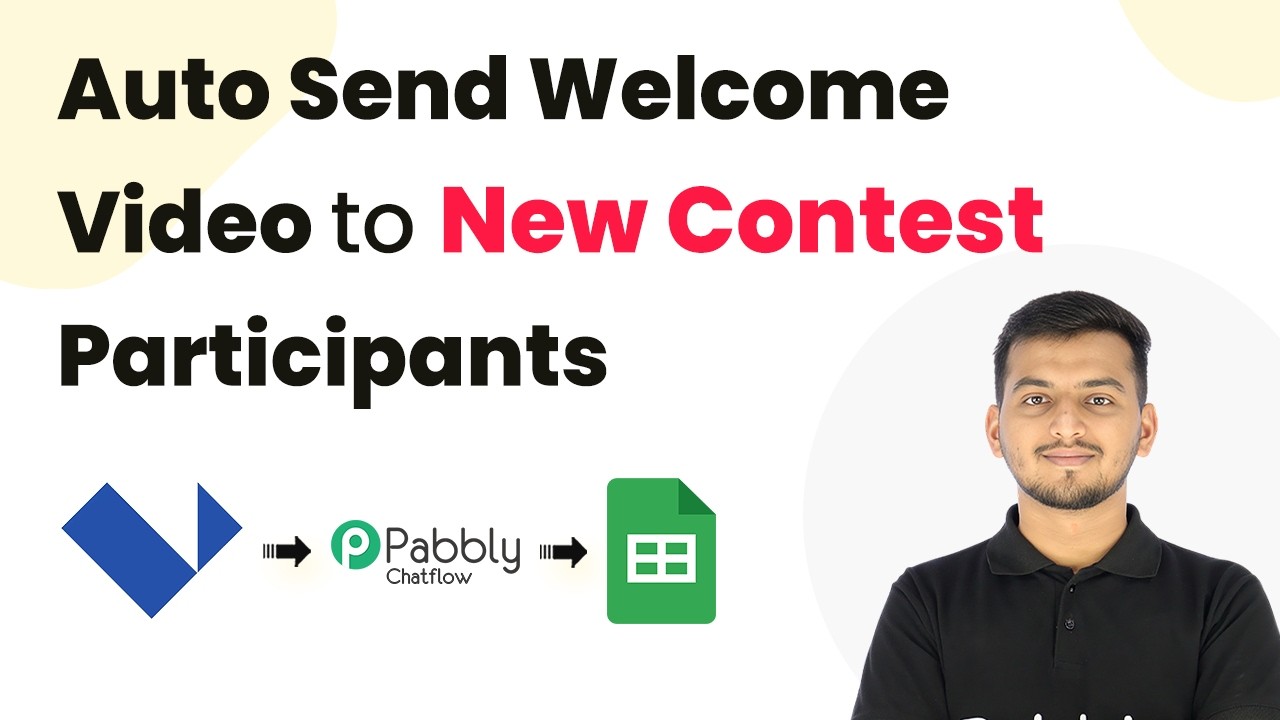
Learn how to automatically send welcome videos to new contest participants using Pabbly Connect. Step-by-step tutorial on integrating Google Sheets, YouTube, and WhatsApp. Implement the precise methodologies leading organizations use to automate repetitive tasks, illustrated with practical examples designed for immediate application.

Watch Step By Step Video Tutorial Below


1. Access Pabbly Connect to Start Automation

To begin automating the process of sending welcome videos to new contest participants, first, access Pabbly Connect. Open a web browser and navigate to the Pabbly Connect website. If you are a new user, click on the ‘Sign Up Free’ button to create an account. Existing users can click on ‘Sign In’ to access their accounts.

Once logged in, you will be directed to the Pabbly Connect dashboard. Here, you can see various applications available for integration. Click on the ‘Create Workflow’ button to start setting up your automation. This is where you will build the workflow that connects all necessary applications.


2. Create a Workflow for Contest Participation

In your Pabbly Connect dashboard, click on the ‘Create Workflow’ button. You will be prompted to name your workflow. For this tutorial, name it ‘Mega Fest Contest Welcome Video Automation’. After naming, select a folder to keep your workflow organized and click ‘Create’.

  • Click on the ‘Add Trigger’ button.
  • Select your trigger application (e.g., Landing Page).
  • Choose the event (e.g., New Lead).

This setup will ensure that every time a new participant registers, the automation is triggered, allowing you to send a welcome video seamlessly.


3. Integrate Landing Page with Pabbly Connect

After setting your trigger, you will need to integrate your landing page where participants will sign up. Copy the webhook URL provided by Pabbly Connect and paste it into the integration settings of your landing page. This step is crucial as it allows data from the landing page to flow into Pabbly Connect when a new participant signs up.

Ensure that the request method is set to POST and save the settings. Once the landing page is published, you can test the integration by filling out the form. Upon submission, the details should appear in your Pabbly Connect account, confirming that the integration works correctly.


4. Send Welcome Video via WhatsApp

Next, you will set up the action to send a welcome video message via WhatsApp. In your workflow, click on the ‘+’ button to add a new action step. Select Pabbly Chatflow as the action application and choose the event ‘Send Text Message’. This allows you to send a personalized message along with the video link.

  • Map the recipient’s WhatsApp number using data from the trigger.
  • Compose your welcome message, including a link to your YouTube video.
  • Test the action to ensure it sends correctly.

This step completes the initial setup for sending welcome videos, making your communication with participants efficient and engaging.


5. Log Participant Data into Google Sheets

Finally, to keep track of your contest participants, you need to log their information into Google Sheets. In Pabbly Connect, add another action step and select Google Sheets as the application. Choose the event ‘Add New Row’ to log participant details automatically.

Connect your Google Sheets account by selecting the appropriate spreadsheet and sheet. Map the participant details like name, email, and phone number to the corresponding columns. This ensures that every new lead captured from your landing page is stored for future reference and follow-ups.

After completing the mapping, test this action step to confirm that new rows are added correctly to your Google Sheets. This integration helps you manage participants effectively and follow up as necessary.


Conclusion

By following this guide, you can automate the process of sending welcome videos to new contest participants using Pabbly Connect. This integration not only enhances participant engagement but also streamlines your data management process through Google Sheets. Start using Pabbly Connect today to simplify your workflows and improve lead nurturing.

Ensure you check out Pabbly Connect to create business automation workflows and reduce manual tasks. Pabbly Connect currently offer integration with 2,000+ applications.

Share Daily News on Discord Automatically

Learn how to automate sharing daily news on Discord using Pabbly Connect. This step-by-step tutorial guides you through the integration process. Transform complex automation concepts into accessible, actionable steps that eliminate unnecessary manual work while maximizing existing application capabilities.

Watch Step By Step Video Tutorial Below


1. Setting Up Pabbly Connect for Daily News Sharing

To start sharing daily news on Discord automatically, you need to access Pabbly Connect. If you are a new user, go to your browser and search for pabbl.com/connect. Once on the landing page, click on the ‘Sign Up for Free’ option in the top right corner. You will receive 100 free tasks every month to explore the features of Pabbly Connect.

Existing users can directly open their workflow builder in Pabbly Connect. This is where you will set up the automation to share news on Discord. This powerful tool allows you to create workflows that connect different applications seamlessly.


2. Creating the Workflow in Pabbly Connect

In the workflow builder of Pabbly Connect, you will need to set up a trigger and an action. The trigger initiates the workflow when a specific event occurs, and the action defines what happens next. Click on the ‘Add Trigger’ button to begin.

  • Search for ‘RSS by Pabbly’ as the trigger application.
  • Select ‘New Item in Feed’ as the event.
  • Connect by entering the feed URL of the news source.

After entering the feed URL, select the sync filter type as ‘Recommended’. Click on ‘Save and Send Test Request’ to test the connection. This will allow Pabbly Connect to fetch the latest news items from the specified RSS feed.


3. Configuring Discord Integration

After setting up the RSS feed trigger, it’s time to configure the action to send messages to Discord. Click on ‘Add New Action Step’ and search for Discord as the action application. Choose the event type that suits your needs, such as ‘Send Channel Message HTML’ or ‘Markdown’. using Pabbly Connect

  • Connect your Discord account by entering the Webhook URL.
  • Set the channel where you want to send the messages.
  • Map the message content dynamically using the data from the RSS feed.

This mapping process ensures that each new news item is sent to Discord automatically, providing real-time updates to your channel members.


4. Mapping News Details in Pabbly Connect

Once you have set up the Discord action, you need to map the news details to the message format you want to send. In the message field, type a message like ‘New Update:’, followed by the news headline and description. Use the mapping feature of Pabbly Connect to insert dynamic content from the RSS feed.

To map the details, simply type a slash and search for the relevant fields like title, description, and link. This will ensure that every time a new news item is fetched, the message sent to Discord will be updated accordingly. After mapping all necessary fields, click on ‘Save and Send Test Request’ to verify that the setup works correctly.


5. Finalizing the Automation Process

After testing the integration, you should see a successful response indicating that the message was sent to your Discord channel. This confirms that Pabbly Connect is functioning properly and will check for new items every 60 minutes as per your settings.

With this automation in place, you can now share daily news updates on Discord without any manual effort. If you wish to change the news category, simply update the feed URL in your workflow. This flexibility allows you to customize the news sources based on your interests.


Conclusion

In this tutorial, we explored how to use Pabbly Connect to automate sharing daily news on Discord. By setting up an RSS feed trigger and mapping the news details, you can keep your Discord channel updated effortlessly. This integration not only saves time but also enhances communication within your community.

Ensure you check out Pabbly Connect to create business automation workflows and reduce manual tasks. Pabbly Connect currently offer integration with 2,000+ applications.

Put Your Entire Business on Autopilot with Pabbly Chatflow AI

Learn how to automate your business with Pabbly Chatflow AI. This detailed tutorial covers step-by-step integration processes for a seamless experience. Explore how leading businesses automate customer interactions with carefully designed chat sequences that feel natural and helpful.

Watch Step By Step Video Tutorial Below


1. Accessing Pabbly Chatflow for Your Business

To put your entire business on autopilot, the first step is to access Pabbly Chatflow. Open a new tab and navigate to Pabbly.com/chatflow. This platform allows you to automate WhatsApp messages and responses effectively.

If you are new to Pabbly, click on the ‘Sign Up Free’ option to receive 100 free credits every month. Existing users should select the ‘Sign In’ button to access their accounts. Once logged in, click on the ‘Access Now’ button for Pabbly Chatflow to reach the dashboard.


2. Creating Your AI-Powered Assistant with Pabbly Chatflow

After accessing Pabbly Chatflow, the next step is to create your AI assistant. Click on the ‘Assistant’ feature on the left side of the dashboard. Then, hit the ‘+ Add Assistant’ button to start building your assistant.

  • Name your assistant, for example, ‘Put Your Entire Business on Autopilot’.
  • Choose the instructions tab and select ‘AI Agent’.
  • Set the temperature to control the creativity of the assistant’s replies.

Once these settings are configured, you can proceed to customize the assistant’s behavior according to your business needs.


3. Configuring Assistant Settings in Pabbly Chatflow

With your assistant created, it’s time to configure its settings in Pabbly Chatflow. Begin by entering a header message that welcomes users when they start a conversation. This sets the tone for user interactions.

Additionally, you can customize the footer message, which will be sent at the end of conversations. Don’t forget to set any stop keywords that will halt the AI’s responses when needed. Here’s how to set them up:

  • Enter a fallback message for situations where the assistant cannot respond.
  • Define retry attempts for the assistant to try responding again.

These configurations ensure your assistant can handle various scenarios effectively and maintain smooth communication with users.


4. Uploading Your Knowledge Base to Pabbly Chatflow

Next, uploading a knowledge base file is crucial for your assistant’s effectiveness in providing accurate responses. In Pabbly Chatflow, you can drag and drop your knowledge base file, which contains essential information about your business.

Ensure your knowledge base is well-structured and includes details such as operating hours, menu options, and FAQs. The accepted formats are PDF and TXT, with a maximum size of 90 MB. After uploading, your assistant will be able to give precise answers based on the information provided.


5. Activating and Testing Your Assistant in Pabbly Chatflow

After configuring all settings and uploading the knowledge base, you can activate your assistant in Pabbly Chatflow. Simply toggle the activation button and save your assistant settings. This will make your assistant live and ready to assist customers.

To test your assistant, send a simple message like ‘Hi’ to see how it responds. This is crucial to ensure everything works as intended. You can also embed the assistant on your website by copying the provided code and pasting it into your site’s HTML.

Conclusion

This guide summarizes the key points and helps you understand the essential features and benefits of using this tool.

Ensure you check out Pabbly Connect to create business automation workflows and reduce manual tasks. Pabbly Connect currently offer integration with 2,000+ applications.


In conclusion, using Pabbly Chatflow to automate your business processes can significantly enhance customer interaction. By following these steps, you can create a responsive AI assistant tailored to your business needs, ensuring 24/7 availability for your customers without manual intervention.

Automate WhatsApp Business Communication with AI

Learn how to automate WhatsApp Business communication using Pabbly Chatflow in this detailed tutorial. Enhance customer support with AI-powered responses. Learn how to create intelligent chat workflows that provide instant customer support while qualifying leads 24/7 without human intervention.

Watch Step By Step Video Tutorial Below


1. Accessing Pabbly Chatflow for WhatsApp Automation

To automate WhatsApp Business communication, you first need to access Pabbly Chatflow. Start by opening a new tab and typing the URL Pabbly.com/chatflow. Once on the homepage, you will see options for signing in or signing up.

If you are new to Pabbly Chatflow, click on the ‘Sign Up Free’ button. After signing up, you will receive 100 free credits to explore the platform. Existing users can simply click on ‘Sign In’ to access their account.


2. Creating Your AI Assistant in Pabbly Chatflow

Once logged into Pabbly Chatflow, navigate to the dashboard where you can see all Pabbly applications. Click on the ‘Access Now’ button under Pabbly Chatflow. Here, you can create your AI assistant that will respond to customer queries on WhatsApp.

  • Click on the ‘AI Assistant’ option from the sidebar.
  • Select ‘Add AI Assistant’ to create a new assistant.
  • Enter a name for your assistant, for example, ‘Cloud Nest AI Assistant’.

After naming your assistant, you will be directed to a configuration page. Here, you can set the AI instructions and choose the instruction type. Make sure to select ‘AI Agent’ for the best results.


3. Configuring Your AI Assistant Settings

In this section, you will configure your AI assistant settings within Pabbly Chatflow. You will need to set the temperature for your AI’s responses, which determines the creativity of the answers. A temperature of 0.5 is recommended for friendly interactions.

Additionally, you will need to provide your OpenAI API key. Follow these steps to get your API key:

  • Visit the OpenAI API key page and click ‘Create New Secret Key’.
  • Enter a name and project name to generate the key.
  • Copy the key and paste it into the API key section in Pabbly Chatflow.

Once the API key is saved successfully, you can manage additional settings like header/footer messages and stop keywords to control the AI assistant’s responses.


4. Setting Up Your Knowledge Base

The knowledge base is essential for your AI assistant to respond accurately. In Pabbly Chatflow, navigate to the ‘Knowledge Source’ tab and upload your business details in .txt or PDF format. Ensure your document contains relevant information about your products and services.

For example, if your business is a SaaS company, your knowledge base should include:

Details about the services you offer. Pricing information. How to create projects or use your software.

After uploading the knowledge base, ensure it’s linked correctly to your AI assistant, so it can provide accurate responses to customer inquiries.


5. Enabling Your AI Assistant for WhatsApp Communication

To finalize your setup, you need to enable your AI assistant for WhatsApp communication through Pabbly Chatflow. Go to the settings and select ‘Inbox Settings’. Here, you can enable AI auto replies for all contacts or a specific contact list.

To enable the assistant for a particular chat, select the contact and click on the ‘Choose AI Assistant’ option. From there, select the AI assistant you created and save the settings. This will allow your assistant to respond to customer queries automatically.

By following these steps, your AI assistant is now ready to handle customer inquiries on WhatsApp, providing instant responses 24/7, thus improving customer service without manual effort.


Conclusion

Using Pabbly Chatflow to automate WhatsApp Business communication enhances customer support significantly. By setting up an AI assistant, businesses can provide instant responses, improving engagement and satisfaction.

Ensure you check out Pabbly Connect to create business automation workflows and reduce manual tasks. Pabbly Connect currently offer integration with 2,000+ applications.

This WhatsApp Bot Replies in Hindi Automatically 😱

Learn how to create a WhatsApp bot that replies automatically in Hindi using Pabbly Connect. Step-by-step guide with detailed instructions. Eliminate manual repetitive tasks from your workflow. Discover proven automation methods with intuitive steps designed for efficiency-minded professionals.

Watch Step By Step Video Tutorial Below


1. Introduction to Pabbly Connect for WhatsApp Integration

Pabbly Connect is an essential tool for creating a WhatsApp bot that replies automatically in Hindi. This powerful integration platform allows businesses to automate responses to customer inquiries seamlessly. In this tutorial, we will walk through the process of setting up this integration step-by-step.

By utilizing Pabbly Connect, you can ensure that your WhatsApp bot efficiently handles customer queries in Hindi, enhancing customer satisfaction while reducing manual workload. Let’s dive into the specifics of accessing and using Pabbly Connect for this purpose.


2. Setting Up Pabbly Connect for Your WhatsApp Bot

To begin, you need to access Pabbly Connect. Open a new tab and go to the Pabbly Connect website. If you don’t have an account yet, sign up for free to get started. Once logged in, you will be directed to the Pabbly Connect dashboard.

  • Sign up for a free account on Pabbly Connect.
  • Log in to your Pabbly Connect dashboard.
  • Navigate to the integration section to set up your WhatsApp bot.

After completing these steps, you will be ready to create your WhatsApp bot that replies automatically in Hindi using Pabbly Connect. This setup will allow you to manage customer interactions effectively.


3. Creating the WhatsApp Bot Assistant in Pabbly Chartflow

Next, we will create the WhatsApp bot assistant using Pabbly Chartflow. From the dashboard, navigate to the assistant section and click on the ‘Add Assistant’ button. Here, you will name your assistant, for instance, ‘This WhatsApp Bot Replies in Hindi Automatically’.

Once named, you will be prompted to input AI instructions. Select the instruction type as ‘Custom Prompt’ and add detailed instructions for the assistant to respond in Hindi. This is crucial for ensuring that your bot understands and processes customer queries correctly.

  • Choose ‘Custom Prompt’ as your instruction type.
  • Input detailed instructions for the assistant’s responses.
  • Ensure that the assistant can detect the language of the customer’s message.

With these configurations, your assistant is now set up to handle queries in Hindi effectively using Pabbly Connect. This integration will allow for a seamless interaction with your customers.


4. Configuring the Knowledge Base for Effective Responses

The next step involves creating a knowledge base that the assistant will utilize to provide accurate responses. This knowledge base should contain information about your business, products, and frequently asked questions. For example, you might create a document titled ‘Urban Weave Clothing Co.’ that details your offerings.

Upload this document in PDF or TXT format to Pabbly Chartflow. Once uploaded, your knowledge base will be linked to the assistant, enabling it to pull relevant information when responding to customer queries.

Create a comprehensive knowledge base document. Upload the document in the supported format (PDF or TXT). Ensure the knowledge base is in Hindi for accurate responses.

By linking the knowledge base with Pabbly Connect, your WhatsApp bot will be well-equipped to provide relevant and accurate answers to customer inquiries in Hindi.


5. Testing Your WhatsApp Bot Assistant

After setting up the assistant and knowledge base, it’s time to test your WhatsApp bot. Send a sample inquiry to your WhatsApp number and observe how the bot responds. For instance, you can ask questions like ‘Is embroidery possible?’ and check if the assistant provides a response in Hindi.

Make sure to check the functionality and accuracy of the responses. If everything works as expected, your WhatsApp bot is now ready to assist customers automatically!

Send test inquiries to your WhatsApp bot. Verify that responses are accurate and in Hindi. Adjust any settings if necessary to improve performance.

With Pabbly Connect, testing and refining your WhatsApp bot is straightforward, ensuring that it meets your business needs effectively.


Conclusion

In this tutorial, we demonstrated how to create a WhatsApp bot that replies automatically in Hindi using Pabbly Connect. By following these steps, you can enhance customer communication and streamline inquiries effectively. Automate your WhatsApp interactions today and improve customer satisfaction with Pabbly Connect.

Ensure you check out Pabbly Connect to create business automation workflows and reduce manual tasks. Pabbly Connect currently offer integration with 2,000+ applications.

My Team Gets Notified Instantly When a Task Is Created

Learn how to set up instant notifications for new tasks using Pabbly Connect and Slack. Follow this step-by-step tutorial for seamless integration. Navigate the automation landscape confidently with clear, structured guidance suitable for professionals regardless of prior technical experience.

Watch Step By Step Video Tutorial Below


1. Accessing Pabbly Connect for Task Notifications

To set up instant notifications for new tasks, first access Pabbly Connect. Open a new tab and navigate to pabby.com/connect. This will bring you to the Pabbly Connect landing page, where you can sign up for free if you’re a new user.

Once signed in, you can create a workflow. Pabbly Connect allows you to automate the process without any coding skills. You will be greeted with an interface that has two major steps: trigger and action. Here, you will set up the trigger for your integration.


2. Setting Up the Trigger in Pabbly Connect

In this section, you’ll set up the trigger to capture new tasks from ClickUp through Pabbly Connect. Select ClickUp as your trigger application. The event you want to track is ‘Task Created’. Click the connect button to establish a connection.

  • Select ClickUp as your trigger application.
  • Choose ‘Task Created’ as the event.
  • Click the connect button to link your ClickUp account.

After clicking connect, you will need to provide your ClickUp API token. Log into your ClickUp account, navigate to the profile section, and regenerate the API token. Copy this token back into Pabbly Connect to establish the connection.


3. Selecting ClickUp Details in Pabbly Connect

Once the connection is established, you need to select the details such as team ID, space ID, folder ID, and list ID in Pabbly Connect. This ensures that the integration captures the correct data from your ClickUp account.

  • Enter your team name, space name, folder name, and list name.
  • Click ‘Save and Send Test Request’ to check the connection.
  • Create a new task in ClickUp to test if the trigger captures the response.

Once you create a new task, Pabbly Connect should capture the task details, including the task ID, description, and assigned user. This confirms that ClickUp is properly linked with Pabbly Connect.


4. Setting Up the Action to Notify via Slack

Now that you have your trigger set up, the next step is to notify your team via Slack using Pabbly Connect. For this action, select Slack as your application and choose ‘Send Channel Message’ as the event.

Click the connect button and select the appropriate connection type. For this integration, use a bot token type for sending messages. After granting the necessary permissions, select the channel ID where you want to send the notifications.

Choose Slack as the action application. Select ‘Send Channel Message’ as the action event. Map the data from ClickUp to the Slack message.

Compose your notification message, including dynamic data from the task created in ClickUp. This way, every time a new task is created, your team will receive an instant notification in the selected Slack channel through Pabbly Connect.


5. Testing and Verifying the Integration

After setting up the action step, it’s time to test the entire workflow using Pabbly Connect. Click on ‘Save and Send Test Request’. If everything is set up correctly, you should see a positive response indicating that the message has been sent to your Slack channel.

Check your Slack channel to verify that the notification appears as intended. This will confirm that your team is now automatically notified whenever a new task is created in ClickUp.

With this setup, you and your team can stay updated on new tasks instantly, ensuring that everyone is on the same page. Thanks to Pabbly Connect, this automation simplifies your workflow and enhances team communication.


Conclusion

In this tutorial, we explored how to set up instant notifications for new tasks using Pabbly Connect and Slack. By following the steps outlined, you can ensure that your team stays informed about new tasks efficiently. This integration enhances productivity and streamlines communication within your team.

Ensure you check out Pabbly Connect to create business automation workflows and reduce manual tasks. Pabbly Connect currently offer integration with 2,000+ applications.

Capture Leads Directly into Google Contacts

Learn how to seamlessly capture leads directly into Google Contacts using Pabbly Connect. Follow this detailed tutorial for step-by-step instructions. Explore efficient methods for automating routine tasks with clear, concise instructions suited for both newcomers and experienced professionals.

Watch Step By Step Video Tutorial Below


1. Access Pabbly Connect to Start Automation

To capture leads directly into Google Contacts, the first step is to access Pabbly Connect. If you’re a new user, visit pabbl.com/connect in your browser.

Once on the landing page, click on the ‘Sign Up for Free’ button located in the top right corner. You will receive 100 free tasks every month, allowing you to explore Pabbly Connect and add up to 100 leads to Google Contacts. If you find it beneficial, consider purchasing a subscription for additional features.


2. Setting Up Your Workflow in Pabbly Connect

After signing in, navigate to the workflow builder within Pabbly Connect. This is where you will configure the automation process. Click on the ‘Add Trigger’ button to start setting up your workflow.

  • Search for ‘Just Dial’ as your trigger application.
  • Select ‘New Leads’ as the trigger event.
  • Click on ‘Connect’ to obtain the webhook URL.

Copy the webhook URL provided by Pabbly Connect and configure it in your Just Dial account. Since Just Dial does not allow direct URL input in its interface, you will need to send this URL to your account manager for setup.


3. Capturing Lead Details from Just Dial

Once the webhook URL is configured in Just Dial, Pabbly Connect will receive lead details automatically. You will see the lead response captured in the workflow, displaying fields such as first name, last name, email, phone number, and company name.

To proceed, click on ‘Add New Action Step’ and search for ‘Google Contacts’. Select it as the action application and choose ‘Create Contact’ as the event. This will allow you to create a new contact in Google Contacts whenever a lead is captured.


4. Connecting Google Contacts with Pabbly Connect

After selecting Google Contacts, click on ‘Connect’. If you have an existing connection, you can select it; otherwise, create a new connection by signing in with your Google account. Ensure you grant all necessary permissions to Pabbly Connect for accessing your Google Contacts.

Now, you need to map the lead details to the respective fields in Google Contacts. Mapping allows Pabbly Connect to dynamically insert lead information into the contact fields. For each field, click on the mapping option and select the corresponding lead detail from the previous step.

  • Map the first name and last name from the lead response.
  • Map the email and phone number accordingly.
  • You can leave fields like gender blank if not applicable.

Once all necessary fields are mapped, click on ‘Save and Send Test Request’. If successful, you will receive a confirmation that a new contact has been created.


5. Finalizing Your Workflow and Testing

After successfully creating a contact, refresh your Google Contacts to verify that the new lead has been added. You should see all mapped details reflected accurately in the contact entry.

With Pabbly Connect, your workflow is now complete! Whenever you receive a new lead from Just Dial, a corresponding Google Contact will be created automatically. This automation streamlines your lead management process significantly.

Additionally, you can use various other applications as triggers with Pabbly Connect, such as Facebook Ads, Instagram Leads, or LinkedIn Ads, to capture leads directly into Google Contacts, enhancing your sales strategy.


Conclusion

In conclusion, using Pabbly Connect to capture leads directly into Google Contacts is an efficient way to manage your leads. By following the steps outlined above, you can automate your lead capture process, ensuring that no lead goes unnoticed. Start using Pabbly Connect today to streamline your lead management!

Ensure you check out Pabbly Connect to create business automation workflows and reduce manual tasks. Pabbly Connect currently offer integration with 2,000+ applications.

How to Build a Free WhatsApp AI Agent for Your Business

Learn how to create a Free WhatsApp AI Agent for your business using Pabbly Connect. Step-by-step tutorial on integrating YouTube and WhatsApp. Master proven automation processes with practical implementation examples and strategic recommendations you can apply immediately in your workflow.

Watch Step By Step Video Tutorial Below


1. Accessing Pabbly Connect for WhatsApp Integration

To create a Free WhatsApp AI Agent for your business, the first step is to access Pabbly Connect. Start by visiting the Pabbly website and navigate to the Pabbly Connect section. If you are a new user, you can sign up for a free account. Existing users can simply log in to their accounts.

Once logged in, you will be directed to the Pabbly Connect dashboard. Here, you can manage all your automation tasks. This platform is essential for integrating WhatsApp with various applications including YouTube, enabling seamless communication with your customers.


2. Creating Your WhatsApp AI Agent

Next, you need to create your WhatsApp AI Agent within Pabbly Connect. Click on the ‘Create New Assistant’ button. You will be prompted to name your assistant and then click ‘Add’. This action initializes the setup process for your AI agent.

  • Select the instruction type from the dropdown menu.
  • Choose predefined examples like AI Agent, Customer Support Agent, or Sales Agent.

After selecting the instruction type, you will configure the AI settings. Here, you can adjust parameters like temperature to control the creativity of responses. This step is crucial to ensure your AI agent provides relevant and accurate answers to customer inquiries.


3. Configuring AI Settings in Pabbly Connect

Once your WhatsApp AI Agent is created, the next step involves configuring its settings in Pabbly Connect. You need to specify the API key for OpenAI to enable the AI functionalities. Click on the provided hyperlink to generate a new API key from your OpenAI account.

After obtaining the API key, return to the Pabbly Connect interface and paste the key into the designated field. This action connects your AI agent to the OpenAI services, allowing it to generate responses based on customer queries.

  • Set the header message for your AI agent.
  • Define keywords that will stop the AI from responding.
  • Upload a knowledge source file for detailed responses.

By completing these configurations, your WhatsApp AI Agent will be equipped to handle various customer inquiries effectively. This enhances customer experience by providing instant responses.


4. Assigning Your AI Agent to WhatsApp

After configuring your AI Agent, the next step is to assign it to your WhatsApp account through Pabbly Connect. Navigate to the settings section and select the option to assign your AI assistant. You can choose to assign it to all contacts or specific chats based on your business needs.

This assignment process allows the AI agent to automatically respond to customer messages on WhatsApp. By enabling the auto-reply feature, you ensure that customers receive prompt assistance without waiting for human intervention.


5. Testing Your WhatsApp AI Agent

The final step is to test your WhatsApp AI Agent. Send a message to your WhatsApp number and observe how the AI responds. This testing phase is critical to ensure that the agent is functioning correctly and providing accurate information.

In case of any issues, return to Pabbly Connect to adjust settings or update the knowledge source. Continuous testing and adjustments will help optimize your AI agent’s performance, ensuring it meets customer expectations effectively.


Conclusion

Creating a Free WhatsApp AI Agent using Pabbly Connect is a straightforward process. By following the steps outlined, you can enhance your business communication and provide instant customer support. This integration not only saves time but also improves customer satisfaction significantly.

Ensure you check out Pabbly Connect to create business automation workflows and reduce manual tasks. Pabbly Connect currently offer integration with 2,000+ applications.

Create and Send Invoices Automatically (Full Setup)

Learn how to automate invoice creation and sending using Pabbly Connect and Pabbly Connect. Step-by-step tutorial for seamless integration. Explore efficient methods for automating routine tasks with clear, concise instructions suited for both newcomers and experienced professionals.

Watch Step By Step Video Tutorial Below


1. Accessing Pabbly Connect for Invoice Automation

To create and send invoices automatically, you first need to access Pabbly Connect. Open your browser and navigate to Pabbly.com/connect. If you are a new user, click on the ‘Sign up free’ button to create your account. Existing users can simply sign in.

Once logged in, you will be directed to the dashboard. Here, you can click on the ‘Create Workflow’ button to start setting up your invoice automation. It’s important to note that Pabbly Connect is the central platform that will facilitate all integrations throughout this process.


2. Creating Your Invoice Workflow in Pabbly Connect

After accessing the Pabbly Connect dashboard, click on the ‘Create Workflow’ button. You will then choose between the new beta version and the classic version for your workflow building. For this tutorial, we will select the new beta version for its modern features.

  • Select a meaningful name for your workflow, such as ‘Pixelcraft Automatic Invoice System’.
  • Choose a folder to save your workflow for better organization.
  • Press the ‘Create’ button to proceed.

Your workflow is now ready for the next steps. Remember, Pabbly Connect is essential for integrating the various applications needed for this invoice system.


3. Integrating Your Payment Gateway with Pabbly Connect

In this step, you will integrate your payment gateway, such as Razorpay, to trigger invoice creation upon successful payment. Click on the plus button to add your trigger application. Search for Razorpay and select it.

  • Choose the event ‘Payment Captured’ to trigger the workflow.
  • Create a new connection by adding your API key and secret from your Razorpay account.
  • Copy the webhook URL provided by Pabbly Connect and set it in your Razorpay account under Webhooks.

This integration ensures that every time a payment is captured, Pabbly Connect will initiate the workflow to send an invoice automatically.


4. Creating the Invoice Document Using Google Docs

Next, you will create the invoice document using Google Docs. Click on the plus button again and search for Google Docs as your action application. Select ‘Create Document from Template’ as your event.

Connect your Google account by signing in through Pabbly Connect. Map the necessary fields from the Razorpay response to your Google Docs template. Specify the location in Google Drive where the invoice will be saved.

By utilizing Pabbly Connect, you can dynamically fill in invoice details based on the payment information received, ensuring accurate and timely invoices for your customers.


5. Sending the Invoice via Gmail

The final step is to send the generated invoice to the customer via Gmail. Click on the plus button and select Gmail as your action application. Choose ‘Send Email’ as the event.

Connect your Gmail account through Pabbly Connect. Map the recipient’s email address, subject, and body of the email. Attach the invoice PDF generated from Google Docs.

Once you save and test this step, Pabbly Connect will send the invoice to your customer’s email automatically, completing the workflow.


Conclusion

This tutorial has guided you through creating an automated invoice system using Pabbly Connect. By integrating payment gateways, Google Docs, and Gmail, you can streamline your invoicing process, ensuring customers receive invoices instantly after their purchase.

Ensure you check out Pabbly Connect to create business automation workflows and reduce manual tasks. Pabbly Connect currently offer integration with 2,000+ applications.

How to Automate Your Google Chat Space

Learn how to use Pabbly Connect to automate your Google Chat Space and receive notifications for new sign-ups from your website forms. Follow this definitive guide to creating powerful automated workflows with straightforward, efficiency-focused solutions that save valuable time.

Watch Step By Step Video Tutorial Below


1. Accessing Pabbly Connect for Automation

To automate your Google Chat Space, start by accessing Pabbly Connect. Simply search for ‘Pabbly.com/connect’ in your browser. This will take you to the Pabbly Connect homepage where you can sign in or create a free account.

If you are a new user, click on the ‘Sign Up Free’ button to get started. Pabbly Connect offers 100 free tasks every month, allowing you to explore its features. Existing users can simply sign in to their accounts to begin the integration process.


2. Creating a Workflow in Pabbly Connect

Once you are logged into Pabbly Connect, click on ‘Access Now’ to reach the dashboard. Here, you can create a new workflow to automate notifications to your Google Chat Space. Select the ‘Create Workflow’ button to start building your automation.

  • Name your workflow, like ‘Automate Your Google Chat Space.’
  • Choose a folder for your workflow, such as ‘Automation.’
  • Select the Beta version for a modern experience.

After naming your workflow and selecting the folder, you will see a new workflow window. Here, you can set up the trigger and action for your automation. This is where Pabbly Connect shines, allowing you to connect various applications seamlessly.


3. Setting Up the Trigger in Pabbly Connect

The next step is to set up a trigger. For this integration, select ‘Typeform’ as your trigger application. Choose the event ‘New Entry’ to initiate the workflow whenever a new form submission occurs.

To establish this connection, click on ‘Add New Connection’ and follow the prompts to connect your Typeform account to Pabbly Connect. Once connected, select your specific form from the dropdown menu that you wish to use for the trigger. This allows Pabbly Connect to listen for new entries effectively.


4. Adding Action Step to Notify Google Chat

After setting up the trigger, it’s time to add an action step to notify your Google Chat Space. Select ‘Chat’ as the action application and choose ‘Create Message’ as the action event. This will send a message to your Google Chat whenever a new sign-up occurs.

  • You will need to provide the Webhook URL from your Google Chat Space.
  • Map the data from the trigger to the message format you want to send.
  • Customize your message to include user details like name, email, and phone number.

Once you have mapped the necessary fields, save your settings. This step demonstrates how Pabbly Connect automates the process of notifying your team in Google Chat effectively.


5. Testing Your Integration with Pabbly Connect

To ensure everything is working correctly, perform a test submission using your Typeform. Enter dummy details and submit the form. This will trigger the workflow you created in Pabbly Connect.

Check your Google Chat Space to confirm that you received the notification with the details of the new sign-up. This test verifies that your automation is functioning as intended, allowing you to streamline communication with your team effortlessly.


Conclusion

In this tutorial, we explored how to automate your Google Chat Space using Pabbly Connect. By integrating Typeform and Google Chat, you can receive instant notifications for new sign-ups, enhancing team communication and efficiency. Start automating today with Pabbly Connect!

Ensure you check out Pabbly Connect to create business automation workflows and reduce manual tasks. Pabbly Connect currently offer integration with 2,000+ applications.