Stop Replying Manually! Let WhatsApp Bots Handle It for You!

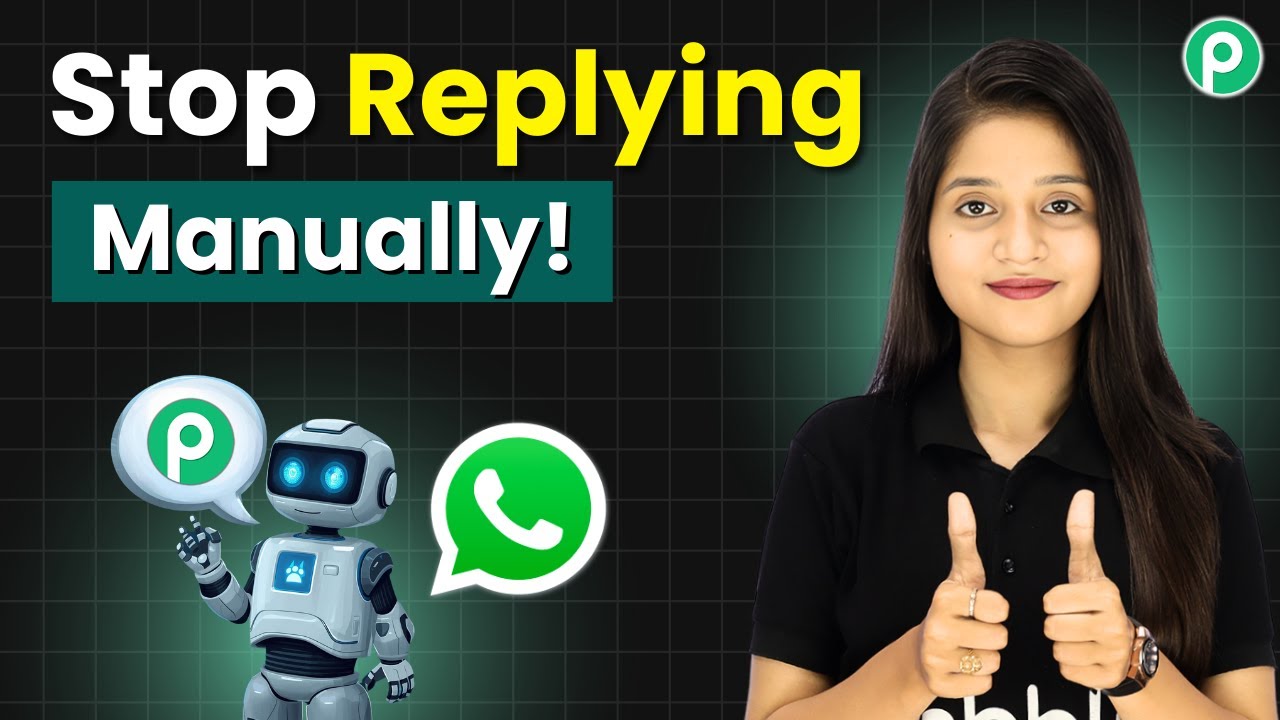
Learn how to automate WhatsApp replies using Pabbly Chatflow. This guide covers integration steps with YouTube and more for seamless customer interactions. Explore how leading businesses automate customer interactions with carefully designed chat sequences that feel natural and helpful.

Watch Step By Step Video Tutorial Below


1. Accessing Pabbly Chatflow for WhatsApp Automation

To start automating your WhatsApp replies, access Pabbly Chatflow by visiting Pabbly.com/chatflow. This platform is essential for creating automated chatbots that can handle customer queries without manual input.

Once on the Pabbly Chatflow page, you can either sign up for a free account or log in if you are an existing user. This will grant you access to the flow builder, where you can design your WhatsApp chatbot.


2. Creating Your WhatsApp Chatbot Flow in Pabbly Chatflow

After logging into Pabbly Chatflow, click on the ‘Add Flow’ button to start creating your WhatsApp chatbot. Name your flow something descriptive, such as ‘Stop Replying Manually! Let WhatsApp Bots Handle It for You.’ This will help you identify the flow later.

  • Select your trigger event as ‘Keyword/Message’ to set up keyword-based responses.
  • Enter keywords like ‘hi,’ ‘hello,’ and ‘help’ that will trigger the bot’s response.

Once the keywords are set, the bot will automatically respond whenever these keywords are sent to your WhatsApp business account. This setup is crucial for initiating conversations with customers.


3. Designing Responses with Pabbly Chatflow

In this step, you will design the initial response that your bot will send. Use the message option in Pabbly Chatflow to send a welcome message along with a media button to enhance interaction.

  • Upload an image related to your business to make the response visually appealing.
  • Add two buttons: ‘Schedule Visit’ and ‘Talk to Agent’ to guide user actions.

Connect this message to the trigger point you created earlier. This will ensure that the bot responds immediately when a user sends a keyword. This interaction is vital for engaging users effectively.


4. Managing User Inputs and Custom Fields

Once users interact with the buttons, you need to manage their inputs effectively. Using Pabbly Chatflow, you can create custom fields to capture user information like full name, contact number, and viewing date.

Add questions for users to provide their full name and contact number. Set the format for each input field to ensure correct data entry.

This setup allows the bot to collect and store user information, making it easier to manage bookings and inquiries. This is essential for providing personalized responses.


5. Finalizing Your Chatbot Flow in Pabbly Chatflow

After setting up user inputs, finalize your chatbot flow in Pabbly Chatflow by adding a summary message that displays the booking details. This message can include dynamic fields to personalize the response.

Use the dollar symbol to include variables like the user’s name and selected property type in the summary. Add buttons for users to confirm or change their booking, enhancing user experience.

Once everything is set, click the save button to ensure your flow is active. This final step is crucial for making your chatbot operational and ready to assist users.


Conclusion

In this tutorial, we explored how to automate WhatsApp replies using Pabbly Chatflow. By following these steps, you can create a fully functional WhatsApp chatbot that enhances customer interaction and streamlines your business processes.

Ensure you check out Pabbly Connect to create business automation workflows and reduce manual tasks. Pabbly Connect currently offer integration with 2,000+ applications.

Send Brochures in Bulk to All Customers on WhatsApp for Free

Learn how to send brochures in bulk to customers on WhatsApp for free using Pabbly Chatflow. Follow our detailed tutorial for seamless integration! Discover how to design chat experiences that feel personal and responsive while handling customer inquiries automatically around the clock.

Watch Step By Step Video Tutorial Below


1. Accessing Pabbly Chatflow for WhatsApp Integration

To send brochures in bulk via WhatsApp, first, access Pabbly Chatflow by visiting pabbl.com/chartflow. This platform enables seamless integration with various applications, making it essential for your automation needs.

Once on the Pabbly Chatflow landing page, click on the ‘Sign Up for Free’ option in the top right corner. After signing up, you will receive 100 free credits each month, allowing you to send up to 100 messages. If you are an existing user, simply sign in to your account.


2. Setting Up WhatsApp in Pabbly Chatflow

After logging into Pabbly Chatflow, ensure you have added your WhatsApp number. You can do this by selecting either the WhatsApp connect method or the manual token connect method.

  • Choose WhatsApp connect or manual token connect.
  • Follow the instructions provided in the tutorial linked in the description.

Once your WhatsApp number is connected, ensure you have a contact list ready. You can add bulk contacts by clicking on the ‘Add Contact’ button and uploading a CSV file that contains your customer details.


3. Creating a Contact List from Google Sheets

To create a contact list, first enter the details of your customers in Google Sheets. After entering all necessary information, download the sheet in CSV format.

  • Open Google Sheets and input customer details.
  • Go to ‘File’ -> ‘Download’ -> ‘Comma-separated values (.csv)’.

Next, return to Pabbly Chatflow and upload the CSV file. The details will auto-populate, allowing you to create your contact list efficiently.


4. Creating a Broadcast in Pabbly Chatflow

Navigate to the ‘Broadcast’ section in Pabbly Chatflow and click on the ‘Add Broadcast’ button. Select ‘Broadcast Campaign’ as the type and enter a campaign name, for example, ‘Offers’.

Choose your contact list from the available options. Select the message type as either a pre-approved template or a regular message.

For a pre-approved template, select the WhatsApp template you have created. Make sure to input the dynamic fields, such as the customer’s name, in the message body to personalize your outreach.


5. Sending the Broadcast and Testing

After configuring your broadcast message, you can test it before sending it to all customers. Enter a test phone number and click on ‘Send Test Message’. Check your WhatsApp to ensure the message appears correctly.

If everything looks good, you can choose to send the broadcast instantly or schedule it for a later date. Ensure to select the correct date format when scheduling your broadcast.

Once the broadcast is sent, you can view the statistics, including sent, delivered, and read messages, directly in Pabbly Chatflow. This allows you to track the effectiveness of your campaign.


Conclusion

Using Pabbly Chatflow simplifies the process of sending brochures in bulk to customers on WhatsApp. By following the steps outlined in this tutorial, you can effortlessly automate your messaging and enhance customer engagement.

Ensure you check out Pabbly Connect to create business automation workflows and reduce manual tasks. Pabbly Connect currently offer integration with 2,000+ applications.

How to Generate Free Stories Using Gemini (Fast & Easy!)

Learn to generate free stories using Gemini integrated with Google Sheets and Pabbly Connect. Follow this detailed tutorial for step-by-step guidance. Explore efficient methods for automating routine tasks with clear, concise instructions suited for both newcomers and experienced professionals.

Watch Step By Step Video Tutorial Below


1. Accessing Pabbly Connect for Story Generation

To generate free stories using Gemini, you first need to access Pabbly Connect. Start by navigating to Pabbly.com/connect in your browser. This will take you to the Pabbly Connect homepage where you can either sign in or sign up for free.

If you are a new user, click on ‘Sign Up Free’ to create an account and receive 100 free tasks every month. Existing users can simply sign in. Once logged in, you will see the Pabbly apps window, where you can access all the applications offered by Pabbly.


2. Creating a Workflow in Pabbly Connect

After accessing Pabbly Connect, the next step is to create a workflow. Click on the ‘Create Workflow’ button. You will have options for the new beta version or classic version. For this tutorial, select the beta version for a more modern experience.

  • Click on the ‘Create’ button to initiate the workflow.
  • Name your workflow as ‘Generate Free Stories Using Gemini’.
  • Select a folder for your workflow, such as ‘Automations’.

Once you have created the workflow, remember that every automation consists of a trigger and an action. The trigger indicates when an action should be executed. In this case, we will set up Google Sheets as our trigger app.


3. Setting Up Google Sheets as a Trigger

To set Google Sheets as the trigger, select Google Sheets from the app options and choose the event as ‘New or Updated Spreadsheet Row’. Click on ‘Connect’ to establish the connection.

Pabbly Connect will provide you with a webhook URL. Copy this URL as it will be used to connect your Google Sheets with Pabbly Connect.

  • Open your Google Sheets and go to Extensions > Add-ons > Get Add-ons.
  • Search for ‘Pabbly Connect Webhooks’ and install it.
  • Refresh your Google Sheets and set up the webhook using the copied URL.

Once the webhook is set up successfully, you can test the connection by adding new details in your Google Sheets. This will trigger the automation process in Pabbly Connect.


4. Integrating Gemini for Story Generation

With the Google Sheets trigger set, the next step is to add Gemini as the action app to generate the story. Select Gemini and choose ‘Generate Content’ as the action event. Click on ‘Connect’ to set up the connection. using Pabbly Connect

To connect Gemini, you will need an API key from Google AI Studio. Click on the provided hyperlink to access Google AI Studio and retrieve your API key.

Add the API key to the Pabbly Connect integration. Map the necessary fields such as story idea, genre, tone, and character name from your Google Sheets. Save and send a test request to generate the story.

Once the story is generated successfully, you can proceed to create a document in Google Docs to save the story.


5. Saving the Generated Story in Google Docs

The final step is to save the generated story in Google Docs. Select Google Docs as the action app and choose ‘Create a Blank Document’ as the event. Click on ‘Connect’ and sign in to your Google account.

Map the document name to the story ID you generated earlier. After saving this document, you can append the generated story content into this document.

Select ‘Append a Paragraph to a Document’ as the next action event. Connect using the existing Google Docs connection. Map the document ID and the generated story content.

After successfully appending the story, you can also save it as a PDF in Google Drive by utilizing the Google Drive integration within Pabbly Connect.


Conclusion

Using Pabbly Connect, you can effortlessly automate the process of generating free stories with Gemini and save them in Google Docs and Google Drive. This integration enhances your storytelling capabilities while streamlining your workflow. Start automating today!

Ensure you check out Pabbly Connect to create business automation workflows and reduce manual tasks. Pabbly Connect currently offer integration with 2,000+ applications.

How to Post Daily Messages on Google Chat Automatically

Learn how to automate daily messages on Google Chat using Pabbly Connect. This step-by-step guide covers integration with Google Gemini for seamless communication. Explore systematic approaches to creating efficient automation solutions that convert technical concepts into practical, implementable instructions.

Watch Step By Step Video Tutorial Below


1. Setting Up Pabbly Connect for Automation

To automate daily messages on Google Chat, the first step is to set up Pabbly Connect. Begin by logging into your Pabbly Connect account. If you are a new user, visit Pabbly.com/connect and click on ‘Sign Up for Free’ to create your account. Once registered, you can access the workflow builder, which is essential for creating your automation.

Within the workflow builder, you will find the option to create a new workflow. This is where you will set up the integration between Google Gemini and Google Chat. Pabbly Connect allows you to automate the process seamlessly, ensuring that your team receives daily motivational messages without manual intervention.


2. Creating the Workflow in Pabbly Connect

In this section, you will create the workflow to send daily messages using Pabbly Connect. Click on the ‘Add Trigger’ button to start. For the trigger application, select ‘Scheduled by Pabbly’ and choose the event as ‘Schedule Workflow’. This will allow you to set the frequency of the messages.

  • Select ‘Every Day’ as the frequency.
  • Set the time to 9:00 AM for the messages to be sent.

After selecting the time, click on ‘Save’. This will ensure that your workflow is scheduled to run every morning at the specified time. With Pabbly Connect, you can automate this process effectively, ensuring your team receives the messages consistently.


3. Integrating Google Gemini with Pabbly Connect

Next, you will integrate Google Gemini to generate the content of your daily messages through Pabbly Connect. Click on ‘Add New Action Step’ and search for Google Gemini. Select it as the action application and choose ‘Generate Content’ as the event. Connect to your Google Gemini account, which requires an API key.

To obtain the API key, go to Google AI Studio and click on ‘Get API Key’. Create a new API key by naming it and selecting the appropriate project. After generating the key, copy it and paste it into Pabbly Connect to establish the connection.


4. Sending Messages to Google Chat

Once Google Gemini is connected, the next step is to send the generated message to Google Chat using Pabbly Connect. Add another action step and select Google Chat as the application. Choose ‘Create Custom Card Message’ for sending formatted messages. You will need to set up a webhook URL from your Google Chat space.

  • Navigate to your Google Chat space and click on the name of the space.
  • Select ‘Apps and Integrations’ and click on ‘Add Webhooks’.

After naming the webhook and saving it, copy the generated link and paste it into Pabbly Connect. This will allow the messages from Google Gemini to be sent directly to your Google Chat space, streamlining the communication process for your team.


5. Finalizing the Automation

Now that you have set up the integration between Google Gemini and Google Chat using Pabbly Connect, it’s time to finalize the automation. You will need to map the generated message from Google Gemini into the message field for Google Chat. This allows the message to dynamically change each day based on the content generated.

After mapping the message, click on ‘Save and Send Test Request’. This will send a test message to your Google Chat space, confirming that the integration works as intended. Once you see the message in your chat, your automation is complete, and it will run daily at 9:00 AM without any manual effort.


Conclusion

In summary, using Pabbly Connect, you can efficiently automate daily messages on Google Chat. This integration with Google Gemini allows you to send motivational quotes to your team every morning, enhancing communication and motivation. Start using Pabbly Connect today to streamline your business communications effortlessly.

Ensure you check out Pabbly Connect to create business automation workflows and reduce manual tasks. Pabbly Connect currently offer integration with 2,000+ applications.

How to Send Consultation Links Automatically and Store Leads in Zoho CRM for Follow-Up

Learn how to automate sending consultation links and storing leads in Zoho CRM using Pabbly Connect. Follow this step-by-step tutorial for seamless integration. Build sophisticated automated workflows in less time than you think. This guide translates complex integrations into straightforward steps for immediate implementation.

Watch Step By Step Video Tutorial Below


1. Accessing Pabbly Connect for Automation

Pabbly Connect is the central platform that facilitates the automation of sending consultation links and storing leads in Zoho CRM. To get started, open a new tab and navigate to the Pabbly Connect website. Here, you will have the option to sign up for free, which includes 100 free tasks per month.

After signing up or logging in, you will land on the dashboard. This is where you can create and manage your automation workflows. Click on the ‘Create Workflow’ button to begin setting up your automation process using Pabbly Connect.


2. Creating the Workflow in Pabbly Connect

To create your workflow, select the new beta builder option for a modern approach. Name your workflow something meaningful, such as ‘Send Consultation Link Automatically and Store Lead in Zoho CRM’. This helps in identifying the workflow later in Pabbly Connect.

  • Select a folder to store your workflow.
  • Click on the ‘Create’ button to proceed.
  • Start building your automation by adding triggers and actions.

In this step, you will set a trigger that initiates the automation whenever a new lead fills out the form. This is where Pabbly Connect truly shines, allowing you to automate tasks without manual intervention.


3. Setting Up the Trigger in Pabbly Connect

The first action in your workflow is to add a trigger. Choose ‘Webhook by Pabbly’ as your app and select the event ‘Catch Webhook’. This will generate a unique webhook URL that you will use to integrate with your landing page.

Copy the webhook URL provided by Pabbly Connect and paste it into the appropriate section of your landing page code. Save the changes and reload your landing page. When a lead submits the form, the data will be sent to Pabbly Connect via this webhook.


After setting up the trigger, it’s time to send the consultation link to your leads. Add a new action step in Pabbly Connect and select Gmail as the app. Choose the event ‘Send Email’ to proceed.

Connect your Gmail account by adding a new connection and granting the necessary permissions. Fill in the sender name, recipient email address (mapped from the previous step), subject, and content of the email. Personalize the email by mapping the lead’s first and last name to make it more engaging.

  • Set the email content as plain text or HTML.
  • Click ‘Save’ and send a test request to ensure everything is working correctly.

With this setup, every time a lead submits their details, they will automatically receive an email with the consultation link, thanks to the capabilities of Pabbly Connect.


5. Storing Leads in Zoho CRM

The final step is to store the lead information in Zoho CRM. Add another action step in your workflow and select Zoho CRM as the app. Choose the event ‘Create Contact’ to save the lead details.

Connect your Zoho CRM account by adding a new connection and entering your domain. After the connection is established, map the lead details such as first name, last name, email address, and phone number from the previous steps. This ensures that the information is automatically populated in Zoho CRM.

Click ‘Save’ and send a test request to confirm that the lead details are stored successfully. Once completed, you will see the lead information reflected in your Zoho CRM account, demonstrating the efficiency of Pabbly Connect in automating this process.


Conclusion

Using Pabbly Connect, you can seamlessly automate the process of sending consultation links and storing leads in Zoho CRM. This tutorial illustrates how to set up the integration step-by-step, making your workflow efficient and hassle-free.

Ensure you check out Pabbly Connect to create business automation workflows and reduce manual tasks. Pabbly Connect currently offer integration with 2,000+ applications.

How I Create Daily Content Using Perplexity AI

Learn how to automate daily content creation using Pabbly Connect with Perplexity AI, Google Sheets, and social media platforms for seamless workflows. Eliminate manual repetitive tasks from your workflow. Discover proven automation methods with intuitive steps designed for efficiency-minded professionals.

Watch Step By Step Video Tutorial Below


1. Accessing Pabbly Connect for Automation

To start automating your daily content creation, you first need to access Pabbly Connect. Visit the Pabbly website and sign in or sign up for a free account. This platform allows you to connect various applications seamlessly.

After logging in, navigate to the Pabbly Connect dashboard where you can manage your workflows. Here, you can create new workflows that will help you automate the process of posting content generated by Perplexity AI to your social media accounts.


2. Creating Workflows in Pabbly Connect

To create a new workflow in Pabbly Connect, click on the ‘Create Workflow’ button. You will be prompted to select a workflow builder. Choose the new beta version for a more flexible experience.

  • Click on ‘Create Workflow’.
  • Name your workflow, e.g., ‘How I Create Daily Content Using Perplexity AI’.
  • Select a folder for organization.

Once your workflow is created, you will set the trigger application, which will be Google Sheets in this case. This application will initiate the workflow when new data is added to the designated spreadsheet.


3. Setting Up Google Sheets as a Trigger

In this step, you will configure Google Sheets as the trigger application in your Pabbly Connect workflow. Select Google Sheets and choose the trigger event as ‘New or Updated Spreadsheet Row’.

  • Connect your Google Sheets account to Pabbly Connect.
  • Set up the spreadsheet name and trigger column.
  • Test the connection to ensure it’s working.

This setup will allow Pabbly Connect to monitor your Google Sheets for any new entries, which will then trigger the content generation process.


4. Generating Content Using Perplexity AI

After setting up Google Sheets, the next step is to generate content using Perplexity AI. In your Pabbly Connect workflow, add a new action step and select Perplexity as the action application.

Choose the action event as ‘Create Chat Completion’. Connect your Perplexity account using the API key. Map the necessary fields from your Google Sheets data.

This integration allows you to leverage Perplexity AI to automatically generate relevant content based on the topics you input in Google Sheets, streamlining your content creation process.


5. Posting Content to Social Media Platforms

Once the content is generated by Perplexity AI, the final step is posting it to your social media accounts. In your Pabbly Connect workflow, add action steps for each social media platform you want to post to, such as Facebook, WordPress, and Twitter.

Select Facebook and choose ‘Create Page Post’ as the action event. Map the content generated from Perplexity AI to the post message. Repeat the process for WordPress and Twitter.

This seamless integration allows you to automate the posting process, ensuring that your content reaches your audience across multiple platforms without manual effort.


Conclusion

Using Pabbly Connect to integrate Perplexity AI with Google Sheets and social media platforms allows for an efficient content creation process. Automate your daily tasks and enhance productivity with this powerful workflow.

Ensure you check out Pabbly Connect to create business automation workflows and reduce manual tasks. Pabbly Connect currently offer integration with 2,000+ applications.

Automate Your Dealership Leads with a WhatsApp AI Agent

Learn how to automate your dealership leads with a WhatsApp AI agent using Pabbly Chatflow. Step-by-step tutorial for seamless integration. This detailed guide shows you how to build powerful chat automation that engages visitors and converts prospects—without any coding required.

Watch Step By Step Video Tutorial Below


1. Accessing Pabbly Chatflow for Integration

To automate your dealership leads, you first need to access Pabbly Chatflow. Start by visiting the Pabbly website and searching for Pabbly Chatflow. Once on the homepage, you will see options to sign in or sign up for free.

If you’re a new user, click on ‘Sign Up Free’ to create your account. Existing users can simply sign in. After signing in, navigate to the Pabbly Chatflow dashboard where you can start setting up your WhatsApp AI agent.


2. Adding Your WhatsApp Number in Pabbly Chatflow

Next, you need to add your WhatsApp number to Pabbly Chatflow. Click on the ‘Add WhatsApp Number’ button on the dashboard. You will have two options: WhatsApp Connect and Manual Token Connect. Select WhatsApp Connect as it is the preferred method.

  • Choose WhatsApp Connect to link your number directly.
  • Ensure your WhatsApp business number is ready for integration.

Once your number is added, Pabbly Chatflow will facilitate all communications through WhatsApp, ensuring you can manage customer queries effectively.


3. Creating Your AI Assistant in Pabbly Chatflow

After adding your WhatsApp number, the next step is to create your AI assistant. In Pabbly Chatflow, click on the ‘Add Assistant’ button. You will be prompted to name your assistant. After naming, click on the ‘Add’ button to proceed.

Now, you will see the AI configuration options. You can select the type of AI agent you want to create, such as a customer support agent or a sales agent. Choose the AI agent type that fits your dealership needs best.

  • Select the AI agent type based on your business requirements.
  • Configure the AI settings according to the preferred response style.

Once configured, your assistant will be ready to respond to customer inquiries on WhatsApp.


4. Configuring AI Settings for Your WhatsApp Agent

With your AI assistant created, it’s time to configure its settings in Pabbly Chatflow. Start by setting the creativity level of the responses. You can adjust the temperature setting to define how creative or focused the answers should be.

Next, enter your OpenAI API key, which is essential for the assistant to function properly. This key allows the assistant to access the necessary resources to generate replies. Make sure to save these settings to ensure your AI assistant is fully operational.

Configure the temperature setting based on the desired response style. Enter your OpenAI API key to enable assistant functionality.

After completing these configurations, your WhatsApp AI agent will be ready to handle customer queries effectively.


5. Activating Your AI Assistant in Pabbly Chatflow

Finally, to activate your AI assistant, you must enable it in Pabbly Chatflow. Click the activation button and then save your settings. This step is crucial to ensure that your assistant can start responding to customer inquiries on WhatsApp.

Once activated, you can test the assistant by sending a message to your WhatsApp number. The assistant should reply instantly, handling customer queries like a pro. This automation will streamline your dealership’s customer service, making it more efficient.

With everything set up, you are now equipped to manage your dealership leads seamlessly using Pabbly Chatflow’s powerful automation capabilities.


Conclusion

In conclusion, automating your dealership leads with a WhatsApp AI agent using Pabbly Chatflow is a straightforward process. By following these steps, you can enhance customer interaction and streamline your dealership’s operations. Start leveraging Pabbly Chatflow for effective automation today!

Ensure you check out Pabbly Connect to create business automation workflows and reduce manual tasks. Pabbly Connect currently offer integration with 2,000+ applications.

How to Notify Customers Automatically via Twilio for WooCommerce Orders

Learn how to automate customer notifications for WooCommerce orders using Pabbly Connect and Twilio in this detailed tutorial. Follow the steps for seamless integration! Discover hidden automation capabilities within your existing tools. This guide shows you how to connect your essential applications and permanently eliminate redundant manual processes.

Watch Step By Step Video Tutorial Below


1. Accessing Pabbly Connect for WooCommerce Integration

To start automating customer notifications via Twilio for WooCommerce orders, you need to access Pabbly Connect. If you’re an existing user, simply log in to your account. If you’re new, visit pabbl.com/connect to sign up for free.

Pabbly Connect offers a free plan that allows you to send up to 100 SMS notifications monthly. This is a great way to explore its capabilities and decide if you want to purchase a subscription for more features. Once logged in, navigate to the workflow builder to begin creating your automation.


2. Creating a Workflow in Pabbly Connect

In Pabbly Connect, the workflow builder is where the magic happens. Click on the ‘Add Trigger’ button to start your automation. For the trigger application, search for ‘WooCommerce’ and select it. using Pabbly Connect

  • Select ‘New Order Created’ as the event.
  • Click on ‘Connect’ to generate a webhook URL.
  • Copy the generated webhook URL for use in WooCommerce.

Once you have the webhook URL, you’ll set it up in your WooCommerce settings to ensure that every new order triggers a notification.


3. Configuring WooCommerce Settings

Next, you need to configure your WooCommerce settings to integrate with Pabbly Connect. In your WordPress dashboard, navigate to WooCommerce settings and go to the ‘Advanced’ tab.

  • Click on ‘Webhooks’ and then ‘Add Webhook’.
  • Name your webhook (e.g., ‘New Order’) and set the status to ‘Active’.
  • Set the Topic to ‘Order Created’ and paste the webhook URL you copied earlier.

After saving the webhook, you will have successfully connected WooCommerce to Pabbly Connect. This allows the workflow to trigger whenever a new order is placed.


4. Capturing Order Details for SMS Notifications

With your webhook set up, it’s time to capture order details. Go back to your Pabbly Connect workflow and click on ‘Re-Capture Webhook Response’. This step is crucial to ensure that you receive the order details for sending notifications.

To capture the response, place a test order in your WooCommerce store. Fill in the required details and complete the checkout process. Once the order is placed, check your Pabbly Connect workflow to see the captured details, including customer information and order specifics.


5. Sending SMS Notifications via Twilio

After capturing the order details, the final step is to set up Twilio for sending SMS notifications. In your Pabbly Connect workflow, click on ‘Add Action Step’ and search for ‘Twilio’.

Select ‘Send SMS Message’ as the event and click ‘Connect’. If you haven’t connected Twilio yet, enter your Twilio Account SID and Auth Token. Map the customer’s name and phone number in the SMS body to personalize the message.

Once everything is set up, click on ‘Save and Send Test Request’ to ensure that SMS notifications are working correctly. If successful, your customers will receive timely updates for their orders automatically!


Conclusion

By following the steps outlined in this tutorial, you can effortlessly automate customer notifications for WooCommerce orders using Pabbly Connect and Twilio. This integration not only saves time but also enhances customer satisfaction by providing timely updates.

Ensure you check out Pabbly Connect to create business automation workflows and reduce manual tasks. Pabbly Connect currently offer integration with 2,000+ applications.

Start using Pabbly Connect today to streamline your WooCommerce operations and improve your customer engagement through automated notifications.

AI FAQ Assistant for Business Queries on WhatsApp

Learn how to create an AI FAQ Assistant for WhatsApp using Pabbly Chatflow. Step-by-step guide to automate business queries effectively. Learn how to create intelligent chat workflows that provide instant customer support while qualifying leads 24/7 without human intervention.

Watch Step By Step Video Tutorial Below


1. Accessing Pabbly Chatflow for Your AI Assistant

To create an AI FAQ Assistant for business queries on WhatsApp, you first need to access Pabbly Chatflow. Open a new tab in your browser and navigate to Pabbly.com/chatflow. Here, you can either sign in if you are an existing user or click on the ‘Sign Up Free’ button to create a new account.

Once you have logged in, you will be directed to the dashboard of Pabbly Chatflow. From here, you can start setting up your AI assistant by adding your WhatsApp number, which is crucial for enabling the assistant to respond to customer queries.


2. Creating Your AI Assistant in Pabbly Chatflow

After accessing the Pabbly Chatflow dashboard, the next step is to create your AI assistant. Click on the ‘Add AI Assistant’ button. You will need to provide a meaningful name for your assistant, such as ‘AI FAQ Assistant for Business Queries.’ This name will help identify the assistant later. using Pabbly Connect

  • Click on the ‘Add AI Assistant’ button.
  • Enter a name for your assistant.
  • Press the ‘Add AI Assistant’ button to proceed.

Once you have named your assistant, you will be taken through four simple steps to set it up. The first step involves configuring AI instructions, where you specify how the AI should respond to users. This includes setting the audience, purpose, and style of communication.


3. Configuring AI Instructions in Pabbly Chatflow

In this step, you will configure the AI instructions for your assistant. Select the instruction type as ‘AI Agent’ from the dropdown menu. Here, you can provide detailed instructions on how the AI assistant should respond to users, including its role and constraints. using Pabbly Connect

Additionally, you can adjust the AI’s creativity level by setting the temperature. A temperature of 0.5 is recommended for a balance between creativity and focus. Ensure to select ‘Open AI’ as the AI to use and choose the GPT-4 model for optimal performance.

  • Select ‘AI Agent’ from the instruction type dropdown.
  • Set the temperature to 0.5 for balanced responses.
  • Choose ‘Open AI’ and select the GPT-4 model.

Finally, copy your Open AI API key into the designated box to connect your assistant with the AI capabilities. This is essential for enabling your assistant to generate responses based on the configured instructions.


4. Uploading Knowledge Base for Your AI Assistant

To enhance the AI assistant’s ability to answer queries, you need to upload a knowledge base. This knowledge base should contain all the relevant information about your business, including FAQs and company background. You can create this document in Google Docs and download it in plain text format.

Once your knowledge base is ready, return to Pabbly Chatflow and navigate to the knowledge source step. Here, you can upload your document. Ensure that the document size is less than 90 MB and is in either .txt or PDF format for compatibility.

Create your knowledge base in Google Docs. Download the document as a .txt file. Upload the document in Pabbly Chatflow.

After successfully uploading the knowledge base, your AI assistant will be equipped with the necessary information to respond to customer inquiries effectively.


5. Testing Your AI Assistant on WhatsApp

After setting up your AI assistant, it’s time to test its functionality. Go back to your WhatsApp account and initiate a conversation by sending a message like ‘Hello, I need help.’ Your AI assistant should respond instantly with a welcome message, confirming that it is ready to assist.

To verify its capabilities, ask specific questions that you have included in the knowledge base. For example, inquire about delivery times or pricing. The assistant should provide accurate responses based on the information you uploaded earlier.

Send a test message to your WhatsApp AI assistant. Ask specific questions included in your knowledge base. Check if the assistant responds accurately.

Once your assistant is functioning correctly, you can enable it for your business to automate customer queries effectively using Pabbly Chatflow.


Conclusion

Creating an AI FAQ Assistant for business queries on WhatsApp using Pabbly Chatflow is a straightforward process. By following the steps outlined above, you can automate responses to customer inquiries effectively, improving your business efficiency.

Ensure you check out Pabbly Connect to create business automation workflows and reduce manual tasks. Pabbly Connect currently offer integration with 2,000+ applications.

Utilizing Pabbly Chatflow allows you to integrate various functionalities seamlessly, ensuring your customers receive timely and accurate information. Start automating your business today with Pabbly Chatflow!

Record Instamojo Orders in Google Sheets in 5 Minutes!

Learn how to automate recording Instamojo orders in Google Sheets using Pabbly Connect with this detailed tutorial. Follow the steps for seamless integration. Master proven automation processes with practical implementation examples and strategic recommendations you can apply immediately in your workflow.

Watch Step By Step Video Tutorial Below


1. Access Pabbly Connect for Automation

To record Instamojo orders in Google Sheets, you first need to access Pabbly Connect. This platform allows you to integrate various applications seamlessly, automating your workflows effectively.

Begin by opening a new tab and navigating to Pabbly.com/connect. Here, you will find options to sign up or sign in. New users can sign up for free and receive 100 free tasks each month. Existing users should click on the sign-in option to access their dashboard.


2. Create a Workflow in Pabbly Connect

After signing in, select Pabbly Connect from the list of applications. You will be directed to the dashboard where you can create a new workflow. Click on the ‘Create Workflow’ button to start the automation process.

Choose the new beta builder for a modern experience and name your workflow something meaningful, such as ‘Record Instamojo Orders in Google Sheets’. Make sure to select a folder to store your workflow for easy access later.

  • Click on ‘Create’ to proceed.
  • Add a trigger by selecting ‘Insta Mojo’ as your app.
  • Choose ‘New Sale’ as the app event to initiate the workflow.

This setup will allow Pabbly Connect to capture data from new sales automatically.


3. Connect Instamojo to Pabbly Connect

To connect your trigger setup, you will need a webhook URL provided by Pabbly Connect. Copy this URL and navigate to your Instamojo account. In Instamojo, select the smart page option on the left-hand side and choose the product you want to connect.

Edit the product page by clicking on the three dots and scrolling down to find the ‘Add Webhook’ option. Paste the webhook URL you copied earlier, and then save and update the page.

  • Ensure the webhook is correctly linked to your product.
  • Save the changes to finalize the connection.

Once this is done, Pabbly Connect will capture the order details automatically whenever a new order is placed on Instamojo.


4. Set Up Google Sheets in Pabbly Connect

Next, it’s time to set up Google Sheets as the action step in your workflow. In Pabbly Connect, search for Google Sheets and select it as your action app. Choose the event ‘Add New Row’ to insert the data from your Instamojo orders.

Now, you will need to connect your Google account. Opt to create a new connection and sign in with your Google credentials. Once connected, select the spreadsheet where you want your order details to be recorded.

Map the fields such as Name, Phone Number, Email Address, Address, Amount, Product, and Payment Status. Ensure all necessary data fields from Instamojo are filled correctly.

With this setup, every new order on Instamojo will automatically populate your Google Sheets, eliminating the need for manual data entry.


5. Test Your Automation

After mapping all the necessary fields, it’s essential to test your setup. Click on the ‘Save’ button and send a test request to ensure that the data is correctly captured in your Google Sheets. If everything is set up properly, you will receive a confirmation response.

This final step confirms that Pabbly Connect is functioning as intended, automatically recording your Instamojo orders into Google Sheets seamlessly. You can now manage your orders efficiently without any manual effort.


Conclusion

In this tutorial, we explored how to use Pabbly Connect to automate the process of recording Instamojo orders in Google Sheets. This integration saves time and minimizes manual tasks, allowing for efficient order management.

Ensure you check out Pabbly Connect to create business automation workflows and reduce manual tasks. Pabbly Connect currently offer integration with 2,000+ applications.